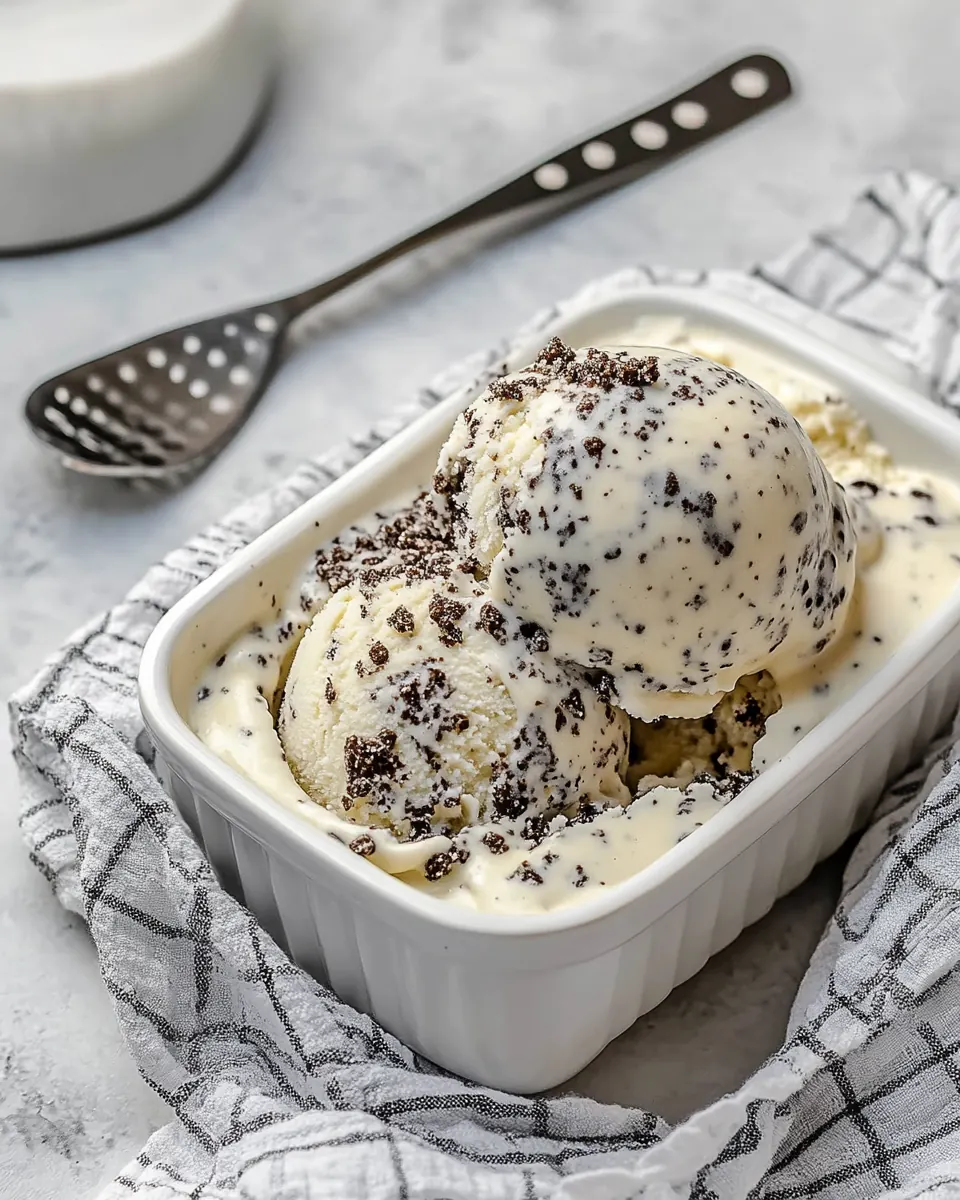
Stracciatella Gelato
Stracciatella Gelato is one of those simple pleasures I return to whenever the weather leans warm and my craving for creamy, cool comfort strikes. The first time I made Stracciatella Gelato, I was experimenting with custards and chocolate texture, trying to reproduce a memory from a summer market where the gelato had a silky mouthfeel and razor thin shards of chocolate that snapped against the tongue. I remember standing by my tiny kitchen counter, stirred by the little steam clouds rising from the saucepan, feeling equal parts nervous and excited as the custard came together.
Over time I learned to trust small techniques that produce big results, like tempering the eggs patiently and chilling the base thoroughly before churning. When I serve Stracciatella Gelato to friends, there is always a hush for a moment as everyone savors that first bite, then a chorus of compliments. For me, this recipe is less about showing off and more about honoring texture, balance, and the quiet joy of good ingredients working in harmony.
Recipe Snapshot
35 mins
25 mins
10 mins
Easy
250 kcal
Italian
Gluten-Free, Low FODMAP
Desserts
Medium saucepan, Medium bowl, Ladle, Whisk, Fine mesh sieve, Ice cream maker
Why You’ll Love This Stracciatella Gelato
Silky yet simple
I love that Stracciatella Gelato achieves a restaurant quality texture with surprisingly few ingredients. The custard base builds a lush, creamy body, which is the backbone of everything that follows. When the freeze and churn are right, the mouthfeel becomes almost velvet, and that contrast with the crisp chocolate makes every spoonful interesting.
Chocolate shards that sing
The technique that creates the thin chocolate ribbons is pure magic to me. While many frozen desserts rely on mix ins that feel chunky, the way the chocolate sets into delicate, crisp slivers inside Stracciatella Gelato is memorable. I’ve noticed guests pay more attention to texture than flavor sometimes, and this recipe delivers on both fronts.
Balanced sweetness
I appreciate how the sweetness is calibrated here, neither cloying nor timid. The touch of corn syrup helps keep the gelato scoopable straight from the freezer, and the measured sugar level lets the dairy and chocolate shine through. That restraint is what keeps this from feeling like an overloaded dessert.
Flexible and approachable
This recipe is accessible even if you are not a frequent ice cream maker. The steps are straightforward, and most of the work happens off the clock while the custard chills. I find that even cooks who are hesitant about custards gain confidence after making this once, and then they return to the technique for other flavors.
Perfect for warm nights
Finally, I love serving Stracciatella Gelato during casual dinners or small celebrations. It feels special without being fussy, and it’s a lovely capstone to al fresco meals. The combination of creamy base and crisp chocolate means it pairs well with many simple accompaniments, so it never overcomplicates a menu.
What Goes Into Stracciatella Gelato
These ingredients are the essence of classic Italian gelato, chosen to create a custardy, creamy base that remains soft and scoopable. The key players here are the dairy for lush texture, the sugar and corn syrup for sweetness and freeze stability, the egg yolks for richness and body, and the chocolate for that iconic stracciatella texture. Each item contributes both flavor and a technical role in the finished gelato.
- 2 cups whole milk: Provide the creamy liquid base that gives gelato its soft texture and helps dissolve sugars; whole milk contributes a lighter mouthfeel than cream–heavy ice cream and balances richness. Incorporate gently into warm custard to ensure smoothness and prevent curdling when combining with egg yolks.
- 1 cup heavy whipping cream: Add richness and a silky mouthfeel that enhances the gelato’s luxurious texture; heavy whipping cream increases fat content for creaminess without overpowering the delicate milk base. Whisk in with milk and heat slowly to create a stable custard that freezes smoothly.
- 2/3 cup granulated white sugar: Sweeten the mixture and help control ice crystal formation for a smoother frozen texture; granulated sugar also contributes to sweetness balance and influences freezing point. Dissolve fully in the warm dairy before adding eggs to ensure even distribution and consistent sweetness.
- 1 tablespoon light corn syrup: Improve scoopability and inhibit large ice crystals by providing additional sugars; light corn syrup adds slight viscosity and prevents the gelato from freezing too hard. Stir in with the dissolved sugar to achieve a uniform custard base before churning.
- 1 tablespoon vanilla extract: Impart aromatic flavor and round out the sweetness with warm, familiar notes; vanilla extract enhances the overall flavor profile without adding texture. Add toward the end of cooking or after cooling to preserve its delicate aroma.
- 1/4 teaspoons salt: Enhance and balance flavors by providing subtle contrast that heightens sweetness and rounds the profile; salt also helps accentuate the chocolate and vanilla notes. Blend into the custard base to evenly distribute and avoid noticeable salty pockets.
- 3 large egg yolks, beaten: Thicken and enrich the custard by adding body and creamy mouthfeel when tempered into warm milk and cream; beaten egg yolks provide structure and prevent the gelato from becoming icy. Temper gradually with warm dairy, then cook to a safe, custard-like consistency before cooling.
- 1/2 cup very finely chopped dark chocolate, divided: Provide intense chocolate flavor and textural contrast when mixed into the churned gelato; very finely chopped dark chocolate yields delicate shards that create the signature stracciatella ribbons. Fold in divided portions toward the end or sprinkle in during churning to create evenly distributed chocolate bits.
The Process for Making Stracciatella Gelato
Below I walk you through a step by step custard method that captures the classic texture of gelato while teaching the small techniques that matter. The steps are forgiving if you move patiently, and each one shapes the final mouthfeel. Read each part slowly, pay attention to sensory clues, and don’t rush the chilling stage.
- In a medium saucepan over medium heat, combine the milk, cream, sugar, corn syrup, vanilla and salt. Once the mixture starts to bubble, remove from heat.: The aroma in this stage becomes gently sweet and milky, with the vanilla starting to bloom as warmth coaxes out its fragrance. You will notice tiny pearls form around the pan edge as the mixture approaches a simmer, a good visual cue that the sugars are dissolved and the dairy is heated evenly. Stirring with a heat proof spatula helps prevent sticking and ensures the 2 cups whole milk and 1 cup heavy whipping cream meld smoothly. One reason to start here is to infuse the base with even heat so when you add the yolks later they temper smoothly. A common mistake is letting the mixture come to a rolling boil, which can scald the dairy and flatten the flavor, so keep the heat to medium and watch for small bubbles at the edge rather than an aggressive boil.
- In a medium bowl, add the beaten egg yolks. Use a ladle to slowly pour a small stream of the milk mixture into the bowl while whisking continuously (slowly… you don’t want the eggs to cook and become scrambled eggs!) Continue until half of the milk mixture has been added.: At this point the kitchen fills with a warm, sweet scent that signals readiness for tempering. Cooling slightly before you begin tempering preserves texture and makes the next step safer for the eggs. Leaving it on heat too long risks concentrating the liquid or creating a skin on top, which you should skim if it forms. One troubleshooting tip is to tilt the pan and check the underside color, ensuring it is not browning; any browning indicates excess heat and can impart a cooked or caramelized note that alters the clean dairy flavor.
- Return the saucepan to medium heat. Carefully and slowly pour the yolk mixture into the remaining milk mixture in the saucepan, continuing to whisk. Whisk continuously about 5 minutes while the custard thickens, then remove from heat.: The yolks should be smooth and uniformly colored, offering a custardy fragrance when whisked. This step is about preparation and rhythm, because you will slowly bring the warm dairy into the yolks without cooking them. Using a shallow bowl lets you whisk continuously and helps the yolks accept heat gradually. A frequent error is rushing the tempering stream, which leads to scrambled egg bits; the solution is patience and a steady hand when adding the hot liquid.
- Pour the mixture through a sieve to remove any egg solids. Refrigerate covered for at least 1 hour (preferably overnight).: As you add the first small stream, the bowl will steam slightly and the whisk movement should keep the yolks fluid and glossy. This is where you build thermal balance, letting the yolks acclimate to warmth. Expect a faint eggy scent that dissipates once fully incorporated, replaced by a richer custard aroma. If you pour too much at once the yolks may seize and create lumps, so always add in a thin ribbon while whisking energetically.
- Continue until half of the milk mixture has been added: By the time half the dairy is incorporated the yolks will feel warm but not cooked, and the mixture will take on a thicker, velvety appearance. This partial tempering stage prevents shock when you return everything to the saucepan, and it helps keep the custard smooth. Watch the color deepen slightly toward a pale gold, which indicates readiness. A common misstep is skipping this midway pause and adding the rest too quickly; that increases the risk of curdling when you recombine in the pot.
- Return the saucepan to medium heat: Putting the pan back on moderate heat allows controlled thickening. You will start to notice the custard coat the back of a spoon after a few minutes, which is the sensory signal that you are approaching the right set point. Keep the heat steady, and stir in slow, deliberate motions to distribute warmth. If the pan gets too hot the custard can curdle rapidly, in which case you should remove it and whisk vigorously off heat to try to rescue it.
- Carefully and slowly pour the yolk mixture into the remaining milk mixture in the saucepan continuing to whisk: When the yolk enriched liquid meets the heated dairy the aromas blend into a richer, more custardy profile, and tiny steam ribbons rise from the surface. This combined liquid must be handled gently to avoid scrambling, and continuous whisking helps maintain a uniform texture. Expect to see the mixture thicken visibly after several minutes into a coating consistency. If you notice flecks of cooked egg forming, remove from heat immediately and pass through a sieve; the next step will remove any solids that escaped your whisk.
- Whisk continuously about 5 minutes while the custard thickens then remove from heat: During these minutes the custard will silently transform, developing a silky viscosity and a warm custard scent, almost sweet cream with eggy undertones. The sound is quiet, just gentle stirring, but the visual change is pronounced as it becomes able to coat a spoon. Removing at the right moment ensures the yolks have cooked enough to thicken but not so much that the texture becomes gelatinous. Overcooking here is the main trap, which results in a grainy mouthfeel; monitor texture by testing the spoon coating often.
- Pour the mixture through a sieve to remove any egg solids: As you strain, the custard flows smooth and glossy into the receiving bowl, and any tiny cooked specks stay behind in the sieve. This filtration is essential to guarantee a silky result and eliminates textural imperfections. Use a fine mesh sieve and a spatula to press the custard through without forcing it, preserving the delicate consistency. If the custard seems too thick to pass easily, let it cool a touch; forcing it can leave air pockets or make it look uneven.
- Refrigerate covered for at least 1 hour preferably overnight: Chilling is where flavors settle and the base firms enough for efficient churning. You will notice the scent becomes calmer and more integrated after cold resting, and the liquid takes on a denser mouthfeel. Overnight chilling improves texture dramatically because cold fat crystals form gently, producing a denser gelato after churning. Avoid rushing this step, because insufficient chilling can cause poor incorporation of air and larger ice crystals, leaving the gelato icy rather than creamy.
- Fold in half of the very finely chopped dark chocolate during churning or after churning: When you stir in the 1/2 cup very finely chopped dark chocolate , the contrast between warm, silky custard and crisp chocolate creates those signature shards. If you drizzle melted chocolate into frozen gelato while churning, it will set into delicate ribbons. If you mix in chopped chocolate, aim for very fine pieces so you achieve the intended stracciatella texture. A typical error is adding large chunks, which produces a chunky rather than ribbon like effect; refine your chop size to avoid that.
- Reserve the remaining chocolate to sprinkle or mix in for texture control: Using the reserved chocolate last lets you adjust the final distribution, ensuring every scoop gets a pleasing ratio of base to stracciatella. The last additions allow you to create pockets of crispness that are texturally satisfying against the creamy gelato. Save some chocolate for garnish so the presentation feels intentional. If you add all the chocolate at once, you may end up with clumps in some portions and scarcity in others, so stage the additions thoughtfully.
Making Adjustments
This section helps you tweak small elements of the process to match texture and flavor preferences. Below are practical, hands on tips to adjust sweetness scoopability and chocolate distribution while preserving the integrity of Stracciatella Gelato.
- Adjust cream to milk ratio: If you prefer a slightly lighter texture, reduce the heavy whipping cream by a couple of tablespoons and increase the whole milk accordingly, which will yield a less rich profile while maintaining a smooth gelato. Make changes in small increments to avoid losing body.
- Control scoopability: For firmer gelato that still scoops well, keep the light corn syrup amount as written; if you skip it you may end up with a harder freeze. Small increases improve softness, but more than the recipe suggests risks a slightly sticky texture.
- Flavor balance: If you want the chocolate to feel more pronounced, reserve a slightly larger portion of the very finely chopped dark chocolate for finishing so each spoonful has visible shards that snap. Conversely, blend more in for a subtler, integrated chocolate note.
- Chill time flexibility: While overnight chilling is best for texture, a minimum of one hour will work in a pinch. Shorter chilling increases the chance of larger ice crystals, so if you must shorten the rest, try to cool the base in an ice bath first to speed the process.
- Straining patience: If the custard is resisting through the sieve, gently press with a spatula and allow time rather than forcing it; this preserves smoothness and avoids aeration that can lead to icy texture.
Perfect Matches for Stracciatella Gelato
Stracciatella Gelato is versatile in serving and pairs well with simple accompaniments that complement its creamy and chocolatey profile. Below I outline pairing ideas for casual treats and small celebrations, plus storage notes to keep texture optimal. Consider these suggestions for occasions and seasonal enjoyment.
- Simple fruit pairing, serve with fresh berries or sliced stone fruit to add bright, acidic contrast that lifts the creamy gelato.
- After dinner dessert, present a small scoop with a crisp cookie or biscotti on the side, which offers a delightful textural interplay between soft gelato and crunchy biscuit.
- Warm topping contrast, drizzle a spoonful of warm chocolate sauce or espresso reduction over the scoop for a warm cold contrast that intensifies chocolate notes.
- Celebration scoop, for small gatherings serve Stracciatella Gelato in chilled bowls with toasted nuts sprinkled on top to add nuttiness and crunch without overpowering the flavor.
- Storage tips, store in an airtight container with a piece of plastic wrap pressed to the surface to minimize ice crystals and maintain the smooth texture when frozen between servings.
- Seasonal pairing, during summer enjoy as a cooling finale after light meals, and in cooler months treat it as a refined dessert option when you want something not too heavy.
FAQ
Conclusion
What makes this recipe special is the combination of a silky custard base and the delicate crispness of the dark chocolate ribbons. The technique rewards patience, and the results feel indulgent without being overcomplicated. Give this a try on a warm evening or for a small celebration, and take your time with tempering and chilling. You will be rewarded with a smooth, luxuriously textured gelato that showcases both dairy richness and chocolate contrast in every spoonful.
Stracciatella Gelato
Equipment
- Medium Saucepan
- Medium Bowl
- Ladle
- Whisk
- Fine mesh sieve
- Ice Cream Maker
Ingredients
- 2 cups whole milk Provide the creamy liquid base that gives gelato its soft texture and helps dissolve sugars; whole milk contributes a lighter mouthfeel than cream-heavy ice cream and balances richness. Incorporate gently into warm custard to ensure smoothness and prevent curdling when combining with egg yolks.
- 1 cup heavy whipping cream Add richness and a silky mouthfeel that enhances the gelato’s luxurious texture; heavy whipping cream increases fat content for creaminess without overpowering the delicate milk base. Whisk in with milk and heat slowly to create a stable custard that freezes smoothly.
- 2/3 cup granulated white sugar Sweeten the mixture and help control ice crystal formation for a smoother frozen texture; granulated sugar also contributes to sweetness balance and influences freezing point. Dissolve fully in the warm dairy before adding eggs to ensure even distribution and consistent sweetness.
- 1 tablespoon light corn syrup Improve scoopability and inhibit large ice crystals by providing additional sugars; light corn syrup adds slight viscosity and prevents the gelato from freezing too hard. Stir in with the dissolved sugar to achieve a uniform custard base before churning.
- 1 tablespoon vanilla extract Impart aromatic flavor and round out the sweetness with warm, familiar notes; vanilla extract enhances the overall flavor profile without adding texture. Add toward the end of cooking or after cooling to preserve its delicate aroma.
- 1/4 teaspoons salt Enhance and balance flavors by providing subtle contrast that heightens sweetness and rounds the profile; salt also helps accentuate the chocolate and vanilla notes. Blend into the custard base to evenly distribute and avoid noticeable salty pockets.
- 3 large egg yolks, beaten Thicken and enrich the custard by adding body and creamy mouthfeel when tempered into warm milk and cream; beaten egg yolks provide structure and prevent the gelato from becoming icy. Temper gradually with warm dairy, then cook to a safe, custard-like consistency before cooling.
- 1/2 cup very finely chopped dark chocolate, divided Provide intense chocolate flavor and textural contrast when mixed into the churned gelato; very finely chopped dark chocolate yields delicate shards that create the signature stracciatella ribbons. Fold in divided portions toward the end or sprinkle in during churning to create evenly distributed chocolate bits.
Instructions
- In a medium saucepan over medium heat, combine the milk, cream, sugar, corn syrup, vanilla and salt. Once the mixture starts to bubble, remove from heat.: The aroma in this stage becomes gently sweet and milky, with the vanilla starting to bloom as warmth coaxes out its fragrance. You will notice tiny pearls form around the pan edge as the mixture approaches a simmer, a good visual cue that the sugars are dissolved and the dairy is heated evenly. Stirring with a heat proof spatula helps prevent sticking and ensures the 2 cups whole milk and 1 cup heavy whipping cream meld smoothly. One reason to start here is to infuse the base with even heat so when you add the yolks later they temper smoothly. A common mistake is letting the mixture come to a rolling boil, which can scald the dairy and flatten the flavor, so keep the heat to medium and watch for small bubbles at the edge rather than an aggressive boil.
- In a medium bowl, add the beaten egg yolks. Use a ladle to slowly pour a small stream of the milk mixture into the bowl while whisking continuously (slowly… you don’t want the eggs to cook and become scrambled eggs!) Continue until half of the milk mixture has been added.: At this point the kitchen fills with a warm, sweet scent that signals readiness for tempering. Cooling slightly before you begin tempering preserves texture and makes the next step safer for the eggs. Leaving it on heat too long risks concentrating the liquid or creating a skin on top, which you should skim if it forms. One troubleshooting tip is to tilt the pan and check the underside color, ensuring it is not browning; any browning indicates excess heat and can impart a cooked or caramelized note that alters the clean dairy flavor.
- Return the saucepan to medium heat. Carefully and slowly pour the yolk mixture into the remaining milk mixture in the saucepan, continuing to whisk. Whisk continuously about 5 minutes while the custard thickens, then remove from heat.: The yolks should be smooth and uniformly colored, offering a custardy fragrance when whisked. This step is about preparation and rhythm, because you will slowly bring the warm dairy into the yolks without cooking them. Using a shallow bowl lets you whisk continuously and helps the yolks accept heat gradually. A frequent error is rushing the tempering stream, which leads to scrambled egg bits; the solution is patience and a steady hand when adding the hot liquid.
- Pour the mixture through a sieve to remove any egg solids. Refrigerate covered for at least 1 hour (preferably overnight).: As you add the first small stream, the bowl will steam slightly and the whisk movement should keep the yolks fluid and glossy. This is where you build thermal balance, letting the yolks acclimate to warmth. Expect a faint eggy scent that dissipates once fully incorporated, replaced by a richer custard aroma. If you pour too much at once the yolks may seize and create lumps, so always add in a thin ribbon while whisking energetically.
- Continue until half of the milk mixture has been added: By the time half the dairy is incorporated the yolks will feel warm but not cooked, and the mixture will take on a thicker, velvety appearance. This partial tempering stage prevents shock when you return everything to the saucepan, and it helps keep the custard smooth. Watch the color deepen slightly toward a pale gold, which indicates readiness. A common misstep is skipping this midway pause and adding the rest too quickly; that increases the risk of curdling when you recombine in the pot.
- Return the saucepan to medium heat: Putting the pan back on moderate heat allows controlled thickening. You will start to notice the custard coat the back of a spoon after a few minutes, which is the sensory signal that you are approaching the right set point. Keep the heat steady, and stir in slow, deliberate motions to distribute warmth. If the pan gets too hot the custard can curdle rapidly, in which case you should remove it and whisk vigorously off heat to try to rescue it.
- Carefully and slowly pour the yolk mixture into the remaining milk mixture in the saucepan continuing to whisk: When the yolk enriched liquid meets the heated dairy the aromas blend into a richer, more custardy profile, and tiny steam ribbons rise from the surface. This combined liquid must be handled gently to avoid scrambling, and continuous whisking helps maintain a uniform texture. Expect to see the mixture thicken visibly after several minutes into a coating consistency. If you notice flecks of cooked egg forming, remove from heat immediately and pass through a sieve; the next step will remove any solids that escaped your whisk.
- Whisk continuously about 5 minutes while the custard thickens then remove from heat: During these minutes the custard will silently transform, developing a silky viscosity and a warm custard scent, almost sweet cream with eggy undertones. The sound is quiet, just gentle stirring, but the visual change is pronounced as it becomes able to coat a spoon. Removing at the right moment ensures the yolks have cooked enough to thicken but not so much that the texture becomes gelatinous. Overcooking here is the main trap, which results in a grainy mouthfeel; monitor texture by testing the spoon coating often.
- Pour the mixture through a sieve to remove any egg solids: As you strain, the custard flows smooth and glossy into the receiving bowl, and any tiny cooked specks stay behind in the sieve. This filtration is essential to guarantee a silky result and eliminates textural imperfections. Use a fine mesh sieve and a spatula to press the custard through without forcing it, preserving the delicate consistency. If the custard seems too thick to pass easily, let it cool a touch; forcing it can leave air pockets or make it look uneven.
- Refrigerate covered for at least 1 hour preferably overnight: Chilling is where flavors settle and the base firms enough for efficient churning. You will notice the scent becomes calmer and more integrated after cold resting, and the liquid takes on a denser mouthfeel. Overnight chilling improves texture dramatically because cold fat crystals form gently, producing a denser gelato after churning. Avoid rushing this step, because insufficient chilling can cause poor incorporation of air and larger ice crystals, leaving the gelato icy rather than creamy.
- Fold in half of the very finely chopped dark chocolate during churning or after churning: When you stir in the 1/2 cup very finely chopped dark chocolate , the contrast between warm, silky custard and crisp chocolate creates those signature shards. If you drizzle melted chocolate into frozen gelato while churning, it will set into delicate ribbons. If you mix in chopped chocolate, aim for very fine pieces so you achieve the intended stracciatella texture. A typical error is adding large chunks, which produces a chunky rather than ribbon like effect; refine your chop size to avoid that.
- Reserve the remaining chocolate to sprinkle or mix in for texture control: Using the reserved chocolate last lets you adjust the final distribution, ensuring every scoop gets a pleasing ratio of base to stracciatella. The last additions allow you to create pockets of crispness that are texturally satisfying against the creamy gelato. Save some chocolate for garnish so the presentation feels intentional. If you add all the chocolate at once, you may end up with clumps in some portions and scarcity in others, so stage the additions thoughtfully.
Notes
- Adjust cream to milk ratio: If you prefer a slightly lighter texture, reduce the heavy whipping cream by a couple of tablespoons and increase the whole milk accordingly, which will yield a less rich profile while maintaining a smooth gelato. Make changes in small increments to avoid losing body.
- Control scoopability: For firmer gelato that still scoops well, keep the light corn syrup amount as written; if you skip it you may end up with a harder freeze. Small increases improve softness, but more than the recipe suggests risks a slightly sticky texture.
- Flavor balance: If you want the chocolate to feel more pronounced, reserve a slightly larger portion of the very finely chopped dark chocolate for finishing so each spoonful has visible shards that snap. Conversely, blend more in for a subtler, integrated chocolate note.
- Chill time flexibility: While overnight chilling is best for texture, a minimum of one hour will work in a pinch. Shorter chilling increases the chance of larger ice crystals, so if you must shorten the rest, try to cool the base in an ice bath first to speed the process.
- Straining patience: If the custard is resisting through the sieve, gently press with a spatula and allow time rather than forcing it; this preserves smoothness and avoids aeration that can lead to icy texture.