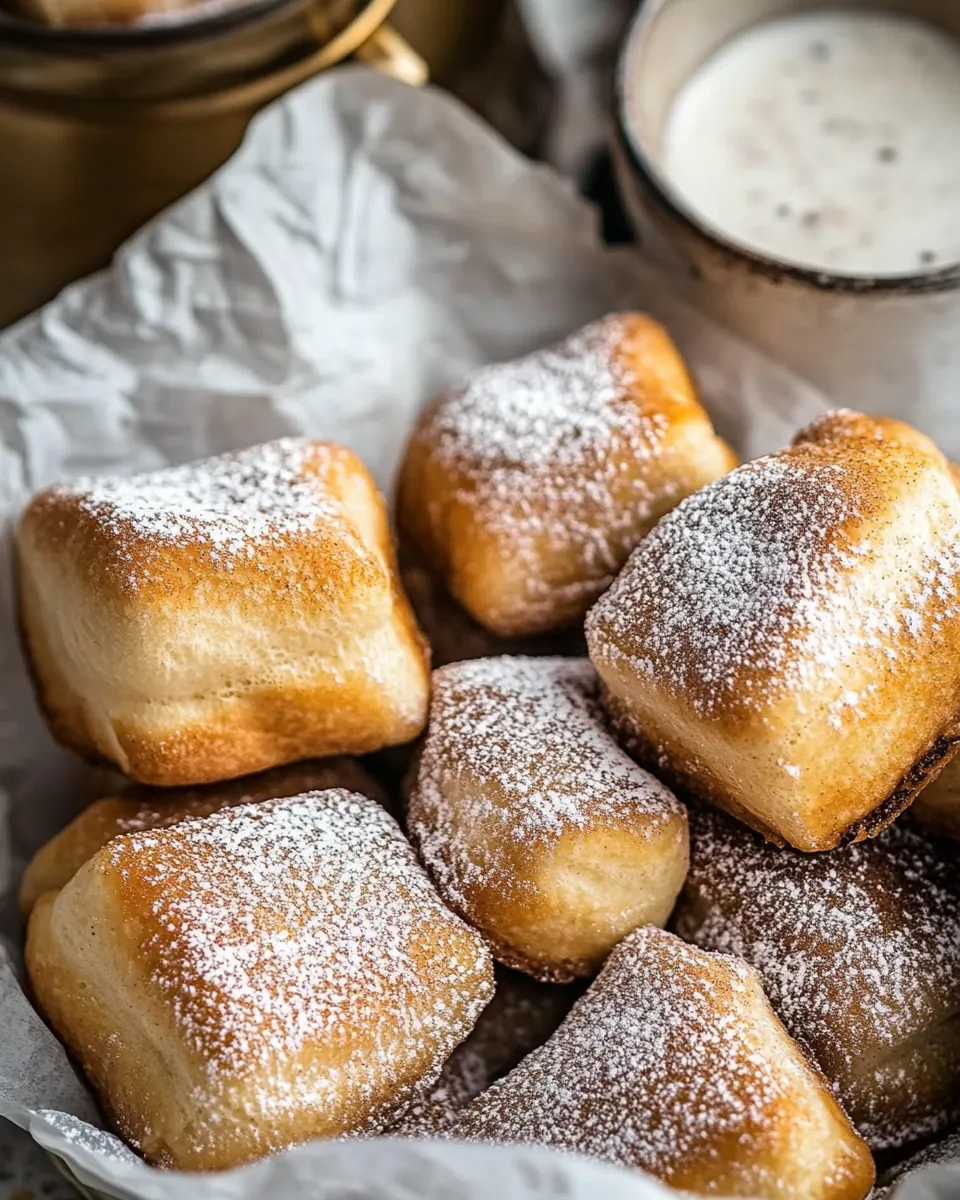
Easiest Cinnamon Buttermilk Beignets
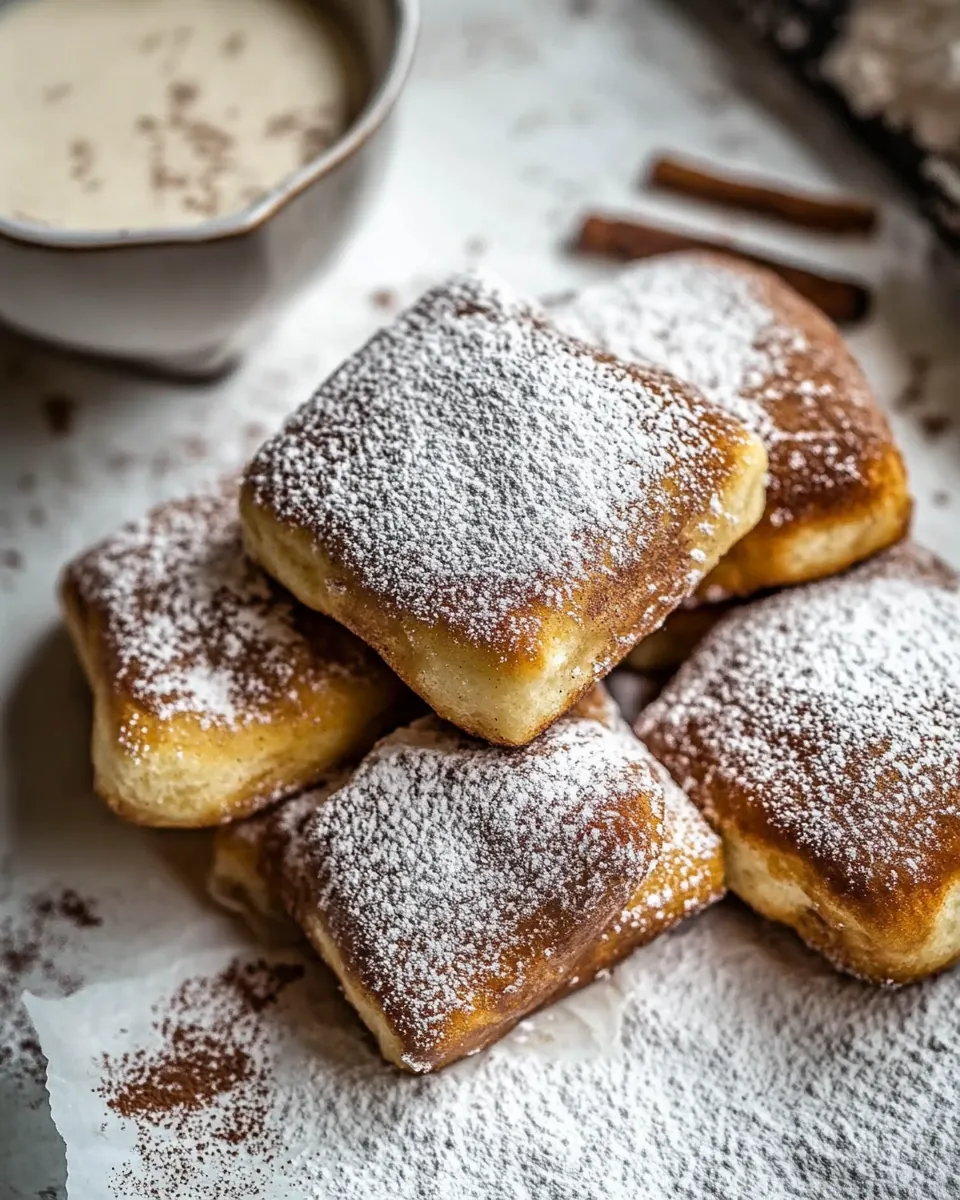
Easiest Cinnamon Buttermilk Beignets are one of those recipes I reach for when a small celebration or a quiet Sunday morning needs a little lift. The first time I made these, my kitchen smelled like warm dough and cinnamon, and I remember laughing because the kids dipped them into steaming cups of hot chocolate before I could dust them with powdered sugar. It felt like a tiny festival across the breakfast table, and ever since they’ve been my go to treat when I want something joyous but not complicated.
There is comfort in the ritual of rolling the dough, cutting neat squares, and watching them puff in bubbling oil. I love that the recipe is forgiving, letting you baby the dough when it needs a touch more flour or hurry it along when the house is warm enough for a quick rise. These little fried pillows always feel like a reward, and serving them warm makes everyone linger a little longer at the table. They have become my answer to simple hospitality, a way to turn a regular morning into a memory.
Recipe Snapshot
30 mins
15 mins
15 mins
Easy
250 kcal
American
Gluten-Free, Low FODMAP
Desserts
Stand mixer, Dough hook, Heavy bottom pot, Deep fry thermometer, Slotted spoon
The Charm of This Easiest Cinnamon Buttermilk Beignets
1. A recipe that is genuinely easy and dependable
I adore how Easiest Cinnamon Buttermilk Beignets takes the intimidation out of frying. The dough is forgiving, and the steps are straightforward, so even if you are nervous about hot oil, you can still succeed. The forgiving nature of the dough means I rarely have to scrap a batch, and that reliability builds confidence, especially for cooks who are newer to frying. I often find myself nudging friends to try this when they want something impressive but not complicated.
2. Flavor that feels nostalgic without fuss
The combination of buttermilk, cinnamon, and powdered sugar creates a familiar, cozy flavor that people instinctively love. I think of the warm notes as a friendly hug for your taste buds, a blend that evokes bakery mornings. You get cinnamon warmth in every bite, with buttermilk adding a subtle tang that brightens the fried dough, making each beignet taste homemade rather than heavy.
3. Great for gatherings and quiet moments alike
These beignets scale well, which is why I reach for them whether I am feeding a few or a crowd. The recipe yields a stack of squares you can fry in batches, and the process encourages togetherness because someone always volunteers to flip or dust. I love serving them with cups of hot chocolate, turning a snack into an experience. They feel festive but are perfectly at home on an ordinary morning.
4. Textural payoff is huge
What gets me every time is the contrast between the light, airy interior and the crisp exterior. The frying temperature and the thickness of the rolled dough both matter, and when they are right, each beignet puffs and develops a golden crust that gives way to a pillowy middle. I appreciate recipes that reward attention to small details, and these beignets do just that, delivering maximum texture for modest effort.
5. Flexible and approachable technique
The steps are simple enough that you can adapt them slightly without ruining the end result. I have warmed the buttermilk a bit on colder days to help the yeast, and I have also let the dough rise in a slightly shorter window when guests arrive early. That flexibility is why this recipe has stayed in rotation, it lets you make it work for your schedule while still producing excellent results.
What Goes Into Easiest Cinnamon Buttermilk Beignets
The chemistry of these ingredients is straightforward and honest. Flour builds the structure, buttermilk brings tender tang and hydration, and yeast gives the dough its lift and airy texture. Small additions like cinnamon and vanilla add aromatic layers, while butter and egg enrich the dough so it fries to a golden, tender interior. Together they create a balance of flavor and texture that makes every bite feel indulgent yet approachable.
- 1/2 cup warm water: Hydrate and activate the yeast by warming the water slightly so it feels lukewarm; it helps dissolve yeast and honey while creating the right environment for fermentation. Proper temperature ensures predictable rise time and airy beignets. Avoid water that's too hot to prevent killing the yeast.
- 1 packet instant yeast (2 1/2 teaspoons): Provide a concentrated source of yeast cells to leaven the dough and create lift during proofing; instant yeast dissolves quickly and can be mixed directly into the dough. Using the specified packet ensures consistent rising power for light, airy beignets. Store unused yeast in a cool, dry place for longevity.
- 1 tablespoon honey: Add fermentable sugars that feed the yeast for a steady rise and contribute subtle sweetness to the dough. Honey also enhances browning and provides a touch of floral complexity to the final beignets. Measure accurately to balance sweetness and yeast activity.
- 1 cup buttermilk, at room temperature: Contribute acidity, richness, and tenderness to the dough; room–temperature buttermilk reacts with baking soda or interacts with dough components to develop flavor and texture. Buttermilk also adds a slight tang that brightens the beignet taste. Warm to room temperature for optimal ingredient integration.
- 1 large egg, beaten: Bind ingredients and add richness while promoting structure and moisture; beaten egg helps create a cohesive dough and contributes to tender crumb. Egg proteins also aid in browning and give a subtle eggy flavor when cooked. Beat thoroughly for even distribution.
- 2 tablespoons unsalted butter, melted: Provide fat that enriches the dough, improves tenderness, and enhances mouthfeel; melted unsalted butter disperses easily for uniform richness. Using unsalted butter allows precise control of overall saltiness in the recipe. Cool slightly before adding to avoid cooking the egg.
- 1 teaspoon vanilla extract: Impart aromatic sweetness and depth of flavor that complements the cinnamon and powdered sugar; vanilla extract rounds out the profile of the beignets. A small amount goes a long way, so add sparingly to avoid overpowering delicate flavors. Use pure vanilla for best results.
- 4 cups all-purpose flour: Build the bulk of the dough and supply gluten-forming proteins that give structure and chew to the beignets; sifted or measured all-purpose flour creates the correct balance of tenderness and strength. Proper handling prevents overworking, which could make the beignets tough. Measure by spooning and leveling for accuracy.
- 1/2 teaspoon ground cinnamon: Introduce warm, fragrant spice that pairs with sugar and vanilla to create characteristic beignet flavor; ground cinnamon should be evenly incorporated for consistent taste. A small amount is enough to add aroma without overwhelming the dough. Use fresh ground cinnamon for best flavor.
- 1/2 teaspoon kosher salt: Enhance overall flavor balance by seasoning the dough to bring out sweetness and depth; kosher salt distributes easily and sharpens other ingredients' flavors. Correct salting is essential even in fried pastries to prevent a flat-tasting result. Adjust slightly for personal taste if needed.
- canola or vegetable oil, for frying: Provide a neutral, high smoke-point medium for frying the beignets until golden and crisp; canola or vegetable oil allows even heat transfer without imparting strong flavors. Maintain proper oil temperature to ensure interior cooks before exterior browns. Use enough oil for shallow or deep frying as directed.
- powdered sugar, for dusting: Add an attractive finish and sweet contrast by dusting beignets with powdered sugar after frying; it melts slightly on warm surfaces to create a classic look and flavor. Powdered sugar also softens the fried exterior and balances any residual oil. Apply generously for traditional presentation.
- hot chocolate, for serving: Offer a warm, comforting beverage pairing that complements the sweet, cinnamon-scented beignets and enhances the eating experience. Hot chocolate's creamy richness contrasts the fried dough and powdered sugar for a delightful combination. Serve in small cups alongside a plate of fresh beignets.
How to Cook Easiest Cinnamon Buttermilk Beignets
I enjoy the steps of frying dough because they are active and rewarding, and these beignets are no exception. The following directions guide you from mixing to frying, and each part is intended to be approachable even if you are new to working with yeast or hot oil.
- In the bowl of a stand mixer fitted with the dough hook, combine the water, yeast, honey, buttermilk, egg, butter, and vanilla. Add the flour, cinnamon, and salt. Knead until the dough comes together, about 1-2 minutes. If the dough feels too sticky, add an additional 1 tablespoon of flour at a time until the dough pulls away from the sides and forms a smooth ball. Cover the bowl and let sit in a warm place for 1-2 hours, until doubled in size. Turn the dough onto a floured work surface. Roll the dough out into a large rectangle, about an 1/4 inch thick. Using a knife, cut the dough into 3×3 inch squares (about 25 squares). Cover with a damp kitchen towel while the oil preheats. Place a deep, heavy bottom pot on the stove and add enough oil to fill the pot about 1 to 1 1/2 inches deep. Turn the burner to medium and preheat the oil to 350 degrees F. Fry 4-6 beignets at a time depending on the size of your pot. Use a slotted spoon to flip them over every 30 seconds. Fry for 2-3 minutes or until golden brown on both sides. Remove with the slotted spoon and place on paper towels to drain. Repeat with remaining squares. Dust each beignet generously with powdered sugar. Enjoy warm, with a side of hot cocoa.: The first sensations are liquid and aroma, as the warm water and honey wake the yeast and the vanilla adds a gentle perfume. You will hear a soft splash as the liquids meet, then a faint hissing of the mixer when you begin to blend. This step matters because it ensures evenly distributed hydration and activation of the yeast , which sets the stage for a reliable rise. A common mistake is adding hot butter or water that kills the yeast ; test temperatures on your wrist so they feel warm not hot. If the mixture seems uneven, stop and stir with a spatula to incorporate any pockets of liquid before adding flour.
- Add the flour, cinnamon, and salt: When you add the flour , the bowl will transform from a glossy pool of liquid into a shaggy mass, and the scent of cinnamon will bloom slightly. This transition is the dough beginning to build structure, and the order matters because slowly incorporating the dry ingredients prevents lumps. The right texture at this point is slightly sticky but cohesive, ready for a few minutes of kneading. Avoid dumping all the flour at once if your mixer seems to strain, because too much dry weight can overwork the motor and yield a dense dough.
- Knead until the dough comes together, about 1 to 2 minutes: You will notice the dough pull away from the sides and gather around the hook, a satisfying sign that gluten is developing. The sound will be a low, steady thrum from the mixer as it works, and visually the dough should look smooth with a slight sheen. This brief knead is purposeful, giving structure without overdeveloping gluten so the beignets remain tender. One frequent error is over kneading which tightens the dough, so keep it short and check for elasticity by pressing a finger into the dough; it should spring back softly.
- If the dough feels too sticky, add an additional 1 tablespoon of flour at a time until the dough pulls away from the sides and forms a smooth ball: At this stage, touch is your best guide. A tacky surface is normal, but the dough should not smear across your fingers. Adding flour in controlled tablespoons is crucial because too much will dry the dough, resulting in dense beignets. As you adjust, notice how the dough becomes less clingy and more cohesive, and avoid the temptation to oversalt; the small salt amount already balances the sweetness. If you add too much flour, you can rescue the dough with a teaspoon of water to rehydrate it gently.
- Cover the bowl and let sit in a warm place for 1 to 2 hours, until doubled in size: The quiet wait is when the yeast does its invisible work, producing air and lifting the dough. You will see the bowl expand like a slow breath, and the dough will smell slightly yeasty and sweet, signaling readiness. This rise is essential for the light interior, so patience pays off; rushing it will produce denser beignets. A typical pitfall is placing the bowl in a drafty or cool spot, which can stall the rise; instead, choose a warm corner or an oven with the light on to provide gentle warmth.
- Turn the dough onto a floured work surface: The texture under your hands will shift from smooth and pillow like to something you can roll without sticking, thanks to the dusting of flour . This tactile step lets you feel the elasticity of the dough and judge how much additional flour is needed for rolling. Be mindful not to incorporate excessive flour while you work, as that leads to a stiffer finished product. If the dough resists rolling, let it rest for a few minutes to relax the gluten, which makes shaping easier and preserves tenderness.
- Roll the dough out into a large rectangle, about an 1/4 inch thick: Rolling transforms the dough into a canvas that will determine the puff and final thickness of your beignets. You should see a smooth surface with small air pockets beneath, and the rolling sound is a quiet, steady glide. Keeping the thickness consistent ensures even frying; too thin will make them crisp through and through, while too thick leaves the center doughy. If the dough springs back while rolling, let it rest briefly to relax, then continue to achieve that even 1/4 inch sheet.
- Using a knife, cut the dough into 3×3 inch squares (about 25 squares): The clean cut will reveal tender layers, and the squares should be roughly uniform to ensure they fry at the same rate. The act of cutting releases a slight puff of dough scent, and it helps to tally the squares as you go to keep track of batch sizes. Uneven pieces are a common oversight and produce inconsistent results during frying, so aim for regularity; if a few pieces are smaller, fry them separately or watch them closely during cooking.
- Cover with a damp kitchen towel while the oil preheats: Resting under a damp towel prevents the cut edges from drying out and keeps the dough supple until frying. The surface will remain soft to the touch, and you will avoid cracked beignets that do not puff properly. This pause also allows you to bring the oil to an even temperature, which is crucial for achieving the ideal exterior and interior balance. If you skip this step, the edges can form a crust that impedes rise and yields denser centers.
- Place a deep, heavy bottom pot on the stove and add enough oil to fill the pot about 1 to 1 1/2 inches deep: The sound of oil settling in a heavy pot is reassuring, and the depth is enough to let the beignets float and crisp without touching the bottom. Using a heavy bottom pot helps maintain stable temperature and prevents scorching. Too little oil makes the dough sit on the bottom and cook unevenly, while too much oil can be wasteful and dangerous; measure the depth and avoid overfilling. Always monitor oil carefully to prevent overheating.
- Turn the burner to medium and preheat the oil to 350 degrees F: You will see soft ripples across the oil when it approaches heat, and a thermometer will show a steady 350 degrees F. This temperature is the sweet spot for a golden exterior and a fully cooked interior. Frying cooler results in oil absorption and soggy beignets, while hotter oil will brown the outside before the center cooks. A common mistake is guessing temperature by sight alone, so I recommend using a reliable thermometer for consistency.
- Fry 4 to 6 beignets at a time depending on the size of your pot: As each square hits the oil, you will hear a lively sizzle and watch the edges puff upward. Crowding the pot drops the oil temperature and prevents even frying, so keep the batches moderate. This step is where timing and observation matter; maintain steady heat and avoid moving pieces too frequently. Overcrowding yields greasy beignets and uneven color, so use fewer pieces if your pot is small.
- Use a slotted spoon to flip them over every 30 seconds: Flipping creates an even golden crust on all sides, and you will notice the beignets developing color in pulses as you turn them. The spoon allows you to control their orientation without damaging the fragile surface. If you skip regular flips, one side can overbrown or cook faster, resulting in uneven texture. Be gentle when flipping so the dough does not deflate or tear.
- Fry for 2 to 3 minutes or until golden brown on both sides: The finished sound is a steady quiet crackle and the visual cue is a deep, warm golden color. Inside, the texture should be airy and steaming slightly when you break one open. This timing provides a balance where the exterior is crisp and not burnt while the interior cooks through. A typical error is pulling them too early; if the middle feels doughy when you tear one open, extend the frying time slightly while monitoring color.
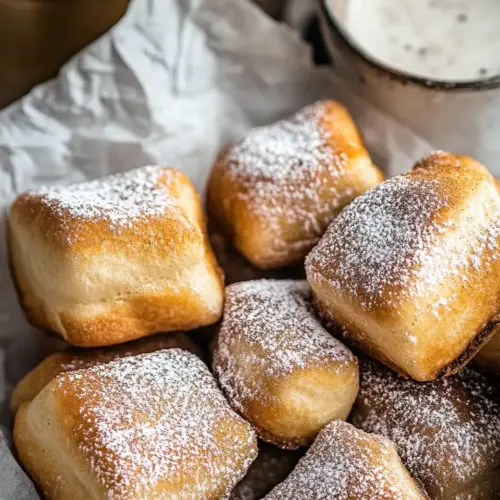
- Remove with the slotted spoon and place on paper towels to drain: The beignets will sigh as they leave the oil, and the paper towels absorb excess oil while keeping the underside crisp. This drainage matters to prevent sogginess and keeps the texture pleasant. If you stack them wet, steam will build and soften the crust, so arrange them in a single layer until the initial oil is absorbed.
- Repeat with remaining squares: Repetition is rhythmic, and you will fall into a comfortable pace as batches come out in warm, fragrant waves. Keep the oil temperature steady between batches, and adjust the heat if the color changes noticeably. A common oversight is not checking oil temperature, which can lead to variations; use the thermometer between batches and let the oil recover to 350 degrees F before adding more dough.
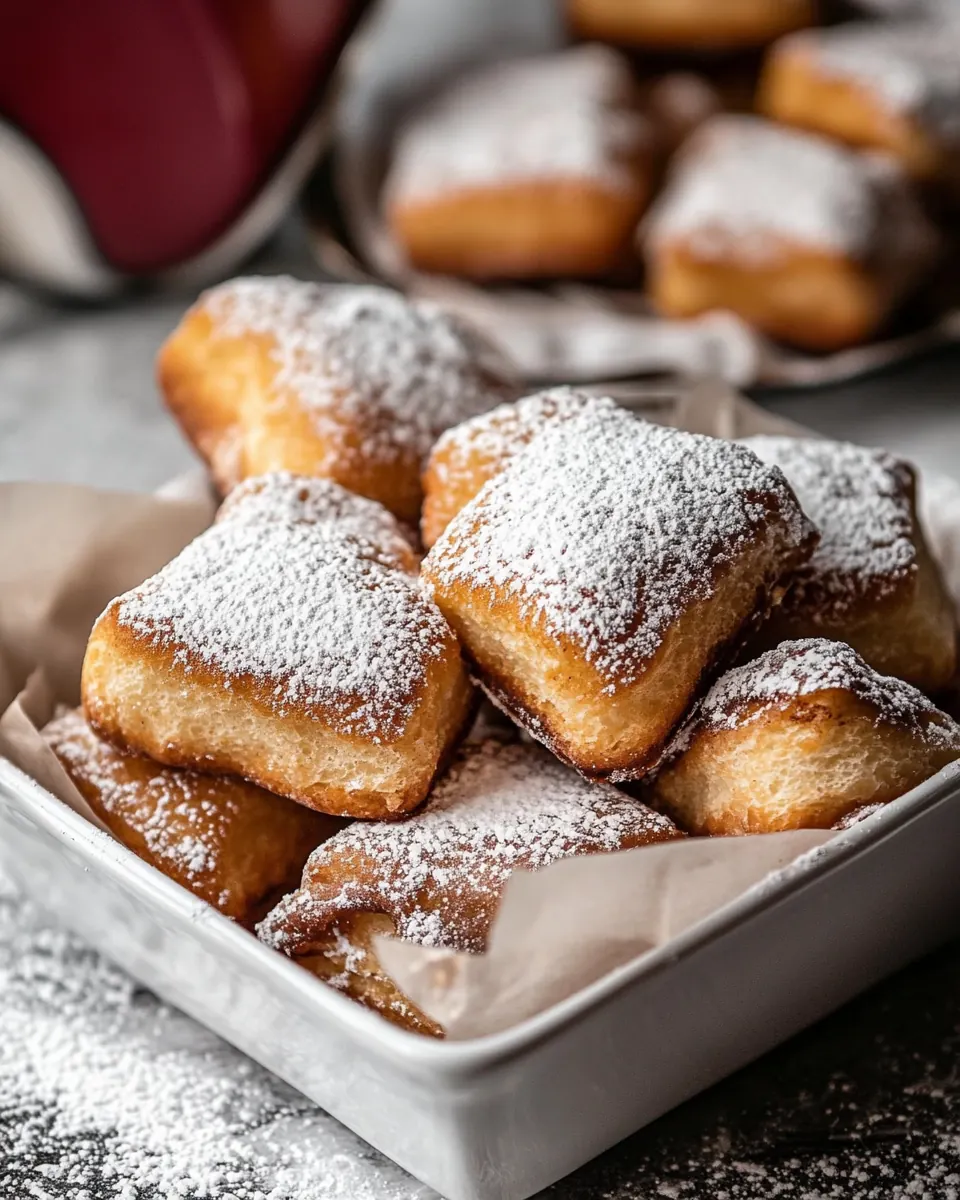
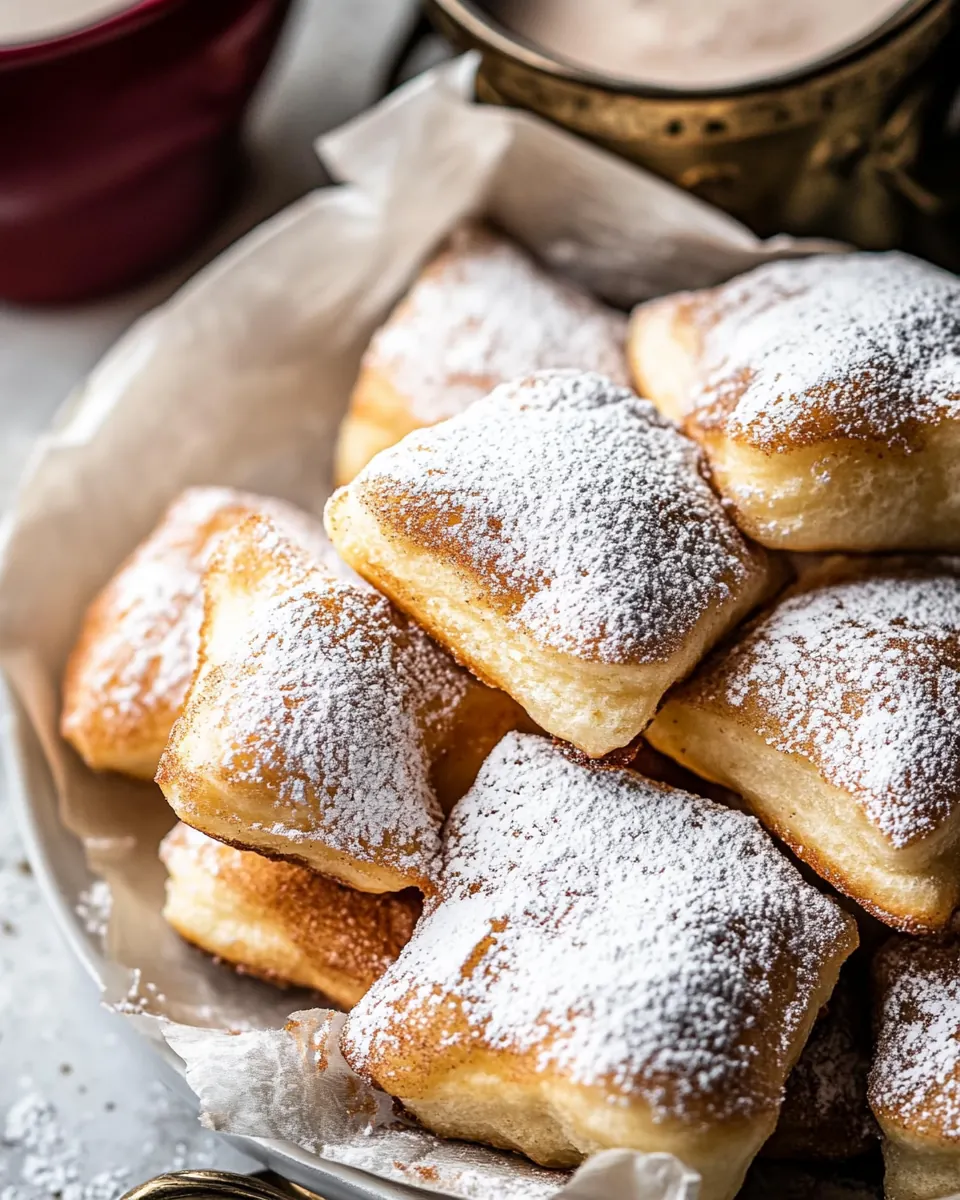
- Dust each beignet generously with powdered sugar: The final flourish is visual and textural, the powdered sugar clings to warm surfaces creating a snowy finish that balances the fried richness. Each bite gets a sweet kiss that complements the cinnamon and the crisp exterior. If you sugar them too far in advance, the powdered sugar can dissolve into the surface, so dust just before serving for the best presentation.
- Enjoy warm, with a side of hot cocoa: The warm beignet and the steaming cup of hot chocolate create a comforting pairing where textures and temperatures play off each other. The combination encourages slow savoring, and the sugar and spice pair beautifully with the drink. Serve promptly because the beignets are at their best when consumed the same day they are fried.
Tips for Success
I like to think of these tips as the small choices that make a big difference. The right temperature, consistent rolling, and gentle handling will reward you with light, pillowy beignets every time.
- Monitor Oil Temperature, use a thermometer and aim for a steady 350 degrees F to achieve a golden crust while keeping the interior airy.
- Measure Flour Carefully, spoon and level the all purpose flour into the cup to avoid a dry, tough dough from packing too much flour.
- Warm buttermilk, allow the buttermilk to come to room temperature so the yeast works efficiently and the dough rises predictably.
- Do Not Overcrowd the Pot, fry 4 to 6 beignets at a time depending on pot size so the oil stays hot and each piece cooks evenly.
- Rest Under a Damp Towel, cover cut dough with a damp cloth while oil preheats to prevent edges from drying and ensure a tender puff.
- Use Neutral Oil, choose canola or vegetable oil for frying because of their high smoke points and mild flavor that won’t compete with the cinnamon.
Best Served With
These beignets are terrific when paired intentionally. A warm beverage and a casual table set up make them feel celebratory, and small accompaniments can elevate the experience without complexity.
- Hot Chocolate, a cup of rich hot chocolate complements the cinnamon and powdered sugar, creating a comforting duo ideal for breakfast or a cozy snack.
- Casual Brunch, serve these with other simple sweet items for a relaxed brunch where guests can help themselves, perfect for weekend gatherings or holiday mornings.
- Afternoon Treat, they are wonderful as a tea time snack when paired with warm beverages and light conversation, lending a nostalgic bakery feel to a quiet afternoon.
- Serve Warm, present the beignets right after frying when they are pillowy inside and crisp outside, and dust with powdered sugar just before they hit the plate.
- Storage Tip, enjoy them same day for best texture; if you must store, keep in an airtight container and reheat briefly to revive the exterior, though results will be best fresh.
- Occasions, ideal for slow weekend mornings, casual holiday breakfasts in fall, or any moment when you want a simple, joyful baked and fried treat.
FAQ
Conclusion
These beignets stand out because they balance simplicity with a deeply satisfying texture and warm, cinnamon kissed flavor. Making them is a joyful process that rewards a little attention with light, puffy dough and a crisp, golden exterior. Try them when you want to turn a normal morning into a small celebration, and invite someone to enjoy the ritual of frying and dusting alongside you. They are forgiving enough for beginners, yet showy enough to impress guests, offering a cozy, memorable treat that brings people together around a warm plate.
Easiest Cinnamon Buttermilk Beignets
Equipment
- Stand mixer
- Dough Hook
- Heavy bottom pot
- deep fry thermometer
- Slotted Spoon
Ingredients
- 1/2 cup warm water Hydrate and activate the yeast by warming the water slightly so it feels lukewarm; it helps dissolve yeast and honey while creating the right environment for fermentation. Proper temperature ensures predictable rise time and airy beignets. Avoid water that's too hot to prevent killing the yeast.
- 1 packet instant yeast (2 1/2 teaspoons) Provide a concentrated source of yeast cells to leaven the dough and create lift during proofing; instant yeast dissolves quickly and can be mixed directly into the dough. Using the specified packet ensures consistent rising power for light, airy beignets. Store unused yeast in a cool, dry place for longevity.
- 1 tablespoon honey Add fermentable sugars that feed the yeast for a steady rise and contribute subtle sweetness to the dough. Honey also enhances browning and provides a touch of floral complexity to the final beignets. Measure accurately to balance sweetness and yeast activity.
- 1 cup buttermilk, at room temperature Contribute acidity, richness, and tenderness to the dough; room-temperature buttermilk reacts with baking soda or interacts with dough components to develop flavor and texture. Buttermilk also adds a slight tang that brightens the beignet taste. Warm to room temperature for optimal ingredient integration.
- 1 large egg, beaten Bind ingredients and add richness while promoting structure and moisture; beaten egg helps create a cohesive dough and contributes to tender crumb. Egg proteins also aid in browning and give a subtle eggy flavor when cooked. Beat thoroughly for even distribution.
- 2 tablespoons unsalted butter, melted Provide fat that enriches the dough, improves tenderness, and enhances mouthfeel; melted unsalted butter disperses easily for uniform richness. Using unsalted butter allows precise control of overall saltiness in the recipe. Cool slightly before adding to avoid cooking the egg.
- 1 teaspoon vanilla extract Impart aromatic sweetness and depth of flavor that complements the cinnamon and powdered sugar; vanilla extract rounds out the profile of the beignets. A small amount goes a long way, so add sparingly to avoid overpowering delicate flavors. Use pure vanilla for best results.
- 4 cups all-purpose flour Build the bulk of the dough and supply gluten-forming proteins that give structure and chew to the beignets; sifted or measured all-purpose flour creates the correct balance of tenderness and strength. Proper handling prevents overworking, which could make the beignets tough. Measure by spooning and leveling for accuracy.
- 1/2 teaspoon ground cinnamon Introduce warm, fragrant spice that pairs with sugar and vanilla to create characteristic beignet flavor; ground cinnamon should be evenly incorporated for consistent taste. A small amount is enough to add aroma without overwhelming the dough. Use fresh ground cinnamon for best flavor.
- 1/2 teaspoon kosher salt Enhance overall flavor balance by seasoning the dough to bring out sweetness and depth; kosher salt distributes easily and sharpens other ingredients' flavors. Correct salting is essential even in fried pastries to prevent a flat-tasting result. Adjust slightly for personal taste if needed.
- canola or vegetable oil, for frying Provide a neutral, high smoke-point medium for frying the beignets until golden and crisp; canola or vegetable oil allows even heat transfer without imparting strong flavors. Maintain proper oil temperature to ensure interior cooks before exterior browns. Use enough oil for shallow or deep frying as directed.
- powdered sugar, for dusting Add an attractive finish and sweet contrast by dusting beignets with powdered sugar after frying; it melts slightly on warm surfaces to create a classic look and flavor. Powdered sugar also softens the fried exterior and balances any residual oil. Apply generously for traditional presentation.
- hot chocolate, for serving Offer a warm, comforting beverage pairing that complements the sweet, cinnamon-scented beignets and enhances the eating experience. Hot chocolate's creamy richness contrasts the fried dough and powdered sugar for a delightful combination. Serve in small cups alongside a plate of fresh beignets.
Instructions
- In the bowl of a stand mixer fitted with the dough hook, combine the water, yeast, honey, buttermilk, egg, butter, and vanilla. Add the flour, cinnamon, and salt. Knead until the dough comes together, about 1-2 minutes. If the dough feels too sticky, add an additional 1 tablespoon of flour at a time until the dough pulls away from the sides and forms a smooth ball. Cover the bowl and let sit in a warm place for 1-2 hours, until doubled in size. Turn the dough onto a floured work surface. Roll the dough out into a large rectangle, about an 1/4 inch thick. Using a knife, cut the dough into 3×3 inch squares (about 25 squares). Cover with a damp kitchen towel while the oil preheats. Place a deep, heavy bottom pot on the stove and add enough oil to fill the pot about 1 to 1 1/2 inches deep. Turn the burner to medium and preheat the oil to 350 degrees F. Fry 4-6 beignets at a time depending on the size of your pot. Use a slotted spoon to flip them over every 30 seconds. Fry for 2-3 minutes or until golden brown on both sides. Remove with the slotted spoon and place on paper towels to drain. Repeat with remaining squares. Dust each beignet generously with powdered sugar. Enjoy warm, with a side of hot cocoa.: The first sensations are liquid and aroma, as the warm water and honey wake the yeast and the vanilla adds a gentle perfume. You will hear a soft splash as the liquids meet, then a faint hissing of the mixer when you begin to blend. This step matters because it ensures evenly distributed hydration and activation of the yeast , which sets the stage for a reliable rise. A common mistake is adding hot butter or water that kills the yeast ; test temperatures on your wrist so they feel warm not hot. If the mixture seems uneven, stop and stir with a spatula to incorporate any pockets of liquid before adding flour.
- Add the flour, cinnamon, and salt: When you add the flour , the bowl will transform from a glossy pool of liquid into a shaggy mass, and the scent of cinnamon will bloom slightly. This transition is the dough beginning to build structure, and the order matters because slowly incorporating the dry ingredients prevents lumps. The right texture at this point is slightly sticky but cohesive, ready for a few minutes of kneading. Avoid dumping all the flour at once if your mixer seems to strain, because too much dry weight can overwork the motor and yield a dense dough.
- Knead until the dough comes together, about 1 to 2 minutes: You will notice the dough pull away from the sides and gather around the hook, a satisfying sign that gluten is developing. The sound will be a low, steady thrum from the mixer as it works, and visually the dough should look smooth with a slight sheen. This brief knead is purposeful, giving structure without overdeveloping gluten so the beignets remain tender. One frequent error is over kneading which tightens the dough, so keep it short and check for elasticity by pressing a finger into the dough; it should spring back softly.
- If the dough feels too sticky, add an additional 1 tablespoon of flour at a time until the dough pulls away from the sides and forms a smooth ball: At this stage, touch is your best guide. A tacky surface is normal, but the dough should not smear across your fingers. Adding flour in controlled tablespoons is crucial because too much will dry the dough, resulting in dense beignets. As you adjust, notice how the dough becomes less clingy and more cohesive, and avoid the temptation to oversalt; the small salt amount already balances the sweetness. If you add too much flour, you can rescue the dough with a teaspoon of water to rehydrate it gently.
- Cover the bowl and let sit in a warm place for 1 to 2 hours, until doubled in size: The quiet wait is when the yeast does its invisible work, producing air and lifting the dough. You will see the bowl expand like a slow breath, and the dough will smell slightly yeasty and sweet, signaling readiness. This rise is essential for the light interior, so patience pays off; rushing it will produce denser beignets. A typical pitfall is placing the bowl in a drafty or cool spot, which can stall the rise; instead, choose a warm corner or an oven with the light on to provide gentle warmth.
- Turn the dough onto a floured work surface: The texture under your hands will shift from smooth and pillow like to something you can roll without sticking, thanks to the dusting of flour . This tactile step lets you feel the elasticity of the dough and judge how much additional flour is needed for rolling. Be mindful not to incorporate excessive flour while you work, as that leads to a stiffer finished product. If the dough resists rolling, let it rest for a few minutes to relax the gluten, which makes shaping easier and preserves tenderness.
- Roll the dough out into a large rectangle, about an 1/4 inch thick: Rolling transforms the dough into a canvas that will determine the puff and final thickness of your beignets. You should see a smooth surface with small air pockets beneath, and the rolling sound is a quiet, steady glide. Keeping the thickness consistent ensures even frying; too thin will make them crisp through and through, while too thick leaves the center doughy. If the dough springs back while rolling, let it rest briefly to relax, then continue to achieve that even 1/4 inch sheet.
- Using a knife, cut the dough into 3×3 inch squares (about 25 squares): The clean cut will reveal tender layers, and the squares should be roughly uniform to ensure they fry at the same rate. The act of cutting releases a slight puff of dough scent, and it helps to tally the squares as you go to keep track of batch sizes. Uneven pieces are a common oversight and produce inconsistent results during frying, so aim for regularity; if a few pieces are smaller, fry them separately or watch them closely during cooking.
- Cover with a damp kitchen towel while the oil preheats: Resting under a damp towel prevents the cut edges from drying out and keeps the dough supple until frying. The surface will remain soft to the touch, and you will avoid cracked beignets that do not puff properly. This pause also allows you to bring the oil to an even temperature, which is crucial for achieving the ideal exterior and interior balance. If you skip this step, the edges can form a crust that impedes rise and yields denser centers.
- Place a deep, heavy bottom pot on the stove and add enough oil to fill the pot about 1 to 1 1/2 inches deep: The sound of oil settling in a heavy pot is reassuring, and the depth is enough to let the beignets float and crisp without touching the bottom. Using a heavy bottom pot helps maintain stable temperature and prevents scorching. Too little oil makes the dough sit on the bottom and cook unevenly, while too much oil can be wasteful and dangerous; measure the depth and avoid overfilling. Always monitor oil carefully to prevent overheating.
- Turn the burner to medium and preheat the oil to 350 degrees F: You will see soft ripples across the oil when it approaches heat, and a thermometer will show a steady 350 degrees F. This temperature is the sweet spot for a golden exterior and a fully cooked interior. Frying cooler results in oil absorption and soggy beignets, while hotter oil will brown the outside before the center cooks. A common mistake is guessing temperature by sight alone, so I recommend using a reliable thermometer for consistency.
- Fry 4 to 6 beignets at a time depending on the size of your pot: As each square hits the oil, you will hear a lively sizzle and watch the edges puff upward. Crowding the pot drops the oil temperature and prevents even frying, so keep the batches moderate. This step is where timing and observation matter; maintain steady heat and avoid moving pieces too frequently. Overcrowding yields greasy beignets and uneven color, so use fewer pieces if your pot is small.
- Use a slotted spoon to flip them over every 30 seconds: Flipping creates an even golden crust on all sides, and you will notice the beignets developing color in pulses as you turn them. The spoon allows you to control their orientation without damaging the fragile surface. If you skip regular flips, one side can overbrown or cook faster, resulting in uneven texture. Be gentle when flipping so the dough does not deflate or tear.
- Fry for 2 to 3 minutes or until golden brown on both sides: The finished sound is a steady quiet crackle and the visual cue is a deep, warm golden color. Inside, the texture should be airy and steaming slightly when you break one open. This timing provides a balance where the exterior is crisp and not burnt while the interior cooks through. A typical error is pulling them too early; if the middle feels doughy when you tear one open, extend the frying time slightly while monitoring color.
- Remove with the slotted spoon and place on paper towels to drain: The beignets will sigh as they leave the oil, and the paper towels absorb excess oil while keeping the underside crisp. This drainage matters to prevent sogginess and keeps the texture pleasant. If you stack them wet, steam will build and soften the crust, so arrange them in a single layer until the initial oil is absorbed.
- Repeat with remaining squares: Repetition is rhythmic, and you will fall into a comfortable pace as batches come out in warm, fragrant waves. Keep the oil temperature steady between batches, and adjust the heat if the color changes noticeably. A common oversight is not checking oil temperature, which can lead to variations; use the thermometer between batches and let the oil recover to 350 degrees F before adding more dough.
- Dust each beignet generously with powdered sugar: The final flourish is visual and textural, the powdered sugar clings to warm surfaces creating a snowy finish that balances the fried richness. Each bite gets a sweet kiss that complements the cinnamon and the crisp exterior. If you sugar them too far in advance, the powdered sugar can dissolve into the surface, so dust just before serving for the best presentation.
- Enjoy warm, with a side of hot cocoa: The warm beignet and the steaming cup of hot chocolate create a comforting pairing where textures and temperatures play off each other. The combination encourages slow savoring, and the sugar and spice pair beautifully with the drink. Serve promptly because the beignets are at their best when consumed the same day they are fried.
Notes
- Monitor Oil Temperature, use a thermometer and aim for a steady 350 degrees F to achieve a golden crust while keeping the interior airy.
- Measure Flour Carefully, spoon and level the all purpose flour into the cup to avoid a dry, tough dough from packing too much flour.
- Warm buttermilk, allow the buttermilk to come to room temperature so the yeast works efficiently and the dough rises predictably.
- Do Not Overcrowd the Pot, fry 4 to 6 beignets at a time depending on pot size so the oil stays hot and each piece cooks evenly.
- Rest Under a Damp Towel, cover cut dough with a damp cloth while oil preheats to prevent edges from drying and ensure a tender puff.
- Use Neutral Oil, choose canola or vegetable oil for frying because of their high smoke points and mild flavor that won’t compete with the cinnamon.