Italian Deviled Eggs with Garlic and Basil
Italian Deviled Eggs with Garlic and Basil were the kind of snack that turned a simple Sunday afternoon into a small celebration at my kitchen table. I first made them for a neighborhood potluck when I had just a handful of pantry staples and a head full of curiosity. The combination of tender eggs, bright basil, and a whisper of garlic felt unexpectedly elegant, and everyone kept asking for the recipe between bites. That day taught me how a few thoughtful touches can make a humble ingredient sing.
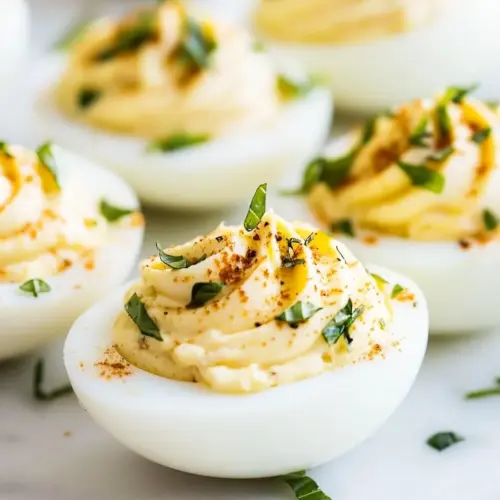
Since then, I’ve come back to this recipe whenever I want something that feels special but is delightfully easy to pull together. The creamy yolk filling, dotted with fresh basil and kissed with lemon, echoes classic Italian flavors without overcomplicating the process. I love that the toasted Panko breadcrumbs and grated Parmigiano Reggiano add a crunchy, savory finish that contrasts beautifully with the smooth filling. Making a batch almost always leads to spontaneous company, which I never complain about.
Over multiple tries, I learned how to time the eggs so the yolks are tender and not chalky, and how a tiny squeeze of lemon can lift the whole mixture. I also began toasting the crumbs separately, which gives the topping a nutty aroma that fills the kitchen and draws people in. When I plate these, I usually set them on a shallow dish and scatter extra chopped basil for color and scent. They travel well to gatherings, and they never last long, which is exactly the kind of recipe I like to keep in my back pocket.
Recipe Snapshot
60 mins
45 mins
15 mins
Medium
120 kcal
Italian
Paleo, Whole30
Appetizers
Heavy bottomed pot, Small skillet, Mixing bowl, Hand mixer or whisk, Knife
What You’ll Enjoy About This Italian Deviled Eggs with Garlic and Basil
Fresh Italian Flavors That Feel Fancy
I adore how Italian Deviled Eggs with Garlic and Basil marry simple ingredients into something that tastes elevated. The basil and Parmigiano Reggiano bring classic Italian notes, and yet the technique stays straightforward, so you get an impressive result without stress.
Texture Contrast That Keeps You Coming Back
The creamy yolk filling paired with crisp, toasted Panko breadcrumbs creates a delightful contrast. I find that the crunch makes each bite more interesting, and that texture balance is what separates a good deviled egg from a great one.
Adaptable for Many Occasions
Italian Deviled Eggs with Garlic and Basil work at brunches, picnics, and holiday spreads. I love bringing them to casual potlucks because they travel well and look attractive on a platter. They also pair nicely with salads and other small plates for a light gathering.
Hands On, but Nothing Fussy
This recipe rewards a little attention to detail, like peeling eggs under running water and toasting crumbs until golden. Those small steps make a tangible difference in flavor and texture, and I enjoy the hands on process without it taking over my day.
Bright, Balanced Seasoning
The lemon and garlic keep the filling lively, while the mayonnaise gives it silkiness. I appreciate that the seasoning is easy to tweak, so you can make it brighter or creamier depending on taste, which makes it a forgiving recipe I often recommend.
Italian Deviled Eggs with Garlic and Basil Shopping List
These ingredients are intentionally simple yet purposeful. The egg yolks provide the rich, creamy base, while mayonnaise smooths the texture. Bright elements like lemon and aromatic basil cut through the richness, and the toasted Panko breadcrumbs with Parmigiano Reggiano add crunch and umami. Together they create a balanced bite where each component plays a clear role.
- 6 large eggs: Boil and cool to provide a creamy, rich base for the deviled egg filling; eggs contribute texture and protein while carrying the flavors of other ingredients when mashed and mixed.
- 1/4 cup mayonnaise: Bind and enrich the yolk mixture with a smooth, creamy mouthfeel; mayonnaise adds fat and subtle tang that balances the garlic and lemon.
- 1 1/2 teaspoons extra-virgin olive oil, divided: Drizzle and finish to add a fruity, peppery richness; extra–virgin olive oil enhances mouthfeel and brings an Italian note when folded into the yolk or drizzled over finished eggs.
- 1 small garlic clove, minced: Mince finely to release pungent, aromatic oils; garlic adds savory depth and a bright bite that lifts the richness of the yolk mixture.
- 1/8 teaspoon fresh lemon juice (small squeeze, plus additional, to taste): Squeeze sparingly to add bright acidity and lift heavy flavors; fresh lemon juice balances fat and enhances the overall freshness of the deviled eggs.
- 1 tablespoon chopped fresh basil: Chop and fold in to provide fresh, aromatic herbiness; basil contributes a sweet, peppery, slightly anise-like flavor that complements garlic and lemon.
- 1 tablespoon unseasoned Panko breadcrumbs: Toast or sauté lightly to add crunch and a toasty note; unseasoned Panko breadcrumbs give a crisp textural contrast when sprinkled atop the finished deviled eggs.
- 1 teaspoon grated Parmigiano Reggiano: Grate finely to add umami and salty depth; Parmigiano Reggiano intensifies savory flavors and provides a nutty, complex finish to each bite.
- 1/8 teaspoon grated lemon zest (pinch): Grate a small amount to perfume the filling and garnish with bright citrus oils; lemon zest delivers concentrated lemon aroma without extra acidity.
Cooking Instructions for Italian Deviled Eggs with Garlic and Basil
I like to approach the steps calmly and in stages, so nothing feels rushed and each element gets the care it deserves. The following directions expand on the original method with sensory cues and common pitfalls to help you get perfect results every time.
- Place eggs in a heavy-bottomed pot and cover with cool water by 1 to 2 inches. Vent lid and bring just to a boil. Cover pot completely, lower heat, and simmer for 30 seconds. Remove from heat and let stand, covered, 12 minutes. Transfer eggs to a bowl of ice water and let stand for 10 minutes before peeling under cool running water. Slice eggs in half lengthwise.: You should hear the faint settling of the eggs as they nestle in the water, and visually ensure there is about a finger to two fingers worth of water above them so heat distributes evenly. Using cool water reduces the chance of cracking when temperature changes, and a heavy-bottomed pot promotes steady, even heating instead of hot spots. One frequent mistake is crowding the pot, which can cause uneven cooking; work with a pot that gives each egg a little space.
- Gently scoop yolks into a bowl. Set egg whites aside. Using a hand mixer or a whisk, mix in mayonnaise, 1 teaspoon extra-virgin olive oil, garlic, and lemon juice until smooth. Stir in fresh basil and season to taste with salt, pepper, and additional lemon juice, if desired.: Watch for tiny bubbles around the pot edges and then slightly larger rolling bubbles, signaling the water is reaching a boil. You want the water to come to a gentle full boil rather than a vigorous roil, which can jostle the eggs and crack them. If you miss this cue and let the water roar, you risk broken shells and uneven whites.
- In a small skillet over medium heat, warm remaining 1/2 teaspoon olive oil. Add bread crumbs and stir to combine, until crumbs are lightly toasted. Transfer to a bowl and season with a pinch of salt and a few grinds of black pepper. Let cool. Stir in Parmigiano Reggiano and lemon zest.: After covering, reduce the heat so the surface shows only a few gentle ripples and not aggressive bubbling. The sizzling sound should quiet to a whisper. This brief simmer helps finish the initial cooking without overdoing the whites. A common oversight is leaving the heat too high, which cooks the eggs too quickly and can lead to rubbery whites.
- Fill egg white halves with garlic-basil yolk mixture. Sprinkle each egg with breadcrumbs just before serving and serve soon after assembling.: You will notice a gentle settling noise as residual heat continues to cook the eggs . This resting period ensures the yolks set through without becoming dry, producing a creamy texture rather than chalky. Use a timer; under timing here often yields runny yolks, while over timing produces grainy centers.
- Transfer eggs to a bowl of ice water and let stand for 10 minutes before peeling under cool running water: The immediate cold bath should create a faint hiss and contraction of the whites, easing the peel. The shock of cold stops cooking and makes the membrane shrink away from the shell. Peel under cool running water to help rinse away tiny shell bits. If you skip the ice bath, peeling becomes messy and the texture can continue to firm up undesirably.
- Slice eggs in half lengthwise: As you cut, take note of the clean, slick white and the even, firm yolk. A sharp knife will give a smooth edge without tearing the white, which helps the halves sit flat for filling. Wiping the blade between cuts prevents ragged edges. Using a dull knife often crushes the whites and creates uneven wells.
- Gently scoop yolks into a bowl: When you scoop, the yolks should feel tender and slightly springy, not crumbly. Doing this gently preserves the white shapes for neat presentation. Place the yolks in a bowl that gives you space to whisk without splashing. Rushing can break the whites or send yolk bits everywhere, which makes assembly fiddly.
- Set egg whites aside: Arrange the hollowed egg whites on a serving plate with the cut side up, creating tidy wells for filling. They should be dry on the surface so the filling adheres well. If the whites are damp, blot them gently with a paper towel. Wet whites can cause the filling to slide and make a mess on the platter.
- Using a hand mixer or a whisk, mix in mayonnaise, 1 teaspoon extra-virgin olive oil, garlic, and lemon juice until smooth: As you blend, listen for a silky, cohesive sound and watch the mixture homogenize into glossy, creamy consistency. The mayonnaise and oil emulsify the yolks, creating a silky mouthfeel. If you overmix, the filling can become too loose; under-mixing leaves lumps. A common mistake is adding too much liquid up front, so add lemon gradually and taste.
- Stir in fresh basil and season to taste with salt, pepper, and additional lemon juice if desired: Fold in the chopped basil until small green flecks are evenly distributed, and then taste for balance. The aroma of the herb should pop as you stir, releasing fragrant oils. Adjust seasoning slowly; too much salt will overpower the delicate herb and citrus interplay. A typical error is adding all the lemon at once, which can tip the balance too far.
- In a small skillet over medium heat, warm remaining 1/2 teaspoon olive oil: You should see a faint shimmer on the surface of the oil, and a soft aroma when it becomes warm. This short step primes the oil to toast the Panko breadcrumbs without burning. If the oil smokes, your pan is too hot, which will make the crumbs bitter; reduce heat immediately.
- Add bread crumbs and stir to combine, until crumbs are lightly toasted: Stir continuously so the crumbs color evenly and emit a toasty, nutty scent; aim for a light golden hue rather than deep brown. The sound is quiet, a soft dry rustle as the crumbs toast. Uneven stirring can cause some bits to scorch while others remain raw, so keep the motion steady.
- Transfer to a bowl and season with a pinch of salt and a few grinds of black pepper: Once cooled slightly, tossing the crumbs with seasoning helps distribute flavor and prevents pockets of salt. You should smell a warm, toasty aroma combined with a peppery edge. If you skip seasoning here, the topping will taste flat compared to the seasoned filling.
- Let cool: Allow the crumbs to cool completely, which preserves their crispness when they top the filled eggs. Warm crumbs will steam once they contact the filling, becoming soggy. A common misstep is rushing this step and applying warm crumbs, losing the desired crunch.
- Stir in Parmigiano Reggiano and lemon zest: The grated Parmigiano Reggiano should meld into the cooled crumbs, lending a savory, slightly salty depth, while the grated lemon zest releases a burst of aroma. You will notice a fragrant lift when the zest is mixed in. Be careful not to add too much zest, which can introduce bitterness if the white pith is included.
- Fill egg white halves with garlic-basil yolk mixture: Spoon or pipe the filling so each well is neatly mounded; the texture should be creamy and glossy. The contrast between the pale white and the lightly speckled filling is visually appealing and signals a successful assembly. Overfilling can cause the topping to slide off, so aim for neat portions.
- Sprinkle each egg with breadcrumbs just before serving: The final sprinkle provides a crunchy finish and a savory top note, and applying it right before serving preserves the texture. The crumbs should make a soft scattering sound as they fall onto the filling. If you add them too early, they will absorb moisture and become limp.
- Serve soon after assembling: These are best enjoyed fresh, when the filling is cool and the crumbs are crisp. Take note of the scents at the table, the bright citrus and herb cutting through the richness. Letting them sit too long will cause the topping to soften and the presentation to lose its pop.
Tips and Variations
I like to keep a handful of tips close by when I make Italian Deviled Eggs with Garlic and Basil, because small tweaks often improve flavor and presentation. Below are expanded notes and variations based on my testing and experience, designed to help you get the best results.
- Master the boil: Bring the water to a full boil, then reduce to a gentle simmer before timing. This helps the eggs cook evenly and prevents the rough textures that come from aggressive boiling. Use a timer for the stand and the ice bath to avoid overcooking the yolks.
- Peel like a pro: Crack the shells all over and roll gently to loosen them, then peel under running cool water. The water helps separate the membrane from the white, giving cleaner halves. If shells cling, chilling longer in the ice bath usually solves the issue.
- Adjust the filling texture: If you prefer an ultra-smooth filling, push the yolks through a fine sieve before mixing with mayonnaise and oil. This removes any small lumps and creates a silky mouthfeel. Beware that sieving is a bit more work, but the result is elegant.
- Control garlic intensity: Mince the garlic into a paste or grate it for a more integrated flavor, or let it rest briefly after mincing to mellow its sharpness. If you want a subtler garlicky note, reduce the amount slightly, tasting as you go.
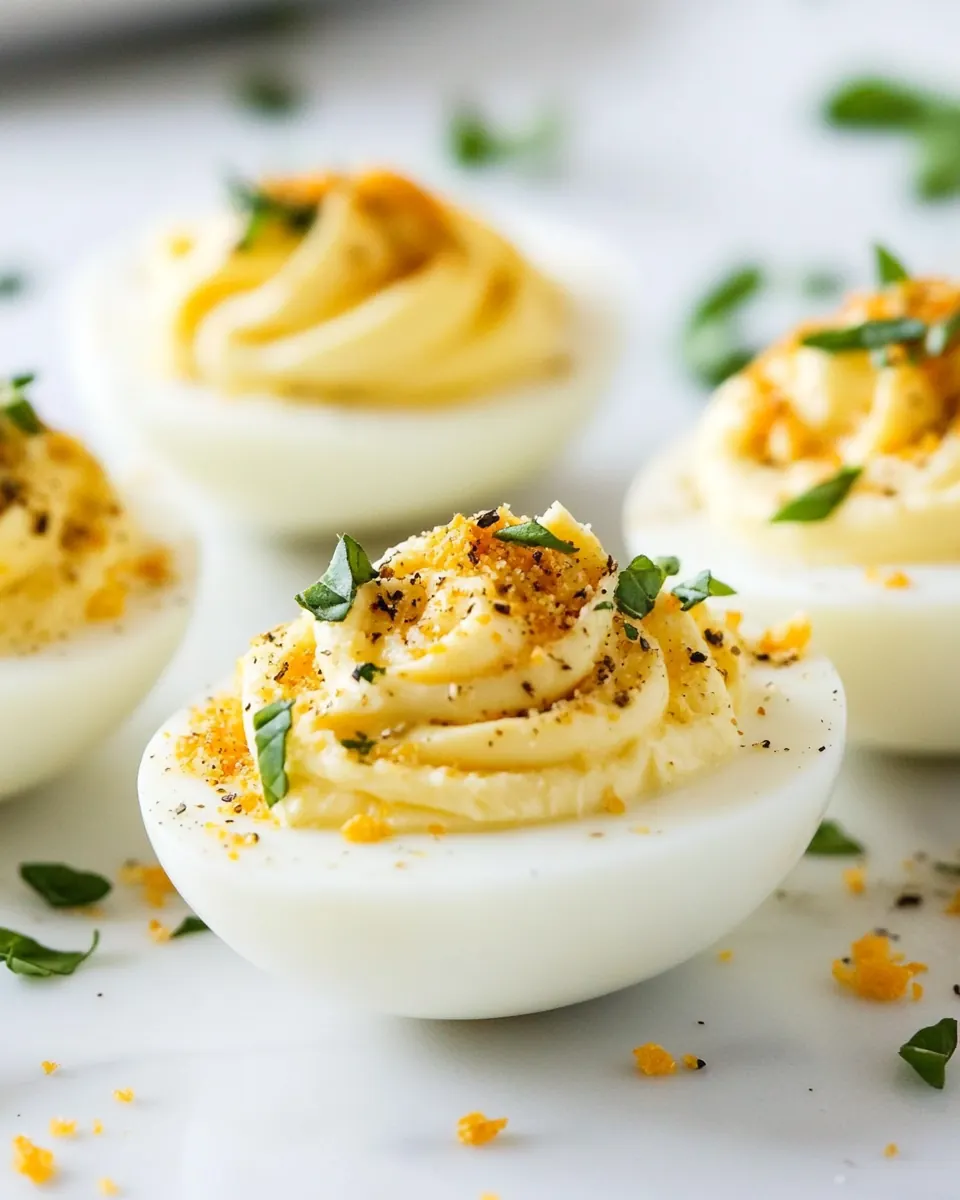
- Toast crumbs for extra aroma: Warm the remaining olive oil then stir in the Panko breadcrumbs until lightly golden. The toasted aroma enhances the overall dish, and mixing in finely grated Parmigiano Reggiano elevates the savory profile. Avoid burning by stirring constantly over medium heat.
- Make ahead strategy: You can hard cook and peel the eggs a day ahead, storing them unfilled in a sealed container. Prepare the filling and crumbs separately, then assemble shortly before serving to preserve the crumb crunch and fresh herb aroma.
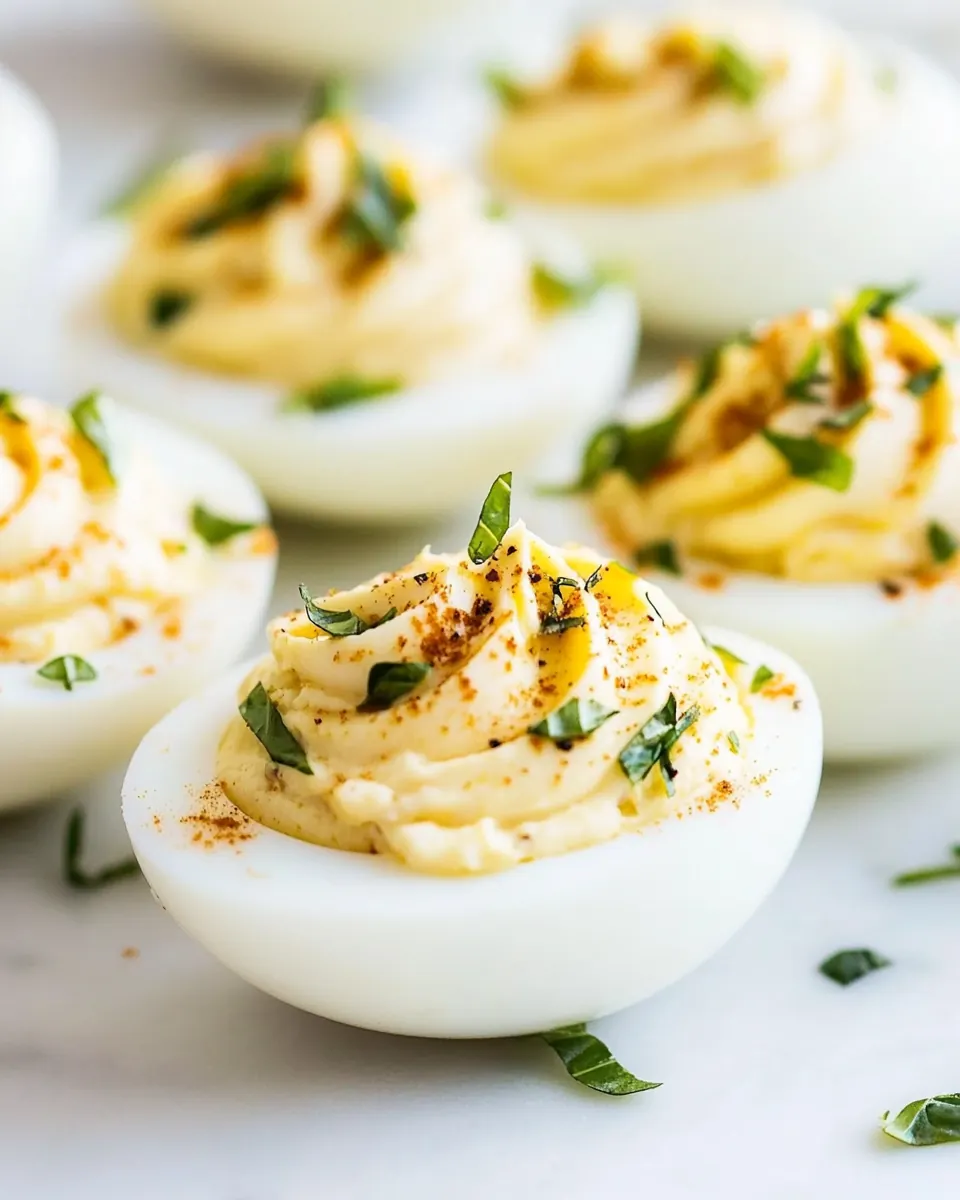
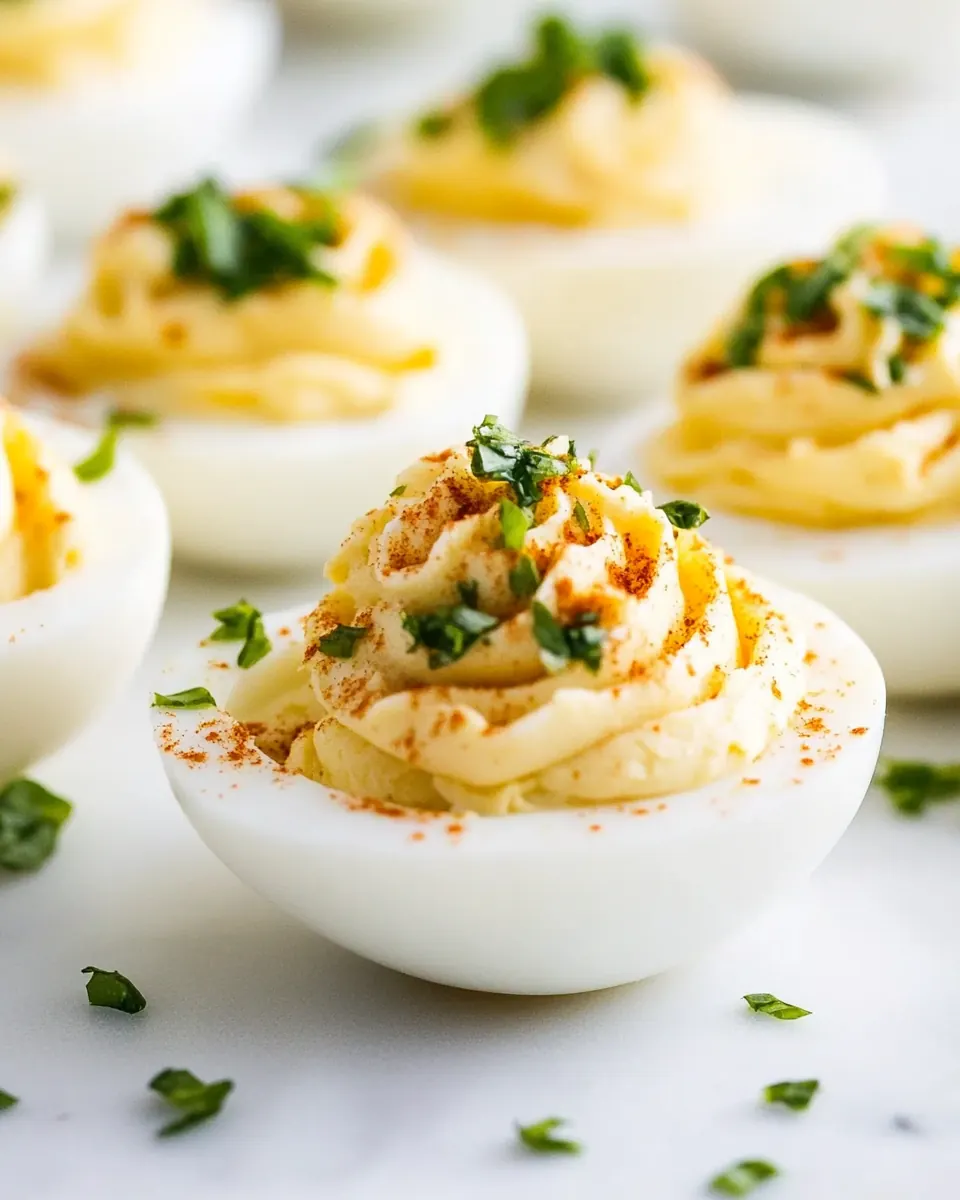
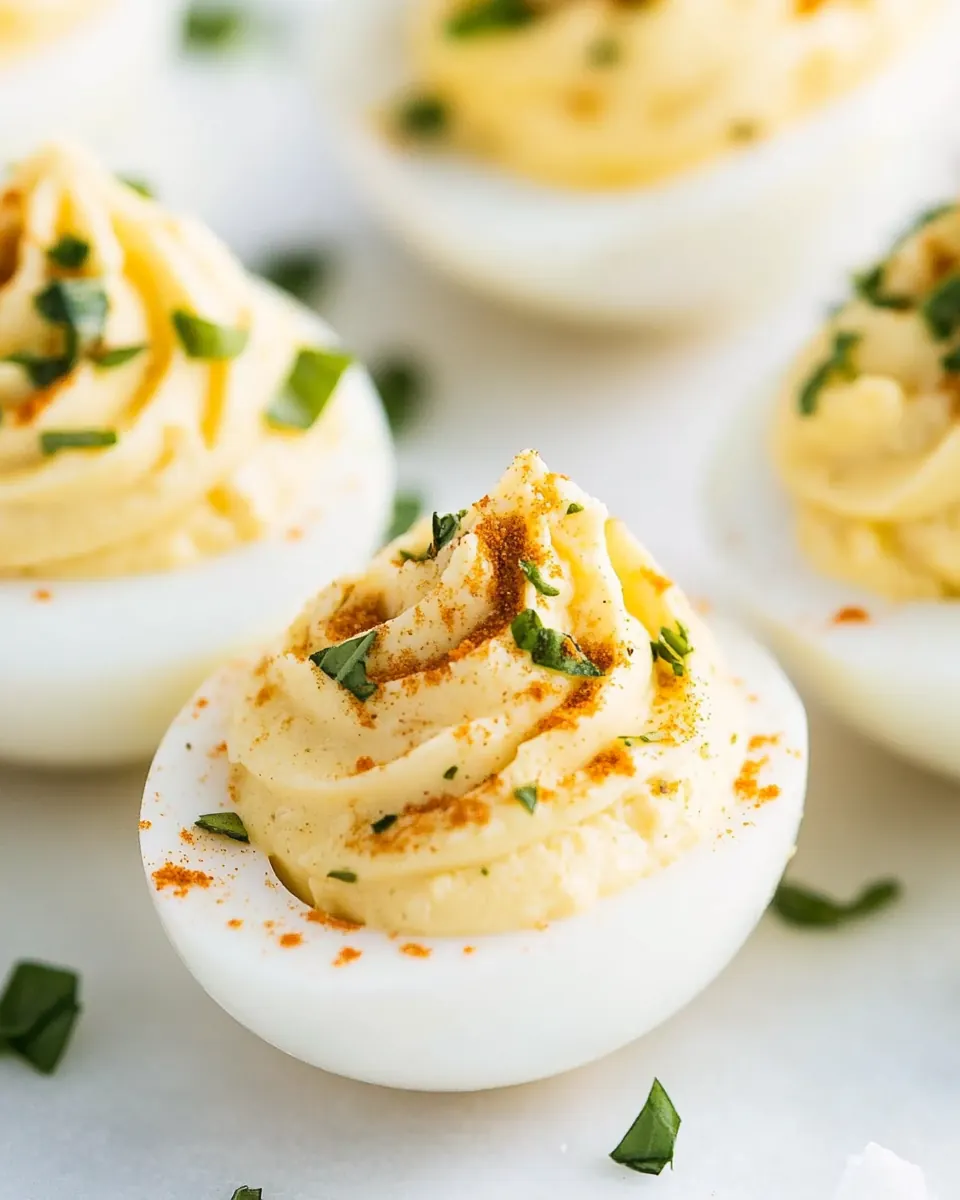
- Presentation matters: Arrange the filled halves on a shallow platter and garnish with a few small torn basil leaves for a fresh visual pop. Using a piping bag for the filling creates a consistent look that impresses at gatherings.
Serving This Italian Deviled Eggs with Garlic and Basil
These little bites are versatile, perfect for an array of occasions from casual snacks to celebratory spreads. Below I outline thoughtful serving approaches, storage notes, and pairing ideas so you can present them with confidence.
- Casual gatherings: Serve the eggs on a large platter with extra torn basil scattered around. They make a delightful finger food at game day spreads or weekend get togethers, where guests can grab one or two as they mingle.
- Brunch or lunch: Pair the deviled eggs with a simple green salad and crusty bread for a light midday meal. The bright lemon and herb notes complement crisp greens, making a balanced plate that feels fresh and satisfying.
- Special occasions: These are lovely on an antipasti board alongside olives, marinated vegetables, and sliced cheeses. Their Italian flavor profile blends naturally with other Mediterranean elements, creating a cohesive spread for holidays or dinner parties.
- Storage tips: Store unfilled halved egg whites separately in an airtight container for up to one day, and keep the filling chilled in another container. Assemble no more than a few hours before serving to preserve the crunch of the toasted crumbs.
- Seasonal pairings: In spring, emphasize fresh herbs and serve with light vegetable sides. These eggs also work well year round, especially when basil is abundant and fragrant, adding a seasonal brightness to your table.
- Serving style: For formal occasions, pipe the filling into the whites and finish with a precise sprinkle of the breadcrumb mixture. For casual affairs, spoon the filling and scatter crumbs more freely for a rustic look that is equally appealing.
FAQ
Conclusion
Italian Deviled Eggs with Garlic and Basil stand out because they marry simple hard cooked eggs with bright herb and citrus notes, and a crunchy savory topping, yielding an elegant bite that is both familiar and fresh. Give them a try the next time you want an easy appetizer that looks put together but is effortless to make. They are forgiving, travel well to gatherings, and reward small attentions like toasting the crumbs and tasting for seasoning, so you can feel proud serving them to friends and family.
Italian Deviled Eggs with Garlic and Basil
Equipment
- Heavy-bottomed pot
- Small skillet
- Mixing Bowl
- Hand mixer or whisk
- Knife
Ingredients
- 6 large eggs Boil and cool to provide a creamy, rich base for the deviled egg filling; eggs contribute texture and protein while carrying the flavors of other ingredients when mashed and mixed.
- 1/4 cup mayonnaise Bind and enrich the yolk mixture with a smooth, creamy mouthfeel; mayonnaise adds fat and subtle tang that balances the garlic and lemon.
- 1 -1/2 teaspoons extra-virgin olive oil, divided Drizzle and finish to add a fruity, peppery richness; extra-virgin olive oil enhances mouthfeel and brings an Italian note when folded into the yolk or drizzled over finished eggs.
- 1 small garlic clove, minced Mince finely to release pungent, aromatic oils; garlic adds savory depth and a bright bite that lifts the richness of the yolk mixture.
- 1/8 teaspoon fresh lemon juice (small squeeze, plus additional, to taste) Squeeze sparingly to add bright acidity and lift heavy flavors; fresh lemon juice balances fat and enhances the overall freshness of the deviled eggs.
- 1 tablespoon chopped fresh basil Chop and fold in to provide fresh, aromatic herbiness; basil contributes a sweet, peppery, slightly anise-like flavor that complements garlic and lemon.
- 1 tablespoon unseasoned Panko breadcrumbs Toast or sauté lightly to add crunch and a toasty note; unseasoned Panko breadcrumbs give a crisp textural contrast when sprinkled atop the finished deviled eggs.
- 1 teaspoon grated Parmigiano Reggiano Grate finely to add umami and salty depth; Parmigiano Reggiano intensifies savory flavors and provides a nutty, complex finish to each bite.
- 1/8 teaspoon grated lemon zest (pinch) Grate a small amount to perfume the filling and garnish with bright citrus oils; lemon zest delivers concentrated lemon aroma without extra acidity.
Instructions
- Place eggs in a heavy-bottomed pot and cover with cool water by 1 to 2 inches. Vent lid and bring just to a boil. Cover pot completely, lower heat, and simmer for 30 seconds. Remove from heat and let stand, covered, 12 minutes. Transfer eggs to a bowl of ice water and let stand for 10 minutes before peeling under cool running water. Slice eggs in half lengthwise.: You should hear the faint settling of the eggs as they nestle in the water, and visually ensure there is about a finger to two fingers worth of water above them so heat distributes evenly. Using cool water reduces the chance of cracking when temperature changes, and a heavy-bottomed pot promotes steady, even heating instead of hot spots. One frequent mistake is crowding the pot, which can cause uneven cooking; work with a pot that gives each egg a little space.
- Gently scoop yolks into a bowl. Set egg whites aside. Using a hand mixer or a whisk, mix in mayonnaise, 1 teaspoon extra-virgin olive oil, garlic, and lemon juice until smooth. Stir in fresh basil and season to taste with salt, pepper, and additional lemon juice, if desired.: Watch for tiny bubbles around the pot edges and then slightly larger rolling bubbles, signaling the water is reaching a boil. You want the water to come to a gentle full boil rather than a vigorous roil, which can jostle the eggs and crack them. If you miss this cue and let the water roar, you risk broken shells and uneven whites.
- In a small skillet over medium heat, warm remaining 1/2 teaspoon olive oil. Add bread crumbs and stir to combine, until crumbs are lightly toasted. Transfer to a bowl and season with a pinch of salt and a few grinds of black pepper. Let cool. Stir in Parmigiano Reggiano and lemon zest.: After covering, reduce the heat so the surface shows only a few gentle ripples and not aggressive bubbling. The sizzling sound should quiet to a whisper. This brief simmer helps finish the initial cooking without overdoing the whites. A common oversight is leaving the heat too high, which cooks the eggs too quickly and can lead to rubbery whites.
- Fill egg white halves with garlic-basil yolk mixture. Sprinkle each egg with breadcrumbs just before serving and serve soon after assembling.: You will notice a gentle settling noise as residual heat continues to cook the eggs . This resting period ensures the yolks set through without becoming dry, producing a creamy texture rather than chalky. Use a timer; under timing here often yields runny yolks, while over timing produces grainy centers.
- Transfer eggs to a bowl of ice water and let stand for 10 minutes before peeling under cool running water: The immediate cold bath should create a faint hiss and contraction of the whites, easing the peel. The shock of cold stops cooking and makes the membrane shrink away from the shell. Peel under cool running water to help rinse away tiny shell bits. If you skip the ice bath, peeling becomes messy and the texture can continue to firm up undesirably.
- Slice eggs in half lengthwise: As you cut, take note of the clean, slick white and the even, firm yolk. A sharp knife will give a smooth edge without tearing the white, which helps the halves sit flat for filling. Wiping the blade between cuts prevents ragged edges. Using a dull knife often crushes the whites and creates uneven wells.
- Gently scoop yolks into a bowl: When you scoop, the yolks should feel tender and slightly springy, not crumbly. Doing this gently preserves the white shapes for neat presentation. Place the yolks in a bowl that gives you space to whisk without splashing. Rushing can break the whites or send yolk bits everywhere, which makes assembly fiddly.
- Set egg whites aside: Arrange the hollowed egg whites on a serving plate with the cut side up, creating tidy wells for filling. They should be dry on the surface so the filling adheres well. If the whites are damp, blot them gently with a paper towel. Wet whites can cause the filling to slide and make a mess on the platter.
- Using a hand mixer or a whisk, mix in mayonnaise, 1 teaspoon extra-virgin olive oil, garlic, and lemon juice until smooth: As you blend, listen for a silky, cohesive sound and watch the mixture homogenize into glossy, creamy consistency. The mayonnaise and oil emulsify the yolks, creating a silky mouthfeel. If you overmix, the filling can become too loose; under-mixing leaves lumps. A common mistake is adding too much liquid up front, so add lemon gradually and taste.
- Stir in fresh basil and season to taste with salt, pepper, and additional lemon juice if desired: Fold in the chopped basil until small green flecks are evenly distributed, and then taste for balance. The aroma of the herb should pop as you stir, releasing fragrant oils. Adjust seasoning slowly; too much salt will overpower the delicate herb and citrus interplay. A typical error is adding all the lemon at once, which can tip the balance too far.
- In a small skillet over medium heat, warm remaining 1/2 teaspoon olive oil: You should see a faint shimmer on the surface of the oil, and a soft aroma when it becomes warm. This short step primes the oil to toast the Panko breadcrumbs without burning. If the oil smokes, your pan is too hot, which will make the crumbs bitter; reduce heat immediately.
- Add bread crumbs and stir to combine, until crumbs are lightly toasted: Stir continuously so the crumbs color evenly and emit a toasty, nutty scent; aim for a light golden hue rather than deep brown. The sound is quiet, a soft dry rustle as the crumbs toast. Uneven stirring can cause some bits to scorch while others remain raw, so keep the motion steady.
- Transfer to a bowl and season with a pinch of salt and a few grinds of black pepper: Once cooled slightly, tossing the crumbs with seasoning helps distribute flavor and prevents pockets of salt. You should smell a warm, toasty aroma combined with a peppery edge. If you skip seasoning here, the topping will taste flat compared to the seasoned filling.
- Let cool: Allow the crumbs to cool completely, which preserves their crispness when they top the filled eggs. Warm crumbs will steam once they contact the filling, becoming soggy. A common misstep is rushing this step and applying warm crumbs, losing the desired crunch.
- Stir in Parmigiano Reggiano and lemon zest: The grated Parmigiano Reggiano should meld into the cooled crumbs, lending a savory, slightly salty depth, while the grated lemon zest releases a burst of aroma. You will notice a fragrant lift when the zest is mixed in. Be careful not to add too much zest, which can introduce bitterness if the white pith is included.
- Fill egg white halves with garlic-basil yolk mixture: Spoon or pipe the filling so each well is neatly mounded; the texture should be creamy and glossy. The contrast between the pale white and the lightly speckled filling is visually appealing and signals a successful assembly. Overfilling can cause the topping to slide off, so aim for neat portions.
- Sprinkle each egg with breadcrumbs just before serving: The final sprinkle provides a crunchy finish and a savory top note, and applying it right before serving preserves the texture. The crumbs should make a soft scattering sound as they fall onto the filling. If you add them too early, they will absorb moisture and become limp.
- Serve soon after assembling: These are best enjoyed fresh, when the filling is cool and the crumbs are crisp. Take note of the scents at the table, the bright citrus and herb cutting through the richness. Letting them sit too long will cause the topping to soften and the presentation to lose its pop.
Notes
- Master the boil: Bring the water to a full boil, then reduce to a gentle simmer before timing. This helps the eggs cook evenly and prevents the rough textures that come from aggressive boiling. Use a timer for the stand and the ice bath to avoid overcooking the yolks.
- Peel like a pro: Crack the shells all over and roll gently to loosen them, then peel under running cool water. The water helps separate the membrane from the white, giving cleaner halves. If shells cling, chilling longer in the ice bath usually solves the issue.
- Adjust the filling texture: If you prefer an ultra-smooth filling, push the yolks through a fine sieve before mixing with mayonnaise and oil. This removes any small lumps and creates a silky mouthfeel. Beware that sieving is a bit more work, but the result is elegant.
- Control garlic intensity: Mince the garlic into a paste or grate it for a more integrated flavor, or let it rest briefly after mincing to mellow its sharpness. If you want a subtler garlicky note, reduce the amount slightly, tasting as you go.
- Toast crumbs for extra aroma: Warm the remaining olive oil then stir in the Panko breadcrumbs until lightly golden. The toasted aroma enhances the overall dish, and mixing in finely grated Parmigiano Reggiano elevates the savory profile. Avoid burning by stirring constantly over medium heat.
- Make ahead strategy: You can hard cook and peel the eggs a day ahead, storing them unfilled in a sealed container. Prepare the filling and crumbs separately, then assemble shortly before serving to preserve the crumb crunch and fresh herb aroma.
- Presentation matters: Arrange the filled halves on a shallow platter and garnish with a few small torn basil leaves for a fresh visual pop. Using a piping bag for the filling creates a consistent look that impresses at gatherings.