
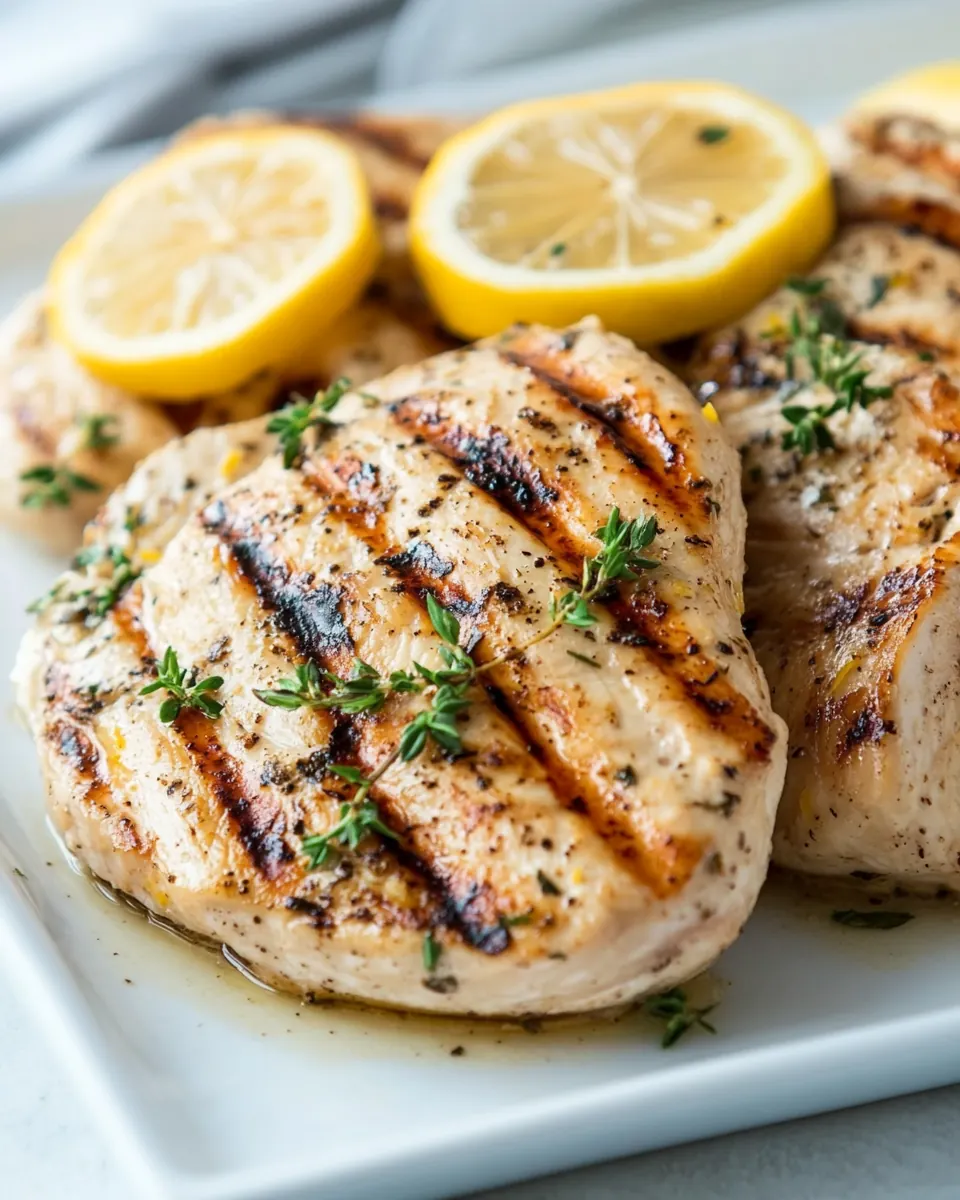
Grilled Lemon Chicken
Grilled Lemon Chicken is one of those recipes I reach for when I want simple, bright flavors and a fast weeknight win. The first time I made it, I was juggling groceries, a tired kid, and a flicker of doubt about whether a five ingredient marinade could actually sing. It did, and that memory of citrus steam rising as the grill hit the flames stuck with me. I still remember the sharp, clean lemon scent hitting the hot metal, and how the chicken soaked it up, turning glossy and fragrant.
Over the years I learned to tune small details, and now this Grilled Lemon Chicken feels like a faithful shortcut to something I might have fussed over for hours. I often make an extra batch and use leftovers in salads or grain bowls during the week. When friends come by, it’s the thing that disappears first because it tastes like sunshine and effort without the heavy lifting. I’ll tell you how I balance acid, oil, and aromatics so the chicken stays juicy and sings with lemon, not puckers into toughness.
Recipe Snapshot
15 mins
5 mins
10 mins
Easy
300 kcal
American
Keto, Paleo
Dinner
Grill, Instant read thermometer, Mixing bowl, Freezer safe plastic bag, Tongs
What We Adore About This Grilled Lemon Chicken
Bright, focused flavor
I love how a few tablespoons of lemon juice completely lift the profile of plain chicken. The acid cuts through the richness and highlights the meat, so every bite feels lively. I always say, if your lemon is fresh, you are already halfway to success.
Speed without sacrifice
This recipe moves fast from marinade to grill, so it fits right into a busy evening. I appreciate how the method gives intense flavor in a short time, which is perfect when you want an easy weeknight dinner that still impresses.
Versatility for leftovers
Once grilled, the chicken adapts well to salads, sandwiches, and grain bowls. I often stretch one meal into three, which is a relief for both the fridge and the wallet.
Simple pantry ingredients
With items you likely already have, like olive oil, salt, and black pepper, this recipe keeps pantry clutter low. That makes it practical for last minute meals without a special shopping run.
Reliable technique
The approach to grilling here teaches you how to read heat and timing, so the results are consistently juicy. I like recipes that build real skills while keeping things friendly, and this one does just that.
Ingredient List for Grilled Lemon Chicken
These ingredients are intentionally lean and purposeful. The key players are the lemon juice for brightness, olive oil to carry flavor and protect the chicken from drying, and simple seasonings to let the meat shine. Together they create a balanced marinade that tenderizes, flavors, and encourages a golden grill crust without fuss.
- 1/2 cup lemon juice: Adds bright, tangy acidity to tenderize the chicken and balance richer flavors; use freshly squeezed lemon juice for the best brightness and aroma. Helps break down proteins for more tender meat when used in the marinade for at least 30 minutes. Also contributes a citrusy aroma that pairs well with herbs and olive oil.
- 1/4 cup olive oil plus more for oiling the grill: Provides a silky base for the marinade and helps carry fat-soluble flavors across the chicken; use extra-virgin olive oil for fruity complexity. Lubricates the grill grates when brushed on to prevent sticking and promotes even browning. Adds subtle richness that balances the lemon juice.
- 1 teaspoon kosher salt: Enhances overall savory flavor and helps season the chicken throughout; kosher salt dissolves well in the marinade for even distribution. Adjust quantity to taste or dietary needs, and remember it also helps proteins retain moisture during cooking.
- 1/2 teaspoon freshly ground black pepper: Adds mild heat and aromatic depth to the chicken; freshly ground black pepper gives a more pronounced, vibrant flavor than pre-ground. Use it to season both marinade and finished chicken for a warm, peppery bite that complements lemon and herbs.
- 1 teaspoon fresh thyme leaves or 1/4 tsp dried: Imparts herby, floral notes that complement the lemon and enrich the marinade's profile; fresh thyme leaves provide brighter flavor while dried is more concentrated. Sprinkle into the marinade and pat onto the chicken to infuse savory, aromatic character during grilling.
- 2 pounds boneless, skinless, chicken breasts (see note 1): Serves as the primary protein providing hearty substance and texture; boneless, skinless breasts cook relatively quickly and absorb marinade flavors well. Pound to even thickness if needed to ensure uniform cooking and avoid overcooking, and consider brining briefly if extra juiciness is desired.
How to Cook Grilled Lemon Chicken
I like to approach grilling with calm confidence, and the steps below will walk you through the marinade, grilling, and finishing touches. The details focus on sensory cues so you can trust your eyes and nose as much as your clock. Read each step so you know what to expect at every turn.
- In a small bowl, whisk together lemon juice, olive oil, salt, pepper, and thyme leaves. Place the chicken in a large freezer-safe plastic bag. Pour in marinade, squeeze out air and close the bag. Mash until chicken is evenly coated. Place the plastic bag in a dish and refrigerate at least 30 minutes or overnight.: The aroma of fresh lemon juice will be immediate, sharp and clean, and you will notice the oil smoothing the mixture into a glossy emulsion. Whisking breaks the tension between acid and fat so the flavors marry, which helps the marinade cling to the chicken surface. A common mistake is under-whisking, which leaves the oil separated, causing uneven coating. If the mixture smells flat, add a pinch more salt to amplify taste.
- Preheat grill over medium-high heat for 5 minutes. Oil grates. Place chicken over direct heat on the grill, close the cover, and grill 5 minutes on each side, turning once.: As you put the chicken into the bag, press out obvious air pockets so the marinade can surround each piece. The tactile feel is important, you should be able to move the pieces and see them glisten. Using a freezer-safe bag prevents leaks and makes massaging the marinade easy. Avoid overcrowding the bag, which can prevent even coverage and lead to patchy seasoning.
- Transfer chicken to indirect heat and continue to cook until an internal thermometer inserted into the thickest part of the largest chicken breast reaches 165 degrees, 5 to 10 minutes longer. Remove to a cutting board and tent with foil for 10 minutes. Slice or chop if desired.: Pouring will release a bright lemon scent that should feel lively, not overpowering. Squeeze the bag gently until the marinade distributes and every surface of the chicken has contact. This circulation lets acid tenderize the outer layer and herbs to cling. A pitfall here is letting the chicken sit in too small a quantity of liquid without massaging, which can leave some spots uncoated; massaging ensures full contact.
- Mash until chicken is evenly coated: Run your hands along the bag and feel for slick, evenly moistened meat. The sound is minimal but you will see the marinade smear and cling. This tactile step matters because it speeds absorption and prevents pockets of dry meat. If you skimp on this, the grilled surface can be uneven in flavor and texture, with some bites tasting under-seasoned.
- Place the plastic bag in a dish and refrigerate at least 30 minutes or overnight: In the fridge the citrus will slowly work on the surface, and the scent will mellow into a balanced, fragrant profile. You will notice tightness in the texture after long marination, which is normal and results in a tender bite after cooking. A common error is marinating too long in a strong acid, which can make the outer layer mealy, so for breasts try to stay within the 30 minute to overnight window depending on thickness.
- Preheat grill over medium-high heat for 5 minutes: When the grill reaches temperature you will feel a steady heat if you hold your hand a few inches above the grates, and the metal may shimmer visually. Preheating ensures immediate sear and prevents sticking. Skipping this step often causes the chicken to cling and tear when you try to turn it, so be patient and let the grates get hot.
- Oil grates: Oiling the grates adds a faint scent of toasted oil and creates that satisfying sizzle when the meat hits the metal. Use a high smoke point oil and a folded towel to rub the grates carefully. If you forget to oil, your chicken is more likely to stick and lose its pretty grill marks, which affects both appearance and texture.
- Place chicken over direct heat on the grill, close the cover, and grill 5 minutes on each side, turning once: The immediate contact will create audible sizzling and the surface will begin to brown and release a nutty, caramelized aroma. Turning once helps build a uniform crust, while closing the cover traps heat for even cooking. Avoid flipping repeatedly, which prevents a steady sear and can dry the surface.
- Transfer chicken to indirect heat and continue to cook until an internal thermometer inserted into the thickest part of the largest chicken breast reaches 165 degrees: Moving to indirect heat lets the interior come up to temperature without burning the exterior. You will hear quieter cooking sounds and see the juices settle on the surface. Rely on an instant read thermometer rather than guessing, because undercooked chicken is unsafe and overcooked chicken becomes dry. A common mistake is pulling too early, which results in an underdone center, so wait for that 165 degree target.
- Remove to a cutting board and tent with foil for 10 minutes: Resting is when juices redistribute, so the meat feels juicier and more cohesive when sliced. You may notice the aroma deepen as the meat cools slightly. Tent loosely so steam does not make the surface soggy. If you skip resting, the juices will run out when cut and the texture will be drier.
- Slice or chop if desired: Slicing across the grain yields tender bites and releases a small pop of steam and savory aroma. The visual cue is a moist interior with a glossy surface. Choose a sharp knife and let the meat rest to preserve moisture. Chopping immediately after cutting can compress the texture, so slice smoothly for best presentation.
Variations to Try
These variations let you adapt the core recipe to different meals or flavor preferences. Each tip starts with a focused suggestion, followed by practical notes on timing and texture so you can adjust confidently.
- Marinate shorter for texture control — If you need to speed things along, marinate for 30 minutes and the chicken will still have plenty of flavor without risking the surface turning mealy from too much acid exposure.
- Use thyme or dried herbs interchangeably — Fresh thyme gives a brighter herb note, while dried is more concentrated; if using dried, reduce the quantity to avoid an overpowering earthy tone.
- Oil the grates for clean searing — Brushing the grill grates with a little oil right before placing the chicken prevents sticking and helps produce attractive grill marks that also enhance flavor through caramelization.
- Butterfly thick breasts for even doneness — Splitting a thick breast into even pieces ensures everything finishes at the same time and avoids a dry exterior with a cold center.
- Make extras for meal prep — Grill a double batch and store cooled portions in the fridge for up to four days so you can toss pieces onto salads and bowls during the week without extra cooking.
Serving Options for Grilled Lemon Chicken
This section outlines ways to present and pair the recipe for different occasions, plus storage ideas and seasonal suggestions to keep meals feeling fresh and intentional.
- Weeknight family dinner — Serve sliced chicken with simple steamed vegetables and a grain like rice or quinoa for a balanced plate that comes together fast.
- Summer backyard meal — Pair the chicken with a bright salad and grilled vegetables to keep the meal light and seasonal for warm evenings.
- Meal prep and lunches — Store sliced chicken in an airtight container and use on salads, bowls, or sandwiches; it keeps well for up to four days refrigerated.
- Entertaining — Arrange sliced chicken on a platter with lemon wedges and herbs for a fuss free centerpiece that guests can help themselves to.
- Storage tips — Cool the chicken to room temperature before refrigerating in a sealed container, and consume within four days for best quality and food safety.
- Seasonal pairing — In summer, emphasize fresh herbs and bright sides; in cooler months, pair with warm grains and roasted root vegetables to make the meal more comforting.
FAQ
Conclusion
What makes this recipe special is its ability to deliver bright, focused flavor with minimal fuss while keeping the chicken juicy and tender. You get a crisp, lemon kissed exterior and a versatile cooked protein that works across meals and occasions. Try it the next time you need an easy weeknight dinner that still feels elevated; I think you will be surprised at how quickly it becomes a go to. It’s straightforward, forgiving, and reliably delicious, and it rewards small adjustments like herb swaps or marinating time without derailing the result.
Grilled Lemon Chicken
Equipment
- Grill
- Instant read thermometer
- Mixing Bowl
- Freezer safe plastic bag
- Tongs
Ingredients
- 1/2 cup lemon juice Adds bright, tangy acidity to tenderize the chicken and balance richer flavors; use freshly squeezed lemon juice for the best brightness and aroma. Helps break down proteins for more tender meat when used in the marinade for at least 30 minutes. Also contributes a citrusy aroma that pairs well with herbs and olive oil.
- 1/4 cup olive oil plus more for oiling the grill Provides a silky base for the marinade and helps carry fat-soluble flavors across the chicken; use extra-virgin olive oil for fruity complexity. Lubricates the grill grates when brushed on to prevent sticking and promotes even browning. Adds subtle richness that balances the lemon juice.
- 1 teaspoon kosher salt Enhances overall savory flavor and helps season the chicken throughout; kosher salt dissolves well in the marinade for even distribution. Adjust quantity to taste or dietary needs, and remember it also helps proteins retain moisture during cooking.
- 1/2 teaspoon freshly ground black pepper Adds mild heat and aromatic depth to the chicken; freshly ground black pepper gives a more pronounced, vibrant flavor than pre-ground. Use it to season both marinade and finished chicken for a warm, peppery bite that complements lemon and herbs.
- 1 teaspoon fresh thyme leaves or 1/4 tsp dried Imparts herby, floral notes that complement the lemon and enrich the marinade's profile; fresh thyme leaves provide brighter flavor while dried is more concentrated. Sprinkle into the marinade and pat onto the chicken to infuse savory, aromatic character during grilling.
- 2 pounds boneless, skinless, chicken breasts (see note 1) Serves as the primary protein providing hearty substance and texture; boneless, skinless breasts cook relatively quickly and absorb marinade flavors well. Pound to even thickness if needed to ensure uniform cooking and avoid overcooking, and consider brining briefly if extra juiciness is desired.
Instructions
- In a small bowl, whisk together lemon juice, olive oil, salt, pepper, and thyme leaves. Place the chicken in a large freezer-safe plastic bag. Pour in marinade, squeeze out air and close the bag. Mash until chicken is evenly coated. Place the plastic bag in a dish and refrigerate at least 30 minutes or overnight.: The aroma of fresh lemon juice will be immediate, sharp and clean, and you will notice the oil smoothing the mixture into a glossy emulsion. Whisking breaks the tension between acid and fat so the flavors marry, which helps the marinade cling to the chicken surface. A common mistake is under-whisking, which leaves the oil separated, causing uneven coating. If the mixture smells flat, add a pinch more salt to amplify taste.
- Preheat grill over medium-high heat for 5 minutes. Oil grates. Place chicken over direct heat on the grill, close the cover, and grill 5 minutes on each side, turning once.: As you put the chicken into the bag, press out obvious air pockets so the marinade can surround each piece. The tactile feel is important, you should be able to move the pieces and see them glisten. Using a freezer-safe bag prevents leaks and makes massaging the marinade easy. Avoid overcrowding the bag, which can prevent even coverage and lead to patchy seasoning.
- Transfer chicken to indirect heat and continue to cook until an internal thermometer inserted into the thickest part of the largest chicken breast reaches 165 degrees, 5 to 10 minutes longer. Remove to a cutting board and tent with foil for 10 minutes. Slice or chop if desired.: Pouring will release a bright lemon scent that should feel lively, not overpowering. Squeeze the bag gently until the marinade distributes and every surface of the chicken has contact. This circulation lets acid tenderize the outer layer and herbs to cling. A pitfall here is letting the chicken sit in too small a quantity of liquid without massaging, which can leave some spots uncoated; massaging ensures full contact.
- Mash until chicken is evenly coated: Run your hands along the bag and feel for slick, evenly moistened meat. The sound is minimal but you will see the marinade smear and cling. This tactile step matters because it speeds absorption and prevents pockets of dry meat. If you skimp on this, the grilled surface can be uneven in flavor and texture, with some bites tasting under-seasoned.
- Place the plastic bag in a dish and refrigerate at least 30 minutes or overnight: In the fridge the citrus will slowly work on the surface, and the scent will mellow into a balanced, fragrant profile. You will notice tightness in the texture after long marination, which is normal and results in a tender bite after cooking. A common error is marinating too long in a strong acid, which can make the outer layer mealy, so for breasts try to stay within the 30 minute to overnight window depending on thickness.
- Preheat grill over medium-high heat for 5 minutes: When the grill reaches temperature you will feel a steady heat if you hold your hand a few inches above the grates, and the metal may shimmer visually. Preheating ensures immediate sear and prevents sticking. Skipping this step often causes the chicken to cling and tear when you try to turn it, so be patient and let the grates get hot.
- Oil grates: Oiling the grates adds a faint scent of toasted oil and creates that satisfying sizzle when the meat hits the metal. Use a high smoke point oil and a folded towel to rub the grates carefully. If you forget to oil, your chicken is more likely to stick and lose its pretty grill marks, which affects both appearance and texture.
- Place chicken over direct heat on the grill, close the cover, and grill 5 minutes on each side, turning once: The immediate contact will create audible sizzling and the surface will begin to brown and release a nutty, caramelized aroma. Turning once helps build a uniform crust, while closing the cover traps heat for even cooking. Avoid flipping repeatedly, which prevents a steady sear and can dry the surface.
- Transfer chicken to indirect heat and continue to cook until an internal thermometer inserted into the thickest part of the largest chicken breast reaches 165 degrees: Moving to indirect heat lets the interior come up to temperature without burning the exterior. You will hear quieter cooking sounds and see the juices settle on the surface. Rely on an instant read thermometer rather than guessing, because undercooked chicken is unsafe and overcooked chicken becomes dry. A common mistake is pulling too early, which results in an underdone center, so wait for that 165 degree target.
- Remove to a cutting board and tent with foil for 10 minutes: Resting is when juices redistribute, so the meat feels juicier and more cohesive when sliced. You may notice the aroma deepen as the meat cools slightly. Tent loosely so steam does not make the surface soggy. If you skip resting, the juices will run out when cut and the texture will be drier.
- Slice or chop if desired: Slicing across the grain yields tender bites and releases a small pop of steam and savory aroma. The visual cue is a moist interior with a glossy surface. Choose a sharp knife and let the meat rest to preserve moisture. Chopping immediately after cutting can compress the texture, so slice smoothly for best presentation.
Notes
- Marinate shorter for texture control — If you need to speed things along, marinate for 30 minutes and the chicken will still have plenty of flavor without risking the surface turning mealy from too much acid exposure.
- Use thyme or dried herbs interchangeably — Fresh thyme gives a brighter herb note, while dried is more concentrated; if using dried, reduce the quantity to avoid an overpowering earthy tone.
- Oil the grates for clean searing — Brushing the grill grates with a little oil right before placing the chicken prevents sticking and helps produce attractive grill marks that also enhance flavor through caramelization.
- Butterfly thick breasts for even doneness — Splitting a thick breast into even pieces ensures everything finishes at the same time and avoids a dry exterior with a cold center.
- Make extras for meal prep — Grill a double batch and store cooled portions in the fridge for up to four days so you can toss pieces onto salads and bowls during the week without extra cooking.