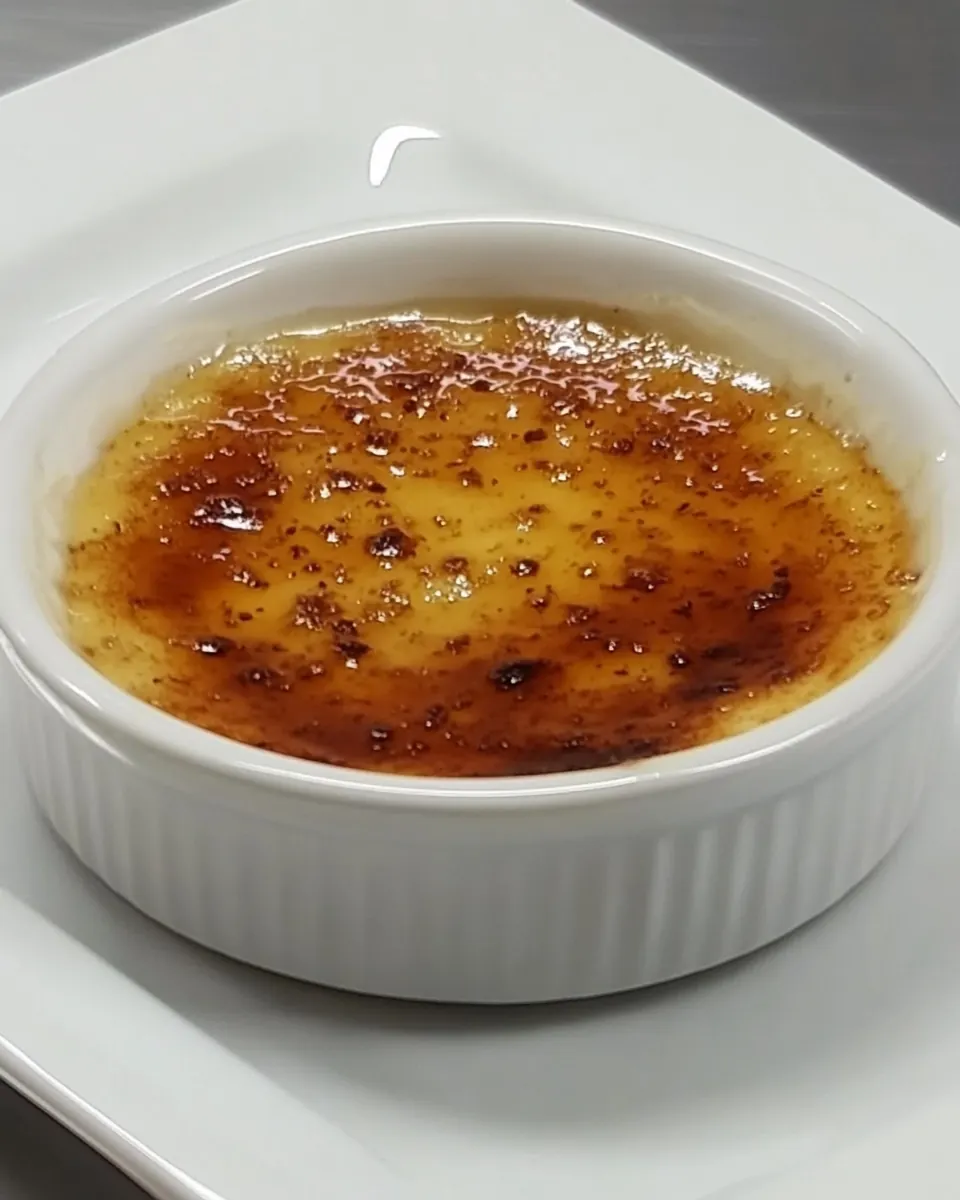
Creme Brulee
Creme Brulee has been my go to indulgence when I want something that feels luxurious but is quietly straightforward to make at home.
I first fell for Creme Brulee on an ordinary Tuesday when a friend brought a tiny ramekin to dinner, the glassy caramel top cracking with a satisfying snap under a spoon. From that night on I kept chasing that contrast between the silky custard and the crisp caramel. Over time I learned that a few small habits, like gently warming the cream and sifting the custard, make a dramatic difference in texture. I enjoy making this for close gatherings because it lets me focus on atmosphere while the oven does most of the work, and there is something delightfully theatrical about torching the sugar at the table.
My version is honest, with no needless shortcuts, and it highlights how simple ingredients, handled carefully, can transform into something memorable. I like to prepare elements a day ahead when I can, particularly the infusion of the vanilla, because it deepens the flavor and lets me enjoy the moment of serving a perfectly chilled custard with that fresh caramel crack. If you love contrast in textures and the kind of dessert that invites slow savoring, Creme Brulee will reward your patience every time.
Recipe Snapshot
1 hr 15 mins
15 mins
60 mins
Medium
350 kcal
French
Gluten-Free, Low FODMAP
Desserts
Oven, Ramekins, Large baking dish, Kitchen torch, Fine sieve, Whisk, Pouring jug
The Appeal of This Creme Brulee
Silky texture that feels decadent
I adore how Creme Brulee delivers a spoonful that glides across your tongue, creamy and smooth. The custard is rich but not heavy when the eggs, cream, and milk are combined with care. I focus on low, even heat and gentle whisking to avoid curdling, and that attention pays off with a velvet mouthfeel that keeps people coming back for another bite.
Minimal ingredients with maximum impact
One reason I keep returning to Creme Brulee is the elegant simplicity of the ingredient list. With just egg yolks, cream, sugar, milk, and vanilla bean, you can build layers of flavor. The vanilla bean seeds are tiny, fragrant gold, and they imbue the custard with floral, aromatic notes that store bought extracts can never match. When I can taste each element clearly, I know the balance is right.
Ritual and showmanship
There is a ritual in preparing and finishing Creme Brulee that I love, from scraping the vanilla bean to torching the sugar crust at the end. That moment of caramelizing the top is genuinely fun, and it invites participation. I often let guests take a turn with the torch, which turns a simple dessert into a shared experience and a memory.
Make ahead friendly
I appreciate how forgiving the timeline is with Creme Brulee. You can bake the custards, chill them thoroughly, and finish them right before serving. This adaptability makes it a reliable option for dinner parties because you can focus on other dishes and then create that dramatic caramel finish at the table.
Customizable but dependable
While the classic recipe sings on its own, I love that tiny adjustments can shift the profile while keeping the core intact. Adjusting the milk to cream ratio subtly changes silkiness, and taking a bit more time to infuse the vanilla yields deeper perfume. I recommend sticking to the basics for your first few tries, then experimenting once you know how the custard should look and feel.
What Goes Into Creme Brulee
The ingredients for Creme Brulee are few, but each one plays a precise role. The custard relies on the richness of the cream and milk to create body, the egg yolks to thicken and bind, and the vanilla bean to contribute aromatic depth. Sugar sweetens and also provides the caramel layer that contrasts with the silky custard.
- 3 large egg yolks: Provide richness and structure to the custard by adding silkiness and mouthfeel; whisk with sugar and yolks to create a smooth base before baking. Supply fat that helps set the custard gently and contributes to the creamy texture characteristic of crème brûlée.
- 1 1/4 cups fresh cream: Bring luxurious fat and creaminess to the custard, ensuring a smooth, velvety texture when combined with yolks and heated gently. Carry and amplify the vanilla flavor, helping to create the dessert’s signature rich mouthfeel.
- 1/4 cups sugar: Sweeten and help stabilize the custard mixture by dissolving into the cream and yolks; sugar also aids in creating the caramelized topping when sprinkled and torched. Control sweetness level while contributing to the custard’s set and surface browning.
- 1/4 cup milk: Lighten and slightly thin the custard mixture so it sets with a delicate, tender texture; milk dilutes the cream just enough to balance richness without losing creaminess. Help produce a smoother custard that cooks evenly in a water bath.
- 1 vanilla bean: Infuse intense, aromatic flavor by scraping the seeds and steeping the pod in the warm cream; provide the classic floral, creamy vanilla notes essential to the dessert. Offer a fresh, natural vanilla profile that elevates the overall taste of the custard.
Putting Together Creme Brulee
As you get started, think of the process as a series of gentle, deliberate moves. The goal is a smooth custard and a brittle caramel crown, so temperature control and patience are your best tools.
- Preheat oven to 170 ℃ (340 ℉).: The air in the oven should feel steady and even, not roaring hot. A water bath will moderate the heat around the ramekins so the custard sets slowly and evenly, producing a creamy texture rather than a curdled one. Listen for a calm hum from the oven and avoid opening the door repeatedly because temperature swings can cause the custard to crack. A common mistake is using too high a temperature which leads to grainy or separated custard.
- Combine the milk and cream.: You will notice a soft steam rising as the two liquids warm together, carrying the first hints of dairy aroma. Warming them helps the vanilla bean release its seeds and oil, improving infusion. Stir gently to marry the liquids and watch for tiny bubbles at the edge indicating heat, but do not let it boil. Boiling can alter texture and flavor, so keep the heat low and steady.
- Split the vanilla bean lengthwise and using the end of a teaspoon or small knife, scrape the seeds into the cream and milk mixture (best result will be achieved if this step is done the day before but not a must).: When you split the bean and scrape, the seeds look like specks of tiny black gold, and the aroma intensifies immediately. Allowing the bean and seeds to steep yields a floral, rounded vanilla that perfumes the custard. If you have time, infuse the mixture overnight in the fridge to deepen flavor, but a short warm steep still produces lovely results. Avoid tossing the pod too soon, because it carries a lot of the scent; also be cautious not to oversteep at very high heat, which can introduce bitter notes.
- Using a whisk, break up egg yolks in a large stainless steel bowl.: As you whisk the egg yolks , notice their color change to a paler, more cohesive ribbon; that indicates they are ready for sugar. Gentle whisking prevents introducing too much air which can show as bubbles in the baked custard. Overbeating is a common error, because trapped air expands in the oven and creates unwanted holes. Keep your movements controlled and even.
- Whisk the sugar into the eggs until dissolved.: As the sugar melds with the yolks, you will feel the mixture become silkier and slightly glossy. Dissolution is important because undissolved sugar can create a grainy texture. Rub a little between your fingers to test for grit, or whisk until it feels smooth. A frequent mistake is adding all the sugar later, which can leave crystals undissolved and affect mouthfeel.
- Using a rubber spatula or large spoon, stir in the cream and milk, try to avoid making bubbles but do ensure all the egg has dissolved into the cream mixture.: After combining, the mixture takes on a luxuriously thick sheen. Stir gently to integrate without aerating. Bubbles will bake into empty pockets, so skim any foam from the top before straining. Many cooks rush here and end up with a foamy surface, so take your time and use a steady hand.
- Pass the mixture through a fine sieve into a pouring jug.: The sieve catches any stray bits or cooked egg, leaving a silky, uniform custard. When it pours from the jug, the stream should be even and smooth, without clumps. Straining also ensures a glassy finish on the custard. A common oversight is skipping this step which risks small lumps or grainy texture in the finished dish.
- Place the ramekins in a large oven dish or tray that can accommodate all the ramekins and some water. Fill the ramekins with the mixture to approx half a fingers thickness from the top.: Pour slowly and watch the custard settle into each ramekin, the surface leveling out like a soft pond. Leaving a little space at the top prevents spills when the water bath is added and gives room for the caramel layer later. Overfilling can cause water to splash into the custard during baking, which ruins the texture.
- Place the oven dish on the oven shelf and fill the dish with water until the ramekins are sitting in water 2/3 rds of the way up their side (water bath).: The water should lap quietly around the ramekins, and you may see gentle steam rising as it heats. This bain marie ensures even cooking and prevents the edges from overcooking before the center sets. Use hot water to avoid shocking the custards and lowering oven temperature. A frequent mistake is adding cold water which alters bake time and can create uneven texture.
- Bake for approx 40 minutes (half way through the baking process, turn the tray around to ensure even heat distribution).: During baking you will see the custards set at the edges while the centers still tremble slightly, a sign they are done. The top will look matte rather than wet, and a gentle jiggle in the center signals perfect doneness. Turning the tray helps if your oven has hot spots, giving uniform color and texture. Overbaking yields a firmer, less creamy custard, so start checking at the earlier end of the time range.
- Remove the Brulees from the baking tray and refrigerate for at least 3-4 hours.: Cooling is where the custard finishes setting and the flavors mellow. As they chill, the mouthfeel tightens into a luxuriant creaminess. I like to cover them lightly while chilling to prevent fridge odors from settling. Cutting cooling short is a common error, because warm custard will not support the caramel layer and may be runny when served.
- Once ready to serve, remove them from the fridge (use a paper towel to dab off any condensation that may have formed on top of them) and sprinkle the top of each brulee with 1 tbsp of sugar and spread around evenly. (Be sure to wipe any excess sugar off the ramekin rim before proceeding): You will see the sugar sit as a fine layer on the chilled surface, ready to caramelize. Dabbing condensation away ensures the sugar does not dissolve before you torch, which would prevent a crisp crust. Wipe any excess sugar from the rim to keep presentation clean. Skipping the dab can cause a sticky, uneven crust instead of a glassy shell.
- Take the lit kitchen torch and gently pass the flame over the top of the brulees, ensuring that you keep the flame moving. Keep flaming the brulee’s until the sugar has caramelized and turned to a deep deep brown.: As you move the torch you will hear a faint hiss and watch the sugar transform from granular to molten, then to a deep amber glass. Keep the flame in constant motion to prevent scorching, and let the caramel rest until it hardens into that signature crack. A common mistake is lingering too long in one spot which creates burned pockets rather than an even, brittle shell.
- If you do not have a kitchen torch, take your old soup spoon and hold the handle with a folded dry towel and place the ladle end into the flame of one of your stove burners. Hold it there until it glows hot and then roll the base of the hot spoon over the sugar on the Brulees. The same effect of caramelised sugar will be achieved.: The spoon method produces a similarly satisfying caramelization, with the spoon glowing hot and creating focused heat when rolled across the sugar. Protect your hand with a towel and work quickly to avoid reheating the custard. This approach takes a little practice to get even coverage, and an error here is not heating the spoon enough which results in partial caramelization.
- Alternatively you could also use you griller (broiler) at a very high temperature and place the sugar covered brulees as close to the heat as possible, with this method, it is important however that your have a powerful griller, otherwise there is the risk of the griller not being hot enough and causing the brulee to split before the sugar caramelizes.: The broiler can caramelize the sugar rapidly if it reaches a sufficiently high temperature, producing that glassy top. Keep a close eye because the intense heat can split the custard if it warms too quickly. Use the shortest possible exposure and position the tray so the sugar is closest to the element. Many get uneven results with a weak broiler, so test carefully and be prepared to switch to a spoon or torch if it is not hot enough.
Tips and Tricks about Creme Brulee
These tips will help you nail the classic contrast of silky custard and crisp caramel. Follow them for consistent texture and confident finishing.
- Room temperature yolks help the eggs blend smoothly with the warm cream and milk so you avoid cooking the eggs prematurely when you combine the liquids.
- Warm the dairy gently until steaming but not boiling to fully extract the aroma from the vanilla bean while preventing scalding that can add off flavors.
- Sift before baking to catch any stray coagulated egg and ensure a perfectly smooth custard surface that will take the caramel evenly.
- Use hot water for the bain marie so the oven does not lose time reheating and the custards begin setting evenly from the start.
- Chill thoroughly for at least three to four hours so the custard firms properly, allowing the caramel to remain brittle and crack cleanly when served.
What Goes Well With This Creme Brulee
Creme Brulee is a flexible dessert that pairs well with many accompaniments and occasions. It shines at dinner parties and special celebrations when you want to end the meal with something elegant yet manageable.
- Light fruit compote such as poached pears or berries adds a bright contrast to the rich custard, offering a refreshing balance in each spoonful.
- Short coffee service like espresso or a small mug of strong coffee makes a perfect partner, the bitter notes cutting through the sweetness and complementing the vanilla.
- Serve chilled after proper refrigeration for a clean texture, and finish with the caramel crust right before serving so it remains crisp for that satisfying crack.
- Occasions include dinner parties, celebratory meals, and intimate gatherings where the table finale is meant to impress without a lot of last minute work.
- Storage tips keep uncaramelized custards covered in the fridge for up to three days, but caramelize only at serving time to maintain the brittle top.
- Seasonal pairings like late summer berries or winter poached fruit work well because Creme Brulee is versatile across seasons and suits both light and richer accompaniments.
FAQ
Conclusion
What makes this Creme Brulee special is the interplay between a velvety custard and a brittle caramel shell, created with simple, honest ingredients and careful technique. Give it a try because it rewards a bit of patience with a graceful dessert that reads as elegant yet approachable. Serving it chilled with the caramelized top added moments before plating makes for a memorable finish that guests will talk about long after the last spoonful.
Creme Brulee
Equipment
- Oven
- Ramekins
- Large baking dish
- kitchen torch
- Fine sieve
- Whisk
- Pouring jug
Ingredients
- 3 large egg yolks Provide richness and structure to the custard by adding silkiness and mouthfeel; whisk with sugar and yolks to create a smooth base before baking. Supply fat that helps set the custard gently and contributes to the creamy texture characteristic of crème brûlée.
- 1 1/4 cups fresh cream Bring luxurious fat and creaminess to the custard, ensuring a smooth, velvety texture when combined with yolks and heated gently. Carry and amplify the vanilla flavor, helping to create the dessert’s signature rich mouthfeel.
- 1/4 cups sugar Sweeten and help stabilize the custard mixture by dissolving into the cream and yolks; sugar also aids in creating the caramelized topping when sprinkled and torched. Control sweetness level while contributing to the custard’s set and surface browning.
- 1/4 cup milk Lighten and slightly thin the custard mixture so it sets with a delicate, tender texture; milk dilutes the cream just enough to balance richness without losing creaminess. Help produce a smoother custard that cooks evenly in a water bath.
- 1 vanilla bean Infuse intense, aromatic flavor by scraping the seeds and steeping the pod in the warm cream; provide the classic floral, creamy vanilla notes essential to the dessert. Offer a fresh, natural vanilla profile that elevates the overall taste of the custard.
Instructions
- Preheat oven to 170 ℃ (340 ℉).: The air in the oven should feel steady and even, not roaring hot. A water bath will moderate the heat around the ramekins so the custard sets slowly and evenly, producing a creamy texture rather than a curdled one. Listen for a calm hum from the oven and avoid opening the door repeatedly because temperature swings can cause the custard to crack. A common mistake is using too high a temperature which leads to grainy or separated custard.
- Combine the milk and cream.: You will notice a soft steam rising as the two liquids warm together, carrying the first hints of dairy aroma. Warming them helps the vanilla bean release its seeds and oil, improving infusion. Stir gently to marry the liquids and watch for tiny bubbles at the edge indicating heat, but do not let it boil. Boiling can alter texture and flavor, so keep the heat low and steady.
- Split the vanilla bean lengthwise and using the end of a teaspoon or small knife, scrape the seeds into the cream and milk mixture (best result will be achieved if this step is done the day before but not a must).: When you split the bean and scrape, the seeds look like specks of tiny black gold, and the aroma intensifies immediately. Allowing the bean and seeds to steep yields a floral, rounded vanilla that perfumes the custard. If you have time, infuse the mixture overnight in the fridge to deepen flavor, but a short warm steep still produces lovely results. Avoid tossing the pod too soon, because it carries a lot of the scent; also be cautious not to oversteep at very high heat, which can introduce bitter notes.
- Using a whisk, break up egg yolks in a large stainless steel bowl.: As you whisk the egg yolks , notice their color change to a paler, more cohesive ribbon; that indicates they are ready for sugar. Gentle whisking prevents introducing too much air which can show as bubbles in the baked custard. Overbeating is a common error, because trapped air expands in the oven and creates unwanted holes. Keep your movements controlled and even.
- Whisk the sugar into the eggs until dissolved.: As the sugar melds with the yolks, you will feel the mixture become silkier and slightly glossy. Dissolution is important because undissolved sugar can create a grainy texture. Rub a little between your fingers to test for grit, or whisk until it feels smooth. A frequent mistake is adding all the sugar later, which can leave crystals undissolved and affect mouthfeel.
- Using a rubber spatula or large spoon, stir in the cream and milk, try to avoid making bubbles but do ensure all the egg has dissolved into the cream mixture.: After combining, the mixture takes on a luxuriously thick sheen. Stir gently to integrate without aerating. Bubbles will bake into empty pockets, so skim any foam from the top before straining. Many cooks rush here and end up with a foamy surface, so take your time and use a steady hand.
- Pass the mixture through a fine sieve into a pouring jug.: The sieve catches any stray bits or cooked egg, leaving a silky, uniform custard. When it pours from the jug, the stream should be even and smooth, without clumps. Straining also ensures a glassy finish on the custard. A common oversight is skipping this step which risks small lumps or grainy texture in the finished dish.
- Place the ramekins in a large oven dish or tray that can accommodate all the ramekins and some water. Fill the ramekins with the mixture to approx half a fingers thickness from the top.: Pour slowly and watch the custard settle into each ramekin, the surface leveling out like a soft pond. Leaving a little space at the top prevents spills when the water bath is added and gives room for the caramel layer later. Overfilling can cause water to splash into the custard during baking, which ruins the texture.
- Place the oven dish on the oven shelf and fill the dish with water until the ramekins are sitting in water 2/3 rds of the way up their side (water bath).: The water should lap quietly around the ramekins, and you may see gentle steam rising as it heats. This bain marie ensures even cooking and prevents the edges from overcooking before the center sets. Use hot water to avoid shocking the custards and lowering oven temperature. A frequent mistake is adding cold water which alters bake time and can create uneven texture.
- Bake for approx 40 minutes (half way through the baking process, turn the tray around to ensure even heat distribution).: During baking you will see the custards set at the edges while the centers still tremble slightly, a sign they are done. The top will look matte rather than wet, and a gentle jiggle in the center signals perfect doneness. Turning the tray helps if your oven has hot spots, giving uniform color and texture. Overbaking yields a firmer, less creamy custard, so start checking at the earlier end of the time range.
- Remove the Brulees from the baking tray and refrigerate for at least 3-4 hours.: Cooling is where the custard finishes setting and the flavors mellow. As they chill, the mouthfeel tightens into a luxuriant creaminess. I like to cover them lightly while chilling to prevent fridge odors from settling. Cutting cooling short is a common error, because warm custard will not support the caramel layer and may be runny when served.
- Once ready to serve, remove them from the fridge (use a paper towel to dab off any condensation that may have formed on top of them) and sprinkle the top of each brulee with 1 tbsp of sugar and spread around evenly. (Be sure to wipe any excess sugar off the ramekin rim before proceeding): You will see the sugar sit as a fine layer on the chilled surface, ready to caramelize. Dabbing condensation away ensures the sugar does not dissolve before you torch, which would prevent a crisp crust. Wipe any excess sugar from the rim to keep presentation clean. Skipping the dab can cause a sticky, uneven crust instead of a glassy shell.
- Take the lit kitchen torch and gently pass the flame over the top of the brulees, ensuring that you keep the flame moving. Keep flaming the brulee’s until the sugar has caramelized and turned to a deep deep brown.: As you move the torch you will hear a faint hiss and watch the sugar transform from granular to molten, then to a deep amber glass. Keep the flame in constant motion to prevent scorching, and let the caramel rest until it hardens into that signature crack. A common mistake is lingering too long in one spot which creates burned pockets rather than an even, brittle shell.
- If you do not have a kitchen torch, take your old soup spoon and hold the handle with a folded dry towel and place the ladle end into the flame of one of your stove burners. Hold it there until it glows hot and then roll the base of the hot spoon over the sugar on the Brulees. The same effect of caramelised sugar will be achieved.: The spoon method produces a similarly satisfying caramelization, with the spoon glowing hot and creating focused heat when rolled across the sugar. Protect your hand with a towel and work quickly to avoid reheating the custard. This approach takes a little practice to get even coverage, and an error here is not heating the spoon enough which results in partial caramelization.
- Alternatively you could also use you griller (broiler) at a very high temperature and place the sugar covered brulees as close to the heat as possible, with this method, it is important however that your have a powerful griller, otherwise there is the risk of the griller not being hot enough and causing the brulee to split before the sugar caramelizes.: The broiler can caramelize the sugar rapidly if it reaches a sufficiently high temperature, producing that glassy top. Keep a close eye because the intense heat can split the custard if it warms too quickly. Use the shortest possible exposure and position the tray so the sugar is closest to the element. Many get uneven results with a weak broiler, so test carefully and be prepared to switch to a spoon or torch if it is not hot enough.
Notes
- Room temperature yolks help the eggs blend smoothly with the warm cream and milk so you avoid cooking the eggs prematurely when you combine the liquids.
- Warm the dairy gently until steaming but not boiling to fully extract the aroma from the vanilla bean while preventing scalding that can add off flavors.
- Sift before baking to catch any stray coagulated egg and ensure a perfectly smooth custard surface that will take the caramel evenly.
- Use hot water for the bain marie so the oven does not lose time reheating and the custards begin setting evenly from the start.
- Chill thoroughly for at least three to four hours so the custard firms properly, allowing the caramel to remain brittle and crack cleanly when served.