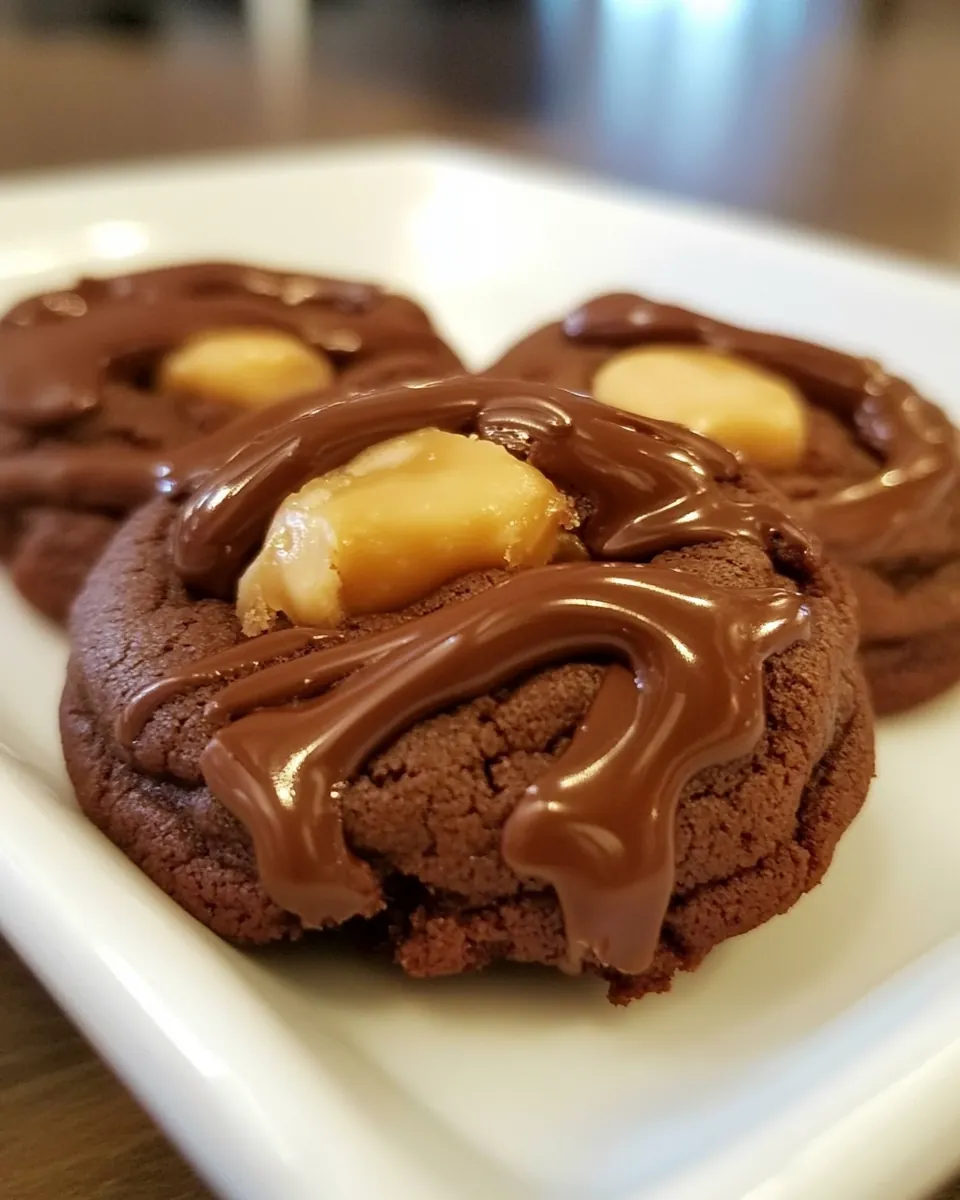
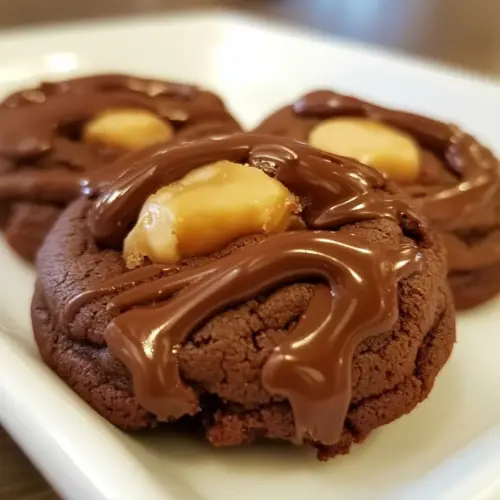
Chocolate Turtle Cookies
Chocolate Turtle Cookies came into my life during a chaotic holiday baking day when I needed a showstopper that was quick to pull together and forgiving if I got distracted by a kitchen disaster or two. I remember juggling a ringing phone, a squirming toddler, and a tray of cooling cookies, yet those little chocolate filled cups with gooey caramel and crunchy pecan made everyone stop and actually listen to me for once. That afternoon taught me that joy can come in tiny, buttery rounds, and that a simple combination of butter, chocolate, and caramel can fix almost anything. I still laugh at myself when I realize I created a crowd pleaser while half paying attention to a cartoon on TV.
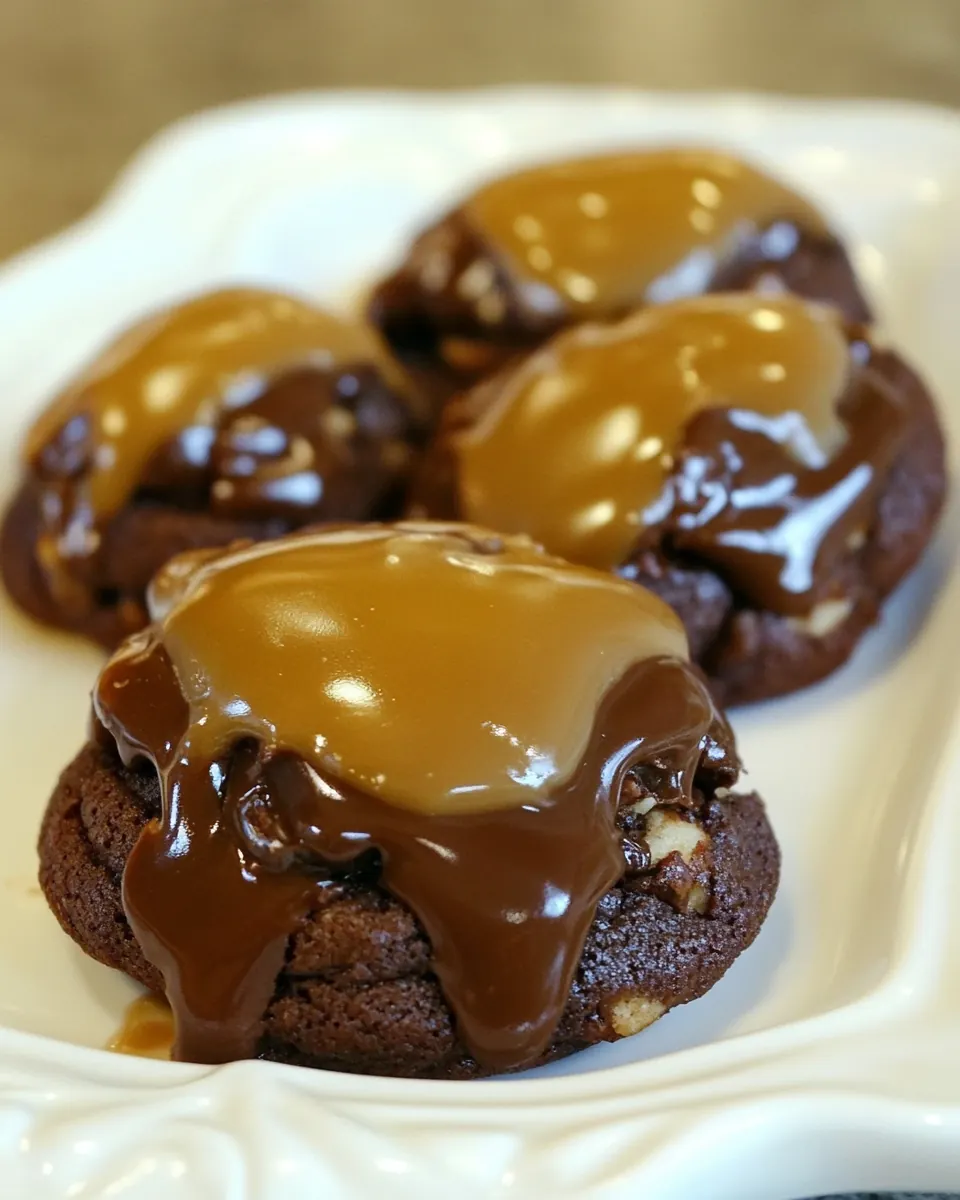
Years later I make Chocolate Turtle Cookies whenever I want to impress without working too hard. The recipe is built on pantry staples, and it lets you play with texture and temperature in a satisfying way. I love how the pecan halves add an old fashioned crunch while the caramel pulls everything together into a warm, sticky center. Baking these feels like sending a little edible hug to friends and family, and I always tuck a few extras into a tin for neighbors.
One of my favorite memories with these cookies involves a last minute potluck where I arrived with a single tin left and watched it empty in minutes. People asked for the recipe, and I realized how a simple technique can elevate basic ingredients into something memorable. Whenever I’m in need of a quick, comforting bake, Chocolate Turtle Cookies are my go to. They are forgiving, portable, and honestly, a perfect way to practice perfecting a thumbprint.
Recipe Snapshot
38 mins
30 mins
8 mins
Easy
150 kcal
American
Gluten-Free, Low FODMAP
Desserts
Oven, Cookie sheet, Parchment paper or silpat, Electric mixer, Large bowl, Double boiler, Small spoon, Cooling rack
What You’ll Enjoy About This Chocolate Turtle Cookies
Classic Nostalgia with a Twist
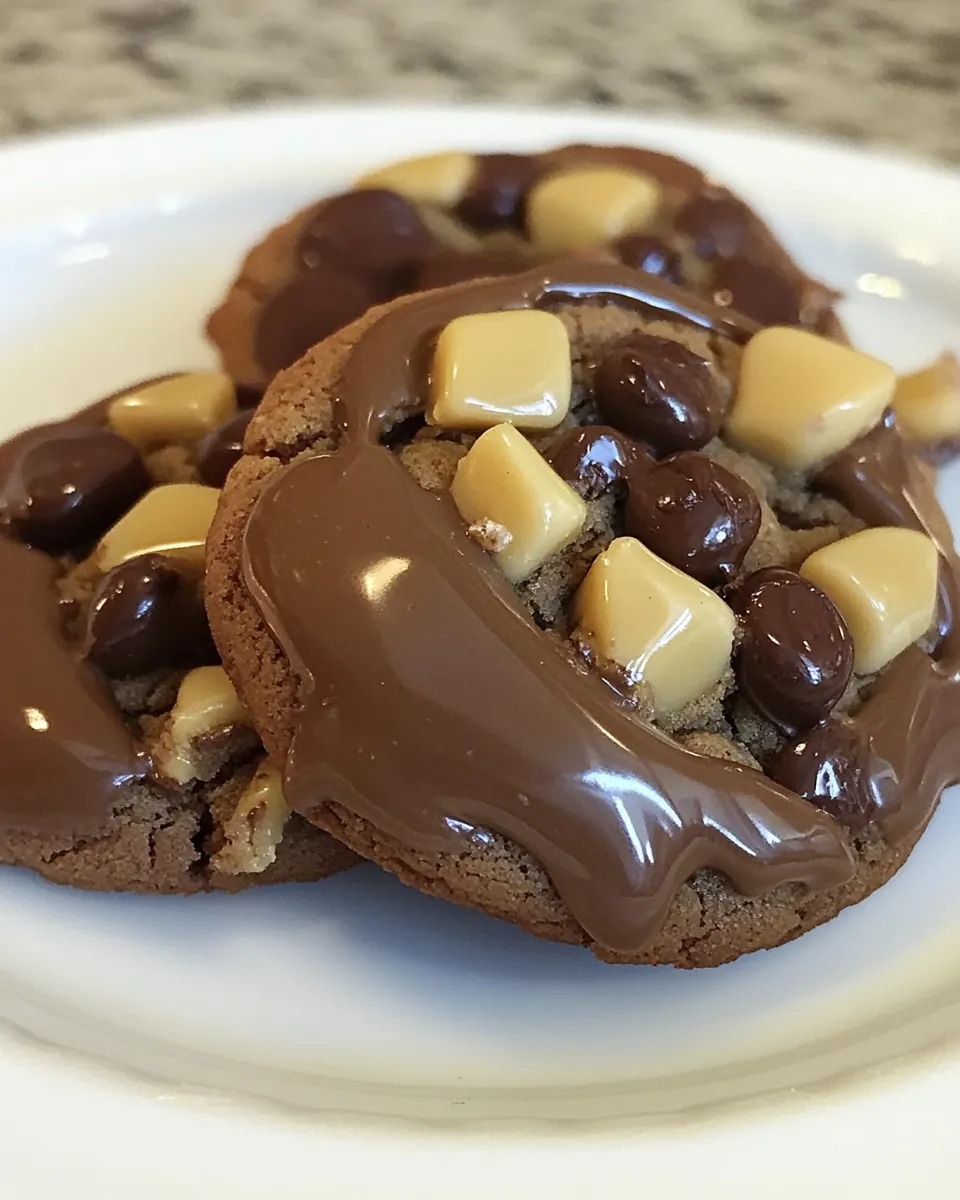
I adore how Chocolate Turtle Cookies tap into nostalgia, but with a playful update. The combination of melted chocolate in the dough and a soft caramel center gives a familiar candy bar feeling in cookie form. I like to say these bridge afternoon tea and dessert without missing a beat, they are comfort food that feels festive yet down to earth.
Textural Harmony
One reason I keep returning to this recipe is the texture play. The tender cookie base, the gooey caramel, and the crisp snap of a pecan half create a trio of sensations in one bite. That contrast is what makes these feel intentionally crafted rather than thrown together, and it keeps people reaching for another.
Reliable and Forgiving
I’ve tested this often, and it is remarkably forgiving. The dough handles well, so if you underbake slightly you still get a pleasant chew. Likewise, if your caramel gets a touch grainy, stirring in a little half and half cream smooths it out. For busy cooks, this reliability is pure gold.
Minimal Ingredients, Maximum Impact
We use familiar pantry items like flour, butter, sugar, and a touch of unsweetened chocolate to create a cookie that tastes far fancier than the ingredient list suggests. That economy of ingredients means you can whip these up for unexpected guests without a special grocery run, and they still feel elevated.
Versatile for Gifting and Parties
I find Chocolate Turtle Cookies ideal for gifting because they store well and travel without falling apart. Arrange them in a box, and they look thoughtful. Bring them to a potluck, and they disappear fast. The recipe scales nicely, and the presentation with a single pecan on top gives a refined finish.
Essential Ingredients for Chocolate Turtle Cookies
These components are straightforward but purposeful. The idea is to balance richness, structure, and a molten finish. The key players are the fat for tenderness, the dry goods for body, the melted chocolate for depth, and the caramel plus pecan for that signature turtle finish.
- 1 cup (2 sticks) salted butter, softened: Soften to provide creamy fat and structure for the cookie dough, creating tenderness and helping ingredients blend evenly. Salted butter adds a touch of seasoning that balances sweetness and contributes to rich mouthfeel when creamed with sugar. Properly softened butter ensures even aeration for lightness in the finished cookies.
- 1 cup granulated white sugar: Sweeten and tenderize by incorporating air when beaten with butter, promoting spread and a pleasant crumb in the baked cookie. Granulated white sugar also assists in caramelization at the edges for subtle browning and crisp texture. Measure accurately to maintain correct dough consistency and sweetness balance.
- 1 large egg: Bind and leaven slightly by adding moisture and protein that help set the cookie structure as it bakes, contributing to chewiness and lift. A large egg also enriches the dough with fat and lecithin, improving texture and overall stability. Break and mix thoroughly to ensure uniform distribution throughout the batter.
- 1 teaspoon vanilla or chocolate extract (see *tips): Flavor the dough with a concentrated aromatic note that complements chocolate and caramel, offering either classic vanilla warmth or intensified chocolate depth. Use the specified extract sparingly to avoid overpowering other flavors while enhancing overall complexity. Choose based on preference or the tips provided for a nuanced profile.
- 2 ounces unsweetened chocolate, chopped and melted (I use a glass dish in the microwave): Melt and enrich the batter with intense cocoa richness and deep chocolate flavor, providing a slightly bitter backbone that balances the sweet caramel and sugar. Chopped unsweetened chocolate melts smoothly into the dough to create uniform chocolate intensity and richer color. Melt gently to avoid scorching and ensure glossy incorporation.
- 2 1/2 cups Gold Medal® All-Purpose Flour: Provide bulk, structure, and the necessary gluten-forming proteins to create the cookie's body and chewiness when combined with wet ingredients. All-purpose flour yields a balanced texture that is neither too cakey nor too tough, helping cookies hold mix-ins like pecans and caramels. Sift or measure properly to maintain consistent results.
- 20 square caramels, unwrapped: Add pockets of chewy, sweet caramel that soften with baking, contributing gooey centers and a buttery caramel flavor contrast to the chocolate dough. Unwrapped caramels are spaced on top of cookies or pressed into dough to create the signature turtle caramel element. Monitor baking time to ensure caramels melt without burning.
- 1/4 cup half and half cream: Thin and soften the caramels for easier molding and filling, offering additional creaminess and preventing grainy texture when mixed or poured. Half and half provides a mild dairy richness that adjusts caramel consistency without overly thinning the cookie dough. Heat gently with caramels to form a smooth, spreadable filling.
- 42 pecan halves: Garnish and add crunchy, nutty flavor with toasted pecan halves that echo the classic turtle combination of chocolate, caramel, and nuts. Pecans provide textural contrast and a buttery, slightly sweet note that complements both chocolate and caramel. Press pecans into warm caramel or atop cookies to adhere and toast lightly during finishing.
Recipe Steps for Chocolate Turtle Cookies
These steps are straightforward but reward patience. Read them through once, then work methodically. You’ll want your tools ready and ingredients measured so the process feels smooth from creaming to final assembly.
- Preheat the oven to 350 degrees F. Line cookie sheets with parchment paper or silpat mats (or spray with nonstick spray).: The kitchen will fill with warm air and a faint hint of butter as the oven comes to temperature, setting the stage for even baking and proper rise. An oven that is too cool can lead to dense, underbaked centers, while an oven that is too hot browns the edges before the interior sets. If you suspect temperature variance, use an oven thermometer to verify accuracy. A common mistake is skipping preheat, which results in uneven spread and an altered texture.
- Use an electric mixer and a large bowl to combine the butter and sugar. Beat in the egg and extract, then chocolate. Add the flour and mix until combined.: Lining prevents sticking and promotes even browning, the parchment will gently insulate the bottoms so they do not darken too quickly, while a silpat gives more direct contact and slightly crisper bottoms. You should hear a faint difference in the way cookies release when cooled, a light tug rather than tearing. Avoid placing dough on a bare pan, which often leads to burned undersides and difficult cleanup.
- Shape into 1-inch balls. Place the dough balls on a cookie sheet 2 inches apart, and make a thumbprint in each ball. Bake for 8 to 10 minutes, or until cooked through and not super soft.: The initial creaming creates a pale, airy mixture; you will notice it lighten in color and fluff in texture, that trapped air contributes to lift. Overmixing at this stage can create too much air and cause cookies to rise and fall oddly, while undermixing yields dense results. Scrape down the bowl to ensure even incorporation, and stop once the texture is uniformly soft and slightly fluffy.
- When you take them out of the oven, use a small spoon to press down slightly into the thumbprinted areas again to make sure each cookie has a nice impression. Cool.: Adding the room temperature egg and extract brings moisture and flavor while the melted chocolate deepens the dough's color and cocoa profile. The batter will become silkier and glossy after these ingredients go in, and you may notice a chocolate aroma blooming. If the chocolate is too hot, it can cook the egg, so cool it slightly before adding. A pitfall here is not fully incorporating the egg which leaves streaks of yellow in the dough.
- Melt caramels in a double boiler. Stir in the half and half until well combined and smooth. Spoon a little bit of the caramel mixture into each cookie imprint. Top with a pecan half.: As you fold in the flour , the dough will transition from glossy to a firmer, more pliable mass, which signals proper structure. Mix just until you do not see streaks of flour, overmixing will develop gluten and make cookies tough. If the dough seems overly dry, check measurements and ensure the butter was adequately softened. A common error is packing the flour which increases dryness and density.
- Shape into 1 inch balls: Rolling the dough yields uniform cookies that bake evenly; you should feel a cohesive, slightly tacky texture rather than a sticky mess. The surface will be smooth when rolled correctly, and consistent sizing prevents some cookies from overbaking while others remain underdone. Use a small scoop for speed and uniformity; if the dough sticks to your hands, briefly chill it to firm up rather than adding extra flour.
- Place the dough balls on a cookie sheet 2 inches apart, and make a thumbprint in each ball: The spacing lets the cookies spread without merging, and the thumbprint creates the pocket for the caramel . You should see a shallow well with a defined edge, not a collapsed center. If the hole fills back in while baking, press again immediately upon removal so the pocket remains. A misstep is leaving balls too close together, causing them to fuse into one large cookie.
- Bake for 8 to 10 minutes, or until cooked through and not super soft: As they bake, listen for a quiet set, and look for gently firmed edges and a slightly soft center; the cookies will not look fully firm but will have color on the bottoms. The scent will shift to a warm, cocoa and butter aroma, a clear cue they are nearing readiness. Overbaking will yield dry cookies, while underbaking leaves doughy centers that collapse when filled. Rotate the pan if your oven has hot spots for even results.
- When you take them out of the oven, use a small spoon to press down slightly into the thumbprinted areas again to make sure each cookie has a nice impression: After baking, the dough will relax and settle, and re pressing the centers deepens the cavity for the caramel so it sits neatly. You will feel a warm, tender texture under the spoon and see a clearer indentation form. If you skip this quick step, the caramel may overflow or sit unevenly. Avoid pressing too hard which can flatten the entire cookie into a disk.
- Cool: ing stabilizes the cookies, the structure firms, and the centers stop shifting so the caramel will sit without sinking. Allow them to rest on the pan briefly, then transfer to a cooling rack to avoid soggy bottoms from trapped steam. A common oversight is piling cookies while warm which causes steam to soften them excessively, so give them space to breathe.
- Melt caramels in a double boiler: Gently melting preserves a glossy, smooth texture; you will see the squares soften into ribbons before fully liquefying. The heat should be gentle so the caramel does not scorch or seize. If you overheat, a grainy texture appears, but stirring in warm half and half cream often rescues it. Avoid microwaving at full power, which can easily overcook small caramel pieces.
- Stir in the half and half until well combined and smooth: The addition of half and half cream loosens and silks the caramel into a spoonable consistency, turning thick ribbons into a glossy sauce. Whisk continuously so the texture becomes homogeneous without lumps. If it becomes too thin, let it cool slightly to thicken before spooning. A frequent mistake is adding cold cream which can temporarily thicken the caramel into clumps, so warm the cream a touch first.
- Spoon a little bit of the caramel mixture into each cookie imprint: The act of spooning introduces a warm, glossy pool into the center that will set slightly as it cools; you should see a shiny dome that glistens and holds its shape. Work methodically so the caramel does not cool into a film before reaching each cookie. If the caramel starts to stiffen, rewarm gently to keep it pourable but not hot enough to melt the cookie surface.
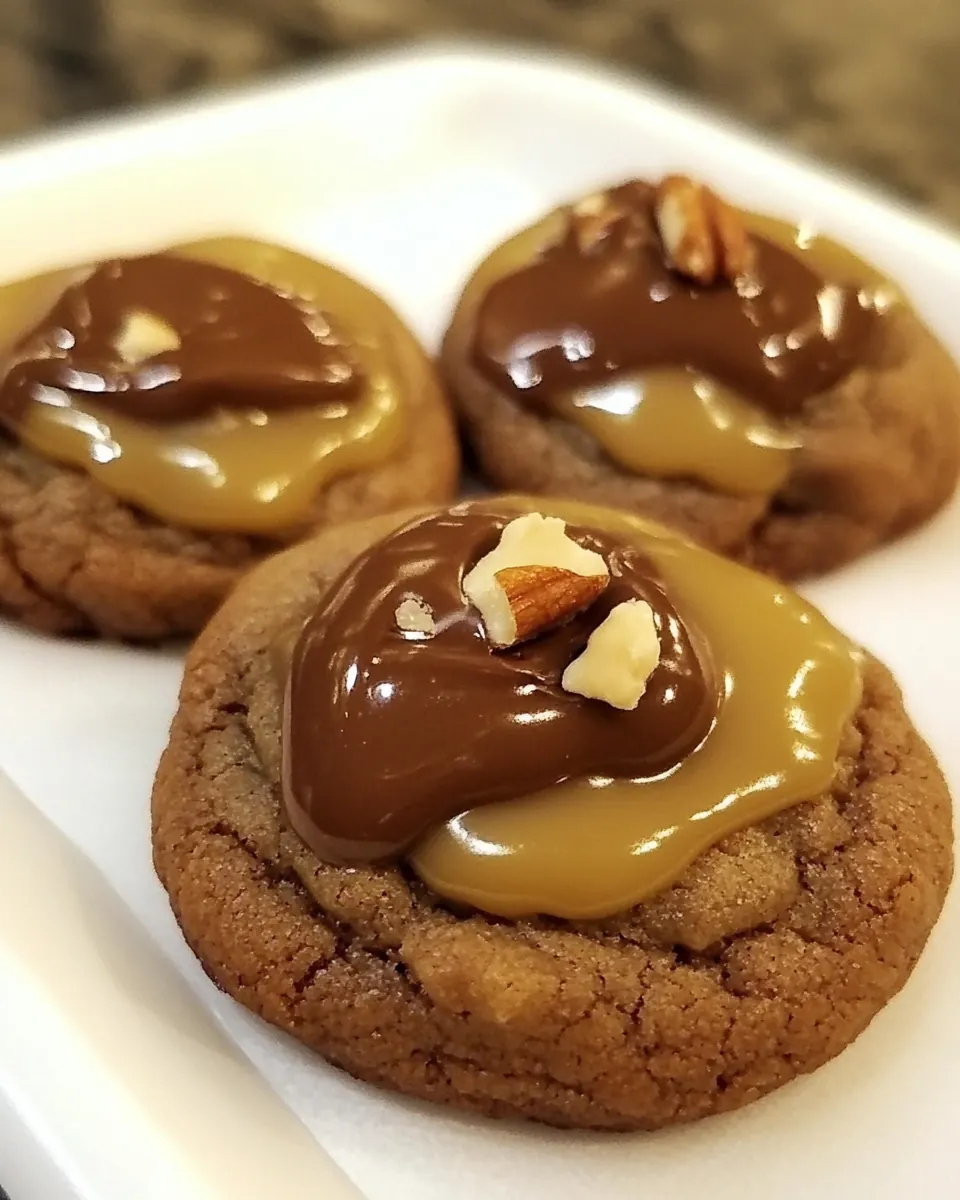
- Top with a pecan half: Placing a pecan on each caramel dollop adds a roasted crunch and a classic visual finish, and pressing it slightly helps it adhere as the caramel firms. You'll hear a faint crunch when you bite into it, balancing the soft center. Avoid pressing so hard that the pecan sinks and displaces caramel, and pick uniform sizes for consistent presentation.
Tips and Tricks about Chocolate Turtle Cookies
These tips help you get consistent, bakery style results. They focus on temperature, texture, and timing to make the process relaxing rather than stressful. Read the list before you start for smoother execution.
- Soften the butter properly Use room temperature butter that yields a slight give when pressed, not greasy or melted, to ensure proper creaming and cookie texture.
- Choose quality unsweetened chocolate Using a good tasting 100 percent chocolate makes a noticeable difference since this ingredient drives the cookie’s cocoa profile.
- Stir caramels over gentle heat Melt the caramels slowly in a double boiler and add warmed half and half cream to get a shiny, spoonable caramel without graininess.
- Shape cookies uniformly Use a small cookie scoop for 1 inch balls to ensure even baking and consistent thumbprint centers across all cookies.
- Press centers twice Make the thumbprint before baking and press again right after baking to maintain a deep well for the caramel, this prevents overflow and ensures a tidy finish.
How to Enjoy Chocolate Turtle Cookies
These cookies are versatile for gifting, dessert plates, and casual snacking. Enjoy them warm or at room temperature, and consider pairing with simple accompaniments for different occasions.
- Serve warm Heat briefly in a low oven for a gooey center, perfect for small gatherings or when you want an indulgent treat.
- Pack for gifting Layer in a tin with parchment for a presentable gift, ideal for holidays or neighborly gestures.
- Potluck favorite These travel well, place on a tray for casual parties or office swaps where they will disappear quickly.
- Storage Keep at room temperature in an airtight container for up to four days, or freeze for longer storage, thawing at room temperature before serving.
- Occasions Great for afternoon tea, dessert spreads, holiday baking, or whenever you want a crowd pleasing, handheld sweet.
FAQ
Conclusion
These Chocolate Turtle Cookies are special because they combine tender, chocolate infused cookie dough with molten caramel and a crisp pecan finish for a perfect balance of textures and flavors. I encourage you to try them when you want an easy, impressive bake that travels well and pleases a crowd. They are forgiving enough for a busy baker and polished enough to gift, making them a versatile addition to your recipe box. Give the steps a mindful run through, enjoy the warm caramel moments, and share the results, because these cookies tend to create small, happy gatherings wherever they go.
Chocolate Turtle Cookies
Equipment
- Oven
- Cookie Sheet
- Parchment paper or Silpat
- Electric Mixer
- Large Bowl
- Double boiler
- Small spoon
- Cooling rack
Ingredients
- 1 cup (2 sticks) salted butter, softened Soften to provide creamy fat and structure for the cookie dough, creating tenderness and helping ingredients blend evenly. Salted butter adds a touch of seasoning that balances sweetness and contributes to rich mouthfeel when creamed with sugar. Properly softened butter ensures even aeration for lightness in the finished cookies.
- 1 cup granulated white sugar Sweeten and tenderize by incorporating air when beaten with butter, promoting spread and a pleasant crumb in the baked cookie. Granulated white sugar also assists in caramelization at the edges for subtle browning and crisp texture. Measure accurately to maintain correct dough consistency and sweetness balance.
- 1 large egg Bind and leaven slightly by adding moisture and protein that help set the cookie structure as it bakes, contributing to chewiness and lift. A large egg also enriches the dough with fat and lecithin, improving texture and overall stability. Break and mix thoroughly to ensure uniform distribution throughout the batter.
- 1 teaspoon vanilla or chocolate extract (see *tips) Flavor the dough with a concentrated aromatic note that complements chocolate and caramel, offering either classic vanilla warmth or intensified chocolate depth. Use the specified extract sparingly to avoid overpowering other flavors while enhancing overall complexity. Choose based on preference or the tips provided for a nuanced profile.
- 2 ounces unsweetened chocolate, chopped and melted (I use a glass dish in the microwave) Melt and enrich the batter with intense cocoa richness and deep chocolate flavor, providing a slightly bitter backbone that balances the sweet caramel and sugar. Chopped unsweetened chocolate melts smoothly into the dough to create uniform chocolate intensity and richer color. Melt gently to avoid scorching and ensure glossy incorporation.
- 2 1/2 cups Gold Medal® All-Purpose Flour Provide bulk, structure, and the necessary gluten-forming proteins to create the cookie's body and chewiness when combined with wet ingredients. All-purpose flour yields a balanced texture that is neither too cakey nor too tough, helping cookies hold mix-ins like pecans and caramels. Sift or measure properly to maintain consistent results.
- 20 square caramels, unwrapped Add pockets of chewy, sweet caramel that soften with baking, contributing gooey centers and a buttery caramel flavor contrast to the chocolate dough. Unwrapped caramels are spaced on top of cookies or pressed into dough to create the signature turtle caramel element. Monitor baking time to ensure caramels melt without burning.
- 1/4 cup half and half cream Thin and soften the caramels for easier molding and filling, offering additional creaminess and preventing grainy texture when mixed or poured. Half and half provides a mild dairy richness that adjusts caramel consistency without overly thinning the cookie dough. Heat gently with caramels to form a smooth, spreadable filling.
- 42 pecan halves Garnish and add crunchy, nutty flavor with toasted pecan halves that echo the classic turtle combination of chocolate, caramel, and nuts. Pecans provide textural contrast and a buttery, slightly sweet note that complements both chocolate and caramel. Press pecans into warm caramel or atop cookies to adhere and toast lightly during finishing.
Instructions
- Preheat the oven to 350 degrees F. Line cookie sheets with parchment paper or silpat mats (or spray with nonstick spray).: The kitchen will fill with warm air and a faint hint of butter as the oven comes to temperature, setting the stage for even baking and proper rise. An oven that is too cool can lead to dense, underbaked centers, while an oven that is too hot browns the edges before the interior sets. If you suspect temperature variance, use an oven thermometer to verify accuracy. A common mistake is skipping preheat, which results in uneven spread and an altered texture.
- Use an electric mixer and a large bowl to combine the butter and sugar. Beat in the egg and extract, then chocolate. Add the flour and mix until combined.: Lining prevents sticking and promotes even browning, the parchment will gently insulate the bottoms so they do not darken too quickly, while a silpat gives more direct contact and slightly crisper bottoms. You should hear a faint difference in the way cookies release when cooled, a light tug rather than tearing. Avoid placing dough on a bare pan, which often leads to burned undersides and difficult cleanup.
- Shape into 1-inch balls. Place the dough balls on a cookie sheet 2 inches apart, and make a thumbprint in each ball. Bake for 8 to 10 minutes, or until cooked through and not super soft.: The initial creaming creates a pale, airy mixture; you will notice it lighten in color and fluff in texture, that trapped air contributes to lift. Overmixing at this stage can create too much air and cause cookies to rise and fall oddly, while undermixing yields dense results. Scrape down the bowl to ensure even incorporation, and stop once the texture is uniformly soft and slightly fluffy.
- When you take them out of the oven, use a small spoon to press down slightly into the thumbprinted areas again to make sure each cookie has a nice impression. Cool.: Adding the room temperature egg and extract brings moisture and flavor while the melted chocolate deepens the dough's color and cocoa profile. The batter will become silkier and glossy after these ingredients go in, and you may notice a chocolate aroma blooming. If the chocolate is too hot, it can cook the egg, so cool it slightly before adding. A pitfall here is not fully incorporating the egg which leaves streaks of yellow in the dough.
- Melt caramels in a double boiler. Stir in the half and half until well combined and smooth. Spoon a little bit of the caramel mixture into each cookie imprint. Top with a pecan half.: As you fold in the flour , the dough will transition from glossy to a firmer, more pliable mass, which signals proper structure. Mix just until you do not see streaks of flour, overmixing will develop gluten and make cookies tough. If the dough seems overly dry, check measurements and ensure the butter was adequately softened. A common error is packing the flour which increases dryness and density.
- Shape into 1 inch balls: Rolling the dough yields uniform cookies that bake evenly; you should feel a cohesive, slightly tacky texture rather than a sticky mess. The surface will be smooth when rolled correctly, and consistent sizing prevents some cookies from overbaking while others remain underdone. Use a small scoop for speed and uniformity; if the dough sticks to your hands, briefly chill it to firm up rather than adding extra flour.
- Place the dough balls on a cookie sheet 2 inches apart, and make a thumbprint in each ball: The spacing lets the cookies spread without merging, and the thumbprint creates the pocket for the caramel . You should see a shallow well with a defined edge, not a collapsed center. If the hole fills back in while baking, press again immediately upon removal so the pocket remains. A misstep is leaving balls too close together, causing them to fuse into one large cookie.
- Bake for 8 to 10 minutes, or until cooked through and not super soft: As they bake, listen for a quiet set, and look for gently firmed edges and a slightly soft center; the cookies will not look fully firm but will have color on the bottoms. The scent will shift to a warm, cocoa and butter aroma, a clear cue they are nearing readiness. Overbaking will yield dry cookies, while underbaking leaves doughy centers that collapse when filled. Rotate the pan if your oven has hot spots for even results.
- When you take them out of the oven, use a small spoon to press down slightly into the thumbprinted areas again to make sure each cookie has a nice impression: After baking, the dough will relax and settle, and re pressing the centers deepens the cavity for the caramel so it sits neatly. You will feel a warm, tender texture under the spoon and see a clearer indentation form. If you skip this quick step, the caramel may overflow or sit unevenly. Avoid pressing too hard which can flatten the entire cookie into a disk.
- Cool: ing stabilizes the cookies, the structure firms, and the centers stop shifting so the caramel will sit without sinking. Allow them to rest on the pan briefly, then transfer to a cooling rack to avoid soggy bottoms from trapped steam. A common oversight is piling cookies while warm which causes steam to soften them excessively, so give them space to breathe.
- Melt caramels in a double boiler: Gently melting preserves a glossy, smooth texture; you will see the squares soften into ribbons before fully liquefying. The heat should be gentle so the caramel does not scorch or seize. If you overheat, a grainy texture appears, but stirring in warm half and half cream often rescues it. Avoid microwaving at full power, which can easily overcook small caramel pieces.
- Stir in the half and half until well combined and smooth: The addition of half and half cream loosens and silks the caramel into a spoonable consistency, turning thick ribbons into a glossy sauce. Whisk continuously so the texture becomes homogeneous without lumps. If it becomes too thin, let it cool slightly to thicken before spooning. A frequent mistake is adding cold cream which can temporarily thicken the caramel into clumps, so warm the cream a touch first.
- Spoon a little bit of the caramel mixture into each cookie imprint: The act of spooning introduces a warm, glossy pool into the center that will set slightly as it cools; you should see a shiny dome that glistens and holds its shape. Work methodically so the caramel does not cool into a film before reaching each cookie. If the caramel starts to stiffen, rewarm gently to keep it pourable but not hot enough to melt the cookie surface.
- Top with a pecan half: Placing a pecan on each caramel dollop adds a roasted crunch and a classic visual finish, and pressing it slightly helps it adhere as the caramel firms. You'll hear a faint crunch when you bite into it, balancing the soft center. Avoid pressing so hard that the pecan sinks and displaces caramel, and pick uniform sizes for consistent presentation.
Notes
- Soften the butter properly Use room temperature butter that yields a slight give when pressed, not greasy or melted, to ensure proper creaming and cookie texture.
- Choose quality unsweetened chocolate Using a good tasting 100 percent chocolate makes a noticeable difference since this ingredient drives the cookie's cocoa profile.
- Stir caramels over gentle heat Melt the caramels slowly in a double boiler and add warmed half and half cream to get a shiny, spoonable caramel without graininess.
- Shape cookies uniformly Use a small cookie scoop for 1 inch balls to ensure even baking and consistent thumbprint centers across all cookies.
- Press centers twice Make the thumbprint before baking and press again right after baking to maintain a deep well for the caramel, this prevents overflow and ensures a tidy finish.