Chile Rellenos
Chile Rellenos have been a warm, crunchy comfort for me since childhood, a dish that always signals family gatherings and hands-on cooking. I can still remember the first time I helped my aunt stuff a pepper, the way the kitchen filled with the scent of charred pepper skin and sizzling oil, and how proud I felt tucking in each strip of Oaxaca cheese so it would melt into glorious strings. That memory taught me that a great Chile Rellenos depends on simple, confident technique, and it turned me into someone who loves slow, satisfying prep.
Over the years I’ve tweaked the process to keep the filling melty and the exterior crisp, and I always come back to a classic combo: roasted peppers, a lively salsa, and a cloudlike egg batter that puffs around the stuffed pepper. When I make Chile Rellenos now, I treat it like a small celebration, taking time to char the skins properly so the final texture is smoky and tender, while the batter fries up golden and just a bit crackly. It is hands on, yes, but that’s part of the fun.
I love serving these for weekend lunches when friends pop by and the kitchen becomes a social spot. There is a rhythm to the work, and sharing the plated, steaming chiles with bowls of tangy salsa and crumbly Cotija cheese feels generous and relaxed. When you make Chile Rellenos you’ll see how the simple act of roasting, stuffing, and frying creates layers of flavor that feel far fancier than the effort required. Trust me, the payoff is worth every minute.
Recipe Snapshot
1 hr 20 mins
25 mins
55 mins
Medium
400 kcal
Mexican
Gluten-Free, Low FODMAP
Dinner
Broiler, Baking sheet, Foil, Blender, Medium saucepan, Heavy-duty pot, Thermometer, Electric hand mixer
The Best Thing About This Chile Rellenos
Smoky roasted flavor that sings
I adore how charring the poblano skins concentrates their flavor, adding a deep, almost sweet smoke note that complements the creamy Oaxaca cheese. I purposely take time to get those blackened patches because they transform ordinary peppers into something savory and complex.
Textural contrast
We get a wonderful play between the soft, yielding pepper and the crispy, golden batter. The batter puffs and shatters just enough to give you a crunchy first bite, then yields to molten, stretchy Oaxaca cheese.
Bright, balanced salsa
The roasted tomato and serrano salsa ranchera cuts through the richness with a bright acid and herbal lift from the cilantro. I simmer it until it thickens slightly, because a saucy bed helps every forkful feel complete.
Make ahead friendly components
I like that you can roast the vegetables earlier in the day and keep the peppers wrapped to steam, then finish the batter and fry later. That flexibility makes hosting easier, and it keeps the final frying step fast and social.
Reliable crowd pleaser
Whenever people come over I know plating steaming Chile Rellenos with a sprinkle of Cotija cheese and chopped cilantro will disappear quickly. It feels special without being pretentious, and that is exactly why I keep this recipe in my regular rotation.
What to Gather for Chile Rellenos
These ingredients are chosen to create balanced, layered flavors that work together without fuss. The key players are the poblano chile peppers for their mild heat and smoky potential, Oaxaca cheese for melt and stretch, and the tomato based salsa for acidity and freshness. The eggs and all purpose flour make a light, airy batter that crisps up in hot oil while the aromatics and spices in both the batter and salsa tie everything together.
- 6 large poblano chile peppers: Roast and blister to develop a smoky, slightly sweet flavor; peel and seed before stuffing with cheese for classic chile rellenos. Handle carefully to preserve skins and achieve a tender interior that holds fillings well during frying.
- 10 ounces Oaxaca cheese, cut into long strips/sticks: Cut into long strips or sticks to create melty, stringy centers that complement the poblano heat; use Oaxaca for its excellent melting quality and mild, creamy flavor. Arrange strips inside each pepper to ensure even cheese distribution and gooey texture when cooked.
- Vegetable oil for frying: Heat to a high temperature for shallow frying the battered chiles; choose a neutral oil with a high smoke point to avoid imparting off-flavors. Maintain steady oil temperature so batter crisps quickly and peppers remain juicy without absorbing excess oil.
- 4 large eggs: Separate and whip to create a light, airy batter when beaten until foamy; fold into seasoned flour for the classic puffy coating. Use fresh eggs at room temperature to achieve maximum volume and stable peaks for a crisp, cloudlike crust.
- 1/2 cup all-purpose flour: Dust peppers lightly to give the egg batter something to adhere to and to create a crisp exterior once fried. Sift if needed to remove lumps and combine with seasonings before dredging the peppers.
- 1/2 teaspoons salt: Season batter and filling to enhance overall flavor balance; measure carefully to avoid over-salting the batter or sauce. Dissolve evenly into flour or egg mixture so every bite has consistent seasoning.
- 1/4 tsp EACH chili powder, dried oregano, ground cumin, garlic powder, onion powder, smoked paprika: Combine as a spice blend to season the batter, sauce, or filling with warm, aromatic notes; use equal parts to create a balanced southwestern profile. Sprinkle into flour or egg mixture and taste as you go to adjust intensity.
- 1 1/2 pounds Roma tomatoes: Roast or simmer to make a bright, slightly sweet tomato sauce that complements the rich, fried chiles; peel and blend for a smooth, flavorful salsa. Use ripe Roma tomatoes for concentrated flavor and to create a velvety sauce consistency.
- 1/2 large yellow onion, peeled and quartered: Sauté or roast with tomatoes to build savory depth in the sauce; quartering speeds cooking and softens the onion for blending. Use half an onion to keep the sauce balanced without overpowering the chiles and cheese filling.
- 3 cloves garlic, peeled: Sauté briefly with tomatoes and onion to add pungent, aromatic depth to the salsa; blending mellows sharpness while retaining savory garlic flavor. Use peeled cloves to avoid bitter bits and to ensure a smooth sauce texture after processing.
- 1 2 serrano chiles (may sub jalapenos for milder): Add fresh heat and brightness to the sauce; adjust quantity for desired spiciness and swap jalapeños to lower heat without losing flavor. Roast or char before blending to add a smoky layer that complements the poblano and tomato base.
- 1/2 cup loosely packed cilantro leaves and tender stems: Fold in after blending the sauce for fresh herbal lift and bright, citrusy notes; use leaves and tender stems for maximum flavor. Add toward the end of cooking or stir into finished sauce to preserve vibrant green color and aroma.
- 1/2 tsp EACH ground cumin, dried oregano, salt: Season the sauce or filling with balanced earthy and herbal spice; measure equal parts to maintain consistent flavor across preparations. Sprinkle into the blended tomato mixture and taste, adjusting for salt and acidity as needed.
- Cotija cheese: Crumble over finished chiles or sprinkle on the plate to provide salty, tangy contrast and a crumbly texture that complements melty Oaxaca. Use sparingly as a finishing touch to enhance creaminess and add savory brightness.
- Chopped cilantro: Garnish just before serving to add fresh, herbaceous aroma and a pop of green color; chop finely for even distribution. Scatter over plated chile rellenos to brighten flavors and offer a refreshing counterpoint to the fried batter.
Chile Rellenos Instructions
These instructions will guide you through roasting, steaming, stuffing, and frying so you end up with crisp exteriors and melty centers. Read each step slowly as you cook, and set up your workspace so you can move from roasting to stuffing to frying without scrambling.
- Prepare oven and pan: Set the oven rack about 4 inches below the broiler and preheat the broiler to high. Line a large (21×15-inch) baking sheet with foil and arrange the poblano peppers, tomatoes, onion, serranos, and garlic in a single layer, without overlapping.: The room fills with the sharp, anticipatory scent of raw tomatoes and peppers as you lay everything on a foil lined baking sheet; arranging items in a single layer ensures each piece receives direct broiler heat and blackens evenly, which is essential because uneven charring leads to inconsistent peeling and steam pockets later, so avoid overlapping items which is the most common mistake here.
- Broil: Broil on high for 5 minutes, then flip everything over with tongs and continue broiling for an additional 5 minutes. Next, turn everything to the side that isn’t blackened yet (you might need to prop chiles against each other to keep the unexposed side up). Broil for an additional 5 minutes. Repeat one more time if needed.: The sound of the broiler is intense and the edges will blacken and blister quickly, a visual cue that sugars are caramelizing and skins are separating from flesh, and rotating and flipping encourages even charring, while rushing this step will leave unblistered skin that is harder to peel.
- Steam Poblanos: Transfer the tomatoes, onion, and garlic to a blender. Wrap the poblanos in foil from the baking sheet to fully enclose them, then set them aside to steam for 10 minutes. Meanwhile:: Wrapping the poblanos traps heat and steam, which makes peeling simple and preserves moisture inside the pepper, and letting them rest for the full steaming time prevents tearing the flesh when you peel, since peeling too early can pull off tender flesh with the skin.
- Make Salsa Ranchera: Chop off the tops of the serrano peppers and deseed them (be careful, seeds tend to hide behind the veins!). Add them to the blender with the cilantro, salsa spices, and blend until smooth. Transfer to a medium saucepan and bring to a simmer over medium-high heat. Then, reduce the heat to medium and simmer for 6 minutes, or until the sauce has thickened. Stir in about 1/4 cup of water, more or less, to reach your desired consistency.: When you blend roasted tomatoes, serranos, and cilantro the aroma becomes bright and herbaceous, and simmering concentrates the flavors while mellowing any harsh raw chile notes; if the sauce seems too thin, simmer a little longer rather than adding water, because watering it down will reduce flavor intensity.
- Peel the Peppers: After 10 minutes, carefully open the foil. Once cooled, peel off the charred outer skin of the chiles (I do this while the salsa is simmering).: As you remove the charred skin you will notice a glossy pepper surface underneath; take care to remove only loose burnt bits and avoid scrubbing too hard which can remove the pepper flesh itself and reduce volume for stuffing.
- Slice Chiles: Starting at the top stem of the chiles, cut a slit about 3 inches long down the center of each chile. (There is no need to remove the seeds because they aren’t spicy, but you can if you wish.): The slit should be wide enough to accommodate the Oaxaca cheese strips but not so large that the pepper loses structural integrity, and leaving some stem attached helps hold shape when handling; cutting too deeply can perforate the pepper and cause the cheese to ooze during frying.
- Stuff Chiles: Gently pull back the chile skin and line the cheese sticks into the opening. Close the opening and gently pinch the ends together. Then, secure the opening closed with toothpicks (see the pictures in the post). Don’t be shy—use as many as you need to make sure the cheese doesn’t ooze out during frying.: Filling the peppers so each one holds a generous line of cheese creates a molten center after frying; use toothpicks to secure the seam because unsecured seams can burst open in hot oil and create a greasy, messy fry.
- Heat the oil: Fill a wide, heavy-duty pot with 2 inches of vegetable oil and heat it to 375°F (I love this fryer). Line a baking rack (from a baking sheet) with paper towels. While the oil heats, prepare the batter:: Heating to the correct frying temperature produces that immediate sizzle that crisps batter without soaking up oil; using a thermometer to reach and maintain 375°F prevents soggy batter, and overheating can scorch the exterior before the cheese melts.
- Make the Batter: Separate the egg whites into a large mixing bowl and the egg yolks into a small bowl. Using an electric hand mixer, beat the egg whites until stiff peaks form, about 5 minutes. Reduce the speed to low, then gently fold in the egg yolks until fully incorporated.: Whipping the egg whites to stiff peaks creates a light, airy structure that crisps beautifully when fried, and folding in the yolks gently preserves that aeration, while vigorous mixing will deflate the whites and yield a dense coating that does not achieve the desired texture.
- Dredge Chiles: Mix the flour and spices in a shallow plate. Gently transfer one chile to the plate, roll it around until it's evenly coated. Gently transfer to the egg mixture and turn to coat.: Coating each stuffed pepper first in the seasoned all purpose flour helps the batter cling, and a careful, even coating prevents bare spots that would brown too quickly; rushing the dredge or letting batter pool will create uneven crusts.
- Fry the chiles: Working in batches to avoid overcrowding the pan, fry the chiles for about 3-4 minutes per side until they are golden brown and crispy. Transfer to the paper towel-lined rack and repeat.: The oil should give a lively sizzle and the batter will turn a warm, even golden brown as proteins set and moisture is driven away, signaling doneness; fry in batches to avoid overcrowding, since crowding lowers oil temperature and results in greasy, undercooked batter.
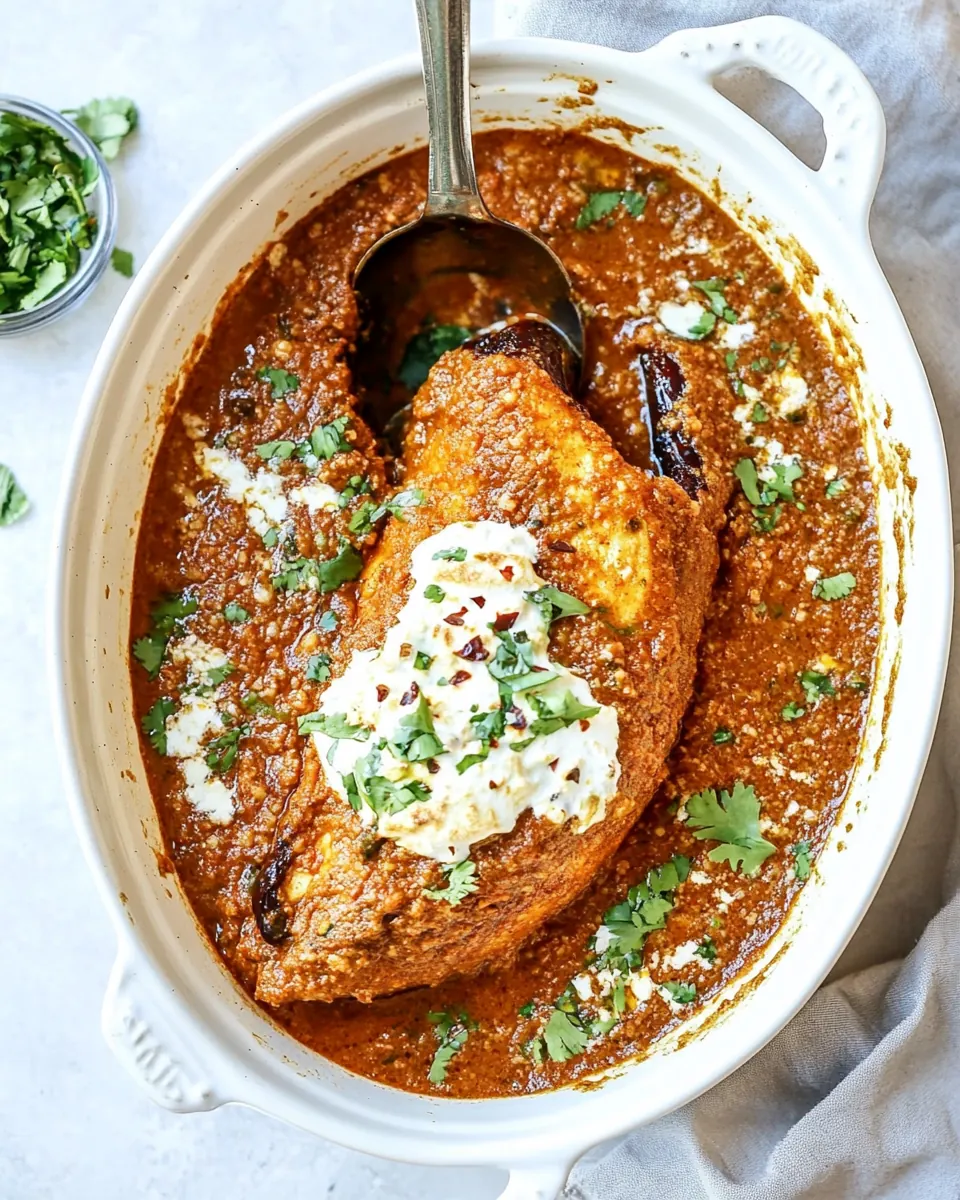
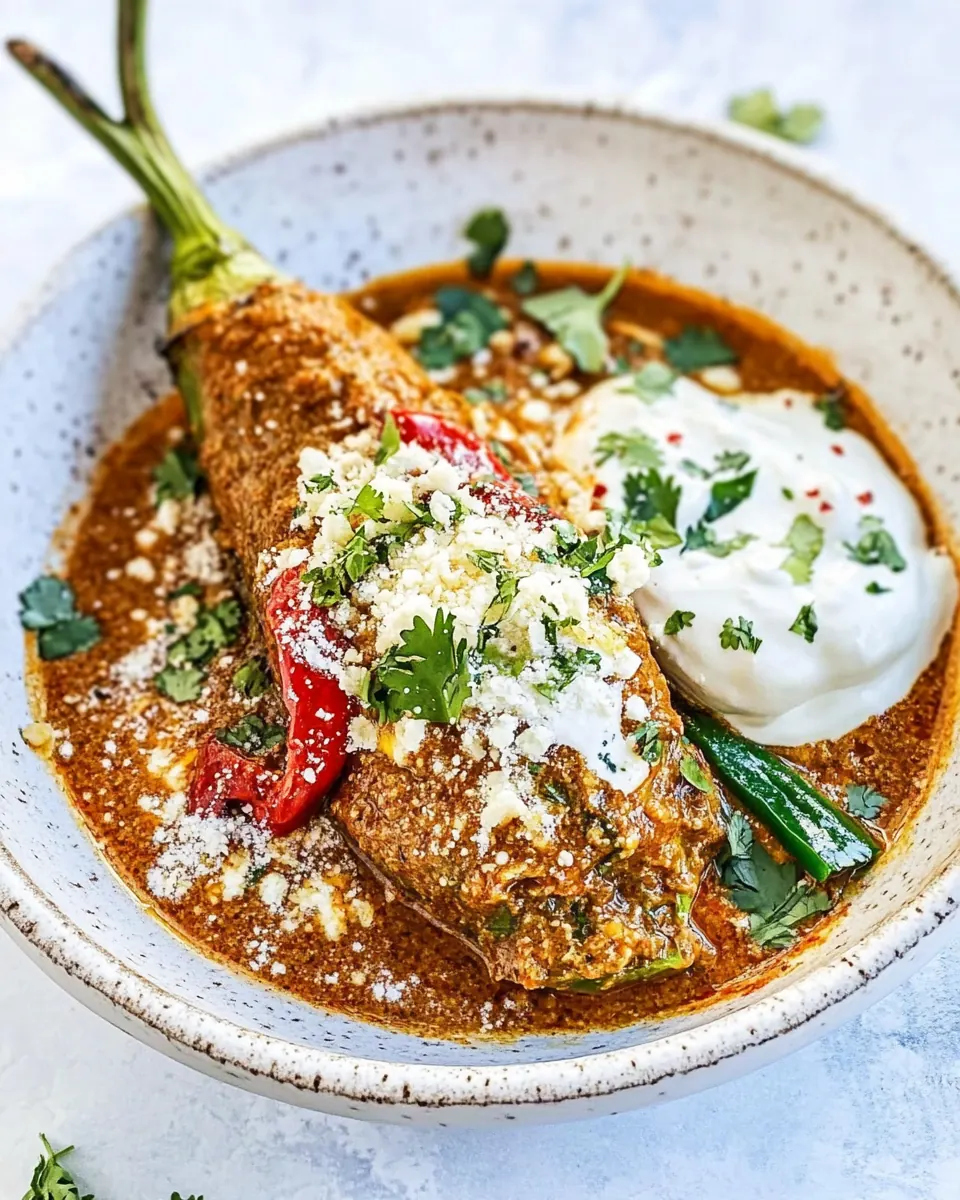
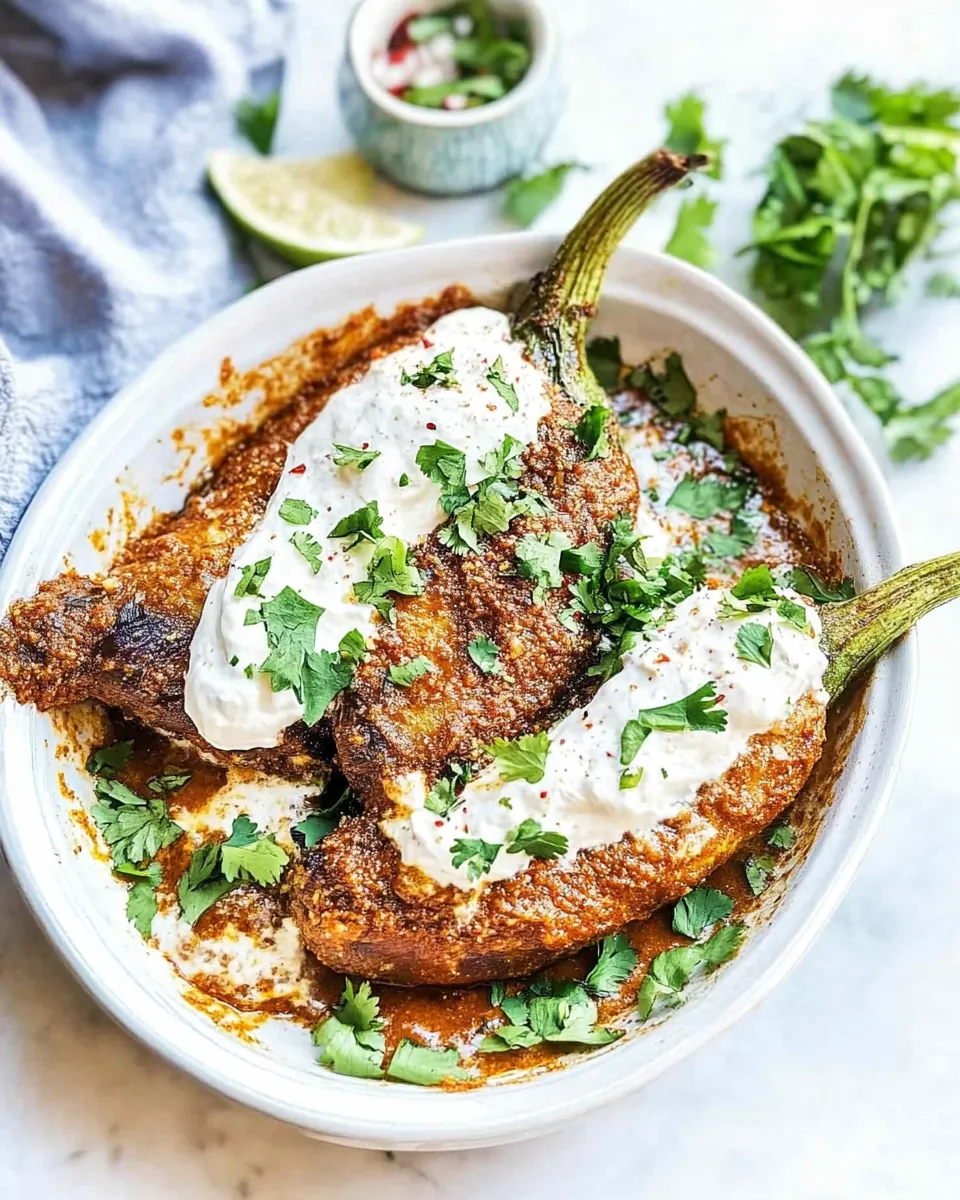
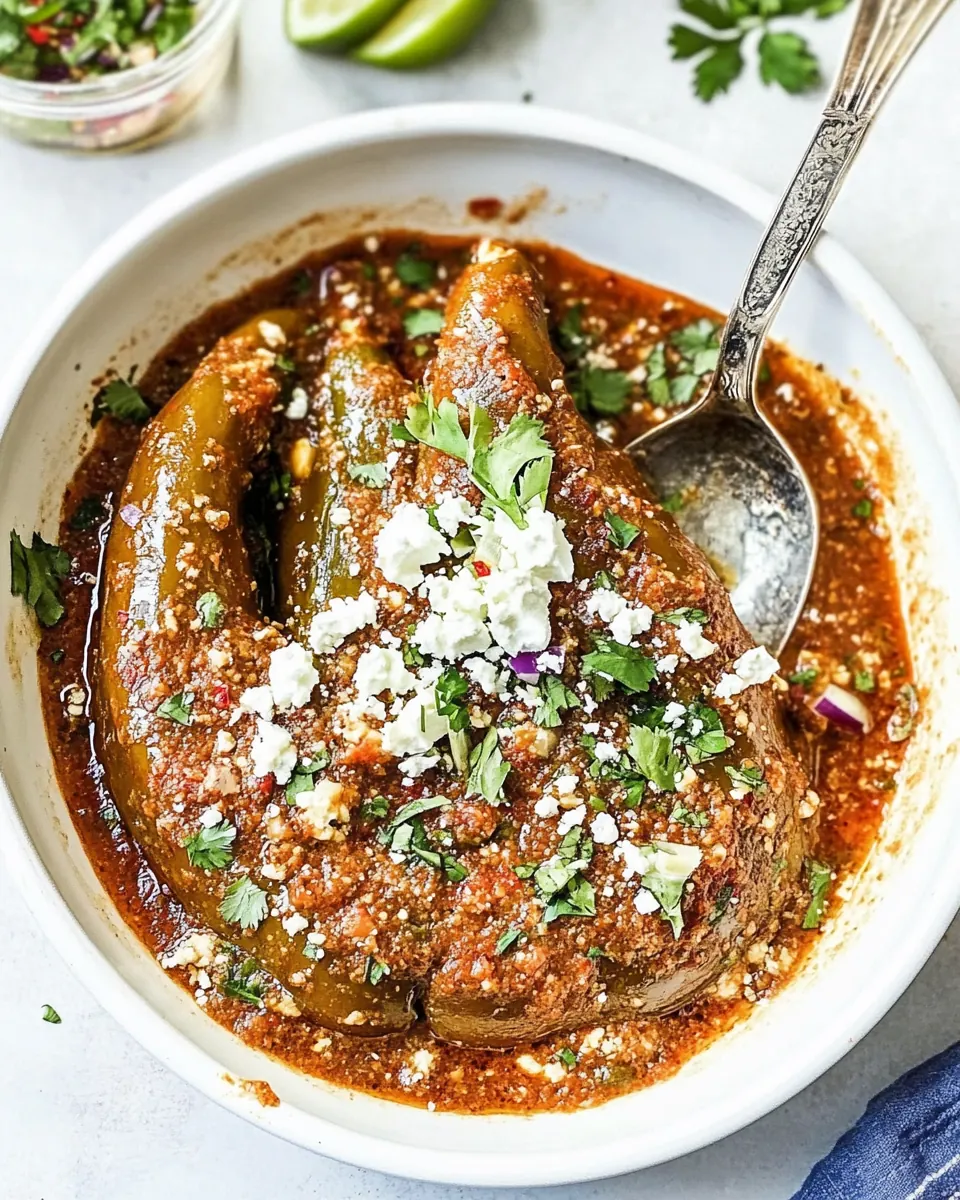
- Serve: Divide the salsa among the plates and top with the chile rellenos. Garnish with chopped cilantro and cotija cheese. Serve immediately while still hot. Please remind eaters to remove the toothpicks!: The final moment is aromatic, with the nutty, roasted salsa and the salty Cotija cheese brightening each bite; plate immediately while still hot, and remind diners to remove the toothpicks to avoid an unpleasant surprise.
Making Adjustments
I like offering practical adjustments so you can tailor Chile Rellenos to your taste and kitchen setup. Below are detailed tips you can apply whether you want milder heat, a make ahead route, or a crisper fry.
- Lowering heat: If you prefer milder chiles, substitute jalapenos for the serranos in the salsa, and remove seeds and ribs when you slice them; this reduces sharp green heat while retaining chile flavor.
- Make ahead roasting: Roast tomatoes and peppers earlier in the day and keep the poblanos wrapped to steam until ready to stuff, this saves active time before frying and preserves peak roasted flavor.
- Maintaining crispness: After frying, place chiles on a wire rack set over paper towels rather than directly on paper, so air circulates and the underside stays crisp rather than steaming soggy.
- Adjusting salt: Taste the salsa before plating and adjust the final salt amount, because roasted tomatoes can vary in sweetness and acidity which affects how much seasoning you need.
- Managing oil temperature: If the oil temperature dips when you add chiles, pause between batches to let the oil recover, as frying too cold absorbs oil and makes the batter heavy.
How to Serve Chile Rellenos
Serving Chile Rellenos is a joy because the dish fits casual lunches, festive dinners, and special occasions. Present them hot and crisp, with the salsa spooned underneath and garnishes that contrast texture and brightness.
- Plated style: Spoon warm salsa ranchera onto each plate and place a hot chile on top for an attractive, saucy presentation that catches melted cheese as it oozes.
- Garnish: Sprinkle crumbled Cotija cheese and chopped cilantro just before serving so the herbs stay fresh and the cheese adds a salty pop against the fried batter.
- Occasions: Serve for weekend lunches, holiday brunches, or family dinners where hands on, shareable food is appreciated, because the act of stuffing and frying invites conversation and participation.
- Side suggestions: Offer simple sides like warm tortillas or a light green salad to balance the richness, keeping accompaniments restrained so the chiles remain the star.
- Storage tips: Store leftover components separately; keep salsa chilled in an airtight container and place fried chiles in a single layer in the fridge, then reheat briefly in a hot oven to crisp the exterior again.
- Seasonal pairing: In summer, highlight the roasted tomato brightness, and consider serving with fresh lime wedges to add extra acidity when tomatoes are at peak flavor.
FAQ
Conclusion
Chile Rellenos stand out because they combine charred, smoky peppers with a delicate, airy batter and melty cheese for deeply satisfying contrast. Try this recipe when you want a hands on, social cooking experience that rewards patience with bold flavor and crunchy texture. The process of roasting, steaming, stuffing, and frying is tactile and fun, and serving them hot with a bright roasted tomato salsa turns a simple meal into something memorable and comforting.

Chile Rellenos
Equipment
- Broiler
- Baking Sheet
- Foil
- Blender
- Medium Saucepan
- Heavy-duty pot
- Thermometer
- electric hand mixer
Ingredients
- 6 large poblano chile peppers Roast and blister to develop a smoky, slightly sweet flavor; peel and seed before stuffing with cheese for classic chile rellenos. Handle carefully to preserve skins and achieve a tender interior that holds fillings well during frying.
- 10 ounces Oaxaca cheese, cut into long strips/sticks Cut into long strips or sticks to create melty, stringy centers that complement the poblano heat; use Oaxaca for its excellent melting quality and mild, creamy flavor. Arrange strips inside each pepper to ensure even cheese distribution and gooey texture when cooked.
- Vegetable oil for frying Heat to a high temperature for shallow frying the battered chiles; choose a neutral oil with a high smoke point to avoid imparting off-flavors. Maintain steady oil temperature so batter crisps quickly and peppers remain juicy without absorbing excess oil.
- 4 large eggs Separate and whip to create a light, airy batter when beaten until foamy; fold into seasoned flour for the classic puffy coating. Use fresh eggs at room temperature to achieve maximum volume and stable peaks for a crisp, cloudlike crust.
- 1/2 cup all-purpose flour Dust peppers lightly to give the egg batter something to adhere to and to create a crisp exterior once fried. Sift if needed to remove lumps and combine with seasonings before dredging the peppers.
- 1/2 teaspoons salt Season batter and filling to enhance overall flavor balance; measure carefully to avoid over-salting the batter or sauce. Dissolve evenly into flour or egg mixture so every bite has consistent seasoning.
- 1/4 tsp EACH chili powder, dried oregano, ground cumin, garlic powder, onion powder, smoked paprika Combine as a spice blend to season the batter, sauce, or filling with warm, aromatic notes; use equal parts to create a balanced southwestern profile. Sprinkle into flour or egg mixture and taste as you go to adjust intensity.
- 1 1/2 pounds Roma tomatoes Roast or simmer to make a bright, slightly sweet tomato sauce that complements the rich, fried chiles; peel and blend for a smooth, flavorful salsa. Use ripe Roma tomatoes for concentrated flavor and to create a velvety sauce consistency.
- 1/2 large yellow onion, peeled and quartered Sauté or roast with tomatoes to build savory depth in the sauce; quartering speeds cooking and softens the onion for blending. Use half an onion to keep the sauce balanced without overpowering the chiles and cheese filling.
- 3 cloves garlic, peeled Sauté briefly with tomatoes and onion to add pungent, aromatic depth to the salsa; blending mellows sharpness while retaining savory garlic flavor. Use peeled cloves to avoid bitter bits and to ensure a smooth sauce texture after processing.
- 1 -2 serrano chiles (may sub jalapenos for milder) Add fresh heat and brightness to the sauce; adjust quantity for desired spiciness and swap jalapeños to lower heat without losing flavor. Roast or char before blending to add a smoky layer that complements the poblano and tomato base.
- 1/2 cup loosely packed cilantro leaves and tender stems Fold in after blending the sauce for fresh herbal lift and bright, citrusy notes; use leaves and tender stems for maximum flavor. Add toward the end of cooking or stir into finished sauce to preserve vibrant green color and aroma.
- 1/2 tsp EACH ground cumin, dried oregano, salt Season the sauce or filling with balanced earthy and herbal spice; measure equal parts to maintain consistent flavor across preparations. Sprinkle into the blended tomato mixture and taste, adjusting for salt and acidity as needed.
- Cotija cheese Crumble over finished chiles or sprinkle on the plate to provide salty, tangy contrast and a crumbly texture that complements melty Oaxaca. Use sparingly as a finishing touch to enhance creaminess and add savory brightness.
- Chopped cilantro Garnish just before serving to add fresh, herbaceous aroma and a pop of green color; chop finely for even distribution. Scatter over plated chile rellenos to brighten flavors and offer a refreshing counterpoint to the fried batter.
Instructions
- Prepare oven and pan: Set the oven rack about 4 inches below the broiler and preheat the broiler to high. Line a large (21×15-inch) baking sheet with foil and arrange the poblano peppers, tomatoes, onion, serranos, and garlic in a single layer, without overlapping.: The room fills with the sharp, anticipatory scent of raw tomatoes and peppers as you lay everything on a foil lined baking sheet; arranging items in a single layer ensures each piece receives direct broiler heat and blackens evenly, which is essential because uneven charring leads to inconsistent peeling and steam pockets later, so avoid overlapping items which is the most common mistake here.
- Broil: Broil on high for 5 minutes, then flip everything over with tongs and continue broiling for an additional 5 minutes. Next, turn everything to the side that isn’t blackened yet (you might need to prop chiles against each other to keep the unexposed side up). Broil for an additional 5 minutes. Repeat one more time if needed.: The sound of the broiler is intense and the edges will blacken and blister quickly, a visual cue that sugars are caramelizing and skins are separating from flesh, and rotating and flipping encourages even charring, while rushing this step will leave unblistered skin that is harder to peel.
- Steam Poblanos: Transfer the tomatoes, onion, and garlic to a blender. Wrap the poblanos in foil from the baking sheet to fully enclose them, then set them aside to steam for 10 minutes. Meanwhile:: Wrapping the poblanos traps heat and steam, which makes peeling simple and preserves moisture inside the pepper, and letting them rest for the full steaming time prevents tearing the flesh when you peel, since peeling too early can pull off tender flesh with the skin.
- Make Salsa Ranchera: Chop off the tops of the serrano peppers and deseed them (be careful, seeds tend to hide behind the veins!). Add them to the blender with the cilantro, salsa spices, and blend until smooth. Transfer to a medium saucepan and bring to a simmer over medium-high heat. Then, reduce the heat to medium and simmer for 6 minutes, or until the sauce has thickened. Stir in about 1/4 cup of water, more or less, to reach your desired consistency.: When you blend roasted tomatoes, serranos, and cilantro the aroma becomes bright and herbaceous, and simmering concentrates the flavors while mellowing any harsh raw chile notes; if the sauce seems too thin, simmer a little longer rather than adding water, because watering it down will reduce flavor intensity.
- Peel the Peppers: After 10 minutes, carefully open the foil. Once cooled, peel off the charred outer skin of the chiles (I do this while the salsa is simmering).: As you remove the charred skin you will notice a glossy pepper surface underneath; take care to remove only loose burnt bits and avoid scrubbing too hard which can remove the pepper flesh itself and reduce volume for stuffing.
- Slice Chiles: Starting at the top stem of the chiles, cut a slit about 3 inches long down the center of each chile. (There is no need to remove the seeds because they aren’t spicy, but you can if you wish.): The slit should be wide enough to accommodate the Oaxaca cheese strips but not so large that the pepper loses structural integrity, and leaving some stem attached helps hold shape when handling; cutting too deeply can perforate the pepper and cause the cheese to ooze during frying.
- Stuff Chiles: Gently pull back the chile skin and line the cheese sticks into the opening. Close the opening and gently pinch the ends together. Then, secure the opening closed with toothpicks (see the pictures in the post). Don’t be shy—use as many as you need to make sure the cheese doesn’t ooze out during frying.: Filling the peppers so each one holds a generous line of cheese creates a molten center after frying; use toothpicks to secure the seam because unsecured seams can burst open in hot oil and create a greasy, messy fry.
- Heat the oil: Fill a wide, heavy-duty pot with 2 inches of vegetable oil and heat it to 375°F (I love this fryer). Line a baking rack (from a baking sheet) with paper towels. While the oil heats, prepare the batter:: Heating to the correct frying temperature produces that immediate sizzle that crisps batter without soaking up oil; using a thermometer to reach and maintain 375°F prevents soggy batter, and overheating can scorch the exterior before the cheese melts.
- Make the Batter: Separate the egg whites into a large mixing bowl and the egg yolks into a small bowl. Using an electric hand mixer, beat the egg whites until stiff peaks form, about 5 minutes. Reduce the speed to low, then gently fold in the egg yolks until fully incorporated.: Whipping the egg whites to stiff peaks creates a light, airy structure that crisps beautifully when fried, and folding in the yolks gently preserves that aeration, while vigorous mixing will deflate the whites and yield a dense coating that does not achieve the desired texture.
- Dredge Chiles: Mix the flour and spices in a shallow plate. Gently transfer one chile to the plate, roll it around until it's evenly coated. Gently transfer to the egg mixture and turn to coat.: Coating each stuffed pepper first in the seasoned all purpose flour helps the batter cling, and a careful, even coating prevents bare spots that would brown too quickly; rushing the dredge or letting batter pool will create uneven crusts.
- Fry the chiles: Working in batches to avoid overcrowding the pan, fry the chiles for about 3-4 minutes per side until they are golden brown and crispy. Transfer to the paper towel-lined rack and repeat.: The oil should give a lively sizzle and the batter will turn a warm, even golden brown as proteins set and moisture is driven away, signaling doneness; fry in batches to avoid overcrowding, since crowding lowers oil temperature and results in greasy, undercooked batter.
- Serve: Divide the salsa among the plates and top with the chile rellenos. Garnish with chopped cilantro and cotija cheese. Serve immediately while still hot. Please remind eaters to remove the toothpicks!: The final moment is aromatic, with the nutty, roasted salsa and the salty Cotija cheese brightening each bite; plate immediately while still hot, and remind diners to remove the toothpicks to avoid an unpleasant surprise.
Notes
- Lowering heat: If you prefer milder chiles, substitute jalapenos for the serranos in the salsa, and remove seeds and ribs when you slice them; this reduces sharp green heat while retaining chile flavor.
- Make ahead roasting: Roast tomatoes and peppers earlier in the day and keep the poblanos wrapped to steam until ready to stuff, this saves active time before frying and preserves peak roasted flavor.
- Maintaining crispness: After frying, place chiles on a wire rack set over paper towels rather than directly on paper, so air circulates and the underside stays crisp rather than steaming soggy.
- Adjusting salt: Taste the salsa before plating and adjust the final salt amount, because roasted tomatoes can vary in sweetness and acidity which affects how much seasoning you need.
- Managing oil temperature: If the oil temperature dips when you add chiles, pause between batches to let the oil recover, as frying too cold absorbs oil and makes the batter heavy.