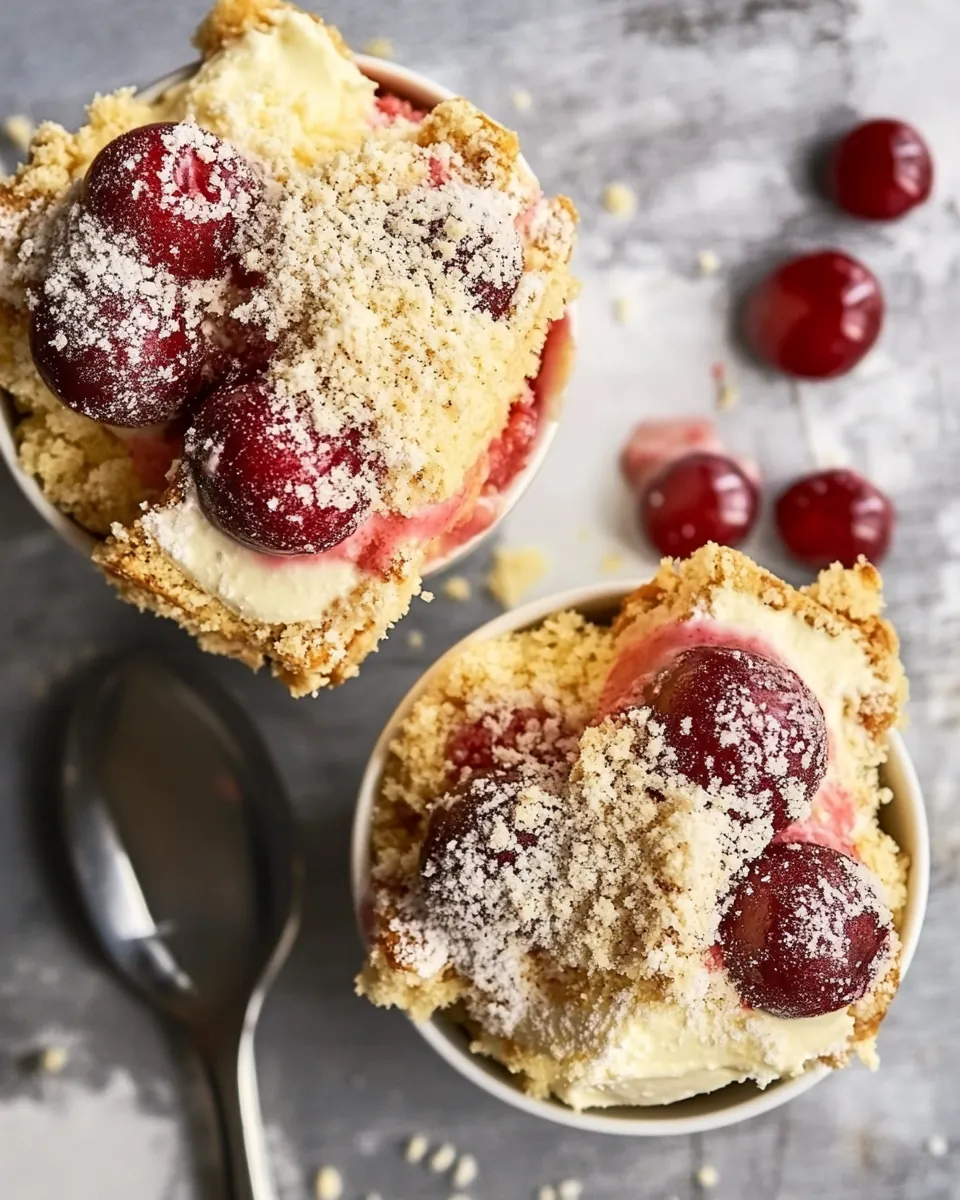
Cherry Swedish Flop
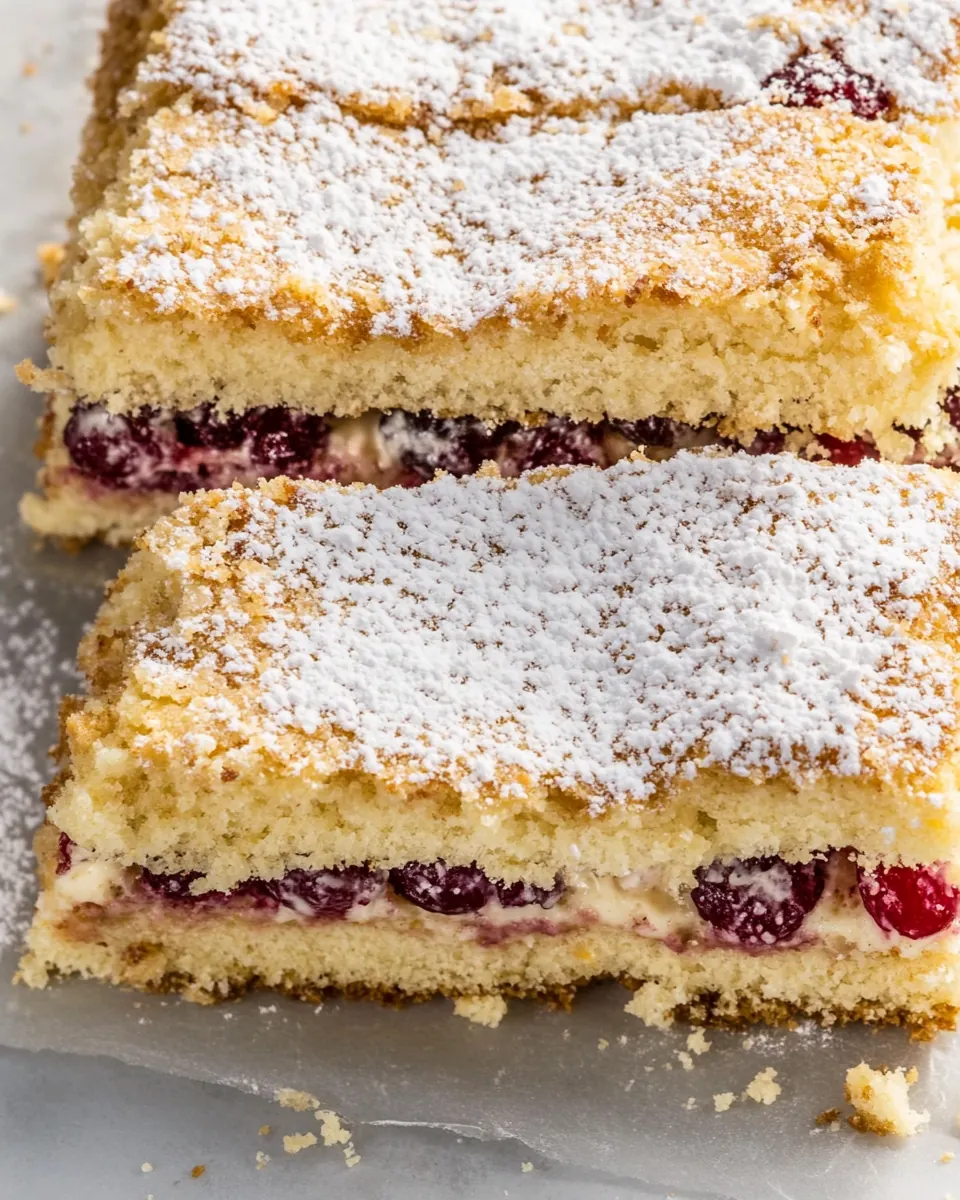
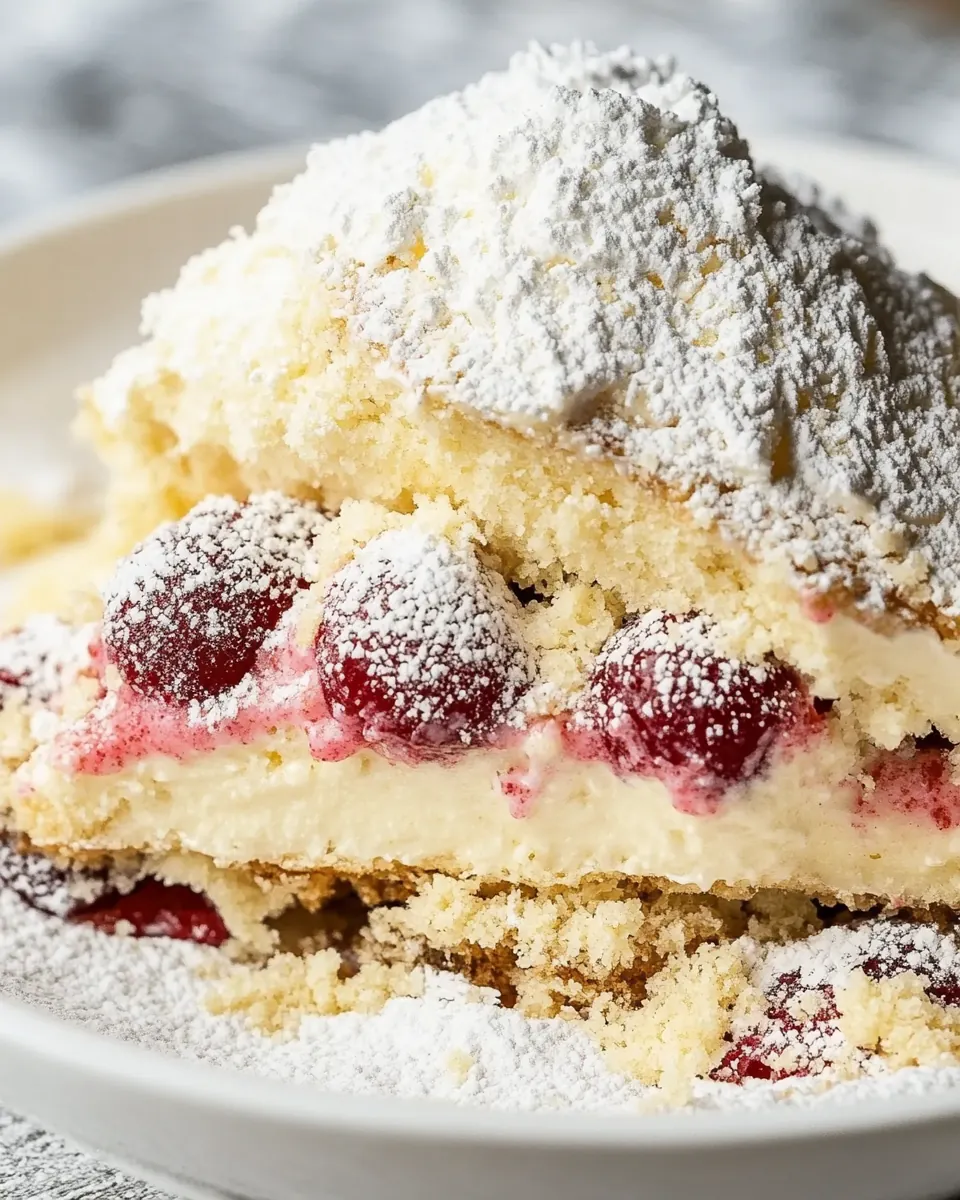
Cherry Swedish Flop is one of those nostalgic cakes I reach for when I want something familiar yet a little showy for guests. I first encountered it at a family potluck where a kindly aunt carried in a rectangular pan dusted with confectioners sugar, and the bright cherry preserves peeking from the middle made everyone lean in. That first bite, with soft, pillowy dough meeting nutty browned butter streusel and a silky ermine frosting, hooked me instantly.
Over the years Ive tweaked how I handle the dough and the timing of the rises so the texture is reliably tender and even. When I make Cherry Swedish Flop now I remember that first potluck and how small comforts can create big memories. The browned butter notes gently whisper through the cake, and the cherry layer adds a pleasant brightness that lifts the whole slice.
What keeps bringing me back to Cherry Swedish Flop is how forgiving it is, even when life is rushed. You can mix the dough, let it rise, and still have time to make coffee, and the resulting cake behaves like a warm hug on a plate. I like serving it chilled slightly so the filling holds its shape, but it also sings at room temperature. Every time I slice into it I think about sharing it with friends, folding in a few minutes of conversation between steps.
Recipe Snapshot
60 mins
30 mins
30 mins
Medium
350 kcal
American
Gluten-Free, Low FODMAP
Desserts
Stand mixer, Paddle attachment, 13 x 9 inch baking pan, Parchment paper, Wire rack, Serrated knife
Why This Cherry Swedish Flop Is So Good
1. Texture contrast that feels intentional
I love how Cherry Swedish Flop balances soft, enriched dough with crunchy, browned butter streusel. The contrast keeps each bite interesting, and the streusels toasted aroma makes the whole kitchen smell irresistible. I find that this interplay is what turns a good cake into one people ask for seconds of.
2. Browned butter depth
The use of Browned Butter in the dough, streusel, and frosting adds a nutty, caramelized note that lifts the cherries. I always say that browned butter is a shortcut to complexity, because it gives a deep, savory-sweet backbone without complicating the recipe. I can taste a lingering richness long after the cake is gone.
3. Crowd friendly format
I frequently make Cherry Swedish Flop for gatherings because the 13 by 9 pan format scales easily, and slices hold together well. Its simple to transport and presents beautifully when dusted with confectioners sugar. Everyone can grab a square, and its forgiving if you need to make it a day ahead.
4. The cherry preserves center
The jarred cherry preserves delivers reliable fruit flavor and a glossy, spreadable texture that contrasts perfectly with the creamy ermine frosting. I appreciate how the preserves stay bright and tart enough to cut through the richness, so the cake never feels cloying.
5. Technique that rewards attention
While the recipe is approachable, I love how small, mindful moveslike proofing the yeast at the right temperature and letting the cake cool completely before slicingmake a noticeable difference. Those little wins build confidence and give consistent results, which is why I keep this recipe in the rotation.
Main Ingredients for Cherry Swedish Flop
These components work together to deliver a cake with depth, tenderness, and bright fruit contrast. The enriched dough gives a soft crumb, Browned Butter layers add toasty richness, and the cherry preserves provide a lively center. Each element plays a clear role, and respecting their individual textures ensures the finished cake is balanced and satisfying.
- 1 cup (160 grams) warm whole milk (110°F/43°C to 115°F/46°C): Warm and foamy to activate yeast efficiently; provides liquid, fat, and structure to enrich the dough while maintaining proper fermentation temperature between 110°F/43°C and 115°F/46°C.
- 21/4 teaspoon s(7 grams) instant yeast: Small and potent yeast granules used to leaven the dough quickly; ensures reliable rise and light crumb when dissolved into warm milk for optimal fermentation.
- 1/4 cup (55 grams) firmly packed light brown sugar: Sweet and moist brown sugar adds caramel notes and tenderness; contributes moisture and helps brown the crust while feeding yeast for slight extra fermentation activity.
- 1/4 cup (57 grams) Browned Butter (recipe follows), melted and cooled slightly: Rich browned butter melted and cooled slightly to add nutty depth; incorporates fat and flavor while retaining enough warmth to blend with eggs without cooking them.
- 2 large eggs (100 grams), room temperature: Large eggs at room temperature used to enrich and bind the dough; provide structure, moisture, and leavening while improving texture and color of the finished bake.
- 1 teaspoon (3 grams) tightly packed orange zest: Tightly packed orange zest provides concentrated citrus aromatic oils; brightens the flavor profile and balances sweetness with fresh, fragrant notes.
- 1 teaspoon (4 grams) vanilla extract: Pure vanilla extract imparts warm, sweet aromatic complexity; enhances overall flavor harmony and rounds out the other sweet and fruity components.
- 2 cup s(250 grams) plus 2 teaspoons (6 grams) all-purpose flour, divided: All-purpose flour measured in two parts supplies the bulk structure and gluten network; first portion hydrates and forms dough while the reserved bit adjusts consistency for kneading.
- 1/2 teaspoon (1.5 grams) kosher salt: Kosher salt strengthens gluten and controls yeast fermentation; enhances flavor depth and balances sweetness throughout the dough and fillings.
- Browned Butter Streusel (recipe follows): Buttery streusel made with browned butter for topping and texture contrast; adds crunchy, caramelized crumble that complements the soft cake layers and cherries.
- Browned Butter Ermine Frosting (recipe follows): Ermine frosting prepared with browned butter creates a silky, less-sweet icing; provides creamy, stable spread with rich butter flavor and smooth mouthfeel for finishing.
- 11/4 cup s(370 grams) cherry preserves: Thick cherry preserves supply sweet-tart fruit filling and moisture; spreads between layers to deliver concentrated cherry flavor and appealing fruit pockets through the bake.
- Garnish: confectioners’ sugar: Confectioners’ sugar used as a light garnish to finish and brighten appearance; dusted over the top for a delicate sweetness and attractive presentation.
How to Make Cherry Swedish Flop
These directions walk you through proofing, mixing, rising, and assembling the cake with close attention to sensory cues and troubleshooting. Ill describe what to look for, how things should feel and smell, and common pitfalls so you can get a consistent result that showcases the browned butter and cherry preserves.
- In the bowl of a stand mixer, whisk together warm milk and yeast by hand, and let stand until foamy, 5 to 10 minutes.: You should notice a gentle yeast smell and a layer of foam forming on the surface, which signals active yeast. The milk should feel warm but not hot when you touch it, and the foam will look bubbly and slightly creamy. This step develops the dough s lift potential, and without the foamy bloom your dough may be dense. A common mistake is using milk that is too hot, which kills the yeast; if you see no foam after 10 minutes, your yeast may be old or the liquid too cool.
- Add brown sugar, Browned Butter, eggs, orange zest, and vanilla to yeast mixture. Using the paddle attachment, beat at medium speed until combined. Add 2 cups (250 grams) flour and salt, and beat until a shiny, loose dough forms, 3 to 4 minutes, stopping to scrape sides and bottom of bowl.: As you add the light brown sugar , melted Browned Butter , large eggs , orange zest , and vanilla , the bowl will fill with rich, sweet aromas and a hint of toasted butter. The mixture should look cohesive and glossy before the flour goes in, and the scent of browned butter will deepen the overall profile. This combination builds flavor and fat distribution that make the crumb tender. Avoid adding hot butter, which can cook the eggs, and if the mixture looks curdled take a moment to whisk gently to recombine.
- Spray a medium bowl with cooking spray. Pour dough into bowl. Dust top of dough with remaining 2 teaspoons (6 grams) flour, and cover tightly with plastic wrap. Let rise in a warm, draft-free place (75°F/24°C) until doubled in size, about 30 minutes.: At medium speed the paddle will integrate ingredients into a smooth, slightly glossy batter. You will hear a consistent, even mixing sound and see no large streaks of egg or butter. Proper mixing ensures even hydration of the flour and consistent crumb. Overmixing at this stage can create too much gluten and a tougher texture, so stop once everything is harmonious.
- Spray a 13 x 9-inch baking pan with baking spray with flour. Line pan with parchment paper, letting excess extend over sides of pan. Transfer dough to prepared pan. Using heavily floured hands, press dough evenly into bottom of pan. Cover and let rise in a warm, draft-free place (75°F/24°C) until doubled in size, about 30 minutes.: As you incorporate the all-purpose flour and kosher salt , the dough will pull away slightly from the bowl and feel tacky but not sticky. It should look glossy from the fats and have faint strands when you lift the paddle. This texture sets the stage for a soft rise. If the dough seems too dry, you may have overmeasured flour; add a teaspoon of warm milk. If it becomes overly elastic and tight, you ve likely overworked it.
- Preheat oven to 350°F (180°C).: The greased bowl will protect the dough during its first rise and make removal effortless. After transferring the dough, the surface should glisten slightly where it touches the oil. Use enough spray to prevent sticking, but not so much that it pools. If the dough clings stubbornly to the bowl later you may have missed spots, so scrape carefully during transfer.
- Sprinkle dough evenly with Browned Butter Streusel.: The dough will slump into the bowl and present a smooth top. It should feel pillowy when gently pressed, springing back slowly. This relaxation helps the gluten relax, making it easier to shape later. If the dough resists stretching, give it a few more minutes to relax before handling.
- Bake until edges start to brown, 25 to 30 minutes. Let cool completely in pan on a wire rack.: The light dusting prevents surface tackiness and the plastic wrap traps moisture for a consistent rise. The top will develop a faint dry skin that keeps it from sticking to the wrap. Ensure the plastic is snug to avoid drafts. If you leave it uncovered the surface can dry out and form a crust, which inhibits proper expansion.
- Using excess parchment as handles, remove cooled cake from pan. Using a serrated knife, cut cake in half horizontally. Spread Browned Butter Ermine Frosting onto bottom half of cake; spread preserves on top of frosting. Top with top half of cake, and refrigerate for at least 30 minutes. Garnish with confectioners’ sugar, if desired.: You want the dough to visibly double and feel aerated, with tiny bubbles beneath the surface. It should feel soft and slightly jiggly when nudged. Proper rising builds flavor and lightness; rushing it will produce a tight crumb, while an overlong rise can collapse. If your kitchen is cool, place the bowl in an oven with just the light on to approximate the target temperature.
- Spray a 13 x 9-inch baking pan with baking spray with flour: The prepared pan and parchment make for an easy release after baking. The spray with flour adds slight traction for the dough to grip while rising. Line with parchment leaving an overhang to lift the cake easily later. If you skip the parchment the cake can stick to the pan and tear when removed.
- Line pan with parchment paper, letting excess extend over sides of pan: The parchment overhang becomes your handle for lifting the cooled cake intact. Ensure the paper lies flat without wrinkles to avoid uneven baking marks. This step makes trimming and slicing neater. Not using parchment often leads to a messy extraction.
- Transfer dough to prepared pan: Gently press the slack dough into the lined pan so it spreads evenly to all corners. You should see an even surface that will rise uniformly. If the dough is unevenly distributed it will bake inconsistently, leaving thin and thick areas. Take time to coax it into corners with lightly floured hands to avoid tearing the dough.
- Using heavily floured hands, press dough evenly into bottom of pan: The flour prevents sticking and allows you to smooth the surface while preserving the dough s airiness. Press to an even thickness so the cake bakes uniformly. If you press too hard you ll squeeze out too much air, making the final cake denser. Keep hands floured and use gentle, confident motions.
- Cover and let rise in a warm, draft-free place (75°F/24°C) until doubled in size, about 30 minutes: The second rise puffs the dough to fill the pan and creates a tender interior. You ll notice the dough reach the edges and feel light to the touch. This rise is essential for a soft final texture. Avoid moving the pan during this time, or the structure can deflate.
- Preheat oven to 350°F (180°C): The oven should reach the correct temperature so the streusel toasts and the cake sets properly. A fully preheated oven ensures even browning and prevents the center from taking too long to cook. If you don t preheat, the cake can bake unevenly, resulting in an underdone center or overly browned edges.
- Sprinkle dough evenly with Browned Butter Streusel: The streusel should be distributed in a thin, even layer so it crisps without burning. As it bakes it will release a warm, nutty smell and form golden pockets of crunch. Too thick a layer can insulate the cake and prevent even baking; too sparse and you lose the intended contrast.
- Bake until edges start to brown, 25 to 30 minutes: Watch for the edges to take on a light golden color and the streusel to smell toasty; the center should feel set when gently pressed. A toothpick inserted near the center should come out mostly clean. Overbaking will dry the cake and make the streusel taste bitter, so check a few minutes early if your oven runs hot.
- Let cool completely in pan on a wire rack: Cooling in the pan helps the cake settle and prevents the preserves from running. The cake will release steam and the surface will firm up; patience here makes assembly neater. Trying to slice when warm often leads to a collapsed middle and messy filling.
- Using excess parchment as handles, remove cooled cake from pan: Lift it gently by the overhang so the cake stays intact. You ll notice the bottom is firm and the streusel set. This handling maintains the cake s shape for slicing and filling. If the cake sticks, slide a thin spatula under the parchment before lifting to avoid tearing.
- Using a serrated knife, cut cake in half horizontally: A long serrated knife produces a clean, even cut without crushing the crumb. Saw gently with steady strokes while supporting the top with your other hand. Visual cues are a straight cut line and minimal crumbs. Rushing the cut will compress the cake and create uneven layers.
- Spread Browned Butter Ermine Frosting onto bottom half of cake; spread preserves on top of frosting: The frosting should feel silky and spread with a glossy finish, and the preserves will add a jewel like layer that is slightly tacky. Apply the frosting first so the preserves sit on a creamy base, preventing direct contact with the cake which could make it soggy. If you spread while the frosting is warm it can slip out from between the layers, so make sure it is cool and stable.
- Top with top half of cake, and refrigerate for at least 30 minutes: Chilling helps the layers set, making slicing clean and letting flavors meld. You will see the frosting firm slightly and the preserves settle. Refrigeration is vital for neat presentation. If you skip chilling the filling may ooze when sliced, producing messy pieces.
- Garnish with confectioners sugar, if desired: A light dusting of confectioners sugar adds a pretty finishing touch and subtle sweetness. Use a fine sieve to dust evenly and avoid clumping. Be mindful of humidity; in moist conditions the sugar can dissolve and lose its visual appeal.
How to Switch It Up
I like suggesting variations that respect the recipes spirit while offering fresh twists. Below are ways to nudge the flavors, texture, and presentation without breaking the method or introducing incompatible ingredients.
- Swap the preserves sparingly, try a slightly tarter cherry preserve or one with whole fruit pieces to add texture and a brighter contrast against the browned butter notes.
- Toast the streusel additions, if your streusel includes nuts, toast them first to amplify the nutty aroma and ensure even crunch throughout the cake.
- Make ahead strategy, bake and cool the cake a day ahead, then assemble and chill the next day for a rested flavor and cleaner slices when serving to guests.
- Adjust sweetness mindfully, if your cherry preserves are very sweet choose a tangier jar or reduce the frostings sugar slightly to maintain balance.
- Presentation tip, dust with confectioners sugar just before serving to keep the topping bright and prevent moisture from dulling the finish.
How to Enjoy Cherry Swedish Flop
This cake is versatile for casual and special occasions, and it rewards gentle serving and thoughtful pairings. Below are ways I like to enjoy and present it, with storage tips and ideas for timing the baking around gatherings.
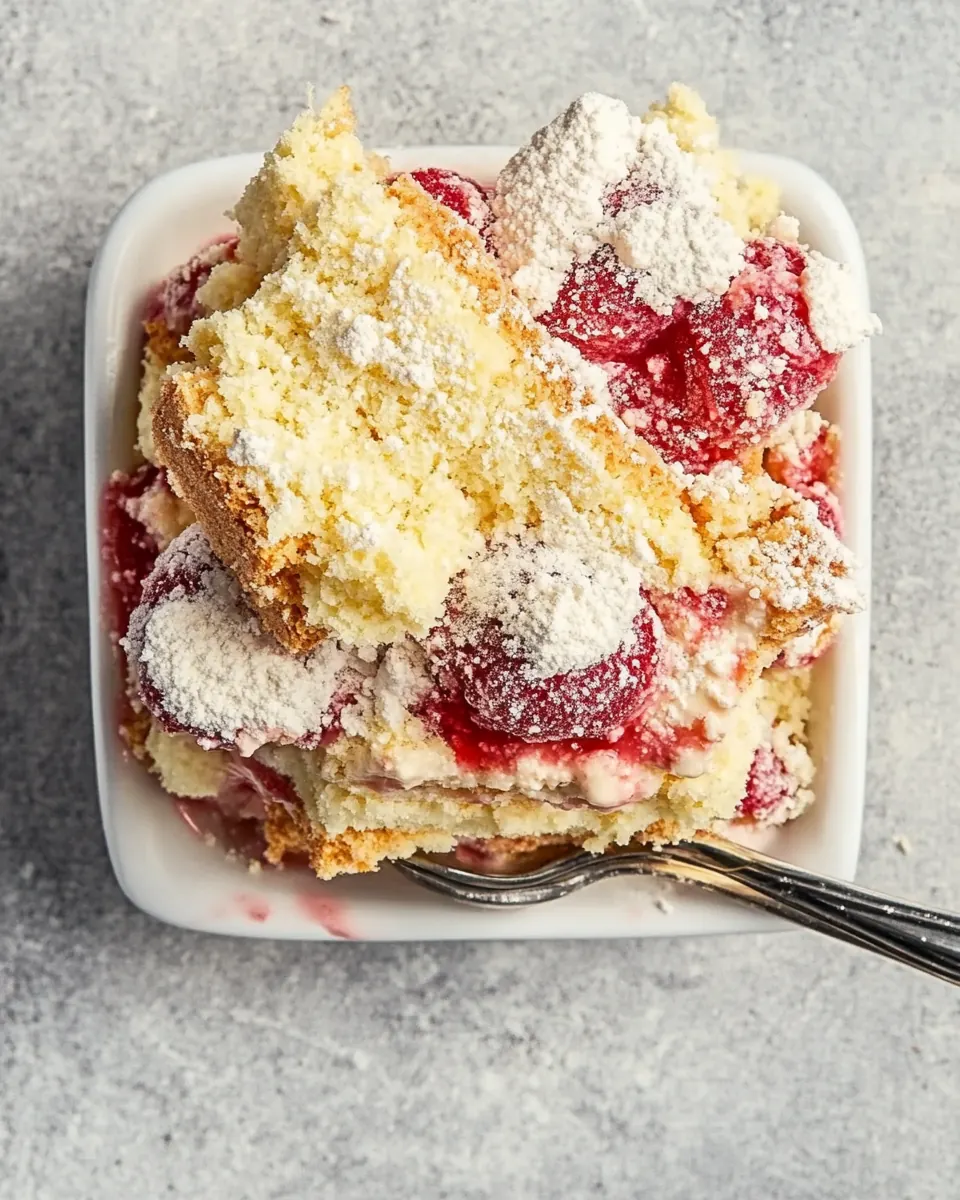
- Serve slightly chilled, slice after refrigeration for at least 30 minutes so the layers hold, making neat portions ideal for buffets or afternoon tea.
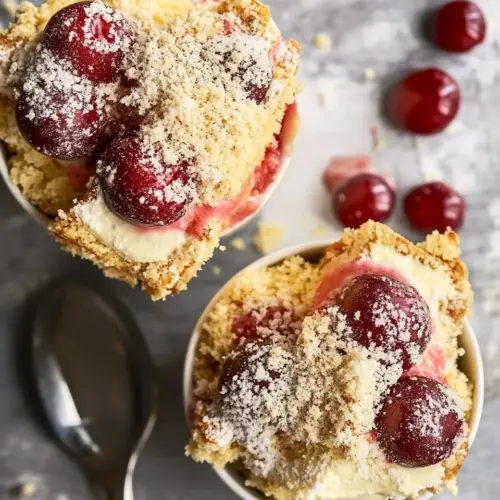
- Afternoon gatherings, the cake pairs beautifully with coffee or tea and makes a lovely centerpiece for a small get together or picnic where guests can grab squares.
- Special occasions, present on a cake stand dusted with confectioners sugar for birthdays or holiday brunches where the browned butter notes feel indulgent without being heavy.
- Storage, keep covered in the refrigerator for up to 3 days, or freeze single slices wrapped tightly for up to one month for easy future treats.
- Seasonal pairing, the bright cherry preserves make this cake particularly lovely in summer when cherries are on theme, but the browned butter keeps it comforting year round.
- Portioning, cut into modest squares for tastings or larger slices for more substantial dessert servings, depending on the occasion and crowd.
FAQ
Conclusion
This cake stands out for its combination of pillowy enriched dough, nutty browned butter accents, and bright cherry preserves that keep each bite lively. Give it a try because its forgiving, crowd friendly, and offers a comforting layered experience that showcases simple techniques. I hope you enjoy making and sharing Cherry Swedish Flop, and that it becomes a go to for moments when you want something both nostalgic and impressive.
Cherry Swedish Flop
Equipment
- Stand mixer
- Paddle attachment
- 13 x 9-inch baking pan
- Parchment Paper
- Wire Rack
- Serrated Knife
Ingredients
- 1 cup (160 grams) warm whole milk (110°F/43°C to 115°F/46°C) Warm and foamy to activate yeast efficiently; provides liquid, fat, and structure to enrich the dough while maintaining proper fermentation temperature between 110°F/43°C and 115°F/46°C.
- 21/4 teaspoon s(7 grams) instant yeast Small and potent yeast granules used to leaven the dough quickly; ensures reliable rise and light crumb when dissolved into warm milk for optimal fermentation.
- 1/4 cup (55 grams) firmly packed light brown sugar Sweet and moist brown sugar adds caramel notes and tenderness; contributes moisture and helps brown the crust while feeding yeast for slight extra fermentation activity.
- 1/4 cup (57 grams) Browned Butter (recipe follows), melted and cooled slightly Rich browned butter melted and cooled slightly to add nutty depth; incorporates fat and flavor while retaining enough warmth to blend with eggs without cooking them.
- 2 large eggs (100 grams), room temperature Large eggs at room temperature used to enrich and bind the dough; provide structure, moisture, and leavening while improving texture and color of the finished bake.
- 1 teaspoon (3 grams) tightly packed orange zest Tightly packed orange zest provides concentrated citrus aromatic oils; brightens the flavor profile and balances sweetness with fresh, fragrant notes.
- 1 teaspoon (4 grams) vanilla extract Pure vanilla extract imparts warm, sweet aromatic complexity; enhances overall flavor harmony and rounds out the other sweet and fruity components.
- 2 cup s(250 grams) plus 2 teaspoons (6 grams) all-purpose flour, divided All-purpose flour measured in two parts supplies the bulk structure and gluten network; first portion hydrates and forms dough while the reserved bit adjusts consistency for kneading.
- 1/2 teaspoon (1.5 grams) kosher salt Kosher salt strengthens gluten and controls yeast fermentation; enhances flavor depth and balances sweetness throughout the dough and fillings.
- Browned Butter Streusel (recipe follows) Buttery streusel made with browned butter for topping and texture contrast; adds crunchy, caramelized crumble that complements the soft cake layers and cherries.
- Browned Butter Ermine Frosting (recipe follows) Ermine frosting prepared with browned butter creates a silky, less-sweet icing; provides creamy, stable spread with rich butter flavor and smooth mouthfeel for finishing.
- 11/4 cup s(370 grams) cherry preserves Thick cherry preserves supply sweet-tart fruit filling and moisture; spreads between layers to deliver concentrated cherry flavor and appealing fruit pockets through the bake.
- Garnish: confectioners’ sugar Confectioners’ sugar used as a light garnish to finish and brighten appearance; dusted over the top for a delicate sweetness and attractive presentation.
Instructions
- In the bowl of a stand mixer, whisk together warm milk and yeast by hand, and let stand until foamy, 5 to 10 minutes.: You should notice a gentle yeast smell and a layer of foam forming on the surface, which signals active yeast. The milk should feel warm but not hot when you touch it, and the foam will look bubbly and slightly creamy. This step develops the dough s lift potential, and without the foamy bloom your dough may be dense. A common mistake is using milk that is too hot, which kills the yeast; if you see no foam after 10 minutes, your yeast may be old or the liquid too cool.
- Add brown sugar, Browned Butter, eggs, orange zest, and vanilla to yeast mixture. Using the paddle attachment, beat at medium speed until combined. Add 2 cups (250 grams) flour and salt, and beat until a shiny, loose dough forms, 3 to 4 minutes, stopping to scrape sides and bottom of bowl.: As you add the light brown sugar , melted Browned Butter , large eggs , orange zest , and vanilla , the bowl will fill with rich, sweet aromas and a hint of toasted butter. The mixture should look cohesive and glossy before the flour goes in, and the scent of browned butter will deepen the overall profile. This combination builds flavor and fat distribution that make the crumb tender. Avoid adding hot butter, which can cook the eggs, and if the mixture looks curdled take a moment to whisk gently to recombine.
- Spray a medium bowl with cooking spray. Pour dough into bowl. Dust top of dough with remaining 2 teaspoons (6 grams) flour, and cover tightly with plastic wrap. Let rise in a warm, draft-free place (75°F/24°C) until doubled in size, about 30 minutes.: At medium speed the paddle will integrate ingredients into a smooth, slightly glossy batter. You will hear a consistent, even mixing sound and see no large streaks of egg or butter. Proper mixing ensures even hydration of the flour and consistent crumb. Overmixing at this stage can create too much gluten and a tougher texture, so stop once everything is harmonious.
- Spray a 13 x 9-inch baking pan with baking spray with flour. Line pan with parchment paper, letting excess extend over sides of pan. Transfer dough to prepared pan. Using heavily floured hands, press dough evenly into bottom of pan. Cover and let rise in a warm, draft-free place (75°F/24°C) until doubled in size, about 30 minutes.: As you incorporate the all-purpose flour and kosher salt , the dough will pull away slightly from the bowl and feel tacky but not sticky. It should look glossy from the fats and have faint strands when you lift the paddle. This texture sets the stage for a soft rise. If the dough seems too dry, you may have overmeasured flour; add a teaspoon of warm milk. If it becomes overly elastic and tight, you ve likely overworked it.
- Preheat oven to 350°F (180°C).: The greased bowl will protect the dough during its first rise and make removal effortless. After transferring the dough, the surface should glisten slightly where it touches the oil. Use enough spray to prevent sticking, but not so much that it pools. If the dough clings stubbornly to the bowl later you may have missed spots, so scrape carefully during transfer.
- Sprinkle dough evenly with Browned Butter Streusel.: The dough will slump into the bowl and present a smooth top. It should feel pillowy when gently pressed, springing back slowly. This relaxation helps the gluten relax, making it easier to shape later. If the dough resists stretching, give it a few more minutes to relax before handling.
- Bake until edges start to brown, 25 to 30 minutes. Let cool completely in pan on a wire rack.: The light dusting prevents surface tackiness and the plastic wrap traps moisture for a consistent rise. The top will develop a faint dry skin that keeps it from sticking to the wrap. Ensure the plastic is snug to avoid drafts. If you leave it uncovered the surface can dry out and form a crust, which inhibits proper expansion.
- Using excess parchment as handles, remove cooled cake from pan. Using a serrated knife, cut cake in half horizontally. Spread Browned Butter Ermine Frosting onto bottom half of cake; spread preserves on top of frosting. Top with top half of cake, and refrigerate for at least 30 minutes. Garnish with confectioners’ sugar, if desired.: You want the dough to visibly double and feel aerated, with tiny bubbles beneath the surface. It should feel soft and slightly jiggly when nudged. Proper rising builds flavor and lightness; rushing it will produce a tight crumb, while an overlong rise can collapse. If your kitchen is cool, place the bowl in an oven with just the light on to approximate the target temperature.
- Spray a 13 x 9-inch baking pan with baking spray with flour: The prepared pan and parchment make for an easy release after baking. The spray with flour adds slight traction for the dough to grip while rising. Line with parchment leaving an overhang to lift the cake easily later. If you skip the parchment the cake can stick to the pan and tear when removed.
- Line pan with parchment paper, letting excess extend over sides of pan: The parchment overhang becomes your handle for lifting the cooled cake intact. Ensure the paper lies flat without wrinkles to avoid uneven baking marks. This step makes trimming and slicing neater. Not using parchment often leads to a messy extraction.
- Transfer dough to prepared pan: Gently press the slack dough into the lined pan so it spreads evenly to all corners. You should see an even surface that will rise uniformly. If the dough is unevenly distributed it will bake inconsistently, leaving thin and thick areas. Take time to coax it into corners with lightly floured hands to avoid tearing the dough.
- Using heavily floured hands, press dough evenly into bottom of pan: The flour prevents sticking and allows you to smooth the surface while preserving the dough s airiness. Press to an even thickness so the cake bakes uniformly. If you press too hard you ll squeeze out too much air, making the final cake denser. Keep hands floured and use gentle, confident motions.
- Cover and let rise in a warm, draft-free place (75°F/24°C) until doubled in size, about 30 minutes: The second rise puffs the dough to fill the pan and creates a tender interior. You ll notice the dough reach the edges and feel light to the touch. This rise is essential for a soft final texture. Avoid moving the pan during this time, or the structure can deflate.
- Preheat oven to 350°F (180°C): The oven should reach the correct temperature so the streusel toasts and the cake sets properly. A fully preheated oven ensures even browning and prevents the center from taking too long to cook. If you don t preheat, the cake can bake unevenly, resulting in an underdone center or overly browned edges.
- Sprinkle dough evenly with Browned Butter Streusel: The streusel should be distributed in a thin, even layer so it crisps without burning. As it bakes it will release a warm, nutty smell and form golden pockets of crunch. Too thick a layer can insulate the cake and prevent even baking; too sparse and you lose the intended contrast.
- Bake until edges start to brown, 25 to 30 minutes: Watch for the edges to take on a light golden color and the streusel to smell toasty; the center should feel set when gently pressed. A toothpick inserted near the center should come out mostly clean. Overbaking will dry the cake and make the streusel taste bitter, so check a few minutes early if your oven runs hot.
- Let cool completely in pan on a wire rack: Cooling in the pan helps the cake settle and prevents the preserves from running. The cake will release steam and the surface will firm up; patience here makes assembly neater. Trying to slice when warm often leads to a collapsed middle and messy filling.
- Using excess parchment as handles, remove cooled cake from pan: Lift it gently by the overhang so the cake stays intact. You ll notice the bottom is firm and the streusel set. This handling maintains the cake s shape for slicing and filling. If the cake sticks, slide a thin spatula under the parchment before lifting to avoid tearing.
- Using a serrated knife, cut cake in half horizontally: A long serrated knife produces a clean, even cut without crushing the crumb. Saw gently with steady strokes while supporting the top with your other hand. Visual cues are a straight cut line and minimal crumbs. Rushing the cut will compress the cake and create uneven layers.
- Spread Browned Butter Ermine Frosting onto bottom half of cake; spread preserves on top of frosting: The frosting should feel silky and spread with a glossy finish, and the preserves will add a jewel like layer that is slightly tacky. Apply the frosting first so the preserves sit on a creamy base, preventing direct contact with the cake which could make it soggy. If you spread while the frosting is warm it can slip out from between the layers, so make sure it is cool and stable.
- Top with top half of cake, and refrigerate for at least 30 minutes: Chilling helps the layers set, making slicing clean and letting flavors meld. You will see the frosting firm slightly and the preserves settle. Refrigeration is vital for neat presentation. If you skip chilling the filling may ooze when sliced, producing messy pieces.
- Garnish with confectioners sugar, if desired: A light dusting of confectioners sugar adds a pretty finishing touch and subtle sweetness. Use a fine sieve to dust evenly and avoid clumping. Be mindful of humidity; in moist conditions the sugar can dissolve and lose its visual appeal.
Notes
- Swap the preserves sparingly, try a slightly tarter cherry preserve or one with whole fruit pieces to add texture and a brighter contrast against the browned butter notes.
- Toast the streusel additions, if your streusel includes nuts, toast them first to amplify the nutty aroma and ensure even crunch throughout the cake.
- Make ahead strategy, bake and cool the cake a day ahead, then assemble and chill the next day for a rested flavor and cleaner slices when serving to guests.
- Adjust sweetness mindfully, if your cherry preserves are very sweet choose a tangier jar or reduce the frostings sugar slightly to maintain balance.
- Presentation tip, dust with confectioners sugar just before serving to keep the topping bright and prevent moisture from dulling the finish.