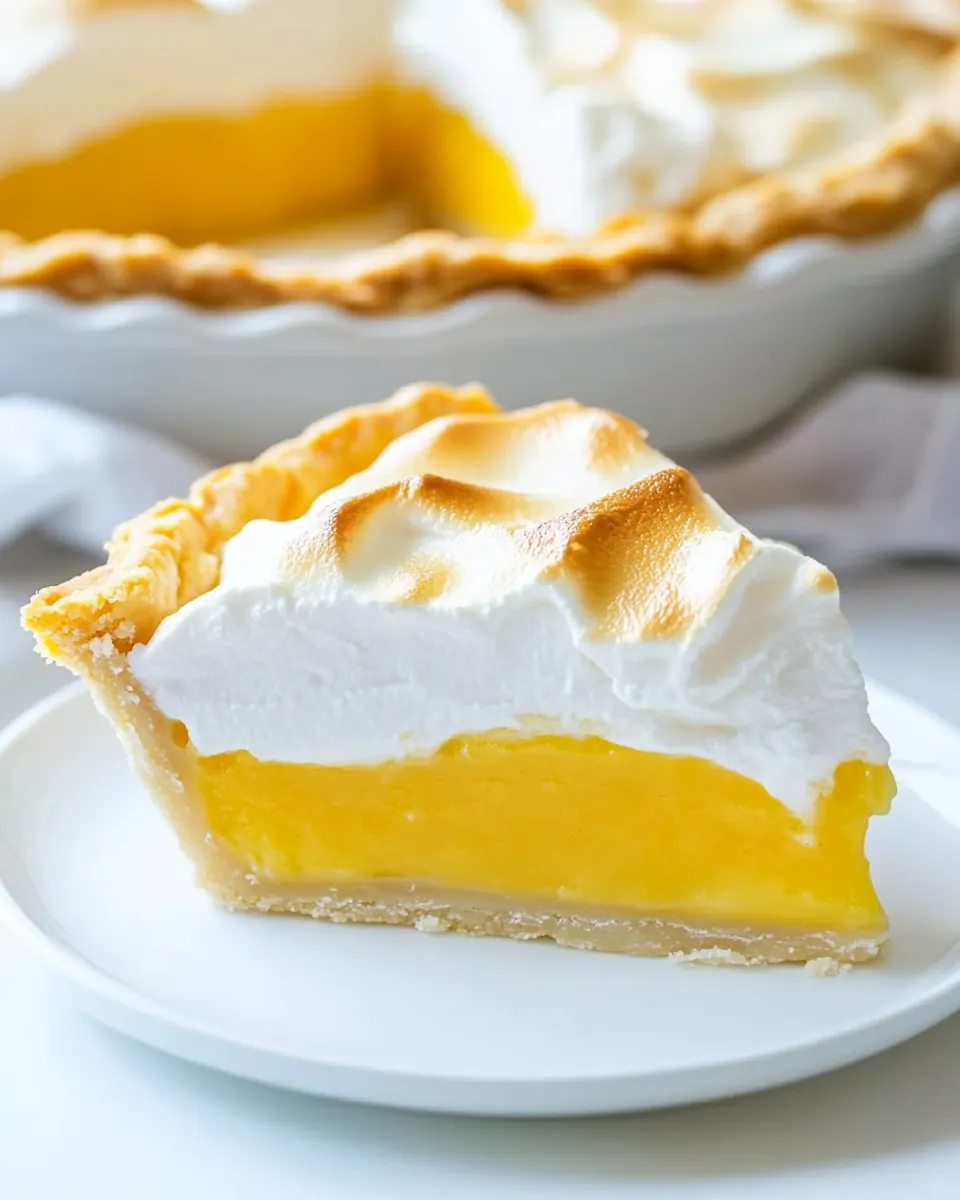
Lemon Meringue Pie
Lemon Meringue Pie was the centerpiece of my first true dessert success, a dish that taught me patience and rewarded it with bright, tangy filling and pillowy peaks.
I remember the afternoon clearly, the kitchen warm from the oven and the air filled with the scent of fresh lemon and butter as I nervously watched the meringue brown. I had borrowed a family trick for blind baking the crust, and between my jittery hands and a trusty rolling pin the pie slowly came together. Friends arrived while the pie chilled, and I loved watching their faces at first forkful as the crisp crust met the satin filling and the cloudlike egg whites on top.
Over time I learned how small details change everything. Zesting a lemon right into the filling, tempering the egg yolks carefully, and coaxing stiff peaks from egg whites make the difference between fine and unforgettable. This pie taught me to trust simple techniques, and it still makes me proud whenever I pull one from the oven.
Recipe Snapshot
2 hr 20 mins
80 mins
60 mins
Hard
320 kcal
American
Gluten-Free, Low FODMAP
Desserts
Electric hand mixer, Stand mixer with whisk, Hand mixer
What We Adore About This Lemon Meringue Pie
Bright, Balanced Flavor
I adore how Lemon Meringue Pie balances tart lemon with sweet, airy meringue. The filling’s acidity wakes up the palate, while the sugar and butter round it out, creating a flavor that is lively yet comforting. I lean on this contrast when I serve slices to guests who think they do not like citrus desserts, because the combination always converts a few skeptics.
Texture Play That Charms
The contrast of a flaky pie crust, silky curd, and marshmallowy egg whites keeps each bite interesting. I love how the crust gives a delicate crack as the fork slices through, followed by the smooth filling and the lofty peaks of meringue. That textural variety is part of why I return to this recipe again and again.
Technique That Rewards Patience
Making Lemon Meringue Pie forces you to slow down, from blind baking to tempering egg yolks. I enjoy that ritual; it trains your senses. When you whisk until the filling thickens and watch the meringue form glossy peaks, you get immediate feedback for your care. Those moments teach you to read visual and tactile cues, which makes you a better baker overall.
Flexible for Gatherings
I find this pie elegant enough for celebrations yet relaxed enough for a weekend tea. It travels well if chilled properly, and you can scale the approach to share with family or a small crowd. That versatility means I often pick it when I want something special that is still achievable on a Sunday afternoon.
Showstopping Finish
There is something theatrical about torching or oven-browning the meringue, it turns simple ingredients into a centerpiece. I often watch guests lean in as the meringue turns golden, and that moment of collective anticipation makes serving this pie feel like a little event every time.
What Goes Into Lemon Meringue Pie
Good baking begins with respectful ingredients, and for Lemon Meringue Pie each player matters. The crust forms the crisp foundation, the filling delivers the bright citrus personality, and the meringue crowns the dessert with sweetness and lift. Together they create contrast in flavor and texture, which is what makes this pie so addictive.
- Two perfect pie crusts: Provide a sturdy, flaky base and top for the pie, supporting the lemon filling and baking to a golden brown; chill before rolling to prevent shrinking and blind-bake if recipe requires to avoid a soggy bottom.
- 11/3 cups water: Add needed liquid for dissolving starch and sugar and for cooking the lemon curd, helping to control consistency and prevent curd from becoming too thick or concentrated during heating.
- 1/4 cup lemon juice fresh: Offer bright acidic flavor and aromatic freshness that balances sweetness, while reacting with egg yolks and sugar to set the lemon curd and contribute essential citrus aroma.
- 5 tablespoon corn starch: Thicken the lemon mixture when heated, creating a smooth, glossy curd by forming a gel with the liquid; whisk thoroughly to avoid lumps and cook until translucent.
- 11/3 cups sugar: Provide primary sweetness to the curd, helping to balance lemon acidity and contributing to texture; dissolve fully during cooking to prevent graininess in the filling.
- 4 egg yolks Save the whites for the meringue: Enrich the curd with fat and protein to create a silky texture and contribute to thickening as the yolks coagulate; temper slowly into hot liquid to avoid scrambling.
- 1 tablespoon lemon zest: Impart concentrated lemon oil and intense citrus aroma that enhances flavor depth; finely grate zest and incorporate to distribute fragrance evenly throughout the curd.
- 2 tablespoon unsalted butter softened: Add richness and smoothness to the curd, rounding out sharp citrus flavors and improving mouthfeel; cut into small pieces and whisk in until fully melted for even texture.
- 4 egg whites use up to 7 (with 1/2 teaspoon cream of tartar) for higher meringue: Whip into stiff, glossy peaks to form the meringue topping that provides light, airy contrast and insulates the filling during baking; adjust number used to achieve desired volume and stability.
- 1/4 teaspoon cream of tartar: Stabilize whipped egg whites to help them hold volume and produce a firmer, longer-lasting meringue; sprinkle in early while whipping to improve texture and prevent weeping.
- 2/3 cups sugar: Sweeten and stabilize the meringue while contributing structure and sheen; gradually add and fully dissolve to achieve a smooth, glossy finish that browns attractively when baked.
Lemon Meringue Pie Instructions
These instructions walk you from a rolled crust to a chilled, set pie. I like to keep my mise en place ready so each step flows, because timing matters once the filling and meringue come together. Read each step and listen to the sensory cues as you go.
- Roll out your pie dough to a 12-inch diameter. Roll it up with your rolling pin and carefully place in a 9-inch pie dish. Use your fingers to press the dough along the sides of the dish. Optional (but recommended): Roll out the 2 nd dough and use a pizza cutter to cut strips to place along the top of the dish. Pinch the dough together, and use your index finger, and your thumb and index finger from your other hand to crimp the edges.: Roll out the 2 nd dough and use a pizza cutter to cut strips to place along the top of the dish. Pinch the dough together, and use your index finger, and your thumb and index finger from your other hand to crimp the edges : You will notice the feel of cool dough as you roll it, slightly tacky yet smooth; that texture tells you it is properly chilled. Pressing the dough into the dish with your fingertips ensures there are no large air pockets, which can cause uneven baking, and crimping the rim creates an attractive seal so filling cannot escape. A common mistake is overworking the dough, which warms the butter inside and causes shrinkage, so handle it gently and return it to the fridge if it softens.
- Place in the refrigerator for a minimum of 30 minutes, or up to 3 hours. Preheat the oven to 400°F.: Chilling firms the butter and relaxes the gluten, which reduces shrinkage during blind baking; you will feel a firmer, less pliable crust when it is properly chilled. The oven heat will produce steam that helps set the crust structure quickly, so preheating is important. A typical error is skipping the chill time, which often leads to a misshapen, shrunken crust.
- Remove from the fridge, and either add pie weights to the dough, or add parchment paper and fill with dried beans, rice, or even pennies. Bake for 17 minutes.: As the crust begins to bake you should see edges turning slightly golden and the center losing its raw sheen; the weights prevent bubbling and preserve shape. Using parchment and beans is a tried method to keep the base flat while the fat in the dough melts. Avoid leaving the crust unweighted, because it will form large bubbles that break the integrity of the shell.
- Remove from the oven and carefully remove the pie weights or the parchment with the beans in it. Use a fork to puncture holes all over the bottom of the pie crust. Place back in the oven and bake until lightly browned, another 10 minutes. Remove and set aside.: When you lift out the weights the crust will smell toasty and you may see a steam plume escape; pricking with a fork allows trapped steam to escape and ensures even browning. The second bake sets the bottom fully so it does not become soggy when the filling is added. A common pitfall is removing it too soon, leaving a doughy center, so look for a pale golden tone across the bottom.
- Place the egg yolks into a small-medium bowl. Set aside.: The egg yolks will feel thick and glossy as you whisk them; having them in a bowl at room temperature helps them incorporate when tempered, minimizing the risk of curdling. One frequent mistake is adding hot mixture too quickly to yolks, which causes scrambling, so always temper slowly.
- In a medium-sized pan, add the water and lemon juice. Stir in the corn starch and whisk until fully dissolved. Stir in the sugar and whisk until dissolved.: As you whisk the liquid it should become smooth and slightly opaque as the corn starch hydrates; this step prevents lumps and gives the curd a uniform texture. The sugar will dissolve into the liquid, reducing grittiness and ensuring a glossy finish when cooked. If you fail to dissolve the starch fully, you will end up with a grainy filling.
- Turn the heat to medium-high and whisk continuously until the mixture comes to a boil. Simmer for exactly 1 minute, whisking constantly. The mixture will be thick.: You will hear a gentle roar as the mixture hits a boil and see it transform from loose to thick and glossy; that minute of simmering activates the starch fully, giving body to the curd. Constant whisking prevents scorching on the pan bottom and keeps the texture smooth. A common error is undercooking the starch, leaving the filling too loose to set properly.
- Remove from the heat and ladle about 1/3 of the corn starch mixture into the egg yolks, whisking constantly (this is 'tempering' the eggs): As you add the hot liquid in a slow stream you will feel the bowl warm and the yolks slowly loosen into a silky emulsion; this step equalizes temperatures so the yolks do not seize into scrambled bits. If you rush and pour too much, you will end up with cooked curdled yolks.
- Add the tempered egg yolks back into the pan and place back on the stove over medium heat. Whisking often, bring to a simmer and cook for exactly 1 minute. You should see big crater-like bubbles appearing on the surface.: Returning to heat integrates the yolks and activates the proteins that thicken the curd further; visually you want large, slow bubbles breaking the surface, which indicate proper simmer. The aroma will shift to a more concentrated citrus, and the texture will feel richer on the spoon. A usual mistake is not whisking often enough, which can lead to uneven cooking and lumps.
- Remove from the heat and stir in the butter and lemon zest. Pour into the pie crust.: Off heat, the unsalted butter will melt into the hot curd, giving it a glossy sheen and a silkier mouthfeel, while the lemon zest releases fragrant oils that brighten flavor. Pouring while warm helps the filling settle evenly into the shell. If the filling is too hot when poured it can cause some separation with the crust, so allow it to cool briefly if it seems aggressively bubbly.
- Turn your oven to 375°F.: Raising the oven temperature prepares for baking the meringue, producing gentle browning on the peaks without overbaking the filling. The change in heat will be noticeable as the oven settles into the new temperature, and having it ready prevents unnecessary waiting with the assembled pie. Forgetting to preheat to the new temperature can lead to uneven browning of the meringue.
- In a large bowl, whisk (preferably with an electric hand mixer) the egg whites with the cream of tartar until foamy. Add the sugar and keep mixing on high until stiff peaks form.: The egg whites will begin as a glossy, translucent foam and gradually turn pearly and stiff as you add the sugar . The cream of tartar gives stability and helps the peaks hold; watch for glossy, firm peaks that stand upright without drooping. A common error is adding sugar too quickly, which can deflate the whites and produce a grainy meringue.
- Transfer the meringue on top of the warm lemon filling and gently spread, covering the pie completely, using a small knife or spatula to press the meringue against the sides of the crust. Press the back of a spoon in various places across the meringue and gently lift up, creating little peaks.: The warm filling helps the meringue adhere to the edge, which creates a seal that reduces weeping; when you create peaks they will brown attractively in the oven, giving visual drama. Use a light touch so you do not deflate the meringue, and ensure the meringue touches the crust around the edge. A mistake is leaving gaps between meringue and crust, which increases the chance the meringue will pull away as it chills.
- Bake the pie for 10 minutes, just until the tops of the meringue are starting to brown. Keep an eye on it, and don't let it burn!: During this short bake watch the peaks transform from pale to a warm golden hue and listen for a faint crackle as the surface dries slightly; that visual cue means your meringue is set. Browning adds flavor through caramelization of the sugar, enhancing the aroma. Leaving it in too long will scorch the tops and impart bitter notes, so monitor closely.
- Chill the pie for 4 hours before serving.: As the pie cools the filling firms to a sliceable consistency and the meringue stabilizes; chilling also reduces the likelihood of excessive weeping. You will feel a sense of accomplishment as the pie sets, and chilling gives you time to prepare a pretty serving plate. Cutting too early is a common mistake because the filling will be too soft and may run when sliced.
Making Adjustments
This section helps you tailor Lemon Meringue Pie to your needs while preserving the essentials. Small changes in technique or timing can make a big difference, and the tips below expand on the notes and advice I have collected through many bakes.
- Reinforce edges: Use scraps from the second pie crust to reinforce edges, which helps prevent shrinkage during blind baking; do not overbuild the edge or the top may become heavy and crack when sliced.
- Stabilize meringue: If you live in a humid climate, add the stated cream of tartar to help the egg whites hold peaks longer and reduce weeping, but avoid overbeating which can dry the meringue.
- Tempering tempo: When you temper the egg yolks, add the hot mixture slowly and whisk constantly to ensure a silky curd and prevent curdling.
- Sugar integration: Dissolve the sugar into the lemon liquid before boiling so the filling is smooth and glossy, and you avoid a gritty texture.
- Monitor the oven: Browning meringue goes from perfect to burnt quickly; watch during those final minutes and rotate the pie if your oven heats unevenly.
- Storage: Keep leftovers chilled in the fridge for up to one week, but expect the meringue to soften over time; for best presentation, serve within 24 hours.
What Complements This Lemon Meringue Pie
Lemon Meringue Pie pairs wonderfully with light accompaniments that let its citrus character shine. I like to think about texture and temperature when planning what to serve alongside each slice, and the list below reflects combinations that have worked for me at brunches, holiday tables, and casual dinners.
- Light whipped cream: A small dollop softens the tartness without competing with the meringue.
- Fresh berries: A few strawberries or raspberries add a fresh, slightly tart contrast that complements the lemon.
- Mint sprigs: A sprig of fresh mint provides a fragrant accent and a pretty garnish for each slice.
- Coffee or tea: Serve with a bright coffee or a cup of black tea for balance during dessert service.
- Occasions: This pie suits spring gatherings, brunches, and celebratory meals; it also works excellently for a special weekend dessert.
- Storage tips: Keep the pie refrigerated, covered loosely to preserve the meringue texture, and consume within one week for best quality.
- Serving temperature: Serve chilled but not fridge cold so the filling is set yet still creamy on the tongue.
FAQ
Conclusion
Lemon Meringue Pie stands out because it combines contrasting textures and bright citrus flavor in a way that feels both elegant and approachable. It rewards careful technique, from blind baking the crust to tempering the yolks and coaxing glossy peaks from the whites, and the result is a dessert that looks special and tastes celebratory. Give this recipe a try on a weekend when you can savor the process, and share slices with friends who will appreciate the balance of tartness and sweetness.
Lemon Meringue Pie
Equipment
- electric hand mixer
- Stand mixer with whisk
- Hand Mixer
Ingredients
- Two perfect pie crusts Provide a sturdy, flaky base and top for the pie, supporting the lemon filling and baking to a golden brown; chill before rolling to prevent shrinking and blind-bake if recipe requires to avoid a soggy bottom.
- 11/3 cups water Add needed liquid for dissolving starch and sugar and for cooking the lemon curd, helping to control consistency and prevent curd from becoming too thick or concentrated during heating.
- 1/4 cup lemon juice fresh Offer bright acidic flavor and aromatic freshness that balances sweetness, while reacting with egg yolks and sugar to set the lemon curd and contribute essential citrus aroma.
- 5 tablespoon corn starch Thicken the lemon mixture when heated, creating a smooth, glossy curd by forming a gel with the liquid; whisk thoroughly to avoid lumps and cook until translucent.
- 11/3 cups sugar Provide primary sweetness to the curd, helping to balance lemon acidity and contributing to texture; dissolve fully during cooking to prevent graininess in the filling.
- 4 egg yolks Save the whites for the meringue Enrich the curd with fat and protein to create a silky texture and contribute to thickening as the yolks coagulate; temper slowly into hot liquid to avoid scrambling.
- 1 tablespoon lemon zest Impart concentrated lemon oil and intense citrus aroma that enhances flavor depth; finely grate zest and incorporate to distribute fragrance evenly throughout the curd.
- 2 tablespoon unsalted butter softened Add richness and smoothness to the curd, rounding out sharp citrus flavors and improving mouthfeel; cut into small pieces and whisk in until fully melted for even texture.
- 4 egg whites use up to 7 (with 1/2 teaspoon cream of tartar) for higher meringue Whip into stiff, glossy peaks to form the meringue topping that provides light, airy contrast and insulates the filling during baking; adjust number used to achieve desired volume and stability.
- 1/4 teaspoon cream of tartar Stabilize whipped egg whites to help them hold volume and produce a firmer, longer-lasting meringue; sprinkle in early while whipping to improve texture and prevent weeping.
- 2/3 cups sugar Sweeten and stabilize the meringue while contributing structure and sheen; gradually add and fully dissolve to achieve a smooth, glossy finish that browns attractively when baked.
Instructions
- Roll out your pie dough to a 12-inch diameter. Roll it up with your rolling pin and carefully place in a 9-inch pie dish. Use your fingers to press the dough along the sides of the dish. Optional (but recommended): Roll out the 2 nd dough and use a pizza cutter to cut strips to place along the top of the dish. Pinch the dough together, and use your index finger, and your thumb and index finger from your other hand to crimp the edges.: Roll out the 2 nd dough and use a pizza cutter to cut strips to place along the top of the dish. Pinch the dough together, and use your index finger, and your thumb and index finger from your other hand to crimp the edges : You will notice the feel of cool dough as you roll it, slightly tacky yet smooth; that texture tells you it is properly chilled. Pressing the dough into the dish with your fingertips ensures there are no large air pockets, which can cause uneven baking, and crimping the rim creates an attractive seal so filling cannot escape. A common mistake is overworking the dough, which warms the butter inside and causes shrinkage, so handle it gently and return it to the fridge if it softens.
- Place in the refrigerator for a minimum of 30 minutes, or up to 3 hours. Preheat the oven to 400°F.: Chilling firms the butter and relaxes the gluten, which reduces shrinkage during blind baking; you will feel a firmer, less pliable crust when it is properly chilled. The oven heat will produce steam that helps set the crust structure quickly, so preheating is important. A typical error is skipping the chill time, which often leads to a misshapen, shrunken crust.
- Remove from the fridge, and either add pie weights to the dough, or add parchment paper and fill with dried beans, rice, or even pennies. Bake for 17 minutes.: As the crust begins to bake you should see edges turning slightly golden and the center losing its raw sheen; the weights prevent bubbling and preserve shape. Using parchment and beans is a tried method to keep the base flat while the fat in the dough melts. Avoid leaving the crust unweighted, because it will form large bubbles that break the integrity of the shell.
- Remove from the oven and carefully remove the pie weights or the parchment with the beans in it. Use a fork to puncture holes all over the bottom of the pie crust. Place back in the oven and bake until lightly browned, another 10 minutes. Remove and set aside.: When you lift out the weights the crust will smell toasty and you may see a steam plume escape; pricking with a fork allows trapped steam to escape and ensures even browning. The second bake sets the bottom fully so it does not become soggy when the filling is added. A common pitfall is removing it too soon, leaving a doughy center, so look for a pale golden tone across the bottom.
- Place the egg yolks into a small-medium bowl. Set aside.: The egg yolks will feel thick and glossy as you whisk them; having them in a bowl at room temperature helps them incorporate when tempered, minimizing the risk of curdling. One frequent mistake is adding hot mixture too quickly to yolks, which causes scrambling, so always temper slowly.
- In a medium-sized pan, add the water and lemon juice. Stir in the corn starch and whisk until fully dissolved. Stir in the sugar and whisk until dissolved.: As you whisk the liquid it should become smooth and slightly opaque as the corn starch hydrates; this step prevents lumps and gives the curd a uniform texture. The sugar will dissolve into the liquid, reducing grittiness and ensuring a glossy finish when cooked. If you fail to dissolve the starch fully, you will end up with a grainy filling.
- Turn the heat to medium-high and whisk continuously until the mixture comes to a boil. Simmer for exactly 1 minute, whisking constantly. The mixture will be thick.: You will hear a gentle roar as the mixture hits a boil and see it transform from loose to thick and glossy; that minute of simmering activates the starch fully, giving body to the curd. Constant whisking prevents scorching on the pan bottom and keeps the texture smooth. A common error is undercooking the starch, leaving the filling too loose to set properly.
- Remove from the heat and ladle about 1/3 of the corn starch mixture into the egg yolks, whisking constantly (this is 'tempering' the eggs): As you add the hot liquid in a slow stream you will feel the bowl warm and the yolks slowly loosen into a silky emulsion; this step equalizes temperatures so the yolks do not seize into scrambled bits. If you rush and pour too much, you will end up with cooked curdled yolks.
- Add the tempered egg yolks back into the pan and place back on the stove over medium heat. Whisking often, bring to a simmer and cook for exactly 1 minute. You should see big crater-like bubbles appearing on the surface.: Returning to heat integrates the yolks and activates the proteins that thicken the curd further; visually you want large, slow bubbles breaking the surface, which indicate proper simmer. The aroma will shift to a more concentrated citrus, and the texture will feel richer on the spoon. A usual mistake is not whisking often enough, which can lead to uneven cooking and lumps.
- Remove from the heat and stir in the butter and lemon zest. Pour into the pie crust.: Off heat, the unsalted butter will melt into the hot curd, giving it a glossy sheen and a silkier mouthfeel, while the lemon zest releases fragrant oils that brighten flavor. Pouring while warm helps the filling settle evenly into the shell. If the filling is too hot when poured it can cause some separation with the crust, so allow it to cool briefly if it seems aggressively bubbly.
- Turn your oven to 375°F.: Raising the oven temperature prepares for baking the meringue, producing gentle browning on the peaks without overbaking the filling. The change in heat will be noticeable as the oven settles into the new temperature, and having it ready prevents unnecessary waiting with the assembled pie. Forgetting to preheat to the new temperature can lead to uneven browning of the meringue.
- In a large bowl, whisk (preferably with an electric hand mixer) the egg whites with the cream of tartar until foamy. Add the sugar and keep mixing on high until stiff peaks form.: The egg whites will begin as a glossy, translucent foam and gradually turn pearly and stiff as you add the sugar . The cream of tartar gives stability and helps the peaks hold; watch for glossy, firm peaks that stand upright without drooping. A common error is adding sugar too quickly, which can deflate the whites and produce a grainy meringue.
- Transfer the meringue on top of the warm lemon filling and gently spread, covering the pie completely, using a small knife or spatula to press the meringue against the sides of the crust. Press the back of a spoon in various places across the meringue and gently lift up, creating little peaks.: The warm filling helps the meringue adhere to the edge, which creates a seal that reduces weeping; when you create peaks they will brown attractively in the oven, giving visual drama. Use a light touch so you do not deflate the meringue, and ensure the meringue touches the crust around the edge. A mistake is leaving gaps between meringue and crust, which increases the chance the meringue will pull away as it chills.
- Bake the pie for 10 minutes, just until the tops of the meringue are starting to brown. Keep an eye on it, and don't let it burn!: During this short bake watch the peaks transform from pale to a warm golden hue and listen for a faint crackle as the surface dries slightly; that visual cue means your meringue is set. Browning adds flavor through caramelization of the sugar, enhancing the aroma. Leaving it in too long will scorch the tops and impart bitter notes, so monitor closely.
- Chill the pie for 4 hours before serving.: As the pie cools the filling firms to a sliceable consistency and the meringue stabilizes; chilling also reduces the likelihood of excessive weeping. You will feel a sense of accomplishment as the pie sets, and chilling gives you time to prepare a pretty serving plate. Cutting too early is a common mistake because the filling will be too soft and may run when sliced.
Notes
- Reinforce edges: Use scraps from the second pie crust to reinforce edges, which helps prevent shrinkage during blind baking; do not overbuild the edge or the top may become heavy and crack when sliced.
- Stabilize meringue: If you live in a humid climate, add the stated cream of tartar to help the egg whites hold peaks longer and reduce weeping, but avoid overbeating which can dry the meringue.
- Tempering tempo: When you temper the egg yolks, add the hot mixture slowly and whisk constantly to ensure a silky curd and prevent curdling.
- Sugar integration: Dissolve the sugar into the lemon liquid before boiling so the filling is smooth and glossy, and you avoid a gritty texture.
- Monitor the oven: Browning meringue goes from perfect to burnt quickly; watch during those final minutes and rotate the pie if your oven heats unevenly.
- Storage: Keep leftovers chilled in the fridge for up to one week, but expect the meringue to soften over time; for best presentation, serve within 24 hours.