
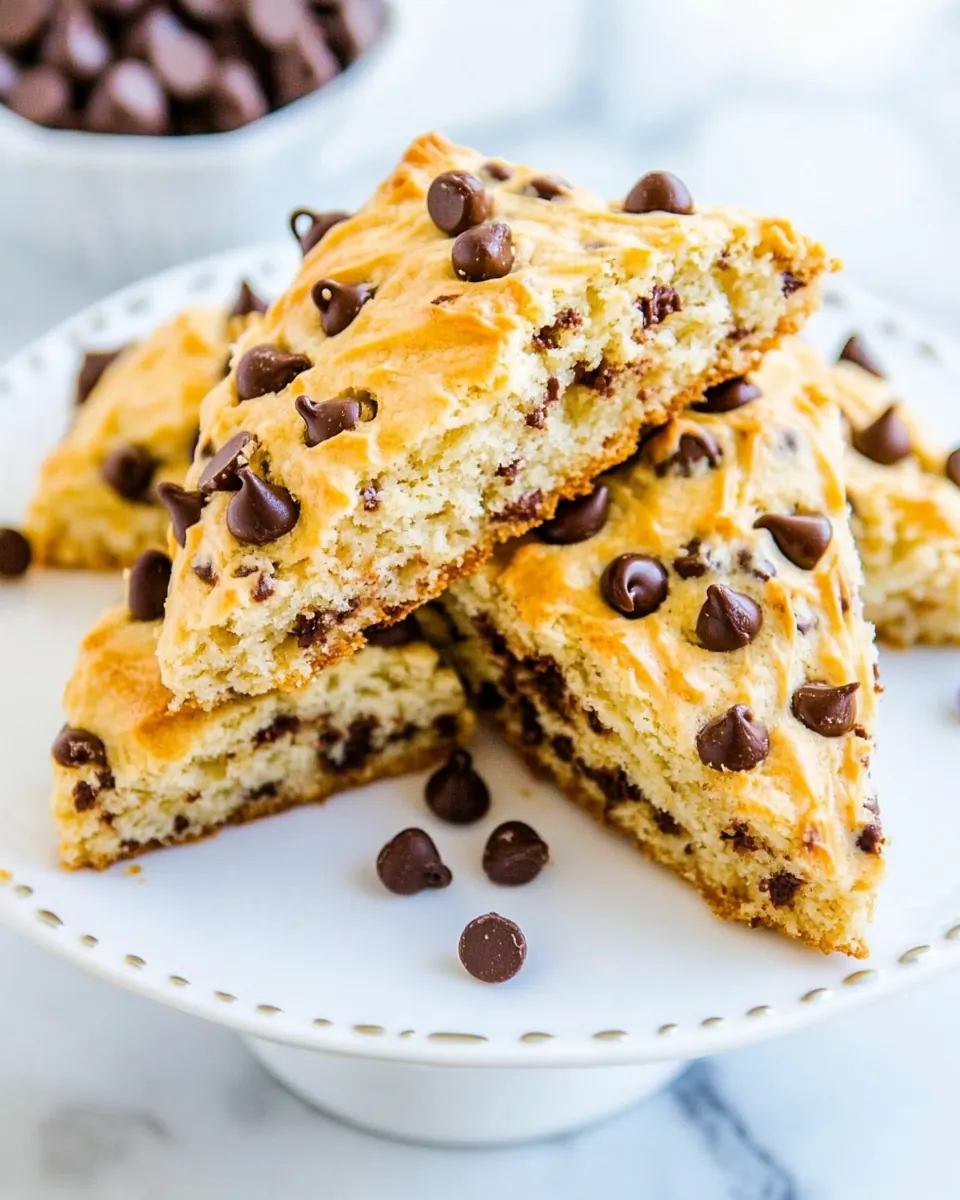
Peanut Butter Chocolate Chip Scones
Peanut Butter Chocolate Chip Scones arrived in my kitchen on a sleepy Saturday when I wanted something that felt indulgent but still cozy enough for a quiet morning with coffee.
I remember pressing the dough into a round on my counter, the cold butter yielding in small, cool lumps, and thinking how the combination of peanut butter and chocolate chips somehow reads like a childhood favorite grown up enough for brunch. The aroma that filled the kitchen as they baked was warm and nutty, with those first faint toasty notes that made me wander back to the oven every few minutes to peek. I like that these scones are slightly rustic, not perfected into uniform shapes, which makes them perfect for sharing with friends or tucking into a picnic basket. There is something comforting about handling the dough with your hands, feeling it come together, then watching the glaze set into glossy ribbons over the wedges. Over the years I have adapted small details, like using a touch of sour cream to give the crumb a tender, almost cakey bite while keeping the exterior bite just enough to hold up to a bold spread of glaze. If you love quick bakes that reward you with buttery flakiness and a hint of nostalgia, these are a go to in my recipe rotation. They are forgiving, fairly speedy to make, and they travel well, which is exactly why I reach for them when I want something that feels homemade but not fussy.
Recipe Snapshot
25 mins
10 mins
15 mins
Medium
250 kcal
American
Gluten-Free, Low FODMAP
Breakfast
Large Baking Sheet, Mixing Bowls, Wire Rack, Microwave Safe Bowl
The Appeal of This Peanut Butter Chocolate Chip Scones
Rich, familiar flavors that comfort
I adore how the pairing of peanut butter and chocolate chips evokes memory while tasting mature. The peanut butter lends a creamy, nutty backbone while the chocolate chips melt into little pockets of sweet contrast. I find that this combo hits a balance where neither element overpowers the other, and that harmony is why I reach for this recipe when I want a crowd pleaser.
Texture that surprises
The structure of these scones is what keeps me coming back. Using cold, cubed unsalted butter creates tender pockets within the crumb, giving a slightly flaky interior with a delicate, golden exterior. The slight chew from the peanut butter and the occasional melt of chocolate chips means every bite has variety, and that textural contrast is deeply satisfying.
Quick and approachable
It takes very little time to get these on a baking sheet, which is a huge selling point for busy mornings or last minute guests. The steps are straightforward, and the recipe is forgiving to small changes like adding a splash more sour cream if your dough feels too dry. I love recipes I can trust to perform even when life is hectic.
Customizable finish
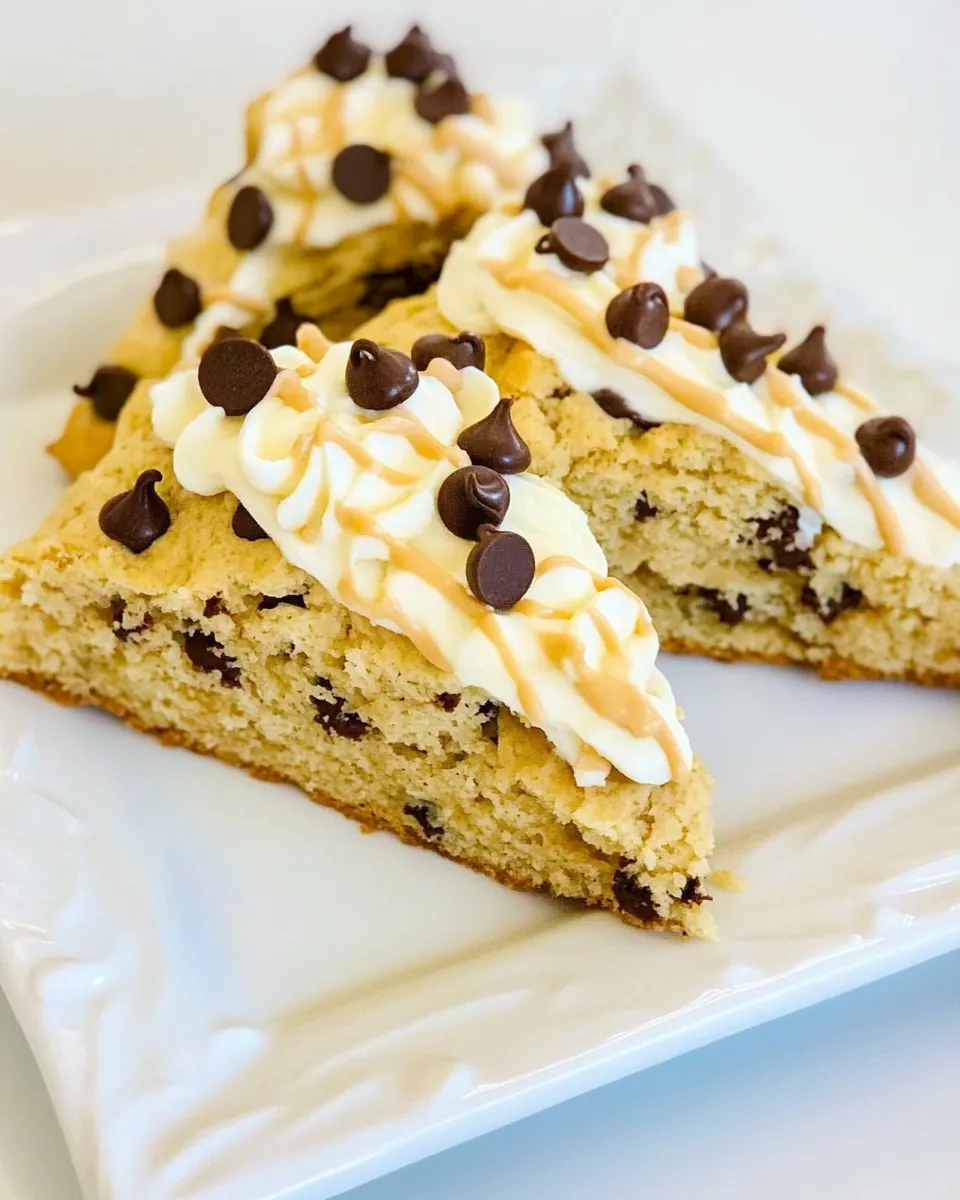
The glaze made from peanut butter and confectioners sugar can be drizzled or spread, and that finishing step transforms humble scones into something feeling a bit celebratory. I often vary the drizzle thickness depending on whether I’m serving them the same day or saving some for later. The glaze also stores well, which makes it easy to refresh scones after a day or two if needed.
Comfort food with picnic potential
These scones travel and store well, making them excellent for brunches, potlucks, or an afternoon treat. They are sturdy enough to pack, yet tender enough to feel special. I always appreciate recipes that can shift between everyday and occasion with minimal fuss.
Everything You Need for Peanut Butter Chocolate Chip Scones
These ingredients are intentionally simple but work in concert to create a scone that is both tender and richly flavored. The dry ingredients build structure, the unsalted butter creates flakiness, and the wet elements like egg, peanut butter, and sour cream add moisture and flavor. Chocolate chips are the joyful finish that melts into pockets of sweetness. Together they form a balanced batter that bakes into wedges with a crisp exterior and soft interior.
- 2 cups all-purpose flour: Provide structure and bulk to the scones by forming the dry base that holds other ingredients together; choose unbleached all-purpose flour for a tender crumb and reliable gluten development suitable for scone texture.
- 1/2 cup granulated sugar: Add sweetness and aid in browning while balancing flavors; granulated sugar also helps create a slight crispness on the exterior when baked.
- 1 tablespoon baking powder: Leaven the dough by releasing air when heated, giving scones lift and a light crumb; use fresh baking powder and distribute evenly through dry ingredients for consistent rise.
- pinch salt, and to taste (optional): Enhance and balance overall flavor by subtly amplifying sweetness and cutting richness; add to taste, especially if using salted butter or sweeter toppings.
- 1/2 cup unsalted butter, cold (1 stick): Contribute richness, flaky layers, and tender texture when cut into the flour; keep butter cold to create pockets of steam that produce a desirable crumb and light flakiness.
- 1 large egg: Bind ingredients together and add moisture while encouraging browning; beat lightly to incorporate air without overmixing for tender scones.
- 1/3 cup creamy peanut butter: Introduce creamy, nutty flavor and additional fat that enriches the dough; incorporate smoothly to complement chocolate chips and provide a peanut-forward profile.
- 1/4 cup sour cream, lite is okay; Greek yogurt may be substituted: Add moisture and tenderize the crumb while contributing slight tang that brightens the overall flavor; choose lite sour cream or a Greek yogurt substitute for similar acidity and texture.
- 2 teaspoons vanilla extract: Enhance aromatic complexity and round out sweetness with warm vanilla notes; stir into wet ingredients to distribute flavor evenly throughout the dough.
- 1 cup semi-sweet mini chocolate chips: Provide bursts of chocolate flavor and pleasant texture contrast throughout the scones; fold in gently to avoid overworking the dough and ensure even distribution.
- 1/2 cup creamy peanut butter: Offer a second addition of creamy, nutty richness for glazes or finishing touches; use for drizzling or mixing with confectioners’ sugar to intensify peanut flavor.
- 1 cup confectioners’ sugar: Create a smooth, sweet glaze when combined with peanut butter and liquid; sift confectioners’ sugar to avoid lumps and achieve a silky finish for drizzling.
- about 2 to 3 tablespoons milk or cream: Adjust glaze consistency and add richness to the icing; use milk or cream sparingly to reach desired thickness while contributing a bit of dairy flavor.
Instructions for Peanut Butter Chocolate Chip Scones
These directions are straightforward and comforting. The steps guide you from mixing the dry ingredients, cutting in cold butter, to shaping and baking wedges, then finishing with a glossy peanut butter glaze. Work on a lightly floured surface and keep the butter cold for the best texture.
- Preheat oven to 400 F. Line a baking sheet with a Silpat or parchment; set aside.: The kitchen will start to smell faintly warm even before the scones go in, and the high oven temperature is important so the exterior sets quickly creating a golden crust while the interior remains tender. If your oven runs hot, rotate the tray midway to prevent dark bottoms. A common mistake is not preheating fully, which can cause uneven rise and denser scones.
- Scones– In a large bowl, add 2 cups flour, granulated sugar, baking powder, optional salt, and whisk to combine.: As you whisk these dry components, breathe in the neutral, slightly sweet scent of flour and sugar mixing. Combining them first ensures even distribution of leavening so every wedge rises consistently. If you skip this step or mix unevenly, you may get pockets of baking powder that create uneven holes in the crumb.
- Add the butter, and with a pastry cutter or two forks, cut the butter in. You can use a food processor, but I find not having to wash it is a big time-saver. I smoosh the butter with forks and when it’s the size of large marbles, I use my hands and knead it in. It will feel like semi-wet, cool sand. Some larger pea-sized butter clumps are okay; set bowl aside.: You will feel the cold butter breaking into pea and marble sized pieces, and the mixture will resemble coarse sand when done. The visual cue is small, dispersed flecks of butter; these melt during baking to create flaky layers. Avoid overworking until the butter becomes too soft, which will make the scones dense rather than flaky.
- In a small bowl, add the egg, 1/3 cup peanut butter, sour cream, vanilla, and whisk to combine until smooth.: The wet mix will look glossy and homogeneous, with a nutty aroma from the peanut butter . Whisking incorporates air and helps the wet ingredients blend into the flour without large streaks. If the mixture is lumpy or separated, whisk a bit longer; lumps can lead to uneven pockets in the dough.
- Pour wet mixture over dry, and fold until just combined with a soft-tipped spatula; don’t overmix or scones will be tough. If dough seems very crumbly or isn’t coming together, add sour cream, 1 tablespoon at a time, until moist enough to come together.: You should hear gentle, muffled scraping as the spatula folds the mixture, and the dough will start to clump together without being overworked. Folding preserves the delicate crumb structure; overmixing activates gluten and leads to tough scones. If the dough feels crumbly, gradually add sour cream , one tablespoon at a time, until the dough just comes together.
- Add the chocolate chips and fold to combine.: Tiny flecks of chocolate will scatter through the dough, and you will see contrast against the pale batter. Folding gently keeps the chips intact and prevents them from melting into streaks. A common error is stirring too vigorously here, which can cause the chips to clump and sink, giving uneven distribution.
- Turn dough out onto a Silpat clean, lightly floured work surface and with lightly floured hands or a spatula, pat dough into an 8-inch round, approximately 2 inches high.: The tactile sensation should be slightly tacky but manageable, and the round will show seams where you press the dough. This height ensures proper rise and wedge shape. If you press too thin, the scones will overbake and dry out; if too thick, they may remain underbaked in the center.
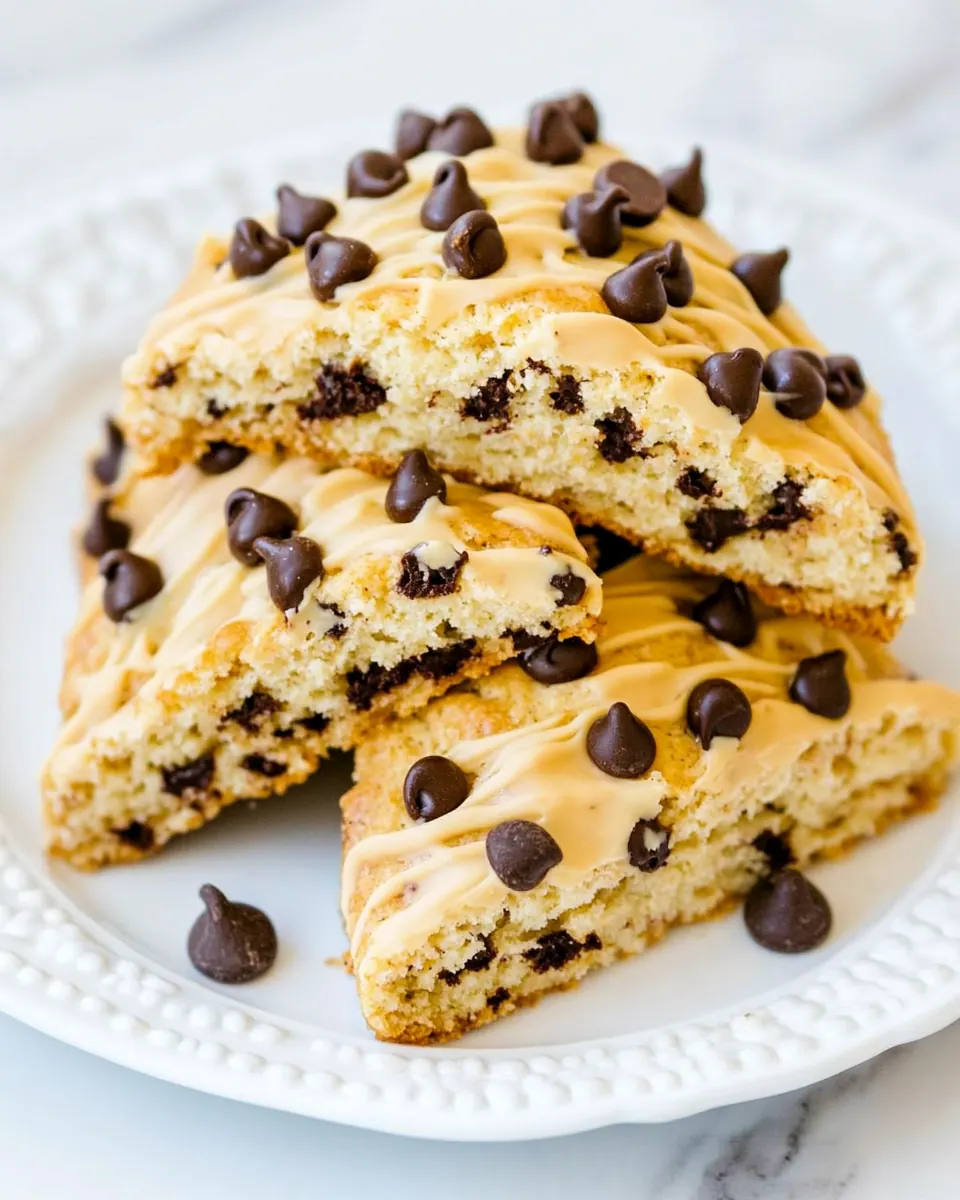
- With a large knife, slice round into 8 equal-sized wedges.: Each cut should feel firm and clean through the dough, and the wedges will reveal a slightly marbled interior with chocolate specks. Equal sizing ensures even baking times for all pieces. Unequal wedges will cause some to overbake while others remain underdone, so take a moment to make tidy, even slices.
- Using a flat spatula or pie turner, transfer wedges to prepared baking sheet spaced at least 2 inches apart. Do not crowd because scones puff and spread while baking.: You will hear the faint scrape of the spatula as you lift each wedge, and they should sit with room to expand. Proper spacing prevents crowding which can lead to squashed sides and uneven browning. Crowding the pan is a common mistake that keeps air from circulating and reduces the attractive golden edges.
- Bake for about 12 to 15 minutes, or until scones are very lightly golden and cooked through. They set up more as they cool; it’s critical not to overbake or scones will be dry. A toothpick inserted in the center should come out clean or with a few moist crumbs, but no batter. Because they’re baking in quite a hot oven, watch them closely starting after about 11 minutes to ensure the bottoms aren’t getting too browned.: The oven will produce a warm, nutty scent and the tops should take on a pale golden hue. A toothpick should come out clean or with moist crumbs, and the bottoms should not be overly dark. Because of the high heat, start checking around 11 minutes to avoid overbaking, which results in dry scones. If the bottoms brown too quickly, lower the rack or reduce oven temperature slightly.
- Allow scones to cool on baking tray for about 5 minutes before removing and transferring to a rack to finish cooling. While the scones cool, make the glaze.: During this short rest you will notice the scones firm slightly as steam escapes, and this helps them hold their shape when moved. If you try to transfer immediately, they may crumble. A common misstep is moving them too soon, which can cause them to break.
- Glaze– In a medium, microwave-safe bowl, add 1/2 cup peanut butter and heat for 30 seconds to soften.: The softened peanut butter will become glossy and easier to whisk into the glaze, releasing a warm nutty aroma. Gentle heat prevents scorching; if overheated the texture can become grainy. If the peanut butter is too stiff, the glaze will be lumpy, so err on the side of short bursts of heat.
- Add the confectioners’ sugar, 2 tablespoons cream, and whisk together until smooth. Depending on desired consistency, you may need to play with the cream and sugar ratios slightly.: The glaze should become silky and opaque, and the whisk will smooth any tiny lumps into a lustrous finish. Adjust the milk or cream to achieve a drizzleable but not runny consistency. A glaze that is too thin will drip off, while one that is too thick will be clumpy, so tweak slowly.
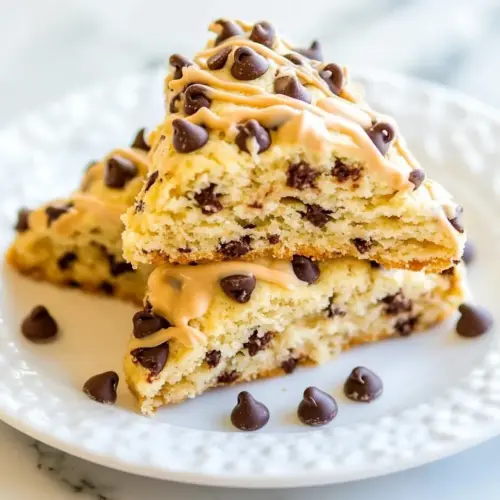
- Evenly drizzle the glaze over the scones before serving or frost them like a frosted sugar cookie, which I prefer. If you drizzle the glaze, you’ll likely have extra. It will keep airtight in the fridge for up to 1 month; reheat gently in micro before using again. Scones are best fresh, but will keep airtight at room temperature for up to 3 days. I’m comfortable storing glazed items at room temperature, but if you’re not, glaze only the scones you plan to consume immediately; I don’t recommend refrigerating scones because they’ll dry out.: The glossy ribbons of glaze add sweetness and visual contrast, and they will set slightly at room temperature. If you plan to store scones, consider glazing only those you will serve immediately to avoid moisture transfer. Refrigerating glazed scones can dry them out, which is a common storage mistake.
- Adapted from The Best Glazed Mixed Berry Scones: Store leftover glaze airtight in the fridge for up to 1 month, reheating gently before using again, and it will regain a spreadable texture when warmed. This is handy for refreshing scones later. Avoid reheating aggressively, which can alter texture and dull flavor.
Tips and Tricks about Peanut Butter Chocolate Chip Scones
These tips will help you get consistent results and explore small variations that change texture and flavor. I include practical notes I use when baking for friends or prepping for a gathering.
- Room and tools: Use a cold butter and chill your bowl briefly if your kitchen is warm, this prevents the fat from melting into the flour which would reduce flakiness.
- Flour handling: Spoon and level the all purpose flour into the measuring cup to avoid compressing it, which gives you a lighter, more tender scone.
- Chocolate distribution: Use mini chocolate chips so they disperse evenly; larger chips can cluster and melt unevenly leaving streaks.
- Adjusting moisture: If the dough is too crumbly, add sour cream or a splash of cream one tablespoon at a time until it holds together.
- Glaze texture: Warm the peanut butter gently and add confectioners sugar gradually to hit a drizzling consistency, and use milk or cream to thin as needed.
- Storage: Keep unglazed scones airtight at room temperature up to three days, and store glaze separately in the fridge for up to a month.
Serving Ideas for Peanut Butter Chocolate Chip Scones
These scones are versatile enough for breakfast, brunch, or an afternoon tea. Their nutty richness pairs well with bright, tart accompaniments or simply with a hot cup of coffee. Serve warm for the best texture and slightly melted chocolate chips.
- Brunch plate pairing: Serve alongside fresh fruit and a pot of coffee for a relaxed weekend spread, the fruit adds acidity that balances the sweet scone.
- Picnic friendly: Pack unglazed scones in a lined container and add the glaze separately to avoid sogginess during transport.
- Snack tray: Arrange wedges on a platter with small bowls of extra glaze for dipping, perfect for casual gatherings or potlucks.
- Holiday treat: These work well for informal celebrations, where you want something homey and crowd pleasing without fuss.
- Storage and reheating: Refresh day old scones in a warm oven for a few minutes to revive texture, or microwave briefly after adding glaze to make them feel freshly made.
- Seasonal twist: For cooler months, serve with warm beverages and a side of spiced fruit to complement the nutty flavors.
FAQ
Conclusion
What makes these scones special is the cozy, familiar pairing of peanut butter and chocolate, wrapped into a tender, slightly flaky wedge that feels both indulgent and approachable. Give them a try when you want a quick bake that rewards you with warm aroma and pockets of melted chocolate, perfect for sharing or savoring slowly with coffee. They are forgiving, quick to assemble, and versatile enough to dress up with a glossy glaze or keep simple for an everyday treat. I hope you enjoy making them as much as I do; they have become a beloved go to for casual brunches and last minute guests.
Peanut Butter Chocolate Chip Scones
Equipment
- Large Baking Sheet
- Mixing Bowls
- Wire Rack
- Microwave-safe Bowl
Ingredients
- 2 cups all-purpose flour Provide structure and bulk to the scones by forming the dry base that holds other ingredients together; choose unbleached all-purpose flour for a tender crumb and reliable gluten development suitable for scone texture.
- 1/2 cup granulated sugar Add sweetness and aid in browning while balancing flavors; granulated sugar also helps create a slight crispness on the exterior when baked.
- 1 tablespoon baking powder Leaven the dough by releasing air when heated, giving scones lift and a light crumb; use fresh baking powder and distribute evenly through dry ingredients for consistent rise.
- pinch salt, optional and to taste Enhance and balance overall flavor by subtly amplifying sweetness and cutting richness; add to taste, especially if using salted butter or sweeter toppings.
- 1/2 cup unsalted butter, cold (1 stick) Contribute richness, flaky layers, and tender texture when cut into the flour; keep butter cold to create pockets of steam that produce a desirable crumb and light flakiness.
- 1 large egg Bind ingredients together and add moisture while encouraging browning; beat lightly to incorporate air without overmixing for tender scones.
- 1/3 cup creamy peanut butter Introduce creamy, nutty flavor and additional fat that enriches the dough; incorporate smoothly to complement chocolate chips and provide a peanut-forward profile.
- 1/4 cup sour cream, lite is okay; Greek yogurt may be substituted Add moisture and tenderize the crumb while contributing slight tang that brightens the overall flavor; choose lite sour cream or a Greek yogurt substitute for similar acidity and texture.
- 2 teaspoons vanilla extract Enhance aromatic complexity and round out sweetness with warm vanilla notes; stir into wet ingredients to distribute flavor evenly throughout the dough.
- 1 cup semi-sweet mini chocolate chips Provide bursts of chocolate flavor and pleasant texture contrast throughout the scones; fold in gently to avoid overworking the dough and ensure even distribution.
- 1/2 cup creamy peanut butter Offer a second addition of creamy, nutty richness for glazes or finishing touches; use for drizzling or mixing with confectioners’ sugar to intensify peanut flavor.
- 1 cup confectioners’ sugar Create a smooth, sweet glaze when combined with peanut butter and liquid; sift confectioners’ sugar to avoid lumps and achieve a silky finish for drizzling.
- about 2 to 3 tablespoons milk or cream Adjust glaze consistency and add richness to the icing; use milk or cream sparingly to reach desired thickness while contributing a bit of dairy flavor.
Instructions
- Preheat oven to 400 F. Line a baking sheet with a Silpat or parchment; set aside.: The kitchen will start to smell faintly warm even before the scones go in, and the high oven temperature is important so the exterior sets quickly creating a golden crust while the interior remains tender. If your oven runs hot, rotate the tray midway to prevent dark bottoms. A common mistake is not preheating fully, which can cause uneven rise and denser scones.
- Scones– In a large bowl, add 2 cups flour, granulated sugar, baking powder, optional salt, and whisk to combine.: As you whisk these dry components, breathe in the neutral, slightly sweet scent of flour and sugar mixing. Combining them first ensures even distribution of leavening so every wedge rises consistently. If you skip this step or mix unevenly, you may get pockets of baking powder that create uneven holes in the crumb.
- Add the butter, and with a pastry cutter or two forks, cut the butter in. You can use a food processor, but I find not having to wash it is a big time-saver. I smoosh the butter with forks and when it’s the size of large marbles, I use my hands and knead it in. It will feel like semi-wet, cool sand. Some larger pea-sized butter clumps are okay; set bowl aside.: You will feel the cold butter breaking into pea and marble sized pieces, and the mixture will resemble coarse sand when done. The visual cue is small, dispersed flecks of butter; these melt during baking to create flaky layers. Avoid overworking until the butter becomes too soft, which will make the scones dense rather than flaky.
- In a small bowl, add the egg, 1/3 cup peanut butter, sour cream, vanilla, and whisk to combine until smooth.: The wet mix will look glossy and homogeneous, with a nutty aroma from the peanut butter . Whisking incorporates air and helps the wet ingredients blend into the flour without large streaks. If the mixture is lumpy or separated, whisk a bit longer; lumps can lead to uneven pockets in the dough.
- Pour wet mixture over dry, and fold until just combined with a soft-tipped spatula; don’t overmix or scones will be tough. If dough seems very crumbly or isn’t coming together, add sour cream, 1 tablespoon at a time, until moist enough to come together.: You should hear gentle, muffled scraping as the spatula folds the mixture, and the dough will start to clump together without being overworked. Folding preserves the delicate crumb structure; overmixing activates gluten and leads to tough scones. If the dough feels crumbly, gradually add sour cream , one tablespoon at a time, until the dough just comes together.
- Add the chocolate chips and fold to combine.: Tiny flecks of chocolate will scatter through the dough, and you will see contrast against the pale batter. Folding gently keeps the chips intact and prevents them from melting into streaks. A common error is stirring too vigorously here, which can cause the chips to clump and sink, giving uneven distribution.
- Turn dough out onto a Silpat clean, lightly floured work surface and with lightly floured hands or a spatula, pat dough into an 8-inch round, approximately 2 inches high.: The tactile sensation should be slightly tacky but manageable, and the round will show seams where you press the dough. This height ensures proper rise and wedge shape. If you press too thin, the scones will overbake and dry out; if too thick, they may remain underbaked in the center.
- With a large knife, slice round into 8 equal-sized wedges.: Each cut should feel firm and clean through the dough, and the wedges will reveal a slightly marbled interior with chocolate specks. Equal sizing ensures even baking times for all pieces. Unequal wedges will cause some to overbake while others remain underdone, so take a moment to make tidy, even slices.
- Using a flat spatula or pie turner, transfer wedges to prepared baking sheet spaced at least 2 inches apart. Do not crowd because scones puff and spread while baking.: You will hear the faint scrape of the spatula as you lift each wedge, and they should sit with room to expand. Proper spacing prevents crowding which can lead to squashed sides and uneven browning. Crowding the pan is a common mistake that keeps air from circulating and reduces the attractive golden edges.
- Bake for about 12 to 15 minutes, or until scones are very lightly golden and cooked through. They set up more as they cool; it’s critical not to overbake or scones will be dry. A toothpick inserted in the center should come out clean or with a few moist crumbs, but no batter. Because they’re baking in quite a hot oven, watch them closely starting after about 11 minutes to ensure the bottoms aren’t getting too browned.: The oven will produce a warm, nutty scent and the tops should take on a pale golden hue. A toothpick should come out clean or with moist crumbs, and the bottoms should not be overly dark. Because of the high heat, start checking around 11 minutes to avoid overbaking, which results in dry scones. If the bottoms brown too quickly, lower the rack or reduce oven temperature slightly.
- Allow scones to cool on baking tray for about 5 minutes before removing and transferring to a rack to finish cooling. While the scones cool, make the glaze.: During this short rest you will notice the scones firm slightly as steam escapes, and this helps them hold their shape when moved. If you try to transfer immediately, they may crumble. A common misstep is moving them too soon, which can cause them to break.
- Glaze– In a medium, microwave-safe bowl, add 1/2 cup peanut butter and heat for 30 seconds to soften.: The softened peanut butter will become glossy and easier to whisk into the glaze, releasing a warm nutty aroma. Gentle heat prevents scorching; if overheated the texture can become grainy. If the peanut butter is too stiff, the glaze will be lumpy, so err on the side of short bursts of heat.
- Add the confectioners’ sugar, 2 tablespoons cream, and whisk together until smooth. Depending on desired consistency, you may need to play with the cream and sugar ratios slightly.: The glaze should become silky and opaque, and the whisk will smooth any tiny lumps into a lustrous finish. Adjust the milk or cream to achieve a drizzleable but not runny consistency. A glaze that is too thin will drip off, while one that is too thick will be clumpy, so tweak slowly.
- Evenly drizzle the glaze over the scones before serving or frost them like a frosted sugar cookie, which I prefer. If you drizzle the glaze, you’ll likely have extra. It will keep airtight in the fridge for up to 1 month; reheat gently in micro before using again. Scones are best fresh, but will keep airtight at room temperature for up to 3 days. I’m comfortable storing glazed items at room temperature, but if you’re not, glaze only the scones you plan to consume immediately; I don’t recommend refrigerating scones because they’ll dry out.: The glossy ribbons of glaze add sweetness and visual contrast, and they will set slightly at room temperature. If you plan to store scones, consider glazing only those you will serve immediately to avoid moisture transfer. Refrigerating glazed scones can dry them out, which is a common storage mistake.
- Adapted from The Best Glazed Mixed Berry Scones: Store leftover glaze airtight in the fridge for up to 1 month, reheating gently before using again, and it will regain a spreadable texture when warmed. This is handy for refreshing scones later. Avoid reheating aggressively, which can alter texture and dull flavor.
Notes
- Room and tools: Use a cold butter and chill your bowl briefly if your kitchen is warm, this prevents the fat from melting into the flour which would reduce flakiness.
- Flour handling: Spoon and level the all purpose flour into the measuring cup to avoid compressing it, which gives you a lighter, more tender scone.
- Chocolate distribution: Use mini chocolate chips so they disperse evenly; larger chips can cluster and melt unevenly leaving streaks.
- Adjusting moisture: If the dough is too crumbly, add sour cream or a splash of cream one tablespoon at a time until it holds together.
- Glaze texture: Warm the peanut butter gently and add confectioners sugar gradually to hit a drizzling consistency, and use milk or cream to thin as needed.
- Storage: Keep unglazed scones airtight at room temperature up to three days, and store glaze separately in the fridge for up to a month.