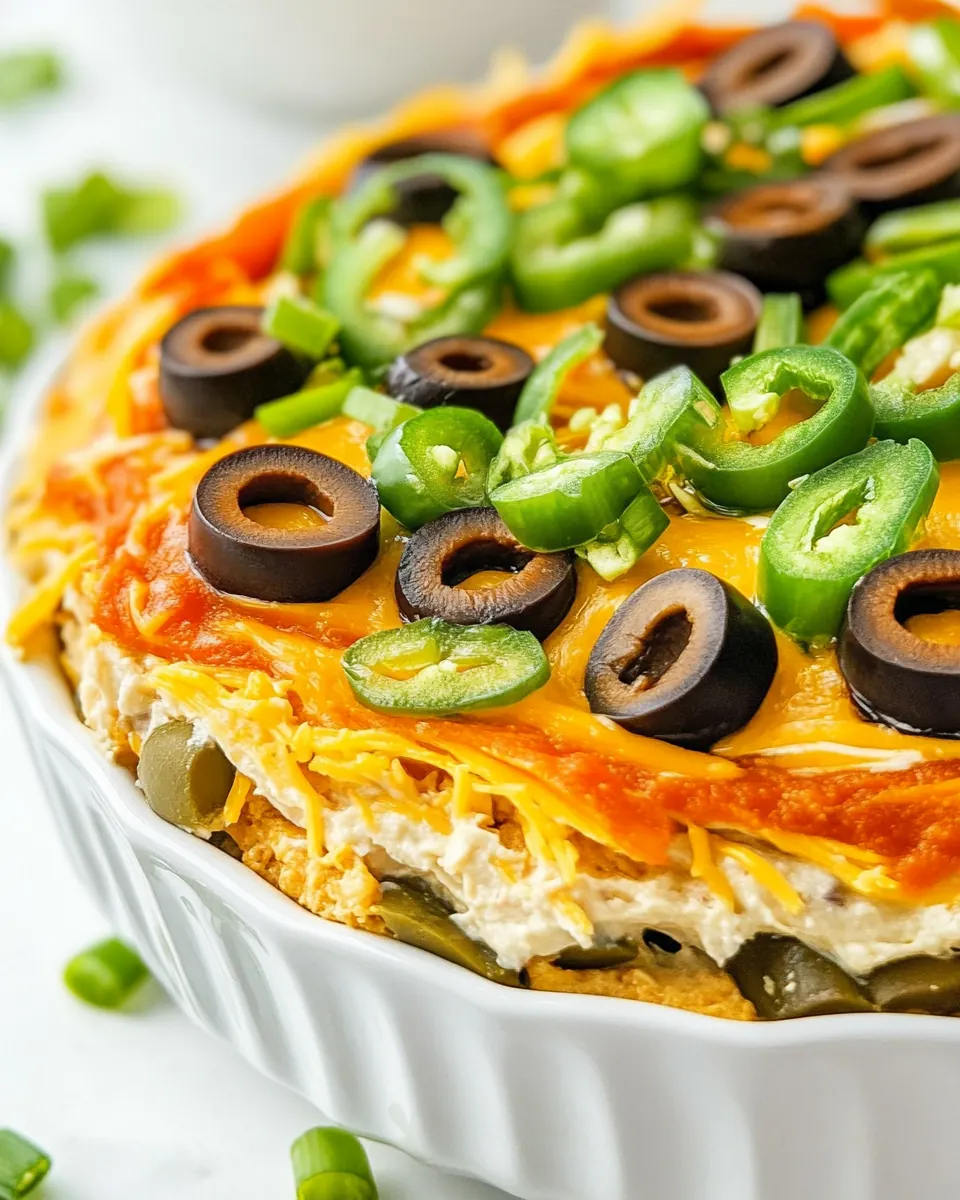
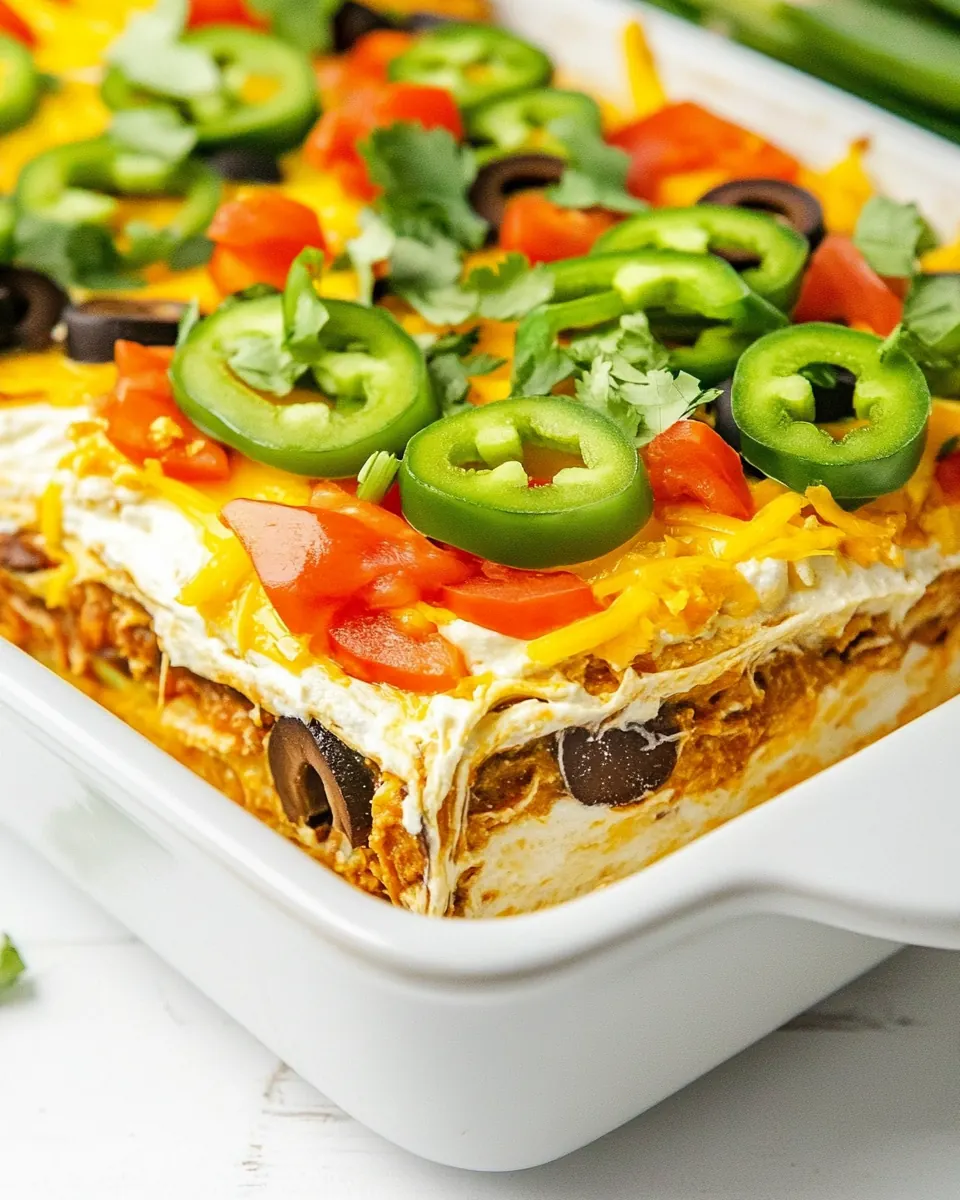
7 Layer Dip
7 Layer Dip has been a party staple in my life for as long as I can remember, and the first time I brought it to a neighborhood potluck everyone kept asking for the recipe. I grew up watching my aunt assemble each layer with care, explaining how balance between creamy, tangy, and crunchy textures makes this dish addictive. Over the years I tweaked proportions and learned to read the signs when an avocado is perfectly ripe or when the beans need a touch more seasoning.
Now when I make 7 Layer Dip for friends, it is never just food, it is a ritual. I like to set the layers with a steady hand, smoothing each one so the colors pop through the glass dish. The conversations start while I chop green onions, and by the time the last sprinkle of cheese goes on, someone has already grabbed a chip for a quick taste. That spontaneous tasting is my favorite part, because it means the dip has captured the right interplay of creamy, bright, and savory flavors.
Recipe Snapshot
20 mins
20 mins
Easy
250 kcal
Mexican
Gluten-Free, Vegan
Appetizers
9×9-inch Baking Pan
Why This 7 Layer Dip Stands Out
Layered textures that please everyone
I love how each component of 7 Layer Dip brings something distinct. The dense, savory refried beans form a hearty base, while the creamy avocados and tangy sour cream add silkiness. Those contrasts mean every scoop is multi dimensional, and that is why guests go back for more.
Versatility for any gathering
This recipe travels well from casual game nights to holiday gatherings. I often change the heat level by adjusting the jalapeño pepper or swapping the salsa, and it still shines. Because assembly is simple, I can scale it up quickly when I know a crowd is coming, which makes entertaining less stressful.
Easy prep, big payoff
What draws me in is how little hands on time yields a visually impressive dish. A few bowls, a spoon, and some careful layering is enough to create something that looks like it took hours. I appreciate recipes that reward small effort with maximum impact, and this one fits the bill.
Bright, fresh accents
The finishing touches matter, and adding chopped cilantro, a squeeze of lime, and crunchy romaine lettuce really freshen the dip. These accents cut through the richness and keep the palate excited from the first bite to the last.
Kid friendly, crowd friendly
Families love it because the flavors are familiar, and I find kids especially like the creamy layers. I also like that it pairs easily with simple sides, so you can build a full spread without fuss. For me, its universal appeal is a big reason I keep this recipe in my rotation.
Main Ingredients for 7 Layer Dip
These ingredients are classic and intentional; they stack into a harmonious whole. The heavy base anchors the dip while the creamy and bright elements create lift. When layered thoughtfully, each ingredient keeps its identity yet contributes to a cohesive, crave worthy bite.
- 16 oz . refried beans store-bought or homemade (1 can): Provide a savory, creamy base layer that binds the dip together and adds hearty texture; use a smooth spreadable consistency to make layering easy and flavorful for scooping.
- 4 oz . diced green chiles (1 small can): Add a mildly smoky, tangy heat that mixes well into the beans or sour cream; drain excess liquid and fold in for compact flavor without watering down layers.
- 1 cup sour cream: Bring a cool, tangy creaminess that lightens the dip and contrasts spicy elements; dollop and spread evenly to create a smooth, cohesive middle layer.
- 2 tbsp taco seasoning store-bought or homemade: Introduce concentrated taco spice to season the sour cream or beans, enhancing complex savory notes; mix thoroughly to ensure even distribution and balanced flavor.
- 2 avocados: Contribute a rich, buttery texture and fresh, mellow flavor when mashed or sliced; use ripe avocados to create a guacamole-like layer that adds creaminess and color.
- 2 tbsp chopped fresh cilantro: Provide bright, herbal aroma and a fresh finish when finely chopped and sprinkled; incorporate sparingly to avoid overpowering other subtle layers.
- 1/2 jalapeño pepper diced () (optional): Deliver a crisp, bright heat and vegetal bite when finely diced; include seeds for extra heat if desired or omit for milder flavor.
- 1/2 lime juiced: Contribute zesty acidity and brightness to balance richer components; squeeze fresh juice directly to avoid bottled flavors and to maintain freshness.
- 1/2 tsp kosher salt: Enhance overall flavor by amplifying savory and acidic notes with subtle salinity; dissolve into wet layers to distribute seasoning uniformly throughout the dip.
- 1 cup salsa store-bought, homemade, diced tomatoes or pico de gallo: Supply vibrant, tangy tomato or salsa elements that add moisture, acidity, and chunky texture; choose preferred heat level and drain slightly if very watery to preserve layers.
- 1 cup shredded romaine lettuce: Add crunchy, fresh leafy texture and a mild, slightly bitter contrast to creamy layers; shred finely and add just before serving to maintain crispness.
- 1 cup shredded Mexican cheese: Provide a melty, salty, cheesy richness that binds and flavors the top layers; use a sharp or mild Mexican blend depending on preference for intensity.
- 4 oz . sliced black olives drained (1 small can), green or kalamata also work: Offer briny, savory pops of flavor and contrasting texture when evenly scattered; rinse if overly salty and pat dry to prevent sogginess in the dip.
- 2 green onions sliced, or use chives: Introduce a mild oniony bite and fresh green color when thinly sliced; sprinkle over the top for aroma and a subtle crunchy finish.
- tortilla chips , for serving (optional): Serve as the crunchy vehicle for scooping and enjoying the dip; choose sturdy, unbroken chips to prevent tearing and to hold multiple layered bites.
Instructions for 7 Layer Dip
This is an assembly focused dish that rewards attention to texture and timing. I find the most joy in the rhythm of spreading each layer, and small adjustments along the way make a big difference in the finished dish.
- Mix the refried beans and green chilis together in a large bowl. Spread the mixture out evenly in the bottom of a 9×9 inch baking dish.: The beans should feel warm and velvety against your spoon, and the faint aroma of the diced green chiles will hint at the flavor beneath. Use a rubber spatula to press and smooth the layer so it is compact and even, ensuring it will support the layers above. If the beans are too stiff, a tablespoon of warm water will make them glide easier, but avoid thinning them excessively. A common mistake is leaving the base lumpy which makes later spreads uneven, so take a few extra seconds to get a smooth, firm foundation.
- In a medium bowl, mix the sour cream and taco seasoning together. Spread it out over the bean layer.: When you whisk the sour cream with taco seasoning , inhale the warm spices lifting from the bowl, and you'll notice the mixture takes on a uniform pale orange hue. Spoon dollops over the bean base and pull a flat spatula across to create a seamless layer. The reason this works is that the tang of the sour cream calms the spice and helps the avocado layer sit without sliding. Watch out for over thinning the sour cream, which can cause it to run into the beans and weaken the structure.
- In a large bowl, mash the avocados. Stir in the cilantro, jalapeño, lime juice, and salt. Spread over the sour cream.: As you mash the avocados , you should see a silky, slightly chunky texture and smell a fresh, green note when you fold in the cilantro . The squeeze of lime brightens the fat in the avocado and prevents browning, while the jalapeño pepper adds quick sparkles of heat. Spread this layer gently so the guacamole sits atop the sour cream without mixing in. A common pitfall is over mashing to a puree, losing the pleasant textural contrast; keep some small pieces for interest.
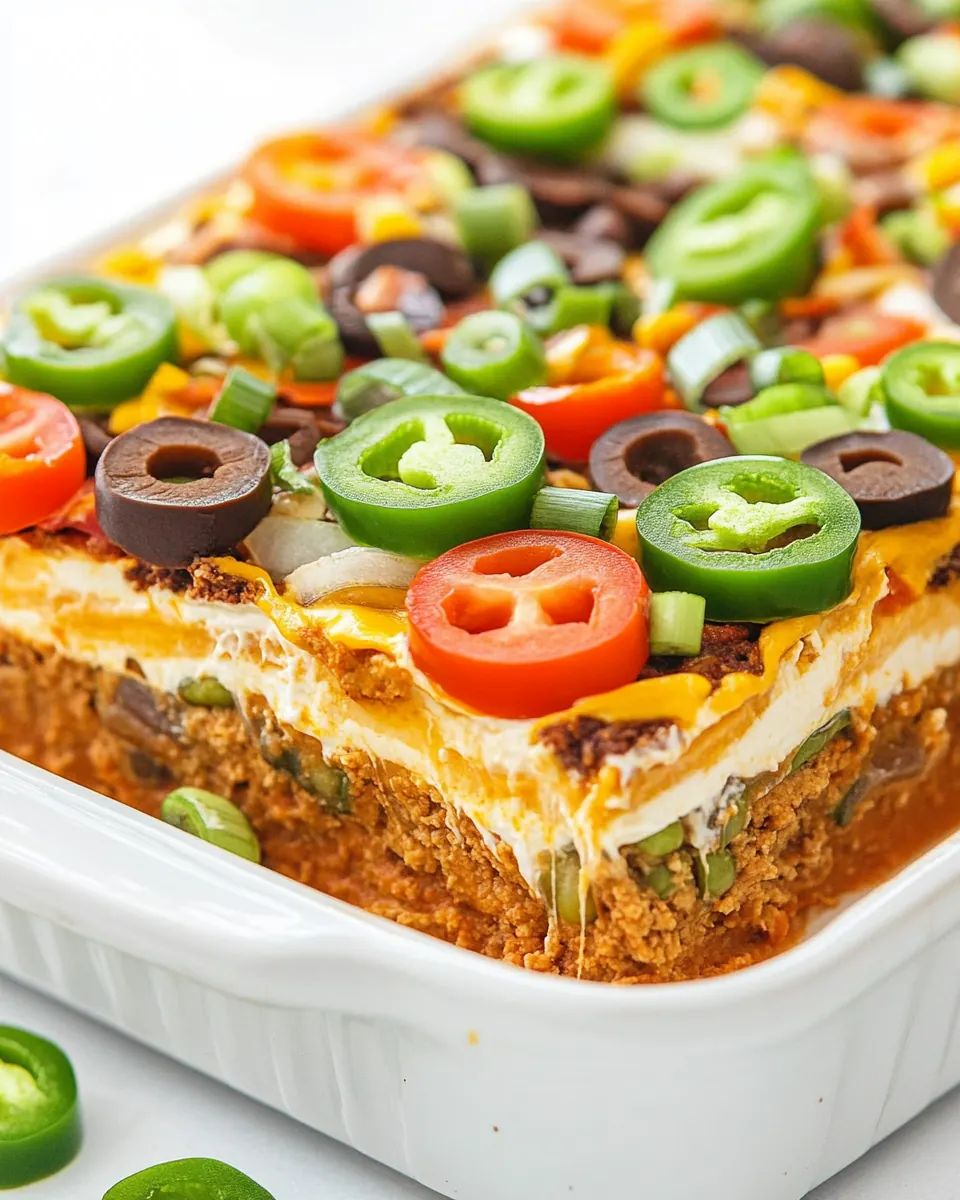
- Spread out the salsa, then romaine, cheese, olives, and green onions. Cover and chill until ready to serve.: The salsa should be distributed in an even, thin layer so its juices stay contained between the guacamole and lettuce. Next, scatter the shredded romaine lettuce to introduce cooling crunch, then pile on the shredded Mexican cheese for salty richness. Place the sliced black olives and then the green onions last to top with briny and sharp notes. Assemble with a light hand, preserving the visual bands of color. Avoid using watery salsa or over packing the lettuce which can make the dip soggy over time.
- Cover and chill until ready to serve.: After assembly, the dish should feel cool to the touch and the layers firm. Chilling sets the structure and lets the flavors marry, creating a more integrated profile. I usually chill for at least thirty minutes, which firms the top layers and makes serving neat scoops easier. One mistake is chilling too long uncovered, which can dry the top; cover it to maintain moisture and freshness.
Recipe Tips about 7 Layer Dip
I like to think of tips as small hacks that change the whole experience. These pointers keep the dip bright, balanced, and easy to serve, whether you are feeding a crowd or sharing with a friend.
- Choose ripe avocados by gently pressing near the stem; they should yield a bit without feeling mushy, which ensures a creamy, fresh guacamole layer.
- Warm the beans slightly if they are firm from refrigeration, it helps them smooth evenly and prevents the top layers from tearing when you spread.
- Drain canned items like green chiles and olives thoroughly to keep the layers from becoming watery, which preserves texture integrity for hours.
- Mix sour cream with seasoning and taste before adding more, because store bought taco blends vary widely in salt and heat level.
- Assemble shortly before serving for the freshest presentation, but if you must prepare ahead, cover tightly and refrigerate to maintain color and moisture.
What Complements This 7 Layer Dip
This dip is perfect for informal gatherings and pairs well with a variety of sides and occasions. I often serve it for game day, backyard barbecues, or as part of a Ramadan iftar spread. Keep the presentation relaxed with bowls of accompaniments so guests can customize their plates.
- Chips and chips varieties such as sturdy corn tortilla chips are the classic pairing, and you can include blue corn or multigrain options for texture variety.
- Vegetable crudites like sliced bell peppers and cucumber are cooler scoops that contrast the creamy layers and work well for guests who want lighter bites.
- Serve it at casual events including game nights, potlucks, or backyard gatherings where finger foods and shareable platters rule the table.
- Storage tips suggest covering the dip tightly and refrigerating; the guacamole layer may darken a bit over a day, but the flavors remain enjoyable for up to two days.
- Seasonal pairings lean into summer produce with fresh salsas and pico de gallo, while in cooler months heartier chips and warm tortillas complement the dip.
FAQ
Conclusion
What makes this recipe special is the satisfying interplay of creamy, crunchy, and bright elements that come together in every scoop. Give 7 Layer Dip a try at your next gathering, and you will see how little effort turns into a crowd pleasing centerpiece. It is forgiving to assemble, easy to scale, and offers pleasing contrasts that keep people reaching for another chip. Share it with friends, tweak the heat to your liking, and enjoy the relaxed, communal vibe it brings to the table.
7 Layer Dip
Equipment
- 9x9-inch Baking Pan
Ingredients
- 16 oz . refried beans store-bought or homemade (1 can) Provide a savory, creamy base layer that binds the dip together and adds hearty texture; use a smooth spreadable consistency to make layering easy and flavorful for scooping.
- 4 oz . diced green chiles (1 small can) Add a mildly smoky, tangy heat that mixes well into the beans or sour cream; drain excess liquid and fold in for compact flavor without watering down layers.
- 1 cup sour cream Bring a cool, tangy creaminess that lightens the dip and contrasts spicy elements; dollop and spread evenly to create a smooth, cohesive middle layer.
- 2 tbsp taco seasoning store-bought or homemade Introduce concentrated taco spice to season the sour cream or beans, enhancing complex savory notes; mix thoroughly to ensure even distribution and balanced flavor.
- 2 avocados Contribute a rich, buttery texture and fresh, mellow flavor when mashed or sliced; use ripe avocados to create a guacamole-like layer that adds creaminess and color.
- 2 tbsp chopped fresh cilantro Provide bright, herbal aroma and a fresh finish when finely chopped and sprinkled; incorporate sparingly to avoid overpowering other subtle layers.
- 1/2 jalapeño pepper diced (optional) Deliver a crisp, bright heat and vegetal bite when finely diced; include seeds for extra heat if desired or omit for milder flavor.
- 1/2 lime juiced Contribute zesty acidity and brightness to balance richer components; squeeze fresh juice directly to avoid bottled flavors and to maintain freshness.
- 1/2 tsp kosher salt Enhance overall flavor by amplifying savory and acidic notes with subtle salinity; dissolve into wet layers to distribute seasoning uniformly throughout the dip.
- 1 cup salsa store-bought, homemade, diced tomatoes or pico de gallo Supply vibrant, tangy tomato or salsa elements that add moisture, acidity, and chunky texture; choose preferred heat level and drain slightly if very watery to preserve layers.
- 1 cup shredded romaine lettuce Add crunchy, fresh leafy texture and a mild, slightly bitter contrast to creamy layers; shred finely and add just before serving to maintain crispness.
- 1 cup shredded Mexican cheese Provide a melty, salty, cheesy richness that binds and flavors the top layers; use a sharp or mild Mexican blend depending on preference for intensity.
- 4 oz . sliced black olives drained (1 small can), green or kalamata also work Offer briny, savory pops of flavor and contrasting texture when evenly scattered; rinse if overly salty and pat dry to prevent sogginess in the dip.
- 2 green onions sliced, or use chives Introduce a mild oniony bite and fresh green color when thinly sliced; sprinkle over the top for aroma and a subtle crunchy finish.
- tortilla chips optional, for serving Serve as the crunchy vehicle for scooping and enjoying the dip; choose sturdy, unbroken chips to prevent tearing and to hold multiple layered bites.
Instructions
- Mix the refried beans and green chilis together in a large bowl. Spread the mixture out evenly in the bottom of a 9×9 inch baking dish.: The beans should feel warm and velvety against your spoon, and the faint aroma of the diced green chiles will hint at the flavor beneath. Use a rubber spatula to press and smooth the layer so it is compact and even, ensuring it will support the layers above. If the beans are too stiff, a tablespoon of warm water will make them glide easier, but avoid thinning them excessively. A common mistake is leaving the base lumpy which makes later spreads uneven, so take a few extra seconds to get a smooth, firm foundation.
- In a medium bowl, mix the sour cream and taco seasoning together. Spread it out over the bean layer.: When you whisk the sour cream with taco seasoning , inhale the warm spices lifting from the bowl, and you'll notice the mixture takes on a uniform pale orange hue. Spoon dollops over the bean base and pull a flat spatula across to create a seamless layer. The reason this works is that the tang of the sour cream calms the spice and helps the avocado layer sit without sliding. Watch out for over thinning the sour cream, which can cause it to run into the beans and weaken the structure.
- In a large bowl, mash the avocados. Stir in the cilantro, jalapeño, lime juice, and salt. Spread over the sour cream.: As you mash the avocados , you should see a silky, slightly chunky texture and smell a fresh, green note when you fold in the cilantro . The squeeze of lime brightens the fat in the avocado and prevents browning, while the jalapeño pepper adds quick sparkles of heat. Spread this layer gently so the guacamole sits atop the sour cream without mixing in. A common pitfall is over mashing to a puree, losing the pleasant textural contrast; keep some small pieces for interest.
- Spread out the salsa, then romaine, cheese, olives, and green onions. Cover and chill until ready to serve.: The salsa should be distributed in an even, thin layer so its juices stay contained between the guacamole and lettuce. Next, scatter the shredded romaine lettuce to introduce cooling crunch, then pile on the shredded Mexican cheese for salty richness. Place the sliced black olives and then the green onions last to top with briny and sharp notes. Assemble with a light hand, preserving the visual bands of color. Avoid using watery salsa or over packing the lettuce which can make the dip soggy over time.
- Cover and chill until ready to serve.: After assembly, the dish should feel cool to the touch and the layers firm. Chilling sets the structure and lets the flavors marry, creating a more integrated profile. I usually chill for at least thirty minutes, which firms the top layers and makes serving neat scoops easier. One mistake is chilling too long uncovered, which can dry the top; cover it to maintain moisture and freshness.
Notes
- Choose ripe avocados by gently pressing near the stem; they should yield a bit without feeling mushy, which ensures a creamy, fresh guacamole layer.
- Warm the beans slightly if they are firm from refrigeration, it helps them smooth evenly and prevents the top layers from tearing when you spread.
- Drain canned items like green chiles and olives thoroughly to keep the layers from becoming watery, which preserves texture integrity for hours.
- Mix sour cream with seasoning and taste before adding more, because store bought taco blends vary widely in salt and heat level.
- Assemble shortly before serving for the freshest presentation, but if you must prepare ahead, cover tightly and refrigerate to maintain color and moisture.