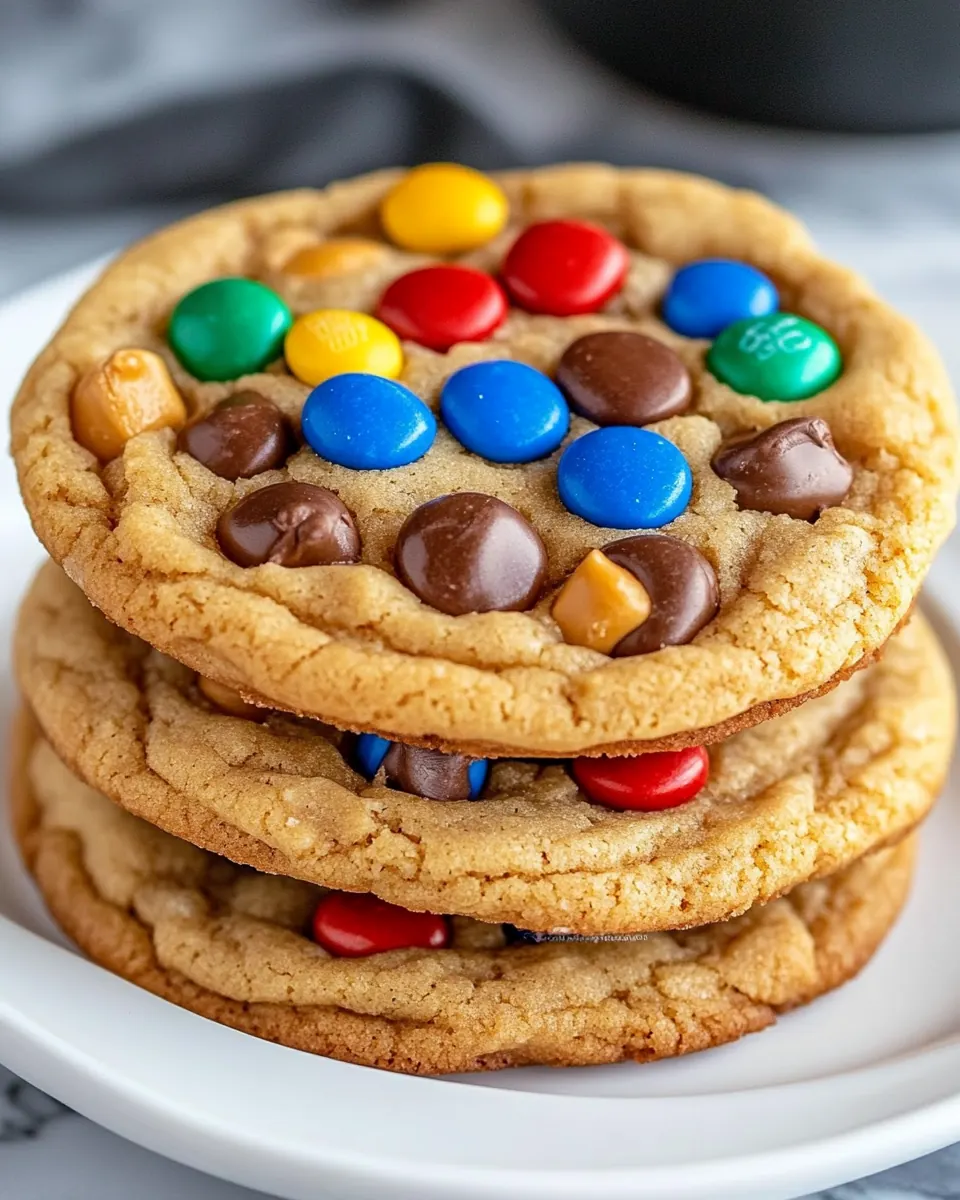
Peanut Butter Candy Cookies
Peanut Butter Candy Cookies are the kind of cookie that makes me smile the moment I open the tin.
I first made these on a rainy afternoon when I needed something quick, cheerful, and utterly satisfying. The memory of hands dusted with sugar, a countertop speckled with colorful candies, and the oven timer singing felt like a small celebration. I remember laughing at how the dough felt almost more like a spread than a typical cookie batter, and how that very texture produced a tender center that hugged the candy surprise.
Every time I bake Peanut Butter Candy Cookies now, I think about that simple joy, and about how this recipe is unfussy yet playful. Friends crowd around the kitchen island, they poke the warm tops to find the melted pockets of candy, and someone inevitably asks for the recipe. What I love is how little fuss gets you a big payoff, and how a few pantry staples become a nostalgic treat. I hope this version gives you that same small, warm celebration.
Recipe Snapshot
30 mins
15 mins
15 mins
Easy
150 kcal
American
Gluten-Free, Low FODMAP
Desserts
Oven, Cookie sheet, Parchment paper or silicone baking mat, Mixing bowl, Spoon or spatula, Ice cream scoop
Why This Peanut Butter Candy Cookies Hits Different
Reason 1 A nostalgic candy crunch
I adore how Peanut Butter Candy Cookies fold familiar candy pieces into a classic peanut butter base. The contrast between the soft cookie crumb and the quick burst of chocolate from the candy feels like revisiting childhood, and I find myself smiling as every bite reveals a tiny candy treasure.
Reason 2 Simple pantry friendly
These cookies are wonderfully straightforward, using things I usually have on hand. With peanut butter, sugars, an egg, and a handful of candy, you can pull together a batch in no time. That simplicity makes them perfect for last minute guests or an easy baking day with kids.
Reason 3 Texture meets flavor balance
The slightly sticky dough yields cookies that are tender yet hold their shape. The peanut butter gives a rich, nutty backbone while the candies add chocolatey sweetness and a pop of color. The result is a cookie that feels indulgent without being overly dense.
Reason 4 Fun to assemble
I love the hands on moment when you tuck a peanut butter cup into each ball of dough and press M&Ms on top. It is part craft, part baking, and everyone can join in. That interactive assembly makes them a go to for celebrations where guests want to help.
Reason 5 Crowd pleasing and adaptable
Whether you need cookies for a school event or a cozy night in, these hit the mark. They are sturdy enough to transport, and the bright candies make them festive. I often double the batch because they disappear fast.
Everything You Need for Peanut Butter Candy Cookies
These ingredients form a short and reliable team. The foundation is peanut butter which gives fat, flavor, and chew. Sugars provide structure and caramel notes, while the egg binds everything together for a tender crumb. Finally, the candy pieces bring pockets of chocolate and playful color, transforming a humble cookie into a treat that feels celebratory.
- 1 cup (268 g) peanut butter (use a no-stir shelf stable brand like Skippy): Provides creamy, rich fat and intense peanut flavor while acting as the primary binding agent to hold cookie dough together; choose a no-stir, shelf–stable style for consistent texture and easier measuring. Adds moisture and contributes to a tender crumb while delivering the classic peanut butter backbone of these candy-studded cookies.
- 3/4 cup (150 g) packed brown sugar: Sweetens and adds deep molasses notes while contributing moisture and chewiness to the cookie; packed brown sugar helps create a soft, slightly sticky texture that complements the peanut butter. Helps with browning and enhances overall flavor complexity through its caramel-like tones.
- 1/4 cup (50 g) granulated sugar: Contributes additional sweetness and helps balance the molasses-rich brown sugar while promoting a crisper exterior during baking; granulated sugar aids in spreading and creates subtle crunch. Also assists with caramelization, improving color and light crispness contrast with the chewy interior.
- 1 large egg: Adds structure, moisture, and leavening through protein and water content while helping to bind the dough; the egg promotes a tender yet cohesive texture and helps the cookies hold their shape. Also contributes to a richer mouthfeel and golden color when baked.
- 10 Reese’s Peanut Butter Cup Miniatures, unwrapped: Provides pockets of sweet peanut butter-chocolate for bursts of flavor and textural contrast; unwrapped miniature peanut butter cups melt slightly into the cookie for concentrated candy centers. Adds nostalgic candy appeal and balances savory peanut butter in each bite.
- 1 cup M&Ms (any flavor): Introduces colorful, crunchy candy pieces that contribute additional chocolate flavor and varied texture; M&Ms create visual interest and a playful crunch in each cookie. Offers flexible flavor choices and helps portion small sweet bites throughout the batch.
How to Make Peanut Butter Candy Cookies

These directions walk you through each step with care, focusing on sensory cues and small adjustments that make baking less mysterious. I like to keep the process relaxed and tactile, letting the dough tell me what it needs as I work. Below are the cleaned steps from the original recipe, expanded with detail so you can bake confidently.
- Preheat oven to 350°F. Line 2 cookie sheets with parchment papers or silicone baking mats.: The kitchen fills with a faint warm, toasty scent as the oven comes up to temperature, and that steady heat is vital so the cookies bake evenly. Preparing two sheets at once saves time and prevents crowding, which keeps cookies from merging. Make sure the parchment is flat and the mats lie smooth, because uneven surfaces create lopsided cookies. A common mistake is skipping the liner, which can lead to sticking and imperfect bottoms, so always prepare your pans first.
- Stir together peanut butter, both sugars, and egg.: As you mix, notice how the glossy peanut butter softens and the sugars dissolve into it, forming a thick, cohesive batter with a sweet, nutty aroma. The sound is a gentle scraping as the bowl clears and the dough comes together. I use a sturdy spoon or spatula to fold until no streaks of sugar remain, which ensures even sweetness and texture. If the mixture seems too dry, small adjustments help, but be careful not to overwork the batter, as that can make the cookies tough. Avoid mixing at high speed, which can incorporate excess air and change the final texture.
- Scoop cookie dough in desired size (I used a large ice cream scoop that's about 1/4 cup). Place a peanut butter cup in the center and roll to cover completely. The dough is pretty wet, so spray your hands with cooking spray so it doesn't stick.: The dough will feel soft and slightly tacky, almost spreadable, and the motion of scooping should be smooth and satisfying. When you tuck a peanut butter cup into the center and roll it in, the candy should be fully enveloped so it does not leak during baking. Spraying hands or lightly flouring them prevents the dough from clinging, which keeps shapes uniform. A trap I often see is making the ball too loose so the candy peeks out, which can melt onto the pan, so be generous when sealing the dough around the candy.
- Place on prepared cookie sheet (3 inches apart) and top with 4-6 peanut butter M&Ms.: Arrange each dough ball with enough space to allow for gentle spreading, and the visual of bright M&Ms pressed into the top is cheerful. Pressing the candies in just enough to nestle them on the surface helps them stay attached during baking and creates a pleasing mosaic once baked. The sound is quiet as the candies lightly settle into the dough, and the contrast of color against the tan dough is attractive. Avoid crowding the pan, as that reduces browning and makes cookies stick together.
- Bake for 10-15 minutes, or until they are just no longer glossy. Cool completely before removing from cookie sheet.: As the cookies bake, the kitchen will smell richly of roasted nuts and warm sugar, and the surface will shift from glossy to matte indicating doneness. Edges may firm slightly while centers remain soft, which is exactly what you want. Let the cookies sit on the sheet to finish setting, because removing them too soon can cause them to break. A typical error is overbaking until they look dark, which removes the tender interior, so pull them when the gloss fades and allow residual heat to finish the bake while cooling.
Pro Tips and Tweaks
I like to offer practical tweaks that help you tailor these cookies to your kitchen and taste. The tips below cover texture, assembly, and presentation so you can bake with confidence. Try one or two adjustments the first time to find what you prefer.
- Measure precisely Use a scale for the peanut butter and sugars to ensure consistent texture from batch to batch, especially when scaling the recipe.
- Control spread If cookies spread too thin, chill the scooped dough for 15 to 20 minutes before baking to help them hold their shape.
- Protect your pans Always line sheets with parchment or silicone to prevent melted candy from sticking and to promote even browning on the bottoms.
- Customize toppings Press the M&Ms into the tops before baking for a bright, festive look and slightly textured surface after baking.
- One bowl method Mixing by hand in a single bowl keeps cleanup easy and preserves the tender crumb by avoiding over mixing.
- Store properly Keep cooled cookies in an airtight container at room temperature for several days, or freeze for longer storage; layer with parchment to prevent sticking.
What to Serve Alongside Peanut Butter Candy Cookies
These cookies are versatile and can be shared in many settings, whether casual or festive. Below are ideas for pairings, occasions, and storage that help you present them beautifully and keep them delicious. Use the list to match the mood you want, from a cozy treat to a party platter.
- Casual snack platter Arrange the cookies with fresh fruit and plain crackers for a simple, crowd friendly board that balances sweet and neutral bites.
- Kids party Use the colorful M&Ms to make a themed dessert table, pairing the cookies with popcorn and juice boxes for an easy celebration spread.
- Gift idea Stack cooled cookies in a clear tin or box with a ribbon for a cheerful homemade gift that travels well to neighbors or teachers.
- Seasonal bundling For holidays or seasonal events, place cookies in decorative tins and include a small card; they are particularly nice for parties and potlucks.
- Storage tips Keep cookies in an airtight container at room temperature for up to four days, or freeze cooled cookies for up to two months, separating layers with parchment.
- Occasions Perfect for bake sales, school events, and casual get togethers, where the portable nature and bright presentation make them an easy favorite.
FAQ
Conclusion
These Peanut Butter Candy Cookies shine because they combine a simple, peanut buttery base with playful pockets of candy that surprise every bite. They are quick to assemble, require minimal ingredients, and create a nostalgic treat that travels well to gatherings. I hope you give them a try, whether for a last minute dessert or a cozy baking afternoon with family. They are forgiving, fun, and reliably loved, so let the oven do the work and enjoy the bright smiles they bring.
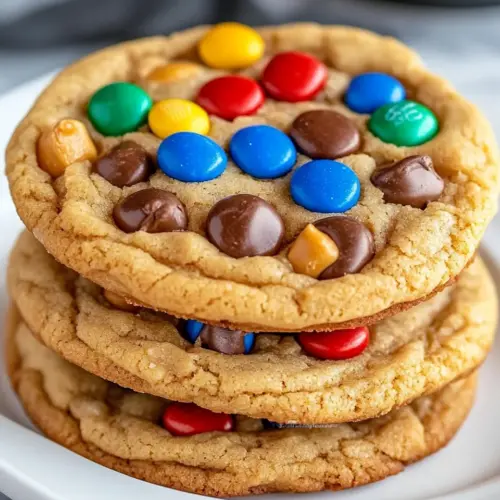
Peanut Butter Candy Cookies
Equipment
- Oven
- Cookie Sheet
- Parchment paper or silicone baking mat
- Mixing Bowl
- Spoon or spatula
- Ice Cream Scoop
Ingredients
- 1 cup (268 g) peanut butter (use a no-stir shelf stable brand like Skippy) Provides creamy, rich fat and intense peanut flavor while acting as the primary binding agent to hold cookie dough together; choose a no-stir, shelf-stable style for consistent texture and easier measuring. Adds moisture and contributes to a tender crumb while delivering the classic peanut butter backbone of these candy-studded cookies.
- 3/4 cup (150 g) packed brown sugar Sweetens and adds deep molasses notes while contributing moisture and chewiness to the cookie; packed brown sugar helps create a soft, slightly sticky texture that complements the peanut butter. Helps with browning and enhances overall flavor complexity through its caramel-like tones.
- 1/4 cup (50 g) granulated sugar Contributes additional sweetness and helps balance the molasses-rich brown sugar while promoting a crisper exterior during baking; granulated sugar aids in spreading and creates subtle crunch. Also assists with caramelization, improving color and light crispness contrast with the chewy interior.
- 1 large egg Adds structure, moisture, and leavening through protein and water content while helping to bind the dough; the egg promotes a tender yet cohesive texture and helps the cookies hold their shape. Also contributes to a richer mouthfeel and golden color when baked.
- 10 Reese’s Peanut Butter Cup Miniatures, unwrapped Provides pockets of sweet peanut butter-chocolate for bursts of flavor and textural contrast; unwrapped miniature peanut butter cups melt slightly into the cookie for concentrated candy centers. Adds nostalgic candy appeal and balances savory peanut butter in each bite.
- 1 cup M&Ms (any flavor) Introduces colorful, crunchy candy pieces that contribute additional chocolate flavor and varied texture; M&Ms create visual interest and a playful crunch in each cookie. Offers flexible flavor choices and helps portion small sweet bites throughout the batch.
Instructions
- Preheat oven to 350°F. Line 2 cookie sheets with parchment papers or silicone baking mats.: The kitchen fills with a faint warm, toasty scent as the oven comes up to temperature, and that steady heat is vital so the cookies bake evenly. Preparing two sheets at once saves time and prevents crowding, which keeps cookies from merging. Make sure the parchment is flat and the mats lie smooth, because uneven surfaces create lopsided cookies. A common mistake is skipping the liner, which can lead to sticking and imperfect bottoms, so always prepare your pans first.
- Stir together peanut butter, both sugars, and egg.: As you mix, notice how the glossy peanut butter softens and the sugars dissolve into it, forming a thick, cohesive batter with a sweet, nutty aroma. The sound is a gentle scraping as the bowl clears and the dough comes together. I use a sturdy spoon or spatula to fold until no streaks of sugar remain, which ensures even sweetness and texture. If the mixture seems too dry, small adjustments help, but be careful not to overwork the batter, as that can make the cookies tough. Avoid mixing at high speed, which can incorporate excess air and change the final texture.
- Scoop cookie dough in desired size (I used a large ice cream scoop that's about 1/4 cup). Place a peanut butter cup in the center and roll to cover completely. The dough is pretty wet, so spray your hands with cooking spray so it doesn't stick.: The dough will feel soft and slightly tacky, almost spreadable, and the motion of scooping should be smooth and satisfying. When you tuck a peanut butter cup into the center and roll it in, the candy should be fully enveloped so it does not leak during baking. Spraying hands or lightly flouring them prevents the dough from clinging, which keeps shapes uniform. A trap I often see is making the ball too loose so the candy peeks out, which can melt onto the pan, so be generous when sealing the dough around the candy.
- Place on prepared cookie sheet (3 inches apart) and top with 4-6 peanut butter M&Ms.: Arrange each dough ball with enough space to allow for gentle spreading, and the visual of bright M&Ms pressed into the top is cheerful. Pressing the candies in just enough to nestle them on the surface helps them stay attached during baking and creates a pleasing mosaic once baked. The sound is quiet as the candies lightly settle into the dough, and the contrast of color against the tan dough is attractive. Avoid crowding the pan, as that reduces browning and makes cookies stick together.
- Bake for 10-15 minutes, or until they are just no longer glossy. Cool completely before removing from cookie sheet.: As the cookies bake, the kitchen will smell richly of roasted nuts and warm sugar, and the surface will shift from glossy to matte indicating doneness. Edges may firm slightly while centers remain soft, which is exactly what you want. Let the cookies sit on the sheet to finish setting, because removing them too soon can cause them to break. A typical error is overbaking until they look dark, which removes the tender interior, so pull them when the gloss fades and allow residual heat to finish the bake while cooling.
Notes
- Measure precisely Use a scale for the peanut butter and sugars to ensure consistent texture from batch to batch, especially when scaling the recipe.
- Control spread If cookies spread too thin, chill the scooped dough for 15 to 20 minutes before baking to help them hold their shape.
- Protect your pans Always line sheets with parchment or silicone to prevent melted candy from sticking and to promote even browning on the bottoms.
- Customize toppings Press the M&Ms into the tops before baking for a bright, festive look and slightly textured surface after baking.
- One bowl method Mixing by hand in a single bowl keeps cleanup easy and preserves the tender crumb by avoiding over mixing.
- Store properly Keep cooled cookies in an airtight container at room temperature for several days, or freeze for longer storage; layer with parchment to prevent sticking.