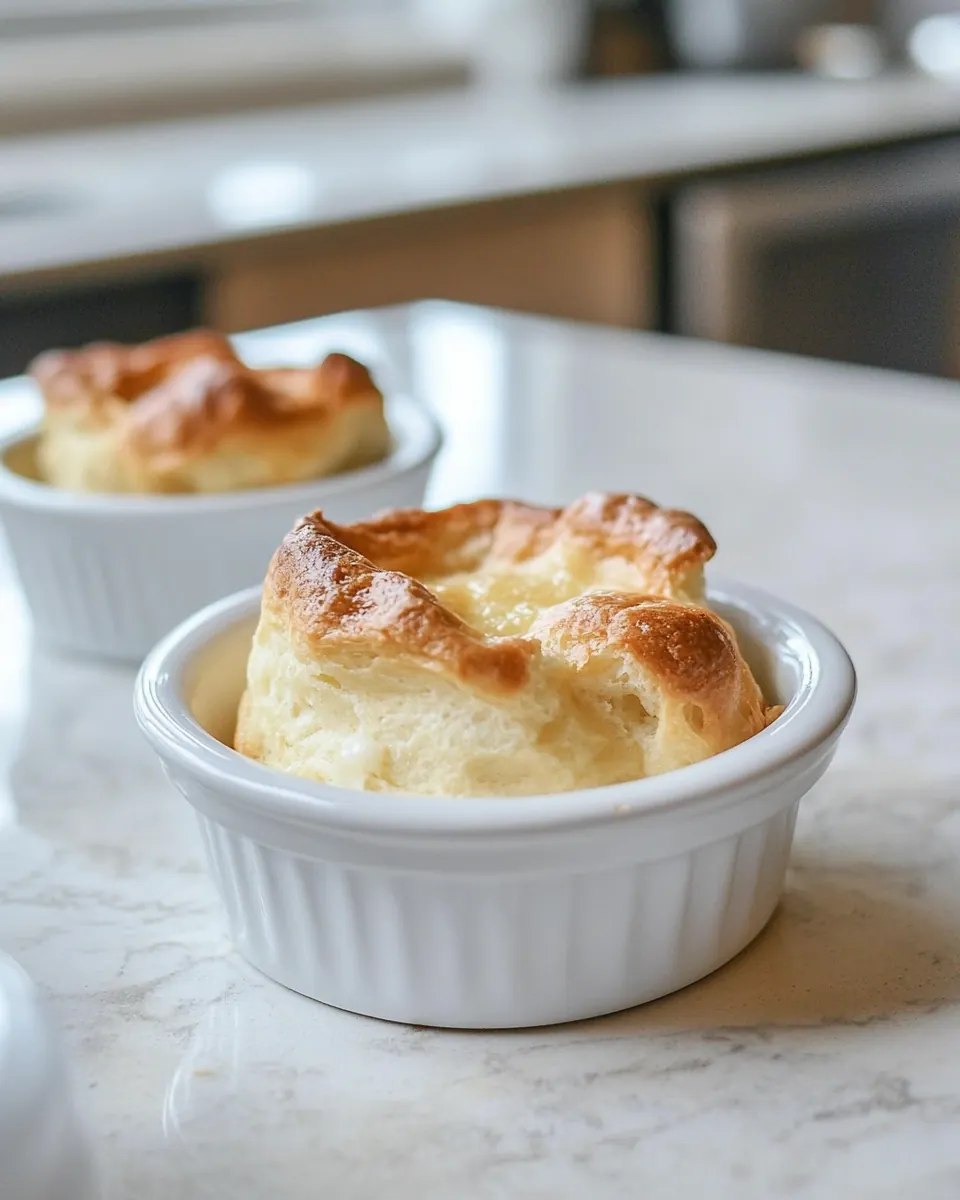
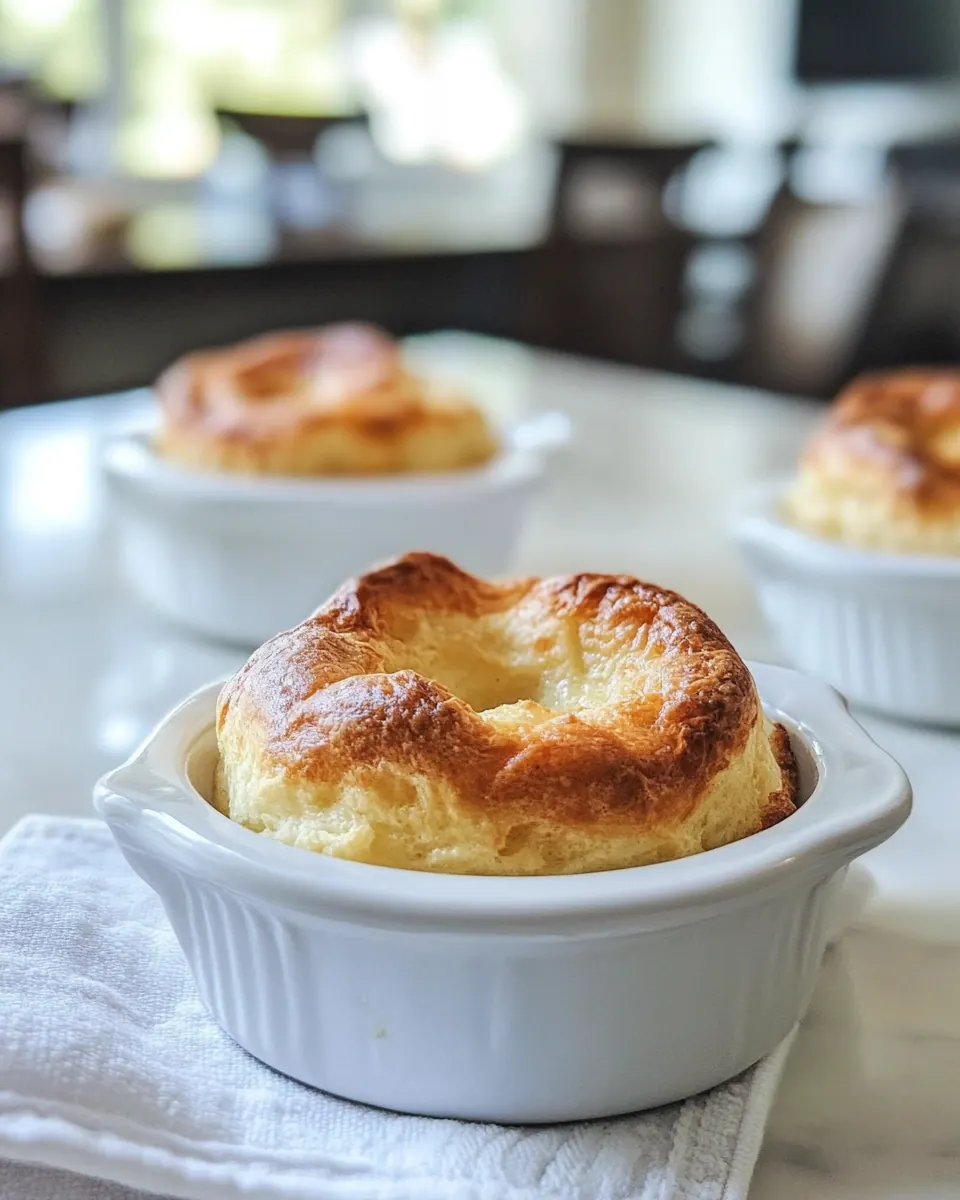
Yorkshire Pudding
Yorkshire Pudding has always been one of those nostalgic recipes I reach for when I want to reconnect with simple, honest baking that makes a meal feel like a celebration.
I first learned to make Yorkshire Pudding on a blustery afternoon in my grandmother’s kitchen, standing on a stool so I could peer into the oven as the batter puffed into tall golden crowns. The warmth of the oven, the faint scent of sizzling fat, and the way the puddings rose then settled slightly as they cooled are memories I carry every time I whisk eggs and flour together. That day she told me a small secret about room temperature ingredients and patience, and it changed my puddings forever.
Years later, whenever I want to impress guests without fuss, I reach for this recipe. I like how Yorkshire Pudding reads like a humble side but performs like a star, offering crisp edges and pillowy centers that soak up gravy or stand boldly beside roasted vegetables. I remember serving it on a rainy Sunday, watching everyone tear into the warm shells and laugh at how something so simple could taste so luxurious. That combination of crunch and tender crumb is what keeps me making it again and again.
Recipe Snapshot
1 hr 10 mins
45 mins
25 mins
Medium
160 kcal
American
Gluten-Free, Low FODMAP
Side Dishes
Muffin tin, Large bowl, Whisk, Sifter, Baking sheet
Why We Love This Yorkshire Pudding
Comforting yet impressive
I adore how Yorkshire Pudding is both approachable and dramatic. When I take the tray out of the oven, the room quiets for a beat as everyone admires the tall, golden cups. It feels like a small theatrical moment, and I love that ordinary pantry ingredients deliver it.
Minimal ingredients, maximum payoff
One of the reasons I keep this recipe on rotation is its thriftiness. With just eggs, milk, flour, salt, and hot fat, you get a variety of textures and flavors. I appreciate recipes that respect simple ingredients and let technique create the magic.
Reliable technique
After a few tries you’ll learn the cues that make a towering pudding, such as the sound of sizzling oil and the batter’s consistency. I enjoy teaching these cues to friends, because once you know them, you can reproduce great results every time.
Versatility at the table
I serve Yorkshire Pudding with everything from Sunday roast to a vegetable-forward midweek supper. Its ability to pair with gravies, roasted root vegetables, or simply buttered greens makes it a go to for many occasions I host.
Great for sharing
Lastly, I love that one batch yields a dozen puddings, which is perfect for gatherings. There is something generous about handing out warm, hollow cups that encourage everyone to dig in and enjoy the simple pleasures of good food together.
Ingredients You’ll Need for Yorkshire Pudding
These ingredients are intentionally minimal, and each plays a clear role. The eggs and milk build structure and steam, the flour provides body, the salt balances flavor, and the hot fat creates that dramatic puff and crisp edge. Together they form a light batter that transforms in a very hot oven into the characteristic tall, airy puddings we love.
- 4 whole eggs at room temperature: Whisk thoroughly to incorporate air and provide structure; eggs help create a light, airy batter and promote rise during baking. Use at room temperature to blend more evenly with other wet ingredients and improve final texture.
- 1 1/2 cups milk at room temperature: Warm gently and blend smoothly to hydrate flour and thin the batter; milk contributes moisture, richness, and steam which aids in puffing up the puddings. Choosing room–temperature milk helps the batter remain cohesive and prevents shock to the eggs.
- 1/2 teaspoons salt: Season evenly to enhance overall flavor and balance the batter; salt strengthens gluten slightly and brings out the natural tastes of the other components. Dissolve it into the liquid to ensure even distribution throughout the mixture.
- 1 1/2 cups all purpose flour: Sift or whisk to remove lumps and form the base of the batter; all-purpose flour provides the starch and gluten network that traps steam and gives the puddings their characteristic rise and crisp edges. Measure accurately and fold gently to avoid overworking the dough while ensuring a smooth consistency.
- 6 tablespoons beef drippings or canola oil: Heat until smoking hot in the tins to create sizzling fat that jump-starts rising; beef drippings or canola oil provide the hot fat necessary for immediate steam formation and a crisp, browned exterior. Use enough to coat each well and replace or refresh between batches for best results.
How to Prepare Yorkshire Pudding
These steps will guide you from room temperature ingredients to crisp, puffed puddings. The technique emphasizes timing and temperature, and once you get comfortable with the cues, the results become dependable and striking.
- If you are just pulling your eggs from the fridge, be sure to place eggs in a bowl of hot water for 10 minutes, to bring to room temperature.: The moment you immerse chilled eggs in hot water you will feel the shell warm, and that slight warmth helps the eggs blend smoothly into the batter. You may notice a quieter, silkier whisking rhythm compared with cold eggs , which tend to resist and create tiny curdled bits. This warming step is important because room temperature eggs incorporate air more readily, aiding lift. A common mistake is skipping this step and finding the batter sluggish, which can lead to shorter puddings.
- Warm milk in microwave for 30-45 seconds, to bring to room temperature.: Heating the milk briefly brings it close to room temperature, which helps the batter remain cohesive and prevents shocking the room temperature eggs . You will notice the milk feel tepid to the touch when it is right. The slight warmth promotes better emulsification and more steam generation in the oven. Avoid overheating, as hot milk can cook the eggs prematurely and ruin the batter.
- In a large bowl using a large whisk, beat the eggs and milk for about 2 minutes; you want to get as much air into this mixture as possible. (You can use a hand mixer for 1 minute.): As you whisk the eggs and milk together you will see the mixture become paler and slightly frothy, with small bubbles gathering on the surface. This aeration is crucial because trapped air expands in the oven and helps the puddings rise. The whisking also creates a smooth texture that avoids lumps later. A common pitfall is underwhisking, which leaves the batter heavy and reduces rise.
- Add the salt, and lightly add the flour using a sugar duster or sifter (don't overlook the sifting step – it makes a difference!) Lightly whisk the batter just until no flour clumps appear. Don't over-mix, or puddings will be dense.: Sifting the flour over the wet mix gives an even distribution and prevents lumps that can weigh down the pudding. As you gently whisk, watch for the batter to come together into a silky, slightly viscous liquid. There should be no visible pockets of dry flour . Overmixing at this stage develops gluten, which results in a denser pudding, so stop when smooth. Avoid vigorous mixing that creates a gluey texture.
- Set the batter aside, and let it stand for 30 minutes. (You can also put the batter into a pitcher or large glass measuring cup at this point – it makes it easier to pour later on).: Allowing the batter to rest lets the flour hydrate fully, creating a more cohesive structure and producing taller puddings. During this time you may notice small bubbles rise and settle, and the batter's texture will smooth further. Resting also relaxes the gluten slightly, preventing toughness. Do not skip this rest, as immediate baking often yields less height and a gummy interior.
- Using a standard muffin tin, add 1/2 TBSP of beef drippings (or canola oil) to each cup. Set aside.: When you portion the hot fat into each cup you will see it pool and reflect the light, and this is the foundation for the crisp base. Enough fat ensures a rapid transfer of heat to the batter, creating steam and lifting the puddings upward. Too little fat can cause uneven browning and sticking, so measure carefully. A frequent error is underfilling the cups with fat, which prevents the trademark crispness.
- Move oven rack to lower-middle position. Place large baking sheet on oven rack, and then the oiled muffin tins on top of the baking sheet.: Positioning the tins on a baking sheet helps with even heat distribution and makes it easier to slide the whole assembly in and out. The lower middle part of the oven gives strong bottom heat which aids in a vigorous initial rise. You'll want the pans centered so heat surrounds them evenly. If you put the tins too low or too high you may get uneven lifting or browning.
- Preheat oven to 450 degrees (with the pans inside the oven). Once the oven is ready, let it sit for another 5 minutes to make sure the oil gets nice and hot.: Preheating with the pans and fat inside is essential; you should see the fat shimmer or give off a faint wispy smoke when hot. That intense heat triggers instant steam when the batter hits the fat, causing the dramatic rise. Waiting the extra five minutes ensures the oil reaches temperature. The usual mistake is opening the oven too often during preheat, which causes temperature drop and reduces rise.
- Working quickly, open the oven and pour the batter into each oiled muffin tin, about 2/3 the way full. Try not to keep the oven door open for long, as you don't want the temperature to drop.: Pouring with a steady hand, aim for uniform fill so each pudding rises evenly; you may hear a quick sizzle as batter hits the hot fat. The batter will spread and settle immediately, and that sizzling sound is a sign the fat is hot enough. Keep the oven door open only briefly to avoid losing heat, which can flatten the puddings. A typical misstep is slow pouring, which reduces the initial lift from the hot fat.
- Quickly close the oven door, and let bake for 5 minutes. Keeping the oven door closed (don't peak!), lower the heat down to 375 degrees and bake for another 10-15 minutes, or until a deep golden brown.: During the first five minutes you will notice an aggressive puff as steam inflates the batter, and then continuing at 375 degrees allows the centers to set while the exterior crisps. The color should progress to a deep golden brown, signaling caramelization and a nutty flavor. Resist peeking, as opening the door releases steam and cold air, which can cause collapse. If puddings brown too quickly, your oven may be hotter than its dial indicates.
- Remove from muffin tins, and serve immediately.: When you take them out, the puddings will sing with steam and the edges will be crisp while the interiors remain tender. Serving hot preserves the contrast between crunchy outside and soft inside, and they are best enjoyed straight away. If you wait too long they will deflate and lose textural contrast. A helpful trick is to serve as soon as you unmold them so everyone experiences the full effect.
Making Adjustments
I like to offer practical tweaks so you can tailor Yorkshire Pudding to your pantry and preference. Below are focused tips that expand on the recipe without changing the essential method.
- Swap fat carefully If you prefer a neutral taste use canola oil, it still reaches a high smoking point and produces a crisp base.
- Use beef drippings for more flavor Beef drippings give a deeper savory note that complements roasted mains and adds richness to each pudding.
- Rest the batter Allow the batter to sit for the full 30 minutes, as this hydrates the flour and helps produce taller, lighter puddings.
- Check oven accuracy If your puddings brown too quickly use an oven thermometer to confirm the real temperature and adjust accordingly.
- Portion consistently Fill each cup about two thirds full for even rising and similar bake times across the batch.
- Hold briefly under foil If you need to delay serving, tent loosely with foil and return to a warm oven for a few minutes to firm them up, watching closely to prevent additional browning.
Accompaniments for Yorkshire Pudding
Yorkshire Pudding pairs beautifully with roast-centric meals and can be adapted for many occasions. Below are ideas for serving, storage, and pairing that will help you plan a complete meal around these puddings.
- Classic roast pairing Serve warm puddings with roasted beef and a rich gravy for a traditional Sunday meal where the puddings soak up the sauce and add a crunchy contrast.
- Vegetable forward meals Offer puddings alongside roasted root vegetables and a robust vegetable gravy for a meatless but satisfying plate that highlights texture and warmth.
- Festive occasions Bring these to holiday dinners as a generous side, they work well for family gatherings and special lunches where sharing is central to the meal.
- Storage tips If you need to make them ahead, cool fully, store in an airtight container for up to two days, and reheat briefly in a hot oven to crisp the edges again before serving.
- Seasonal pairings In cooler months I pair them with root vegetables and braised greens, while in milder seasons they complement lighter roasted vegetables and simple herbed gravies.
- Serving style Present them warm on a platter so guests can take one or two; the hollow centers invite filling with gravies or savory stews for a lovely interactive element at the table.
FAQ
Conclusion
Yorkshire Pudding is special because it transforms a handful of pantry staples into tall, golden pockets of texture and flavor that elevate any meal. I encourage you to try this recipe next time you roast or want an impressive yet uncomplicated side, because mastering the cues for temperature and timing will reward you with consistently dramatic results. Enjoy the ritual of heating the fat, the quiet satisfaction of the initial puff, and the shared smiles when everyone reaches for a warm, crisp pudding.
Yorkshire Pudding
Equipment
- Muffin Tin
- Large Bowl
- Whisk
- Sifter
- Baking Sheet
Ingredients
- 4 whole eggs at room temperature Whisk thoroughly to incorporate air and provide structure; eggs help create a light, airy batter and promote rise during baking. Use at room temperature to blend more evenly with other wet ingredients and improve final texture.
- 1 1/2 cups milk at room temperature Warm gently and blend smoothly to hydrate flour and thin the batter; milk contributes moisture, richness, and steam which aids in puffing up the puddings. Choosing room-temperature milk helps the batter remain cohesive and prevents shock to the eggs.
- 1/2 teaspoons salt Season evenly to enhance overall flavor and balance the batter; salt strengthens gluten slightly and brings out the natural tastes of the other components. Dissolve it into the liquid to ensure even distribution throughout the mixture.
- 1 1/2 cups all purpose flour Sift or whisk to remove lumps and form the base of the batter; all-purpose flour provides the starch and gluten network that traps steam and gives the puddings their characteristic rise and crisp edges. Measure accurately and fold gently to avoid overworking the dough while ensuring a smooth consistency.
- 6 tablespoons beef drippings or canola oil Heat until smoking hot in the tins to create sizzling fat that jump-starts rising; beef drippings or canola oil provide the hot fat necessary for immediate steam formation and a crisp, browned exterior. Use enough to coat each well and replace or refresh between batches for best results.
Instructions
- If you are just pulling your eggs from the fridge, be sure to place eggs in a bowl of hot water for 10 minutes, to bring to room temperature.: The moment you immerse chilled eggs in hot water you will feel the shell warm, and that slight warmth helps the eggs blend smoothly into the batter. You may notice a quieter, silkier whisking rhythm compared with cold eggs , which tend to resist and create tiny curdled bits. This warming step is important because room temperature eggs incorporate air more readily, aiding lift. A common mistake is skipping this step and finding the batter sluggish, which can lead to shorter puddings.
- Warm milk in microwave for 30-45 seconds, to bring to room temperature.: Heating the milk briefly brings it close to room temperature, which helps the batter remain cohesive and prevents shocking the room temperature eggs . You will notice the milk feel tepid to the touch when it is right. The slight warmth promotes better emulsification and more steam generation in the oven. Avoid overheating, as hot milk can cook the eggs prematurely and ruin the batter.
- In a large bowl using a large whisk, beat the eggs and milk for about 2 minutes; you want to get as much air into this mixture as possible. (You can use a hand mixer for 1 minute.): As you whisk the eggs and milk together you will see the mixture become paler and slightly frothy, with small bubbles gathering on the surface. This aeration is crucial because trapped air expands in the oven and helps the puddings rise. The whisking also creates a smooth texture that avoids lumps later. A common pitfall is underwhisking, which leaves the batter heavy and reduces rise.
- Add the salt, and lightly add the flour using a sugar duster or sifter (don't overlook the sifting step – it makes a difference!) Lightly whisk the batter just until no flour clumps appear. Don't over-mix, or puddings will be dense.: Sifting the flour over the wet mix gives an even distribution and prevents lumps that can weigh down the pudding. As you gently whisk, watch for the batter to come together into a silky, slightly viscous liquid. There should be no visible pockets of dry flour . Overmixing at this stage develops gluten, which results in a denser pudding, so stop when smooth. Avoid vigorous mixing that creates a gluey texture.
- Set the batter aside, and let it stand for 30 minutes. (You can also put the batter into a pitcher or large glass measuring cup at this point – it makes it easier to pour later on).: Allowing the batter to rest lets the flour hydrate fully, creating a more cohesive structure and producing taller puddings. During this time you may notice small bubbles rise and settle, and the batter's texture will smooth further. Resting also relaxes the gluten slightly, preventing toughness. Do not skip this rest, as immediate baking often yields less height and a gummy interior.
- Using a standard muffin tin, add 1/2 TBSP of beef drippings (or canola oil) to each cup. Set aside.: When you portion the hot fat into each cup you will see it pool and reflect the light, and this is the foundation for the crisp base. Enough fat ensures a rapid transfer of heat to the batter, creating steam and lifting the puddings upward. Too little fat can cause uneven browning and sticking, so measure carefully. A frequent error is underfilling the cups with fat, which prevents the trademark crispness.
- Move oven rack to lower-middle position. Place large baking sheet on oven rack, and then the oiled muffin tins on top of the baking sheet.: Positioning the tins on a baking sheet helps with even heat distribution and makes it easier to slide the whole assembly in and out. The lower middle part of the oven gives strong bottom heat which aids in a vigorous initial rise. You'll want the pans centered so heat surrounds them evenly. If you put the tins too low or too high you may get uneven lifting or browning.
- Preheat oven to 450 degrees (with the pans inside the oven). Once the oven is ready, let it sit for another 5 minutes to make sure the oil gets nice and hot.: Preheating with the pans and fat inside is essential; you should see the fat shimmer or give off a faint wispy smoke when hot. That intense heat triggers instant steam when the batter hits the fat, causing the dramatic rise. Waiting the extra five minutes ensures the oil reaches temperature. The usual mistake is opening the oven too often during preheat, which causes temperature drop and reduces rise.
- Working quickly, open the oven and pour the batter into each oiled muffin tin, about 2/3 the way full. Try not to keep the oven door open for long, as you don't want the temperature to drop.: Pouring with a steady hand, aim for uniform fill so each pudding rises evenly; you may hear a quick sizzle as batter hits the hot fat. The batter will spread and settle immediately, and that sizzling sound is a sign the fat is hot enough. Keep the oven door open only briefly to avoid losing heat, which can flatten the puddings. A typical misstep is slow pouring, which reduces the initial lift from the hot fat.
- Quickly close the oven door, and let bake for 5 minutes. Keeping the oven door closed (don't peak!), lower the heat down to 375 degrees and bake for another 10-15 minutes, or until a deep golden brown.: During the first five minutes you will notice an aggressive puff as steam inflates the batter, and then continuing at 375 degrees allows the centers to set while the exterior crisps. The color should progress to a deep golden brown, signaling caramelization and a nutty flavor. Resist peeking, as opening the door releases steam and cold air, which can cause collapse. If puddings brown too quickly, your oven may be hotter than its dial indicates.
- Remove from muffin tins, and serve immediately.: When you take them out, the puddings will sing with steam and the edges will be crisp while the interiors remain tender. Serving hot preserves the contrast between crunchy outside and soft inside, and they are best enjoyed straight away. If you wait too long they will deflate and lose textural contrast. A helpful trick is to serve as soon as you unmold them so everyone experiences the full effect.
Notes
- Swap fat carefully If you prefer a neutral taste use canola oil, it still reaches a high smoking point and produces a crisp base.
- Use beef drippings for more flavor Beef drippings give a deeper savory note that complements roasted mains and adds richness to each pudding.
- Rest the batter Allow the batter to sit for the full 30 minutes, as this hydrates the flour and helps produce taller, lighter puddings.
- Check oven accuracy If your puddings brown too quickly use an oven thermometer to confirm the real temperature and adjust accordingly.
- Portion consistently Fill each cup about two thirds full for even rising and similar bake times across the batch.
- Hold briefly under foil If you need to delay serving, tent loosely with foil and return to a warm oven for a few minutes to firm them up, watching closely to prevent additional browning.