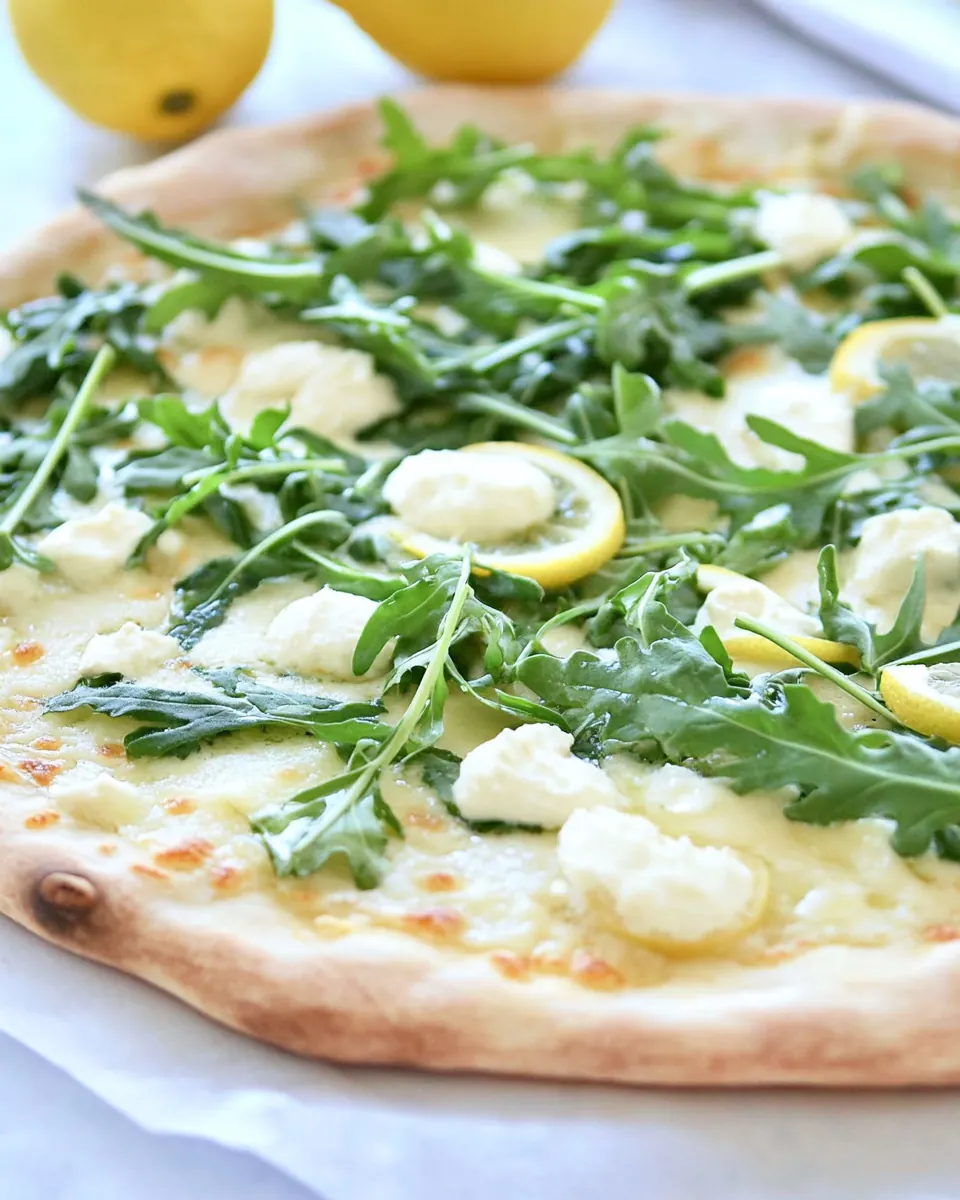
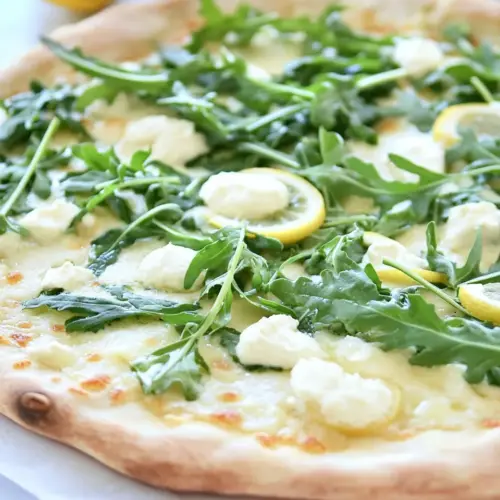
Lemon Arugula Pizza
Lemon Arugula Pizza has been one of my favorite go to recipes when I want something bright, fresh, and a little bit fancy without fuss. The first time I made this pizza I was racing the late afternoon light to get dinner on the table, and the combo of warm bubbling mozzarella, peppery arugula, and a bright squeeze of lemon juice felt like sunshine on a plate. I remember tasting that first slice and thinking how a few thoughtful ingredients could transform simple pizza into something that tasted celebratory yet totally doable on a weeknight.
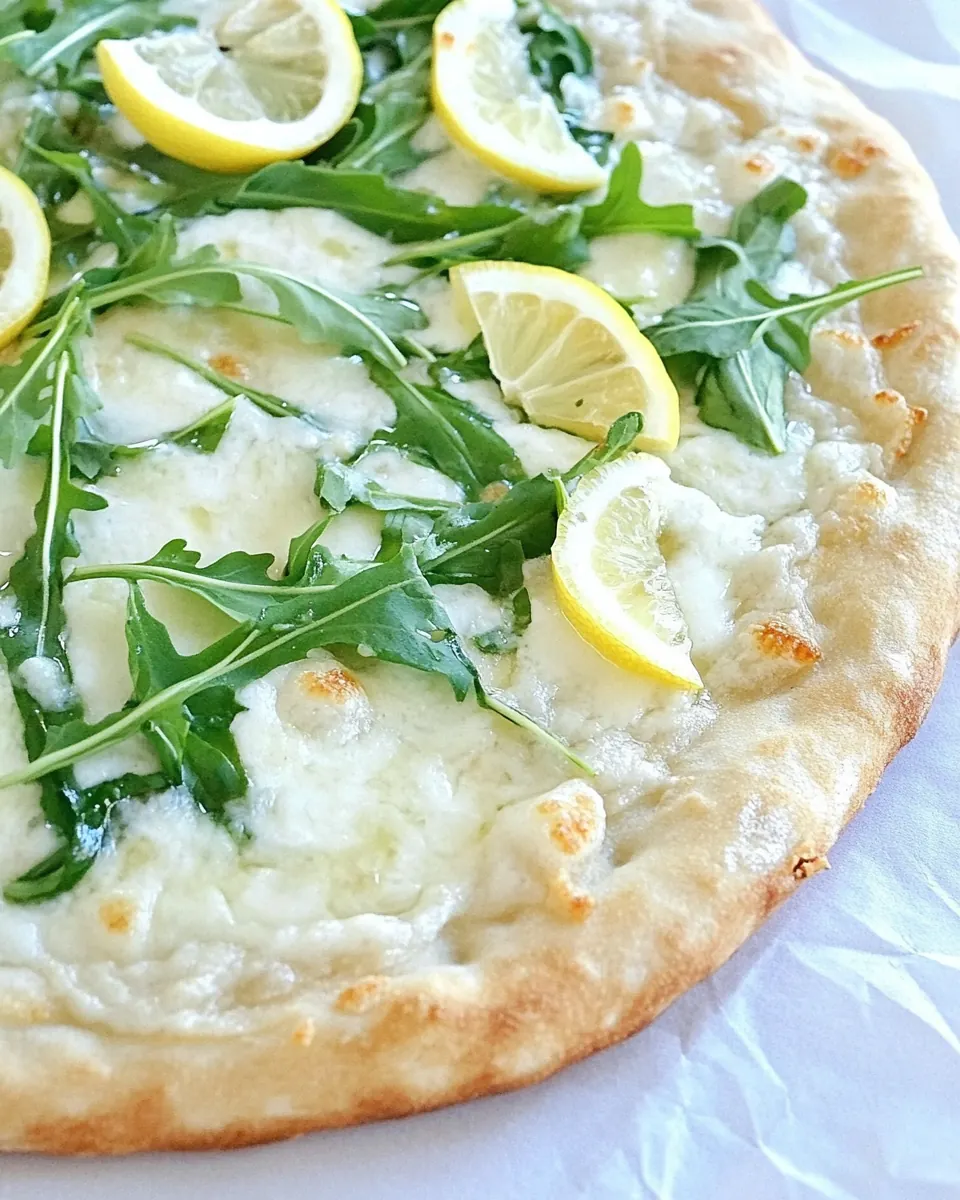
Over the years I have tweaked how I handle the dough and how I dress the finished pie. I like a slightly crisp crust with a tender interior, so I roll the dough thinner than I used to. I also learned to add olive oil to the base rather than a heavy sauce, which lets the silkiness of the mozzarella and the salty tang of Parmesan cheese sing. Every time friends come over, they comment on the lift the fresh lemon juice gives the greens, and I always smile because it is such an easy flourish.
Recipe Snapshot
45 mins
30 mins
15 mins
Medium
250 kcal
Italian
Gluten-Free, Low FODMAP
Dinner
Stand mixer, Dough hook, Rolling pin, Pizza stone or pizza pan
The Magic of This Lemon Arugula Pizza
It balances bright and savory
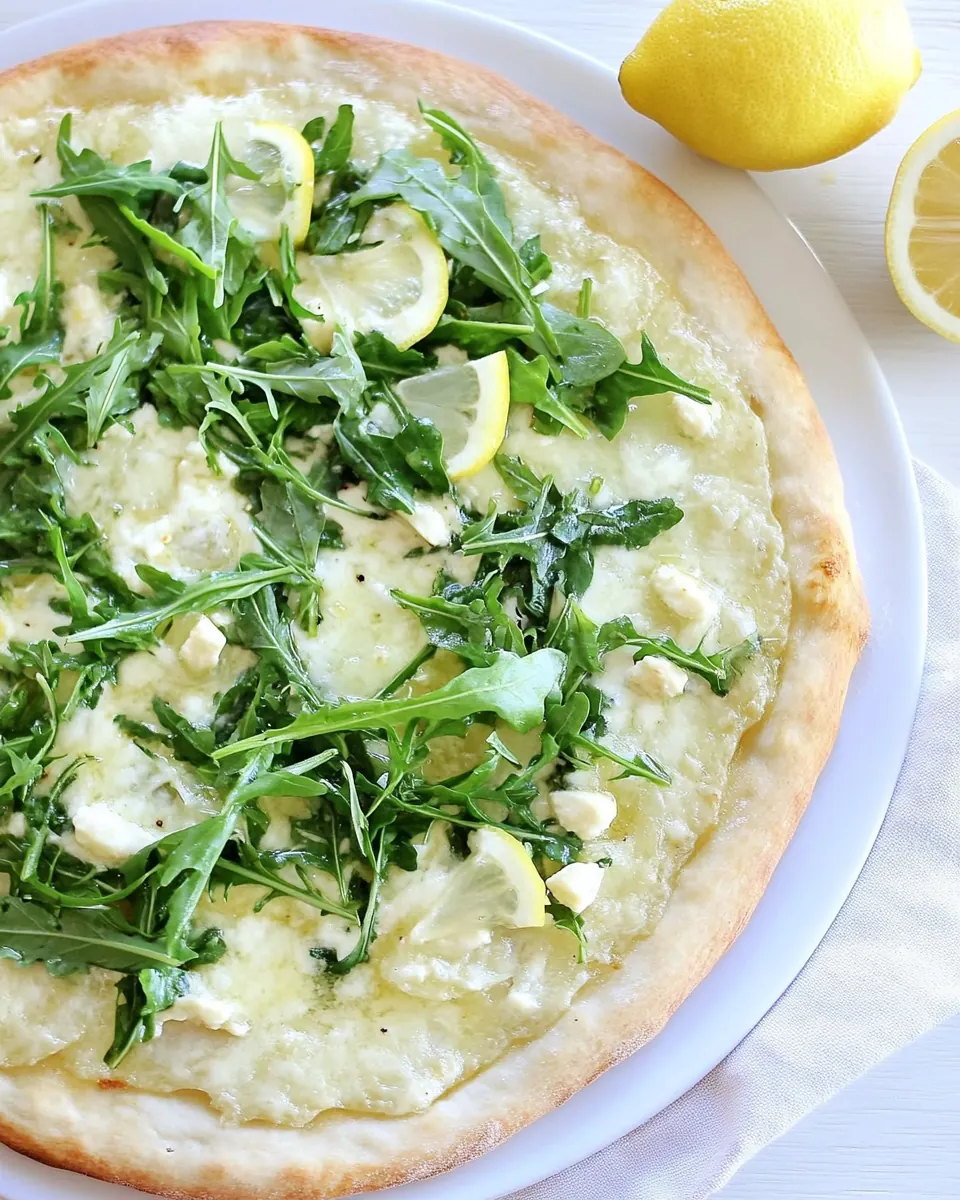
I love how the dish blends peppery arugula with melty mozzarella and sharp Parmesan cheese, creating a contrast that keeps each bite interesting. The lemon juice provides a citrusy lift that cuts through the richness so the pizza never feels heavy. When I serve it, I find people notice that brightness first, and then the cheesy warmth follows, which is always satisfying.
Versatile for occasions
We make this pie for casual weeknights and also for small dinner parties because it looks a little elegant without requiring hours in the kitchen. I appreciate recipes that travel well between everyday meals and small celebrations, and this one does that easily. You can scale the dough or make two pies to feed a crowd, and it still reads special.
Simple pantry forward
The ingredients are straightforward and fridge friendly, so I can usually put one together on short notice. Basic pantry items like flour and yeast form the backbone of the crust, while a little olive oil and cheese finish the pie. That practicality makes it a reliable go to when I want something impressive with minimal shopping.
Fast, but feels artisanal
From dough mixing to pulling the pizza from the oven, it moves quickly and the results feel intentional. I enjoy the tactile work of shaping the dough and watching the crust blister and brown, it is therapeutic. Plus, the final step of tossing arugula with lemon juice and piling it on the hot pie feels like a culinary flourish that anyone can perform.
Customizable finishing touches
I often vary how much Parmesan cheese I add at the end or adjust the amount of lemon juice depending on the fruit’s brightness. These small tweaks let me tailor the pizza to the season or my mood, and that flexibility is why I find myself returning to it again and again.
Ingredients You’ll Need for Lemon Arugula Pizza
These ingredients are chosen to let the crust, cheese, and greens each play a clear role. The dough ingredients give structure and chew, the cheeses supply creaminess and salt, and the finishing arugula and lemon juice add lift so the pie feels fresh rather than heavy. I think of the dough as the stage, the cheeses as the lead performers, and the greens as a bright chorus that completes the composition.
- For the pizza dough: Used to label the section of dough preparation and signal the beginning of the ingredient list for clarity in recipe steps. Provides structure to separate components of the recipe and guides workflow for batch preparation. Helps readers identify which items pertain specifically to making the crust versus toppings.
- 2 1/4 teaspoons rapid rise yeast: Activated to leaven the dough by fermenting sugars and producing carbon dioxide, creating a light and airy crust. Dissolved into warm water with a pinch of sugar to ensure viability before mixing into flour. Rapid rise variety reduces proofing time and helps achieve quicker dough development.
- 1 cup warm water: Heated to a lukewarm temperature to dissolve and activate yeast without killing it, aiding fermentation and dough rise. Combined with yeast and sugar to form the initial mixture that hydrates flour and encourages gluten formation. Temperature control is important for predictable fermentation and dough texture.
- Pinch of sugar: Added in small amount to feed the yeast and jump-start fermentation, improving rise speed and yeast activity. Used sparingly so it does not overly sweeten the dough while providing necessary fuel for yeast metabolism. Helps ensure consistent proofing times with rapid rise yeast.
- 3 1/2 cups Gold Medal Better For Bread Flour: Measured as the primary source of flour for the dough, providing structure, gluten, and texture when hydrated and kneaded. Specified brand implies consistent protein content suited for bread-style pizza crust and predictable baking performance. Forms the bulk of dough mass and determines chew and crumb.
- 1 teaspoons salt: Seasoned into the dough to enhance flavor and strengthen gluten by tightening the dough matrix slightly during mixing. Measured precisely to balance taste without inhibiting yeast performance. Contributes to overall savory profile of the finished crust.
- 1 tablespoon olive oil: Emulsified into the dough to add fat, tenderize the crumb, and improve dough handling and browning in the oven. Added during mixing to incorporate evenly, producing a more extensible and flavorful crust. Also helps prevent sticking during shaping and baking.
- Corn meal for spreading on pizza peel: Sprinkled on the pizza peel or baking surface to prevent sticking and to help the dough slide onto the stone or pan. Provides a bit of crunch and aids in easy transfer of the shaped pizza. Use sparingly to avoid excessive grittiness on the crust underside.
- Pizza Toppings: Introduced to mark the beginning of the toppings list and separate it from dough ingredients, guiding assembly order during cooking. Indicates a shift from dough preparation to finishing and flavoring the pizza. Helps cooks quickly locate garnish and finishing components.
- 1 tablespoon olive oil: Brushed or drizzled to sauté or lightly dress toppings, promoting flavor and helping cheeses brown evenly during baking. Used both for coating the crust edge and for dressing arugula or other finishing greens. Adds fruity or peppery notes depending on oil quality.
- 6 ounces fresh mozzarella sliced: Layered over the dough to provide a creamy, melting cheese base that yields stringy texture and mild milky flavor when baked. Sliced for even coverage and to allow pockets of melted cheese that complement other toppings. Balances sharper cheeses and fresh greens.
- 1/2 cup Parmesan cheese shredded: Sprinkled for a nutty, salty, and umami-rich finish that complements milder mozzarella and bright lemon. Shredded form melts slightly under heat and adheres to the pizza surface, enhancing savory depth. Can be increased or decreased to taste for stronger flavor.
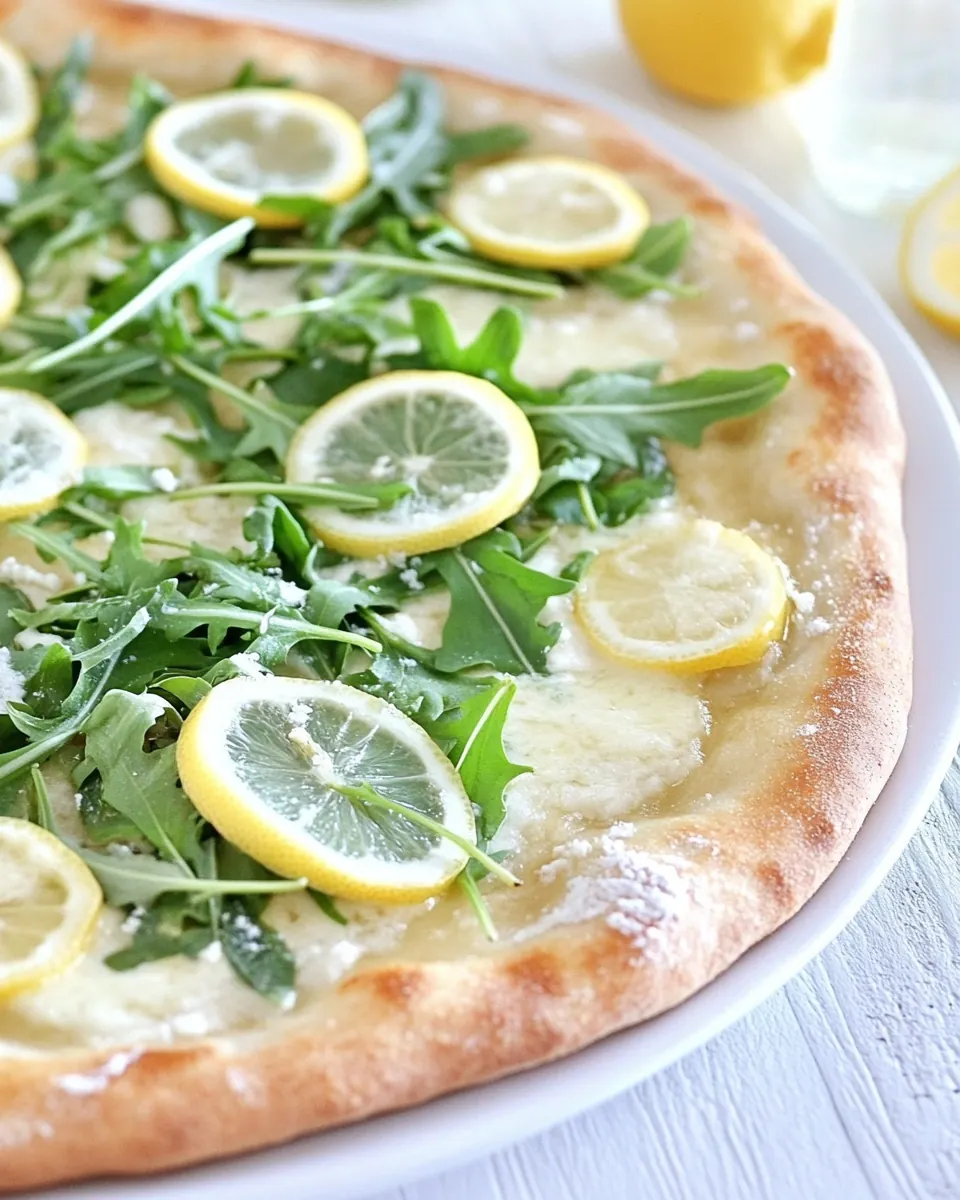
- 2 cups arugula: Tossed or piled after baking to add a peppery, fresh, and slightly bitter contrast to the rich cheese and baked crust. Used raw to preserve its delicate texture and vibrant flavor, pairing particularly well with citrus and sharp cheeses. Quantity can be adjusted for desired green coverage.
- 2 tablespoons fresh lemon juice: Squeezed over arugula to add bright acidity that balances the cheese and oil, lifting the overall flavor profile of the pizza. Freshly squeezed juice provides clean citrus notes and helps wilt the greens slightly when dressed. Adds a zesty counterpoint to savory toppings.
- Salt and pepper to taste: Seasoned to taste to enhance and balance all flavors on the finished pizza, providing finishing touches to both greens and crust edges. Ground and added after dressing the arugula or before serving to ensure proper seasoning level for the whole dish. Adjust according to personal preference.
- Additional shredded parmesan cheese for serving (optional): Garnished at the end to add extra salty, savory richness and a finishing sprinkle for presentation, used only if a stronger cheese presence is desired. Shredded form makes it easy to scatter lightly over warm pizza so it melds with melted cheeses. Optional usage allows control over saltiness and texture.
How to Prepare Lemon Arugula Pizza
Working through these steps is rhythmic and rewarding, from waking the yeast to pulling the steaming pie from the oven. Take your time with tactile moments like kneading and shaping, and use the oven heat to coax the crust into blistered perfection. Below I expand each original direction into detailed guidance so you can follow along confidently.
- First, make the pizza dough. In a glass measuring cup or small bowl, combine yeast and 1 cup warm water. Add a pinch of sugar and let sit for 5 minutes.: You will notice a slight froth and yeasty aroma forming on the surface, which is the reassuring sign the yeast is alive and active. The warm water should feel comfortable to the wrist, and that gentle warmth helps the yeast bloom into bubbles, giving the dough lift. As you wait, the scent turns mildly sweet and bready, and that scent is a good indicator of readiness. If nothing happens after five minutes, the yeast may be old or the water too hot or too cold. Do not rush forward with inactive yeast, or the crust will remain dense and pale. A common mistake here is using water that is too hot, which can kill the yeast instantly, so test the temperature carefully.
- In the bowl of a stand mixer, add the flour and salt. Mix the ingredients until combined.: When you blend the flour and salt, the mixture should look even and fine without pockets of salt. This step ensures the salt will season the entire dough and prevents patches of over salted dough. The dry mixture smells clean and wheaty, and once combined it is ready to accept the liquid. A frequent oversight is adding salt directly onto the yeast during activation, which can inhibit it, so keeping them separate is wise.
- Add the yeast mixture to the flour mixture. Next, add 1 tablespoon of olive oil. Mix until combined. Switch to the dough hook and knead for about 5 minutes on medium speed.: As the dough takes shape, it will go from shaggy to a cohesive mass, soft and slightly tacky to the touch. The motion of the dough hook develops gluten, and you will see the dough pull away from the bowl and form a smooth surface. The sound changes too, from splattering to a low, steady thunk as the hook works. Under kneading leaves a crumbly texture, while over kneading can produce a tough crust, so aim for that sweet spot where the dough is stretchy and springs back when poked.
- Spray a large bowl with cooking spray. Form dough into a ball and place in the bowl. Cover pizza dough with a damp towel and set in a warm area to rise. Let the dough rise for 1 hour or until dough has doubled in size.: The dough should become noticeably puffy and airy, almost doubled in volume, with a slightly domed top and soft, tender skin. The aroma deepens into a richer dough scent, and pressing gently will leave a faint indentation that springs slowly back. Rising time depends on room temperature, so a cool kitchen may require a bit longer. Avoid letting the dough overproof, which causes weak structure and a collapsed crust when baked.
- Preheat the oven to 450 degrees F. Cut the dough in half. Take one piece of dough and punch it down on a lightly floured surface. You can refrigerate or freeze the other half of the dough or make 2 pizzas, if you wish. Using a rolling pin, roll the dough out into a circle. Place the pizza dough on a pizza pan or pizza stone.: The preheated oven readies the environment for immediate oven spring and browning. When you punch the dough down, you release large gas bubbles and create a denser, more even crumb. Rolling the dough thin will produce a crisper crust, while leaving it slightly thicker yields a chewier interior. Transfer it carefully to a pan or stone dusted with corn meal so it slides easily. One common error is over flouring the surface, which can dry out the dough and prevent good browning.
- Evenly brush the olive oil on the pizza. Top with fresh mozzarella slices. Add the parmesan cheese. Place the pizza in the oven and bake for 12-15 minutes or until pizza crust is golden and cheese is melted.: As the pie bakes, you will hear gentle bubbling and see the mozzarella melt into glossy pools while the crust develops golden blisters and a toasty aroma. The olive oil on the surface encourages even browning and a crisp edge. Watch for the cheese to be fully melted and the crust edges to take on a warm amber hue, that is the cue to pull it. Avoid leaving it unattended for too long, as cheese can over brown and the crust can harden if overbaked.
- Remove the pizza from the oven and place arugula on top. Squeeze fresh lemon juice over the arugula and season with salt and black pepper, to taste. Garnish with additional parmesan cheese, if desired. Cut into slices and serve.: The residual heat will slightly wilt the arugula so it softens without losing its peppery snap, and the aroma of citrus will brighten the whole pie. Toss the greens with the lemon juice briefly so they are evenly dressed, then distribute them across the hot pizza so each slice carries that fresh contrast. Season thoughtfully because the cheeses already add salt, and a light hand with pepper will enhance rather than overpower. A frequent mistake is adding too much lemon, which can take over the delicate balance.
- Note we made a thin crust pizza. Josh rolled the crust into about a 13-inch circle. If you want a thicker crust, don't roll it out as far.: The final sprinkle of extra Parmesan cheese provides an added savory note and a slight granular texture against the melted mozzarella . Cutting through the golden crust releases fragrant steam and creates neat slices that highlight the topping contrast. Serve immediately while the cheese is warm and the greens remain fresh. Waiting too long can lead to a soggy base as the toppings settle, so enjoy while hot.
- Note we made a thin crust pizza. Josh rolled the crust into about a 13 inch circle. If you want a thicker crust, don't roll it out as far: You can judge thickness visually as you roll, aiming for an even edge and uniform center so the bake is consistent. A thinner roll yields crispness and a larger surface for toppings, while a thicker roll gives a chewier interior; both are delicious depending on your preference. If you opt for thick, expect slightly longer bake time and a softer crumb. Avoid uneven rolling, which creates hotspots that brown before the center is done.
Tips and Tricks about Lemon Arugula Pizza
I like sharing practical tips that save time and improve results, and these are the little habits I use every time I make this pizza. They cover dough handling, baking, and finishing so you can consistently get a balanced, bright pie.
- Proofing check Always test the yeast in warm water with a pinch of sugar and expect gentle foaming after five minutes, which avoids wasted effort on dead yeast.
- Temperature matters Preheat your oven to 450 degrees F and, if using a stone, let it heat for at least 30 minutes to ensure a crisp bottom crust rather than a floppy base.
- Less is more with toppings Use moderate amounts of mozzarella and Parmesan cheese to allow the crust to crisp and to keep the lemon and arugula meaningful in the final bite.
- Finish fresh Add the arugula and squeeze of lemon juice just before serving so they retain brightness, rather than wilting into the hot cheese.
- Use corn meal Dust the peel or pan with corn meal so the dough slides easily and the underside gets a little extra texture without sticking.
How to Serve Lemon Arugula Pizza
This pizza is wonderfully adaptable, and I enjoy recommending simple serving ideas that complement its fresh profile. Below are several ways to present and pair the pie, with storage and occasion notes to help you plan.
- Serve warm and fresh Right out of the oven is when the texture is best, with warm melted mozzarella and bright arugula on top, so plan to plate immediately for the ideal contrast of hot and cool.
- Simple sides Pair with a crisp green salad or a light vegetable side so the meal stays balanced and the lemon notes in the pizza can shine without heavy competition.
- Occasions Great for a casual weeknight dinner or a relaxed weekend lunch, this pie also works well for small gatherings where you want to offer something that feels a little special yet approachable.
- Storage Store leftovers in an airtight container in the refrigerator and reheat in a hot oven or skillet to revive the crust; microwaving can make it soggy so avoid that when possible.
- Portioning Cut into 6 to 8 slices depending on appetite and serve on a wooden board to keep the presentation rustic and inviting.
- Seasonal pairing In spring use vibrant arugula and fresh lemons, while in cooler months choose ripe, firm citrus for consistent brightness.
FAQ
Conclusion
Lemon Arugula Pizza stands out because it pairs warm, cheesy comfort with a bright, citrus kissed finish that keeps each slice lively. I encourage you to give it a try, whether for a busy weeknight or a relaxed weekend meal, because it rewards simple effort with exceptional flavor. The process of mixing, shaping, and baking is satisfying, and the final flourish of arugula and lemon juice makes it feel special without being complicated. Take your time with the dough, have fun with the shaping, and enjoy sharing it warm with friends or family.
Lemon Arugula Pizza
Equipment
- Stand mixer
- Dough Hook
- Rolling Pin
- Pizza stone or pizza pan
Ingredients
- For the pizza dough: Used to label the section of dough preparation and signal the beginning of the ingredient list for clarity in recipe steps. Provides structure to separate components of the recipe and guides workflow for batch preparation. Helps readers identify which items pertain specifically to making the crust versus toppings.
- 2 1/4 teaspoons rapid rise yeast Activated to leaven the dough by fermenting sugars and producing carbon dioxide, creating a light and airy crust. Dissolved into warm water with a pinch of sugar to ensure viability before mixing into flour. Rapid rise variety reduces proofing time and helps achieve quicker dough development.
- 1 cup warm water Heated to a lukewarm temperature to dissolve and activate yeast without killing it, aiding fermentation and dough rise. Combined with yeast and sugar to form the initial mixture that hydrates flour and encourages gluten formation. Temperature control is important for predictable fermentation and dough texture.
- Pinch of sugar Added in small amount to feed the yeast and jump-start fermentation, improving rise speed and yeast activity. Used sparingly so it does not overly sweeten the dough while providing necessary fuel for yeast metabolism. Helps ensure consistent proofing times with rapid rise yeast.
- 3 1/2 cups Gold Medal Better For Bread Flour Measured as the primary source of flour for the dough, providing structure, gluten, and texture when hydrated and kneaded. Specified brand implies consistent protein content suited for bread-style pizza crust and predictable baking performance. Forms the bulk of dough mass and determines chew and crumb.
- 1 teaspoons salt Seasoned into the dough to enhance flavor and strengthen gluten by tightening the dough matrix slightly during mixing. Measured precisely to balance taste without inhibiting yeast performance. Contributes to overall savory profile of the finished crust.
- 1 tablespoon olive oil Emulsified into the dough to add fat, tenderize the crumb, and improve dough handling and browning in the oven. Added during mixing to incorporate evenly, producing a more extensible and flavorful crust. Also helps prevent sticking during shaping and baking.
- Corn meal for spreading on pizza peel Sprinkled on the pizza peel or baking surface to prevent sticking and to help the dough slide onto the stone or pan. Provides a bit of crunch and aids in easy transfer of the shaped pizza. Use sparingly to avoid excessive grittiness on the crust underside.
- Pizza Toppings: Introduced to mark the beginning of the toppings list and separate it from dough ingredients, guiding assembly order during cooking. Indicates a shift from dough preparation to finishing and flavoring the pizza. Helps cooks quickly locate garnish and finishing components.
- 1 tablespoon olive oil Brushed or drizzled to sauté or lightly dress toppings, promoting flavor and helping cheeses brown evenly during baking. Used both for coating the crust edge and for dressing arugula or other finishing greens. Adds fruity or peppery notes depending on oil quality.
- 6 ounces fresh mozzarella sliced Layered over the dough to provide a creamy, melting cheese base that yields stringy texture and mild milky flavor when baked. Sliced for even coverage and to allow pockets of melted cheese that complement other toppings. Balances sharper cheeses and fresh greens.
- 1/2 cup Parmesan cheese shredded Sprinkled for a nutty, salty, and umami-rich finish that complements milder mozzarella and bright lemon. Shredded form melts slightly under heat and adheres to the pizza surface, enhancing savory depth. Can be increased or decreased to taste for stronger flavor.
- 2 cups arugula Tossed or piled after baking to add a peppery, fresh, and slightly bitter contrast to the rich cheese and baked crust. Used raw to preserve its delicate texture and vibrant flavor, pairing particularly well with citrus and sharp cheeses. Quantity can be adjusted for desired green coverage.
- 2 tablespoons fresh lemon juice Squeezed over arugula to add bright acidity that balances the cheese and oil, lifting the overall flavor profile of the pizza. Freshly squeezed juice provides clean citrus notes and helps wilt the greens slightly when dressed. Adds a zesty counterpoint to savory toppings.
- Salt and pepper to taste Seasoned to taste to enhance and balance all flavors on the finished pizza, providing finishing touches to both greens and crust edges. Ground and added after dressing the arugula or before serving to ensure proper seasoning level for the whole dish. Adjust according to personal preference.
- Additional shredded parmesan cheese for serving, optional Garnished at the end to add extra salty, savory richness and a finishing sprinkle for presentation, used only if a stronger cheese presence is desired. Shredded form makes it easy to scatter lightly over warm pizza so it melds with melted cheeses. Optional usage allows control over saltiness and texture.
Instructions
- First, make the pizza dough. In a glass measuring cup or small bowl, combine yeast and 1 cup warm water. Add a pinch of sugar and let sit for 5 minutes.: You will notice a slight froth and yeasty aroma forming on the surface, which is the reassuring sign the yeast is alive and active. The warm water should feel comfortable to the wrist, and that gentle warmth helps the yeast bloom into bubbles, giving the dough lift. As you wait, the scent turns mildly sweet and bready, and that scent is a good indicator of readiness. If nothing happens after five minutes, the yeast may be old or the water too hot or too cold. Do not rush forward with inactive yeast, or the crust will remain dense and pale. A common mistake here is using water that is too hot, which can kill the yeast instantly, so test the temperature carefully.
- In the bowl of a stand mixer, add the flour and salt. Mix the ingredients until combined.: When you blend the flour and salt, the mixture should look even and fine without pockets of salt. This step ensures the salt will season the entire dough and prevents patches of over salted dough. The dry mixture smells clean and wheaty, and once combined it is ready to accept the liquid. A frequent oversight is adding salt directly onto the yeast during activation, which can inhibit it, so keeping them separate is wise.
- Add the yeast mixture to the flour mixture. Next, add 1 tablespoon of olive oil. Mix until combined. Switch to the dough hook and knead for about 5 minutes on medium speed.: As the dough takes shape, it will go from shaggy to a cohesive mass, soft and slightly tacky to the touch. The motion of the dough hook develops gluten, and you will see the dough pull away from the bowl and form a smooth surface. The sound changes too, from splattering to a low, steady thunk as the hook works. Under kneading leaves a crumbly texture, while over kneading can produce a tough crust, so aim for that sweet spot where the dough is stretchy and springs back when poked.
- Spray a large bowl with cooking spray. Form dough into a ball and place in the bowl. Cover pizza dough with a damp towel and set in a warm area to rise. Let the dough rise for 1 hour or until dough has doubled in size.: The dough should become noticeably puffy and airy, almost doubled in volume, with a slightly domed top and soft, tender skin. The aroma deepens into a richer dough scent, and pressing gently will leave a faint indentation that springs slowly back. Rising time depends on room temperature, so a cool kitchen may require a bit longer. Avoid letting the dough overproof, which causes weak structure and a collapsed crust when baked.
- Preheat the oven to 450 degrees F. Cut the dough in half. Take one piece of dough and punch it down on a lightly floured surface. You can refrigerate or freeze the other half of the dough or make 2 pizzas, if you wish. Using a rolling pin, roll the dough out into a circle. Place the pizza dough on a pizza pan or pizza stone.: The preheated oven readies the environment for immediate oven spring and browning. When you punch the dough down, you release large gas bubbles and create a denser, more even crumb. Rolling the dough thin will produce a crisper crust, while leaving it slightly thicker yields a chewier interior. Transfer it carefully to a pan or stone dusted with corn meal so it slides easily. One common error is over flouring the surface, which can dry out the dough and prevent good browning.
- Evenly brush the olive oil on the pizza. Top with fresh mozzarella slices. Add the parmesan cheese. Place the pizza in the oven and bake for 12-15 minutes or until pizza crust is golden and cheese is melted.: As the pie bakes, you will hear gentle bubbling and see the mozzarella melt into glossy pools while the crust develops golden blisters and a toasty aroma. The olive oil on the surface encourages even browning and a crisp edge. Watch for the cheese to be fully melted and the crust edges to take on a warm amber hue, that is the cue to pull it. Avoid leaving it unattended for too long, as cheese can over brown and the crust can harden if overbaked.
- Remove the pizza from the oven and place arugula on top. Squeeze fresh lemon juice over the arugula and season with salt and black pepper, to taste. Garnish with additional parmesan cheese, if desired. Cut into slices and serve.: The residual heat will slightly wilt the arugula so it softens without losing its peppery snap, and the aroma of citrus will brighten the whole pie. Toss the greens with the lemon juice briefly so they are evenly dressed, then distribute them across the hot pizza so each slice carries that fresh contrast. Season thoughtfully because the cheeses already add salt, and a light hand with pepper will enhance rather than overpower. A frequent mistake is adding too much lemon, which can take over the delicate balance.
- Note we made a thin crust pizza. Josh rolled the crust into about a 13-inch circle. If you want a thicker crust, don't roll it out as far.: The final sprinkle of extra Parmesan cheese provides an added savory note and a slight granular texture against the melted mozzarella . Cutting through the golden crust releases fragrant steam and creates neat slices that highlight the topping contrast. Serve immediately while the cheese is warm and the greens remain fresh. Waiting too long can lead to a soggy base as the toppings settle, so enjoy while hot.
- Note we made a thin crust pizza. Josh rolled the crust into about a 13 inch circle. If you want a thicker crust, don't roll it out as far: You can judge thickness visually as you roll, aiming for an even edge and uniform center so the bake is consistent. A thinner roll yields crispness and a larger surface for toppings, while a thicker roll gives a chewier interior; both are delicious depending on your preference. If you opt for thick, expect slightly longer bake time and a softer crumb. Avoid uneven rolling, which creates hotspots that brown before the center is done.
Notes
- Proofing check Always test the yeast in warm water with a pinch of sugar and expect gentle foaming after five minutes, which avoids wasted effort on dead yeast.
- Temperature matters Preheat your oven to 450 degrees F and, if using a stone, let it heat for at least 30 minutes to ensure a crisp bottom crust rather than a floppy base.
- Less is more with toppings Use moderate amounts of mozzarella and Parmesan cheese to allow the crust to crisp and to keep the lemon and arugula meaningful in the final bite.
- Finish fresh Add the arugula and squeeze of lemon juice just before serving so they retain brightness, rather than wilting into the hot cheese.
- Use corn meal Dust the peel or pan with corn meal so the dough slides easily and the underside gets a little extra texture without sticking.