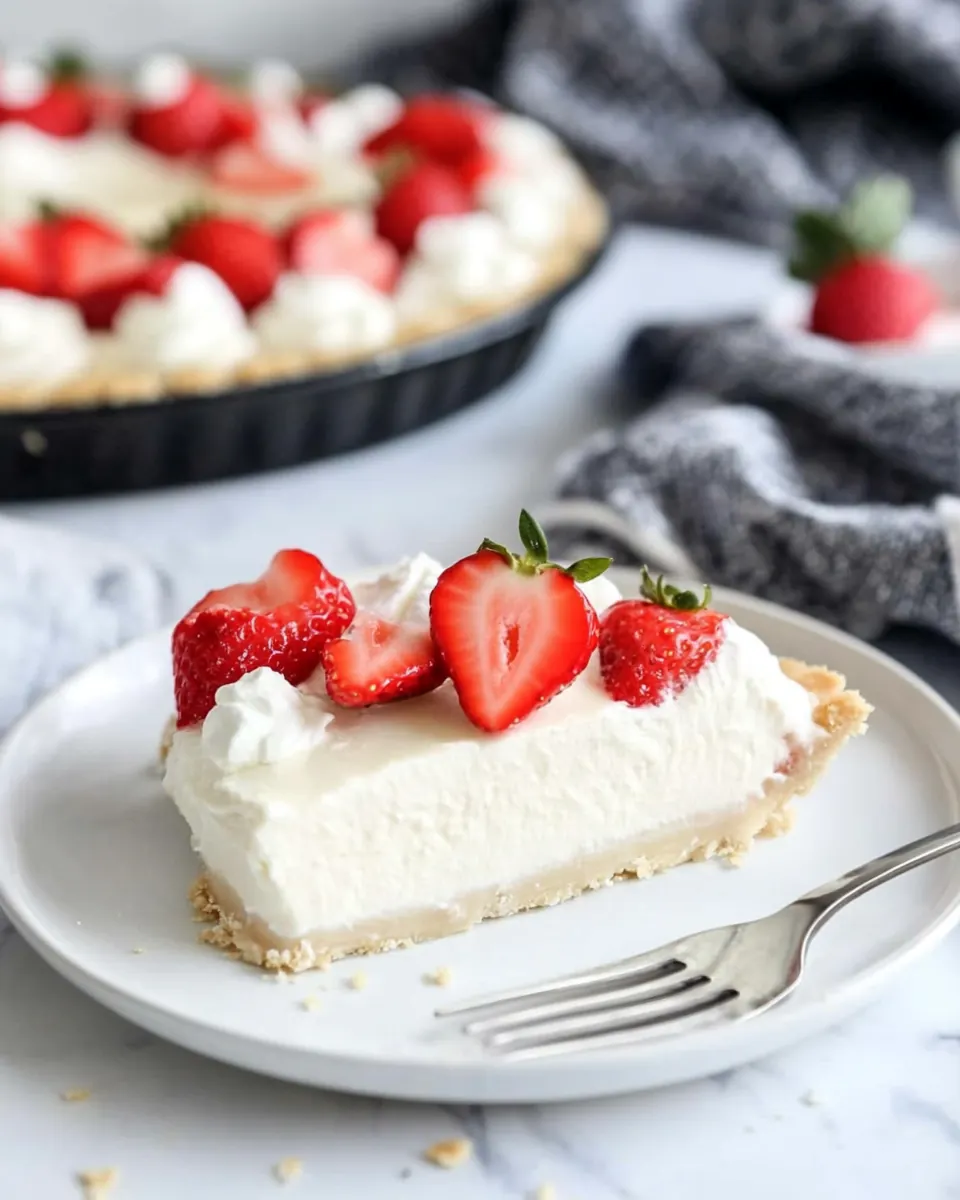
Strawberry Cream Cheese Pie
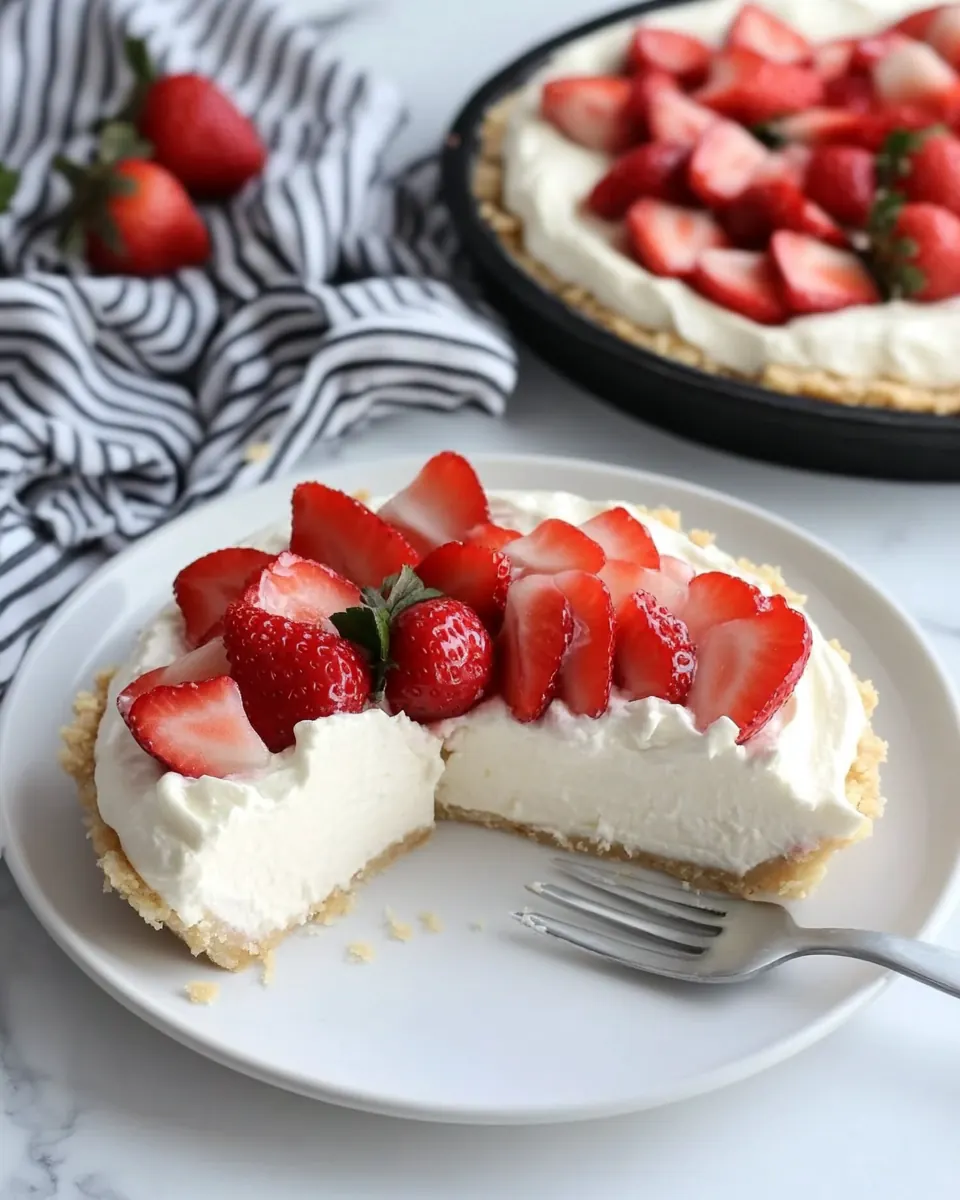
Strawberry Cream Cheese Pie has been my go to showstopper whenever I want a dessert that looks like it took all day without the stress that usually comes with it. The first time I made this, I was bringing a pie to a neighborhood potluck and I remember feeling nervous about transporting a fragile dessert. What arrived was a glossy crown of strawberries atop a cloudlike cream cheese filling, set in a buttery crust, and every bite confirmed that the fuss was absolutely worth it.
Since then, I find myself turning to Strawberry Cream Cheese Pie for celebrations that need a touch of nostalgia. It’s the kind of dessert that sparks conversations about summer strawberry stands, childhood kitchens, and the small rituals we use to mark special moments. I like to make the crust a day ahead so I can focus on the filling and the strawberries the morning of the event, which takes the pressure off and makes the final assembly feel almost ceremonious.
What I appreciate most is the balance in Strawberry Cream Cheese Pie. The crust provides a crisp, slightly savory foundation, the cream cheese layer is luxuriously smooth and lightly sweetened, and the strawberries add a bright, juicy contrast. Depending on how ripe and sweet the strawberries are, I sometimes skip the glaze entirely, and other times I make a light glaze to intensify the color and add a glossy finish. Every variation has its charm, and I love experimenting while still keeping the core technique the same.
Recipe Snapshot
55 mins
30 mins
25 mins
Medium
350 kcal
American
Gluten-Free, Low FODMAP
Desserts
9 inch pie pan, Oven, Electric mixer, Mixing bowls, Pastry blender, Small saucepan, Spatula
What You’ll Enjoy About This Strawberry Cream Cheese Pie
Perfect balance of textures
I love Strawberry Cream Cheese Pie because it marries a crisp, shortbread like crust with a velvety, creamy filling and juicy fruit. The contrast between the crunchy shell and the soft center makes every forkful interesting, and I always notice how guests pause to savor that combination.
Flexible presentation options
You can dress this pie in several ways, and I enjoy the freedom that provides. Use plain sliced strawberries for a rustic look, or create a glossy glaze when you want a show stopping centerpiece. I often adapt the topping based on the sweetness of the berries, so the recipe feels alive and adaptable rather than rigid.
Make ahead friendly
One of my favorite reasons to make Strawberry Cream Cheese Pie is how well it fits into a prep ahead strategy. The crust and filling can be prepared in advance, which frees up day of time. I keep sliced berries separate until serving when I want extra crispness, or I prepare a glaze in advance if I need convenience.
Approachable technique
This pie looks elegant but the methods are straightforward. From mixing a simple dough to whipping cream and folding it into the cream cheese, the steps are accessible to home cooks. I remember teaching a friend these techniques and watching their confidence grow with each successful step.
Seasonal star
When strawberries are at their peak, Strawberry Cream Cheese Pie feels like the very best use of the fruit. The filling showcases the berries rather than overpowering them, which is why I often reach for this recipe in spring when the berries are fragrant and sweet.
Strawberry Cream Cheese Pie Ingredients
These ingredients are simple, but they work in harmony to create texture, creaminess, and bright fruit flavor. The crust offers a buttery base, the cream cheese layer brings richness and tang, and the whipped cream lightens the filling so the pie feels decadent yet airy. The strawberries are the crowning glory, providing acidity, color, and a fresh finish.
- 1 1/2 cups all-purpose flour: Provide structure and body to the crust or dough by contributing gluten and starch; measure accurately for consistent texture and crumb. Aid in browning and absorbing moisture from fats and liquids to create a cohesive base for the pie. Sift or spoon into the cup for even incorporation when mixing with butter.
- 1/4 cups sugar: Add mild sweetness to balance flavors and tenderize the crust by slightly inhibiting gluten formation when creamed with butter. Dissolve readily during mixing to contribute uniform sweetness throughout the dough and filling. Use measured amount to avoid an overly sweet or too-soft crust.
- 1/8 teaspoon Morton kosher salt: Enhance overall flavor by providing a subtle saline contrast that brightens the sweet components and balances richness. Help control yeast or leavening behavior when present in baked goods, ensuring even taste development. Use a light hand, as kosher salt crystals can be larger than table salt.
- 1/2 cup unsalted butter, at room temperature: Contribute richness, tenderness, and pliability to the crust by coating flour proteins with fat and creating flakiness when cut into the dough. Bring softened butter to room temperature for easier creaming with sugar and better incorporation into the crust or filling. Use unsalted to control overall seasoning precisely.
- 6 ounces full-fat cream cheese, at room temperature: Impart creamy tang and smoothness to the filling while adding fat for richness and body; at room temperature it blends seamlessly for a silkier texture. Provide structure to the cheesecake-like layer and help stabilize whipped components when combined with sugar and cream. Use full-fat to ensure optimal mouthfeel and firmness.
- 1 cup powdered sugar: Supply sweetness and sweetness-adjusted texture to the cream cheese mixture while dissolving for a velvety consistency. Help stabilize and thicken the filling slightly when beaten into cream cheese, preventing graininess. Sift if necessary to avoid lumps and achieve a smooth filling.
- 1 teaspoon pure vanilla extract: Contribute aromatic sweetness and depth by enhancing butter and cream cheese flavors with warm vanilla notes. Balance and round out the overall flavor profile, marrying fruity and dairy components together. Use pure extract for the cleanest, most natural flavor.
- 1 cup heavy whipping cream: Create lightness and volume in the filling when whipped, adding airy texture and helping to set the final pie after chilling. Provide richness and mouth-coating fat that complements the tang of cream cheese and the brightness of strawberries. Chill bowl and beaters for best whipping performance and stability.
- 3 cups thick-sliced strawberries: Provide fresh fruity flavor, juiciness, and bright color as the primary topping or folded into the filling, offering texture with each bite. Pair naturally with sugar and optional glaze to release juices that soak into the filling slightly, enhancing overall strawberry presence. Slice thick for noticeable fruit pieces throughout the pie.
- 1/2 cup powdered sugar, for strawberry glaze (optional): Offer optional extra sweetness and gloss for a strawberry glaze that enhances shine and surface sweetness without altering the base filling. Dissolve with cornstarch and heated berries to create a syrupy coating that helps preserve fruit and adds visual appeal. Use sparingly if natural berry sweetness suffices.
- 2 teaspoons cornstarch, for strawberry glaze (optional): Thicken and stabilize the optional strawberry glaze when cooked with berries and sugar, creating a gel-like coating that clings to fruit slices. Prevent watery juices from seeping into the filling while providing a smooth, glossy finish on top of the pie. Mix with cold water or sugar before adding to hot fruit to avoid clumping.
- red food coloring, (not needed when using beautiful strawberries) (optional): Provide optional vivid color enhancement for the strawberry topping when natural berry color is insufficient or seasonal berries are pale. Allow tiny drops to intensify visual appeal without adding flavor, using sparingly to avoid overly artificial appearance. Not necessary when strawberries are already richly hued.
Cooking Instructions for Strawberry Cream Cheese Pie
These instructions will guide you from a raw dough to a finished, chilled pie topped with vibrant strawberries. The methods are straightforward, and I encourage you to take your time with each sensory cue to ensure the best texture. Read through the steps once before starting so you know which tools to have ready.
- Preheat oven to 325°F.: As the oven warms, notice the faint scent of the heating element and the gradual rise in temperature, which is critical for even baking. Preheating ensures the crust begins to set immediately, preventing a soggy bottom. A common mistake is placing the pie in a cold oven which causes uneven baking and a denser crust, so wait until the oven reaches the full temperature before you insert the pie.
- In a medium bowl, whisk together flour, sugar, and salt. With a rigid pastry blender, cut in the butter until crumbly. Then quickly mix with hands until it forms a dough. Don’t worry if it seems a bit dry. Press dough evenly onto the bottom and up the sides of a 9" pie pan. Aim for a uniform thickness on all surfaces and don’t press the dough in too hard.: Right after whisking, you should see a uniform pale mixture with tiny specks of sugar distributed throughout. This step ensures even seasoning and sweetening throughout the crust, which matters because uneven distribution can yield pockets of overly sweet or bland dough. When you add the butter , keep an eye on how the texture shifts; if the flour seems overworked, stop blending to avoid toughness.
- Place pie pan in oven and bake crust for 23 to 26 minutes, or until it is just lightly browned. Remove from oven, to a cooling rack, and let cool completely.: As you work, the mixture will change from powdery to coarse crumbs, with pea sized pieces of butter visible. Those pea sized pieces create flakiness as they melt during baking, so resist the urge to over blend into a paste. If the butter melts or becomes greasy, your crust will lose its tender, flaky structure, which is an easy error to make on warm days.
- In a medium bowl, with an electric mixer, beat cream cheese, powdered sugar, and vanilla until smooth and fluffy, about 1-2 minutes on medium-high to high speed.: The dough should just come together when pressed; you will feel it hold its shape but still be slightly crumbly. Handle it quickly and lightly to avoid warming the butter, which keeps the crust tender. Over kneading can activate gluten and make the crust chewy, so mix until just combined.
- In another medium bowl, with an electric mixer, whip heavy cream until stiff.: Use gentle, even pressure so the crust has uniform thickness, which helps it bake consistently. You want to form a defined rim without compacting the dough too much. Pressing too hard will compress air pockets and produce a dense crust, which is an easy misstep when you are aiming for a delicate texture.
- With a spatula, gently fold whipped cream into the cream cheese mixture until evenly combined. Then transfer mixture to the cooled pie shell and spread in an even layer. Refrigerate for at least 1 hour (2-4 hours is even better).: Visually inspect the crust for thin spots and gently fill them to avoid areas that may overbrown. A uniform wall will hold the filling without cracking or sagging, and it bakes to an even golden color. If you press too much at the rim, it might shrink down during baking, so keep your touch light and even.
- If you prefer to dress the pie with only fresh strawberries and no additional glaze (especially nice when you have sweet, beautiful strawberries), skip to Step 8, and omit the powdered sugar and cornstarch.: You will notice the aroma of baked butter and a subtle toasting of the flour. Light browning around the edges signals readiness; the center may still be slightly pale. Removing the crust too early will leave it doughy, while overbaking leads to a dry, hard shell, which is the usual pitfall to avoid.
- To create strawberry topping with glaze: In a medium bowl, fold together sliced strawberries and 1/2 cup powdered sugar. Let stand for 30 minutes, folding gently halfway through.: Cooling stabilizes the crust and prevents the filling from melting when added. You should feel the crust firm up and lose some of its initial warmth. Filling a hot crust can cause the cream cheese layer to soften too much, so give it sufficient cooling time to preserve texture.
- Drain strawberries, saving all accumulated strawberry juice. Add water (if needed) to strawberry juice to equal 1/3 cup of strawberry juice.: As you beat, the mixture will lighten in color and texture and you will hear the mixer change pitch as the cream cheese softens. Smoothness is key; any lumps indicate the cream cheese was too cold. Scrape the bowl down periodically to ensure an even mix, because missed pockets of cream cheese can lead to uneven sweetness in the filling.
- In a small saucepan over medium heat, combine 1/3 cup strawberry juice and cornstarch. If your strawberry juice is not very red, and if you want a deeper red color, add a drop or two of red food coloring. Cook, stirring constantly, until you have a thickened, clear glaze. If the cornstarch forms lumps, simply smoosh out the lumps with a spatula. A small whisk also works well. Once thickened, immediately remove strawberry glaze from heat and let cool completely.: Watch the cream transform from glossy to billowy peaks, and listen for the mixer’s sound changing as air is incorporated. Stiff peaks will hold shape when you lift the whisk, which is essential for the filling’s structure. Overwhipping can turn the cream grainy and buttery, which ruins the delicate texture, so stop as soon as stiff peaks form.
- You have a few options for incorporating the strawberry glaze: 1) fold the strawberries into all of the strawberry glaze (for a heavier glaze), 2) fold the strawberries into a portion of the strawberry glaze (for a lighter glaze), 3) top cream cheese pie with the sliced strawberries and then drizzle some of the glaze over the top of the berries. See Notes below.: You should sense a pillowy, silky texture develop, with no streaks of white or lumps of cream cheese . Folding preserves the air you just incorporated, making the filling light. If you stir aggressively, you will deflate the mixture and lose the airy mouthfeel, so use slow, deliberate motions.
- If you plan to eat the pie within a few hours after making it, go ahead and add your preferred strawberry topping (using one of the methods from "Strawberry Topping/Step 5") to the center of the cream cheese pie, leaving an inch of bare cream cheese around the perimeter. This helps to keep any strawberry juices from soaking into the crust, which can make the crust soggy. Slice pie into pieces and serve. If you will not be eating all of the pie within a few hours, I recommend leaving the strawberry topping off the pie. To serve, slice individual pieces and place them on dessert plates. Then top the pieces with your preferred strawberry topping (using one of the methods from "Strawberry Topping/Step 5"). This method will give you pie pieces with a cleaner appearance, plus the crust will stay more crisp.: As you spread, the filling should look smooth and glossy, filling the pan without doming. A flat, even surface helps the strawberries sit attractively on top. If you overwork the surface, it can develop a rough or pitted look, so use long, gentle strokes to smooth it.
- Refrigerate for at least 1 hour (2 to 4 hours is even better).: Chilling firms the filling, allowing it to set so clean slices hold their shape. You will notice the filling becomes denser and cooler to the touch. Rushing this step often results in a filling that is too soft to slice neatly, which is the most common serving time mistake.
- If you prefer to dress the pie with only fresh strawberries and no additional glaze, skip to Step 8, and omit the powdered sugar and cornstarch.: Fresh strawberries keep the presentation bright and allow the fruit's natural flavor to shine through, and you will enjoy a lighter finish. The risk here is that the berry juices may seep into the crust if left too long, so plan to add toppings close to serving time to maintain a crisp shell.
- To create strawberry topping with glaze: In a medium bowl, fold together sliced strawberries and 1/2 cup powdered sugar. : As they rest, the strawberries will release juices and the sugar will draw out their natural sweetness, creating a syrupy mixture. Fold gently to avoid crushing the slices into mush. If you stir too vigorously, the berries will disintegrate and the topping will turn soupy instead of glossy.
- Let stand for 30 minutes, folding gently halfway through.: This resting allows a syrup to form which will be used to make the glaze, and you will see a noticeable pool of juice at the bottom of the bowl. The extracted juice concentrates the berry flavor, which makes the glaze more intense. Not letting it sit long enough yields a weaker glaze, while letting it sit too long risks overly soft berries.
- Drain strawberries, saving all accumulated strawberry juice.: The drained berries will be plump and glossy, while the reserved juice holds the concentrated strawberry aroma. Keeping the juice is crucial because it provides both color and flavor for the glaze. Discarding it is a missed opportunity to make an impactful topping.
- Add water (if needed) to strawberry juice to equal 1/3 cup of strawberry juice.: Adjusting the volume ensures you have the right liquid to cornstarch ratio for the glaze. The goal is a smooth, translucent finish without making the glaze too thin. Too much water dilutes flavor, and too little will make the glaze overly thick and pasty.
- In a small saucepan over medium heat, combine 1/3 cup strawberry juice and cornstarch.: Heat will activate the thickening power of cornstarch , transforming the juice into a clear glaze. Stir constantly so the cornstarch disperses evenly; you'll see the liquid become glossy and slightly syrupy. If you do not whisk frequently, lumps can form and create an uneven texture, which is easily avoided by steady stirring.
- If your strawberry juice is not very red, and if you want a deeper red color, add a drop or two of red food coloring.: Adding color is purely aesthetic and can make the topping pop in photos or on a table. Use only a tiny amount to avoid an artificial hue. Over coloring leads to an unnatural tone, which is a cosmetic misstep many people later regret.
- Cook, stirring constantly, until you have a thickened, clear glaze.: The glaze should cling to the back of a spoon and appear shiny and translucent. Remove promptly once thickened because residual heat continues to thicken the glaze and can overcook it. If it gets too thick, you can thin it slightly with a few drops of water, but overheating can also dull the fresh strawberry flavor.
- If the cornstarch forms lumps, simply smoosh out the lumps with a spatula.: A small spatula or whisk will break up any stubborn bits and restore a smooth texture. The glaze should be silky and free of specks. If lumps persist, straining can rescue the glaze and prevent unpleasant textures on the finished pie.
- Once thickened, immediately remove strawberry glaze from heat and let cool completely.: Cooling prevents the glaze from cooking the berries and keeps the texture glossy and stable. You can feel the difference when it reaches room temperature, as the glaze loses steam and becomes more cohesive. Applying a warm glaze can soften the filling and cause juices to run, so ensure it is fully cooled.
- You have a few options for incorporating the strawberry glaze: Choose the method that matches your presentation goals, whether that is fully glazed berries, lightly glazed fruit, or a delicate drizzle. Each approach alters the look and weight of the topping, so consider whether you want a heavy, jam like finish or a light, fresh appearance. The main mistake here is applying too much glaze, which can overpower the pie and make slices messy.
- If you plan to eat the pie within a few hours after making it, go ahead and add your preferred strawberry topping: Adding the topping shortly before serving ensures the crust stays crisp and the berries retain structure. Leave an inch of bare cream cheese around the edge to protect the crust from juices. If you skip this step, the crust may absorb the juices and become soggy, which undermines the textural contrast.
- This helps to keep any strawberry juices from soaking into the crust, which can make the crust soggy.: The visual result is cleaner slices and a more pleasant mouthfeel, with a defined edge where the filling meets the crust. If you plan to serve later, hold the topping separate and add it at plating time to preserve the crispness.
- Slice pie into pieces and serve.: Use a sharp knife wiped between cuts for neat slices, and notice how the filling holds shape while the berries provide bursts of tartness. If you refrigerated the pie thoroughly, slices will be clean and elegant. Serving too soon can lead to slumping slices and unattractive presentation.
- If you will not be eating all of the pie within a few hours, I recommend leaving the strawberry topping off the pie.: Storing the glaze and berries separately maintains the crust and filling texture, and you can add the topping just before serving for peak freshness. The typical error is assembling everything too early and losing the delightful contrast that makes this pie so memorable.
- To serve, slice individual pieces and place them on dessert plates.: Add your preferred strawberry topping at plating for the cleanest presentation, and you will notice friends appreciate the care in each slice. Taking this extra step makes the pie look professional, and it prevents any excess juice from spreading on the server, which is a helpful serving tip.
Customization Ideas
This pie is wonderfully adaptable, and small tweaks let you make it uniquely yours. Below are practical ways to customize the filling, crust, and topping while preserving the core character of the dessert.
- Gluten Free Crust: Substitute a gluten free all purpose flour blend for the all-purpose flour in equal measure, and press the dough gently to form the crust. Note that texture will differ slightly, and you may need to adjust baking time by a few minutes to prevent overbrowning.
- Less Sweet Filling: Reduce the 1 cup powdered sugar in the filling by a quarter cup if you prefer a tangier profile that lets the cream cheese shine. Taste as you go and remember the berries add natural sweetness, so balance carefully to avoid an overly tart result.
- Extra Crisp Crust: Blind bake the crust slightly longer until the center is just set to create a firmer base that withstands juicier toppings. Keep a close eye to avoid burning, and allow complete cooling before filling.
- Lightened Filling: For a lighter mouthfeel, whip the heavy whipping cream to soft peaks and fold gently into the cream cheese, though this will yield a less stable filling that benefits from extra chilling time.
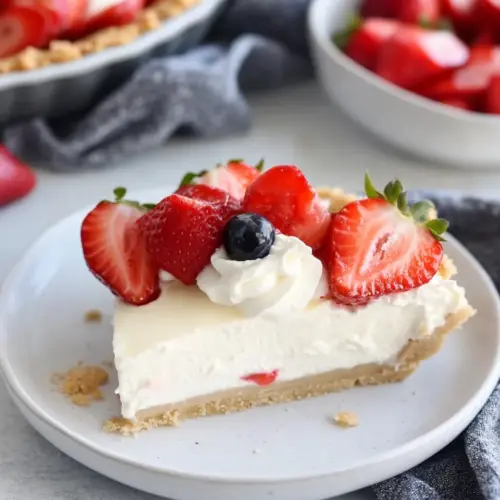
- Fresh Berry Mix: Replace up to half of the sliced strawberries with a mix of raspberries or blueberries for color contrast and layered fruit flavor, keeping in mind the recipe’s strawberry centric glaze pairs best with mostly strawberries.
- Decorative Finish: Arrange slices in concentric circles for a classic look or create a rustic mound for a homey presentation, and decide whether to apply glaze based on the visual you want and how long before serving you will top the pie.
Serving Options for Strawberry Cream Cheese Pie
This pie adapts to many occasions, and how you serve it can elevate the entire experience. Whether for casual gatherings or special celebrations, consider serving style, timing, and accompaniments to highlight the pie’s strengths.
- Casual family dessert: Slice and serve with no additional garnish for a relaxed after dinner treat that showcases the simple pleasures of strawberries and cream.
- Party centerpiece: Arrange glazed strawberries artfully across the top and set the pie on a decorative stand so it becomes a focal point on a dessert table.
- Spring picnic: Keep the strawberry topping in a separate container and assemble slices at serving to preserve crust crispness, which works well for outdoor meals where travel can affect texture.
- Holiday gatherings: Use the glossy glaze and neat slices for a refined presentation suitable for festive occasions like springtime brunches or family celebrations.
- Storage tip: Refrigerate the pie, uncovered, for up to 24 hours if topped. For longer storage, keep the berries and glaze separate and refrigerate the crust and filling covered for up to 3 days.
- Seasonal pairing: Serve during spring when strawberries are peak for the best flavor, and pair slices with a simple scoop of plain ice cream or a light herbal tea to complement the richness.
FAQ
Conclusion
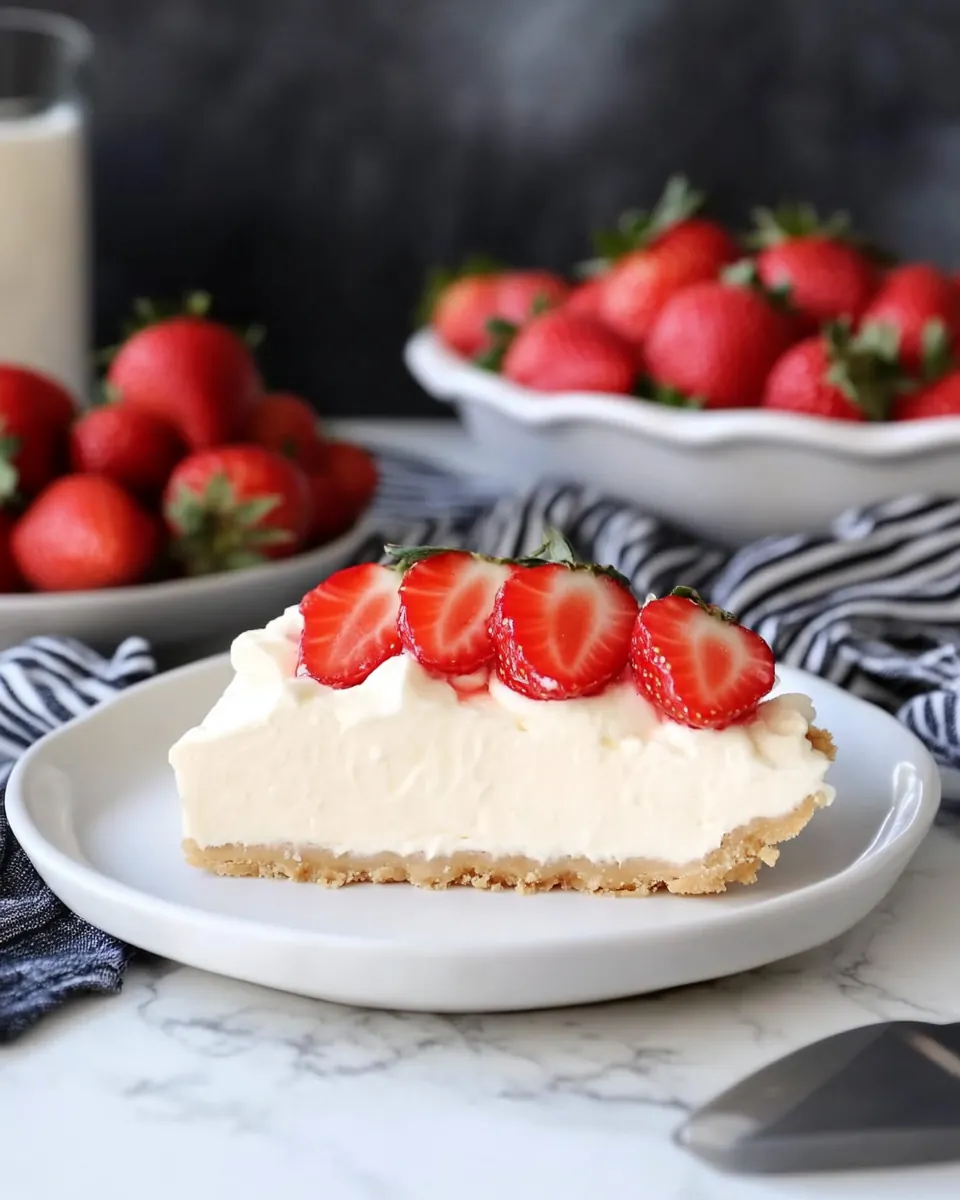
Strawberry Cream Cheese Pie stands out because it combines a crisp, buttery crust with a luxuriously smooth cream cheese filling and vibrant fresh strawberries for a delightful contrast of textures and flavors. Give this pie a try when strawberries are in season, or prepare the crust and filling ahead to make the day of serving relaxing and joyful. I hope this recipe becomes one of your reliable crowd pleasers, bringing a bit of seasonal brightness and a lot of smiles to your table.
Strawberry Cream Cheese Pie
Equipment
- 9-inch pie pan
- Oven
- Electric Mixer
- Mixing Bowls
- Pastry blender
- Small Saucepan
- Spatula
Ingredients
- 1 1/2 cups all-purpose flour Provide structure and body to the crust or dough by contributing gluten and starch; measure accurately for consistent texture and crumb. Aid in browning and absorbing moisture from fats and liquids to create a cohesive base for the pie. Sift or spoon into the cup for even incorporation when mixing with butter.
- 1/4 cups sugar Add mild sweetness to balance flavors and tenderize the crust by slightly inhibiting gluten formation when creamed with butter. Dissolve readily during mixing to contribute uniform sweetness throughout the dough and filling. Use measured amount to avoid an overly sweet or too-soft crust.
- 1/8 teaspoon Morton kosher salt Enhance overall flavor by providing a subtle saline contrast that brightens the sweet components and balances richness. Help control yeast or leavening behavior when present in baked goods, ensuring even taste development. Use a light hand, as kosher salt crystals can be larger than table salt.
- 1/2 cup unsalted butter, at room temperature Contribute richness, tenderness, and pliability to the crust by coating flour proteins with fat and creating flakiness when cut into the dough. Bring softened butter to room temperature for easier creaming with sugar and better incorporation into the crust or filling. Use unsalted to control overall seasoning precisely.
- 6 ounces full-fat cream cheese, at room temperature Impart creamy tang and smoothness to the filling while adding fat for richness and body; at room temperature it blends seamlessly for a silkier texture. Provide structure to the cheesecake-like layer and help stabilize whipped components when combined with sugar and cream. Use full-fat to ensure optimal mouthfeel and firmness.
- 1 cup powdered sugar Supply sweetness and sweetness-adjusted texture to the cream cheese mixture while dissolving for a velvety consistency. Help stabilize and thicken the filling slightly when beaten into cream cheese, preventing graininess. Sift if necessary to avoid lumps and achieve a smooth filling.
- 1 teaspoon pure vanilla extract Contribute aromatic sweetness and depth by enhancing butter and cream cheese flavors with warm vanilla notes. Balance and round out the overall flavor profile, marrying fruity and dairy components together. Use pure extract for the cleanest, most natural flavor.
- 1 cup heavy whipping cream Create lightness and volume in the filling when whipped, adding airy texture and helping to set the final pie after chilling. Provide richness and mouth-coating fat that complements the tang of cream cheese and the brightness of strawberries. Chill bowl and beaters for best whipping performance and stability.
- 3 cups thick-sliced strawberries Provide fresh fruity flavor, juiciness, and bright color as the primary topping or folded into the filling, offering texture with each bite. Pair naturally with sugar and optional glaze to release juices that soak into the filling slightly, enhancing overall strawberry presence. Slice thick for noticeable fruit pieces throughout the pie.
- 1/2 cup powdered sugar, optional for strawberry glaze Offer optional extra sweetness and gloss for a strawberry glaze that enhances shine and surface sweetness without altering the base filling. Dissolve with cornstarch and heated berries to create a syrupy coating that helps preserve fruit and adds visual appeal. Use sparingly if natural berry sweetness suffices.
- 2 teaspoons cornstarch, optional for strawberry glaze Thicken and stabilize the optional strawberry glaze when cooked with berries and sugar, creating a gel-like coating that clings to fruit slices. Prevent watery juices from seeping into the filling while providing a smooth, glossy finish on top of the pie. Mix with cold water or sugar before adding to hot fruit to avoid clumping.
- red food coloring, optional (not needed when using beautiful strawberries) Provide optional vivid color enhancement for the strawberry topping when natural berry color is insufficient or seasonal berries are pale. Allow tiny drops to intensify visual appeal without adding flavor, using sparingly to avoid overly artificial appearance. Not necessary when strawberries are already richly hued.
Instructions
- Preheat oven to 325°F.: As the oven warms, notice the faint scent of the heating element and the gradual rise in temperature, which is critical for even baking. Preheating ensures the crust begins to set immediately, preventing a soggy bottom. A common mistake is placing the pie in a cold oven which causes uneven baking and a denser crust, so wait until the oven reaches the full temperature before you insert the pie.
- In a medium bowl, whisk together flour, sugar, and salt. With a rigid pastry blender, cut in the butter until crumbly. Then quickly mix with hands until it forms a dough. Don’t worry if it seems a bit dry. Press dough evenly onto the bottom and up the sides of a 9" pie pan. Aim for a uniform thickness on all surfaces and don’t press the dough in too hard.: Right after whisking, you should see a uniform pale mixture with tiny specks of sugar distributed throughout. This step ensures even seasoning and sweetening throughout the crust, which matters because uneven distribution can yield pockets of overly sweet or bland dough. When you add the butter , keep an eye on how the texture shifts; if the flour seems overworked, stop blending to avoid toughness.
- Place pie pan in oven and bake crust for 23 to 26 minutes, or until it is just lightly browned. Remove from oven, to a cooling rack, and let cool completely.: As you work, the mixture will change from powdery to coarse crumbs, with pea sized pieces of butter visible. Those pea sized pieces create flakiness as they melt during baking, so resist the urge to over blend into a paste. If the butter melts or becomes greasy, your crust will lose its tender, flaky structure, which is an easy error to make on warm days.
- In a medium bowl, with an electric mixer, beat cream cheese, powdered sugar, and vanilla until smooth and fluffy, about 1-2 minutes on medium-high to high speed.: The dough should just come together when pressed; you will feel it hold its shape but still be slightly crumbly. Handle it quickly and lightly to avoid warming the butter, which keeps the crust tender. Over kneading can activate gluten and make the crust chewy, so mix until just combined.
- In another medium bowl, with an electric mixer, whip heavy cream until stiff.: Use gentle, even pressure so the crust has uniform thickness, which helps it bake consistently. You want to form a defined rim without compacting the dough too much. Pressing too hard will compress air pockets and produce a dense crust, which is an easy misstep when you are aiming for a delicate texture.
- With a spatula, gently fold whipped cream into the cream cheese mixture until evenly combined. Then transfer mixture to the cooled pie shell and spread in an even layer. Refrigerate for at least 1 hour (2-4 hours is even better).: Visually inspect the crust for thin spots and gently fill them to avoid areas that may overbrown. A uniform wall will hold the filling without cracking or sagging, and it bakes to an even golden color. If you press too much at the rim, it might shrink down during baking, so keep your touch light and even.
- If you prefer to dress the pie with only fresh strawberries and no additional glaze (especially nice when you have sweet, beautiful strawberries), skip to Step 8, and omit the powdered sugar and cornstarch.: You will notice the aroma of baked butter and a subtle toasting of the flour. Light browning around the edges signals readiness; the center may still be slightly pale. Removing the crust too early will leave it doughy, while overbaking leads to a dry, hard shell, which is the usual pitfall to avoid.
- To create strawberry topping with glaze: In a medium bowl, fold together sliced strawberries and 1/2 cup powdered sugar. Let stand for 30 minutes, folding gently halfway through.: Cooling stabilizes the crust and prevents the filling from melting when added. You should feel the crust firm up and lose some of its initial warmth. Filling a hot crust can cause the cream cheese layer to soften too much, so give it sufficient cooling time to preserve texture.
- Drain strawberries, saving all accumulated strawberry juice. Add water (if needed) to strawberry juice to equal 1/3 cup of strawberry juice.: As you beat, the mixture will lighten in color and texture and you will hear the mixer change pitch as the cream cheese softens. Smoothness is key; any lumps indicate the cream cheese was too cold. Scrape the bowl down periodically to ensure an even mix, because missed pockets of cream cheese can lead to uneven sweetness in the filling.
- In a small saucepan over medium heat, combine 1/3 cup strawberry juice and cornstarch. If your strawberry juice is not very red, and if you want a deeper red color, add a drop or two of red food coloring. Cook, stirring constantly, until you have a thickened, clear glaze. If the cornstarch forms lumps, simply smoosh out the lumps with a spatula. A small whisk also works well. Once thickened, immediately remove strawberry glaze from heat and let cool completely.: Watch the cream transform from glossy to billowy peaks, and listen for the mixer’s sound changing as air is incorporated. Stiff peaks will hold shape when you lift the whisk, which is essential for the filling’s structure. Overwhipping can turn the cream grainy and buttery, which ruins the delicate texture, so stop as soon as stiff peaks form.
- You have a few options for incorporating the strawberry glaze: 1) fold the strawberries into all of the strawberry glaze (for a heavier glaze), 2) fold the strawberries into a portion of the strawberry glaze (for a lighter glaze), 3) top cream cheese pie with the sliced strawberries and then drizzle some of the glaze over the top of the berries. See Notes below.: You should sense a pillowy, silky texture develop, with no streaks of white or lumps of cream cheese . Folding preserves the air you just incorporated, making the filling light. If you stir aggressively, you will deflate the mixture and lose the airy mouthfeel, so use slow, deliberate motions.
- If you plan to eat the pie within a few hours after making it, go ahead and add your preferred strawberry topping (using one of the methods from "Strawberry Topping/Step 5") to the center of the cream cheese pie, leaving an inch of bare cream cheese around the perimeter. This helps to keep any strawberry juices from soaking into the crust, which can make the crust soggy. Slice pie into pieces and serve. If you will not be eating all of the pie within a few hours, I recommend leaving the strawberry topping off the pie. To serve, slice individual pieces and place them on dessert plates. Then top the pieces with your preferred strawberry topping (using one of the methods from "Strawberry Topping/Step 5"). This method will give you pie pieces with a cleaner appearance, plus the crust will stay more crisp.: As you spread, the filling should look smooth and glossy, filling the pan without doming. A flat, even surface helps the strawberries sit attractively on top. If you overwork the surface, it can develop a rough or pitted look, so use long, gentle strokes to smooth it.
- Refrigerate for at least 1 hour (2 to 4 hours is even better).: Chilling firms the filling, allowing it to set so clean slices hold their shape. You will notice the filling becomes denser and cooler to the touch. Rushing this step often results in a filling that is too soft to slice neatly, which is the most common serving time mistake.
- If you prefer to dress the pie with only fresh strawberries and no additional glaze, skip to Step 8, and omit the powdered sugar and cornstarch.: Fresh strawberries keep the presentation bright and allow the fruit's natural flavor to shine through, and you will enjoy a lighter finish. The risk here is that the berry juices may seep into the crust if left too long, so plan to add toppings close to serving time to maintain a crisp shell.
- To create strawberry topping with glaze: In a medium bowl, fold together sliced strawberries and 1/2 cup powdered sugar. : As they rest, the strawberries will release juices and the sugar will draw out their natural sweetness, creating a syrupy mixture. Fold gently to avoid crushing the slices into mush. If you stir too vigorously, the berries will disintegrate and the topping will turn soupy instead of glossy.
- Let stand for 30 minutes, folding gently halfway through.: This resting allows a syrup to form which will be used to make the glaze, and you will see a noticeable pool of juice at the bottom of the bowl. The extracted juice concentrates the berry flavor, which makes the glaze more intense. Not letting it sit long enough yields a weaker glaze, while letting it sit too long risks overly soft berries.
- Drain strawberries, saving all accumulated strawberry juice.: The drained berries will be plump and glossy, while the reserved juice holds the concentrated strawberry aroma. Keeping the juice is crucial because it provides both color and flavor for the glaze. Discarding it is a missed opportunity to make an impactful topping.
- Add water (if needed) to strawberry juice to equal 1/3 cup of strawberry juice.: Adjusting the volume ensures you have the right liquid to cornstarch ratio for the glaze. The goal is a smooth, translucent finish without making the glaze too thin. Too much water dilutes flavor, and too little will make the glaze overly thick and pasty.
- In a small saucepan over medium heat, combine 1/3 cup strawberry juice and cornstarch.: Heat will activate the thickening power of cornstarch , transforming the juice into a clear glaze. Stir constantly so the cornstarch disperses evenly; you'll see the liquid become glossy and slightly syrupy. If you do not whisk frequently, lumps can form and create an uneven texture, which is easily avoided by steady stirring.
- If your strawberry juice is not very red, and if you want a deeper red color, add a drop or two of red food coloring.: Adding color is purely aesthetic and can make the topping pop in photos or on a table. Use only a tiny amount to avoid an artificial hue. Over coloring leads to an unnatural tone, which is a cosmetic misstep many people later regret.
- Cook, stirring constantly, until you have a thickened, clear glaze.: The glaze should cling to the back of a spoon and appear shiny and translucent. Remove promptly once thickened because residual heat continues to thicken the glaze and can overcook it. If it gets too thick, you can thin it slightly with a few drops of water, but overheating can also dull the fresh strawberry flavor.
- If the cornstarch forms lumps, simply smoosh out the lumps with a spatula.: A small spatula or whisk will break up any stubborn bits and restore a smooth texture. The glaze should be silky and free of specks. If lumps persist, straining can rescue the glaze and prevent unpleasant textures on the finished pie.
- Once thickened, immediately remove strawberry glaze from heat and let cool completely.: Cooling prevents the glaze from cooking the berries and keeps the texture glossy and stable. You can feel the difference when it reaches room temperature, as the glaze loses steam and becomes more cohesive. Applying a warm glaze can soften the filling and cause juices to run, so ensure it is fully cooled.
- You have a few options for incorporating the strawberry glaze: Choose the method that matches your presentation goals, whether that is fully glazed berries, lightly glazed fruit, or a delicate drizzle. Each approach alters the look and weight of the topping, so consider whether you want a heavy, jam like finish or a light, fresh appearance. The main mistake here is applying too much glaze, which can overpower the pie and make slices messy.
- If you plan to eat the pie within a few hours after making it, go ahead and add your preferred strawberry topping: Adding the topping shortly before serving ensures the crust stays crisp and the berries retain structure. Leave an inch of bare cream cheese around the edge to protect the crust from juices. If you skip this step, the crust may absorb the juices and become soggy, which undermines the textural contrast.
- This helps to keep any strawberry juices from soaking into the crust, which can make the crust soggy.: The visual result is cleaner slices and a more pleasant mouthfeel, with a defined edge where the filling meets the crust. If you plan to serve later, hold the topping separate and add it at plating time to preserve the crispness.
- Slice pie into pieces and serve.: Use a sharp knife wiped between cuts for neat slices, and notice how the filling holds shape while the berries provide bursts of tartness. If you refrigerated the pie thoroughly, slices will be clean and elegant. Serving too soon can lead to slumping slices and unattractive presentation.
- If you will not be eating all of the pie within a few hours, I recommend leaving the strawberry topping off the pie.: Storing the glaze and berries separately maintains the crust and filling texture, and you can add the topping just before serving for peak freshness. The typical error is assembling everything too early and losing the delightful contrast that makes this pie so memorable.
- To serve, slice individual pieces and place them on dessert plates.: Add your preferred strawberry topping at plating for the cleanest presentation, and you will notice friends appreciate the care in each slice. Taking this extra step makes the pie look professional, and it prevents any excess juice from spreading on the server, which is a helpful serving tip.
Notes
- Gluten Free Crust: Substitute a gluten free all purpose flour blend for the all-purpose flour in equal measure, and press the dough gently to form the crust. Note that texture will differ slightly, and you may need to adjust baking time by a few minutes to prevent overbrowning.
- Less Sweet Filling: Reduce the 1 cup powdered sugar in the filling by a quarter cup if you prefer a tangier profile that lets the cream cheese shine. Taste as you go and remember the berries add natural sweetness, so balance carefully to avoid an overly tart result.
- Extra Crisp Crust: Blind bake the crust slightly longer until the center is just set to create a firmer base that withstands juicier toppings. Keep a close eye to avoid burning, and allow complete cooling before filling.
- Lightened Filling: For a lighter mouthfeel, whip the heavy whipping cream to soft peaks and fold gently into the cream cheese, though this will yield a less stable filling that benefits from extra chilling time.
- Fresh Berry Mix: Replace up to half of the sliced strawberries with a mix of raspberries or blueberries for color contrast and layered fruit flavor, keeping in mind the recipe's strawberry centric glaze pairs best with mostly strawberries.
- Decorative Finish: Arrange slices in concentric circles for a classic look or create a rustic mound for a homey presentation, and decide whether to apply glaze based on the visual you want and how long before serving you will top the pie.