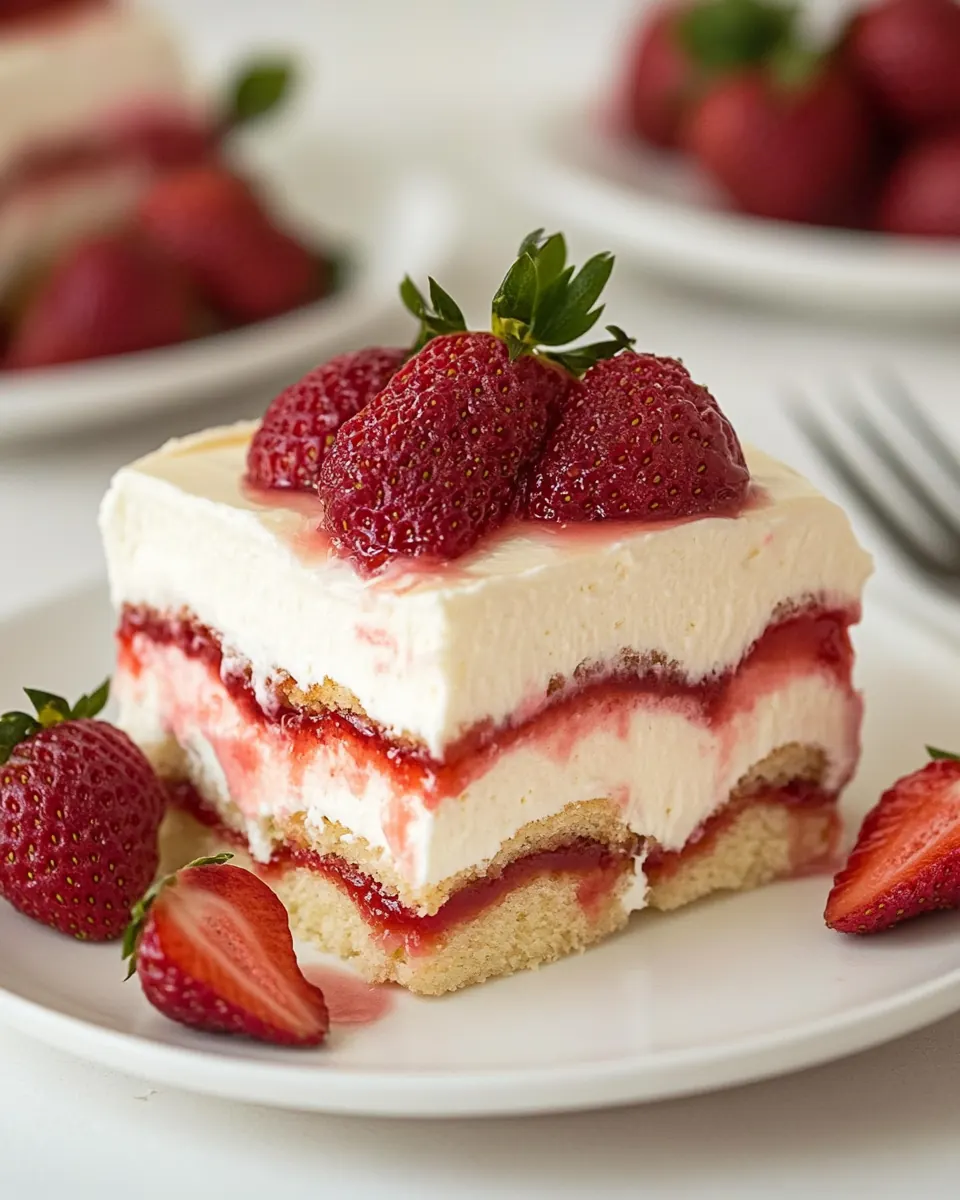
Strawberry Cheesecake Tiramisu
Strawberry Cheesecake Tiramisu is one of those desserts I reach for when I want something that feels both fancy and utterly comforting.
I first made Strawberry Cheesecake Tiramisu on a bright spring afternoon when friends dropped by unannounced, and I only had a handful of pantry staples plus a big bowl of fresh strawberries. The result was a layered dessert that tasted like two favorites had a delicious truce, creamy and slightly tangy from the cream cheese, with bright fruity hits from the strawberries and a glossy, jewel toned pomegranate sip soaking the lady fingers. I remember the way the kitchen filled with the sweet, slightly tart aroma as the reduced pomegranate simmered, and how everyone kept sneaking spoonfuls while I fussed over presentation.
Over time I’ve tweaked little things, like whipping the heavy cream to very firm peaks and folding it gently so the texture stays cloudlike, and using slightly softened cream cheese whipped until airy to keep each bite light. This dessert travels well to potlucks, and I’ve learned that assembling it ahead makes the flavors knit together into something richer. When you slice into it, the layers should hold, with a soft, yielding center and a glossy fruit top that makes people pause, fork midair. I love serving it when I want to impress without spending an entire afternoon in the kitchen, because it rewards with elegant flavor and simple technique.
Recipe Snapshot
31 mins
30 mins
1 mins
Medium
300 kcal
American
Gluten-Free, Low FODMAP
Desserts
Saucepan, Mixing bowls, Electric hand mixer, 9 by 9 inch baking dish
What’s Great About This Strawberry Cheesecake Tiramisu
Layered Luxury without the Fuss
I love Strawberry Cheesecake Tiramisu because it feels indulgent while being straightforward to build. The technique is simple but the payoff is immediate, every spoonful offering creamy cream cheese, pillowy heavy cream, and juicy strawberries.
Bright Fruity Contrast
The reduced pomegranate juice gives a bright acidity that cuts through the richness. I appreciate how that tart note lifts the dessert, making it less cloying and more sophisticated than a plain cheesecake.
Textural Play
The interplay between slightly softened, juice kissed lady fingers and the whipped, airy filling is delightful. You get a tender bite, a creamy center, and a fresh fruit snap depending on where your fork lands, and that variety keeps every mouthful interesting.
Make Ahead Friendly
I often assemble this the night before, letting the flavors meld. The chilling time means you can relax while your dessert does the finishing work, and that kind of easy planning makes it perfect for gatherings.
Customizable but Reliable
This recipe is forgiving. You can scale the fruit or swap how you sweeten the pomegranate soak, and it still delivers. I value recipes that let you adapt without losing their essential charm, and this one does just that.
Ingredients You’ll Need for Strawberry Cheesecake Tiramisu

These ingredients are chosen to create harmony between creamy richness and fruity brightness. The key players are the cream cheese and whipped heavy cream, which form a light, cheesecake like filling. The lady fingers act as a neutral, sponge like layer that soaks up the concentrated pomegranate, tying the dessert together. Fresh strawberries bring texture and freshness, and modest sugar balances tartness without overwhelming the fruit.
- 1 1/2 cups pomegranate juice: Adds bright, tart liquid and a fruity backbone to macerate strawberries or soak ladyfingers, contributing color and subtle acidity to balance the dessert.
- 1/2 cup + 2 Tbsp granulated sugar, divided: Provides sweetness and structure; divided usage allows part to sweeten the strawberry mixture and part to be whipped or folded into the cream layer for balanced flavor.
- 1 1/4 cups heavy cream: Contributes rich, airy texture when whipped and creates a light, creamy layer that contrasts with soaked ladyfingers and supports the cheesecake component.
- 12 oz . cream cheese, softened: Delivers tangy, creamy density and classic cheesecake flavor; softened texture blends smoothly into the filling to provide body and richness.
- 32 lady fingers, such as these (from 2 packages): Supplies structure and spongey layers that absorb pomegranate juice and strawberry juices, forming the tiramisu’s distinctive soaked cake layers.
- 1 tsp vanilla extract () (optional): Imparts warm, familiar aroma and enhances overall sweetness; optional use allows for a subtle vanilla note without overpowering the strawberry and cream flavors.
- 1 1/2 lb chopped strawberries, stems removed, plus more for top garnish if desired: Offers fresh, juicy fruit flavor and texture; chopped strawberries add natural sweetness, brightness, and a fresh contrast to the rich cream and soaked ladyfingers.
Instructions for Strawberry Cheesecake Tiramisu
This recipe is a layering project that rewards patience and attention to texture. I walk you through each action so you can feel confident about the visual cues, the aromas, and how to avoid common missteps while building the dessert.
- Pour pomegranate juice into a small saucepan, bring to a simmer over medium heat. Let simmer until reduced by half, about 6 to 10 minutes. Stir in 2 Tbsp sugar until dissolved. Pour into a shallow dish and let cool completely.: The kitchen will fill with a bright, tangy scent as the pomegranate warms, and you should see gentle bubbles forming across the surface which signal a proper simmer; reducing concentrates the flavor so you will notice the aroma deepen and the liquid thicken slightly, indicating it is nearing the target reduction; a common mistake is letting it boil vigorously which can scorch and make the juice bitter, so maintain medium heat and stir occasionally to prevent sticking.
- Pour heavy cream into a medium mixing bowl. Using an electric hand mixer whip until very stiff peaks form.: Visually the volume will shrink and the liquid will gain a glossy sheen, clinging to the spoon in a syrup like way which shows it has concentrated; the reduced sugar content will dissolve faster into this syrup, and the scent will intensify to a fruity, slightly floral note; avoid over reducing as it can become too syrupy and overly sweet, and if it seems too thick remove from heat and thin with a splash of fresh juice.
- In a separate mixing bowl whip cream cheese, remaining 1/2 cup granulated sugar and vanilla extract on low speed until combined, then increase to high speed and whip until light and fluffy, about 2 to 3 minutes.: You will notice the granules disappear into the warm reduction leading to a smooth, glistening finish, and the added sugar mellows sharp edges in the pomegranate flavor; stir until no graininess remains and allow it to cool so it does not melt the lady fingers on contact; a common issue is adding sugar to a cold liquid which can leave undissolved grit, so always add to warm reduction and stir until silky.
- Add heavy cream into cream cheese mixture and blend just until combined.: Cooling changes the syrup from actively steaming to a calm, glossy pool and prevents it from wilting the lady fingers on contact; place in a cool spot or refrigerate briefly, but avoid freezing which can alter texture; many people rush this step and dunk warm liquid which makes the biscuit overly soggy, so ensure it is fully cooled before dipping.
- Working with one lady finger at a time dip both sides quickly into reduced pomegranate juice then transfer to a deep 9 by 9-inch baking dish. Create a layer of half the lady fingers doing this setting them side by side.: The sound of whisking will change as you create volume, starting as a soft swoosh then brightening to an energetic whip when air is incorporated; chill the bowl for best results because cold metal helps the heavy cream hold structure; skipping this can result in under whipped cream that weeps later.
- Spread half the strawberries into a single layer over the lady fingers, then spread half the cream cheese mixture over strawberry layer.: You want the peaks to stand tall without collapsing, creating a light, billowy texture that yields slowly when the beater is lifted; stop frequently to check texture because over whipping turns cream grainy into butter; a typical pitfall is whipping at too high speed which creates small curd like bits, so increase speed gradually and watch closely as firm peaks form.
- Repeat this process once more of dipping remaining half of the lady fingers and aligning in dish, then topping with remaining half of the strawberries, and remaining half of the cream cheese mixture.: The cream cheese will first loosen into a slightly thick paste and then transform into airy, pale clouds as air is incorporated, producing a subtly tangy aroma that pairs beautifully with the fruit; ensure the cream cheese is softened to room temperature for smooth, lump free whipping; working too cold causes uneven texture and overworking it can make it too loose and difficult to set.
- Cover and chill 4 hours. Optionally garnish on top with extra strawberries just before serving.: The sound becomes softer as the airy heavy cream folds into the denser cream cheese , and visually you should see streaks vanish leaving a uniform pale filling; fold gently to preserve volume, because vigorous mixing knocks out air and yields a dense result; a frequent error is to overmix which flattens the filling, so stop as soon as the mixture is homogeneous.
- For best results cut and serve within 24 hours (the strawberries will start to break down and the juices over time will make the lady fingers soggy).: When dipped briefly the lady fingers will darken slightly and smell subtly fruity, they should be pliable but not falling apart, giving a tender foundation for the layers; use a quick motion because soaking too long turns them into a mushy base; a common mistake is lingering too long which ruins the textural contrast, so a second or two per side is usually enough.
- Create a layer of half the lady fingers doing this setting them side by side: As you align them you will feel the soft, sponge like give under your fingertips and visually a neat grid forms that promises even slices later; pressing too hard compresses the soak and can make the layer overly dense, so arrange gently and keep edges neat to maintain structure when slicing.
- Spread half the strawberries into a single layer over the lady fingers, then spread half the cream cheese mixture over strawberry layer: The bright red of the sliced strawberries will contrast with the pale filling creating an inviting mosaic, and the first lick of the filling should be cool and tangy; spread evenly to avoid high peaks which can cause uneven chilling; a common misstep is piling fruit in the center, which leads to an unstable top, so distribute fruit evenly to support the next layer.
- Repeat this process once more of dipping remaining half of the lady fingers and aligning in dish, then topping with remaining half of the strawberries, and remaining half of the cream cheese mixture: Building the second tier should mirror the first, and the result is a balanced stack where each forkful will capture all elements; smooth the final top with a spatula for good presentation, and chill promptly so the layers marry; waiting too long before chilling can let juices redistribute and make the dessert runny, so move to refrigeration soon after assembling.
- Cover and chill 4 hours: Cooling allows the textures to set and the flavors to blend, and you will notice the filling firm slightly while the lady fingers achieve an ideal yielding texture; chilling also helps slicing clean squares; cutting too soon yields loose slices and a messy presentation, so plan ahead and respect the chilling time.
- Optionally garnish on top with extra strawberries just before serving: Fresh strawberries add a lively finish and a fresh scent, and adding them just before serving preserves their color and firmness; avoid garnish too early because the fruit will weep and stain the surface, so place them immediately prior to presenting the dish.
- For best results cut and serve within 24 hours: Over time the strawberries release juices that will continue to soften the lady fingers , so serving within a day means you enjoy the intended contrast of textures; if stored longer expect a softer, more trifle like consistency, which is still tasty but different; many people underestimate this and are surprised when layers lose definition after extended refrigeration.
Ways to Customize
There are a few simple ways to put a personal stamp on Strawberry Cheesecake Tiramisu. Below are detailed ideas you can try, each starting with a bolded suggestion so you can scan quickly and pick one that fits your mood and pantry.
- Use a quicker pomegranate soak If you are short on time, substitute with 3/4 cup pomegranate juice combined with 1 Tbsp sugar as the note in the recipe suggests, this short cut still offers fruity flavor though less concentrated.
- Adjust fruit amount Increase or decrease the strawberries to suit your preference, more fruit will brighten each bite while less will emphasize the cheesecake like filling.
- Make single servings Assemble in individual jars or cups for portable portions, layering the same elements in smaller vessels yields pretty presentations for parties.
- Control sweetness Taste the filling before assembling and adjust sugar in small increments to suit your palate, some berries are naturally sweet and need less added sugar.
- Presentation focus Garnish with whole or halved strawberries right before serving to keep them firm and visually striking, and consider a light dusting of powdered sugar for a soft finish.
Perfect Pairings for Strawberry Cheesecake Tiramisu
Strawberry Cheesecake Tiramisu pairs beautifully with light beverages, fresh fruit plates, and occasions where make ahead desserts shine. Below are serving ideas, storage notes, and suggestions for occasions where this dessert earns center stage.
- Serve with fresh berries A small bowl of extra strawberries or mixed berries complements the dessert and gives guests a chance to add more fresh fruit if they like.
- Occasion friendly This dessert fits spring gatherings, brunches, or weekend dinners when you want a relaxed yet elegant sweet; it also travels well for potlucks because chilling stabilizes it before transport.
- Pair with light coffee or tea Offer mild coffee or fragrant tea alongside the slices to balance sweetness and add a comforting finish to the meal.
- Storage tips Keep covered and refrigerated, and aim to serve within 24 hours to preserve the contrast between the creamy filling and the soaked lady fingers; if stored longer expect a softer texture.
- Serving style Cut into squares and use a spatula to transfer neat portions; for a refined touch, garnish each piece with a small strawberry half and a drizzle of any reserved reduced pomegranate.
- Seasonal pairing In spring when strawberries are at their peak, the dessert shines; for summer gatherings it also works well at al fresco dinners where chilled desserts are appreciated.
FAQ
Conclusion
This recipe stands out for its marriage of creamy cheesecake flavor and bright strawberry freshness, all assembled in an approachable layered format. I encourage you to try making Strawberry Cheesecake Tiramisu the next time you want a showstopping dessert that is relaxed to prepare. It rewards a little planning and offers elegant results that guests will remember, and it’s flexible enough to suit busy schedules and last minute gatherings.
Strawberry Cheesecake Tiramisu
Equipment
- Saucepan
- Mixing Bowls
- electric hand mixer
- 9 by 9 inch baking dish
Ingredients
- 1 1/2 cups pomegranate juice Adds bright, tart liquid and a fruity backbone to macerate strawberries or soak ladyfingers, contributing color and subtle acidity to balance the dessert.
- 1/2 cup + 2 Tbsp granulated sugar, divided Provides sweetness and structure; divided usage allows part to sweeten the strawberry mixture and part to be whipped or folded into the cream layer for balanced flavor.
- 1 1/4 cups heavy cream Contributes rich, airy texture when whipped and creates a light, creamy layer that contrasts with soaked ladyfingers and supports the cheesecake component.
- 12 oz . cream cheese, softened Delivers tangy, creamy density and classic cheesecake flavor; softened texture blends smoothly into the filling to provide body and richness.
- 32 lady fingers, such as these (from 2 packages) Supplies structure and spongey layers that absorb pomegranate juice and strawberry juices, forming the tiramisu’s distinctive soaked cake layers.
- 1 tsp vanilla extract (optional) Imparts warm, familiar aroma and enhances overall sweetness; optional use allows for a subtle vanilla note without overpowering the strawberry and cream flavors.
- 1 1/2 lb chopped strawberries, stems removed, plus more for top garnish if desired Offers fresh, juicy fruit flavor and texture; chopped strawberries add natural sweetness, brightness, and a fresh contrast to the rich cream and soaked ladyfingers.
Instructions
- Pour pomegranate juice into a small saucepan, bring to a simmer over medium heat. Let simmer until reduced by half, about 6 to 10 minutes. Stir in 2 Tbsp sugar until dissolved. Pour into a shallow dish and let cool completely.: The kitchen will fill with a bright, tangy scent as the pomegranate warms, and you should see gentle bubbles forming across the surface which signal a proper simmer; reducing concentrates the flavor so you will notice the aroma deepen and the liquid thicken slightly, indicating it is nearing the target reduction; a common mistake is letting it boil vigorously which can scorch and make the juice bitter, so maintain medium heat and stir occasionally to prevent sticking.
- Pour heavy cream into a medium mixing bowl. Using an electric hand mixer whip until very stiff peaks form.: Visually the volume will shrink and the liquid will gain a glossy sheen, clinging to the spoon in a syrup like way which shows it has concentrated; the reduced sugar content will dissolve faster into this syrup, and the scent will intensify to a fruity, slightly floral note; avoid over reducing as it can become too syrupy and overly sweet, and if it seems too thick remove from heat and thin with a splash of fresh juice.
- In a separate mixing bowl whip cream cheese, remaining 1/2 cup granulated sugar and vanilla extract on low speed until combined, then increase to high speed and whip until light and fluffy, about 2 to 3 minutes.: You will notice the granules disappear into the warm reduction leading to a smooth, glistening finish, and the added sugar mellows sharp edges in the pomegranate flavor; stir until no graininess remains and allow it to cool so it does not melt the lady fingers on contact; a common issue is adding sugar to a cold liquid which can leave undissolved grit, so always add to warm reduction and stir until silky.
- Add heavy cream into cream cheese mixture and blend just until combined.: Cooling changes the syrup from actively steaming to a calm, glossy pool and prevents it from wilting the lady fingers on contact; place in a cool spot or refrigerate briefly, but avoid freezing which can alter texture; many people rush this step and dunk warm liquid which makes the biscuit overly soggy, so ensure it is fully cooled before dipping.
- Working with one lady finger at a time dip both sides quickly into reduced pomegranate juice then transfer to a deep 9 by 9-inch baking dish. Create a layer of half the lady fingers doing this setting them side by side.: The sound of whisking will change as you create volume, starting as a soft swoosh then brightening to an energetic whip when air is incorporated; chill the bowl for best results because cold metal helps the heavy cream hold structure; skipping this can result in under whipped cream that weeps later.
- Spread half the strawberries into a single layer over the lady fingers, then spread half the cream cheese mixture over strawberry layer.: You want the peaks to stand tall without collapsing, creating a light, billowy texture that yields slowly when the beater is lifted; stop frequently to check texture because over whipping turns cream grainy into butter; a typical pitfall is whipping at too high speed which creates small curd like bits, so increase speed gradually and watch closely as firm peaks form.
- Repeat this process once more of dipping remaining half of the lady fingers and aligning in dish, then topping with remaining half of the strawberries, and remaining half of the cream cheese mixture.: The cream cheese will first loosen into a slightly thick paste and then transform into airy, pale clouds as air is incorporated, producing a subtly tangy aroma that pairs beautifully with the fruit; ensure the cream cheese is softened to room temperature for smooth, lump free whipping; working too cold causes uneven texture and overworking it can make it too loose and difficult to set.
- Cover and chill 4 hours. Optionally garnish on top with extra strawberries just before serving.: The sound becomes softer as the airy heavy cream folds into the denser cream cheese , and visually you should see streaks vanish leaving a uniform pale filling; fold gently to preserve volume, because vigorous mixing knocks out air and yields a dense result; a frequent error is to overmix which flattens the filling, so stop as soon as the mixture is homogeneous.
- For best results cut and serve within 24 hours (the strawberries will start to break down and the juices over time will make the lady fingers soggy).: When dipped briefly the lady fingers will darken slightly and smell subtly fruity, they should be pliable but not falling apart, giving a tender foundation for the layers; use a quick motion because soaking too long turns them into a mushy base; a common mistake is lingering too long which ruins the textural contrast, so a second or two per side is usually enough.
- Create a layer of half the lady fingers doing this setting them side by side: As you align them you will feel the soft, sponge like give under your fingertips and visually a neat grid forms that promises even slices later; pressing too hard compresses the soak and can make the layer overly dense, so arrange gently and keep edges neat to maintain structure when slicing.
- Spread half the strawberries into a single layer over the lady fingers, then spread half the cream cheese mixture over strawberry layer: The bright red of the sliced strawberries will contrast with the pale filling creating an inviting mosaic, and the first lick of the filling should be cool and tangy; spread evenly to avoid high peaks which can cause uneven chilling; a common misstep is piling fruit in the center, which leads to an unstable top, so distribute fruit evenly to support the next layer.
- Repeat this process once more of dipping remaining half of the lady fingers and aligning in dish, then topping with remaining half of the strawberries, and remaining half of the cream cheese mixture: Building the second tier should mirror the first, and the result is a balanced stack where each forkful will capture all elements; smooth the final top with a spatula for good presentation, and chill promptly so the layers marry; waiting too long before chilling can let juices redistribute and make the dessert runny, so move to refrigeration soon after assembling.
- Cover and chill 4 hours: Cooling allows the textures to set and the flavors to blend, and you will notice the filling firm slightly while the lady fingers achieve an ideal yielding texture; chilling also helps slicing clean squares; cutting too soon yields loose slices and a messy presentation, so plan ahead and respect the chilling time.
- Optionally garnish on top with extra strawberries just before serving: Fresh strawberries add a lively finish and a fresh scent, and adding them just before serving preserves their color and firmness; avoid garnish too early because the fruit will weep and stain the surface, so place them immediately prior to presenting the dish.
- For best results cut and serve within 24 hours: Over time the strawberries release juices that will continue to soften the lady fingers , so serving within a day means you enjoy the intended contrast of textures; if stored longer expect a softer, more trifle like consistency, which is still tasty but different; many people underestimate this and are surprised when layers lose definition after extended refrigeration.
Notes
- Use a quicker pomegranate soak If you are short on time, substitute with 3/4 cup pomegranate juice combined with 1 Tbsp sugar as the note in the recipe suggests, this short cut still offers fruity flavor though less concentrated.
- Adjust fruit amount Increase or decrease the strawberries to suit your preference, more fruit will brighten each bite while less will emphasize the cheesecake like filling.
- Make single servings Assemble in individual jars or cups for portable portions, layering the same elements in smaller vessels yields pretty presentations for parties.
- Control sweetness Taste the filling before assembling and adjust sugar in small increments to suit your palate, some berries are naturally sweet and need less added sugar.
- Presentation focus Garnish with whole or halved strawberries right before serving to keep them firm and visually striking, and consider a light dusting of powdered sugar for a soft finish.