Christmas Muddy Buddies
Christmas Muddy Buddies began as my go to holiday stash when the weather turned crisp and the living room filled with twinkling lights. I still remember the first year I made it for a cookie exchange, arriving with a big bowl and a grin, watching neighbors reach in and declare it addictive. That moment hooked me, and each winter since I tweak the mix slightly, remembering that child like thrill when candy melts snap and powdered sugar puffs the air.
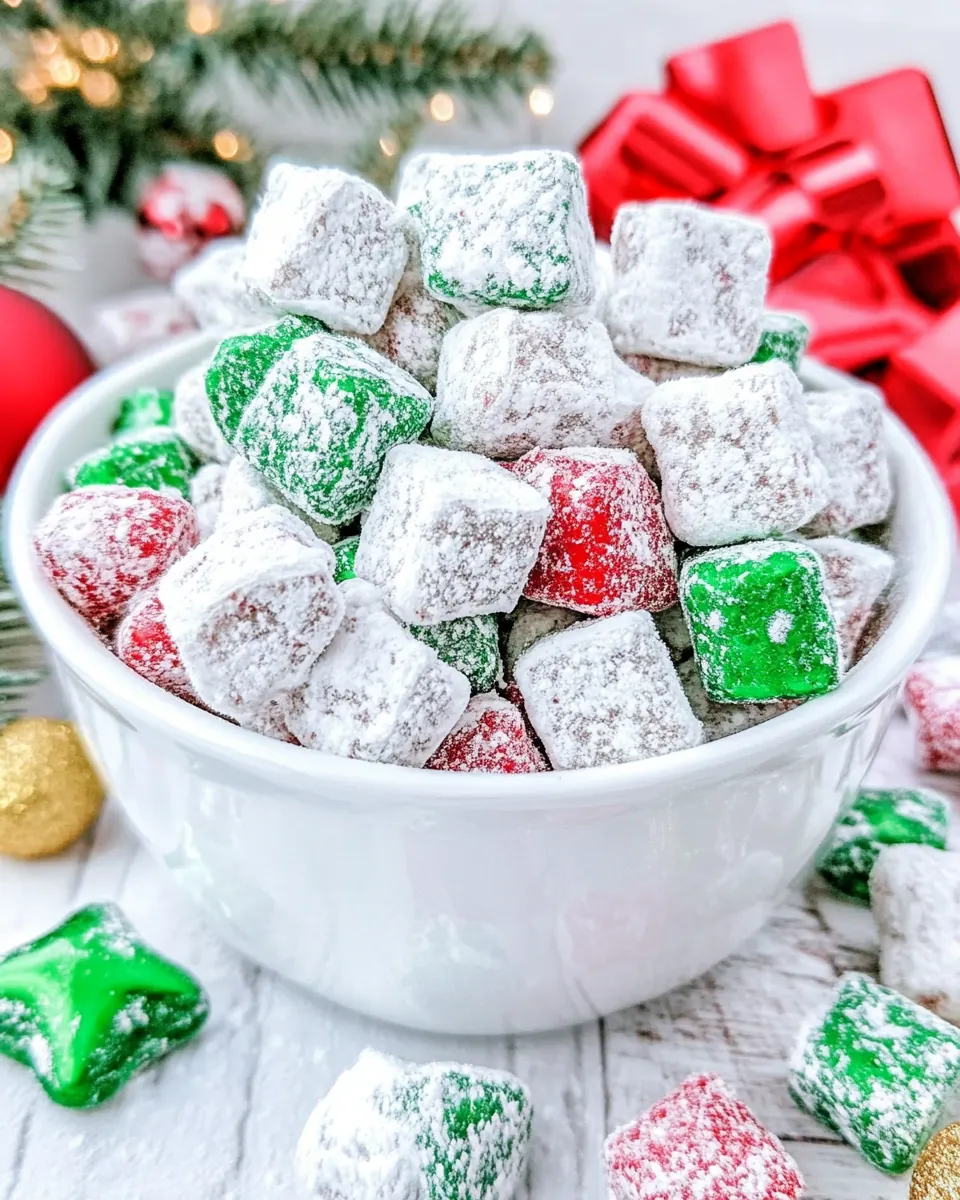
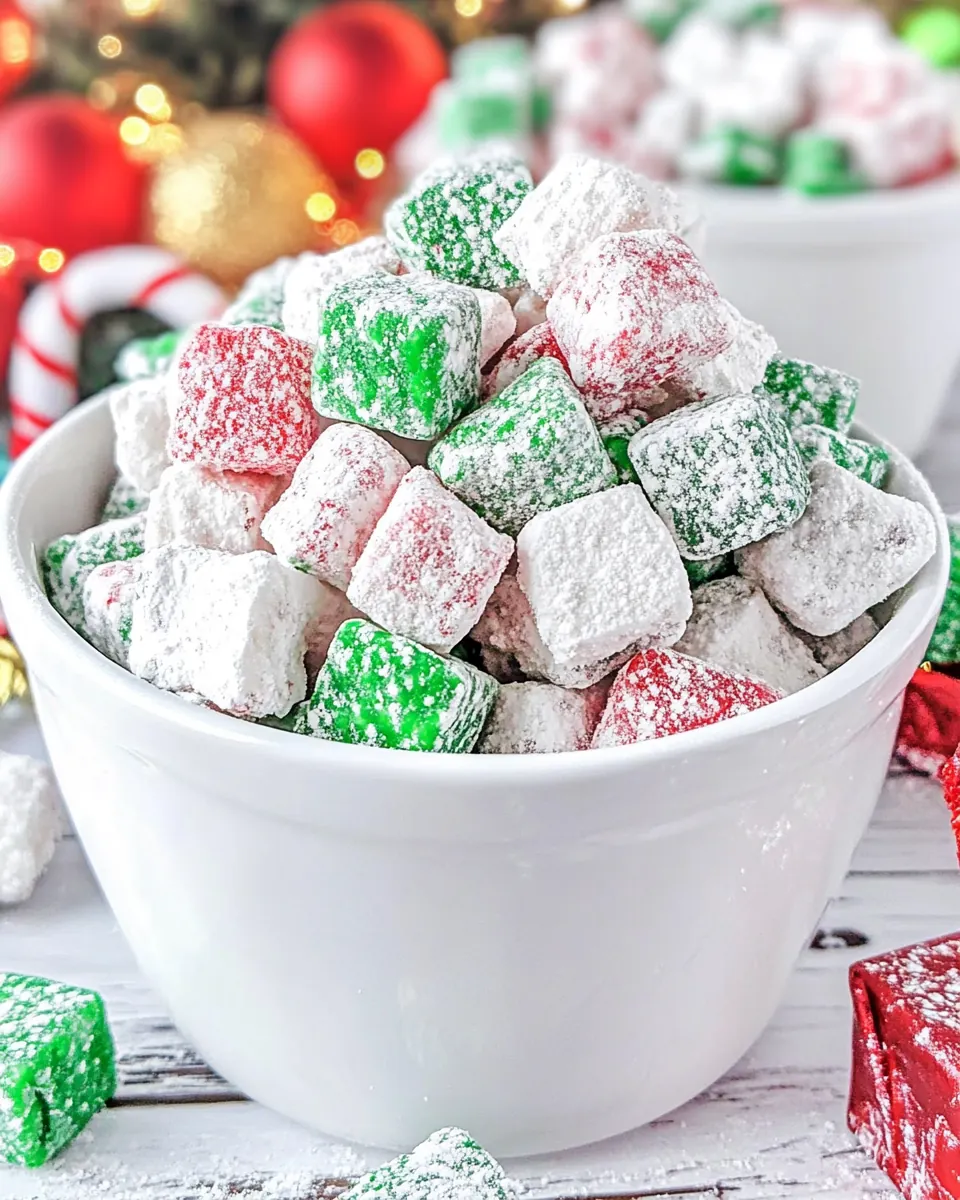
Some years I make it as a quick last minute gift, other years it becomes the centerpiece of our snack table, tossed into clear jars tied with ribbon. I love how Christmas Muddy Buddies balances sweet and salty, and how the red and green candy melts transform a simple cereal into something festive and bright. It is one of those recipes I trust to bring a smile, whether I serve it at a casual game night or slip it into a neighbor s care package.
As you read on, you will find this recipe is forgiving, fast, and great for involving kids, with clear textures to watch for when melting and coating. I find the ritual of shaking the bag to dust the cereal with powdered sugar almost as fun as the tasting. If you are looking for a fast crowd pleaser that still feels homemade and thoughtful, Christmas Muddy Buddies is a dependable choice that never fails to charm.
Recipe Snapshot
15 mins
5 mins
10 mins
Easy
150 kcal
American
Gluten-Free, Low FODMAP
Desserts
Microwave safe bowl, Gallon ziplock bags, Large bowl, Parchment or wax paper
What We Adore About This Christmas Muddy Buddies
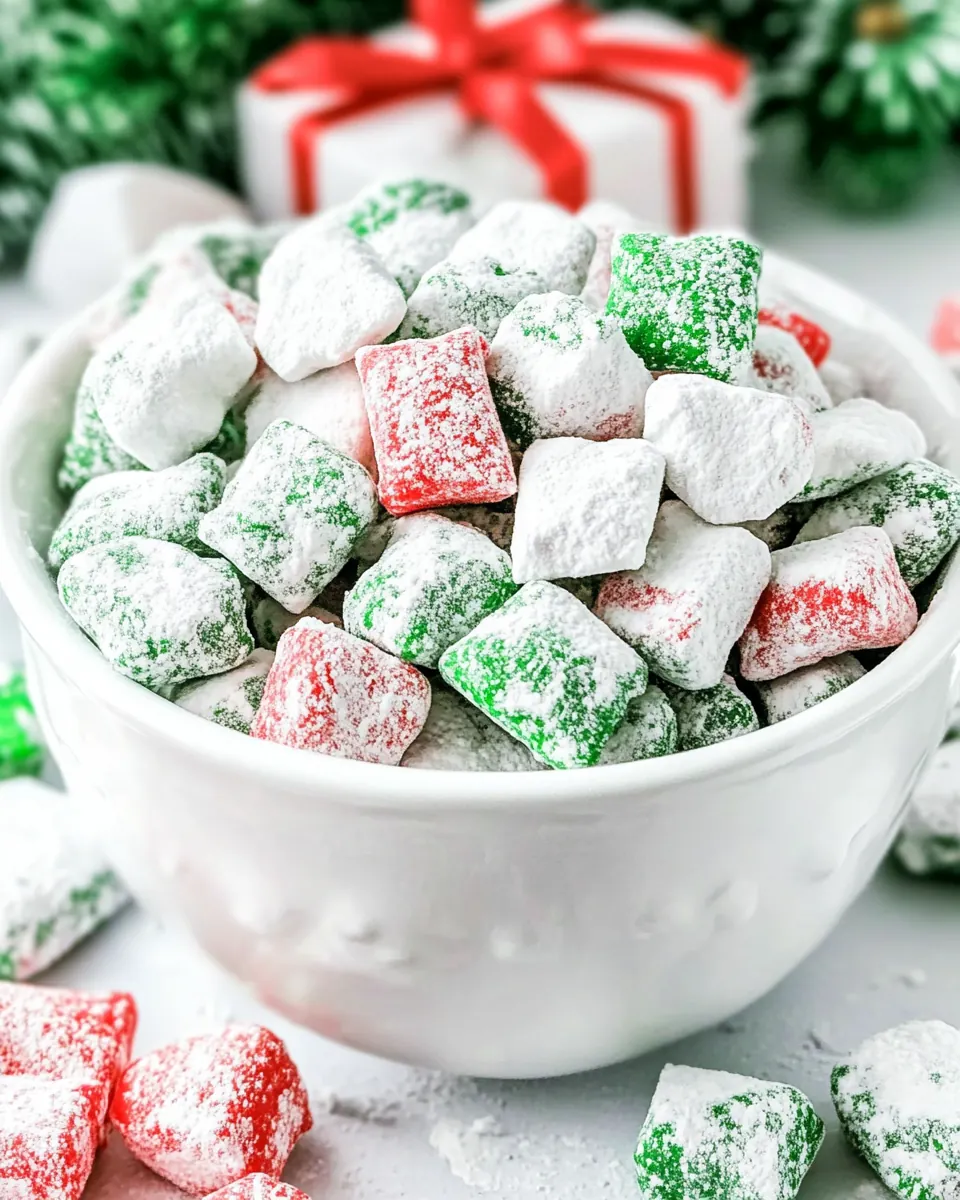
Bold festive appearance
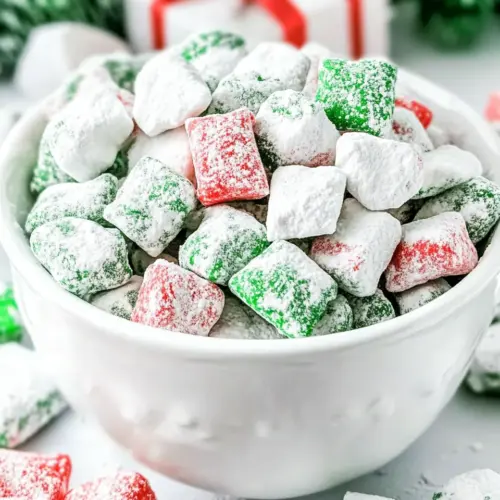
I adore how Christmas Muddy Buddies looks on the table. The red and green candy coatings give this snack an instant holiday identity, and when you pile it in a bowl or jar it reads like celebration. I ve watched guests dive in without hesitation, drawn first by color, then by texture.
Speed and simplicity
What draws me back year after year is how fast this comes together. With only a few minutes at the microwave and some shaking in a bag, you have a multi cup treat ready to share. For busy holiday nights, that quick payoff is gold, and I often make a double batch without breaking a sweat.
Playful texture contrast
The combination of crunchy Chex cereal, smooth candy coating, and the light dusting of powdered sugar creates a layered mouthfeel that keeps you reaching for more. I like that every bite offers a crackle from the cereal, a creamy snap from the candy melts, and a soft, snow like finish from the powdered sugar.
Kid friendly and collaborative
I love inviting kids into this process because most of the work is tactile and safe. They can measure, pour, and shake with enthusiasm, and the results are immediate and celebratory. It s a great way to make memories while assembling something delicious.
Flexible and forgiving
I appreciate that this recipe tolerates small substitutions without collapsing. You can switch flavors of cereal or candy melts and still end up with a beloved snack. That flexibility means I can adapt with what I have on hand and still present a festive offering.
Ingredients You’ll Need for Christmas Muddy Buddies
For me, the magic of these ingredients comes from contrast and simplicity. The crunchy Chex cereal provides a neutral, sturdy base, while the candy melts and creamy peanut butter add sweet, glossy coating. The powdered sugar finishes everything with a snowy look and a pleasant dusting that tones down any excess stickiness. Each player keeps the balance intact and lets the festive colors shine.
- 8 cups Chex cereal, divided: Provide a light, crunchy base for the snack mix and allow even coating; divide amount ensures layers for coating and tossing without crushing the cereal. Keep cereal in large bowls or bags when mixing to prevent clumping and maintain crisp texture for best results.
- 1/2 cup creamy peanut butter, divided: Add creamy, binding richness and a peanut flavor that helps coatings adhere; dividing the peanut butter allows one portion to be mixed with cereal and another to blend with coatings for balanced taste. Warm gently before combining to achieve a smooth consistency that evenly coats the cereal.
- 1 tbsp vegetable oil, divided: Help thin and loosen the peanut butter for smoother melting and coating; dividing the oil lets you emulsify small portions for separate coatings without over-saturating the cereal. Use sparingly to preserve crunch while improving spreadability and shine of the candy coatings.
- 1 cup red candy melts: Provide vivid red color and sweet, smooth coating when melted to create festive clusters; measure precisely to ensure enough to coat a portion of the cereal without excess. Melt gently and temper slightly if needed to avoid seizing, then stir until fully fluid for even coverage.
- 1 cup green candy melts: Provide vivid green color and sweet, smooth coating when melted to create contrasting festive clusters; using the measured amount ensures consistent coverage across the divided cereal batches. Melt gently and stir until fully fluid to prevent graininess and achieve a glossy finish.
- 1 1/2 cups powdered sugar, divided: Supply a fine, sweet dusting that prevents pieces from sticking and adds a snowy appearance; dividing the powdered sugar allows one portion for initial coating and another for final dusting to ensure full coverage. Sift if clumpy and shake gently in bags to coat evenly without crushing the cereal.
- 2 gallon-sized ziplock bags: Allow easy tossing and shaking to coat cereal with melted coatings and powdered sugar while containing mess; using two gallon–sized bags lets you handle divided batches without overcrowding. Seal bags securely and shake gently to achieve uniform coverage and protect the cereal from breaking.
How to Assemble Christmas Muddy Buddies
This assembly process is straightforward but benefits from attention to texture and timing. As you melt and coat, keep a close eye on the glossy finish of the candy melts and the evenness of the powdered sugar coating. Work in two batches and give each its own bag for shaking and setting.
- Place 4 cups of Chex cereal in a large bowl. In a microwave safe bowl, combine 1 cup Red Candy Melts, 1/4 cup peanut butter and 1/2 Tbsp vegetable oil. Microwave on HIGH for 30 seconds, stir and cook in 15 second intervals until smooth. Pour melted peanut butter mixture over cereal, toss to coat. Pour coated cereal into gallon ziplock bag. Pour half of the powdered sugar (3/4 cup) into ziplock bag and seal. Shake to coat cereal. Pour coated cereal onto parchment or wax paper and allow to set.: The first sensory cue here is the dry, crisp rustle as you pour the Chex cereal into your bowl, and you want a light, even layer to receive the coating. This step matters because separating the cereal into a clean, measured portion prevents overcrowding when you pour the melted mixture, allowing each piece to be coated. A common mistake is piling too much cereal at once which leads to clumping and uneven coverage, so measure carefully and keep the pieces gently fluffed.
- Repeat process with remaining ingredients and Green Candy Melts.: When you stir these together the aroma is sweet and nutty, with the peanut butter lending a roasted note. The oil gives the mix a shiny flow that helps it cling to the cereal. This blend is important because it creates a glossy, spreadable coating, and if any ingredient is too cold it may seize, so ensure the peanut butter is soft. Avoid overheating the candy melts which can become grainy, so use short bursts.
- Store in an airtight container for up to a week.: You will hear occasional quiet bubbling as the melts soften, and the texture should shift to silky and homogenous when stirred. This melting routine prevents scorching, which would ruin the smoothness and introduce a burnt taste. A typical pitfall is microwaving too long at once, which can break emulsions, so stop, stir, and only continue if needed until the mixture glides off your spoon.
- Pour melted peanut butter mixture over cereal, toss to coat: At this point you should see ribbons of glossy candy drape over the crunchy Chex cereal , and the sound changes to a gentle clinking as pieces separate under the coating. Tossing ensures each piece gets an even layer and that the coating reaches crevices, which creates balanced bites. One thing to avoid is vigorous stirring that crushes the cereal; use gentle folding motions to keep pieces intact.
- Pour coated cereal into gallon ziplock bag: Sliding the warm, shiny pieces into a large bag will cause a fragrant puff of sweet, nutty steam. The bag gives you room to shake without spilling, and it s essential for the next step where powdered sugar is applied. A mistake here is choosing a bag that s too small which risks tearing or insufficient movement, so always use generously sized bags.
- Pour half of the powdered sugar (3/4 cup) into ziplock bag and seal: The powdered sugar looks like a soft snowfall as it lands on the coated cereal, and sealing the bag traps that fine dust so it can clothe the pieces evenly. This dusting both tones the sweetness and prevents stickiness, which helps the final texture. If you pour too much one time you can over sweeten and create clumps, so measure the sugar carefully.
- Shake to coat cereal: You will hear a rhythmic pattering as the cereal collides inside the bag, and the goal is an even, snowy finish on every piece. Shaking mixes the sugar into the sticky coating, creating a dry matte surface. Avoid under shaking which leaves spots bare, and over shaking that can crush cereal; aim for steady, moderate motions until you see uniform dusting.
- Pour coated cereal onto parchment or wax paper and allow to set: As the cereal cools on the paper the candy coating firms and you can see a subtle sheen dull into a soft matte. Letting it set prevents pieces from sticking together when you store them. A typical mistake is stacking while still warm, which leads to clumps, so spread in a single layer and give it time to fully cool and set.
- Repeat process with remaining ingredients and Green Candy Melts: You will repeat the same aroma, motion, and visual cues with the green batch, maintaining consistent texture and color contrast. Matching quantities ensures that both red and green portions have the same nutty, glossy character. People sometimes rush the second batch, but maintaining the same melt and shake rhythm keeps the overall bowl balanced.
- Store in an airtight container for up to a week: Once cooled, you will notice the final texture is crisp with a gentle powdered sugar dusting that resists clumping in storage. An airtight container preserves crunch and prevents moisture from softening the cereal. Avoid storing in warm or humid places which make the coating sticky, and if condensation occurs, transfer to a cooler, dry spot.
Tips and Tricks about Christmas Muddy Buddies

This batch of tips will help you master texture and timing, and keep cleanup easy. I ve condensed what I ve learned into practical, hands on suggestions so you can produce consistent, festive treats with minimal fuss.
- Pick quality candy melts The smoother the melts, the shinier and more stable your coating will be, which improves texture and appearance.
- Warm peanut butter first Softening the peanut butter slightly helps it blend seamlessly with the candy melts for an even, glossy coating.
- Use parchment for cooling Spreading the coated cereal on parchment prevents sticking and makes cleanup a breeze while pieces set.
- Divide powdered sugar Coating in two portions avoids over saturating any piece and gives you more control over final sweetness and texture.
- Store airtight Keeping the finished mix in an airtight container preserves crunch and prevents humidity from softening the coating.
What Goes Well With This Christmas Muddy Buddies
I like serving Christmas Muddy Buddies on casual occasions where people graze and mingle. It pairs well with warm beverages and simple dessert spreads. For gifting, package it in clear bags or jars with ribbon for instant charm.
- Serve with hot cocoa The warm, spiced notes of hot cocoa contrast nicely with the crunchy, sugary bites and make for a cozy pairing during holiday evenings.
- Include on a dessert table Place jars of the mix alongside cookies and candy for a colorful, approachable option that guests of all ages enjoy.
- Package as gifts Spoon the mix into clear bags or small jars, tie with ribbon, and label for a quick, homemade neighbor gift.
- Bring to parties This snack is ideal for informal gatherings because it s easy to make in larger batches and stays crunchy when stored properly.
- Store tips Keep the mix in an airtight container at room temperature for up to a week to preserve the coating and crunch.
- Seasonal pairing The red and green colors make this perfect for winter holidays and casual family celebrations throughout the season.
FAQ
Conclusion
Christmas Muddy Buddies stands out because it blends speed, color, and irresistible texture into a single, shareable snack. I encourage you to try it for a party, a neighbor gift, or a cozy night in, because it s easy to make and universally loved. The red and green presentation makes it seasonal without fuss, and the process is joyful enough to involve family or friends. Give it a go and enjoy the happy reactions when people discover how delightful and simple this holiday treat can be.
Christmas Muddy Buddies
Equipment
- Microwave-safe Bowl
- Gallon ziplock bags
- Large Bowl
- Parchment or wax paper
Ingredients
- 8 cups Chex cereal, divided Provide a light, crunchy base for the snack mix and allow even coating; divide amount ensures layers for coating and tossing without crushing the cereal. Keep cereal in large bowls or bags when mixing to prevent clumping and maintain crisp texture for best results.
- 1/2 cup creamy peanut butter, divided Add creamy, binding richness and a peanut flavor that helps coatings adhere; dividing the peanut butter allows one portion to be mixed with cereal and another to blend with coatings for balanced taste. Warm gently before combining to achieve a smooth consistency that evenly coats the cereal.
- 1 tbsp vegetable oil, divided Help thin and loosen the peanut butter for smoother melting and coating; dividing the oil lets you emulsify small portions for separate coatings without over-saturating the cereal. Use sparingly to preserve crunch while improving spreadability and shine of the candy coatings.
- 1 cup red candy melts Provide vivid red color and sweet, smooth coating when melted to create festive clusters; measure precisely to ensure enough to coat a portion of the cereal without excess. Melt gently and temper slightly if needed to avoid seizing, then stir until fully fluid for even coverage.
- 1 cup green candy melts Provide vivid green color and sweet, smooth coating when melted to create contrasting festive clusters; using the measured amount ensures consistent coverage across the divided cereal batches. Melt gently and stir until fully fluid to prevent graininess and achieve a glossy finish.
- 1 1/2 cups powdered sugar, divided Supply a fine, sweet dusting that prevents pieces from sticking and adds a snowy appearance; dividing the powdered sugar allows one portion for initial coating and another for final dusting to ensure full coverage. Sift if clumpy and shake gently in bags to coat evenly without crushing the cereal.
- 2 gallon-sized ziplock bags Allow easy tossing and shaking to coat cereal with melted coatings and powdered sugar while containing mess; using two gallon-sized bags lets you handle divided batches without overcrowding. Seal bags securely and shake gently to achieve uniform coverage and protect the cereal from breaking.
Instructions
- Place 4 cups of Chex cereal in a large bowl. In a microwave safe bowl, combine 1 cup Red Candy Melts, 1/4 cup peanut butter and 1/2 Tbsp vegetable oil. Microwave on HIGH for 30 seconds, stir and cook in 15 second intervals until smooth. Pour melted peanut butter mixture over cereal, toss to coat. Pour coated cereal into gallon ziplock bag. Pour half of the powdered sugar (3/4 cup) into ziplock bag and seal. Shake to coat cereal. Pour coated cereal onto parchment or wax paper and allow to set.: The first sensory cue here is the dry, crisp rustle as you pour the Chex cereal into your bowl, and you want a light, even layer to receive the coating. This step matters because separating the cereal into a clean, measured portion prevents overcrowding when you pour the melted mixture, allowing each piece to be coated. A common mistake is piling too much cereal at once which leads to clumping and uneven coverage, so measure carefully and keep the pieces gently fluffed.
- Repeat process with remaining ingredients and Green Candy Melts.: When you stir these together the aroma is sweet and nutty, with the peanut butter lending a roasted note. The oil gives the mix a shiny flow that helps it cling to the cereal. This blend is important because it creates a glossy, spreadable coating, and if any ingredient is too cold it may seize, so ensure the peanut butter is soft. Avoid overheating the candy melts which can become grainy, so use short bursts.
- Store in an airtight container for up to a week.: You will hear occasional quiet bubbling as the melts soften, and the texture should shift to silky and homogenous when stirred. This melting routine prevents scorching, which would ruin the smoothness and introduce a burnt taste. A typical pitfall is microwaving too long at once, which can break emulsions, so stop, stir, and only continue if needed until the mixture glides off your spoon.
- Pour melted peanut butter mixture over cereal, toss to coat: At this point you should see ribbons of glossy candy drape over the crunchy Chex cereal , and the sound changes to a gentle clinking as pieces separate under the coating. Tossing ensures each piece gets an even layer and that the coating reaches crevices, which creates balanced bites. One thing to avoid is vigorous stirring that crushes the cereal; use gentle folding motions to keep pieces intact.
- Pour coated cereal into gallon ziplock bag: Sliding the warm, shiny pieces into a large bag will cause a fragrant puff of sweet, nutty steam. The bag gives you room to shake without spilling, and it s essential for the next step where powdered sugar is applied. A mistake here is choosing a bag that s too small which risks tearing or insufficient movement, so always use generously sized bags.
- Pour half of the powdered sugar (3/4 cup) into ziplock bag and seal: The powdered sugar looks like a soft snowfall as it lands on the coated cereal, and sealing the bag traps that fine dust so it can clothe the pieces evenly. This dusting both tones the sweetness and prevents stickiness, which helps the final texture. If you pour too much one time you can over sweeten and create clumps, so measure the sugar carefully.
- Shake to coat cereal: You will hear a rhythmic pattering as the cereal collides inside the bag, and the goal is an even, snowy finish on every piece. Shaking mixes the sugar into the sticky coating, creating a dry matte surface. Avoid under shaking which leaves spots bare, and over shaking that can crush cereal; aim for steady, moderate motions until you see uniform dusting.
- Pour coated cereal onto parchment or wax paper and allow to set: As the cereal cools on the paper the candy coating firms and you can see a subtle sheen dull into a soft matte. Letting it set prevents pieces from sticking together when you store them. A typical mistake is stacking while still warm, which leads to clumps, so spread in a single layer and give it time to fully cool and set.
- Repeat process with remaining ingredients and Green Candy Melts: You will repeat the same aroma, motion, and visual cues with the green batch, maintaining consistent texture and color contrast. Matching quantities ensures that both red and green portions have the same nutty, glossy character. People sometimes rush the second batch, but maintaining the same melt and shake rhythm keeps the overall bowl balanced.
- Store in an airtight container for up to a week: Once cooled, you will notice the final texture is crisp with a gentle powdered sugar dusting that resists clumping in storage. An airtight container preserves crunch and prevents moisture from softening the cereal. Avoid storing in warm or humid places which make the coating sticky, and if condensation occurs, transfer to a cooler, dry spot.
Notes
- Pick quality candy melts The smoother the melts, the shinier and more stable your coating will be, which improves texture and appearance.
- Warm peanut butter first Softening the peanut butter slightly helps it blend seamlessly with the candy melts for an even, glossy coating.
- Use parchment for cooling Spreading the coated cereal on parchment prevents sticking and makes cleanup a breeze while pieces set.
- Divide powdered sugar Coating in two portions avoids over saturating any piece and gives you more control over final sweetness and texture.
- Store airtight Keeping the finished mix in an airtight container preserves crunch and prevents humidity from softening the coating.