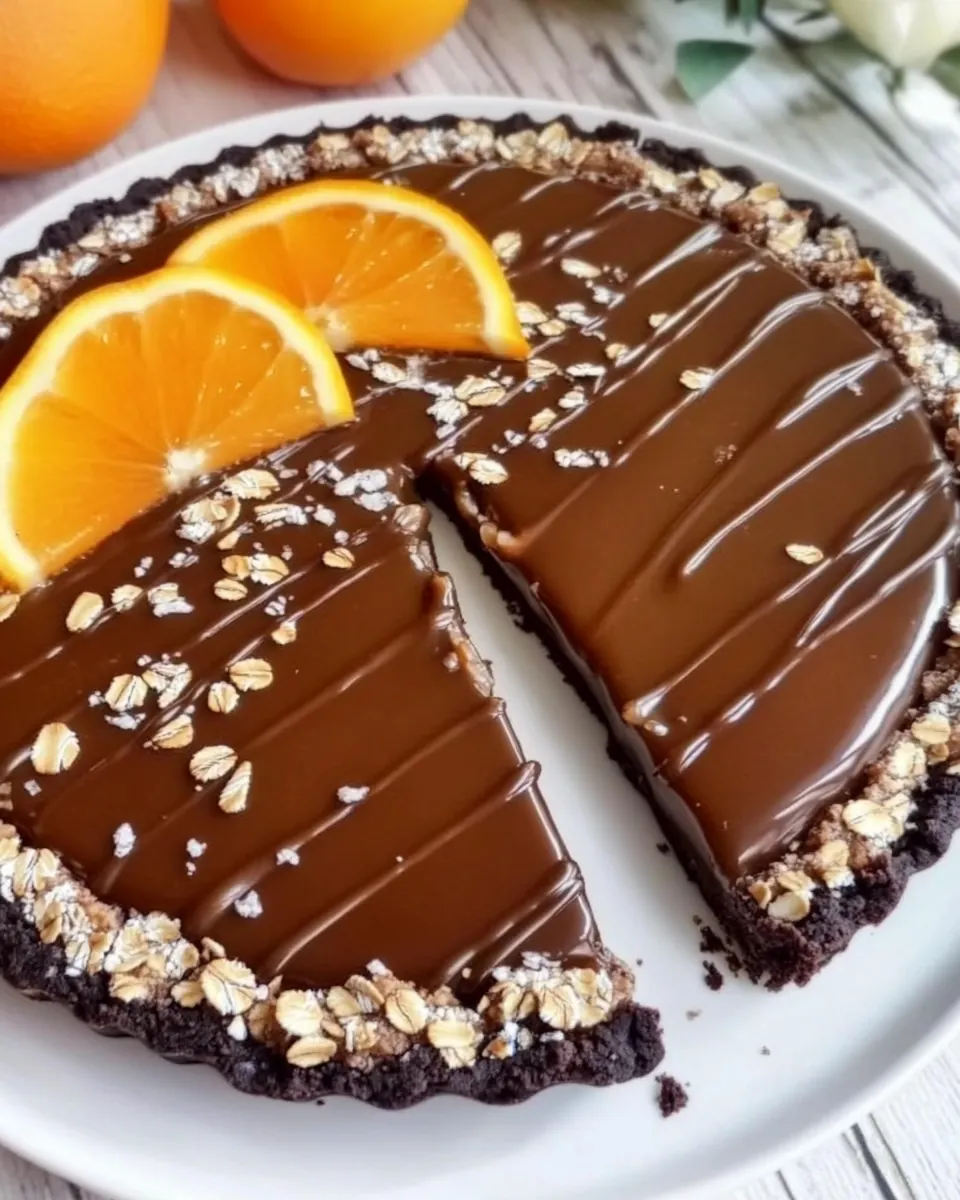
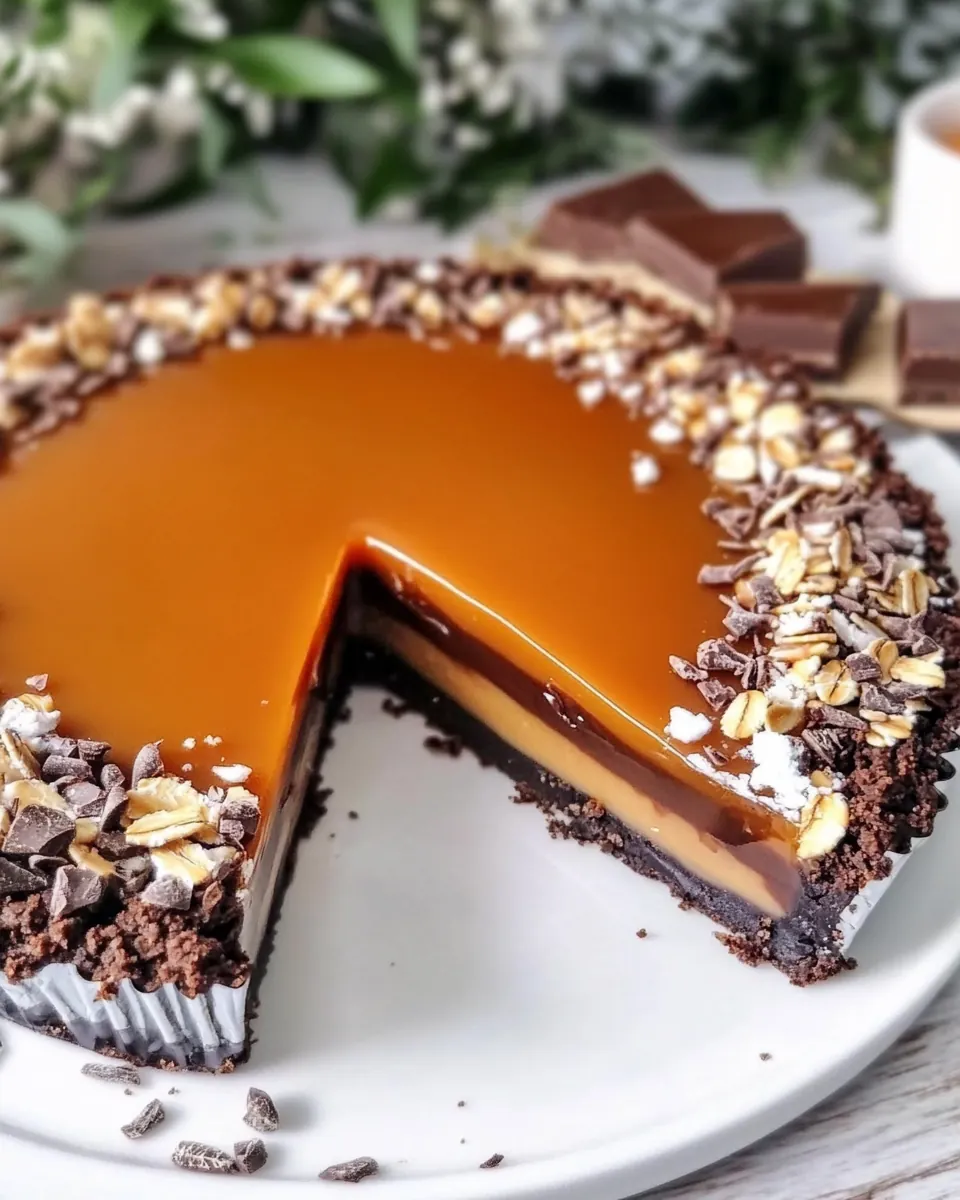
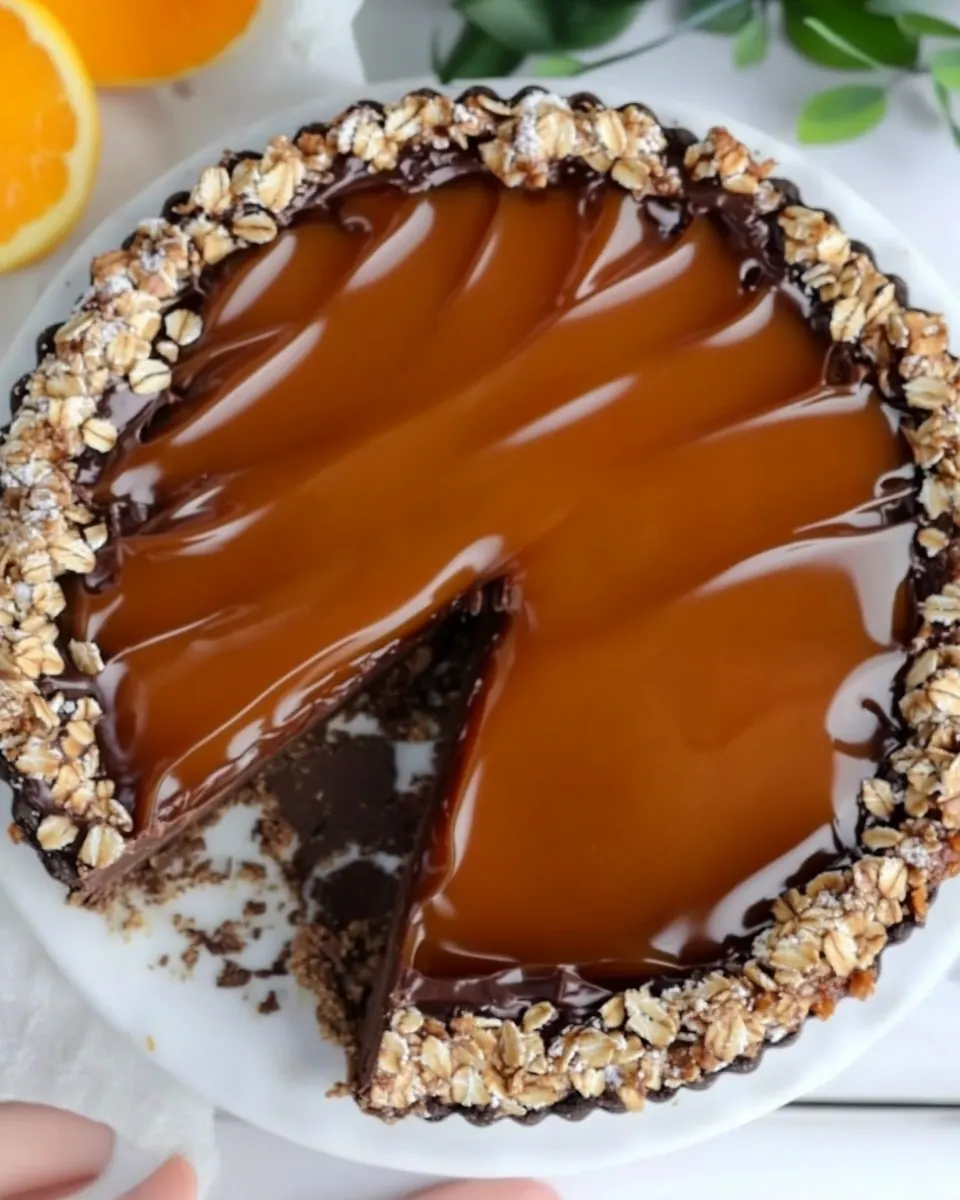
Salted Caramel Chocolate Tart with Almond Oats Crust
Salted Caramel Chocolate Tart with Almond Oats Crust is the kind of dessert I reach for when I want something that feels both rustic and a little indulgent at the same time.
I first made this tart on a blustery afternoon in fall, after bringing home a bag of fragrant oranges from the market. I was craving texture and warmth, so I turned to the pantry staples I trust most: hearty oats and toasted almonds. The crust came together in minutes and smelled of toasted nuts and sweet butter while the caramel bubbled in the saucepan, filling the kitchen with a deep, almost toffee like aroma that made me linger by the stove. While the tart set, I found myself slicing the orange and arranging the mint leaves with more care than the occasion strictly required, because I love the little rituals that make a recipe feel special.
Serving the tart later that evening, the contrast between the crisp, nutty crust and the glossy chocolate ganache was unforgettable. Each bite combined brittle, creamy, and a whisper of sea salt that made the sweetness sing. Friends asked for the recipe again before dessert plates were cleared, and I promised I would write it down with the small adjustments I’d made that afternoon. Over time I refined the balance, leaning on the almond and oats for structure, and on the salted caramel for that signature, slightly savory counterpoint.
Recipe Snapshot
40 mins
20 mins
20 mins
Hard
320 kcal
American
Gluten-Free, Vegan
Desserts
Oven, Blender or Food Processor, Loose Bottomed Tart Tin, Heavy Bottom Sauce Pan, Double Boiler
Why This Salted Caramel Chocolate Tart with Almond Oats Crust Works
Texture that sings
I love how the crust of Salted Caramel Chocolate Tart with Almond Oats Crust provides a sturdy, slightly chewy counterpoint to the silky ganache. The combination of oats and almonds gives the base a rustic chew while still holding together when you slice it, so you get clean, satisfying wedges. That tooth and bite make every forkful interesting, and I always notice guests commenting on the texture first.
Balanced sweetness with salt
The salted caramel in this tart is the reason people keep coming back for seconds. I like to tune the sea salt so that it brightens the sugar and chocolate, instead of masking them. That contrast lifts the whole dessert, turning familiar sweet flavors into something more grown up and memorable.
Quick to pull together
Even though the finished tart looks like it took all afternoon, the reality is different. The crust mixes in a blender or food processor in minutes, and the caramel and ganache move fast on the stovetop. If I need a reliable dessert for last minute company, this is one I reach for because it’s forgiving and fast.
Adaptable and pantry friendly
I adore how flexible the recipe is. You can swap butter for coconut oil, change the nuts, or adjust the cream to make the filling richer or lighter. That makes it perfect for kitchens that change with the seasons, and I often tweak it depending on what I have on hand.
Beautiful finish
Finally, the finishing touches are simple but dramatic. A few orange slices and a sprig of fresh mint create a pop of color and a hint of freshness that balances the richness. The tart looks elegant on a dessert table, and you don’t need fancy plating skills to impress.
Key Ingredients for Salted Caramel Chocolate Tart with Almond Oats Crust
This tart relies on a short list of honest ingredients that work in harmony. The crust uses oats and almonds for structure and nutty flavor, while the salted caramel builds complexity and the chocolate layer adds glossy richness. I treat each component as a partner, not just a separate element, so the tart finishes balanced and layered.
- 1 cup oats: Provide a hearty, chewy base and nutty texture when combined with ground nuts and melted butter to form the crust; helps bind the crust and adds a wholesome whole-grain flavor to balance the tart sweetness.
- 3/4 cup almonds or walnuts: Add a crunchy, rich nutty element when ground or chopped for the crust; contributes healthy fats and depth, enhancing the overall texture and mouthfeel of the tart.
- 4 tbsp jaggery powder or brown sugar: Sweeten and caramelize to create a deep, molasses-like flavor in the crust or filling; melts smoothly into the oats and nuts to help bind and add warm sweetness.
- 1/3 cup melted butter or coconut oil: Bind and moisten the crust ingredients while adding a rich, silky fat note; melts into the dry mix to help form a pressable base that bakes or chills firm.
- 1/2 tsp vanilla essence or 1/2 a vanilla pod: Impart a delicate aromatic sweetness and enhance other flavors in the crust or filling; provides floral, creamy vanilla notes that lift the overall flavor profile.
- 1/4 cup water: Hydrate and help the crust ingredients come together while allowing jaggery or sugar to dissolve evenly; ensures the mixture is pliable enough to press into a tart pan.
- 1 cup sugar: Create the foundational caramel by melting into syrup and developing toffee notes; when cooked properly, forms the sweet layer that contrasts with bitter chocolate.
- 2/3 cup cream: Enrich the caramel with creaminess and smooth mouthfeel while preventing crystallization; adds silkiness and a luxurious texture to the caramel layer.
- 3 tbsp butter: Contribute buttery richness and glossy sheen to the caramel; helps create a smooth, flavorful caramel that sets properly and slices cleanly.
- 1 tsp vanilla essence: Enhance the flavor profile with pure vanilla warmth in the chocolate or cream layers; amplifies sweetness perception and rounds out deeper flavors.
- 1 tsp sea salt to taste: Elevate savory balance by providing salty contrast to the sweet caramel and chocolate; a pinch of sea salt intensifies flavor complexity and highlights sweetness.
- 7 oz dark cooking chocolate: Deliver deep, intense chocolate flavor and a firm ganache texture when melted; provides the primary chocolate component that gives the tart its rich, bitter backbone.
- 1 cup fresh cream: Thicken and enrich the chocolate ganache while adding a creamy mouthfeel; fresh cream helps produce a glossy, smooth filling that sets softly.
- 1 tbsp melted butter: Add a touch of buttery flavor and help smooth the ganache when stirred into melted chocolate; contributes to sheen and richness in the final topping.
- 1/2 tsp salt: Season with a subtle savory note to balance sweetness and amplify flavors; a small amount of salt brightens the chocolate and caramel layers.
- orange slices: Garnish with bright, citrusy slices to add freshness and a hint of acidity that cuts through the richness; provides visual appeal and a refreshing flavor contrast.
- fresh mint () (optional): Garnish optionally with aromatic, cooling mint leaves to add color and a fresh herbal lift that complements chocolate and citrus notes.
Putting Together Salted Caramel Chocolate Tart with Almond Oats Crust
Assembling this tart is a satisfying blend of quick work and attentive moments. I like to set out all my ingredients and tools first, because the caramel and ganache move quickly. With the crust baked and warm, the layers come together beautifully and the final chill gives you clean slices that hold their shape.
- Pre-heat the oven to 180 °C / 356 ℉.: The first sensory clue is the gentle warmth filling the kitchen as the oven cycles up, a dry, toasty scent that tells you the baking environment is ready. This step ensures the crust bakes evenly and the exposed edges brown without overcooking the center. A common mistake is turning the oven on too late, which makes you rush and can yield an underbaked base. I set a timer for the preheat so I am not tempted to press the crust in before the oven reaches temperature.
- Blend the oats, nuts, and sugar to a coarse texture.: You should hear a rhythmic chattering as the blades break down the oats and almonds , and the mixture will look sandy with small flecks of nut. This coarse texture gives the crust body; if you overblend it will become powdery and the crust can turn gummy. Pulse in short bursts for control, and pause to scrape down the sides if big pieces remain.
- Add the melted butter or coconut oil and vanilla essence, and blend till combined.: As you add the warm liquid fat, the scent shifts to a richer, slightly glossy mix that holds together when pressed. The goal is a crumb that clumps when squeezed between your fingers, not a paste. Overworking here can make the mixture oily, so stop blending once cohesion appears. If it seems too dry, add an extra teaspoon of melted butter .
- Press the mix evenly into a loose bottomed tart tin.: Pressing by hand or with the bottom of a measuring cup creates a compact, even base. You will feel the mixture firming under your palm, and visually it should appear smooth and uniform. Avoid leaving thin spots at the edges which can burn, and take care to press the sides so the filling has a sturdy wall to rest against.
- Bake for 10 mins, until the crust has browned.: The oven will reward you with a nutty aroma and golden edges; look for even color, not deep brown. The brief bake firms the crust and toasts the nuts, enhancing flavor. A common error is leaving it in too long, which dries it out; check at the ten minute mark and remove if edges are a light golden color.
- In a heavy bottom sauce pan, heat the water and sugar.: The pan will shimmer as the water and sugar warm, and the surface will flatten as the sugar dissolves. Use a heavy bottom pan to distribute heat evenly and prevent hotspots that burn the sugar. Stir gently at first to help dissolution, then step back as it nears a simmer.
- Stir till the sugar has dissolved and begins to bubble.: Visual cues matter here, the syrup should look clear and glossy before it starts bubbling. You will hear a soft, steady simmer that deepens as it cooks. If any crystals cling to the sides, wipe them down with a wet pastry brush to avoid recrystallization which causes grainy caramel.
- Increase the heat to high and let it bubble. Do not stir. Let the mixture boil till it turns an amber, light golden color. This may take up to 10 mins.: The sugar will go through color stages from pale to deep amber, and that visual transition is your key indicator. Resist stirring, because agitation can cause crystals to form and ruin the texture. Instead gently swirl the pan if you want to move the liquid. A common pitfall is waiting too long, which makes the caramel taste bitter, so watch for the light golden hue.
- Remove from the heat and slowly whisk in the cream. Be careful of any bubbling and splattering.: When the warm cream hits the hot sugar you will get vigorous bubbling and a loud hiss; add it in a thin stream while whisking to tame the reaction. The mixture will calm into a glossy caramel, rich in steam and buttery scent. If you add the cream too quickly you risk a violent boil that can spatter hot caramel, so use caution and a long handled whisk.
- Add in the vanilla, butter, and salt and mix together. Adjust the salt according to taste.: As the butter melts in, the caramel becomes silkier and takes on a golden sheen. Tasting for salt here is vital, because the right amount will elevate the sweetness without making it salty. A frequent mistake is over salting, so start small and taste incrementally.
- Use immediately or allow to cool and refrigerate and reheat in a microwave.: Fresh caramel is pourable and warm, offering a molten ribbon when drizzled, while chilled caramel firms up and needs gentle reheating to regain spreadable texture. If refrigerated, zap it in short bursts in a microwave and stir to avoid hotspots. Avoid overheating the caramel when reheating as it can become grainy or too runny.
- It can store in the fridge for up to 2 weeks.: Stored in an airtight container, the caramel develops deeper flavor over time and will thicken as it cools. Bring it to room temperature or gently rewarm before using so it is easily drizzled. A common oversight is leaving it uncovered, which allows it to form a crust and lose shine.
- Heat the chocolate in a double boiler.: The steam kissed warmth from the double boiler yields a glossy melt and prevents scorching. You will see the chocolate soften and become glossy, and the aroma will be deep and cocoa forward. Avoid letting any water touch the chocolate , as even a drop can seize it into a grainy mess.
- Add the cream and stir till the chocolate starts to melt.: As warm cream meets chopped chocolate, the mixture loosens into ribbons of glossy ganache. Stir gently in concentric motions until smooth, and allow the residual heat to finish the melt. Adding cold cream will shock the chocolate and make the texture uneven, so warm the cream first.
- Add the salt and butter and keep stirring till the chocolate is fully melted and incorporated with the cream.: The slight pop of salt and the sheen from melted butter give the ganache a rounded mouthfeel. The final texture should be smooth, thick, and glossy. If you notice lumps, keep stirring off heat and let the bowl sit over warm water to finish melting.
- Pour the chocolate ganache into the baked base and drizzle over salted caramel.: When you pour the ganache you will hear a soft settling sound as it fills the tart shell, then the caramel ribbons create visual contrast as you drizzle. The ganache should be pourable but not hot, so it sets into a sleek surface. Pour too hot and the crust can soften, pour too cold and the ganache will not level evenly.
- To finish the look, add some orange slices and mint leaves.: The bright scent of orange lifts the dessert and the fresh mint adds a fragrant green accent. Arrange them with a light hand so the tart looks natural rather than staged. Avoid overcrowding, which can hide the glossy surface of the ganache.
- Refrigerate for 2 hours until set.: As the tart chills, the ganache and caramel firm to sliceable textures; you will notice the gloss dull slightly as the filling stabilizes. Two hours gives clean slices, but longer chilling is fine if you plan ahead. Cutting too soon yields soft, messy slices, so be patient for the best presentation.
- Demould the tart. Cut it into slices and serve.: When the tart comes out of the tin you will feel the firmness of the set layers and see clean edges where the crust supports the filling. Use a hot, dry knife to make neat slices, wiping the blade between cuts for perfect wedges. A common serving error is trying to cut while the tart is still warm, which makes the ganache smear.
Substitutions and Tips
This section expands on practical swaps and techniques that have worked for me over several makes. These tips help you adapt the tart while preserving the signature contrasts between the crust, caramel, and ganache.
- Cream choice: Use full fat cream for a silkier ganache, but light cream can thin the filling if you prefer a less rich result.
- Nut swap: If you prefer a milder nut flavor, almonds are ideal; walnuts add earthier notes and a slightly softer texture to the crust.
- Fat alternative: Butter gives a richer crust, while coconut oil will add a subtle coconut tone and is helpful for dairy free variations.
- Chocolate selection: Choose a dark chocolate with a cocoa percentage you enjoy; higher cocoa gives more bitterness to balance the caramel.
- Storage: Store the tart in an airtight container in the fridge for up to two weeks, and bring to room temperature before serving for the best texture.
- Caramel reheating: Rewarm chilled caramel in short microwave bursts and stir between intervals to keep it smooth and spreadable.
- Vanilla intensity: Using a vanilla pod intensifies aroma, but vanilla essence works well and is more convenient for quick makes.
Serving This Salted Caramel Chocolate Tart with Almond Oats Crust
This tart is versatile for many occasions, and the serving approach can highlight either its rustic charm or its elegance. Whether for a cozy dessert after a fall dinner or a show stopping plate at a small gathering, the presentation options let you tailor the moment.
- Slice size: For casual gatherings, cut slightly larger wedges so each person gets a generous portion; for formal service, slice thinner to let the richness shine without overwhelming.
- Accompaniments: A small dollop of lightly whipped cream or a scoop of vanilla style ice cream contrasts beautifully with the warm spice of the caramel and the cool mint garnish.
- Occasions: This tart is perfect for fall and holiday desserts, dinner parties, or special weekend treats when you want a dessert that feels seasonal and considered.
- Plating: Arrange thin orange slices and fresh mint leaves on the tart just before serving to keep them vibrant; a light dusting of finely grated orange zest over each slice can add sparkle.
- Storage for events: Make the tart a day ahead and keep chilled in an airtight container, then bring out an hour before serving to take the chill off and restore glossy ganache texture.
- Transport tips: For potlucks, keep the tart on a flat tray and chill until just before leaving to prevent slipping; use a loose bottomed tart tin to unmold at the venue if needed.
- Seasonal pairings: Serve during fall with spiced beverages, or offer alongside simple coffee and tea for an afternoon treat that feels both indulgent and approachable.
FAQ
Conclusion
This tart stands out because of its layered textures and the bright balance of salted caramel against dark chocolate and a nutty, oat based crust. I encourage you to give it a try for a special occasion or a quiet weekend treat, because it rewards attention with deep flavor and a striking presentation. Once you taste the interplay of crunchy crust, silky ganache, and salted caramel, it becomes one of those desserts you reach for again and again.

Salted Caramel Chocolate Tart with Almond Oats Crust
Equipment
- Oven
- Blender or food processor
- Loose Bottomed Tart Tin
- Heavy Bottom Sauce Pan
- Double boiler
Ingredients
- 1 cup oats Provide a hearty, chewy base and nutty texture when combined with ground nuts and melted butter to form the crust; helps bind the crust and adds a wholesome whole-grain flavor to balance the tart sweetness.
- 3/4 cup almonds or walnuts Add a crunchy, rich nutty element when ground or chopped for the crust; contributes healthy fats and depth, enhancing the overall texture and mouthfeel of the tart.
- 4 tbsp jaggery powder or brown sugar Sweeten and caramelize to create a deep, molasses-like flavor in the crust or filling; melts smoothly into the oats and nuts to help bind and add warm sweetness.
- 1/3 cup melted butter or coconut oil Bind and moisten the crust ingredients while adding a rich, silky fat note; melts into the dry mix to help form a pressable base that bakes or chills firm.
- 1/2 tsp vanilla essence or 1/2 a vanilla pod Impart a delicate aromatic sweetness and enhance other flavors in the crust or filling; provides floral, creamy vanilla notes that lift the overall flavor profile.
- 1/4 cup water Hydrate and help the crust ingredients come together while allowing jaggery or sugar to dissolve evenly; ensures the mixture is pliable enough to press into a tart pan.
- 1 cup sugar Create the foundational caramel by melting into syrup and developing toffee notes; when cooked properly, forms the sweet layer that contrasts with bitter chocolate.
- 2/3 cup cream Enrich the caramel with creaminess and smooth mouthfeel while preventing crystallization; adds silkiness and a luxurious texture to the caramel layer.
- 3 tbsp butter Contribute buttery richness and glossy sheen to the caramel; helps create a smooth, flavorful caramel that sets properly and slices cleanly.
- 1 tsp vanilla essence Enhance the flavor profile with pure vanilla warmth in the chocolate or cream layers; amplifies sweetness perception and rounds out deeper flavors.
- 1 tsp sea salt to taste Elevate savory balance by providing salty contrast to the sweet caramel and chocolate; a pinch of sea salt intensifies flavor complexity and highlights sweetness.
- 7 oz dark cooking chocolate Deliver deep, intense chocolate flavor and a firm ganache texture when melted; provides the primary chocolate component that gives the tart its rich, bitter backbone.
- 1 cup fresh cream Thicken and enrich the chocolate ganache while adding a creamy mouthfeel; fresh cream helps produce a glossy, smooth filling that sets softly.
- 1 tbsp melted butter Add a touch of buttery flavor and help smooth the ganache when stirred into melted chocolate; contributes to sheen and richness in the final topping.
- 1/2 tsp salt Season with a subtle savory note to balance sweetness and amplify flavors; a small amount of salt brightens the chocolate and caramel layers.
- orange slices Garnish with bright, citrusy slices to add freshness and a hint of acidity that cuts through the richness; provides visual appeal and a refreshing flavor contrast.
- fresh mint (optional) Garnish optionally with aromatic, cooling mint leaves to add color and a fresh herbal lift that complements chocolate and citrus notes.
Instructions
- Pre-heat the oven to 180 °C / 356 ℉.: The first sensory clue is the gentle warmth filling the kitchen as the oven cycles up, a dry, toasty scent that tells you the baking environment is ready. This step ensures the crust bakes evenly and the exposed edges brown without overcooking the center. A common mistake is turning the oven on too late, which makes you rush and can yield an underbaked base. I set a timer for the preheat so I am not tempted to press the crust in before the oven reaches temperature.
- Blend the oats, nuts, and sugar to a coarse texture.: You should hear a rhythmic chattering as the blades break down the oats and almonds , and the mixture will look sandy with small flecks of nut. This coarse texture gives the crust body; if you overblend it will become powdery and the crust can turn gummy. Pulse in short bursts for control, and pause to scrape down the sides if big pieces remain.
- Add the melted butter or coconut oil and vanilla essence, and blend till combined.: As you add the warm liquid fat, the scent shifts to a richer, slightly glossy mix that holds together when pressed. The goal is a crumb that clumps when squeezed between your fingers, not a paste. Overworking here can make the mixture oily, so stop blending once cohesion appears. If it seems too dry, add an extra teaspoon of melted butter .
- Press the mix evenly into a loose bottomed tart tin.: Pressing by hand or with the bottom of a measuring cup creates a compact, even base. You will feel the mixture firming under your palm, and visually it should appear smooth and uniform. Avoid leaving thin spots at the edges which can burn, and take care to press the sides so the filling has a sturdy wall to rest against.
- Bake for 10 mins, until the crust has browned.: The oven will reward you with a nutty aroma and golden edges; look for even color, not deep brown. The brief bake firms the crust and toasts the nuts, enhancing flavor. A common error is leaving it in too long, which dries it out; check at the ten minute mark and remove if edges are a light golden color.
- In a heavy bottom sauce pan, heat the water and sugar.: The pan will shimmer as the water and sugar warm, and the surface will flatten as the sugar dissolves. Use a heavy bottom pan to distribute heat evenly and prevent hotspots that burn the sugar. Stir gently at first to help dissolution, then step back as it nears a simmer.
- Stir till the sugar has dissolved and begins to bubble.: Visual cues matter here, the syrup should look clear and glossy before it starts bubbling. You will hear a soft, steady simmer that deepens as it cooks. If any crystals cling to the sides, wipe them down with a wet pastry brush to avoid recrystallization which causes grainy caramel.
- Increase the heat to high and let it bubble. Do not stir. Let the mixture boil till it turns an amber, light golden color. This may take up to 10 mins.: The sugar will go through color stages from pale to deep amber, and that visual transition is your key indicator. Resist stirring, because agitation can cause crystals to form and ruin the texture. Instead gently swirl the pan if you want to move the liquid. A common pitfall is waiting too long, which makes the caramel taste bitter, so watch for the light golden hue.
- Remove from the heat and slowly whisk in the cream. Be careful of any bubbling and splattering.: When the warm cream hits the hot sugar you will get vigorous bubbling and a loud hiss; add it in a thin stream while whisking to tame the reaction. The mixture will calm into a glossy caramel, rich in steam and buttery scent. If you add the cream too quickly you risk a violent boil that can spatter hot caramel, so use caution and a long handled whisk.
- Add in the vanilla, butter, and salt and mix together. Adjust the salt according to taste.: As the butter melts in, the caramel becomes silkier and takes on a golden sheen. Tasting for salt here is vital, because the right amount will elevate the sweetness without making it salty. A frequent mistake is over salting, so start small and taste incrementally.
- Use immediately or allow to cool and refrigerate and reheat in a microwave.: Fresh caramel is pourable and warm, offering a molten ribbon when drizzled, while chilled caramel firms up and needs gentle reheating to regain spreadable texture. If refrigerated, zap it in short bursts in a microwave and stir to avoid hotspots. Avoid overheating the caramel when reheating as it can become grainy or too runny.
- It can store in the fridge for up to 2 weeks.: Stored in an airtight container, the caramel develops deeper flavor over time and will thicken as it cools. Bring it to room temperature or gently rewarm before using so it is easily drizzled. A common oversight is leaving it uncovered, which allows it to form a crust and lose shine.
- Heat the chocolate in a double boiler.: The steam kissed warmth from the double boiler yields a glossy melt and prevents scorching. You will see the chocolate soften and become glossy, and the aroma will be deep and cocoa forward. Avoid letting any water touch the chocolate , as even a drop can seize it into a grainy mess.
- Add the cream and stir till the chocolate starts to melt.: As warm cream meets chopped chocolate, the mixture loosens into ribbons of glossy ganache. Stir gently in concentric motions until smooth, and allow the residual heat to finish the melt. Adding cold cream will shock the chocolate and make the texture uneven, so warm the cream first.
- Add the salt and butter and keep stirring till the chocolate is fully melted and incorporated with the cream.: The slight pop of salt and the sheen from melted butter give the ganache a rounded mouthfeel. The final texture should be smooth, thick, and glossy. If you notice lumps, keep stirring off heat and let the bowl sit over warm water to finish melting.
- Pour the chocolate ganache into the baked base and drizzle over salted caramel.: When you pour the ganache you will hear a soft settling sound as it fills the tart shell, then the caramel ribbons create visual contrast as you drizzle. The ganache should be pourable but not hot, so it sets into a sleek surface. Pour too hot and the crust can soften, pour too cold and the ganache will not level evenly.
- To finish the look, add some orange slices and mint leaves.: The bright scent of orange lifts the dessert and the fresh mint adds a fragrant green accent. Arrange them with a light hand so the tart looks natural rather than staged. Avoid overcrowding, which can hide the glossy surface of the ganache.
- Refrigerate for 2 hours until set.: As the tart chills, the ganache and caramel firm to sliceable textures; you will notice the gloss dull slightly as the filling stabilizes. Two hours gives clean slices, but longer chilling is fine if you plan ahead. Cutting too soon yields soft, messy slices, so be patient for the best presentation.
- Demould the tart. Cut it into slices and serve.: When the tart comes out of the tin you will feel the firmness of the set layers and see clean edges where the crust supports the filling. Use a hot, dry knife to make neat slices, wiping the blade between cuts for perfect wedges. A common serving error is trying to cut while the tart is still warm, which makes the ganache smear.
Notes
- Cream choice: Use full fat cream for a silkier ganache, but light cream can thin the filling if you prefer a less rich result.
- Nut swap: If you prefer a milder nut flavor, almonds are ideal; walnuts add earthier notes and a slightly softer texture to the crust.
- Fat alternative: Butter gives a richer crust, while coconut oil will add a subtle coconut tone and is helpful for dairy free variations.
- Chocolate selection: Choose a dark chocolate with a cocoa percentage you enjoy; higher cocoa gives more bitterness to balance the caramel.
- Storage: Store the tart in an airtight container in the fridge for up to two weeks, and bring to room temperature before serving for the best texture.
- Caramel reheating: Rewarm chilled caramel in short microwave bursts and stir between intervals to keep it smooth and spreadable.
- Vanilla intensity: Using a vanilla pod intensifies aroma, but vanilla essence works well and is more convenient for quick makes.