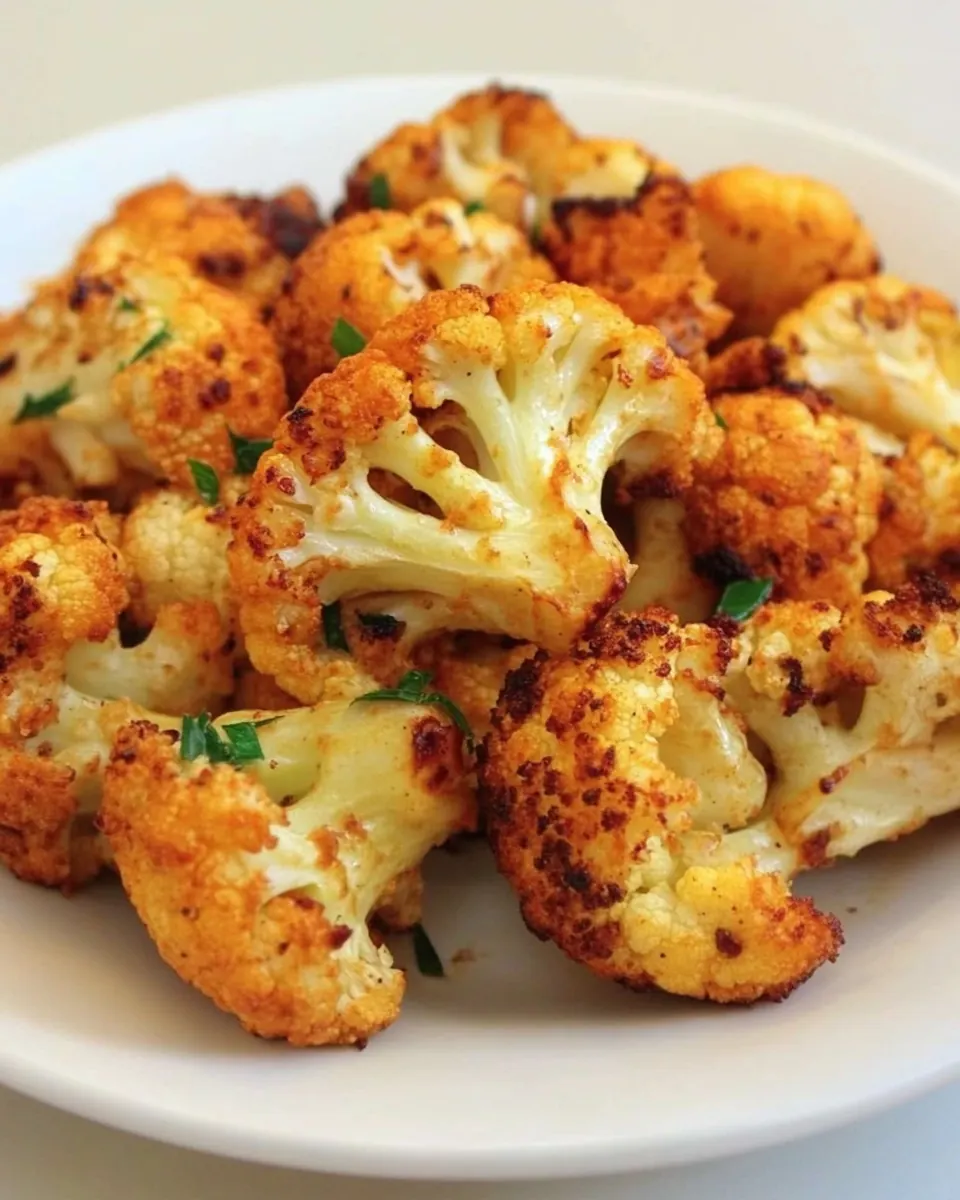
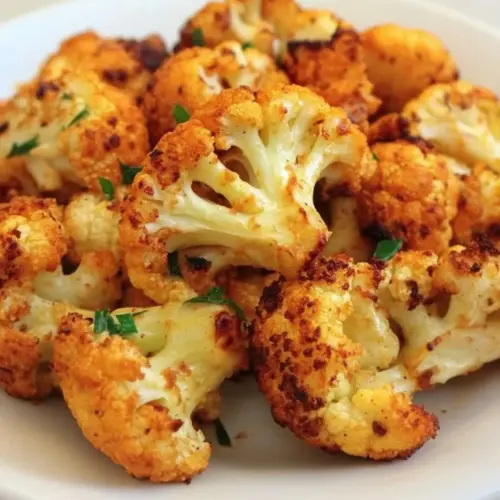
Smoky Roasted Cauliflower
Smoky Roasted Cauliflower is the kind of simple, satisfying dish I reach for when I want big flavor without fuss. The first time I roasted a whole head of cauliflower with smoked paprika and just a splash of extra virgin olive oil, I remember walking into the kitchen and being stopped by the aroma. It smelled warm, slightly sweet, with that subtle whisper of smoke that makes your mouth water before you even taste anything.
I grew up watching family members fuss over complicated sides, but this recipe taught me that restraint can yield more character than overcomplication. I like how the florets get golden at the edges, carrying that pleasant chew while the centers stay tender. On a hectic weeknight I’ll toss the pieces, slide the pan into the oven, and savor a few quiet minutes while the kitchen fills with a toasty perfume. When guests arrive, it’s one of those dishes that disappears off the serving platter fast, and people always ask how I got such depth of flavor with so few ingredients.
Recipe Snapshot
30 mins
5 mins
25 mins
Medium
150 kcal
American
Vegan, Gluten-Free
Side Dishes
Baking sheet or small roasting pan, Colander, Measuring spoon
Why This Smoky Roasted Cauliflower Shines
Simple ingredients, bold payoff
I love that Smoky Roasted Cauliflower uses only a handful of pantry staples, yet delivers a concentrated, satisfying taste. The combination of cauliflower, extra virgin olive oil, and smoked paprika lets each component shine. The oil helps the exterior crisp and caramelize, while the paprika introduces that smoky warmth that lingers on the palate. I often think minimalism in the ingredient list forces you to treat each item with care, and the result feels intentional.
Texture that surprises
One reason this recipe stands out for me is the contrast of textures. When roasted properly the edges get a caramelized, slightly crisp bite while the interior remains soft and yielding. That interplay makes every forkful interesting. I find myself noticing the way the heat transforms the vegetable, changing water to vapor and concentrating the natural sugars. If you love a mix of tender and slightly chewy, this dish will win you over.
Fast and reliable for weeknights
As someone who cooks after a long day, I appreciate recipes that are fast and forgiving. Smoky Roasted Cauliflower requires minimal hands on time, so you can prep, relax, and come back to something delicious. The steps are straightforward, and even if your florets vary a little in size, the technique still produces a tasty result. That reliability makes it a go to when I need a dependable side.
Versatile for many meals
I often serve this as part of a casual dinner, or tossed into bowls with grains and a squeeze of citrus for a light lunch. The smoky notes pair nicely with roasted vegetables and hearty mains, and the dish adapts well to different meal contexts. I especially appreciate its crowd friendly nature; it travels well from oven to table and holds up for a short while without losing its texture.
Low fuss, high reward
There is something deeply satisfying about achieving complex flavor from very little effort. The roasting process does the heavy lifting, transforming humble cauliflower into something almost indulgent. For me, that sense of getting more than I put in keeps this recipe in regular rotation.
Ingredients You’ll Need for Smoky Roasted Cauliflower
These ingredients are intentionally few, and each plays a clear role. The key players work together to create crisped edges, tender interiors, and a smoky aroma that lifts the whole dish. The philosophy here is restraint, letting the natural flavor of the vegetable shine while the oil and smoked seasoning amplify and carry that taste.
- 1 large head of cauliflower: Provide a sturdy base and hearty texture that holds up when roasted whole, offering a mild, nutty flavor and crisp edges when properly caramelized. Break into florets or leave whole for presentation, allowing seasoning to cling to its surface and absorb smoky notes. Contains plenty of fiber and makes a satisfying centerpiece or side.
- 1 tablespoon extra virgin olive oil: Coat florets evenly to promote browning and prevent sticking, adding a fruity, peppery richness that enhances roasted flavors. Drizzle and toss thoroughly to ensure an even, glossy finish that helps spices adhere during cooking. Use sparingly to balance moisture and crispness.
- 1 2 teaspoons smoked paprika: Impart a deep, smoky warmth that defines the dish’s flavor profile while adding a subtle red hue to the cauliflower’s surface. Sprinkle according to taste to avoid overpowering, and combine with oil to help it bloom and distribute evenly. Adjust between one and two teaspoons depending on desired intensity.
- Salt: Enhance and balance overall flavor by elevating natural sweetness and amplifying roasted and smoky notes; use to taste. Season before and possibly after roasting to build layers of flavor, keeping in mind proper salting brings out texture and aroma.
Making This Smoky Roasted Cauliflower
Roasting this vegetable is straightforward, but the technique matters. I like to walk you through each moment so you recognize the right visuals and smells. Focus on the cues more than the clock, and you will end up with perfectly caramelized pieces.
- Place a rack in the center of your oven and preheat to 400 degrees F. Line a baking sheet with aluminum foil for easier cleanup, if desired. Pull the leaves off of the cauliflower base. Cut off the lower part of the stem.: You should notice the oven climbing steadily to the target temperature, and a consistent hot environment helps the cauliflower brown evenly. The smell of warming metal and a slight electrical hum signals readiness. Misjudging oven temperature can lead to pale, steamed florets rather than crisped ones, so use an oven thermometer if your appliance runs hot or cold.
- Cut the head of cauliflower into four quarters.: The foil will reflect heat and make cleanup simple, while the pan itself will start to warm as it sits in the preheating oven. You might hear a faint ping as the sheet expands. Avoid foil if you want maximum browning from direct metal contact, as foil can slightly reduce crust development for very thin spots.
- Slice each quarter into 6-8 pieces. You want as many flat surfaces as possible on each floret– the flat surfaces caramelize best. Caramelization is the key to giving the roasted cauliflower flavor. Give all the florets a thorough rinse in a colander. Shake them dry. Spread out the cauliflower on your baking sheet or pan.: The fresh vegetal scent is pronounced when you remove the outer leaves, and the exposed stem looks pale and firm. Removing leaves makes trimming easier and presents cleaner florets for roasting. A mistake here is leaving too much stem attached, which can cause uneven cooking since the stem takes longer to soften.
- Drizzle the florets evenly with 1 tbsp olive oil. I use a measuring spoon of olive oil, which makes it easier to gauge how much oil I'm using, rather than pouring straight from the bottle. Toss the florets to coat them fully with oil– I use clean hands for this step.: Once you remove the base, the exposed stem will show a pale, fibrous interior. Slicing off the lower portion creates a stable base and helps you cut the head into uniform pieces. If you cut too aggressively you waste edible parts, and if you leave too much stem, some pieces may remain undercooked in the same roast.
- Sprinkle the cauliflower evenly with smoked paprika and salt to taste. Be generous with the salt– smoked paprika really sings when it's combined with salt.: The quarters expose more surface area and reveal the inner florets. You will see a cross section of branching stems and small clusters. Quartering creates manageable pieces that are easier to slice into consistent sizes. Avoid uneven quarters, since wildly different sizes will lead to inconsistent roasting, with smaller bits overcooking while larger ones are still firm.
- Place the baking sheet into the preheated oven and let the cauliflower roast for 10 minutes.: Aim for flat surfaces on each floret so they meet the pan and caramelize effectively, producing a nutty aroma as sugars brown. When you press a piece on the pan, the contact area should be broad and stable. If your slices are too thick or too small the texture will be off, so aim for consistency and adjust the number of slices to achieve uniform pieces.
- Take the baking sheet out of the oven. Stir the cauliflower on the baking sheet, moving pieces from the outside of the sheet towards the inside, and vice versa.: Running water will wash away dirt trapped in the crevices, and the cauliflower will release a faint vegetal scent. Shake or pat dry until the pieces are mostly dry, because excess moisture creates steam in the oven and prevents browning. A common error is skipping this drying step, which leads to soggy rather than crisp edges.
- Return the baking sheet to the oven. Let the cauliflower roast for 10-20 minutes longer until very tender. When it's ready you will be able to pierce it easily with a fork. Keep a close eye on the cauliflower, it can go from brown to burned fairly quickly if you're not careful. Serve hot.: After rinsing, the gentle rustle of the colander and a quick pat with a towel removes lingering droplets. The florets should look matte rather than glistening. Dry florets will brown faster; wet florets steam and stay pale. If you skip thorough drying you will miss that desirable golden caramelization.
- Spread out the cauliflower on your baking sheet or pan: Arrange the pieces in a single layer so hot air can circulate and each floret has direct contact with the metal. You will see the pieces sit apart, not crowded together, which encourages even browning. Crowding traps moisture and causes steaming, so give each floret breathing room for best texture.
- Drizzle the florets evenly with 1 tbsp olive oil: The oil should glisten as it coats the surfaces, helping them go from pale to golden in the oven. Tossing ensures full coverage, which promotes even crust formation. Using too much oil will make the florets heavy and greasy, while too little prevents proper browning, so stick to the measured tablespoon for balance.
- Toss the florets to coat them fully with oil: Use clean hands or a spoon to ensure every nook and cranny gets a thin layer of extra virgin olive oil , which enhances the roast and carries the smoked paprika. You will feel some resistance as the oil smooths across the florets, and you may hear a faint sliding sound as they move on the pan. Incomplete coating leads to patchy browning, so take a moment to distribute the oil evenly.
- Sprinkle the cauliflower evenly with smoked paprika and salt to taste: The dusting of smoked paprika releases a fragrant note, and the salt sharpens the overall profile. Smell the warm, slightly sweet aroma as the spices hit the oiled surfaces. Over-seasoning masks the vegetable, so start lighter if you are unsure, and increase on future batches once you know your preference.
- Place the baking sheet into the preheated oven and let the cauliflower roast for 10 minutes: You will hear the oven hum and later notice gentle sizzling as moisture escapes and the surface begins to brown. At this early stage the florets will develop faint golden edges and a toasted scent. Removing them too soon results in underdeveloped flavor, while leaving them too long risks overbrowning, so set a timer for accuracy.
- Take the baking sheet out of the oven: When you pull the pan out you will see the first signs of color and smell a warm, nutty fragrance. Use oven mitts to avoid burns from the hot metal. A frequent pitfall is skipping this rest and stir step, which can let the outsides brown unevenly, so handle the pan carefully and proceed to redistribute.
- Stir the cauliflower on the baking sheet, moving pieces from the outside of the sheet towards the inside, and vice versa: Stirring ensures that the pieces roasted on the edges rotate into hotter zones and that the ones from the center move outward to brown. You will notice some pieces already more colored than others, and this redistribution equalizes the roast. Avoid aggressive stirring that breaks delicate florets; gentle movement preserves shape while improving evenness.
- Return the baking sheet to the oven: Slide the pan back into the heat and listen for the renewed soft sizzle as the pieces continue to caramelize. The kitchen aroma will deepen and you will see increased color progression over the next minutes. Not returning the sheet on time can leave parts underdone, so be prompt to maintain heat continuity.
- Let the cauliflower roast for 10 to 20 minutes longer until very tender: During this period the florets will deepen to a rich golden brown, and a knife or fork should pierce them easily. The smell becomes more concentrated and slightly sweet as sugars caramelize. Keep an eye on the color, because the difference between golden and burned can happen quickly if left unattended.
- When it's ready you will be able to pierce it easily with a fork: The final texture should feel soft at the center with crisped edges, and the fork will slide in without resistance. This tactile cue confirms doneness more reliably than time alone. Overcooking will yield mushy pieces, so stop roasting as soon as the fork test passes for optimal texture.
- Keep a close eye on the cauliflower, it can go from brown to burned fairly quickly if you're not careful: The aroma will shift from toasty to acrid if it burns, and the visual cue is a sudden darkening at the tips. If you see rapid darkening reduce oven time on subsequent batches and consider tenting with foil for the last minutes. A common error is leaving the pan unattended during the final stages, which risks charring rather than caramelizing.
- Serve hot: Serve the Smoky Roasted Cauliflower straight from the pan while edges are crisp and the center is warm and tender. The contrast between the hot interior and toasted surfaces is most appealing right away. If you let it sit too long it will lose crispness, so plate and serve promptly for the best eating experience.
Helpful Notes about Smoky Roasted Cauliflower
This recipe rewards attention to small details more than elaborate steps. Below are focused notes that expand on timing, seasoning, and presentation to help you get consistent, flavorful results every time.
- Measure the oil, using exactly 1 tablespoon of extra virgin olive oil keeps the coating light enough to crisp edges without making the florets greasy, which preserves texture and concentrates flavor.
- Adjust smoked paprika amount, start with 1 teaspoon for a subtle smoky note, and move to 2 teaspoons when you want a more pronounced aroma, being careful not to overpower the natural sweetness of the cauliflower.
- Use a roomy baking sheet, allowing space between florets helps hot air circulate and encourages even caramelization, preventing steaming and soggy results.
- Rotate the pan if needed, some ovens have hotspots, so rotating the sheet halfway through baking helps achieve uniform browning across the batch.
- Serve immediately, the contrast between warm tender centers and crisped edges is at its best right out of the oven, so plate while still hot for maximum texture and flavor.
What to Pair With Smoky Roasted Cauliflower
This vegetable side works across many meals and occasions. Below I outline thoughtful pairings, serving styles, and storage tips that help you integrate it into weeknight dinners or special gatherings.
- Serve with roasted mains, pair the Smoky Roasted Cauliflower with grilled or roasted proteins for a hearty dinner, as the smoky notes complement roasted meat and plant based mains alike.
- Grain bowls and salads, add the florets to warm grain bowls with cooked rice or quinoa for a balanced lunch, the roasted texture adds contrast to softer grains and fresh herbs.
- Casual family dinners, this dish is ideal for everyday meals where you want ease and flavor, it travels well from oven to table and satisfies varied palates.
- Meal prep and storage, cool completely before storing in an airtight container in the refrigerator for up to three days, then reheat in a hot oven to refresh crispness rather than microwaving.
- Seasonal menus, the recipe suits fall and cooler months when roasted vegetables are especially comforting, and the deep flavor profile pairs well with autumnal sides and spices.
FAQ
Conclusion
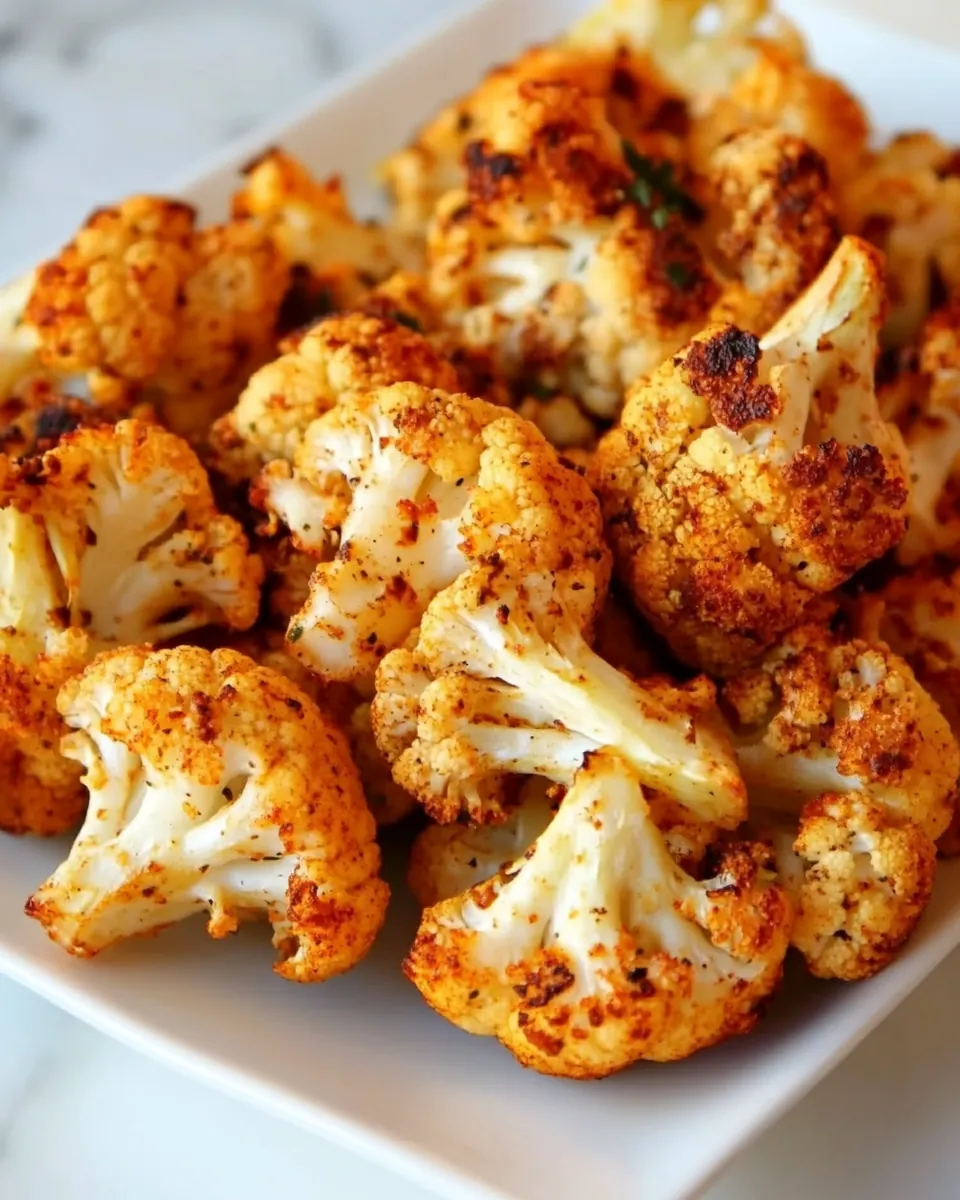
Smoky Roasted Cauliflower stands out because it transforms a humble vegetable into a deeply flavored side with minimal fuss. The recipe rewards attention to texture and seasoning, giving you crisped edges and tender centers with a warm smoky note. Try it next time you want an easy yet impressive dish, and enjoy how a few simple ingredients create something memorable. Share it hot from the oven and watch how quickly it disappears at the table.
Smoky Roasted Cauliflower
Equipment
- Baking sheet or small roasting pan
- Colander
- Measuring Spoon
Ingredients
- 1 large head of cauliflower Provide a sturdy base and hearty texture that holds up when roasted whole, offering a mild, nutty flavor and crisp edges when properly caramelized. Break into florets or leave whole for presentation, allowing seasoning to cling to its surface and absorb smoky notes. Contains plenty of fiber and makes a satisfying centerpiece or side.
- 1 tablespoon extra virgin olive oil Coat florets evenly to promote browning and prevent sticking, adding a fruity, peppery richness that enhances roasted flavors. Drizzle and toss thoroughly to ensure an even, glossy finish that helps spices adhere during cooking. Use sparingly to balance moisture and crispness.
- 1 -2 teaspoons smoked paprika Impart a deep, smoky warmth that defines the dish’s flavor profile while adding a subtle red hue to the cauliflower’s surface. Sprinkle according to taste to avoid overpowering, and combine with oil to help it bloom and distribute evenly. Adjust between one and two teaspoons depending on desired intensity.
- Salt Enhance and balance overall flavor by elevating natural sweetness and amplifying roasted and smoky notes; use to taste. Season before and possibly after roasting to build layers of flavor, keeping in mind proper salting brings out texture and aroma.
Instructions
- Place a rack in the center of your oven and preheat to 400 degrees F. Line a baking sheet with aluminum foil for easier cleanup, if desired. Pull the leaves off of the cauliflower base. Cut off the lower part of the stem.: You should notice the oven climbing steadily to the target temperature, and a consistent hot environment helps the cauliflower brown evenly. The smell of warming metal and a slight electrical hum signals readiness. Misjudging oven temperature can lead to pale, steamed florets rather than crisped ones, so use an oven thermometer if your appliance runs hot or cold.
- Cut the head of cauliflower into four quarters.: The foil will reflect heat and make cleanup simple, while the pan itself will start to warm as it sits in the preheating oven. You might hear a faint ping as the sheet expands. Avoid foil if you want maximum browning from direct metal contact, as foil can slightly reduce crust development for very thin spots.
- Slice each quarter into 6-8 pieces. You want as many flat surfaces as possible on each floret-- the flat surfaces caramelize best. Caramelization is the key to giving the roasted cauliflower flavor. Give all the florets a thorough rinse in a colander. Shake them dry. Spread out the cauliflower on your baking sheet or pan.: The fresh vegetal scent is pronounced when you remove the outer leaves, and the exposed stem looks pale and firm. Removing leaves makes trimming easier and presents cleaner florets for roasting. A mistake here is leaving too much stem attached, which can cause uneven cooking since the stem takes longer to soften.
- Drizzle the florets evenly with 1 tbsp olive oil. I use a measuring spoon of olive oil, which makes it easier to gauge how much oil I'm using, rather than pouring straight from the bottle. Toss the florets to coat them fully with oil-- I use clean hands for this step.: Once you remove the base, the exposed stem will show a pale, fibrous interior. Slicing off the lower portion creates a stable base and helps you cut the head into uniform pieces. If you cut too aggressively you waste edible parts, and if you leave too much stem, some pieces may remain undercooked in the same roast.
- Sprinkle the cauliflower evenly with smoked paprika and salt to taste. Be generous with the salt-- smoked paprika really sings when it's combined with salt.: The quarters expose more surface area and reveal the inner florets. You will see a cross section of branching stems and small clusters. Quartering creates manageable pieces that are easier to slice into consistent sizes. Avoid uneven quarters, since wildly different sizes will lead to inconsistent roasting, with smaller bits overcooking while larger ones are still firm.
- Place the baking sheet into the preheated oven and let the cauliflower roast for 10 minutes.: Aim for flat surfaces on each floret so they meet the pan and caramelize effectively, producing a nutty aroma as sugars brown. When you press a piece on the pan, the contact area should be broad and stable. If your slices are too thick or too small the texture will be off, so aim for consistency and adjust the number of slices to achieve uniform pieces.
- Take the baking sheet out of the oven. Stir the cauliflower on the baking sheet, moving pieces from the outside of the sheet towards the inside, and vice versa.: Running water will wash away dirt trapped in the crevices, and the cauliflower will release a faint vegetal scent. Shake or pat dry until the pieces are mostly dry, because excess moisture creates steam in the oven and prevents browning. A common error is skipping this drying step, which leads to soggy rather than crisp edges.
- Return the baking sheet to the oven. Let the cauliflower roast for 10-20 minutes longer until very tender. When it's ready you will be able to pierce it easily with a fork. Keep a close eye on the cauliflower, it can go from brown to burned fairly quickly if you're not careful. Serve hot.: After rinsing, the gentle rustle of the colander and a quick pat with a towel removes lingering droplets. The florets should look matte rather than glistening. Dry florets will brown faster; wet florets steam and stay pale. If you skip thorough drying you will miss that desirable golden caramelization.
- Spread out the cauliflower on your baking sheet or pan: Arrange the pieces in a single layer so hot air can circulate and each floret has direct contact with the metal. You will see the pieces sit apart, not crowded together, which encourages even browning. Crowding traps moisture and causes steaming, so give each floret breathing room for best texture.
- Drizzle the florets evenly with 1 tbsp olive oil: The oil should glisten as it coats the surfaces, helping them go from pale to golden in the oven. Tossing ensures full coverage, which promotes even crust formation. Using too much oil will make the florets heavy and greasy, while too little prevents proper browning, so stick to the measured tablespoon for balance.
- Toss the florets to coat them fully with oil: Use clean hands or a spoon to ensure every nook and cranny gets a thin layer of extra virgin olive oil , which enhances the roast and carries the smoked paprika. You will feel some resistance as the oil smooths across the florets, and you may hear a faint sliding sound as they move on the pan. Incomplete coating leads to patchy browning, so take a moment to distribute the oil evenly.
- Sprinkle the cauliflower evenly with smoked paprika and salt to taste: The dusting of smoked paprika releases a fragrant note, and the salt sharpens the overall profile. Smell the warm, slightly sweet aroma as the spices hit the oiled surfaces. Over-seasoning masks the vegetable, so start lighter if you are unsure, and increase on future batches once you know your preference.
- Place the baking sheet into the preheated oven and let the cauliflower roast for 10 minutes: You will hear the oven hum and later notice gentle sizzling as moisture escapes and the surface begins to brown. At this early stage the florets will develop faint golden edges and a toasted scent. Removing them too soon results in underdeveloped flavor, while leaving them too long risks overbrowning, so set a timer for accuracy.
- Take the baking sheet out of the oven: When you pull the pan out you will see the first signs of color and smell a warm, nutty fragrance. Use oven mitts to avoid burns from the hot metal. A frequent pitfall is skipping this rest and stir step, which can let the outsides brown unevenly, so handle the pan carefully and proceed to redistribute.
- Stir the cauliflower on the baking sheet, moving pieces from the outside of the sheet towards the inside, and vice versa: Stirring ensures that the pieces roasted on the edges rotate into hotter zones and that the ones from the center move outward to brown. You will notice some pieces already more colored than others, and this redistribution equalizes the roast. Avoid aggressive stirring that breaks delicate florets; gentle movement preserves shape while improving evenness.
- Return the baking sheet to the oven: Slide the pan back into the heat and listen for the renewed soft sizzle as the pieces continue to caramelize. The kitchen aroma will deepen and you will see increased color progression over the next minutes. Not returning the sheet on time can leave parts underdone, so be prompt to maintain heat continuity.
- Let the cauliflower roast for 10 to 20 minutes longer until very tender: During this period the florets will deepen to a rich golden brown, and a knife or fork should pierce them easily. The smell becomes more concentrated and slightly sweet as sugars caramelize. Keep an eye on the color, because the difference between golden and burned can happen quickly if left unattended.
- When it's ready you will be able to pierce it easily with a fork: The final texture should feel soft at the center with crisped edges, and the fork will slide in without resistance. This tactile cue confirms doneness more reliably than time alone. Overcooking will yield mushy pieces, so stop roasting as soon as the fork test passes for optimal texture.
- Keep a close eye on the cauliflower, it can go from brown to burned fairly quickly if you're not careful: The aroma will shift from toasty to acrid if it burns, and the visual cue is a sudden darkening at the tips. If you see rapid darkening reduce oven time on subsequent batches and consider tenting with foil for the last minutes. A common error is leaving the pan unattended during the final stages, which risks charring rather than caramelizing.
- Serve hot: Serve the Smoky Roasted Cauliflower straight from the pan while edges are crisp and the center is warm and tender. The contrast between the hot interior and toasted surfaces is most appealing right away. If you let it sit too long it will lose crispness, so plate and serve promptly for the best eating experience.
Notes
- Measure the oil, using exactly 1 tablespoon of extra virgin olive oil keeps the coating light enough to crisp edges without making the florets greasy, which preserves texture and concentrates flavor.
- Adjust smoked paprika amount, start with 1 teaspoon for a subtle smoky note, and move to 2 teaspoons when you want a more pronounced aroma, being careful not to overpower the natural sweetness of the cauliflower.
- Use a roomy baking sheet, allowing space between florets helps hot air circulate and encourages even caramelization, preventing steaming and soggy results.
- Rotate the pan if needed, some ovens have hotspots, so rotating the sheet halfway through baking helps achieve uniform browning across the batch.
- Serve immediately, the contrast between warm tender centers and crisped edges is at its best right out of the oven, so plate while still hot for maximum texture and flavor.