
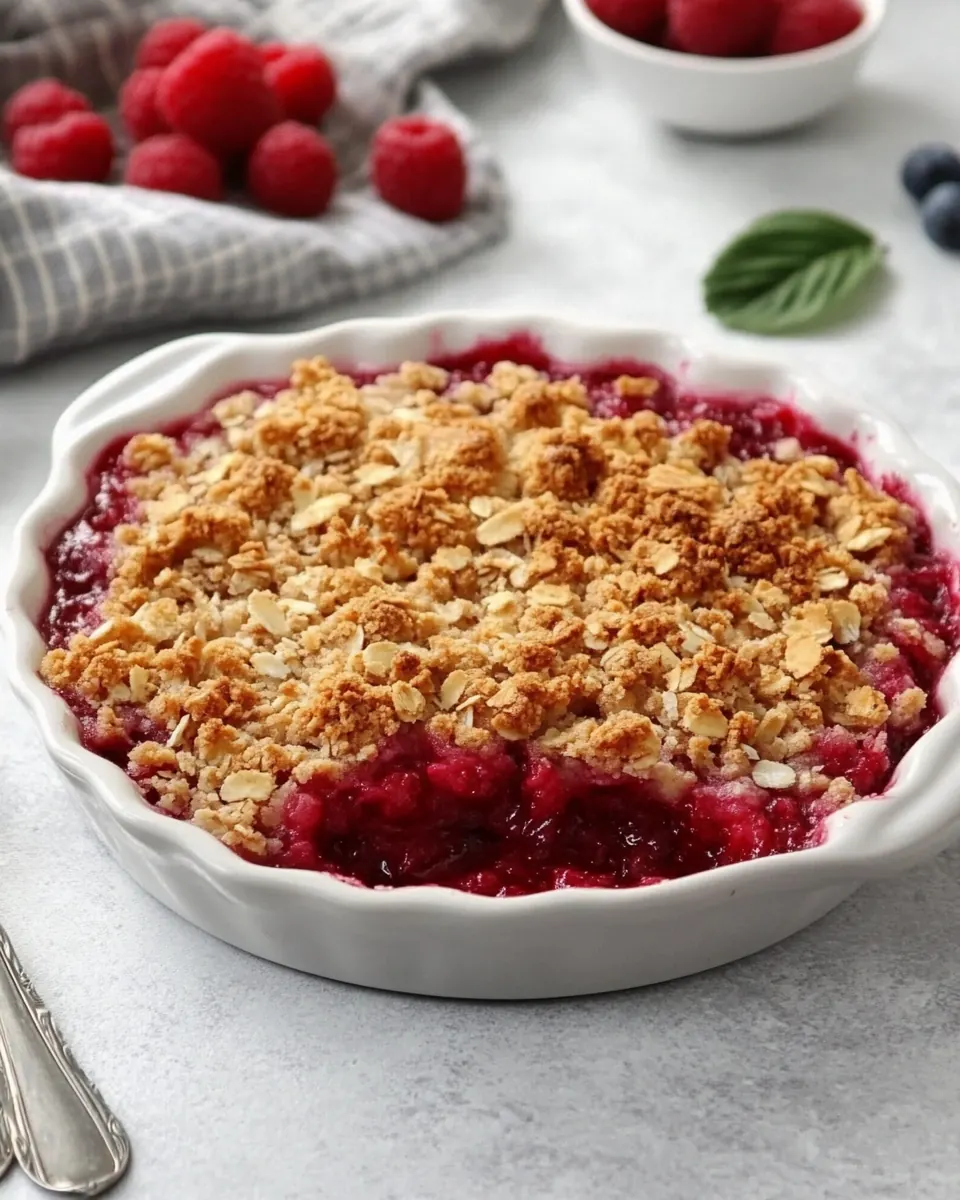
Fresh Raspberry Crisp
Fresh Raspberry Crisp has been my go to summer dessert when ripe berries are begging to be used, and I still remember the first time I tasted it at a neighbor’s picnic, warm from the pan and smelling of caramelized sugar and butter.
That afternoon taught me how a handful of pantry staples can turn into something that feels special, even on a weekday. I started making Fresh Raspberry Crisp whenever the market had raspberries on sale, and it became the recipe I bring to block parties because it travels well and everyone raves about the bubbling fruit. I love how the tartness of the raspberries plays against the crunchy, buttery topping, and how a little scoop of ice cream melts into the warm fruit, creating a silky sauce.
Over the years I adjusted the balance between sugar and tang until the filling felt just right, and I learned easy tricks to make the topping extra crumbly without fuss. Once I mastered the technique, I started teaching friends, and it always makes them smile because it tastes like summer in a bowl. If you keep a bag of frozen berries as backup, you can make this any time the craving hits, but there is really no substitute for fresh raspberries when they are in season.
Recipe Snapshot
55 mins
15 mins
40 mins
Medium
250 kcal
American
Vegan, Gluten-Free
Desserts
9 x 9-inch baking pan, Large bowl, Medium bowl, Pastry blender, Oven
The Charm of This Fresh Raspberry Crisp
Bright seasonal flavor
I adore how Fresh Raspberry Crisp highlights the electric brightness of ripe raspberries. Their natural tang and perfume cut through the sweet topping, so each bite feels light yet indulgent. I often say the fruit is the star, and the rest exists to support it.
Simple pantry ingredients
This recipe shines because it uses a few staples you likely already have, like sugar, flour, and butter. That simplicity means you can pull it together fast, and it still yields a dessert that looks and tastes like you spent hours on it. I love recipes that reward minimal effort with maximum comfort.
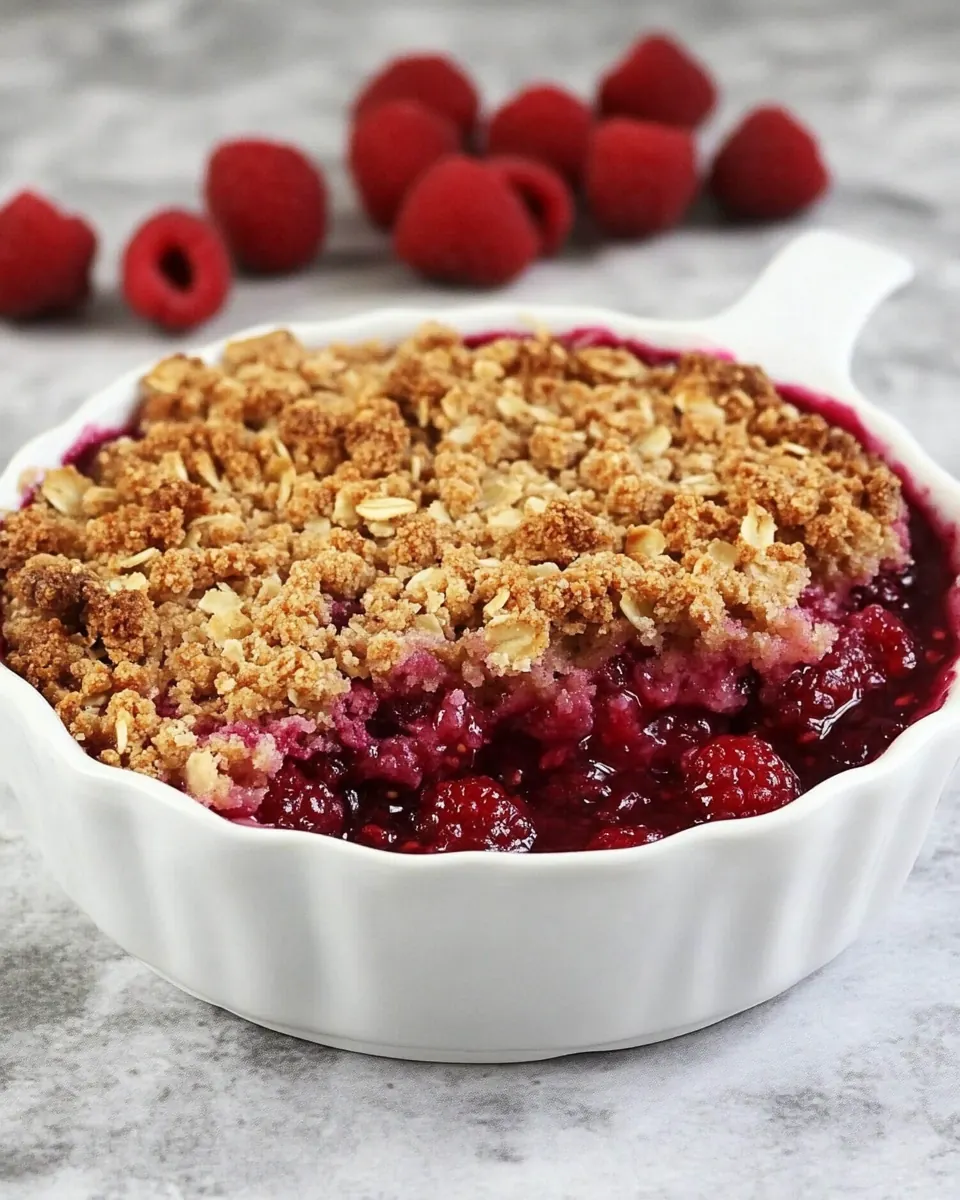
Textural contrast
What keeps me coming back to Fresh Raspberry Crisp is the crunch of the crumb topping against the soft, bubbling filling. The contrast is satisfying, and it elevates a bowl of warm fruit into a full dessert experience. When I take that first spoonful, the crispy bits, the juicy fruit, and a cool bite of ice cream all come together.
Versatile and crowd friendly
This crisp is forgiving and scales up easily, so it is perfect for gatherings. I often double the batch for potlucks, and it still bakes evenly in a larger pan. It is one of those recipes that gets better with age, especially if you serve leftovers warmed and topped with something creamy.
No-fuss technique
The method is approachable, which makes me pass it along to new bakers. There are no fancy tools required, and small adjustments are simple. If you know how to toss fruit with a little cornstarch and make a crumbly topping with your fingers, you are already halfway there.
What Goes Into Fresh Raspberry Crisp
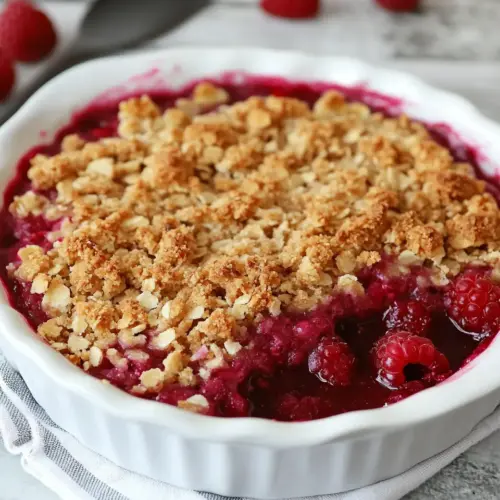
These ingredients are deliberately straightforward, letting the raspberries shine while the topping provides crunch and caramelized flavor. The filling relies on a balance between fruit, sugar, and a thickener so the juices set as it bakes. The topping is a simple mix of flour, brown sugar, and butter that creates those irresistible golden crumbs.
- 5 cups fresh raspberries: Provide bright, tart fruit flavor and juicy body to the crisp; they break down during baking to create a luscious filling that balances sweetness. Fold gently to preserve some whole berries for texture, and spread evenly in the baking dish for uniform cooking. Their natural juices mingle with the thickener and sugar to form a glossy, spoonable compote when baked.
- 5 tablespoons cornstarch: Stabilize the raspberry juices by thickening and preventing a runny filling when heated; it creates a smooth, cohesive sauce that clings to the fruit. Blend thoroughly with the sugar before adding to the raspberries to avoid lumps and ensure even consistency. Use the measured amount to achieve a tender but not gelatinous set once the crisp cools slightly.
- 3/4 cup sugar: Sweeten and enhance the raspberries while balancing their tartness; sugar helps draw out juices to form the base of the filling and caramelizes slightly during baking for depth of flavor. Mix with the cornstarch to evenly coat the fruit so the texture remains consistent. Adjust sweetness carefully to let the raspberry's natural brightness shine through.
Directions for Fresh Raspberry Crisp
These directions are straightforward, and I like to bake this crisp until the filling is bubbling and the topping is golden. Read each step fully before you begin so you can prep tools and have everything within reach. Baking times vary by oven and pan, so watch the visual cues listed below rather than relying solely on time.
- Preheat oven to 350 degrees.: The kitchen will start to smell faintly warm and ready as the oven heats, and preheating ensures even baking from the moment you slide the pan in. When the oven reaches 350 degrees , the air becomes dry and hot, which promotes a crisp topping and a bubbling filling. If you skip preheating, the fruit may release juices before the topping sets, resulting in a soggy crust. A common pitfall is not knowing if your oven runs cool or hot, so I recommend an oven thermometer to confirm true temperature.
- Spray a 9 x 9-inch baking pan with non-stick spray. Set aside.: Coating the pan prevents the raspberries from sticking and makes serving simple. As you spray, you might notice a light scent from the non-stick spray, and the shiny surface makes the crumb topping less likely to adhere. If you skip this step, the edges can cling stubbornly to the pan. A typical mistake is using too little spray, so make sure the bottom and sides are evenly coated.
- Add raspberries to a large bowl followed by sugar and cornstarch. Toss to combine, then add berries to the baking dish and distribute the sugar/cornstarch mixture that's left in the bowl over the fruit.: As you toss the raspberries with sugar and cornstarch , you will see the berries release a little juice and become glossy, which signals a good coating. This initial maceration helps the cornstarch begin absorbing moisture before it meets oven heat, improving the final texture. If you rush and pour the mixture without tossing, clumps of cornstarch can create thick pockets; stirring thoroughly prevents that. Be gentle so you do not crush the berries completely, unless you want a more jamlike filling.
- Make the topping by mixing the flour and brown sugar together in a medium bowl. Cut in the flour using a pastry blender, two knives or your fingers, until the butter is well distributed. Then pinch and squeeze the topping mixture with your fingers to make nice crumbs.: While combining the flour and brown sugar , you will feel a sandy texture that slowly turns into coarse crumbs as you work in the butter . The sound is subtle, a soft rubbing as the fat coats the dry ingredients, and the aroma becomes rich and slightly caramel like. This technique creates uneven pebbles that bake into an appealing crunchy topping, and it matters because larger, buttery crumbs give more contrast to the soft filling. A common error is overworking the mixture until it becomes pastey; aim for varied clumps and chill briefly if the butter becomes too soft.
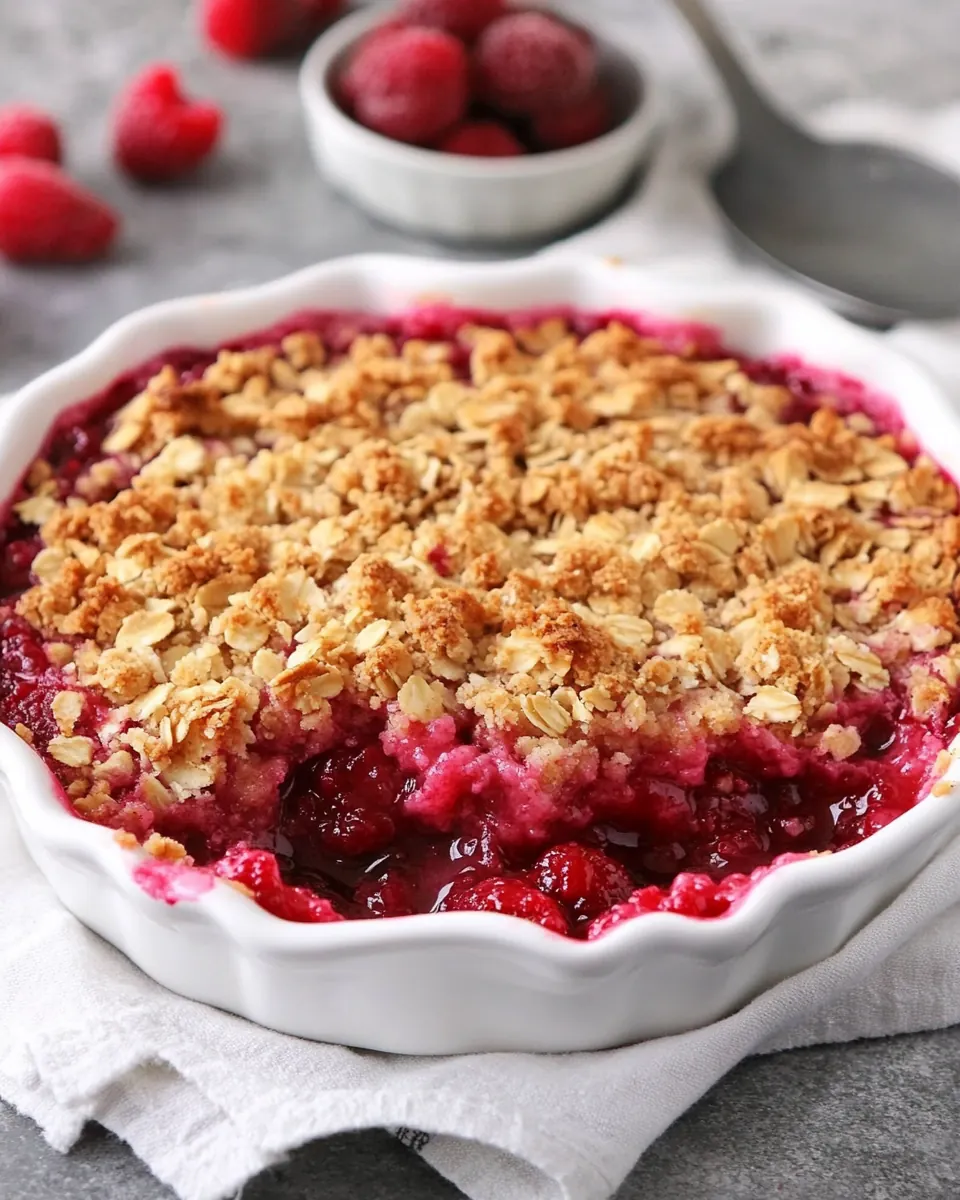
- Sprinkle the crumbs over the berries.: When you scatter the crumbs across the top you should see a textured, patchy surface rather than a smooth blanket, which allows steam to escape and the fruit juices to bubble up around the crumbs. The topping will brown and crisp in parts, creating flavorful crunchy bits. If you press the crumbs down too firmly they will fuse and lose their delicate crunch, so let them sit loosely. Avoid piling crumbs only in the center, because the edges need coverage to brown evenly.
- Bake for 35-45 minutes or longer, until the middle of the crisp is bubbling.: As the crisp bakes, you will hear a faint bubbling and see glossy juices simmering through the topping; the crumbs should turn a golden brown and smell buttery. The bubbling indicates the cornstarch is activating and thickening the filling, and the top browning adds nutty, caramel notes. Ovens vary, so start checking at the low end of the time range; if the center is not bubbling, give it more time in five minute increments. Be careful not to overbake to the point the crumbs become hard and dry, which can happen if left too long.
- Serve warm with a scoop of vanilla ice cream or sweetened whipped cream.: Warm servings bring steam and an elevated aroma, while a scoop of vanilla ice cream melts into the fruit, creating a silky sauce that balances the tart raspberries . The contrast between hot and cold is part of the pleasure, and you will notice a slight hiss as the ice cream meets the hot filling. If you serve it too late, the topping can soften and the ice cream will not melt attractively, so aim to present it within minutes of removing it from the oven. A common slip is waiting until the crisp cools completely, which reduces the lusciousness that makes this dessert memorable.
Recipe Variations about Fresh Raspberry Crisp
I like to experiment with small changes that amplify flavor without complicating the recipe. These variations keep the spirit of Fresh Raspberry Crisp intact while offering different textures and notes, depending on what you have on hand.
- Use a mix of berries to introduce complexity, keeping the same total volume so the filling sets the same.
- Stir in a pinch of citrus zest to brighten the filling, which complements the natural tartness of the raspberries.
- Swap half the topping flour for oats for a heartier, chewier crisp that still crisps at the edges.
- Toast the topping briefly in a skillet before sprinkling for a nuttier, deeper flavor if you prefer more caramel notes.
- Serve with chilled whipped cream lightly sweetened to balance the warm, tart berries for a classic pairing.
How to Enjoy Fresh Raspberry Crisp
This dessert is wonderfully flexible and suits many occasions, from casual weeknight treats to festive gatherings. Serve it warm to showcase the bubbling filling and crunchy topping, and think about pairing with a cooling accompaniment to add contrast.
- Classic serving Warm from the oven, spoon into bowls and top with a scoop of vanilla ice cream for a timeless combination.
- Party-friendly Bake in a larger pan for potlucks, and offer a bowl of whipped cream on the side so guests can customize portions.
- Seasonal flair Make it during summer when raspberries are at peak flavor to celebrate fresh fruit.
- Storage tip Cool completely, then cover and refrigerate for up to three days; reheat gently in an oven to revive crispness.
- Occasions Works beautifully for outdoor gatherings, casual dinners, and anytime you want a dessert that tastes like summer comfort.
FAQ
Conclusion
Fresh Raspberry Crisp stands out because it turns a few simple ingredients into a comforting, summery dessert that highlights bright berry flavor and a buttery, crunchy topping. Give it a try when raspberries are in season or when you want a fast, crowd pleasing dessert that feels homemade. Serve it warm, top with something cold and creamy, and enjoy how a humble recipe can make an ordinary day feel a bit more festive.
Fresh Raspberry Crisp
Equipment
- 9 x 9 inch baking pan
- Large Bowl
- Medium Bowl
- Pastry blender
- Oven
Ingredients
- 5 cups fresh raspberries Provide bright, tart fruit flavor and juicy body to the crisp; they break down during baking to create a luscious filling that balances sweetness. Fold gently to preserve some whole berries for texture, and spread evenly in the baking dish for uniform cooking. Their natural juices mingle with the thickener and sugar to form a glossy, spoonable compote when baked.
- 5 tablespoons cornstarch Stabilize the raspberry juices by thickening and preventing a runny filling when heated; it creates a smooth, cohesive sauce that clings to the fruit. Blend thoroughly with the sugar before adding to the raspberries to avoid lumps and ensure even consistency. Use the measured amount to achieve a tender but not gelatinous set once the crisp cools slightly.
- 3/4 cup sugar Sweeten and enhance the raspberries while balancing their tartness; sugar helps draw out juices to form the base of the filling and caramelizes slightly during baking for depth of flavor. Mix with the cornstarch to evenly coat the fruit so the texture remains consistent. Adjust sweetness carefully to let the raspberry's natural brightness shine through.
Instructions
- Preheat oven to 350 degrees.: The kitchen will start to smell faintly warm and ready as the oven heats, and preheating ensures even baking from the moment you slide the pan in. When the oven reaches 350 degrees , the air becomes dry and hot, which promotes a crisp topping and a bubbling filling. If you skip preheating, the fruit may release juices before the topping sets, resulting in a soggy crust. A common pitfall is not knowing if your oven runs cool or hot, so I recommend an oven thermometer to confirm true temperature.
- Spray a 9 x 9-inch baking pan with non-stick spray. Set aside.: Coating the pan prevents the raspberries from sticking and makes serving simple. As you spray, you might notice a light scent from the non-stick spray, and the shiny surface makes the crumb topping less likely to adhere. If you skip this step, the edges can cling stubbornly to the pan. A typical mistake is using too little spray, so make sure the bottom and sides are evenly coated.
- Add raspberries to a large bowl followed by sugar and cornstarch. Toss to combine, then add berries to the baking dish and distribute the sugar/cornstarch mixture that's left in the bowl over the fruit.: As you toss the raspberries with sugar and cornstarch , you will see the berries release a little juice and become glossy, which signals a good coating. This initial maceration helps the cornstarch begin absorbing moisture before it meets oven heat, improving the final texture. If you rush and pour the mixture without tossing, clumps of cornstarch can create thick pockets; stirring thoroughly prevents that. Be gentle so you do not crush the berries completely, unless you want a more jamlike filling.
- Make the topping by mixing the flour and brown sugar together in a medium bowl. Cut in the flour using a pastry blender, two knives or your fingers, until the butter is well distributed. Then pinch and squeeze the topping mixture with your fingers to make nice crumbs.: While combining the flour and brown sugar , you will feel a sandy texture that slowly turns into coarse crumbs as you work in the butter . The sound is subtle, a soft rubbing as the fat coats the dry ingredients, and the aroma becomes rich and slightly caramel like. This technique creates uneven pebbles that bake into an appealing crunchy topping, and it matters because larger, buttery crumbs give more contrast to the soft filling. A common error is overworking the mixture until it becomes pastey; aim for varied clumps and chill briefly if the butter becomes too soft.
- Sprinkle the crumbs over the berries.: When you scatter the crumbs across the top you should see a textured, patchy surface rather than a smooth blanket, which allows steam to escape and the fruit juices to bubble up around the crumbs. The topping will brown and crisp in parts, creating flavorful crunchy bits. If you press the crumbs down too firmly they will fuse and lose their delicate crunch, so let them sit loosely. Avoid piling crumbs only in the center, because the edges need coverage to brown evenly.
- Bake for 35-45 minutes or longer, until the middle of the crisp is bubbling.: As the crisp bakes, you will hear a faint bubbling and see glossy juices simmering through the topping; the crumbs should turn a golden brown and smell buttery. The bubbling indicates the cornstarch is activating and thickening the filling, and the top browning adds nutty, caramel notes. Ovens vary, so start checking at the low end of the time range; if the center is not bubbling, give it more time in five minute increments. Be careful not to overbake to the point the crumbs become hard and dry, which can happen if left too long.
- Serve warm with a scoop of vanilla ice cream or sweetened whipped cream.: Warm servings bring steam and an elevated aroma, while a scoop of vanilla ice cream melts into the fruit, creating a silky sauce that balances the tart raspberries . The contrast between hot and cold is part of the pleasure, and you will notice a slight hiss as the ice cream meets the hot filling. If you serve it too late, the topping can soften and the ice cream will not melt attractively, so aim to present it within minutes of removing it from the oven. A common slip is waiting until the crisp cools completely, which reduces the lusciousness that makes this dessert memorable.
Notes
- Use a mix of berries to introduce complexity, keeping the same total volume so the filling sets the same.
- Stir in a pinch of citrus zest to brighten the filling, which complements the natural tartness of the raspberries.
- Swap half the topping flour for oats for a heartier, chewier crisp that still crisps at the edges.
- Toast the topping briefly in a skillet before sprinkling for a nuttier, deeper flavor if you prefer more caramel notes.
- Serve with chilled whipped cream lightly sweetened to balance the warm, tart berries for a classic pairing.