Shamrock Shake Shortbread Cookies
Shamrock Shake Shortbread Cookies are one of those recipes that take me straight back to festive afternoons in my kitchen, when a faint minty breeze seemed to follow every batch out of the oven. I first made these for a small neighborhood gathering the spring after I moved into my current house, and the way the buttery aroma filled the rooms made everyone wander in from the yard before the cookies even hit the cooling rack. I remember laughing as a neighbor declared them better than the shamrock shakes we used to get as kids, and that little moment convinced me I needed to keep this recipe in heavy rotation.
Every time I make Shamrock Shake Shortbread Cookies I change one tiny thing, just to see how it nudges the final bite. Once I swapped a different mint extract and the whole batch turned a touch more floral, which taught me how sensitive shortbread is to small flavor shifts. Another time I chilled the dough a bit longer, and the slices cut perfectly, yielding neat, uniform cookies that looked like they belonged in a bakery window. I love how forgiving the recipe is, yet how proud I feel when the cookies come out just right.
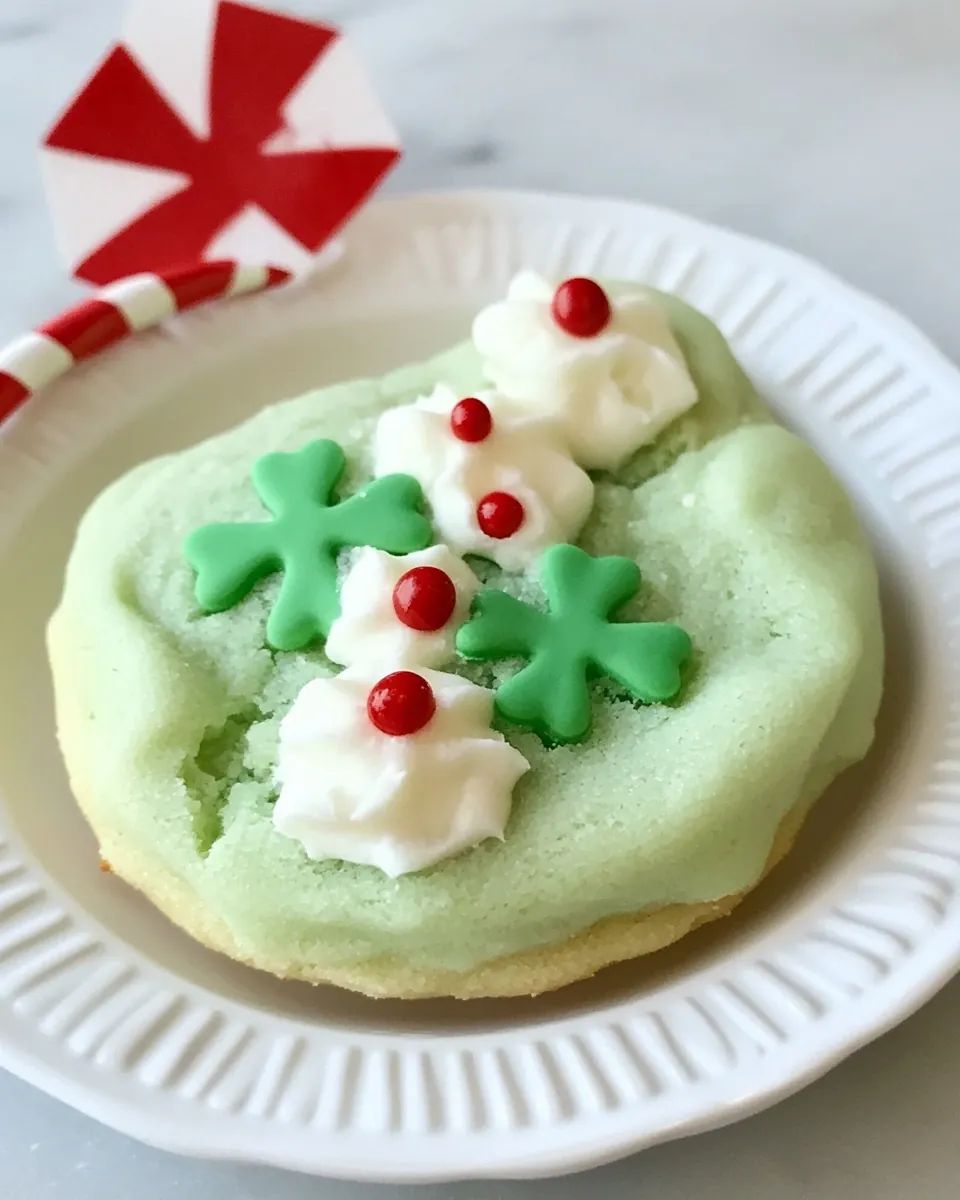
When I serve these, I usually bring a plate to friends across the street, because nothing builds quick conversation like handing someone a minty, buttery cookie with a cheeky cherry on top. The green frosting and the single cherry make them joyful to look at, and the texture balances crisp edges with a tender interior. Over the years I have learned to trust the cues in the dough and the oven, and most importantly, I have learned the pleasure of sharing small, thoughtful treats. I hope these notes help you find your own little rituals with Shamrock Shake Shortbread Cookies.
Recipe Snapshot
45 mins
25 mins
20 mins
Hard
150 kcal
American
Gluten-Free, Low FODMAP
Desserts
Stand mixer, Paddle attachment, Whisk attachment, Mixing bowl, Pastry bag, Star icing tip, Wire rack, Cookie sheet, Parchment paper
Why You Need This Shamrock Shake Shortbread Cookies
Minty Nostalgia in a Bite
I love these cookies because they pack that unmistakable mint flavor without overwhelming the buttery base. The combination of mint or peppermint extract and a touch of green color evokes classic shakes, while the shortbread base keeps the experience elegant and subtle.
Buttery Texture That Melts
Shortbread is beloved because of its tender, melt in your mouth crumb. Using cold, firm dough and the right ratio of unsalted butter to flour gives those crisp edges and a soft center I crave. The technique matters, and I’ll explain how to get it right.
Customizable Frosting for Every Palate
The vanilla mint buttercream is flexible, so you can dial the mint intensity up or down. The heavy whipping cream and extra beating whiten and lighten the frosting for that classic, almost shake like finish. I like that you can make it subtle or bold depending on your guests.
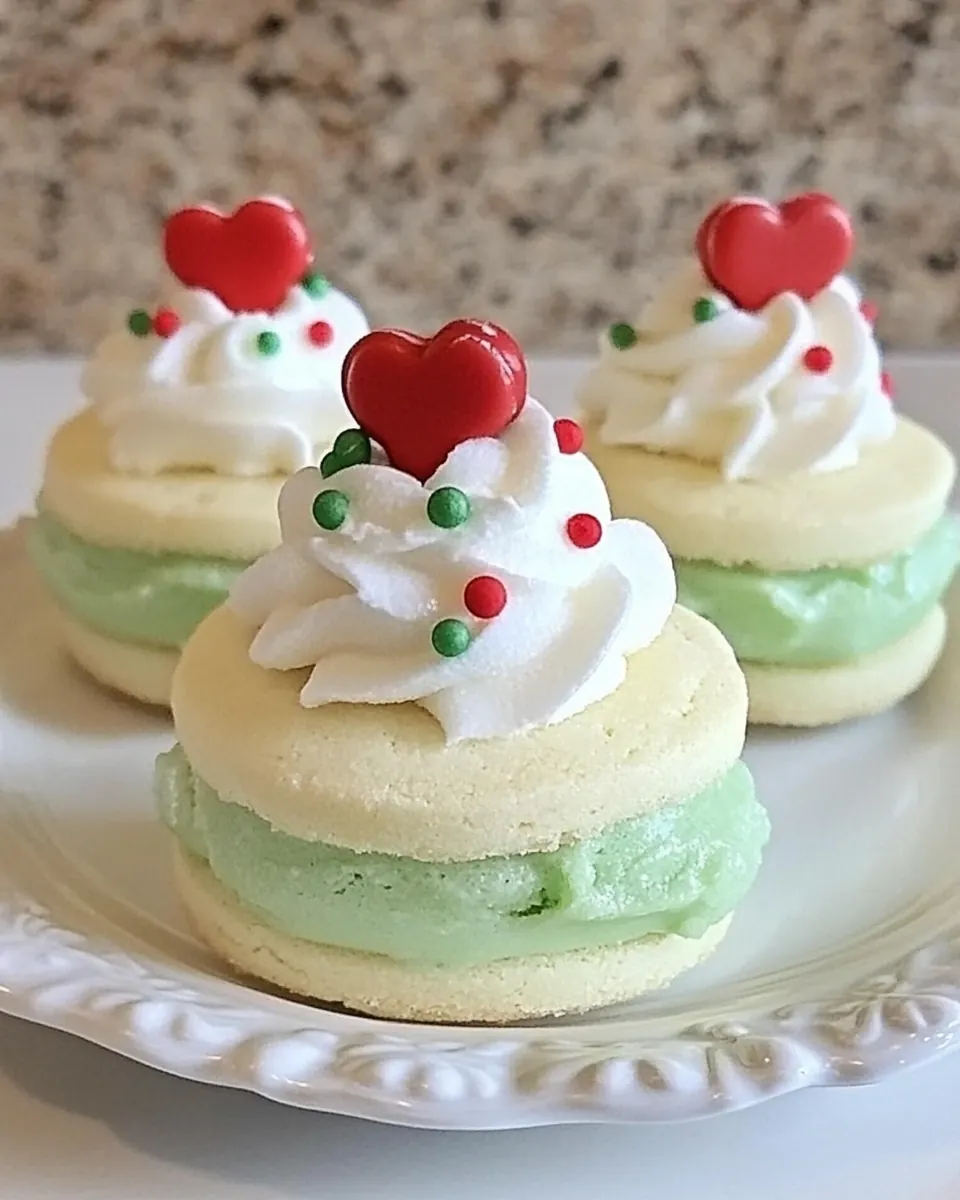
Picture Perfect Presentation
These cookies are cheerful to present. A neat swirl of frosting topped with a halved maraschino cherry makes them party ready, and the cherry adds a pop of color and sweet tang that plays beautifully with the mint.
Great for Sharing and Gifting
They hold up well at room temperature for several days, making them an ideal cookie for school parties, potlucks, or a thoughtful baking gift. I always pack a few in parchment for neighbors, because they travel nicely and still look great when unwrapped.
Key Ingredients for Shamrock Shake Shortbread Cookies

These ingredients are chosen to balance a rich, tender shortbread base with a light, minty frosting that recalls a classic shake. The shortbread relies on high quality unsalted butter and just enough powdered sugar to keep the crumb fine while the all purpose flour provides structure. For the frosting, the same buttery base is brightened with more powdered sugar and a splash of heavy whipping cream to achieve a silky, pipeable texture.
- Shortbread cookies: Provide a crisp, buttery base for the cookies that holds shape during baking and offers a tender, melt-in-your-mouth texture when properly chilled and handled.
- 1 cup 2 sticks unsalted butter, room temperature: Soften and enrich the dough by incorporating fat and moisture, creating a rich flavor and contributing to the shortbread’s tender, flaky crumb when creamed with sugar.
- 1 cup powdered sugar (also known as confectioner's sugar): Sweeten and lighten the dough while helping create a delicate, fine texture; powdered sugar dissolves smoothly into butter for a silky dough consistency.
- 1 teaspoon pure vanilla extract: Enhance and deepen overall flavor with warm, familiar notes that round out the sweetness and complement the mint to create a balanced cookie profile.
- 1/2 teaspoon mint or peppermint extract: Impart a cool, refreshing mint flavor to the dough, providing the signature Shamrock Shake taste while using a small amount to avoid overpowering other flavors.
- 1/2 teaspoons salt: Balance sweetness and enhance overall flavor by strengthening other taste components; salt also controls and improves the cookie’s structure and mouthfeel.
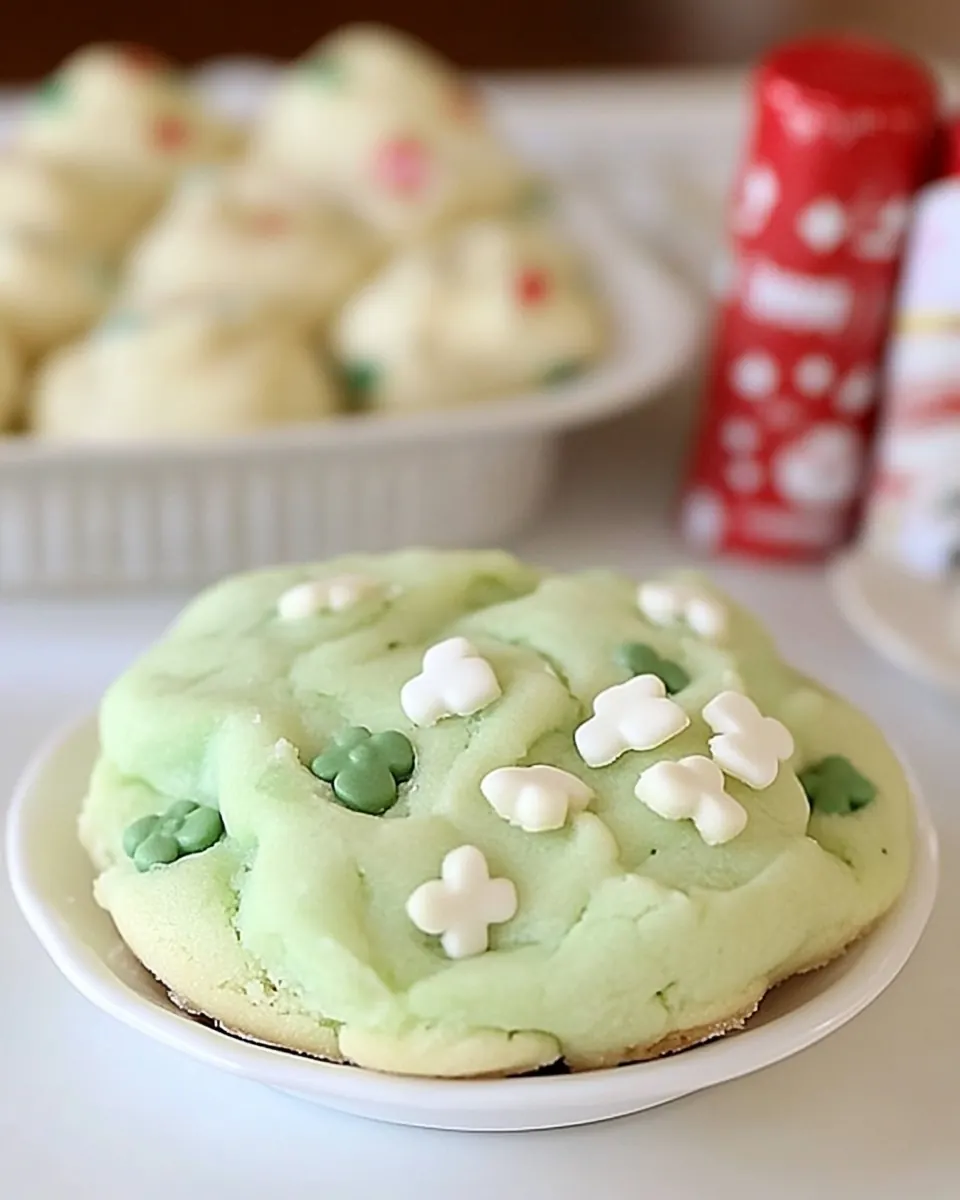
- A couple drops of green food coloring: Add visual appeal and an iconic green color associated with Shamrock Shake, using only a couple drops to achieve a pastel green without altering flavor.
- 2 cups all-purpose flour (plus more for rolling): Provide structure and body to the dough by binding ingredients and giving the cookies their tender but stable texture; additional flour helps prevent sticking while rolling.
- Vanilla-Mint Buttercream Frosting: Serve as a creamy, flavored topping that complements the shortbread by adding sweetness, mint intensity, and a smooth texture contrasted with the crisp cookie.
- 1 cup 2 sticks unsalted butter, room temperature: Soften and stabilize the frosting by adding fat and body; creaming butter yields a smooth, rich base that supports powdered sugar and flavorings for piping or spreading.
- 2 cups powdered sugar: Sweeten and thicken the frosting while creating a smooth, pipeable consistency; powdered sugar also helps stabilize the buttercream when beaten into the butter.
- 1 1/2 teaspoons pure vanilla extract: Add warm, aromatic vanilla notes to the frosting, enhancing overall flavor complexity and rounding out the sweetness for a more balanced topping.
- 1/2 teaspoon mint or peppermint extract: Introduce the mint flavor into the buttercream to mirror the cookie’s flavor, providing the characteristic coolness while used sparingly to avoid bitterness.
- Pinch salt: Adjust and refine the frosting’s taste by providing a subtle flavor backbone and enhancing other flavor notes; a small pinch prevents the frosting from tasting flat.
- 2 tablespoons heavy whipping cream: Loosen and smooth the buttercream to a spreadable, pipeable consistency while adding richness and slight silkiness for a creamy mouthfeel.
- Plus: Indicate additional items that accompany the recipe and may be needed for assembly, garnishing, or serving beyond the primary list of components.
- 9 maraschino cherries for topping the cookies (cut in half and placed on a paper towel, cut side down, for about 5 minutes to collect extra juices): Garnish and finish the cookies by adding a bright, sweet pop of color and flavor when halved and drained briefly to remove excess syrup before topping.
Step by Step Instructions for Shamrock Shake Shortbread Cookies
These steps guide you from mixing the dough to piping frosting and finishing with a cherry on top. I write directions that focus on sensory cues and little checks I use to know when things are right, so you can bake confidently and adjust as needed.
- In the large bowl of a stand mixer fitted with the paddle attachment, or in a large bowl with a hand mixer, beat together the butter, sugar, vanilla extract, mint extract, salt, and green food coloring on medium speed. Beat until smooth and well blended.: Expect a soft, pale mixture that smells richly of butter with an immediate lifted hint of vanilla and mint. The texture should be light, not greasy, as the sugar incorporates air and the butter takes on a slightly whipped look. This aeration is why I use medium speed, it helps build body without overheating the butter. If you see streaks of unmixed butter or lumps of sugar, scrape the bowl and continue beating until the mixture looks homogeneous, smooth and glossy. A common mistake here is working with too warm butter, which makes the mixture oily; if that happens, chill the bowl briefly then resume. The color will begin to show from the green food coloring but should still be soft and pastel at this stage.
- Turn the power to low and mix in the flour just until the dough comes together.: You will feel the dough change from loose to slightly shaggy, and the sound of the mixer will quiet a bit as the all purpose flour absorbs the butter. The goal is to avoid over mixing so gluten does not develop and make the cookies tough. Stop as soon as the dough forms large clumps and pulls away from the bowl sides. If the dough looks overly dry, a teaspoon of cream or two can be added briefly, but usually the balance is correct. Avoid the impulse to mix on high, which will make the dough dense and ruin the tender shortbread texture.
- Lay out a 24" long or so piece of wax paper or parchment paper and sprinkle lightly with flour.: The sensory cue here is a faint dusty feel to the paper that will prevent sticking. The lightly floured surface gives the dough a nonstick bed for rolling. If you skip this step the dough can adhere to the paper and tear when you try to roll it, creating uneven logs and frustrating slicing later. Use just a dusting of flour to keep the exterior from getting cakey.
- Carefully turn the dough onto the paper, then, with floured hands, roll the dough into a log about 2 1/2 inches in diameter.: As you roll, notice the dough warming slightly from your hands, becoming smoother. Aim for a consistent diameter so slices bake evenly. If the dough becomes too soft or sticky, pause and chill briefly so it firms up again. Uneven logs lead to cookies that bake differently, so take a moment to smooth and compress as you roll to create a taut, even surface.
- Roll the dough into the wax or parchment paper, then twist the ends of the paper tightly so the dough forms a round, taut log.: You should feel a gentle tension as you twist, similar to wrapping a candy. This helps the log keep its shape in the chill, preventing flat spots. The wrapped log also protects the dough from drying out in the fridge. A mistake is to wrap too loosely, which can let edges sag and cause uneven slices; twist snugly but not so tight that it deforms the log.
- Refrigerate for 1 to 1 1/2 hours, until firm.: The dough should feel solid to the touch and cool through to the center. Chilling allows the butter to re firm, which controls spread and preserves the shortbread texture. When you press the log it should give slightly but not indent deeply. If you rush this step the cookies will spread thin and lose their tender, crumbly interior, so be patient and trust the hour to firm things up.
- Preheat oven to 325 degrees Fahrenheit.: Heat until the oven maintains temperature, which ensures even browning. You will notice a warm, dry air when you open the oven; that steady environment is what helps shortbread develop a delicate edge without burning. The moderate temperature favors slow coloring for a golden edge while keeping the centers pale and tender, which is the hallmark of proper shortbread.
- Remove dough from the refrigerator and cut into approximately 18 slices about 3/8" thick. If the dough gets crumbly, let it sit at room temperature for a couple of minutes then try again.: The slices should hold their shape when cut and have clean edges. If they crumble, they are too cold or brittle, so a brief rest softens them just enough to slice cleanly. Pay attention to thickness so all cookies bake uniformly; uneven thickness leads to some cookies being done before others. Use a sharp knife and a gentle sawing motion to prevent smashing.
- Lay about one inch apart on an ungreased cookie sheet.: You should hear a very faint clink as the cookies touch the metal briefly while you place them, and they should sit with space to allow minimal spreading. The one inch spacing is intentional to keep them nearly touching when finished, which preserves edges. Avoid overcrowding the sheet, which creates uneven heat and can produce cookies that bake inconsistently.
- Bake for 15 – 20 minutes, until the edges begin to turn brown.: Use visual cues rather than strict timing, because ovens vary. The aroma will shift from buttery to slightly toasted, and the edges will ginger to a pale golden brown while the centers remain light. Remove closer to 15 minutes for more tender centers, or up to 20 for crisper cookies. A common error is leaving them until the centers darken, which indicates overbake; aim for gentle edge coloring.
- Remove from oven and let sit for a couple of minutes, then transfer to a wire rack to let cool completely.: Letting them rest on the sheet helps them set slightly so they do not fall apart when moved. Then transfer to a wire rack where air circulates, preventing sogginess and ensuring even cooling. You will notice the scent intensify as they cool, and the texture firms to that signature shortbread snap.
- In the bowl of a stand mixer fitted with the whisk attachment, or in a large bowl with a hand mixer, beat the butter on medium speed until creamy, about 30 seconds.: The butter will go from dense to pale and smooth, and a light, airy presence will form. This initial cream creates the base structure for the frosting. If the butter stays lumpy, it may be too cold and will not incorporate the powdered sugar well; let it warm slightly and try again to avoid a gritty frosting.
- Turn the mixer speed to low and slowly pour in the powdered sugar. Once the powdered sugar is incorporated, mix on medium for about 30 seconds.: Slowly adding powdered sugar prevents a cloud of dust and allows it to blend into a stable, silky body. Once combined, the mixture should be smooth and no longer grainy. If it looks dry, a small splash of heavy whipping cream can help, but add sparingly to maintain piping structure.
- Add the vanilla extract, peppermint extract and pinch of salt. Mix for another 30 seconds.: The aroma shifts here as the mint becomes noticeable against the sweet frosting. The pinch of salt sharpens the sweetness and brings clarity. Taste cautiously because extracts can be potent; overdoing the mint can overshadow the shortbread's buttery essence.
- Add the heavy whipping cream and beat on medium until light and white, about three minutes.: As you beat, the frosting will lighten and become nearly fluffy, with a texture perfect for piping. The heavy whipping cream also makes the frosting silky and less dense, which balances the cookie. If the frosting seems too loose, beat a bit longer or add a touch more powdered sugar; if too stiff, a teaspoon of cream loosens it without making it sloppy.
- Place the frosting in a pastry bag (or Ziploc bag – it works) fitted with a star icing tip.: You should feel the frosting glide into the bag and hold its shape, not drip. The star tip creates pretty ridges and helps the frosting mimic the look of a thick shake swirl. Avoid overfilling the bag which makes it hard to control; half full gives the best control and appearance.
- Squeeze the icing onto the cooled shortbread. I start with the outer circle and end at the top.: The frosting should hold a defined shape and look glossy. Start on the outside so you build a neat edge, then work inward in a spiral to create a pleasing mound. A common oversight is piping onto warm cookies, which melts the frosting; always ensure cookies are thoroughly cool to preserve the decorative swirl.
- Top each cookie with a half drained maraschino cherry.: The cherry adds a sweet, slightly tangy contrast and a visual pop of color. Press gently so it nestles into the frosting without sinking. Use the drained halves to avoid excess syrup that can make the frosting run. Placing the cherry while the frosting is still slightly tacky helps it adhere.
- Cookies keep in an airtight container at room temperature for three or four days.: Stored properly, they maintain texture and flavor. You will notice the frosting soften slightly over time but the shortbread should remain tender. If storing longer, refrigerate and let come to room temperature before serving for best texture. A common mistake is stacking without parchment between layers, which causes frosting to stick and mar the decoration.
Variations to Try
I like to tweak small elements to suit different occasions, and these variations keep the core cookies familiar while offering new flavor angles. Below are ideas that have worked well for gift boxes, parties, and tasting plates.
- Swap mint intensity Adjust the amount of mint or peppermint extract in either the dough or frosting to make the cookie more subtle or more pronounced depending on your guests preferences.
- Color play Use a touch more green food coloring for a vivid look, but add it sparingly so it does not affect flavor.
- Frosting texture For a lighter frosting, beat an extra minute after adding the heavy whipping cream to incorporate more air and create a fluffier finish.
- Make ahead The dough can be wrapped and frozen for up to one month; thaw in the refrigerator before slicing to preserve structure and ease of cutting.
- Presentation upgrade Pipe a neat star swirl and top with the halved maraschino cherry for a classic, nostalgic presentation that photographs beautifully.
Great Combinations for Shamrock Shake Shortbread Cookies
These cookies pair well with simple beverages and seasonal gatherings, and they travel nicely to potlucks or afternoon tea. Below are pairing ideas, serving suggestions, and storage notes to help you plan the perfect presentation.
- Afternoon tea pairing Serve with a lightly brewed green tea or a mild black tea to balance the mint and sweet frosting without overwhelming it.
- Party platter Arrange on a platter with other small cookies for a visually appealing dessert table, grouping by color to enhance the festive vibe.
- Gift boxes Pack in a sturdy box with parchment between layers, and include a small note about keeping them at room temperature for optimal texture.
- Spring celebrations These are ideal for spring events or St Patrick themed gatherings where the green frosting and cherry accent feel seasonal and playful.
- Storage tips Keep in an airtight container at room temperature for up to four days, or refrigerate for longer storage and bring to room temperature before serving for best flavor.
- Serving suggestion Present on a white plate to make the mint green and cherry color pop, and consider adding a small garnish of fresh mint leaves on the platter for ambiance.
FAQ
Conclusion
What makes these cookies special is the way they blend a classic buttery shortbread base with a nostalgic, mint forward finish and a bright cherry on top. The contrast of crisp edge and tender interior, paired with silky vanilla mint frosting, creates a treat that feels both familiar and festive. Give them a try for your next spring gathering or as a thoughtful homemade gift, and enjoy how few ingredients can yield a memorable, shareable cookie that brings people together.

Shamrock Shake Shortbread Cookies
Equipment
- Stand mixer
- Paddle attachment
- Whisk attachment
- Mixing Bowl
- Pastry bag
- Star icing tip
- Wire Rack
- Cookie Sheet
- Parchment Paper
Ingredients
- Shortbread cookies Provide a crisp, buttery base for the cookies that holds shape during baking and offers a tender, melt-in-your-mouth texture when properly chilled and handled.
- 1 cup 2 sticks unsalted butter, room temperature Soften and enrich the dough by incorporating fat and moisture, creating a rich flavor and contributing to the shortbread’s tender, flaky crumb when creamed with sugar.
- 1 cup powdered sugar (also known as confectioner's sugar) Sweeten and lighten the dough while helping create a delicate, fine texture; powdered sugar dissolves smoothly into butter for a silky dough consistency.
- 1 teaspoon pure vanilla extract Enhance and deepen overall flavor with warm, familiar notes that round out the sweetness and complement the mint to create a balanced cookie profile.
- 1/2 teaspoon mint or peppermint extract Impart a cool, refreshing mint flavor to the dough, providing the signature Shamrock Shake taste while using a small amount to avoid overpowering other flavors.
- 1/2 teaspoons salt Balance sweetness and enhance overall flavor by strengthening other taste components; salt also controls and improves the cookie’s structure and mouthfeel.
- A couple drops of green food coloring Add visual appeal and an iconic green color associated with Shamrock Shake, using only a couple drops to achieve a pastel green without altering flavor.
- 2 cups all-purpose flour (plus more for rolling) Provide structure and body to the dough by binding ingredients and giving the cookies their tender but stable texture; additional flour helps prevent sticking while rolling.
- Vanilla-Mint Buttercream Frosting Serve as a creamy, flavored topping that complements the shortbread by adding sweetness, mint intensity, and a smooth texture contrasted with the crisp cookie.
- 1 cup 2 sticks unsalted butter, room temperature Soften and stabilize the frosting by adding fat and body; creaming butter yields a smooth, rich base that supports powdered sugar and flavorings for piping or spreading.
- 2 cups powdered sugar Sweeten and thicken the frosting while creating a smooth, pipeable consistency; powdered sugar also helps stabilize the buttercream when beaten into the butter.
- 1 1/2 teaspoons pure vanilla extract Add warm, aromatic vanilla notes to the frosting, enhancing overall flavor complexity and rounding out the sweetness for a more balanced topping.
- 1/2 teaspoon mint or peppermint extract Introduce the mint flavor into the buttercream to mirror the cookie’s flavor, providing the characteristic coolness while used sparingly to avoid bitterness.
- Pinch salt Adjust and refine the frosting’s taste by providing a subtle flavor backbone and enhancing other flavor notes; a small pinch prevents the frosting from tasting flat.
- 2 tablespoons heavy whipping cream Loosen and smooth the buttercream to a spreadable, pipeable consistency while adding richness and slight silkiness for a creamy mouthfeel.
- Plus Indicate additional items that accompany the recipe and may be needed for assembly, garnishing, or serving beyond the primary list of components.
- 9 maraschino cherries for topping the cookies (cut in half and placed on a paper towel, cut side down, for about 5 minutes to collect extra juices) Garnish and finish the cookies by adding a bright, sweet pop of color and flavor when halved and drained briefly to remove excess syrup before topping.
Instructions
- In the large bowl of a stand mixer fitted with the paddle attachment, or in a large bowl with a hand mixer, beat together the butter, sugar, vanilla extract, mint extract, salt, and green food coloring on medium speed. Beat until smooth and well blended.: Expect a soft, pale mixture that smells richly of butter with an immediate lifted hint of vanilla and mint. The texture should be light, not greasy, as the sugar incorporates air and the butter takes on a slightly whipped look. This aeration is why I use medium speed, it helps build body without overheating the butter. If you see streaks of unmixed butter or lumps of sugar, scrape the bowl and continue beating until the mixture looks homogeneous, smooth and glossy. A common mistake here is working with too warm butter, which makes the mixture oily; if that happens, chill the bowl briefly then resume. The color will begin to show from the green food coloring but should still be soft and pastel at this stage.
- Turn the power to low and mix in the flour just until the dough comes together.: You will feel the dough change from loose to slightly shaggy, and the sound of the mixer will quiet a bit as the all purpose flour absorbs the butter. The goal is to avoid over mixing so gluten does not develop and make the cookies tough. Stop as soon as the dough forms large clumps and pulls away from the bowl sides. If the dough looks overly dry, a teaspoon of cream or two can be added briefly, but usually the balance is correct. Avoid the impulse to mix on high, which will make the dough dense and ruin the tender shortbread texture.
- Lay out a 24" long or so piece of wax paper or parchment paper and sprinkle lightly with flour.: The sensory cue here is a faint dusty feel to the paper that will prevent sticking. The lightly floured surface gives the dough a nonstick bed for rolling. If you skip this step the dough can adhere to the paper and tear when you try to roll it, creating uneven logs and frustrating slicing later. Use just a dusting of flour to keep the exterior from getting cakey.
- Carefully turn the dough onto the paper, then, with floured hands, roll the dough into a log about 2 1/2 inches in diameter.: As you roll, notice the dough warming slightly from your hands, becoming smoother. Aim for a consistent diameter so slices bake evenly. If the dough becomes too soft or sticky, pause and chill briefly so it firms up again. Uneven logs lead to cookies that bake differently, so take a moment to smooth and compress as you roll to create a taut, even surface.
- Roll the dough into the wax or parchment paper, then twist the ends of the paper tightly so the dough forms a round, taut log.: You should feel a gentle tension as you twist, similar to wrapping a candy. This helps the log keep its shape in the chill, preventing flat spots. The wrapped log also protects the dough from drying out in the fridge. A mistake is to wrap too loosely, which can let edges sag and cause uneven slices; twist snugly but not so tight that it deforms the log.
- Refrigerate for 1 to 1 1/2 hours, until firm.: The dough should feel solid to the touch and cool through to the center. Chilling allows the butter to re firm, which controls spread and preserves the shortbread texture. When you press the log it should give slightly but not indent deeply. If you rush this step the cookies will spread thin and lose their tender, crumbly interior, so be patient and trust the hour to firm things up.
- Preheat oven to 325 degrees Fahrenheit.: Heat until the oven maintains temperature, which ensures even browning. You will notice a warm, dry air when you open the oven; that steady environment is what helps shortbread develop a delicate edge without burning. The moderate temperature favors slow coloring for a golden edge while keeping the centers pale and tender, which is the hallmark of proper shortbread.
- Remove dough from the refrigerator and cut into approximately 18 slices about 3/8" thick. If the dough gets crumbly, let it sit at room temperature for a couple of minutes then try again.: The slices should hold their shape when cut and have clean edges. If they crumble, they are too cold or brittle, so a brief rest softens them just enough to slice cleanly. Pay attention to thickness so all cookies bake uniformly; uneven thickness leads to some cookies being done before others. Use a sharp knife and a gentle sawing motion to prevent smashing.
- Lay about one inch apart on an ungreased cookie sheet.: You should hear a very faint clink as the cookies touch the metal briefly while you place them, and they should sit with space to allow minimal spreading. The one inch spacing is intentional to keep them nearly touching when finished, which preserves edges. Avoid overcrowding the sheet, which creates uneven heat and can produce cookies that bake inconsistently.
- Bake for 15 - 20 minutes, until the edges begin to turn brown.: Use visual cues rather than strict timing, because ovens vary. The aroma will shift from buttery to slightly toasted, and the edges will ginger to a pale golden brown while the centers remain light. Remove closer to 15 minutes for more tender centers, or up to 20 for crisper cookies. A common error is leaving them until the centers darken, which indicates overbake; aim for gentle edge coloring.
- Remove from oven and let sit for a couple of minutes, then transfer to a wire rack to let cool completely.: Letting them rest on the sheet helps them set slightly so they do not fall apart when moved. Then transfer to a wire rack where air circulates, preventing sogginess and ensuring even cooling. You will notice the scent intensify as they cool, and the texture firms to that signature shortbread snap.
- In the bowl of a stand mixer fitted with the whisk attachment, or in a large bowl with a hand mixer, beat the butter on medium speed until creamy, about 30 seconds.: The butter will go from dense to pale and smooth, and a light, airy presence will form. This initial cream creates the base structure for the frosting. If the butter stays lumpy, it may be too cold and will not incorporate the powdered sugar well; let it warm slightly and try again to avoid a gritty frosting.
- Turn the mixer speed to low and slowly pour in the powdered sugar. Once the powdered sugar is incorporated, mix on medium for about 30 seconds.: Slowly adding powdered sugar prevents a cloud of dust and allows it to blend into a stable, silky body. Once combined, the mixture should be smooth and no longer grainy. If it looks dry, a small splash of heavy whipping cream can help, but add sparingly to maintain piping structure.
- Add the vanilla extract, peppermint extract and pinch of salt. Mix for another 30 seconds.: The aroma shifts here as the mint becomes noticeable against the sweet frosting. The pinch of salt sharpens the sweetness and brings clarity. Taste cautiously because extracts can be potent; overdoing the mint can overshadow the shortbread's buttery essence.
- Add the heavy whipping cream and beat on medium until light and white, about three minutes.: As you beat, the frosting will lighten and become nearly fluffy, with a texture perfect for piping. The heavy whipping cream also makes the frosting silky and less dense, which balances the cookie. If the frosting seems too loose, beat a bit longer or add a touch more powdered sugar; if too stiff, a teaspoon of cream loosens it without making it sloppy.
- Place the frosting in a pastry bag (or Ziploc bag - it works) fitted with a star icing tip.: You should feel the frosting glide into the bag and hold its shape, not drip. The star tip creates pretty ridges and helps the frosting mimic the look of a thick shake swirl. Avoid overfilling the bag which makes it hard to control; half full gives the best control and appearance.
- Squeeze the icing onto the cooled shortbread. I start with the outer circle and end at the top.: The frosting should hold a defined shape and look glossy. Start on the outside so you build a neat edge, then work inward in a spiral to create a pleasing mound. A common oversight is piping onto warm cookies, which melts the frosting; always ensure cookies are thoroughly cool to preserve the decorative swirl.
- Top each cookie with a half drained maraschino cherry.: The cherry adds a sweet, slightly tangy contrast and a visual pop of color. Press gently so it nestles into the frosting without sinking. Use the drained halves to avoid excess syrup that can make the frosting run. Placing the cherry while the frosting is still slightly tacky helps it adhere.
- Cookies keep in an airtight container at room temperature for three or four days.: Stored properly, they maintain texture and flavor. You will notice the frosting soften slightly over time but the shortbread should remain tender. If storing longer, refrigerate and let come to room temperature before serving for best texture. A common mistake is stacking without parchment between layers, which causes frosting to stick and mar the decoration.
Notes
- Swap mint intensity Adjust the amount of mint or peppermint extract in either the dough or frosting to make the cookie more subtle or more pronounced depending on your guests preferences.
- Color play Use a touch more green food coloring for a vivid look, but add it sparingly so it does not affect flavor.
- Frosting texture For a lighter frosting, beat an extra minute after adding the heavy whipping cream to incorporate more air and create a fluffier finish.
- Make ahead The dough can be wrapped and frozen for up to one month; thaw in the refrigerator before slicing to preserve structure and ease of cutting.
- Presentation upgrade Pipe a neat star swirl and top with the halved maraschino cherry for a classic, nostalgic presentation that photographs beautifully.