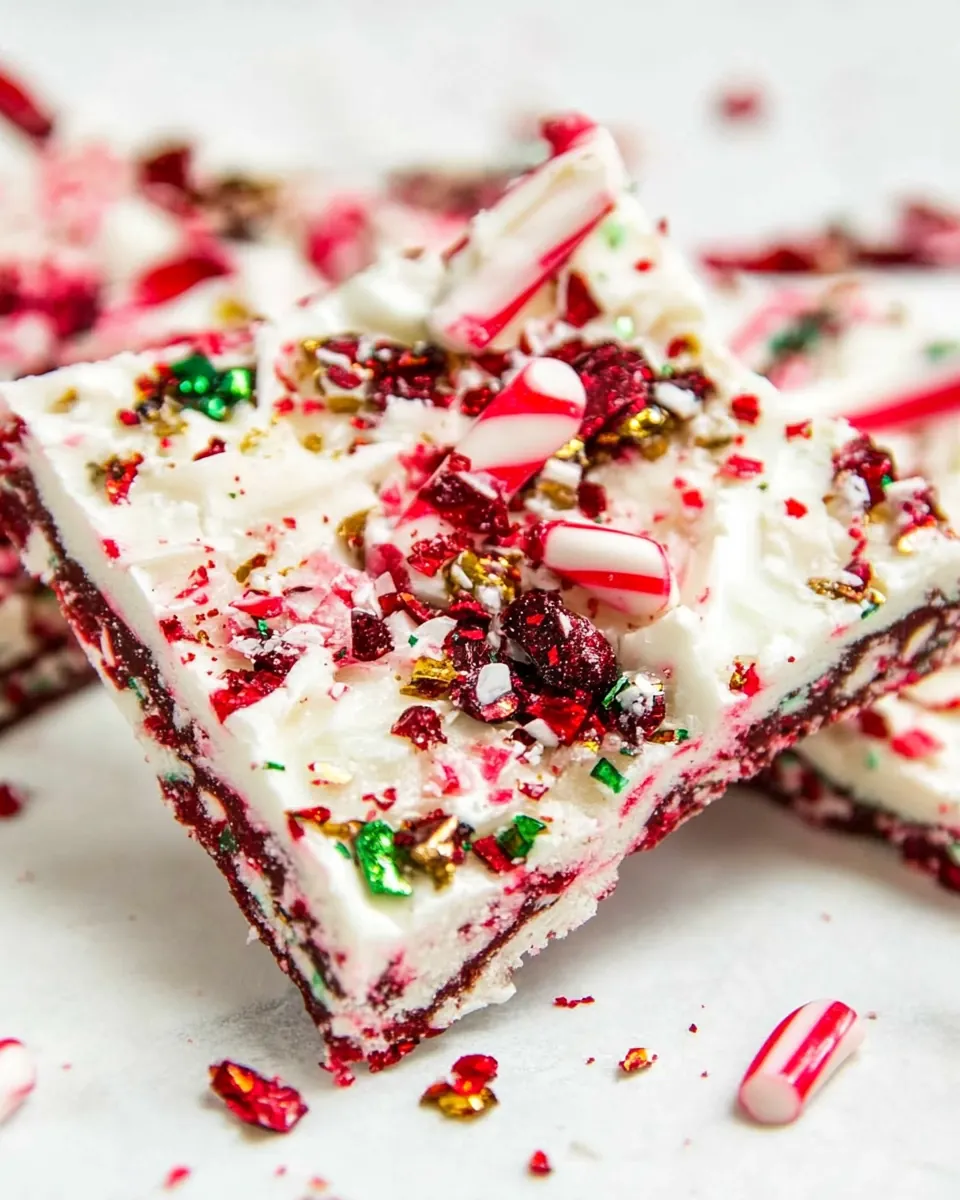
Christmas Candy Cane Bark
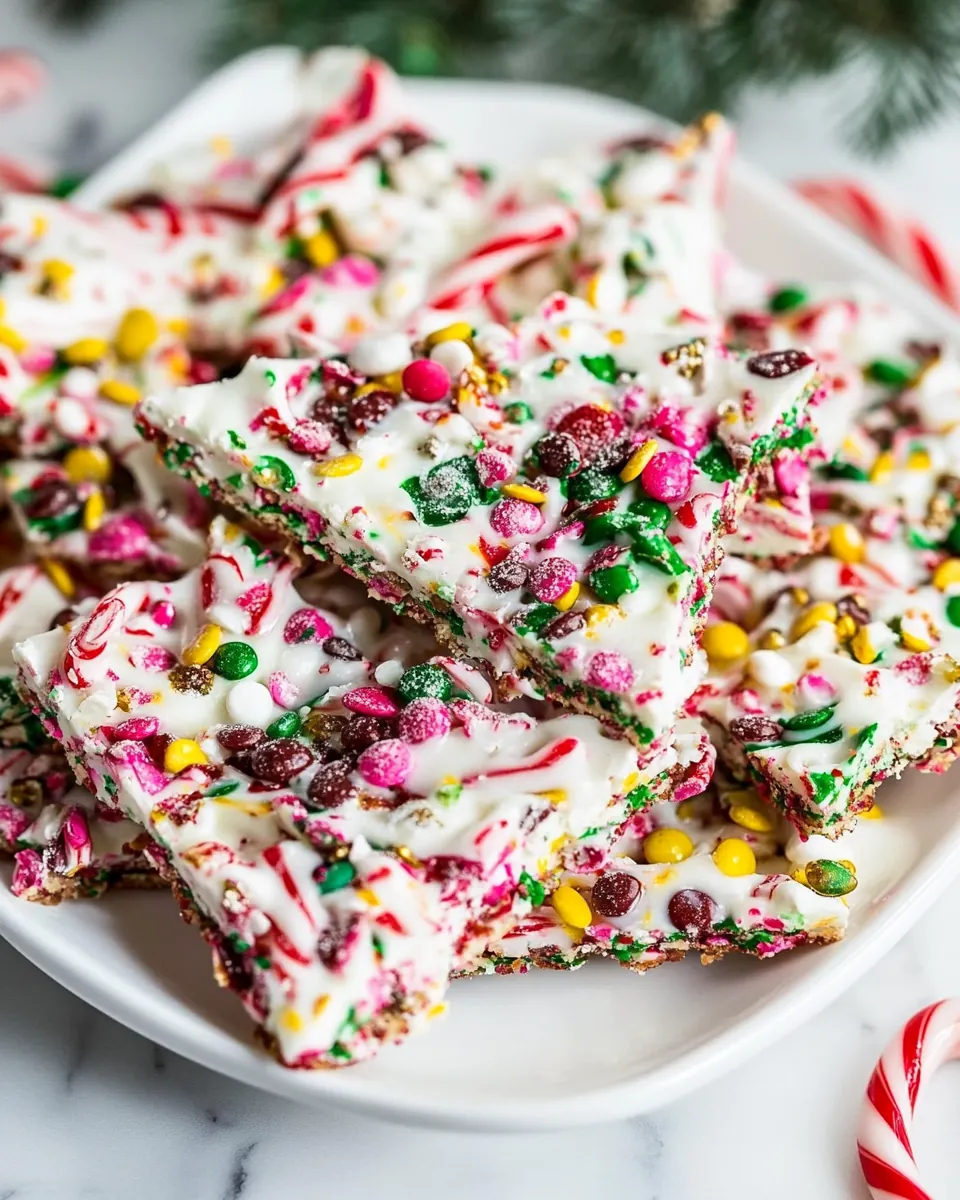
Christmas Candy Cane Bark is the little festive treat I reach for when I want to make something playful, colorful, and impossibly simple for holiday guests. The first time I made it, I was racing the clock between school pickup and a holiday potluck, and this bark became my secret weapon, turning a chaotic afternoon into something that actually looked like I had planned ahead. I loved how the crushed candy canes snapped with a crystalline crunch against the creamy white candy melts, and how the flecks of pistachios added a savory green pop that felt cheerful and seasonal.
I remember my niece’s face lighting up when she saw the swirls of red candy melts and green candy melts pooled like little ornaments on the glossy white base. We giggled as she insisted on placing each sprinkle just so, and that playful moment is exactly why I keep this recipe in my holiday arsenal. It’s fast enough for last minute entertaining, but pretty enough to gift in a cellophane bag. I tend to make an extra sheet because the torn pieces disappear the moment people set them on a cookie plate.
Recipe Snapshot
11 mins
10 mins
1 mins
Medium
150 kcal
American
Vegan, Gluten-Free
Desserts
Aluminum Baking Sheet (2 pack), Parchment Paper, Keep Calm And Bake On Spatula
Why This Christmas Candy Cane Bark Is So Good
Quick to make, big on cheer
I love that Christmas Candy Cane Bark comes together in under an hour, with most of that time spent waiting for the chocolate to set. That means I can assemble it while finishing other holiday tasks, and still have something that looks delightful on the table. The speed makes it perfect for last minute gift trays or impromptu gatherings.
Colorful and customizable
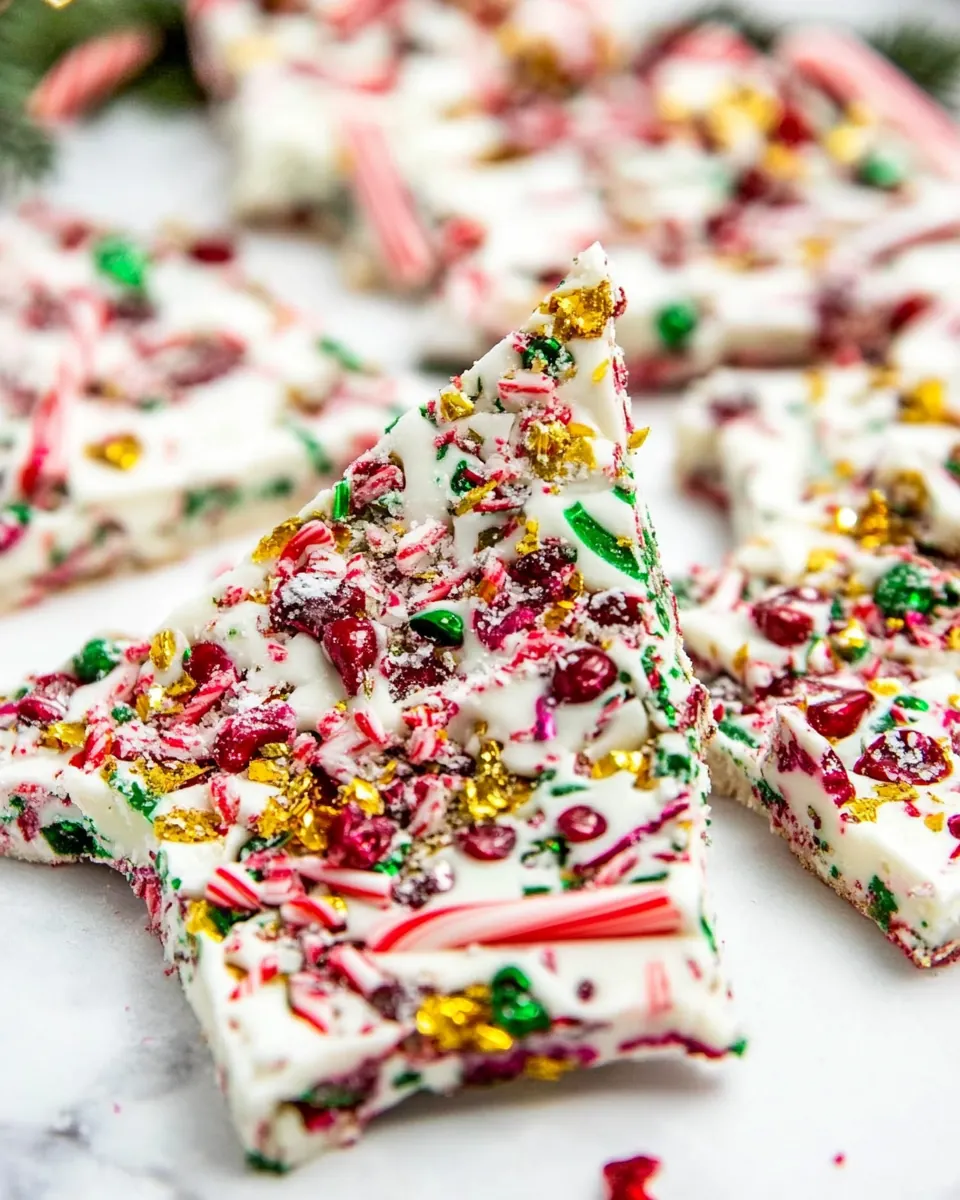
This recipe is a canvas. Using white candy melts, plus pops of red candy melts and green candy melts, you get a classic holiday palette without much effort. Swap the crushed candy cane pieces quantity or scatter more pistachios for extra texture, I often change the pattern depending on who I am gifting it to.
Textural contrast that sings
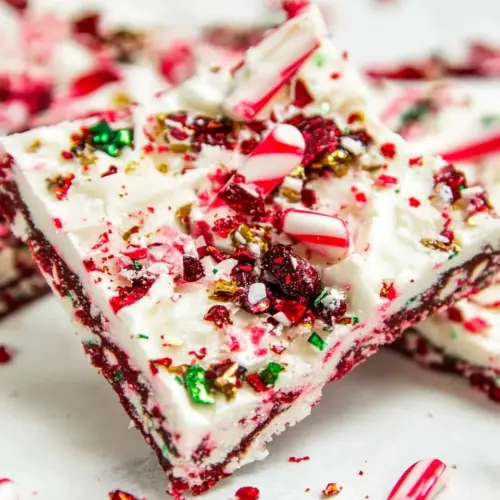
The interplay between the silky melted candy and crunchy toppings is what makes each bite compelling. The crunchy candy cane pieces cut through the sweetness, while the chopped cranberries bring a chewy, tart note that keeps it interesting. I find people keep coming back for one more piece because that contrast is so satisfying.
Family friendly and kid approved
Kids adore creating the swirls, and adults appreciate how presentable it looks with almost no skill required. I let younger helpers spoon the dollops of red candy melts and green candy melts while I handle the heating. The simplicity invites participation, and that collaborative moment becomes part of the memory.
Great for gifting
It stores well, and when wrapped in cellophane or placed in a tin, Christmas Candy Cane Bark becomes a thoughtful homemade gift. I often package it with a handwritten note, and people love receiving something that tastes like the holidays without any fuss.
Ingredients Overview for Christmas Candy Cane Bark
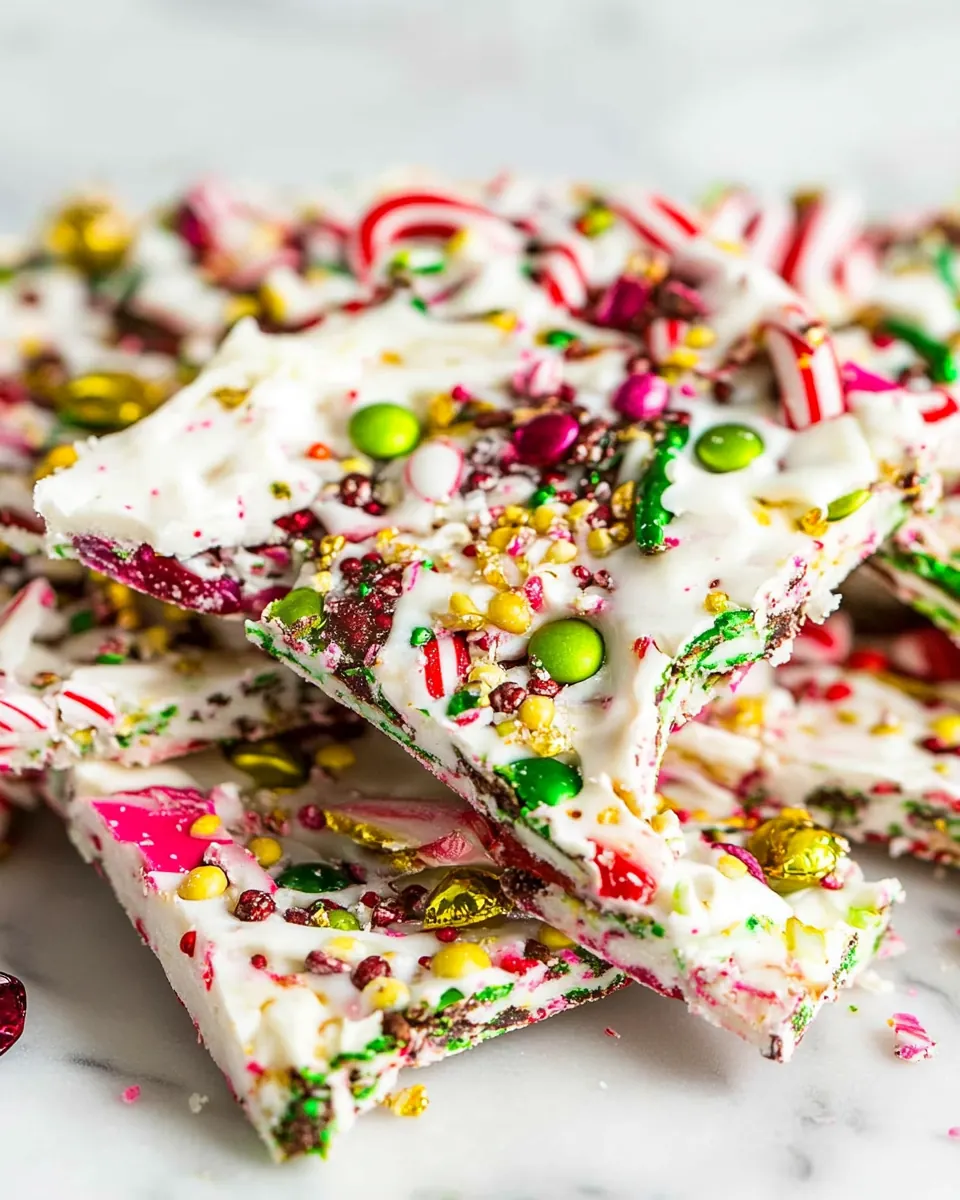
The goal here is bright, festive flavor with a simple ingredient list that works together harmoniously. The bulk of the recipe is the smooth white candy melts which form a neutral, creamy base that carries color and texture. The red candy melts and green candy melts give joyful, swirled color that feels seasonal without altering the overall sweetness. The pistachios and cranberries add savory, nutty, and tart contrasts, while the candy cane pieces provide that classic peppermint crunch that defines this bark.
- 12 ounce white candy melts: Melted and silky, provides the sweet, creamy white base for the bark and helps bind toppings; temper gently to maintain a smooth glossy finish and prevent graininess. Adds sweetness and visual contrast against red and green swirls, making the finished bark look festive and polished.
- 4 ounce red candy melts: Vibrant and smooth, offers concentrated red color and sweet flavor for festive swirls or stripes; melt carefully and spoon or pipe to create candy cane patterns. Enhances visual appeal and balances the white base while contributing a slightly firmer texture when set.
- 4 ounce green candy melts: Bold and colorful, supplies the green accent for holiday-themed swirls or stripes and adds bright contrast to the white base. Melts to a smooth consistency suitable for decorating; use sparingly to control overall sweetness and color intensity.
- 1/4 cup pistachios (chopped): Crunchy and nutty, contributes texture and a mild savory note that contrasts the sweetness of the candy melts; chop uniformly to ensure even distribution across the bark. Adds visual green flecks and enhances mouthfeel, helping to balance the overall flavor profile with a toasty finish.
- 1/4 cup cranberries (dried, chopped): Chewy and tart, provides bursts of cranberry flavor and a chewy counterpoint to the smooth chocolate-like melts; chop into small pieces so they incorporate evenly. Introduces red color specks and a pleasant acidity that cuts through the sweetness for a well-rounded treat.
- 1 ounce candy cane pieces (crushed): Icy and brittle, supplies classic peppermint flavor and crunchy texture when sprinkled on top; crush finely for even coverage and to prevent large shards. Reinforces the candy cane theme and leaves aromatic peppermint notes that brighten each bite.
Directions for Christmas Candy Cane Bark
This recipe is straightforward, but the real results come from careful melting and thoughtful assembly. Take your time melting the candy at lower power, and keep your toppings ready so you can decorate immediately once the base is spread. The following steps walk you through each action with sensory cues and troubleshooting tips.
- Line a 9 x 13 baking sheet with parchment paper.: I love the crisp sound parchment makes as I smooth it into the pan, and it creates a nonstick surface so the bark peels away cleanly. Make sure the sheet lies flat, without folds that can imprint the candy. If the parchment shifts while you pour the melted candy, it can create waves in the surface, so press it into the corners firmly before you begin.
- Place the white candy melts, red candy melts and green candy melts in 3 different microwavable bowls. Microwave the bowl with candy melts for 1 minute at 50% power. Stir, they won’t look melted, but stir anyway. Place back in the microwave for another 30 seconds at 50% power. Stir again. The candy melts should begin to melt. Place back in the microwave and melt for another 30 seconds at 50% power. Stir again until smooth. Repeat if candy melts are not completely melted.: You will notice the smooth plastic glint on the bowls as you set them out, and separating colors prevents cross contamination and dulling of hues. Use shallow bowls so the candy melts heat evenly. A mistake here is crowding too much candy into a small bowl, which leads to uneven melting and hot spots.
- Pour the melted white chocolate onto the prepared baking sheet and spread it evenly with a spatula over the entire baking sheet, leaving a couple inches around the edges.: After the first minute, the surface will look glossy with small pools forming, and there may be unmelted bits that look opaque. Let the bowl rest for a few seconds, then stir to promote even melting. Overheating is the most common error, it can make the candy grainy and clumpy, so always use reduced power and short intervals.
- Spoon a couple tablespoon dollops each of the melted red and green chocolate candy melts, alternating colors, three across and about four rows if you can fit them in.: You will feel the texture change as the warmth softens the candy, and stirring helps residual heat finish the job. The candies will loosen and start to become smooth, but you may still see a few solid pieces. If you skip stirring, pockets of unmelted candy remain, which causes uneven spreading later on.
- Take a skewer stick and swirl the red dollops, spreading them out and do the same with the green dollops.: The second burst often brings the candy closer to a pourable consistency, with a gentle sheen and thicker ribbons when you stir. Use a clean spatula to mix and avoid splashing. If you rush and use full power, the candy can scorch or seize, becoming grainy and unusable.
- Sprinkle the crushed pistachios over the top, then the chopped cranberries and top off by sprinkling the crushed candy cane pieces overtop.: The bowl will begin to release fragrant hints from the added coloring and flavorings, and the movement makes the mixture glossy. Stir until the texture is smooth and runny, but still viscous enough to stay where you place it. Be mindful that overmixing does not harm the candy, but excessive heat does, so keep the microwave time minimal.
- Refrigerate again until cool enough to break the bark into pieces. Should harden pretty quickly, in about 10 to 20 minutes.: Now you will see ribbons of melted candy and a few soft lumps; this is the perfect cue to continue in short intervals. The smell is sweet and slightly buttery, signaling that the candy is nearing readiness. If it looks grainy rather than smooth, stop microwaving and whisk gently to see if it smooths out, otherwise return in very short bursts.
- Place back in the microwave and melt for another 30 seconds at 50% power: By this point the candy should be mostly fluid, with a shiny, uniform surface when stirred. If a couple stubborn bits remain, chop them with your spatula and gently warm again. The biggest mistake is overheating to force complete melting in one blast, which can ruin the glossy finish.
- Stir again until smooth: A smooth, luscious flow is what you want for easy spreading and pretty swirls. Use long strokes with your spatula to incorporate all lumps, and watch for a satin sheen that indicates proper melting. If the mixture starts to look matte or crystallized, it may have overheated previously and could set with a grainy bite.
- Repeat if candy melts are not completely melted: Patience pays here, and repeating short heat-and-stir cycles will preserve texture. The candy should never be aggressively hot to the touch, only pleasantly warm and spreadable. If you try to rush it, the result can be seized candy which becomes thick and unpleasant to spread.
- Pour the melted white chocolate onto the prepared baking sheet and spread it evenly with a spatula over the entire baking sheet, leaving a couple inches around the edges: As you pour, you will hear a quiet settling sound, and the glossy white will flow like cream across the parchment. Use a firm, flat spatula to coax it into an even layer, looking for uniform thickness so pieces break consistently. Leaving space around the edges prevents overflow, and if you press too hard you can create ridges that will show up in the finished bark.
- Spoon a couple tablespoon dollops each of the melted red and green chocolate candy melts, alternating colors, three across and about four rows if you can fit them in: The contrast of bright red and green dollops against the white is visually striking, and arranging them in rows helps achieve a patterned swirl. Use the back of a spoon to form tidy dollops, and place them promptly before the white starts to cool and set. If the base has already stiffened, your dollops will sit unevenly and resist swirling properly.
- Take a skewer stick and swirl the red dollops, spreading them out and do the same with the green dollops: The motion creates marbled ribbons of color, and you will see thin veins of red and green weave through the white base. Work gently so the colors mingle without mixing into brownish streaks, and aim for graceful arcs rather than frantic scribbles. Overworking the surface can muddy the colors, so stop when you like the pattern.
- Sprinkle the crushed pistachios over the top, then the chopped cranberries and top off by sprinkling the crushed candy cane pieces overtop: This is where texture comes alive, with the nutty crunch, chewy fruit, and peppermint shards combining into festive bites. Scatter evenly so every piece gets a little of each topping, pressing lightly so toppings adhere but do not sink. A common misstep is waiting too long to add toppings, which can prevent them from sticking properly.
- Refrigerate again until cool enough to break the bark into pieces: Place the sheet in the fridge and listen for the quiet hum as the candy firms. It should harden in about 10 to 20 minutes; you want it set through but not cold to the point of condensation when removed. If you leave it too long in a humid fridge, moisture can form, so pop it into an airtight container soon after breaking to preserve texture.
Recipe Notes about Christmas Candy Cane Bark
This treat is forgiving, but a few focused tips help you get a polished result every time. Below are practical pointers that expand on the basics and prevent common mistakes.
- Melting power matters, always microwave at reduced power in short intervals to maintain a glossy finish rather than a grainy texture.
- Separate bowls for colors, keep each color in its own bowl to preserve vibrant hues and avoid accidental color blending.
- Prepare toppings ahead, have pistachios, cranberries, and crushed candy cane ready so you can sprinkle immediately once the base is spread.
- Work quickly when swirling, the white base firms as it cools, so create your swirls while the surface is still soft and glossy.
- Storage, keep finished bark in an airtight container with layers separated by parchment, and it will remain fresh for a couple weeks.
Serving Ideas for Christmas Candy Cane Bark
I like to present this bark on holiday cookie platters, tucked into gift boxes, or as part of a dessert buffet. Its bright colors and crunchy texture make it versatile for parties and gifting. Below are detailed serving suggestions, pairings, and storage ideas to make the most of this festive treat.
- Cookie platters, arrange broken pieces alongside shortbread and chocolate chip cookies for a colorful contrast that brightens the plate and offers peppermint variety to guests.
- Gift packs, place bark pieces into cellophane bags tied with ribbon for an easy homemade present, ideal for neighbors, teachers, or coworkers during the holiday season.
- Party favors, portion small handfuls into mini boxes or tins for events like office parties or classroom exchanges, labeling them with a festive tag.
- Holiday dessert table, include the bark as a crunchy element among softer desserts, balancing textures so guests can alternate between chewy pies and crisp candy bark.
- Storage and freshness, store in an airtight container at room temperature for short term, or refrigerate for longer storage, separating layers with parchment to maintain crispness.
- Occasion pairing, this fits perfectly for Christmas gatherings, winter cookie swaps, or anytime you need a quick, seasonal candy to brighten a holiday spread.
FAQ
Conclusion
This recipe stands out for its festive look, simple technique, and playful textures that capture the spirit of the season. Try making Christmas Candy Cane Bark when you want a quick, shareable treat that looks homemade and thoughtful. It’s a great way to involve family in a hands on activity, and the finished pieces travel well as gifts or party contributions. Pull out those candy melts, set up a small assembly station, and enjoy how a few colorful ingredients transform into a crowd pleasing confection.
Christmas Candy Cane Bark
Equipment
- Aluminum Baking Sheet (2 pack)
- Parchment Paper
- Keep Calm And Bake On Spatula
Ingredients
- 12 ounce white candy melts Melted and silky, provides the sweet, creamy white base for the bark and helps bind toppings; temper gently to maintain a smooth glossy finish and prevent graininess. Adds sweetness and visual contrast against red and green swirls, making the finished bark look festive and polished.
- 4 ounce red candy melts Vibrant and smooth, offers concentrated red color and sweet flavor for festive swirls or stripes; melt carefully and spoon or pipe to create candy cane patterns. Enhances visual appeal and balances the white base while contributing a slightly firmer texture when set.
- 4 ounce green candy melts Bold and colorful, supplies the green accent for holiday-themed swirls or stripes and adds bright contrast to the white base. Melts to a smooth consistency suitable for decorating; use sparingly to control overall sweetness and color intensity.
- 1/4 cup pistachios (chopped) Crunchy and nutty, contributes texture and a mild savory note that contrasts the sweetness of the candy melts; chop uniformly to ensure even distribution across the bark. Adds visual green flecks and enhances mouthfeel, helping to balance the overall flavor profile with a toasty finish.
- 1/4 cup cranberries (dried, chopped) Chewy and tart, provides bursts of cranberry flavor and a chewy counterpoint to the smooth chocolate-like melts; chop into small pieces so they incorporate evenly. Introduces red color specks and a pleasant acidity that cuts through the sweetness for a well-rounded treat.
- 1 ounce candy cane pieces (crushed) Icy and brittle, supplies classic peppermint flavor and crunchy texture when sprinkled on top; crush finely for even coverage and to prevent large shards. Reinforces the candy cane theme and leaves aromatic peppermint notes that brighten each bite.
Instructions
- Line a 9 x 13 baking sheet with parchment paper.: I love the crisp sound parchment makes as I smooth it into the pan, and it creates a nonstick surface so the bark peels away cleanly. Make sure the sheet lies flat, without folds that can imprint the candy. If the parchment shifts while you pour the melted candy, it can create waves in the surface, so press it into the corners firmly before you begin.
- Place the white candy melts, red candy melts and green candy melts in 3 different microwavable bowls. Microwave the bowl with candy melts for 1 minute at 50% power. Stir, they won’t look melted, but stir anyway. Place back in the microwave for another 30 seconds at 50% power. Stir again. The candy melts should begin to melt. Place back in the microwave and melt for another 30 seconds at 50% power. Stir again until smooth. Repeat if candy melts are not completely melted.: You will notice the smooth plastic glint on the bowls as you set them out, and separating colors prevents cross contamination and dulling of hues. Use shallow bowls so the candy melts heat evenly. A mistake here is crowding too much candy into a small bowl, which leads to uneven melting and hot spots.
- Pour the melted white chocolate onto the prepared baking sheet and spread it evenly with a spatula over the entire baking sheet, leaving a couple inches around the edges.: After the first minute, the surface will look glossy with small pools forming, and there may be unmelted bits that look opaque. Let the bowl rest for a few seconds, then stir to promote even melting. Overheating is the most common error, it can make the candy grainy and clumpy, so always use reduced power and short intervals.
- Spoon a couple tablespoon dollops each of the melted red and green chocolate candy melts, alternating colors, three across and about four rows if you can fit them in.: You will feel the texture change as the warmth softens the candy, and stirring helps residual heat finish the job. The candies will loosen and start to become smooth, but you may still see a few solid pieces. If you skip stirring, pockets of unmelted candy remain, which causes uneven spreading later on.
- Take a skewer stick and swirl the red dollops, spreading them out and do the same with the green dollops.: The second burst often brings the candy closer to a pourable consistency, with a gentle sheen and thicker ribbons when you stir. Use a clean spatula to mix and avoid splashing. If you rush and use full power, the candy can scorch or seize, becoming grainy and unusable.
- Sprinkle the crushed pistachios over the top, then the chopped cranberries and top off by sprinkling the crushed candy cane pieces overtop.: The bowl will begin to release fragrant hints from the added coloring and flavorings, and the movement makes the mixture glossy. Stir until the texture is smooth and runny, but still viscous enough to stay where you place it. Be mindful that overmixing does not harm the candy, but excessive heat does, so keep the microwave time minimal.
- Refrigerate again until cool enough to break the bark into pieces. Should harden pretty quickly, in about 10 to 20 minutes.: Now you will see ribbons of melted candy and a few soft lumps; this is the perfect cue to continue in short intervals. The smell is sweet and slightly buttery, signaling that the candy is nearing readiness. If it looks grainy rather than smooth, stop microwaving and whisk gently to see if it smooths out, otherwise return in very short bursts.
- Place back in the microwave and melt for another 30 seconds at 50% power: By this point the candy should be mostly fluid, with a shiny, uniform surface when stirred. If a couple stubborn bits remain, chop them with your spatula and gently warm again. The biggest mistake is overheating to force complete melting in one blast, which can ruin the glossy finish.
- Stir again until smooth: A smooth, luscious flow is what you want for easy spreading and pretty swirls. Use long strokes with your spatula to incorporate all lumps, and watch for a satin sheen that indicates proper melting. If the mixture starts to look matte or crystallized, it may have overheated previously and could set with a grainy bite.
- Repeat if candy melts are not completely melted: Patience pays here, and repeating short heat-and-stir cycles will preserve texture. The candy should never be aggressively hot to the touch, only pleasantly warm and spreadable. If you try to rush it, the result can be seized candy which becomes thick and unpleasant to spread.
- Pour the melted white chocolate onto the prepared baking sheet and spread it evenly with a spatula over the entire baking sheet, leaving a couple inches around the edges: As you pour, you will hear a quiet settling sound, and the glossy white will flow like cream across the parchment. Use a firm, flat spatula to coax it into an even layer, looking for uniform thickness so pieces break consistently. Leaving space around the edges prevents overflow, and if you press too hard you can create ridges that will show up in the finished bark.
- Spoon a couple tablespoon dollops each of the melted red and green chocolate candy melts, alternating colors, three across and about four rows if you can fit them in: The contrast of bright red and green dollops against the white is visually striking, and arranging them in rows helps achieve a patterned swirl. Use the back of a spoon to form tidy dollops, and place them promptly before the white starts to cool and set. If the base has already stiffened, your dollops will sit unevenly and resist swirling properly.
- Take a skewer stick and swirl the red dollops, spreading them out and do the same with the green dollops: The motion creates marbled ribbons of color, and you will see thin veins of red and green weave through the white base. Work gently so the colors mingle without mixing into brownish streaks, and aim for graceful arcs rather than frantic scribbles. Overworking the surface can muddy the colors, so stop when you like the pattern.
- Sprinkle the crushed pistachios over the top, then the chopped cranberries and top off by sprinkling the crushed candy cane pieces overtop: This is where texture comes alive, with the nutty crunch, chewy fruit, and peppermint shards combining into festive bites. Scatter evenly so every piece gets a little of each topping, pressing lightly so toppings adhere but do not sink. A common misstep is waiting too long to add toppings, which can prevent them from sticking properly.
- Refrigerate again until cool enough to break the bark into pieces: Place the sheet in the fridge and listen for the quiet hum as the candy firms. It should harden in about 10 to 20 minutes; you want it set through but not cold to the point of condensation when removed. If you leave it too long in a humid fridge, moisture can form, so pop it into an airtight container soon after breaking to preserve texture.
Notes
- Melting power matters, always microwave at reduced power in short intervals to maintain a glossy finish rather than a grainy texture.
- Separate bowls for colors, keep each color in its own bowl to preserve vibrant hues and avoid accidental color blending.
- Prepare toppings ahead, have pistachios, cranberries, and crushed candy cane ready so you can sprinkle immediately once the base is spread.
- Work quickly when swirling, the white base firms as it cools, so create your swirls while the surface is still soft and glossy.
- Storage, keep finished bark in an airtight container with layers separated by parchment, and it will remain fresh for a couple weeks.