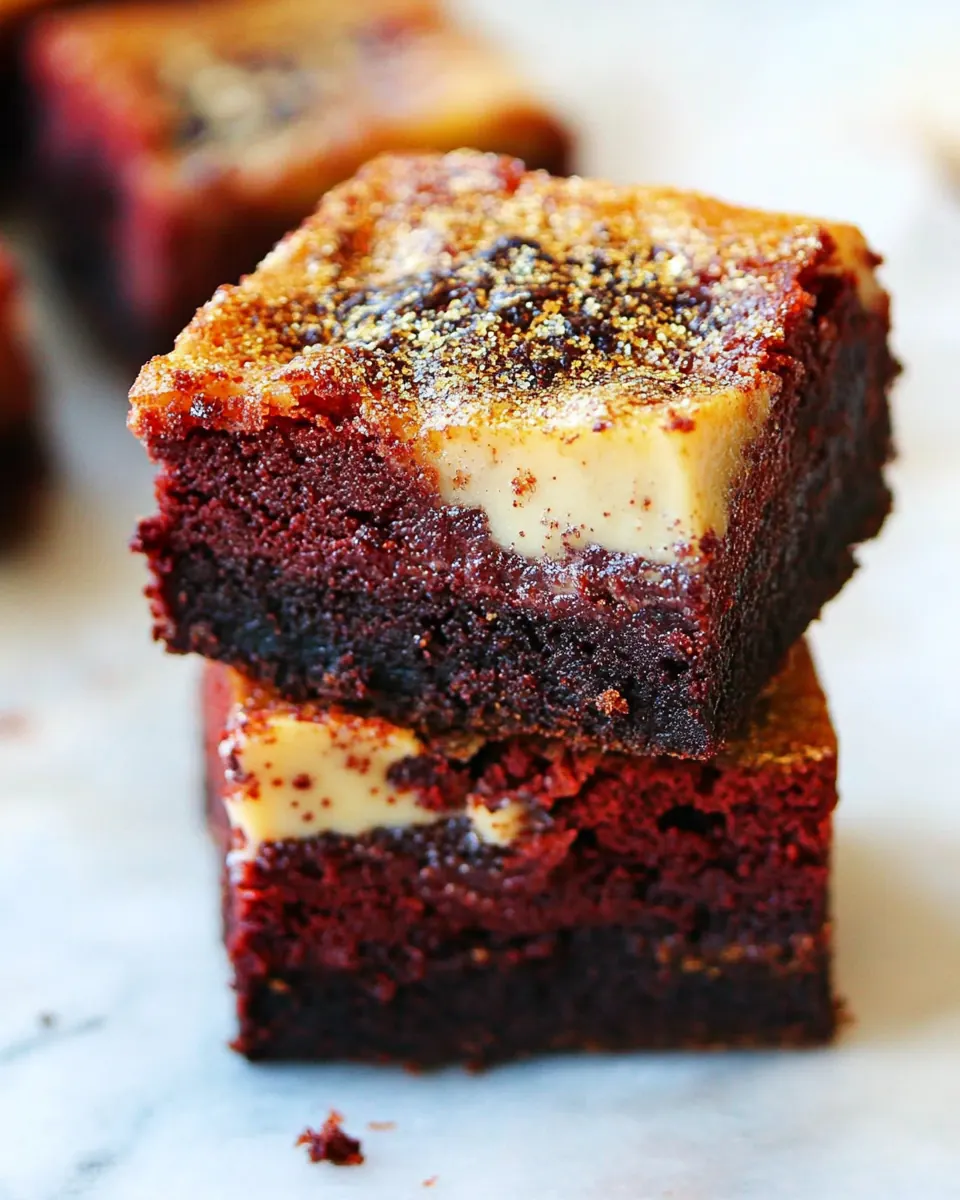
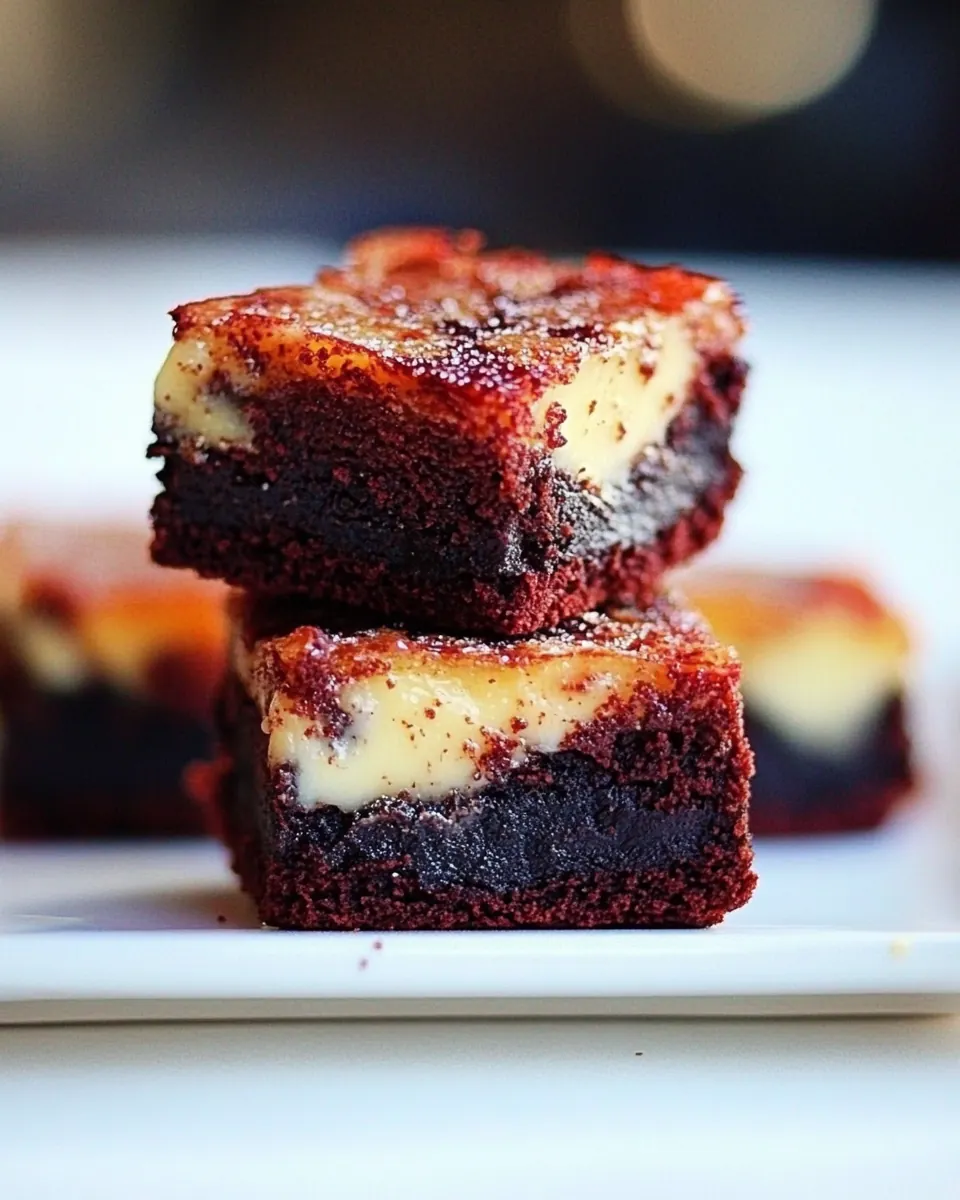
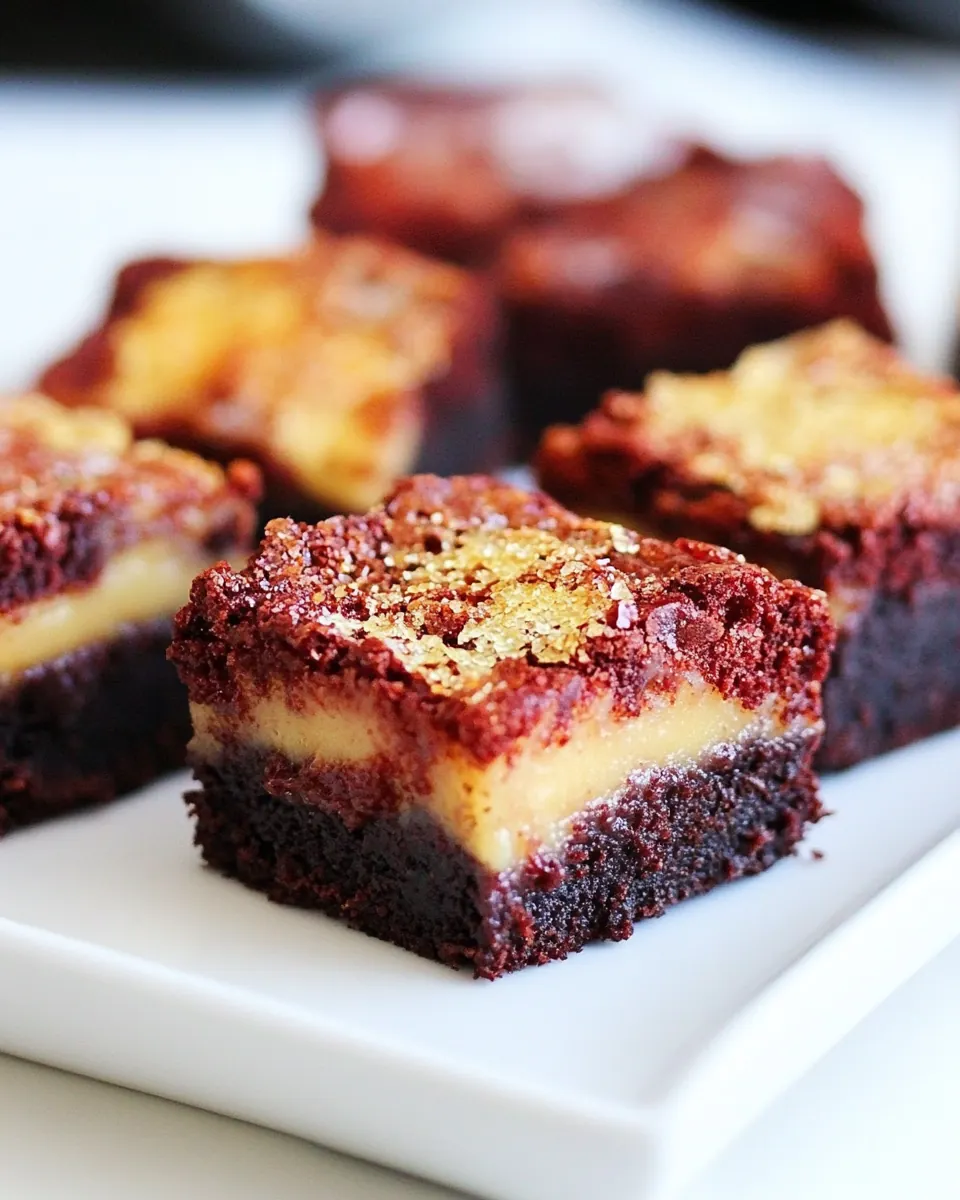
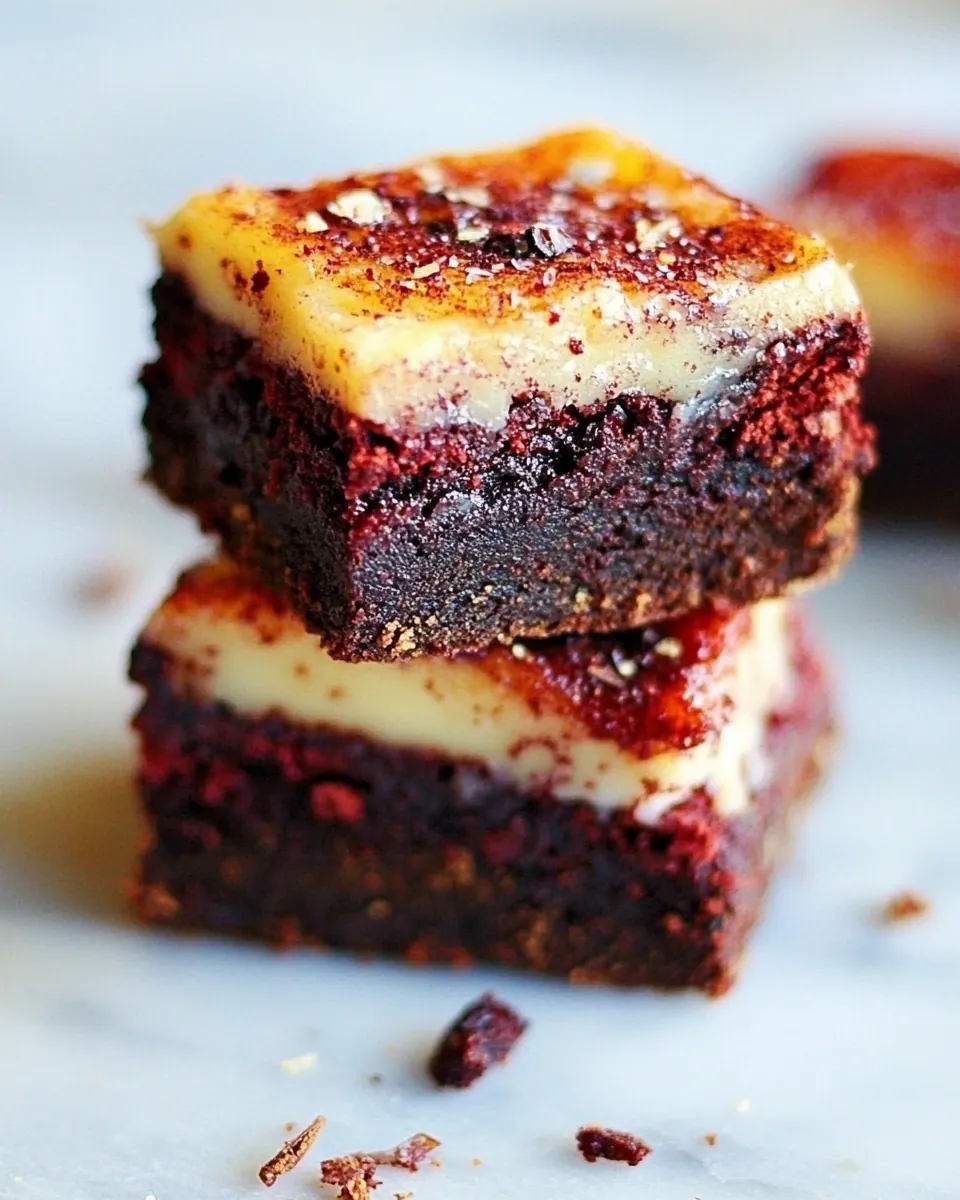
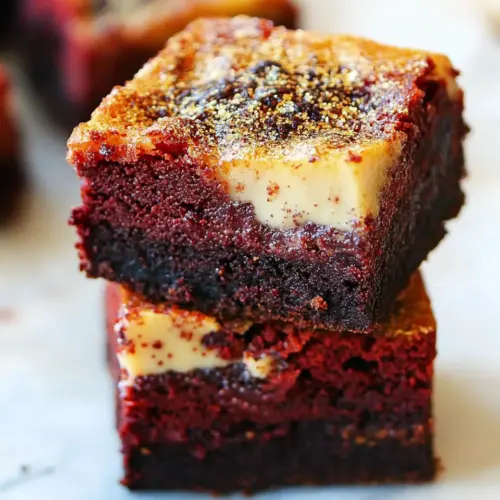
Red Velvet Creme Brulee Brownies
Red Velvet Creme Brulee Brownies popped onto my holiday baking list the first time I wanted something that felt both nostalgic and showy. I remember testing the first batch on a chilly evening, humming along to a playlist while the kitchen filled with a warm, caramel note from the custard and the faint cocoa whisper from the brownie base. This recipe has a way of turning a simple dessert into a small celebration, and I find myself reaching for it when I want to impress without fussing.
When I make Red Velvet Creme Brulee Brownies I like to treat the process like a slow conversation with the oven and the stovetop. The brownie layer is dense and chocolate forward, while the creme brulee layer brings a lusciously smooth contrast, finished with that spectacular glassy caramel crackle. Friends often ask how I get the custard silky and the sugar crust perfectly brittle, and I always smile because the secret is gentle heat and patience. Over time I adjusted a few steps, and now the recipe reliably produces the split personality I love, where each bite gives you chewy brownie, creamy custard, and a satisfying crisp.
Recipe Snapshot
1 hr 15 mins
30 mins
45 mins
Medium
300 kcal
American
Gluten-Free, Low FODMAP
Desserts
Mixer, Wire attachment, Spatula, Saucepan, Torch, 8 x 11 inch pan, Parchment paper
The Beauty of This Red Velvet Creme Brulee Brownies
Contrast of Textures
I adore how Red Velvet Creme Brulee Brownies marry two distinct textures in one bar. The dense, fudgy brownie base anchors each bite, while the custardy top melts on your tongue. I always mention to guests that this interplay is what makes the dessert linger in memory, because you get chewy, creamy, and crunchy in sequence.
Showstopping Finish
The caramelized sugar crown is theatrical without being fussy. I love torching the sugar at the table, watching it transform into a thin, glassy shell. It adds drama, and the crack when you slice into it feels like a small reward for patience.
Customizable Color and Flavor
I often tweak the intensity of the red with red gel food coloring, dialing it up or down depending on the occasion. The vanilla bean in the custard gives aromatic depth, and you can sense those tiny black specks as a mark of care. This recipe is flexible enough to suit holidays, birthdays, or an elegant weekend dessert.
Make Ahead Friendly
I appreciate that you can bake this ahead and chill it overnight. The flavors settle and the custard firms, making slicing neater and service smoother. For gatherings I bake the day before, chill, then bring it to room temperature before torching the sugar so the top crisps without shocking the custard.
Balanced Sweetness
What keeps me coming back is how the dessert avoids cloying sweetness. The granulated sugar for the topping gives a bright, clean crunch, and the custard uses a measured amount of sugar so it complements the rich brownie base instead of competing with it. I find that balance keeps each bite interesting and never overwhelmingly sweet.
What You’ll Need for Red Velvet Creme Brulee Brownies
These ingredients are chosen to create a rich, layered dessert where each component plays a clear role. The brownie items provide structure and chocolate depth, the vanilla bean and heavy cream elevate the custard into something aromatic and silky, and the sugars are split between sweetening and producing that signature caramelized top. Together they form a team that balances texture, flavor, and visual appeal.
- 4 large eggs: Whisk vigorously to incorporate air and provide structure, stability, and richness to the brownie batter while helping set the custard component during baking.
- 2 cups sugar: Sweeten evenly and help create a tender crumb; sugar also aids in caramelization of the brulee topping and balances cocoa bitterness in the brownie layer.
- 2 sticks melted butter 8 oz sticks: Melt thoroughly to add moistness, tender texture, and a rich butter flavor; melted butter also helps dissolve sugar and bind dry ingredients for a fudgy brownie.
- 1 cup cocoa sifted: Sift finely to prevent lumps and contribute deep chocolate flavor and color; cocoa assists in balancing the red hue and adds bitter complexity to the dessert.
- 2 vanilla beans seeds only: Scrape seeds carefully to deliver pure vanilla aroma and concentrated flavor; the seeds infuse the batter with warm, floral notes without adding liquid.
- 1 1/2 cups flour sifted: Sift to ensure lightness and even distribution, providing structure and chew while preventing dense pockets; flour also thickens the batter for proper rise and texture.
- 1/2 teaspoon kosher salt: Season sparingly to enhance overall flavors and balance sweetness; kosher salt strengthens chocolate notes and rounds out the dessert profile.
- red gel food coloring: Add judiciously to achieve vivid color without affecting batter consistency; concentrated gel coloring provides bright red appearance traditional to red velvet.
- 2 cups heavy cream: Heat gently to create a rich, silky custard base and add creaminess to the creme brulee layer; heavy cream also carries vanilla flavor and produces a smooth texture when set.
- 2 vanilla bean split and scraped: Split and scrape to extract fragrant seeds and infuse the cream with intense vanilla; the split pod can be steeped to deepen aroma during gentle heating.
- 1/2 cup granulated sugar + 1/2 cup more for garnish: Dissolve into the custard mixture and sprinkle for caramelization; granulated sugar sweetens the custard and provides the crunchy brulee surface when torched.
- 3 egg yolks: Whisk until smooth and glossy to thicken and enrich the custard; egg yolks add silkiness, emulsify the cream, and help the creme brulee set with a tender custard.
Step by Step Instructions for Red Velvet Creme Brulee Brownies
This recipe merges two classic techniques, so take your time and enjoy the process. I break it into clear stages so you can focus on texture at each turn, and so the sensory cues will guide you. With practice you will recognize the right visual and tactile signs that mean success.
- Place parchment paper in an 11 x 8 inch pan or an 8 inch baking pan so it covers the bottom and 2 sides (to facilitate the brownie removal). Butter the pan and set aside.: The parchment creates an easy release and protects the pan, which is especially helpful after the custard sets. You should feel the slickness of the paper under your fingers as you press it into the corners, and visually the pan will look neat and lined. Doing this step makes slicing and serving much cleaner. If you skip greasing lightly, the paper may shift when you pour batter, so make sure to butter the pan first to anchor the parchment.
- In a mixer fitted with the wire attachment, beat the eggs at medium speed until fluffy and light yellow, add the sugar and beat until combined. Add remaining ingredients, and mix to combine.: As the mixer works, you will notice the eggs grow paler and fluffier, and the sugar will dissolve into a glossy mixture. The sound softens as air is incorporated, and the batter's texture turns smooth. This step builds structure so the base is cohesive after baking, giving the final bars a tender crumb. A common error is rushing this stage, leaving the eggs under aerated which results in a denser brownie .
- Add red gel food coloring as much as you need, until you achieve the red hue that you like.: Gel color is concentrated so you should add it sparingly, stirring and observing the hue shift as you go. The visual cue is key here, aim for a saturated but not artificial shade, and remember that baking slightly deepens color. If you dump too much at once you may overcolor, and because gels are intense it is difficult to reverse, so proceed cautiously.
- Pour the batter into the pan, smooth the top with a spatula and pop it into the freezer for about one hour.: The batter will settle level and the chill firms the surface, helping the custard layer sit evenly on top. While in the freezer the batter becomes cold and slightly more solid to the touch, which reduces mixing between layers later. Avoid skipping this chill, because a warm batter can blend with the custard and ruin the clean stratification you want.
- Preheat oven to 325 degrees F.: Preheating ensures even baking and the correct rise for the brownie base and the creme brulee top. You should hear the oven cycle and see the set temperature on the dial or digital display. If you place the pan in a not fully heated oven the custard may take longer to set and texture can suffer, so wait until the oven registers the proper temperature.
- Add the cream, vanilla bean and its seeds to a medium saucepan that is set over medium heat and bring to a boil, stirring occasionally. Once the mixture is boiling, remove the saucepan from heat, cover with a lid and allow sitting for 15 minutes. Remove the vanilla bean and discard.: As the cream warms you will smell the rich aroma of vanilla bean blooming, and tiny flecks will be visible from the seeds. Bringing it to a boil then steeping extracts maximum flavor gently. Leaving the pod in contact while cooling infuses more complexity; however do remove the pod before continuing so it does not create bitter notes in the custard.
- In the bowl of an electric mixer fitted with the wire attachment, whisk together on medium-high speed the sugar and the egg yolks until well combined, the mixture must start to lighten in color and become fluffy. Scrape the sides of the bowl with a spatula as needed.: The yolks will transform into a pale, aerated ribbon, which contributes to a silky custard texture. Listen for the mixer change in tone as the mixture thickens, and scrape to ensure even aeration. Failing to lighten the yolks sufficiently can make the custard thin and less set, so be patient with this step.
- Whisk in the cream, adding it slowly, a little at a time. Stop the mixer, scrape the sides of the bowl and mix again on medium-low speed for a few seconds to make sure that the mixture is well blended.: Tempering with slow additions prevents the yolks from cooking and ensures a smooth custard. As you pour, you may detect a warm steam and a richer aroma; stop frequently to scrape to incorporate any thicker pockets. If you rush and pour all the cream at once you risk curdling the yolks which yields a grainy custard.
- Carefully and slowly pour the mixture over the brownie layer.: Pour evenly so the custard settles into a uniform layer across the chilled brownie base, watching as it spreads in a glossy sheet. The visual should be of a smooth, pale surface covering the red base. Pouring too quickly can cause the custard to dive into the brownie and create an uneven finish, so take your time.
- Bake just until the creme brûlée is set, but still slightly trembling in the center, about 40-45 minutes.: During baking the edges will firm and the center will develop a gentle wobble that signals a perfectly set custard with a tender interior. You may observe a faint puff and a golden edge on the brownie beneath. Overbaking removes the custard's silk and makes it dry, so test gently and pull when the center still quivers.
- Remove from oven and let it cool to room temperature, after that refrigerate for at least 2 hours.: Cooling at room temperature lets residual heat settle, then chilling finishes the set and simplifies slicing. You will notice the custard firming and the aroma mellowing into a balanced scent. If you skip refrigeration the custard may remain too soft and ingredients can weep when sliced.
- The red velvet creme brûlée brownie must be removed from the refrigerator 30 minutes prior to browning the sugar on top.: Bringing it closer to room temperature slightly softens the custard, reducing the temperature gap when you torch the sugar so the custard does not crack. The surface will look matte when it is chilled and become smoother as it warms. If you torch while it is ice cold you risk uneven caramelization and potential cracking of the custard below.
- Before serving sprinkle with the remaining sugar and using a torch, melt the sugar to form a crispy top. Let sit for at least 5 minutes before serving.: The sugar will transform under the flame into a thin, glassy shell that crackles delightfully when sliced. You should hear small popping and see the sugar flow into amber beads as it melts, then harden within minutes. Give the caramel time to cool and set; slicing too soon will smear the topping and collapse the texture.
Tips for Success
I like to think of these tips as small habits that add up to a reliable, elegant dessert. A little attention at each stage prevents common pitfalls and elevates the final presentation. Below I expand practical pointers I use every time I bake Red Velvet Creme Brulee Brownies.
- Measure accurately: Use a scale or careful measuring cups so the balance between flour and cocoa remains consistent, which affects texture and bake time.
- Temper thoughtfully: Add the warm cream slowly to the whisked yolks to keep the custard glossy and prevent curdling which causes grainy texture.
- Chill before custard: Freezing the baked base briefly firms it, helping the custard form a clean top layer without sinking into the brown base.
- Watch your oven: Ovens vary, so check at 35 minutes and look for a slight tremble in the center rather than relying solely on time.
- Even sugar layer: For a uniform crackle, sprinkle the topping sugar evenly and torch from a consistent distance until the surface liquefies and then hardens.
- Use beans for aroma: Real vanilla bean elevates the custard aroma; scrape thoroughly to extract all seeds for the fullest flavor.
Serve This Red Velvet Creme Brulee Brownies With
These bars are decadent enough to be the centerpiece of a dessert course, yet portable for parties or special occasions. I often plan accompaniments that complement the creamy custard and crisp sugar top. Below are serving ideas, pairings, and practical storage tips presented as helpful options for many occasions.
- Simple plating: Serve a single bar at room temperature with the caramelized top intact, garnish if desired, and let each guest crack the top for theater.
- Occasions: Ideal for holidays like Valentine’s Day, anniversaries, and dinner parties where a rich, shareable dessert is appropriate.
- Portioning: Warm slightly before torching so slices come out clean, then let them rest five minutes to allow the sugar crust to stabilize for neat presentation.
- Storage: Keep refrigerated between sessions, covered to prevent absorbing odors; the tartness of chilled custard pairs well with a short rest out of the fridge before serving.
- Serve styles: Offer small forks for tasting portions or plate alongside a light fruit compote if you want a bright counterpoint to the richness.
- Seasonal pairing: In cooler months offer warm spices in the coffee service, while in warmer weather a lightly brewed iced tea balances the dessert’s density.
FAQ
Conclusion
These Red Velvet Creme Brulee Brownies stand out because they combine a fudgy, cocoa rich base with a luxuriously smooth custard and a crisp caramel top, giving you three complementary textures in one elegant dessert. Give it a try when you want a dessert that feels celebratory but is surprisingly manageable, especially when you prepare parts ahead of time. Embrace the small rituals here tempered cooling, slow tempering, and patient caramelizing and you will be rewarded with a show stopping treat that guests remember and ask for again.
Red Velvet Creme Brulee Brownies
Equipment
- Mixer
- Wire attachment
- Spatula
- Saucepan
- Torch
- 8 x 11 inch pan
- Parchment Paper
Ingredients
- 4 large eggs Whisk vigorously to incorporate air and provide structure, stability, and richness to the brownie batter while helping set the custard component during baking.
- 2 cups sugar Sweeten evenly and help create a tender crumb; sugar also aids in caramelization of the brulee topping and balances cocoa bitterness in the brownie layer.
- 2 sticks melted butter 8 oz sticks Melt thoroughly to add moistness, tender texture, and a rich butter flavor; melted butter also helps dissolve sugar and bind dry ingredients for a fudgy brownie.
- 1 cup cocoa sifted Sift finely to prevent lumps and contribute deep chocolate flavor and color; cocoa assists in balancing the red hue and adds bitter complexity to the dessert.
- 2 vanilla beans seeds only Scrape seeds carefully to deliver pure vanilla aroma and concentrated flavor; the seeds infuse the batter with warm, floral notes without adding liquid.
- 1 1/2 cups flour sifted Sift to ensure lightness and even distribution, providing structure and chew while preventing dense pockets; flour also thickens the batter for proper rise and texture.
- 1/2 teaspoon kosher salt Season sparingly to enhance overall flavors and balance sweetness; kosher salt strengthens chocolate notes and rounds out the dessert profile.
- red gel food coloring Add judiciously to achieve vivid color without affecting batter consistency; concentrated gel coloring provides bright red appearance traditional to red velvet.
- 2 cups heavy cream Heat gently to create a rich, silky custard base and add creaminess to the creme brulee layer; heavy cream also carries vanilla flavor and produces a smooth texture when set.
- 2 vanilla bean split and scraped Split and scrape to extract fragrant seeds and infuse the cream with intense vanilla; the split pod can be steeped to deepen aroma during gentle heating.
- 1/2 cup granulated sugar + 1/2 cup more for garnish Dissolve into the custard mixture and sprinkle for caramelization; granulated sugar sweetens the custard and provides the crunchy brulee surface when torched.
- 3 egg yolks Whisk until smooth and glossy to thicken and enrich the custard; egg yolks add silkiness, emulsify the cream, and help the creme brulee set with a tender custard.
Instructions
- Place parchment paper in an 11 x 8 inch pan or an 8 inch baking pan so it covers the bottom and 2 sides (to facilitate the brownie removal). Butter the pan and set aside.: The parchment creates an easy release and protects the pan, which is especially helpful after the custard sets. You should feel the slickness of the paper under your fingers as you press it into the corners, and visually the pan will look neat and lined. Doing this step makes slicing and serving much cleaner. If you skip greasing lightly, the paper may shift when you pour batter, so make sure to butter the pan first to anchor the parchment.
- In a mixer fitted with the wire attachment, beat the eggs at medium speed until fluffy and light yellow, add the sugar and beat until combined. Add remaining ingredients, and mix to combine.: As the mixer works, you will notice the eggs grow paler and fluffier, and the sugar will dissolve into a glossy mixture. The sound softens as air is incorporated, and the batter's texture turns smooth. This step builds structure so the base is cohesive after baking, giving the final bars a tender crumb. A common error is rushing this stage, leaving the eggs under aerated which results in a denser brownie .
- Add red gel food coloring as much as you need, until you achieve the red hue that you like.: Gel color is concentrated so you should add it sparingly, stirring and observing the hue shift as you go. The visual cue is key here, aim for a saturated but not artificial shade, and remember that baking slightly deepens color. If you dump too much at once you may overcolor, and because gels are intense it is difficult to reverse, so proceed cautiously.
- Pour the batter into the pan, smooth the top with a spatula and pop it into the freezer for about one hour.: The batter will settle level and the chill firms the surface, helping the custard layer sit evenly on top. While in the freezer the batter becomes cold and slightly more solid to the touch, which reduces mixing between layers later. Avoid skipping this chill, because a warm batter can blend with the custard and ruin the clean stratification you want.
- Preheat oven to 325 degrees F.: Preheating ensures even baking and the correct rise for the brownie base and the creme brulee top. You should hear the oven cycle and see the set temperature on the dial or digital display. If you place the pan in a not fully heated oven the custard may take longer to set and texture can suffer, so wait until the oven registers the proper temperature.
- Add the cream, vanilla bean and its seeds to a medium saucepan that is set over medium heat and bring to a boil, stirring occasionally. Once the mixture is boiling, remove the saucepan from heat, cover with a lid and allow sitting for 15 minutes. Remove the vanilla bean and discard.: As the cream warms you will smell the rich aroma of vanilla bean blooming, and tiny flecks will be visible from the seeds. Bringing it to a boil then steeping extracts maximum flavor gently. Leaving the pod in contact while cooling infuses more complexity; however do remove the pod before continuing so it does not create bitter notes in the custard.
- In the bowl of an electric mixer fitted with the wire attachment, whisk together on medium-high speed the sugar and the egg yolks until well combined, the mixture must start to lighten in color and become fluffy. Scrape the sides of the bowl with a spatula as needed.: The yolks will transform into a pale, aerated ribbon, which contributes to a silky custard texture. Listen for the mixer change in tone as the mixture thickens, and scrape to ensure even aeration. Failing to lighten the yolks sufficiently can make the custard thin and less set, so be patient with this step.
- Whisk in the cream, adding it slowly, a little at a time. Stop the mixer, scrape the sides of the bowl and mix again on medium-low speed for a few seconds to make sure that the mixture is well blended.: Tempering with slow additions prevents the yolks from cooking and ensures a smooth custard. As you pour, you may detect a warm steam and a richer aroma; stop frequently to scrape to incorporate any thicker pockets. If you rush and pour all the cream at once you risk curdling the yolks which yields a grainy custard.
- Carefully and slowly pour the mixture over the brownie layer.: Pour evenly so the custard settles into a uniform layer across the chilled brownie base, watching as it spreads in a glossy sheet. The visual should be of a smooth, pale surface covering the red base. Pouring too quickly can cause the custard to dive into the brownie and create an uneven finish, so take your time.
- Bake just until the creme brûlée is set, but still slightly trembling in the center, about 40-45 minutes.: During baking the edges will firm and the center will develop a gentle wobble that signals a perfectly set custard with a tender interior. You may observe a faint puff and a golden edge on the brownie beneath. Overbaking removes the custard's silk and makes it dry, so test gently and pull when the center still quivers.
- Remove from oven and let it cool to room temperature, after that refrigerate for at least 2 hours.: Cooling at room temperature lets residual heat settle, then chilling finishes the set and simplifies slicing. You will notice the custard firming and the aroma mellowing into a balanced scent. If you skip refrigeration the custard may remain too soft and ingredients can weep when sliced.
- The red velvet creme brûlée brownie must be removed from the refrigerator 30 minutes prior to browning the sugar on top.: Bringing it closer to room temperature slightly softens the custard, reducing the temperature gap when you torch the sugar so the custard does not crack. The surface will look matte when it is chilled and become smoother as it warms. If you torch while it is ice cold you risk uneven caramelization and potential cracking of the custard below.
- Before serving sprinkle with the remaining sugar and using a torch, melt the sugar to form a crispy top. Let sit for at least 5 minutes before serving.: The sugar will transform under the flame into a thin, glassy shell that crackles delightfully when sliced. You should hear small popping and see the sugar flow into amber beads as it melts, then harden within minutes. Give the caramel time to cool and set; slicing too soon will smear the topping and collapse the texture.
Notes
- Measure accurately: Use a scale or careful measuring cups so the balance between flour and cocoa remains consistent, which affects texture and bake time.
- Temper thoughtfully: Add the warm cream slowly to the whisked yolks to keep the custard glossy and prevent curdling which causes grainy texture.
- Chill before custard: Freezing the baked base briefly firms it, helping the custard form a clean top layer without sinking into the brown base.
- Watch your oven: Ovens vary, so check at 35 minutes and look for a slight tremble in the center rather than relying solely on time.
- Even sugar layer: For a uniform crackle, sprinkle the topping sugar evenly and torch from a consistent distance until the surface liquefies and then hardens.
- Use beans for aroma: Real vanilla bean elevates the custard aroma; scrape thoroughly to extract all seeds for the fullest flavor.