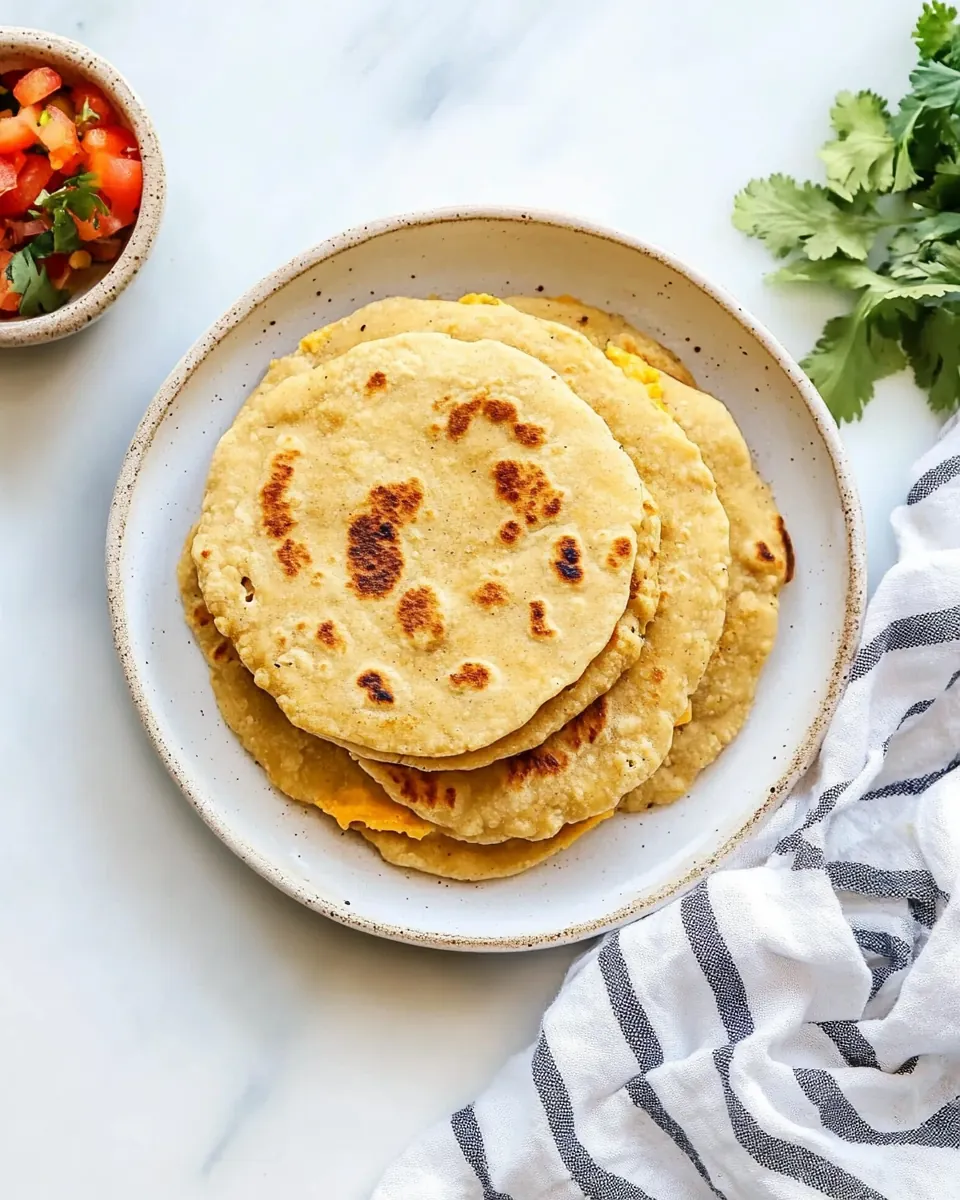
Easy Bean and Cheese Pupusas
Easy Bean and Cheese Pupusas came into my life on a rainy evening when I wanted something comforting, handheld, and honest.
I remember standing at my small kitchen counter with a bowl of masa harina corn flour and a can of refried beans, thinking about the years I spent chasing the perfect stuffed tortilla. The first time I made Easy Bean and Cheese Pupusas I was surprised by how simple the process felt, how the dough responded under my palms, and how the aroma of toasting corn filled the room. That moment reminded me why I cook with my hands more often than not, because texture and touch teach you things a recipe can barely explain.
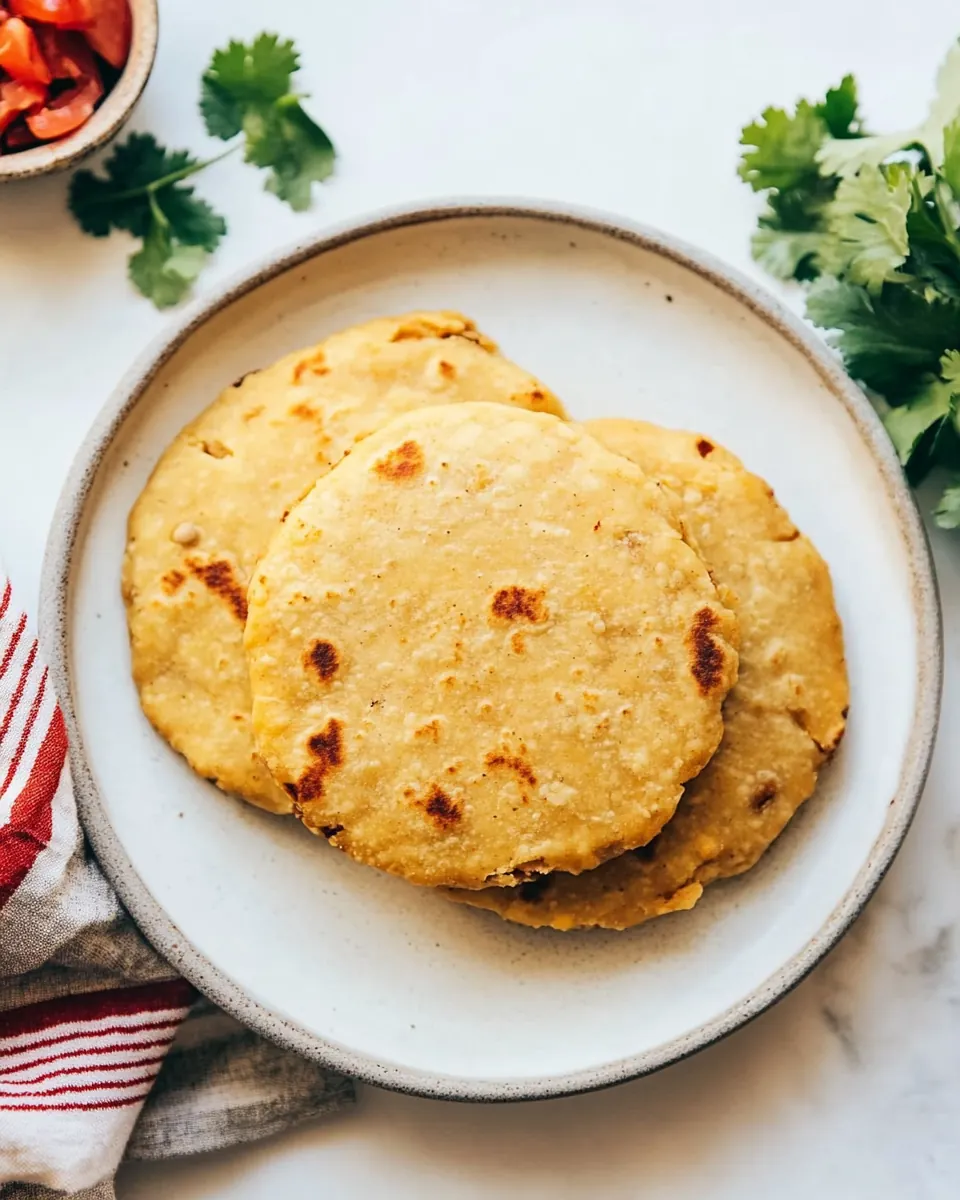
Over the next few afternoons I tweaked the ratio of water to masa harina corn flour, experimented with the size of each pupusa, and learned to trust the sound of the skillet when a golden crust was forming. Serving warm pupusas pulled from the pan with molten mozzarella cheese oozing out became my go to for casual gatherings. Friends would comment on the crisp exterior and the creamy, savory interior, and I loved watching jaws relax into a contented smile between bites.
There is a quiet satisfaction in making something so simple taste so complete. When I make Easy Bean and Cheese Pupusas now, I think about small rituals like wetting my hands just so, how the dough should feel slightly tacky but not sticky, and how a few minutes in the skillet can change the whole experience. This recipe is one of those staples I keep returning to, whether for a lazy weekend lunch or when I need an easy crowd pleaser.
Recipe Snapshot
20 mins
10 mins
10 mins
Easy
300 kcal
Mexican
Gluten-Free, Vegan
Dinner
Nonstick Skillet, Mixing Bowl, Spatula
What We Adore About This Easy Bean and Cheese Pupusas
Hearty yet light
I love how Easy Bean and Cheese Pupusas manage to feel filling without being heavy. The combination of masa harina corn flour and warm water yields a tender, corn forward wrapper that frames the filling instead of overpowering it. That balance makes these pupusas perfect for lunch or a casual dinner.
Simple pantry ingredients
One reason I keep this recipe on rotation is the short shopping list. With pantry staples like refried beans and a block of mozzarella cheese, you can pull together a satisfying meal fast. I appreciate recipes that reward you for being slightly lazy without sacrificing flavor.
Textural contrast
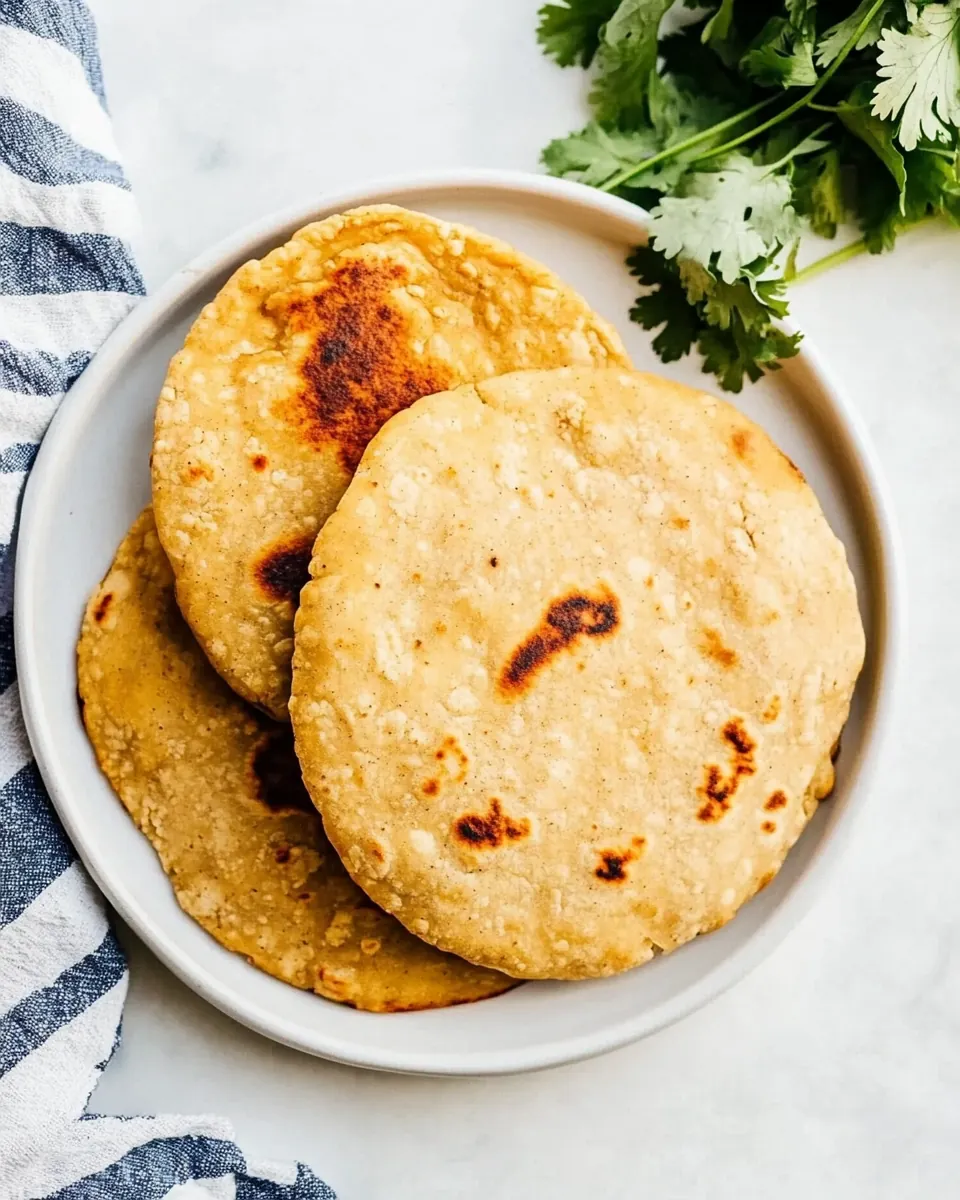
The crisp, golden exterior against the creamy interior is what I come back for. When the pupusa hits the skillet, that first sizzle signals transformation, and the finished bite is a delightful contrast that keeps people reaching for seconds.
Customizable comfort food
Even though this version sticks to beans and cheese, the concept is endlessly adaptable. I like that these pupusas are approachable for cooks of all levels, and that they pair well with simple sides. You can get creative with accompaniments while keeping the core assembly straightforward.
Great for sharing
Making a batch of Easy Bean and Cheese Pupusas feels communal. The process of shaping, filling, and cooking lends itself to kitchen conversation, and plated pupusas disappear fast when friends gather. They are a real crowd pleaser.
What’s In This Easy Bean and Cheese Pupusas
These ingredients are chosen to showcase simple corn masa dough and a creamy, savory filling. The key players work together to create a pupusa with a tender interior and a golden, slightly crisp exterior. The masa harina corn flour provides the essential corn flavor and structure, while the refried beans add creaminess and depth. The mozzarella cheese melts into a gooey center that contrasts with the dough, and a touch of salt ties every element together.
- 3 cups masa harina corn flour: Provide a neutral, pliable dough base for pupusas by combining with water and salt; masa harina creates the characteristic corn flavor and texture when hydrated and rested for a few minutes. Ensure even hydration to avoid dry or crumbly dough and allow slight resting to improve workability and flavor melding.
- 2 3/4 cups warm water: Add moisture and activate the masa to form a soft, workable dough; warm water helps fully hydrate the corn flour and yields a tender finished texture. Measure carefully to achieve a dough that is smooth but not sticky, adjusting only slightly if needed for humidity.
- 1 teaspoon salt: Season the dough lightly to enhance overall flavor of the pupusas; salt balances the natural sweetness of masa and complements the savory fillings. Dissolve thoroughly into the warm water before mixing to ensure even distribution throughout the dough.
- 1 cup refried beans: Supply creamy, savory filling and a smooth texture that contrasts with the corn dough; refried beans add body, protein, and a spreadable center that holds together during cooking. Warm and mash or smooth the beans if needed, and season to taste before assembling to boost flavor in every bite.
- 2 cups shredded mozzarella cheese: Provide melty, stringy cheese that creates a gooey, indulgent interior when heated; shredded mozzarella yields excellent stretch and mild flavor that pairs well with beans. Use evenly packed shreds to ensure consistent melting throughout the pupusa and prevent dry spots.
How to Make Easy Bean and Cheese Pupusas
These directions guide you through forming, filling, and cooking the pupusas with attention to feel and timing. I like to have all ingredients prepped and within reach so the assembly flows. The skillet stage is where the aroma and color develop, so pay attention to sound and sight as you cook.
- Preheat a nonstick skillet to medium-high heat. In a medium-sized bowl, combine 3 cups masa harina corn flour, 2 3/4 cups warm water, and 1 teaspoon salt to form a dough.: As the skillet warms you will hear a faint even hum from the burner, and the surface should feel hot when held a few inches above it, giving a quick sizzle when you drop a tiny bit of dough. This preheat sets the stage for a quick golden crust, locking moisture inside. If the pan is not hot enough the pupusa will absorb oil and become greasy, while an overly hot pan will char the exterior before the interior heats through. Adjust the heat to maintain a steady medium high so each side browns slowly to a deep golden color.
- Scoop out a large 3-inch ball of dough. Flatten the dough and put in 1 tablespoon of the 1 cup refried beans and sprinkle with a few tablespoons of the 2 cups shredded mozzarella cheese. Fold the ends up together to enclose the beans and cheese. Flatten to 1/4-inch thick.: As the warm water touches the masa harina corn flour , the mixture will darken slightly and smell like toasted corn. Use your hand to gently fold until the dough holds together, feeling for a texture that is springy and slightly tacky, not crumbly. This hydration step is essential because under hydrated dough will crack when you form the pupusas, and over hydrated dough will be too sticky to handle. Resting the dough a few minutes helps the flour fully absorb water and yields a more cohesive, tender shell.
- Place in a skillet and cook each side until golden brown, 3-5 minutes. Serve with coleslaw, salsa, or desired side dish.: When you press the ball it should yield slightly and spring back a bit, indicating the right hydration. Flatten it gently between your palms to create a shallow cup that will hold the filling. Keep a small bowl of water nearby to wet your hands if the dough starts to stick, which helps you shape without tearing. Avoid pressing holes in the center when forming the cup, because a thin barrier can burst during cooking and spill the filling into the skillet.
- Flatten the dough and put in 1 tablespoon of the 1 cup refried beans and sprinkle with a few tablespoons of the 2 cups shredded mozzarella cheese: The contrast between the creamy refried beans and the melting mozzarella cheese is what creates the signature pupusa interior. Place the filling in the center and be mindful not to overstuff, which could cause leaking. The beans should be spoonable and not runny, and the cheese should be evenly distributed to create pockets of melt rather than a single dense mass. If the filling is cold it can chill the dough, so bring fillings to near room temperature for easier sealing.
- Fold the ends up together to enclose the beans and cheese: As you bring the edges up and pinch, you should hear a slight rubbing sound as the dough seals. Smooth the seam with your fingers and gently flatten to form a disc about a quarter inch thick, keeping the edges intact so the filling remains enclosed. A well sealed pupusa prevents filling loss and ensures even cooking. Common mistakes here include thin spots along the seam which will burst when cooked, so take an extra second to reinforce the pinch if needed.
- Flatten to 1/4 inch thick: The finished thickness controls how quickly the heat reaches the center. At a quarter inch thickness the exterior crisps while the interior becomes warm and melty without overcooking. Use gentle, even pressure to avoid squeezing out filling. If the pupusa ends up thicker it will take longer to heat through and may remain doughy inside, while too thin will cook too fast and risk tearing.
- Place in a skillet and cook each side until golden brown, 3 to 5 minutes: You will hear a satisfying sizzle as the pupusa hits the hot surface and smell the corn toast into a nutty fragrance. Look for even browning and tiny blistering on the surface as a cue to flip. Use a thin spatula to turn, and press lightly to ensure contact for a consistent crust. A common error is flipping too often, which prevents proper browning, so allow each side time to develop color. Adjust the heat if the exterior is darkening too quickly without the chewy center heating through.
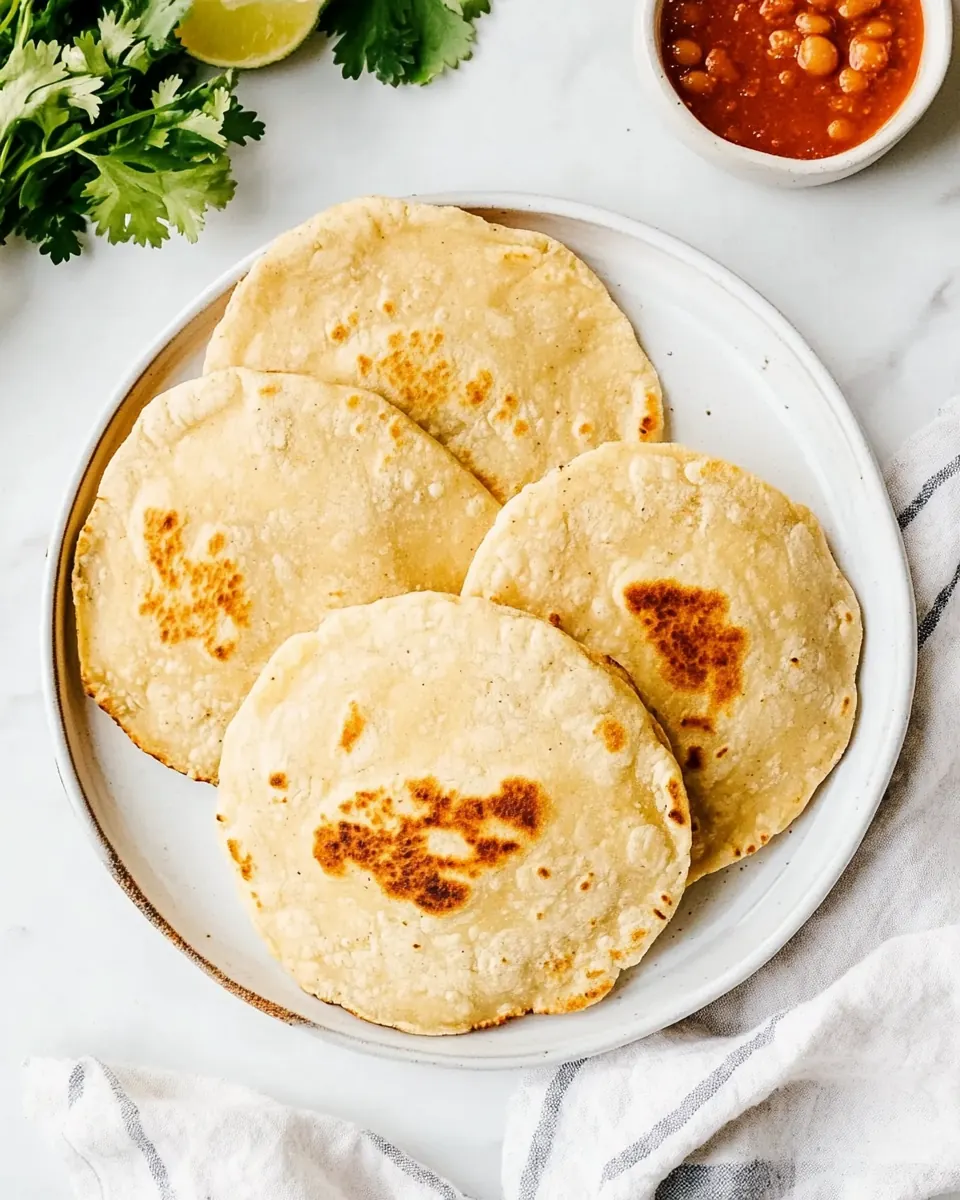
- Serve with coleslaw, salsa, or desired side dish: Once the pupusas are warm and the cheese inside is melty, transfer to a plate and allow them to rest briefly so the filling settles. The accompaniments add brightness and contrast; the crisp acidity of coleslaw or the tang of a simple salsa cuts through the richness. Serving immediately while still warm gives the best texture and flavor. Reheating later may soften the exterior, so plan to finish and serve close to when guests arrive.
Substitutions and Tips
I like to think of these tips as small adjustments that make a big difference when preparing Easy Bean and Cheese Pupusas. Below are practical pointers based on hands on experience that help streamline the process and improve results. Treat them like little chef secrets you can borrow.
- Shape with damp hands to reduce sticking, this keeps the dough smooth and prevents tears when sealing the filling.
- Rest the dough briefly after mixing so the masa harina corn flour fully hydrates, which leads to a more cohesive and tender shell.
- Control filling moisture by adjusting the consistency of the refried beans, too wet a filling will leak during cooking, while too dry can make bites feel chalky.
- Moderate skillet heat to develop color without burning, medium high usually works best, but adjust for stovetop differences.
- Make them uniform by measuring dough balls for consistent size, this ensures even cooking across the batch.
- Serve immediately for the best contrast between the crisp exterior and melty interior, pupusas are at their peak right off the skillet.
Pairing Suggestions for Easy Bean and Cheese Pupusas
Pupusas are versatile and pair well with bright, crunchy, or acidic sides to balance the rich interior. Below are serving ideas and suggestions for occasions and storage to help you present these as a complete meal. I often choose sides that cut through richness and add freshness to each bite.
- Simple coleslaw provides a crisp, tangy contrast that refreshes the palate between warm, cheesy bites.
- Fresh tomato salsa adds acidity and brightness, lifting the flavors of the refried beans and mozzarella cheese.
- Light salad with citrus dressing complements the corn flavor and keeps the meal feeling balanced for lunch or dinner.
- Family gatherings are ideal occasions, since pupusas are easy to make in batches and encourage informal sharing.
- Storage tip store leftover pupusas in an airtight container in the refrigerator for up to three days, reheat in a skillet to regain some crispness.
- Seasonal pairing these work year round as a cozy dish for cool evenings and a quick handheld for warmer afternoons when paired with a chilled salad.
FAQ
Conclusion
What makes this recipe special is its combination of simple pantry ingredients and hands on technique that yields a satisfying contrast between a tender corn dough and a creamy, melty filling. The process of shaping, sealing, and cooking pupusas is meditative and fun, and the results are comforting and shareable. Give these a try when you want a casual, flavorful meal that feels both homey and impressive. Invite friends or family to help with the assembly, serve them warm from the skillet, and enjoy the smiles that follow each gooey bite.
Easy Bean and Cheese Pupusas
Equipment
- nonstick skillet
- Mixing Bowl
- Spatula
Ingredients
- 3 cups masa harina corn flour Provide a neutral, pliable dough base for pupusas by combining with water and salt; masa harina creates the characteristic corn flavor and texture when hydrated and rested for a few minutes. Ensure even hydration to avoid dry or crumbly dough and allow slight resting to improve workability and flavor melding.
- 2 3/4 cups warm water Add moisture and activate the masa to form a soft, workable dough; warm water helps fully hydrate the corn flour and yields a tender finished texture. Measure carefully to achieve a dough that is smooth but not sticky, adjusting only slightly if needed for humidity.
- 1 teaspoon salt Season the dough lightly to enhance overall flavor of the pupusas; salt balances the natural sweetness of masa and complements the savory fillings. Dissolve thoroughly into the warm water before mixing to ensure even distribution throughout the dough.
- 1 cup refried beans Supply creamy, savory filling and a smooth texture that contrasts with the corn dough; refried beans add body, protein, and a spreadable center that holds together during cooking. Warm and mash or smooth the beans if needed, and season to taste before assembling to boost flavor in every bite.
- 2 cups shredded mozzarella cheese Provide melty, stringy cheese that creates a gooey, indulgent interior when heated; shredded mozzarella yields excellent stretch and mild flavor that pairs well with beans. Use evenly packed shreds to ensure consistent melting throughout the pupusa and prevent dry spots.
Instructions
- Preheat a nonstick skillet to medium-high heat. In a medium-sized bowl, combine 3 cups masa harina corn flour, 2 3/4 cups warm water, and 1 teaspoon salt to form a dough.: As the skillet warms you will hear a faint even hum from the burner, and the surface should feel hot when held a few inches above it, giving a quick sizzle when you drop a tiny bit of dough. This preheat sets the stage for a quick golden crust, locking moisture inside. If the pan is not hot enough the pupusa will absorb oil and become greasy, while an overly hot pan will char the exterior before the interior heats through. Adjust the heat to maintain a steady medium high so each side browns slowly to a deep golden color.
- Scoop out a large 3-inch ball of dough. Flatten the dough and put in 1 tablespoon of the 1 cup refried beans and sprinkle with a few tablespoons of the 2 cups shredded mozzarella cheese. Fold the ends up together to enclose the beans and cheese. Flatten to 1/4-inch thick.: As the warm water touches the masa harina corn flour , the mixture will darken slightly and smell like toasted corn. Use your hand to gently fold until the dough holds together, feeling for a texture that is springy and slightly tacky, not crumbly. This hydration step is essential because under hydrated dough will crack when you form the pupusas, and over hydrated dough will be too sticky to handle. Resting the dough a few minutes helps the flour fully absorb water and yields a more cohesive, tender shell.
- Place in a skillet and cook each side until golden brown, 3-5 minutes. Serve with coleslaw, salsa, or desired side dish.: When you press the ball it should yield slightly and spring back a bit, indicating the right hydration. Flatten it gently between your palms to create a shallow cup that will hold the filling. Keep a small bowl of water nearby to wet your hands if the dough starts to stick, which helps you shape without tearing. Avoid pressing holes in the center when forming the cup, because a thin barrier can burst during cooking and spill the filling into the skillet.
- Flatten the dough and put in 1 tablespoon of the 1 cup refried beans and sprinkle with a few tablespoons of the 2 cups shredded mozzarella cheese: The contrast between the creamy refried beans and the melting mozzarella cheese is what creates the signature pupusa interior. Place the filling in the center and be mindful not to overstuff, which could cause leaking. The beans should be spoonable and not runny, and the cheese should be evenly distributed to create pockets of melt rather than a single dense mass. If the filling is cold it can chill the dough, so bring fillings to near room temperature for easier sealing.
- Fold the ends up together to enclose the beans and cheese: As you bring the edges up and pinch, you should hear a slight rubbing sound as the dough seals. Smooth the seam with your fingers and gently flatten to form a disc about a quarter inch thick, keeping the edges intact so the filling remains enclosed. A well sealed pupusa prevents filling loss and ensures even cooking. Common mistakes here include thin spots along the seam which will burst when cooked, so take an extra second to reinforce the pinch if needed.
- Flatten to 1/4 inch thick: The finished thickness controls how quickly the heat reaches the center. At a quarter inch thickness the exterior crisps while the interior becomes warm and melty without overcooking. Use gentle, even pressure to avoid squeezing out filling. If the pupusa ends up thicker it will take longer to heat through and may remain doughy inside, while too thin will cook too fast and risk tearing.
- Place in a skillet and cook each side until golden brown, 3 to 5 minutes: You will hear a satisfying sizzle as the pupusa hits the hot surface and smell the corn toast into a nutty fragrance. Look for even browning and tiny blistering on the surface as a cue to flip. Use a thin spatula to turn, and press lightly to ensure contact for a consistent crust. A common error is flipping too often, which prevents proper browning, so allow each side time to develop color. Adjust the heat if the exterior is darkening too quickly without the chewy center heating through.
- Serve with coleslaw, salsa, or desired side dish: Once the pupusas are warm and the cheese inside is melty, transfer to a plate and allow them to rest briefly so the filling settles. The accompaniments add brightness and contrast; the crisp acidity of coleslaw or the tang of a simple salsa cuts through the richness. Serving immediately while still warm gives the best texture and flavor. Reheating later may soften the exterior, so plan to finish and serve close to when guests arrive.
Notes
- Shape with damp hands to reduce sticking, this keeps the dough smooth and prevents tears when sealing the filling.
- Rest the dough briefly after mixing so the masa harina corn flour fully hydrates, which leads to a more cohesive and tender shell.
- Control filling moisture by adjusting the consistency of the refried beans, too wet a filling will leak during cooking, while too dry can make bites feel chalky.
- Moderate skillet heat to develop color without burning, medium high usually works best, but adjust for stovetop differences.
- Make them uniform by measuring dough balls for consistent size, this ensures even cooking across the batch.
- Serve immediately for the best contrast between the crisp exterior and melty interior, pupusas are at their peak right off the skillet.