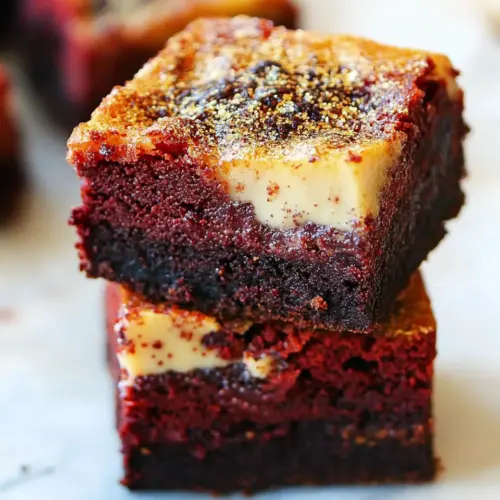
Red Velvet Creme Brulee Brownies
Red Velvet Creme Brulee Brownies are a creamy and crispy hybrid dessert that combines fudgy brownie depth with a silky creme brulee crown. Vibrant color and aromatic vanilla bean make these an elegant treat for parties and easy weeknight celebrations, delivering layered textures and a showstopping caramel top that's worth the effort.
Equipment
- Mixer
- Wire attachment
- Spatula
- Saucepan
- Torch
- 8 x 11 inch pan
- Parchment Paper
Ingredients
- 4 large eggs Whisk vigorously to incorporate air and provide structure, stability, and richness to the brownie batter while helping set the custard component during baking.
- 2 cups sugar Sweeten evenly and help create a tender crumb; sugar also aids in caramelization of the brulee topping and balances cocoa bitterness in the brownie layer.
- 2 sticks melted butter 8 oz sticks Melt thoroughly to add moistness, tender texture, and a rich butter flavor; melted butter also helps dissolve sugar and bind dry ingredients for a fudgy brownie.
- 1 cup cocoa sifted Sift finely to prevent lumps and contribute deep chocolate flavor and color; cocoa assists in balancing the red hue and adds bitter complexity to the dessert.
- 2 vanilla beans seeds only Scrape seeds carefully to deliver pure vanilla aroma and concentrated flavor; the seeds infuse the batter with warm, floral notes without adding liquid.
- 1 1/2 cups flour sifted Sift to ensure lightness and even distribution, providing structure and chew while preventing dense pockets; flour also thickens the batter for proper rise and texture.
- 1/2 teaspoon kosher salt Season sparingly to enhance overall flavors and balance sweetness; kosher salt strengthens chocolate notes and rounds out the dessert profile.
- red gel food coloring Add judiciously to achieve vivid color without affecting batter consistency; concentrated gel coloring provides bright red appearance traditional to red velvet.
- 2 cups heavy cream Heat gently to create a rich, silky custard base and add creaminess to the creme brulee layer; heavy cream also carries vanilla flavor and produces a smooth texture when set.
- 2 vanilla bean split and scraped Split and scrape to extract fragrant seeds and infuse the cream with intense vanilla; the split pod can be steeped to deepen aroma during gentle heating.
- 1/2 cup granulated sugar + 1/2 cup more for garnish Dissolve into the custard mixture and sprinkle for caramelization; granulated sugar sweetens the custard and provides the crunchy brulee surface when torched.
- 3 egg yolks Whisk until smooth and glossy to thicken and enrich the custard; egg yolks add silkiness, emulsify the cream, and help the creme brulee set with a tender custard.
Instructions
- Place parchment paper in an 11 x 8 inch pan or an 8 inch baking pan so it covers the bottom and 2 sides (to facilitate the brownie removal). Butter the pan and set aside.: The parchment creates an easy release and protects the pan, which is especially helpful after the custard sets. You should feel the slickness of the paper under your fingers as you press it into the corners, and visually the pan will look neat and lined. Doing this step makes slicing and serving much cleaner. If you skip greasing lightly, the paper may shift when you pour batter, so make sure to butter the pan first to anchor the parchment.
- In a mixer fitted with the wire attachment, beat the eggs at medium speed until fluffy and light yellow, add the sugar and beat until combined. Add remaining ingredients, and mix to combine.: As the mixer works, you will notice the eggs grow paler and fluffier, and the sugar will dissolve into a glossy mixture. The sound softens as air is incorporated, and the batter's texture turns smooth. This step builds structure so the base is cohesive after baking, giving the final bars a tender crumb. A common error is rushing this stage, leaving the eggs under aerated which results in a denser brownie .
- Add red gel food coloring as much as you need, until you achieve the red hue that you like.: Gel color is concentrated so you should add it sparingly, stirring and observing the hue shift as you go. The visual cue is key here, aim for a saturated but not artificial shade, and remember that baking slightly deepens color. If you dump too much at once you may overcolor, and because gels are intense it is difficult to reverse, so proceed cautiously.
- Pour the batter into the pan, smooth the top with a spatula and pop it into the freezer for about one hour.: The batter will settle level and the chill firms the surface, helping the custard layer sit evenly on top. While in the freezer the batter becomes cold and slightly more solid to the touch, which reduces mixing between layers later. Avoid skipping this chill, because a warm batter can blend with the custard and ruin the clean stratification you want.
- Preheat oven to 325 degrees F.: Preheating ensures even baking and the correct rise for the brownie base and the creme brulee top. You should hear the oven cycle and see the set temperature on the dial or digital display. If you place the pan in a not fully heated oven the custard may take longer to set and texture can suffer, so wait until the oven registers the proper temperature.
- Add the cream, vanilla bean and its seeds to a medium saucepan that is set over medium heat and bring to a boil, stirring occasionally. Once the mixture is boiling, remove the saucepan from heat, cover with a lid and allow sitting for 15 minutes. Remove the vanilla bean and discard.: As the cream warms you will smell the rich aroma of vanilla bean blooming, and tiny flecks will be visible from the seeds. Bringing it to a boil then steeping extracts maximum flavor gently. Leaving the pod in contact while cooling infuses more complexity; however do remove the pod before continuing so it does not create bitter notes in the custard.
- In the bowl of an electric mixer fitted with the wire attachment, whisk together on medium-high speed the sugar and the egg yolks until well combined, the mixture must start to lighten in color and become fluffy. Scrape the sides of the bowl with a spatula as needed.: The yolks will transform into a pale, aerated ribbon, which contributes to a silky custard texture. Listen for the mixer change in tone as the mixture thickens, and scrape to ensure even aeration. Failing to lighten the yolks sufficiently can make the custard thin and less set, so be patient with this step.
- Whisk in the cream, adding it slowly, a little at a time. Stop the mixer, scrape the sides of the bowl and mix again on medium-low speed for a few seconds to make sure that the mixture is well blended.: Tempering with slow additions prevents the yolks from cooking and ensures a smooth custard. As you pour, you may detect a warm steam and a richer aroma; stop frequently to scrape to incorporate any thicker pockets. If you rush and pour all the cream at once you risk curdling the yolks which yields a grainy custard.
- Carefully and slowly pour the mixture over the brownie layer.: Pour evenly so the custard settles into a uniform layer across the chilled brownie base, watching as it spreads in a glossy sheet. The visual should be of a smooth, pale surface covering the red base. Pouring too quickly can cause the custard to dive into the brownie and create an uneven finish, so take your time.
- Bake just until the creme brûlée is set, but still slightly trembling in the center, about 40-45 minutes.: During baking the edges will firm and the center will develop a gentle wobble that signals a perfectly set custard with a tender interior. You may observe a faint puff and a golden edge on the brownie beneath. Overbaking removes the custard's silk and makes it dry, so test gently and pull when the center still quivers.
- Remove from oven and let it cool to room temperature, after that refrigerate for at least 2 hours.: Cooling at room temperature lets residual heat settle, then chilling finishes the set and simplifies slicing. You will notice the custard firming and the aroma mellowing into a balanced scent. If you skip refrigeration the custard may remain too soft and ingredients can weep when sliced.
- The red velvet creme brûlée brownie must be removed from the refrigerator 30 minutes prior to browning the sugar on top.: Bringing it closer to room temperature slightly softens the custard, reducing the temperature gap when you torch the sugar so the custard does not crack. The surface will look matte when it is chilled and become smoother as it warms. If you torch while it is ice cold you risk uneven caramelization and potential cracking of the custard below.
- Before serving sprinkle with the remaining sugar and using a torch, melt the sugar to form a crispy top. Let sit for at least 5 minutes before serving.: The sugar will transform under the flame into a thin, glassy shell that crackles delightfully when sliced. You should hear small popping and see the sugar flow into amber beads as it melts, then harden within minutes. Give the caramel time to cool and set; slicing too soon will smear the topping and collapse the texture.
Notes
- Measure accurately: Use a scale or careful measuring cups so the balance between flour and cocoa remains consistent, which affects texture and bake time.
- Temper thoughtfully: Add the warm cream slowly to the whisked yolks to keep the custard glossy and prevent curdling which causes grainy texture.
- Chill before custard: Freezing the baked base briefly firms it, helping the custard form a clean top layer without sinking into the brown base.
- Watch your oven: Ovens vary, so check at 35 minutes and look for a slight tremble in the center rather than relying solely on time.
- Even sugar layer: For a uniform crackle, sprinkle the topping sugar evenly and torch from a consistent distance until the surface liquefies and then hardens.
- Use beans for aroma: Real vanilla bean elevates the custard aroma; scrape thoroughly to extract all seeds for the fullest flavor.