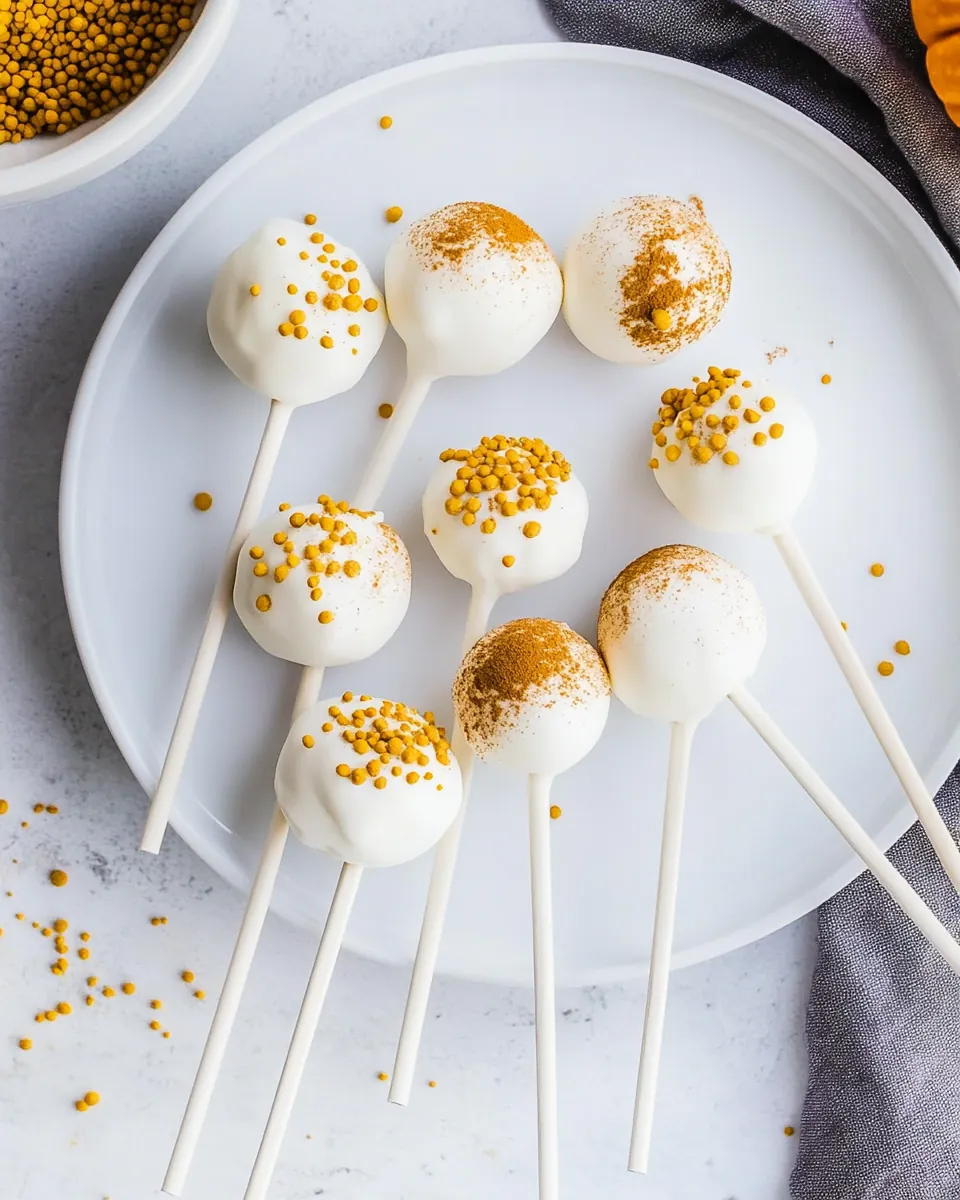
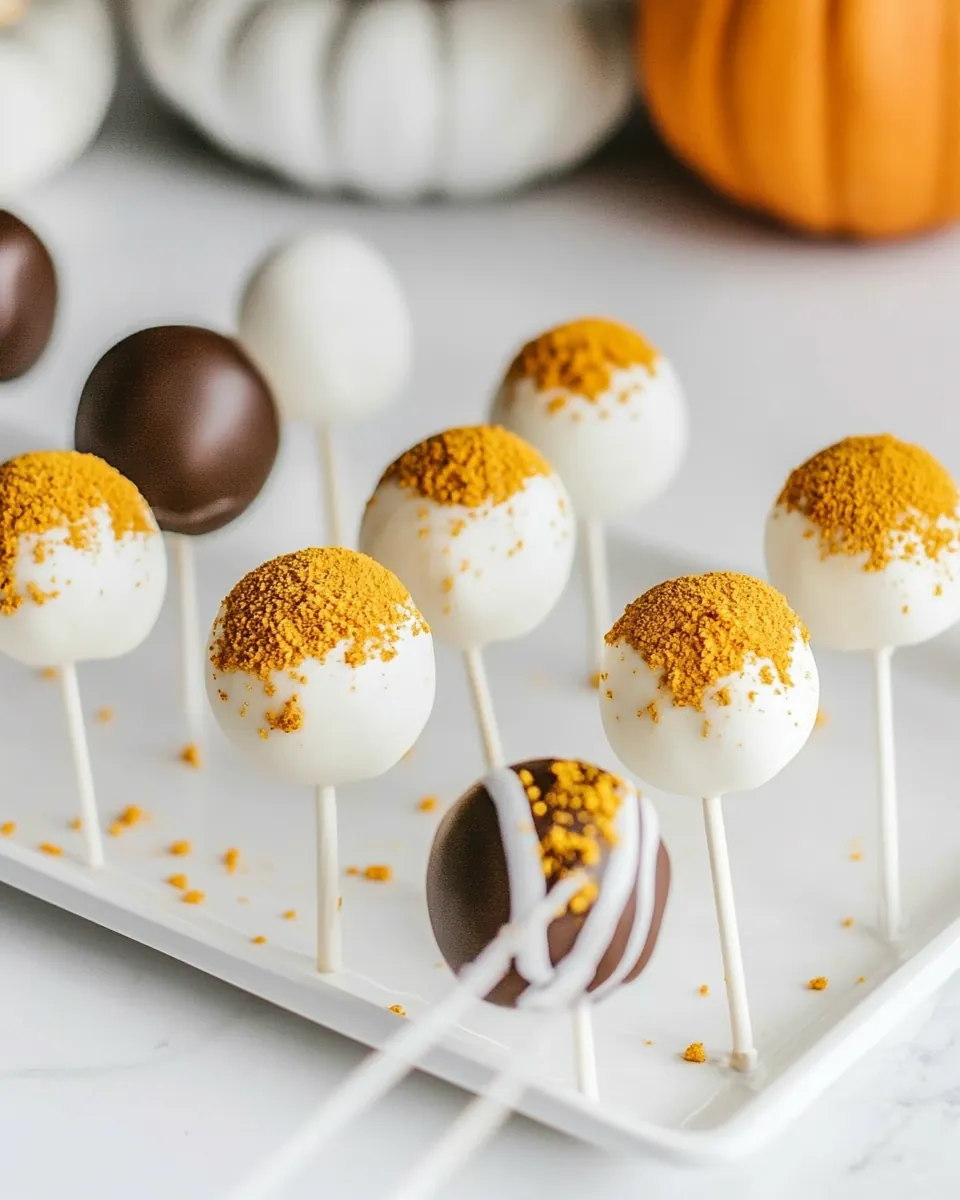
Pumpkin Cake Pops
Pumpkin Cake Pops are one of those treats I reach for when I want something whimsical and crowd friendly at once. The first time I made them I was hosting a small autumn get together and wanted something that felt festive without being fussy, so I turned my favorite pumpkin cake into bite sized pops. Guests loved the way the warm spice from the cake met the cool snap of chocolate, and I loved how easy they were to hand out while I kept conversation flowing.
Every batch since has carried a memory, whether it was a rainy afternoon baking with my niece or a late night assembly session while music played in the background. I enjoy the rhythm of rolling the cake into balls, the satisfying cold hush of chilling them, and the quick, precise moment when a stick goes into a pop and the chocolate covers it like a glossy coat. There is something very domestic and playful about the process that still makes me smile.
Recipe Snapshot
1 hr 40 mins
60 mins
40 mins
Medium
120 kcal
American
Gluten-Free, Low FODMAP
Desserts
Oven, 9 inch cake pans, Electric mixer, Food processor, Microwave safe bowl
What We Adore About This Pumpkin Cake Pops
Perfect bite sized joy
I love that Pumpkin Cake Pops transform a classic pan cake into individual servings that feel celebratory. Guests can grab one, enjoy a tidy portion, and move on with their evening, which makes these ideal for parties or potluck style events. The texture contrast between the tender spiced cake and the crisp chocolate shell is what keeps people coming back for more.
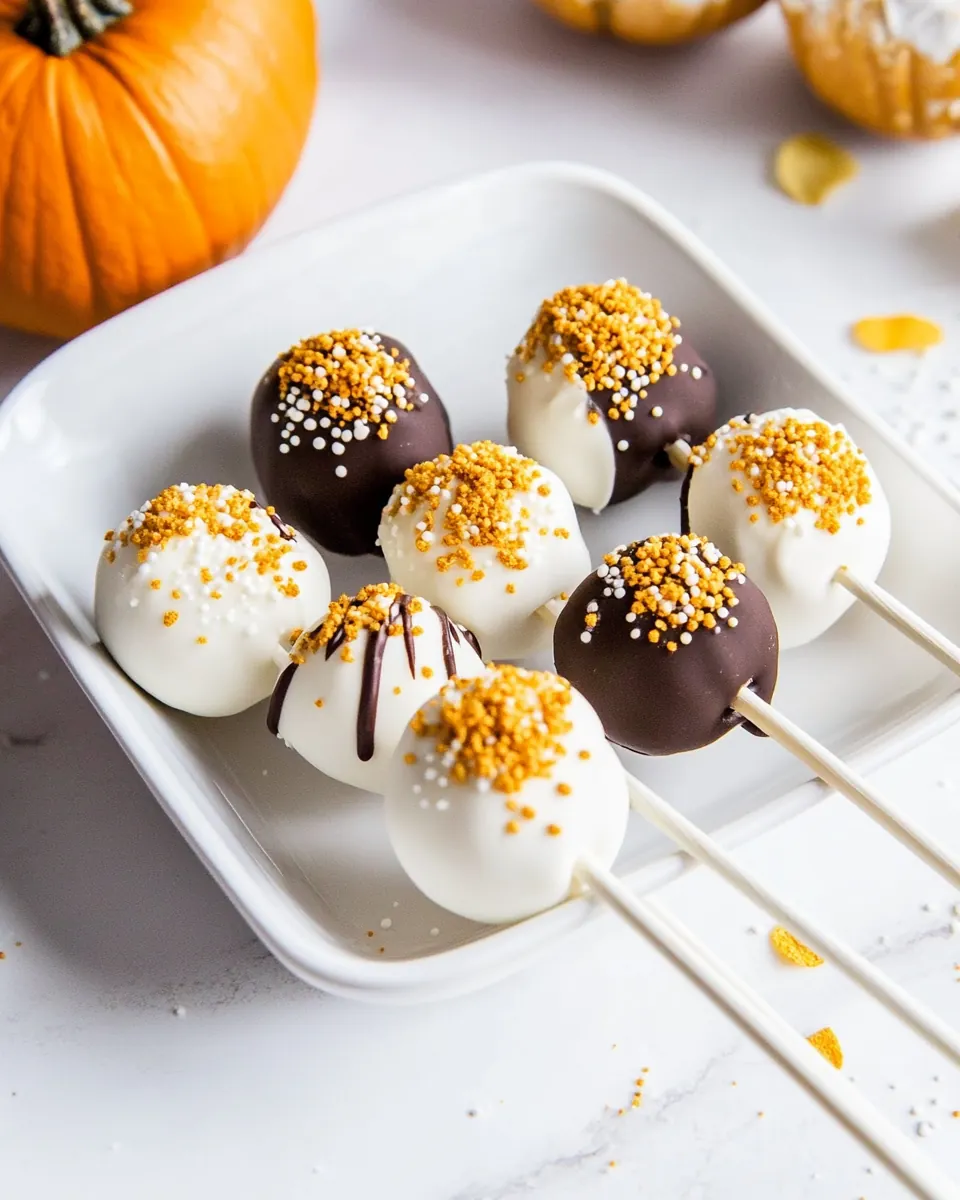
Flexible decorating canvas
We can get playful with decorations, and that flexibility makes these a creative outlet. Use colorful sprinkles, edible glitter, or themed candies to match any occasion. I often set up a little decorating station and let kids join in, which turns making them into a shared activity instead of a chore.
Make ahead freedom
One of my favorite reasons to make Pumpkin Cake Pops is how well they hold up when prepared a day in advance. You can bake, form, chill, and even dip most of them ahead of time, freeing you to focus on last minute details the day of your event. That calm makes entertaining so much more enjoyable.
Resource friendly
These pops are a great way to use up leftover cake or even a boxed cake mix when life gets busy. Mixing crumbs with frosting is forgiving and efficient, and the end result feels much more special than just serving slices. I appreciate recipes that reduce waste and still taste homemade.
Kid friendly technique
The technique is approachable for cooks at all levels. I explain steps slowly when teaching friends, and they consistently tell me the sensory cues help them succeed. Once you get the hang of chilling and dipping, the process becomes rhythmic and fun, and that confidence is priceless.
What You’ll Need for Pumpkin Cake Pops
These ingredients create a harmonious balance between warm autumn spice and sweet, festive coating. The dry spices and leaveners provide structure and flavor to the base cake, while the sugars, oil, and eggs create moist crumb that binds well when mixed with frosting. The pumpkin puree adds natural moisture and a subtle earthiness, and the frosting acts as the glue that converts crumbs into moldable balls. Finally, the coating and decor let you dial up the presentation.
- 3 cups all purpose flour: Sifted and measured to provide structure and body to the cake batter, supporting leavening and absorbing moisture for tender crumb.
- 1 tablespoon ground cinnamon: Aromatic and warm, added to infuse classic pumpkin-spice flavor and enhance the baked goods' cozy fragrance throughout the cake.
- 2 teaspoons ground ginger: Earthy and slightly peppery, blended in to contribute depth to the spice profile and complement the pumpkin puree's sweetness.
- 2 teaspoons baking powder: Light and dry, included to help the batter rise by creating air pockets when combined with wet ingredients and heat.
- 1 3/4 teaspoons ground allspice: Fragrant and mildly sweet, used in small quantity to add a complex, clove-like warmth that balances other spices.
- 1 teaspoon baking soda: Fine and reactive, incorporated to react with acidic components and assist in achieving proper rise and texture in the cake.
- 1 teaspoon salt: Fine and crystalline, mixed to season the batter, enhance flavor balance, and control sweetness contrast in the finished pops.
- 1/2 teaspoon ground nutmeg: Warm and nutty, sprinkled into the dry mix to contribute subtle aromatic notes that round out the pumpkin spice ensemble.
- 1 1/2 cups granulated white sugar: Fine and granulated, stirred into the batter to sweeten, tenderize, and promote moistness by interacting with the fats and liquids.
- 1 cup packed brown sugar: Moist and caramel-like when packed, folded into the cake batter to add richness, deeper flavor, and extra moisture.
- 1 cup canola or vegetable oil (or avocado): Neutral-flavored liquid fat, blended with sugars and eggs to create a moist, tender crumb and carry flavors evenly.
- 4 large eggs: Beaten and incorporated to provide structure, leavening support, and richness while helping to emulsify the batter.
- One 15-ounce can unsweetened pumpkin puree: Smooth and dense, folded in to contribute moisture, pumpkin flavor, and a soft, tender texture ideal for cake pops.
- 1 tablespoon vanilla extract: Fragrant and sweet, mixed in to add floral vanilla notes that enhance overall flavor complexity and sweetness perception.
- 1 tablespoon finely grated orange zest: Bright and citrusy, finely grated into the batter to add aromatic lift and a subtle fresh contrast to warm spices.
- Two 16-ounce tubs prepared white or vanilla frosting: Creamy and sweet, used to bind cake crumbs into a moldable center for forming pops and to add extra flavor.
- 6 or 8-inch long treat sticks: Sturdy and food-safe, inserted to support and present cake pops while allowing dipping and decorating without breaking.
- melting chocolate (or chocolate discs/wafers): Meltable and glossy, warmed and used to coat the formed cake balls, providing a crisp shell that seals and decorates.
- decor, sprinkles, etc.: Colorful and textured, sprinkled or pressed on the coated pops to provide visual appeal and additional flavor/texture.
- ribbon for the sticks () (optional): Decorative and optional, tied around sticks to enhance presentation for gifting or seasonal serving with a polished finish.
Putting Together Pumpkin Cake Pops

Assembling these pops is a multi stage affair that feels almost meditative when you move through each step. I like to set up stations for baking, processing, forming, chilling, and dipping so the workflow stays smooth and stress free. Below are the cleaned direction steps expanded into detailed, sensory rich guidance to help you succeed.
- Preheat the oven to 350°F. Butter two 9-inch-diameter cake pans and dust with flour.: The scent of a warm oven creates anticipation, and preheating ensures even baking from the moment the pans go in. When you butter and flour the pans, the surface should gleam slightly with a thin film of fat and a light dusting of flour, which prevents sticking and promotes an even release. A common mistake is to skip flouring after buttering, which can cause the cake to cling to the pan and tear when removed. If your oven runs hot, consider checking the internal temperature with an oven thermometer to avoid over browning. I prefer using room temperature pans so the batter spreads evenly rather than shocking a cold surface.
- Sift flour and next 7 ingredients (through nutmeg) into a medium bowl.: You will notice the spices mingle visually as the warm brown specks combine with the pale flour, releasing a fragrant spice aroma as you sift. Sifting distributes the baking powder , allspice , baking soda , and salt evenly so the cake rises uniformly and the spice pockets do not create bitter bursts. A frequent error is to eyeball dry ingredients without sifting, which can yield uneven texture and lumps of spice. Use a whisk if you lack a sifter, and take a moment to inhale the blended spices, they hint at the final cake's character.
- Using electric mixer, beat both of the sugars and the oil in a large bowl until combined (mixture will look grainy). Add the eggs, 1 at a time, beating until well blended after each addition. Add the pumpkin, vanilla, and orange zest; beat until well blended. Add the flour mixture; beat just until incorporated. Divide the batter between the prepared pans.: The mixing begins with the sugar and oil creating a sandy, grainy texture that glitters slightly under light, which is normal. As you add each egg , the batter will smooth and thicken, with a faint sheen and a richer aroma; pause to scrape down the bowl so everything incorporates. When you fold in the pumpkin, the batter will deepen in color to a warm orange brown and take on a moist, supple quality. Adding the dry sifted mixture should be done gently and stopped as soon as streaks disappear to keep the cake tender. Over mixing at this stage can create a denser crumb that is less ideal for forming moist cake balls. When dividing the batter, look for even thickness in both pans to ensure similar bake time and uniform crumb texture.
- Bake the cakes until a tester comes out clean- about 35-40 minutes. Cool the cakes on a rack.: The kitchen will fill with a spicy, baked aroma, and the cake tops should spring back lightly when touched. Insert a toothpick and expect it to come out mostly clean or with a few moist crumbs, but not wet batter. Allow the pans to rest for 10 minutes before loosening the edges, then invert onto a cooling rack so steam escapes and the crumb firms slightly. A common pitfall is removing the cakes too soon, which can cause them to crumble when you try to handle them. Cooling fully before processing will yield the best crumb consistency.
- Line a baking sheet (one that fits in your refrigerator or freezer) with parchment or waxed paper. Remove the cakes in pieces and place them in your food processor. Process to crumbs; dump the crumbs into a large bowl. Add one tub of frosting to the crumb mixture. Mix with the back of a large spoon (or your hands). Add additional frosting, as needed, until the mixture sticks easily together. Form quarter-sized balls with your hands and place onto the prepared baking sheet. Place the balls into the refrigerator and chill until firm (a shorter stay in the freezer would be okay too).: As you break the cake into the processor, the aroma intensifies and the machine transforms soft cake into fine, uniform crumbs that resemble damp sand. When you add a tub of frosting , the mixture will come together gradually, becoming tacky and pliable; this is when you know you have the right ratio. Use your hands to judge texture, forming a ball that holds without crumbling or oozing excess frosting. Chill the balls until they are firm to the touch, which makes inserting sticks and dipping easier; if you skip chilling, the balls may fall apart when dipped. If the mixture is too wet, add a little more crumbs chilled from the freezer, and if too dry add a scant spoonful of frosting. Aim for uniform quarter sized portions so they set and present consistently.
- Melt the chocolate in a small glass bowl in the microwave in 30 second intervals. Keep checking and stirring. If you cook it too long, it will harden. It should take about a minute and a half for about a cup of chocolate. When using chocolate chips, I add about a half teaspoon of shortening to assist with smoothing it out. (fyi- white chocolate chips don’t melt well- for this project, I use white chocolate disks found at a specialty baking shop).: Melted chocolate should be glossy and pourable, moving like thick liquid when stirred, with no grainy bits. Microwaving in short bursts prevents overheating, which causes separation or seizing, and stirring between intervals helps distribute heat evenly. If you add a tiny bit of shortening to chips they will become silkier and easier to coat with, which is particularly helpful for white coatings that can be temperamental. Overcooking is the most common error, leading to dull, clumpy chocolate that does not set smoothly. Keep a damp cloth beneath the bowl to stabilize it on your work surface and watch the texture as you go.
- You’ll need to work quickly, so make sure you have all of your decorator supplies out. A paper plate is handy to use as a ‘catcher’ for errant sprinkles. Take out your tray of chilled cake balls and set it near your workplace. Place a stick about a half inch into the melted chocolate and then gently push into one of the chilled balls. Hold the ball with your other hand to make sure that it goes in nicely and doesn’t cause it to crack. Gently dip the ball into the melted chocolate and turn quickly to coat. Work over your paper plate to quickly sprinkle decor items onto the melted chocolate. The chocolate dries pretty fast so you need to do the decor right away. Place the decorated pop back onto your baking sheet and let set. Repeat with remaining balls, and melt more chocolate as you go along.: The dipping station should hum with activity, and you will notice steam rising faintly from the warm chocolate while the chilled pops remain cool. When you insert the stick, the coating of chocolate around the base helps anchor the pop, and holding the ball steady prevents it from cracking or falling. As you dip, the chocolate should flow smoothly around the ball, creating an even glossy shell; if it looks blotchy or streaky it may need a quick stir or reheating. Immediately add sprinkles while the chocolate is wet, because it sets quickly into a crisp shell that locks decorations in place. A typical slip up is not having enough workspace or supplies ready, which slows the process and causes chocolate to thicken mid session. Keep extras of melted chocolate handy, and if it cools, warm gently in 10 second bursts to restore fluidity.
- Pops should be stored in the refrigerator until ready to serve. These are okay to make 24 hours in advance.: Once set, the coating takes on a satisfying snap when bitten, and the chilled interior offers a cool, creamy contrast. Refrigeration maintains shape and stability, especially in warm environments where the coating could soften. If you plan to make them a day ahead, store them in a single layer on a tray or in an airtight container to keep decorations intact. Avoid stacking pops which can smudge decorations or dent the coating. A frequent oversight is leaving them at room temperature too long, which can cause the coating to soften and decorations to slide; keep them chilled until just before serving.
Recipe Variations about Pumpkin Cake Pops
There are many ways to adapt these pops for flavor and presentation while keeping the core method the same. Below are helpful variations and ideas to try, each expanded into a practical tip to guide creativity without losing the original charm.
- Use boxed cake mix shortcut If you are pressed for time, bake a boxed pumpkin or yellow cake mix according to package instructions, then process into crumbs and combine with frosting as directed. This saves time while still yielding tasty, uniform crumbs for shaping, and is a great option when you need to scale up for a large group.
- Switch coating colors Melt white candy wafers and tint with oil based colors for pastel or bright finishes; this creates a festive palette for holidays or themed parties. Oil based color prevents seizing that water based color can cause, and it keeps the coating glossy and smooth while offering vivid hues.
- Flavor the frosting glue Stir a little orange zest or a touch of ground cinnamon into the frosting before combining with crumbs to deepen the overall spice profile. This small adjustment layers flavor into the interior and complements the outer chocolate shell for more complexity in each bite.
- Try textured toppings After dipping, press finely chopped nuts or crushed cookies onto the wet coating for added crunch and visual interest. This creates delightful textural contrast and makes each pop feel more substantial, perfect for adult gatherings where complexity is appreciated.
- Make mini or jumbo sizes Adjust the portion size by rolling smaller balls for bite sized nibbles or larger ones for a showpiece; just be mindful that larger pops may need longer chilling time to set properly before dipping. Size affects chilling and dipping technique, so modify times accordingly to maintain structural integrity.
Perfect Matches for Pumpkin Cake Pops
These pops pair well with seasonal beverages and light accompaniments, and they shine at many occasions. Below I describe serving ideas and storage guidance to help you present them beautifully.
- Party platter presentation Arrange the pops upright in a decorated foam block or in a shallow vase filled with wrapped candies for a playful centerpiece. This makes them easy for guests to pick and creates an attractive focal point on the dessert table.
- Serve with warm beverages Pair with a hot cup of coffee or spiced tea for contrast The warm drink highlights the chilled interior and lets guests alternate between hot and cool sensations which is very satisfying.
- Holiday gatherings These are ideal for fall events such as Halloween or Thanksgiving They are portable, handheld, and festive which makes them perfect for mingling occasions or for serving at a dessert station during holiday visits.
- Storage and make ahead Store in a single layer in the refrigerator in an airtight container for up to 24 hours To transport, place in a shallow box with parchment between layers to prevent smudging and keep them cool until ready to serve.
- Seasonal pairings Serve them during autumn gatherings or school events where the pumpkin flavor fits the seasonal mood They also work well for bake sales and classroom parties because they are portion friendly and visually appealing.
FAQ
Conclusion
What makes these Pumpkin Cake Pops special is how they turn a comforting spiced cake into playful individual treats that are as fun to make as they are to eat. They are approachable, forgiving, and perfect for gatherings where you want a pretty, portable dessert without a lot of fuss. Give them a try the next time you want a seasonal sweet that can be prepared ahead and dressed up to suit any celebration, and enjoy the smiles they bring.
Pumpkin Cake Pops
Equipment
- Oven
- 9-inch cake pans
- Electric Mixer
- Food Processor
- Microwave-safe Bowl
Ingredients
- 3 cups all purpose flour Sifted and measured to provide structure and body to the cake batter, supporting leavening and absorbing moisture for tender crumb.
- 1 tablespoon ground cinnamon Aromatic and warm, added to infuse classic pumpkin-spice flavor and enhance the baked goods' cozy fragrance throughout the cake.
- 2 teaspoons ground ginger Earthy and slightly peppery, blended in to contribute depth to the spice profile and complement the pumpkin puree's sweetness.
- 2 teaspoons baking powder Light and dry, included to help the batter rise by creating air pockets when combined with wet ingredients and heat.
- 1 3/4 teaspoons ground allspice Fragrant and mildly sweet, used in small quantity to add a complex, clove-like warmth that balances other spices.
- 1 teaspoon baking soda Fine and reactive, incorporated to react with acidic components and assist in achieving proper rise and texture in the cake.
- 1 teaspoon salt Fine and crystalline, mixed to season the batter, enhance flavor balance, and control sweetness contrast in the finished pops.
- 1/2 teaspoon ground nutmeg Warm and nutty, sprinkled into the dry mix to contribute subtle aromatic notes that round out the pumpkin spice ensemble.
- 1 1/2 cups granulated white sugar Fine and granulated, stirred into the batter to sweeten, tenderize, and promote moistness by interacting with the fats and liquids.
- 1 cup packed brown sugar Moist and caramel-like when packed, folded into the cake batter to add richness, deeper flavor, and extra moisture.
- 1 cup canola or vegetable oil (or avocado) Neutral-flavored liquid fat, blended with sugars and eggs to create a moist, tender crumb and carry flavors evenly.
- 4 large eggs Beaten and incorporated to provide structure, leavening support, and richness while helping to emulsify the batter.
- One 15-ounce can unsweetened pumpkin puree Smooth and dense, folded in to contribute moisture, pumpkin flavor, and a soft, tender texture ideal for cake pops.
- 1 tablespoon vanilla extract Fragrant and sweet, mixed in to add floral vanilla notes that enhance overall flavor complexity and sweetness perception.
- 1 tablespoon finely grated orange zest Bright and citrusy, finely grated into the batter to add aromatic lift and a subtle fresh contrast to warm spices.
- Two 16-ounce tubs prepared white or vanilla frosting Creamy and sweet, used to bind cake crumbs into a moldable center for forming pops and to add extra flavor.
- 6 or 8-inch long treat sticks Sturdy and food-safe, inserted to support and present cake pops while allowing dipping and decorating without breaking.
- melting chocolate (or chocolate discs/wafers) Meltable and glossy, warmed and used to coat the formed cake balls, providing a crisp shell that seals and decorates.
- decor, sprinkles, etc. Colorful and textured, sprinkled or pressed on the coated pops to provide visual appeal and additional flavor/texture.
- ribbon for the sticks (optional) Decorative and optional, tied around sticks to enhance presentation for gifting or seasonal serving with a polished finish.
Instructions
- Preheat the oven to 350°F. Butter two 9-inch-diameter cake pans and dust with flour.: The scent of a warm oven creates anticipation, and preheating ensures even baking from the moment the pans go in. When you butter and flour the pans, the surface should gleam slightly with a thin film of fat and a light dusting of flour, which prevents sticking and promotes an even release. A common mistake is to skip flouring after buttering, which can cause the cake to cling to the pan and tear when removed. If your oven runs hot, consider checking the internal temperature with an oven thermometer to avoid over browning. I prefer using room temperature pans so the batter spreads evenly rather than shocking a cold surface.
- Sift flour and next 7 ingredients (through nutmeg) into a medium bowl.: You will notice the spices mingle visually as the warm brown specks combine with the pale flour, releasing a fragrant spice aroma as you sift. Sifting distributes the baking powder , allspice , baking soda , and salt evenly so the cake rises uniformly and the spice pockets do not create bitter bursts. A frequent error is to eyeball dry ingredients without sifting, which can yield uneven texture and lumps of spice. Use a whisk if you lack a sifter, and take a moment to inhale the blended spices, they hint at the final cake's character.
- Using electric mixer, beat both of the sugars and the oil in a large bowl until combined (mixture will look grainy). Add the eggs, 1 at a time, beating until well blended after each addition. Add the pumpkin, vanilla, and orange zest; beat until well blended. Add the flour mixture; beat just until incorporated. Divide the batter between the prepared pans.: The mixing begins with the sugar and oil creating a sandy, grainy texture that glitters slightly under light, which is normal. As you add each egg , the batter will smooth and thicken, with a faint sheen and a richer aroma; pause to scrape down the bowl so everything incorporates. When you fold in the pumpkin, the batter will deepen in color to a warm orange brown and take on a moist, supple quality. Adding the dry sifted mixture should be done gently and stopped as soon as streaks disappear to keep the cake tender. Over mixing at this stage can create a denser crumb that is less ideal for forming moist cake balls. When dividing the batter, look for even thickness in both pans to ensure similar bake time and uniform crumb texture.
- Bake the cakes until a tester comes out clean- about 35-40 minutes. Cool the cakes on a rack.: The kitchen will fill with a spicy, baked aroma, and the cake tops should spring back lightly when touched. Insert a toothpick and expect it to come out mostly clean or with a few moist crumbs, but not wet batter. Allow the pans to rest for 10 minutes before loosening the edges, then invert onto a cooling rack so steam escapes and the crumb firms slightly. A common pitfall is removing the cakes too soon, which can cause them to crumble when you try to handle them. Cooling fully before processing will yield the best crumb consistency.
- Line a baking sheet (one that fits in your refrigerator or freezer) with parchment or waxed paper. Remove the cakes in pieces and place them in your food processor. Process to crumbs; dump the crumbs into a large bowl. Add one tub of frosting to the crumb mixture. Mix with the back of a large spoon (or your hands). Add additional frosting, as needed, until the mixture sticks easily together. Form quarter-sized balls with your hands and place onto the prepared baking sheet. Place the balls into the refrigerator and chill until firm (a shorter stay in the freezer would be okay too).: As you break the cake into the processor, the aroma intensifies and the machine transforms soft cake into fine, uniform crumbs that resemble damp sand. When you add a tub of frosting , the mixture will come together gradually, becoming tacky and pliable; this is when you know you have the right ratio. Use your hands to judge texture, forming a ball that holds without crumbling or oozing excess frosting. Chill the balls until they are firm to the touch, which makes inserting sticks and dipping easier; if you skip chilling, the balls may fall apart when dipped. If the mixture is too wet, add a little more crumbs chilled from the freezer, and if too dry add a scant spoonful of frosting. Aim for uniform quarter sized portions so they set and present consistently.
- Melt the chocolate in a small glass bowl in the microwave in 30 second intervals. Keep checking and stirring. If you cook it too long, it will harden. It should take about a minute and a half for about a cup of chocolate. When using chocolate chips, I add about a half teaspoon of shortening to assist with smoothing it out. (fyi- white chocolate chips don’t melt well- for this project, I use white chocolate disks found at a specialty baking shop).: Melted chocolate should be glossy and pourable, moving like thick liquid when stirred, with no grainy bits. Microwaving in short bursts prevents overheating, which causes separation or seizing, and stirring between intervals helps distribute heat evenly. If you add a tiny bit of shortening to chips they will become silkier and easier to coat with, which is particularly helpful for white coatings that can be temperamental. Overcooking is the most common error, leading to dull, clumpy chocolate that does not set smoothly. Keep a damp cloth beneath the bowl to stabilize it on your work surface and watch the texture as you go.
- You’ll need to work quickly, so make sure you have all of your decorator supplies out. A paper plate is handy to use as a ‘catcher’ for errant sprinkles. Take out your tray of chilled cake balls and set it near your workplace. Place a stick about a half inch into the melted chocolate and then gently push into one of the chilled balls. Hold the ball with your other hand to make sure that it goes in nicely and doesn’t cause it to crack. Gently dip the ball into the melted chocolate and turn quickly to coat. Work over your paper plate to quickly sprinkle decor items onto the melted chocolate. The chocolate dries pretty fast so you need to do the decor right away. Place the decorated pop back onto your baking sheet and let set. Repeat with remaining balls, and melt more chocolate as you go along.: The dipping station should hum with activity, and you will notice steam rising faintly from the warm chocolate while the chilled pops remain cool. When you insert the stick, the coating of chocolate around the base helps anchor the pop, and holding the ball steady prevents it from cracking or falling. As you dip, the chocolate should flow smoothly around the ball, creating an even glossy shell; if it looks blotchy or streaky it may need a quick stir or reheating. Immediately add sprinkles while the chocolate is wet, because it sets quickly into a crisp shell that locks decorations in place. A typical slip up is not having enough workspace or supplies ready, which slows the process and causes chocolate to thicken mid session. Keep extras of melted chocolate handy, and if it cools, warm gently in 10 second bursts to restore fluidity.
- Pops should be stored in the refrigerator until ready to serve. These are okay to make 24 hours in advance.: Once set, the coating takes on a satisfying snap when bitten, and the chilled interior offers a cool, creamy contrast. Refrigeration maintains shape and stability, especially in warm environments where the coating could soften. If you plan to make them a day ahead, store them in a single layer on a tray or in an airtight container to keep decorations intact. Avoid stacking pops which can smudge decorations or dent the coating. A frequent oversight is leaving them at room temperature too long, which can cause the coating to soften and decorations to slide; keep them chilled until just before serving.
Notes
- Use boxed cake mix shortcut If you are pressed for time, bake a boxed pumpkin or yellow cake mix according to package instructions, then process into crumbs and combine with frosting as directed. This saves time while still yielding tasty, uniform crumbs for shaping, and is a great option when you need to scale up for a large group.
- Switch coating colors Melt white candy wafers and tint with oil based colors for pastel or bright finishes; this creates a festive palette for holidays or themed parties. Oil based color prevents seizing that water based color can cause, and it keeps the coating glossy and smooth while offering vivid hues.
- Flavor the frosting glue Stir a little orange zest or a touch of ground cinnamon into the frosting before combining with crumbs to deepen the overall spice profile. This small adjustment layers flavor into the interior and complements the outer chocolate shell for more complexity in each bite.
- Try textured toppings After dipping, press finely chopped nuts or crushed cookies onto the wet coating for added crunch and visual interest. This creates delightful textural contrast and makes each pop feel more substantial, perfect for adult gatherings where complexity is appreciated.
- Make mini or jumbo sizes Adjust the portion size by rolling smaller balls for bite sized nibbles or larger ones for a showpiece; just be mindful that larger pops may need longer chilling time to set properly before dipping. Size affects chilling and dipping technique, so modify times accordingly to maintain structural integrity.