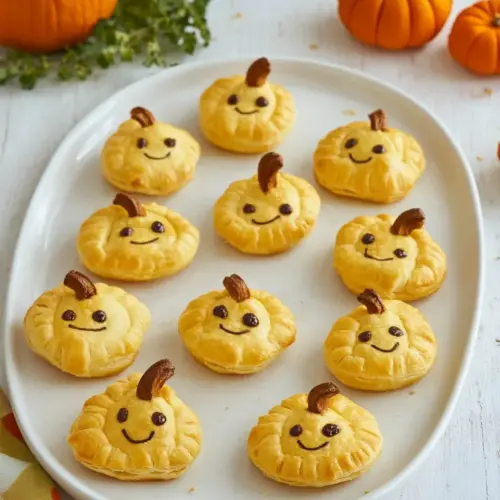
Puff Pastry Pumpkins
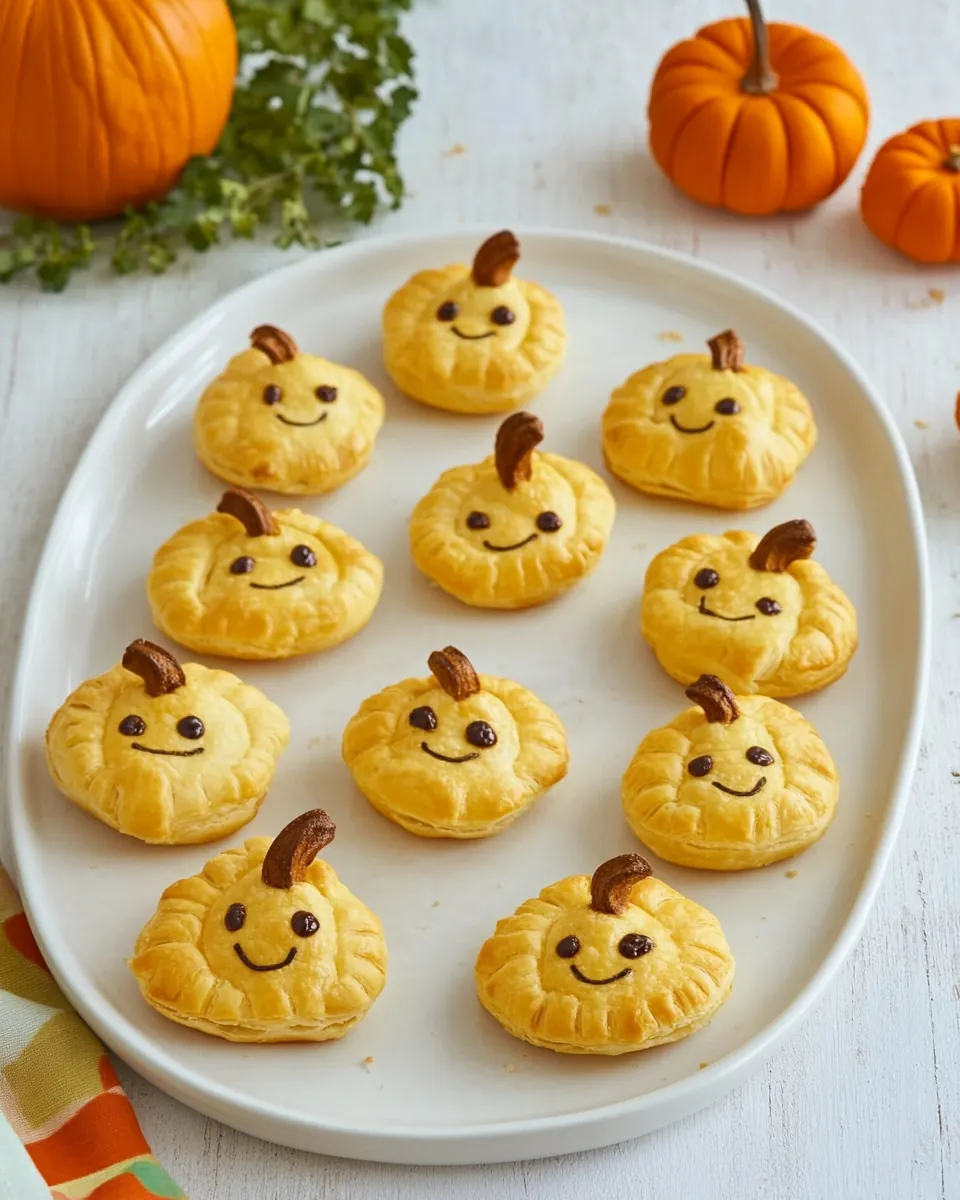
Puff Pastry Pumpkins are one of those treats I reach for when I want something playful yet elegant on the same plate. I first made these for an autumn brunch where I wanted a small, showstopping bite that felt festive without being fussy. The troupe of friends at my table loved that each little pumpkin looked like it came from a bakery, yet the steps were refreshingly straightforward. I remember laughing as one guest carefully inspected a tiny chocolate chip eye, then declared it too cute to eat, before promptly taking a bite.
On another afternoon, I found myself with a sheet of thawed pastry and a craving for something seasonal. Turning simple pantry items into a whimsical treat felt like a small creative victory. The combination of flaky pastry and creamy pumpkin filling makes these especially satisfying, and I enjoy how they bring a smile whether served at a family dessert spread or as a quirky addition to a tea gathering. I often tweak the size based on who I expect, but the basic idea remains the same and always draws compliments.
Recipe Snapshot
15 mins
5 mins
10 mins
Easy
200 kcal
American
Gluten-Free, Low FODMAP
Desserts
Baking sheet, Electric mixer, Pumpkin cookie cutter, Mixing bowl
What Sets This Puff Pastry Pumpkins Apart
They look like a celebration
I love how Puff Pastry Pumpkins arrive at the table like miniature party favors. Their shape alone makes people pause, and that visual appeal does half the job for you when entertaining. I always find that presentation matters, and these pumpkins score high on that front without requiring professional piping skills.
Simple, approachable technique
From my experience, the method is forgiving. Using store bought puff pastry cuts down on time and technical hurdles, so you can focus on assembly and flavor. I appreciate recipes that welcome kitchen novices, and this one fits that bill because the steps are clear and resilient to small mistakes.
Textural contrast that sings
The flaky, golden exterior and the smooth, spiced filling form a lovely contrast. When I bite into one, I want to hear a light crackle from the puff pastry and then feel the creamy pumpkin filling. That interplay of textures is what makes these memorable to me.
Customizable and family friendly
I often adapt the filling sweetness or spice level depending on my crowd. Kids gravitate toward the chocolate chip eyes, while adults often ask for a touch less sugar. This recipe is flexible, so you can tune it to your household without changing the core technique.
Great for seasonal occasions
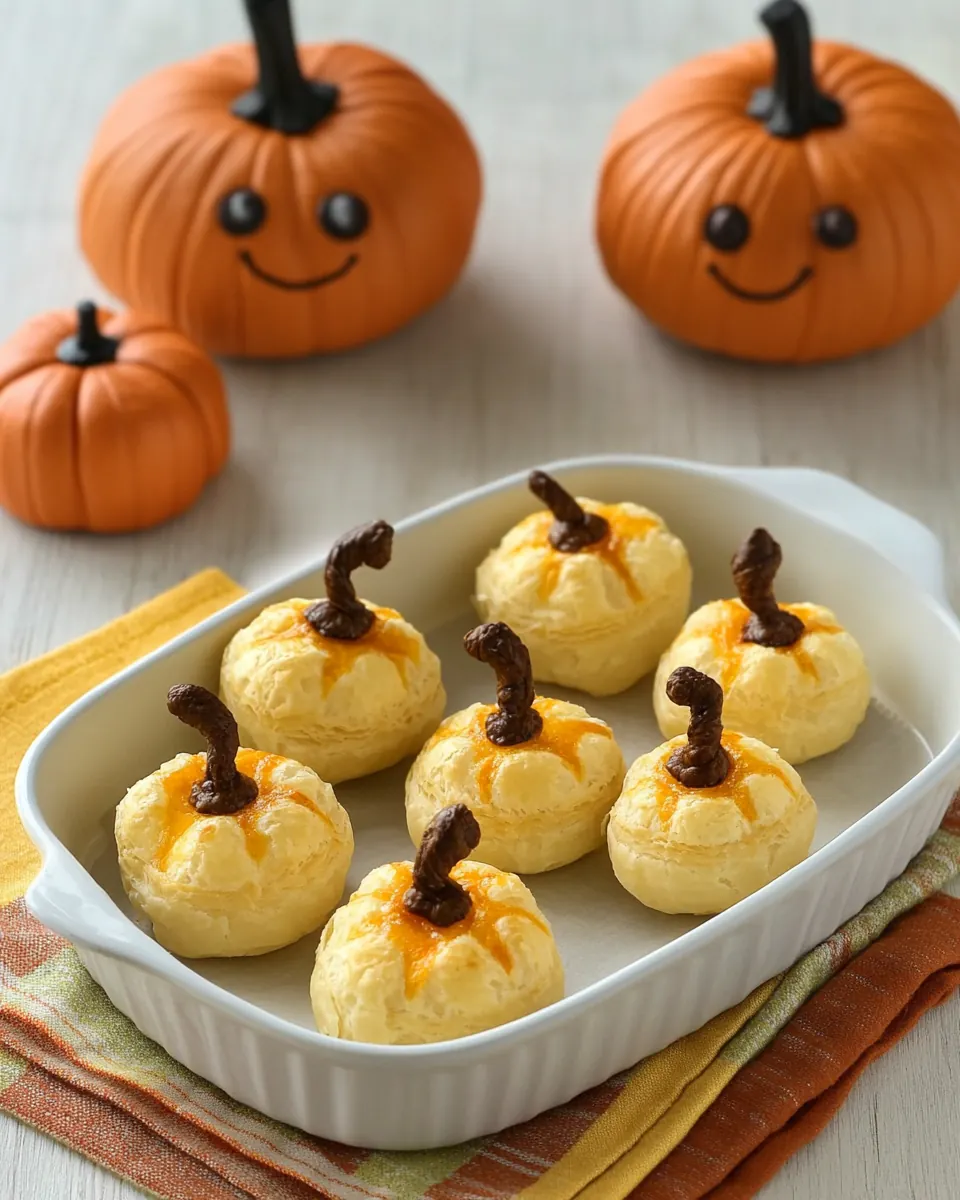
Because these are clearly autumnal, I find they work wonderfully for Halloween gatherings or fall brunches. They bring charm and a homemade vibe, and they are easy to serve on a platter so guests can help themselves. I keep making these whenever I want something festive that still feels relaxed.
Ingredient List for Puff Pastry Pumpkins
I choose ingredients here to balance flakiness, creaminess, and seasonal spice. The sheeted puff pastry is the structural hero, while a small amount of whipped cream and pumpkin puree create a silky, spiced filling. Powdered sugar and pumpkin pie spice do the flavor heavy lifting, and a hint of vanilla lifts everything. Together these components give you a dessert that is both light and indulgent.
- 2 sheets puff pastry: Provide a flaky, buttery base that puffs up into layers when baked; supports fillings and shapes the pumpkin form. Chill and handle gently to maintain its lamination and achieve a golden, crisp exterior.
- 1/2 cup whipping cream: Whip until soft peaks form to create a light, airy cream that adds richness and smoothness to the filling. Fold gently into other components to lend body and a silky mouthfeel without overpowering the pastry.
- 1/4 cup pumpkin puree: Contribute concentrated pumpkin flavor and creamy texture that defines the seasonal taste profile; adds moisture and natural color to the filling. Combine evenly with spices and sweeteners to ensure consistent flavor in each bite.
- 1/2 teaspoon vanilla extract: Add warm, floral aroma and subtle sweetness that enhances the dessert’s flavor complexity; balances the earthiness of pumpkin. Use sparingly to avoid overpowering the delicate creaminess and maintain a harmonious profile.
- 2 tablespoons powdered sugar: Sweeten and slightly thicken the filling while dissolving smoothly into cream or puree; helps achieve a pleasant sweetness level and light texture. Sift beforehand to prevent clumps and ensure an even, silky consistency.
- 1/4 teaspoon pumpkin pie spice: Introduce warm, aromatic notes like cinnamon, nutmeg, and cloves to establish classic pumpkin spice character. Sprinkle carefully to avoid dominance and to complement the pumpkin and vanilla for a balanced flavor.
The Method for Puff Pastry Pumpkins

Working through these steps is satisfying because each action produces a clear, immediate result. Keep your workspace organized, and take a moment to read each step fully before you begin so the process flows smoothly. Now let us walk through every stage so your little pumpkins look and taste their best.
- Preheat oven to 400.: As the oven warms, you will notice the ambient kitchen heat and a faint electrical hum while positions settle, which signals readiness. Getting the oven to 400 degrees is crucial because puff pastry relies on rapid oven spring to create distinct flaky layers, producing the light, airy texture you want. If the oven is not fully preheated, the pastry may spread rather than rise, yielding a denser result. A common mistake is putting pastry into an oven that registers warm but has not stabilized; wait for the indicator or use an oven thermometer for accuracy. The air should feel dry and the rack positioned in the center to allow even browning. When the temperature is right, the pastry will quickly begin to blister and separate into golden sheets.
- Unfold the puff pastry and cut into pumpkins using a pumpkin cookie cutter.: As you unfold each sheet, you will hear a soft rustling and notice the chilled, slightly tacky surface of the dough. Working on a lightly floured surface or parchment, press the pumpkin cookie cutter firmly and lift to reveal clean, shaped pieces, which should hold their edges crisply. This shaping step matters for presentation and even baking, because uniform pieces bake at a similar rate and puff consistently. Avoid stretching the dough when transferring, since that can distort the shape and cause uneven puffing. If the pastry feels sticky, chill it briefly to firm up so the cuts stay sharp.
- Place the pumpkins on a baking sheet and bake for 10-12 minutes, until golden brown.: As the pastries bake, listen for a very light crackling as layers separate, and watch them transform from pale to a rich golden tone. The visual cue of even golden color around the edges indicates proper caramelization of the butter layers inside the puff pastry , which adds flavor and crispness. If you open the oven too often, you will lose heat and compromise the rise, so resist peeking until the final few minutes. A frequent error is underbaking, which leaves the interior doughy; ensure the undersides are also golden by checking the bottoms briefly with a spatula.
- While the pumpkins are baking, place the remaining ingredients in a large bowl and beat with an electric mixer, or in the bowl of a stand mixer, until thoroughly combined and fluffy, about 5 minutes.: As you whip the whipping cream with the pumpkin puree , powdered sugar , vanilla extract , and pumpkin pie spice , you will hear the mixer hum and see the mixture thicken and lighten in color. The texture should become airy and hold soft peaks, giving a mousse like cream that will contrast nicely with the crisp pastry shell. This emulsification traps air, which makes the filling lift gently when spread. Overbeating will deflate the cream and create a buttery texture, so stop when it reaches the desired fluffiness. A common mistake is adding the sugar too fast, which can cause graininess; sifted powdered sugar and gradual incorporation prevent that issue.
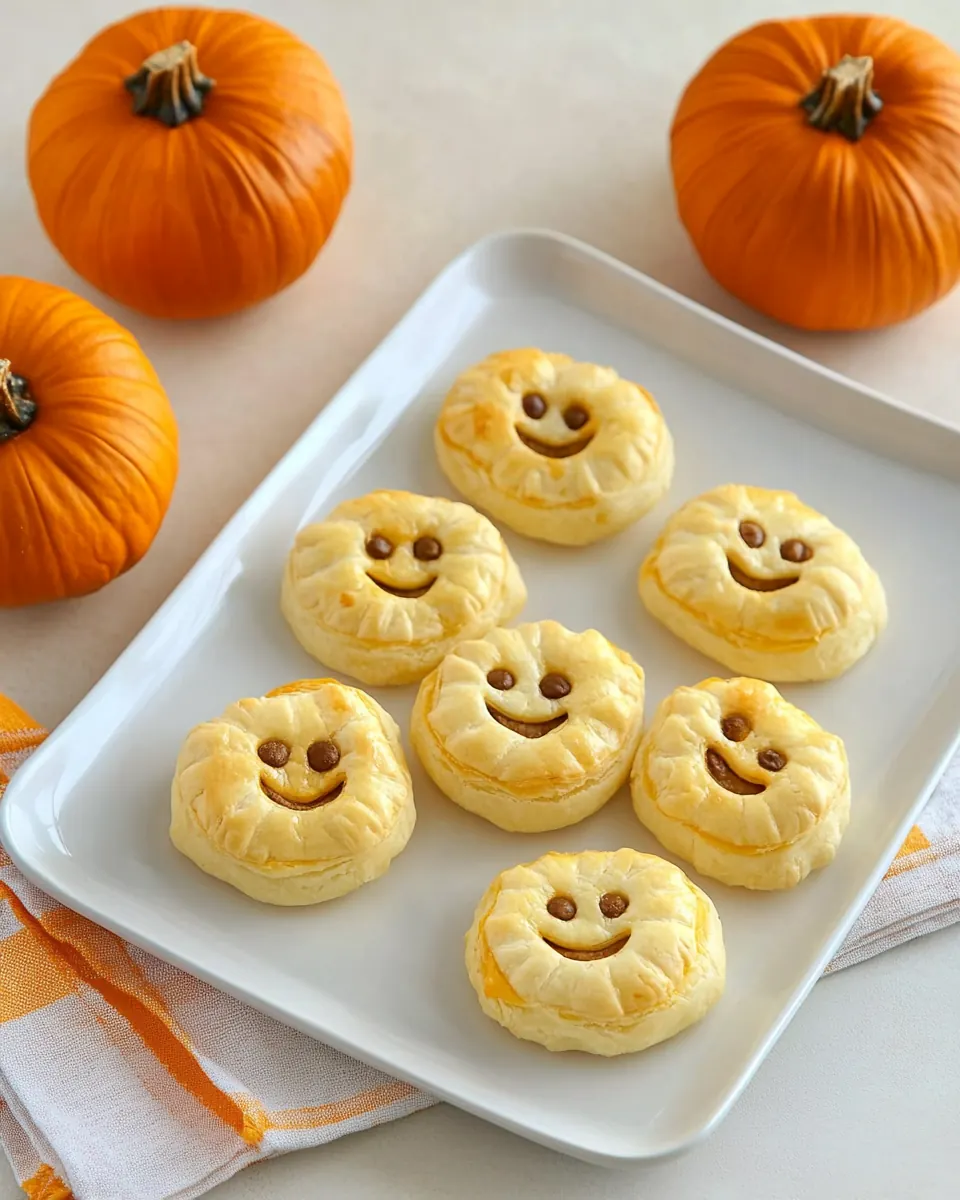
- Remove the pumpkins from the oven, allow to cool slightly, then slice in half. Top one half with the pumpkin mixture, place the other pumpkin half on top and decorate with chocolate chips for eyes as desired.: Fresh from the oven the little pastry pumpkins will smell toasty and buttery, and the tops will glisten. Let them cool just until you can handle them safely, as cutting while too hot might compress layers and release steam that softens the interior. Slicing in half reveals the airy pockets inside, which is your sign of success. A trap to avoid is slicing with a blunt knife which can smash the layers rather than cleanly separating them; use a serrated or sharp paring knife for precision.
- Top one half with the pumpkin mixture, place the other pumpkin half on top and decorate with chocolate chips for eyes as desired: When you spoon the filling onto the bottom halves, you will feel the creamy weight of pumpkin puree mixture settle into the hollow pockets, and the contrast of textures becomes apparent. Press the top halves lightly to create a little sandwich, and add playful chocolate chip eyes for personality. This finishing step is about balance, so avoid overfilling which can cause the pastries to slip or become soggy. A common error is filling while the pastry is too warm, which can melt the cream and alter texture; ensure a slight cooling period first.
How to Switch It Up
These small ideas will help you adapt Puff Pastry Pumpkins for different occasions and flavor preferences. Each tip below focuses on a single, practical adjustment that keeps the recipe simple while offering variety.
- Make smaller or larger pumpkins by using different sized cookie cutters to suit appetizers, desserts, or party platters.
- Adjust sweetness by adding or reducing the amount of powdered sugar so the filling matches your taste and pairs well with other desserts.
- Stabilize the filling for make ahead service by chilling the whipped filling briefly before assembly to keep it from spreading.
- Use fresh spices to elevate flavor by toasting and grinding your own pumpkin pie spice for a brighter aromatic punch.
- Prep ahead by baking the shaped pastry shells earlier in the day and assembling just before serving to preserve crispness.
- Play with decorations such as using seeds or small candies for faces instead of chocolate chips to change the look for different events.
Perfect Matches for Puff Pastry Pumpkins
These pairings and serving ideas will help you present Puff Pastry Pumpkins beautifully, whether you are hosting a Halloween spread or a cozy autumn brunch. Think about balance, ease of serving, and seasonal touches to elevate the experience.
- Cheese and savory board as a whimsical contrast offer the pumpkins alongside a selection of mild cheeses and crackers for a sweet and savory mix at parties.
- Warm beverages serve with hot tea or spiced coffee to complement the pumpkin spice notes and provide comfort on cool days.
- Brunch buffet add them to a fall brunch lineup next to fruit salads and breakfast pastries for a festive table display.
- Party platters arrange on a tiered stand for easy passing at social gatherings and to create an eye catching centerpiece.
- Storage tips keep leftover components separately in the fridge, with baked shells stored in an airtight container to maintain crunch and filling refrigerated for up to two days.
- Seasonal occasions these work wonderfully for Halloween, autumn gatherings, or school parties where a themed treat is appreciated.
FAQ
Conclusion
What makes these Puff Pastry Pumpkins special is the marrying of crispy, golden pastry with a light, spiced pumpkin filling that feels festive without fuss. If you enjoy seasonal desserts that look impressive yet stay approachable, this recipe is worth trying tonight or saving for your next autumn gathering. Give them a go, and let the playful presentation do some of the entertaining work for you while you enjoy the smiles around the table.
Puff Pastry Pumpkins
Equipment
- Baking Sheet
- Electric Mixer
- Pumpkin cookie cutter
- Mixing Bowl
Ingredients
- 2 sheets puff pastry Provide a flaky, buttery base that puffs up into layers when baked; supports fillings and shapes the pumpkin form. Chill and handle gently to maintain its lamination and achieve a golden, crisp exterior.
- 1/2 cup whipping cream Whip until soft peaks form to create a light, airy cream that adds richness and smoothness to the filling. Fold gently into other components to lend body and a silky mouthfeel without overpowering the pastry.
- 1/4 cup pumpkin puree Contribute concentrated pumpkin flavor and creamy texture that defines the seasonal taste profile; adds moisture and natural color to the filling. Combine evenly with spices and sweeteners to ensure consistent flavor in each bite.
- 1/2 teaspoon vanilla extract Add warm, floral aroma and subtle sweetness that enhances the dessert’s flavor complexity; balances the earthiness of pumpkin. Use sparingly to avoid overpowering the delicate creaminess and maintain a harmonious profile.
- 2 tablespoons powdered sugar Sweeten and slightly thicken the filling while dissolving smoothly into cream or puree; helps achieve a pleasant sweetness level and light texture. Sift beforehand to prevent clumps and ensure an even, silky consistency.
- 1/4 teaspoon pumpkin pie spice Introduce warm, aromatic notes like cinnamon, nutmeg, and cloves to establish classic pumpkin spice character. Sprinkle carefully to avoid dominance and to complement the pumpkin and vanilla for a balanced flavor.
Instructions
- Preheat oven to 400.: As the oven warms, you will notice the ambient kitchen heat and a faint electrical hum while positions settle, which signals readiness. Getting the oven to 400 degrees is crucial because puff pastry relies on rapid oven spring to create distinct flaky layers, producing the light, airy texture you want. If the oven is not fully preheated, the pastry may spread rather than rise, yielding a denser result. A common mistake is putting pastry into an oven that registers warm but has not stabilized; wait for the indicator or use an oven thermometer for accuracy. The air should feel dry and the rack positioned in the center to allow even browning. When the temperature is right, the pastry will quickly begin to blister and separate into golden sheets.
- Unfold the puff pastry and cut into pumpkins using a pumpkin cookie cutter.: As you unfold each sheet, you will hear a soft rustling and notice the chilled, slightly tacky surface of the dough. Working on a lightly floured surface or parchment, press the pumpkin cookie cutter firmly and lift to reveal clean, shaped pieces, which should hold their edges crisply. This shaping step matters for presentation and even baking, because uniform pieces bake at a similar rate and puff consistently. Avoid stretching the dough when transferring, since that can distort the shape and cause uneven puffing. If the pastry feels sticky, chill it briefly to firm up so the cuts stay sharp.
- Place the pumpkins on a baking sheet and bake for 10-12 minutes, until golden brown.: As the pastries bake, listen for a very light crackling as layers separate, and watch them transform from pale to a rich golden tone. The visual cue of even golden color around the edges indicates proper caramelization of the butter layers inside the puff pastry , which adds flavor and crispness. If you open the oven too often, you will lose heat and compromise the rise, so resist peeking until the final few minutes. A frequent error is underbaking, which leaves the interior doughy; ensure the undersides are also golden by checking the bottoms briefly with a spatula.
- While the pumpkins are baking, place the remaining ingredients in a large bowl and beat with an electric mixer, or in the bowl of a stand mixer, until thoroughly combined and fluffy, about 5 minutes.: As you whip the whipping cream with the pumpkin puree , powdered sugar , vanilla extract , and pumpkin pie spice , you will hear the mixer hum and see the mixture thicken and lighten in color. The texture should become airy and hold soft peaks, giving a mousse like cream that will contrast nicely with the crisp pastry shell. This emulsification traps air, which makes the filling lift gently when spread. Overbeating will deflate the cream and create a buttery texture, so stop when it reaches the desired fluffiness. A common mistake is adding the sugar too fast, which can cause graininess; sifted powdered sugar and gradual incorporation prevent that issue.
- Remove the pumpkins from the oven, allow to cool slightly, then slice in half. Top one half with the pumpkin mixture, place the other pumpkin half on top and decorate with chocolate chips for eyes as desired.: Fresh from the oven the little pastry pumpkins will smell toasty and buttery, and the tops will glisten. Let them cool just until you can handle them safely, as cutting while too hot might compress layers and release steam that softens the interior. Slicing in half reveals the airy pockets inside, which is your sign of success. A trap to avoid is slicing with a blunt knife which can smash the layers rather than cleanly separating them; use a serrated or sharp paring knife for precision.
- Top one half with the pumpkin mixture, place the other pumpkin half on top and decorate with chocolate chips for eyes as desired: When you spoon the filling onto the bottom halves, you will feel the creamy weight of pumpkin puree mixture settle into the hollow pockets, and the contrast of textures becomes apparent. Press the top halves lightly to create a little sandwich, and add playful chocolate chip eyes for personality. This finishing step is about balance, so avoid overfilling which can cause the pastries to slip or become soggy. A common error is filling while the pastry is too warm, which can melt the cream and alter texture; ensure a slight cooling period first.
Notes
- Make smaller or larger pumpkins by using different sized cookie cutters to suit appetizers, desserts, or party platters.
- Adjust sweetness by adding or reducing the amount of powdered sugar so the filling matches your taste and pairs well with other desserts.
- Stabilize the filling for make ahead service by chilling the whipped filling briefly before assembly to keep it from spreading.
- Use fresh spices to elevate flavor by toasting and grinding your own pumpkin pie spice for a brighter aromatic punch.
- Prep ahead by baking the shaped pastry shells earlier in the day and assembling just before serving to preserve crispness.
- Play with decorations such as using seeds or small candies for faces instead of chocolate chips to change the look for different events.