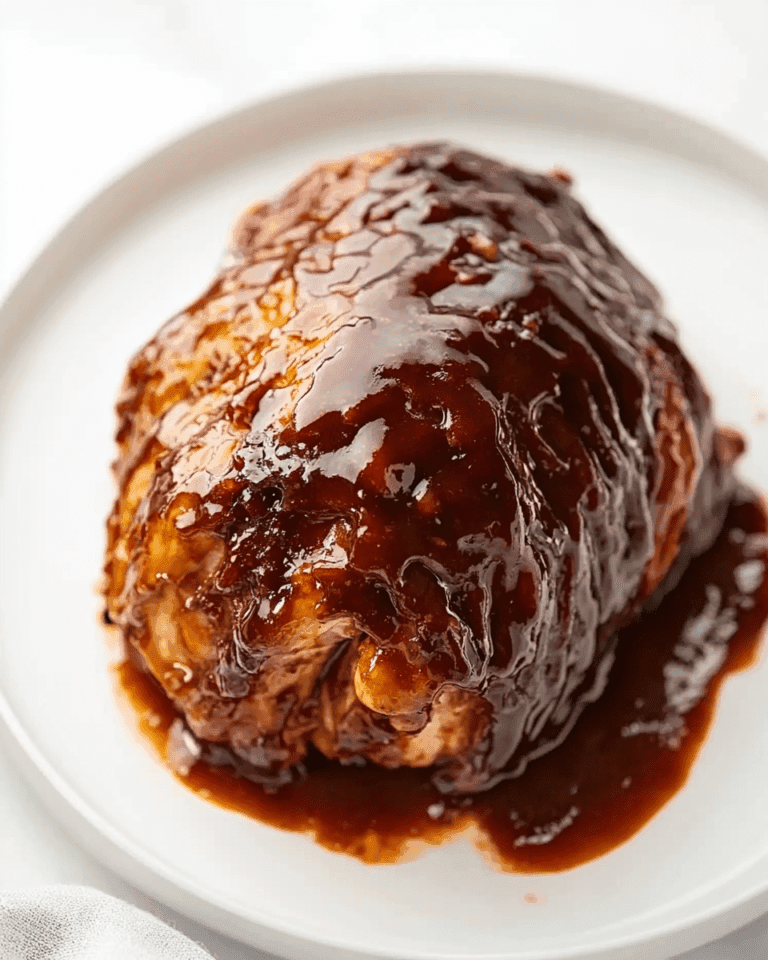
Focaccia Grilled Cheese
Focaccia Grilled Cheese is the kind of sandwich I reach for when I want something that feels indulgent but comes together in a snap.
There was a rainy afternoon when I first turned a leftover loaf of focaccia into this sandwich. I remember the way the kitchen filled with the scent of toasted bread and melting cheese, and how a simple tweak, using that airy, olive oil kissed focaccia instead of plain sandwich bread, transformed a weekday lunch into a small celebration. I carried one half to the living room, wrapped in a towel to keep the steam in, and every bite felt like comfort and crispness at once.
Over time I learned which cheeses play best together, how a quick broil sets the crust, and why letting the sandwich rest for a couple of minutes keeps everything wonderfully gooey without turning into a molten mess. I like to think of this as a grown up grilled cheese, the kind you make when you want to impress without fuss. Guests always ask what I did different, and I tell them it is the bread, the generous cheese, and the little nudge of garlic and salt that take it over the top.
Recipe Snapshot
27 mins
10 mins
17 mins
Easy
350 kcal
Italian
Gluten-Free, Keto
Dinner
Rimmed sheet pan, Foil or parchment paper, Sharp serrated knife
Why This Focaccia Grilled Cheese Is So Good
1. Textural Contrast
I adore how the Focaccia Grilled Cheese balances a crisp, olive oil scented crust with a molten interior. When the top gets golden and the crumb stays tender, you get biting satisfaction and rich, cheesy pull in the same mouthful. I love that every element contributes a different texture, it keeps each bite interesting.
2. Bold, layered flavors
Using three cheeses lets me layer flavors, from the sharp edge of sharp Cheddar cheese to the buttery, creamy notes of Gouda and the mild, melty body of Muenster cheese. I appreciate how those cheeses mingle when they melt, giving depth without one overpowering the others.
3. Speed and simplicity
We can take a bakery loaf, do a little prep, and be eating in under 30 minutes. That makes this perfect for an easy weeknight dinner or a relaxed weekend lunch. I often reach for this recipe when I need something fast that still feels thoughtfully cooked.
4. Flexible and approachable
I like that the recipe welcomes small adjustments, like an optional smear of pesto or more cheese if your loaf is large. It is forgiving, so you can make it your own without fearing it will fall apart. That makes it a go to for feeding friends, since it is both reliable and crowd pleasing.
5. Comfort with a touch of finesse
This sandwich gives the comfort of classic grilled cheese while feeling a bit elevated thanks to the focaccia and three cheese blend. I find it perfect for when I want something homey but slightly special. It is one of those recipes that feels nostalgic and modern at the same time.
Key Ingredients for Focaccia Grilled Cheese

These ingredients are intentionally simple and focused. The loaf of focaccia provides olive oil richness and an open crumb that crisps beautifully. The trio of shredded cheeses brings complementary melting qualities and flavor notes, while unsalted butter, garlic powder, and salt add browning, aroma, and seasoning. Optional pesto offers a bright herbal finish for those who want a pop of freshness.
- 1 loaf Focaccia Bread with Roasted Tomato & Parmesan see note 1: Provide structure and a flavorful base for the sandwich; tear or slice loaf to desired thickness and use as the bread for grilling. Enhance with roasted tomato and Parmesan already in the focaccia to boost savory depth and texture during grilling.
- 3 tablespoons unsalted butter softened: Soften and spread to create an even browning agent on the outside of the bread; allows for golden, crispy crust when pan-frying or pressing. Contributes a subtle richness that complements the cheeses and helps prevent sticking.
- 2/3 cup freshly shredded sharp Cheddar cheese see note 2: Deliver sharp, tangy flavor and melty texture when shredded and layered between focaccia slices; lends pronounced cheddar bite that balances milder cheeses. Sprinkle evenly to ensure consistent cheesiness in every bite.
- 1/2 cup freshly shredded Gouda cheese: Add a creamy, slightly sweet smokiness and smooth meltability; shred and distribute to contribute to the sandwich’s gooey interior. Provide a milder counterpoint to sharp cheddar while enhancing overall mouthfeel.
- 1/2 cup freshly shredded Muenster cheese: Introduce a mild, buttery flavor with excellent melting qualities; shred and layer to create stretchy, smooth cheese pull. Help bind the cheese mixture together and round out the flavor profile for a comforting finish.
- Garlic powder to taste: Season lightly to introduce subtle savory garlic notes; sprinkle to taste to avoid overpowering delicate cheese flavors. Use sparingly to lift overall aroma and complement the roasted tomato elements in the focaccia.
- Salt to taste: Enhance overall flavor balance and highlight savory components; add cautiously to taste so the saltiness doesn’t overwhelm cheeses or pesto. Use small adjustments during assembly to achieve a well-seasoned sandwich.
- Pesto (optional): Brighten and add herbaceous, nutty complexity if desired; spread a thin layer on bread interior or serve alongside as a dip. Optional inclusion that pairs particularly well with the roasted tomato and Parmesan in the focaccia.
Focaccia Grilled Cheese Instructions

These directions guide you from prep to the final warm, gooey sandwich. I like to work in a rhythm, preheating the oven and prepping the loaf so everything flows. Below I expand each step so you can follow sensory cues and avoid common pitfalls.
- Arrange a rack in the middle of the oven. Heat to high broil. Line a rimmed sheet pan with foil or high-heat parchment paper.: The moment the oven starts to heat you will notice a faint warmth and the metallic hum; placing the rack in the middle ensures even broiling distance and balanced heat exposure for the cut focaccia . Why this matters is the top of the loaf should toast quickly without burning the crumb, and the middle position gives you that controlled proximity. Watch for rapid color change during broiling as the sugars in the focaccia caramelize; a common mistake is leaving the loaf unattended, which can lead to blackened edges. If your oven broils unevenly, rotate the pan halfway to achieve uniform browning.
- Using a sharp serrated knife, cut the focaccia loaf in half horizontally. Place cut sides up on the prepared sheet pan. Spread softened butter all over the cut sides, then sprinkle lightly with garlic powder and salt.: As the oven reaches broil temperature you will hear a slight fan and feel a burst of hot air when you open the door; choose high broil to rapidly toast the cut surfaces. This quick, intense heat creates a crisp exterior and a toasted aroma that signals readiness. The why here is that initial searing helps form a protective crust, which keeps the interior from getting soggy when the cheese melts. A typical error is broiling from too far away or for too long, which can dry the bread; stand close by and watch closely for 1 to 3 minutes only.
- Broil on the middle rack for 2 minutes, or until lightly toasted. Watch closely so it doesn’t burn. Remove from the oven and reduce oven temperature to 400ºF.: The pan lining provides easy cleanup and reflects heat to help the underside of the bread brown slightly, producing that irresistible crunch. You will notice the foil catching any melted cheese, making it simple to salvage and avoid flare ups. A troubleshooting tip is to ensure the edges are flat so the loaf sits evenly; if the bread rocks it may brown unevenly.
- Sprinkle all three cheeses evenly over the bottom half of the bread. Place the top half back on to form a sandwich.: A sharp serrated knife glides through the airy crumb without compressing it, yielding two even cut surfaces for buttering. You can feel the knife tooth engage the crust, and a clean cut preserves the bread structure. The reason this technique matters is a smashed crumb will produce uneven toasting and a denser bite. Avoid pressing down hard, which compresses the interior and makes it harder for the cheese to heat evenly.
- Return to the oven and bake 15–18 minutes, or until the bread is crisp and the cheese is fully melted.: With the cut sides up, you can spread unsalted butter directly onto the exposed crumb, ensuring each crevice gets a touch. The butter will sink slightly into the pores, and when broiled it creates an appealing golden surface. If you skip spreading evenly, some spots will remain pale and not crisp properly, so take a moment to coat thoroughly but gently.
- Transfer to a cutting board, cool for 2 minutes, then cut crosswise into 6 sandwiches. If desired, gently lift the tops and spread with pesto. Serve warm and gooey!: The softened unsalted butter should glide across the crumb, imparting richness and aiding browning; the faint sizzle when it hits the hot pan is a good sign. The garlic powder and salt bloom in the heat, releasing aroma and seasoning the surface. This step matters because butter promotes Maillard reactions for color and flavor. A frequent mistake is using cold butter that tears the bread; make sure it is pliable but not melted.
- Broil on the middle rack for 2 minutes, or until lightly toasted: You will see the cut surfaces shift from pale to flecked gold, and the scent of toasted crust will make you eager to move to the next step. The quick broil gives initial structure and prevents sogginess during the bake. Since broilers differ, watch closely and be prepared to stop at the first sign of even golden color, avoiding deep browning that tastes bitter.
- Watch closely so it doesn’t burn: While broiling, the change happens fast; look for uniform color and remove the pan at the first hint of deep gold. The sensory cue is an increased toasty aroma and a visual of small browned spots across the crumb. If you let it char, the bitterness will overwhelm the cheeses, so vigilance is the best safeguard. If you notice uneven toasting, rotate the pan or move the rack slightly lower for the next attempt.
- Remove from the oven and reduce oven temperature to 400ºF: When you pull the pan out, the air will carry that toasty scent; lowering to 400ºF establishes a gentler environment for the cheese to melt without burning the crust. This step matters because extended exposure to broil heat can overbake the bread, while a moderate bake melts the cheeses evenly. A common pitfall is skipping the temperature drop, which risks a toasted top and unmelted center.
- Sprinkle all three cheeses evenly over the bottom half of the bread: As you scatter shredded sharp Cheddar cheese , Gouda , and Muenster cheese , notice how the pile forms a textured blanket on the crumb. Even distribution ensures every bite has the same melty experience. The why is that mixed melting characteristics create a silky, flavorful interior rather than a single dominant note. If you heap cheese in one spot you will get uneven melt and possible spillage during baking.
- Place the top half back on to form a sandwich: Lowering the top half creates a gentle press that brings heat and cheese into contact with both sides of the bread, encouraging an even melt. You should feel a slight give as the cheeses begin to warm, and steam may puff from the seam. This matters because it traps steam just long enough for the cheeses to melt fully, then the crust reestablishes crispness during baking. Avoid pressing too hard, which can expel melted cheese from the edges.
- Return to the oven and bake 15 to 18 minutes, or until the bread is crisp and the cheese is fully melted: During this bake the oven hums and the aroma deepens as the cheeses liquefy and mingle; watch for the crust to develop a deep golden tone and for the sandwich to feel warm through when touched carefully. The why is that sustained, moderate heat finishes melting without overbrowning. A common error is pulling the sandwich too early, leaving pockets of unmelted cheese; if in doubt, give it another few minutes and check again.
- Transfer to a cutting board, cool for 2 minutes, then cut crosswise into 6 sandwiches: Letting the sandwich rest lets the molten cheese settle slightly so you get clean cuts instead of molten streams across the counter. You will notice steam easing out and the cheese thickening just enough to hold shape. This pause matters because immediate slicing will cause the filling to gush and make the sandwiches harder to serve. Be cautious when cutting, using a serrated knife to avoid compressing the loaf.
- If desired, gently lift the tops and spread with pesto: A light smear of pesto adds a fresh herbal zing and a glossy finish; the aroma of basil and oil brightens the rich interior. This finishing touch provides contrast and lifts the overall profile. If you add pesto while the sandwich is piping hot, it will meld into the cheese quickly, so apply sparingly to maintain texture. The mistake to avoid is overloading with condiment, which can make the sandwich slippery and soggy.
- Serve warm and gooey: The ideal serving temperature is warm enough for the cheese to stretch but not so hot it scalds the mouth; you will notice a satisfying string when you pull a piece apart. Serving right away showcases the crisp crust and velvety interior at their peak. If you wait too long, the crust will soften as steam redistributes, so serve promptly for the best contrast.
Change It Up

I like to offer small variations so each sandwich night feels new. Below are practical ways to customize texture, flavor, and presentation without changing the core method. These tips are based on what I actually do in my kitchen.
- Try a different focaccia style Fresh focaccia with herbs or tomatoes shifts the flavor profile; choose a thinner loaf so the bread to cheese ratio stays balanced.
- Adjust the cheese ratio If you prefer a sharper bite, increase the sharp Cheddar cheese slightly, but keep Muenster for meltiness to avoid a crumbly texture.
- Use softened unsalted butter Soft butter spreads evenly and promotes an even golden crust, making broiling safer and more predictable.
- Add pesto sparingly A thin layer of pesto after baking brightens the sandwich without making it overly wet or heavy.
- Monitor oven times closely Since ovens vary, use visual cues like golden color and cheese melt rather than relying solely on minutes.
- Pack cheese into the cup when measuring Gently pressing shredded cheese into a measuring cup ensures accurate quantities and consistent results.
- Serve immediately for best contrast The crisp exterior and melty interior are at their peak right after cutting, so plan to serve as soon as slices are ready.
Best Served With
This sandwich works in many settings, from casual lunches to relaxed dinners. Think about pairing textures and flavors that complement the rich, melty interior, and consider practical serving notes for leftovers and occasions.
- Simple green salad A light tossed salad with a bright vinaigrette balances the richness and adds a refreshing contrast for lunch or dinner.
- Tomato soup Warm, smooth tomato soup creates a classic, comforting pairing that enhances the roasted tomato notes in the focaccia.
- Pickles or quick pickled vegetables Acidic, crunchy sides cut through the cheese and add a lively counterpoint to the sandwich.
- Casual occasions This is perfect for easy weeknight dinners, weekend lunches, or informal gatherings where hands on serving is welcome.
- Storage tips Store leftovers in an airtight container in the refrigerator for 1 to 2 days, then reheat in the oven to restore crispness rather than microwaving, which can make the bread soggy.
- Seasonal pairing In cooler months like fall, this sandwich feels cozy and satisfying, while in warmer seasons a light side salad keeps the meal bright.
- Serving style Cut into six manageable sandwiches for sharing, and offer small bowls of pesto on the side for guests to add as they like.
FAQ
Conclusion
What makes this sandwich special is the marriage of an olive oil kissed focaccia with a trio of cheeses that melt into a luxuriously gooey interior while the crust crisps to golden perfection. Try it the next time you want a meal that feels elevated but requires minimal fuss. It is an approachable recipe that rewards attention to small details like shredding cheese and watching the broiler, and I promise the results will feel comforting, memorable, and wholly worth the short effort.

Focaccia Grilled Cheese
Equipment
- Rimmed sheet pan
- Foil or parchment paper
- Sharp serrated knife
Ingredients
- 1 loaf Focaccia Bread with Roasted Tomato & Parmesan see note 1 Provide structure and a flavorful base for the sandwich; tear or slice loaf to desired thickness and use as the bread for grilling. Enhance with roasted tomato and Parmesan already in the focaccia to boost savory depth and texture during grilling.
- 3 tablespoons unsalted butter softened Soften and spread to create an even browning agent on the outside of the bread; allows for golden, crispy crust when pan-frying or pressing. Contributes a subtle richness that complements the cheeses and helps prevent sticking.
- 2/3 cup freshly shredded sharp Cheddar cheese see note 2 Deliver sharp, tangy flavor and melty texture when shredded and layered between focaccia slices; lends pronounced cheddar bite that balances milder cheeses. Sprinkle evenly to ensure consistent cheesiness in every bite.
- 1/2 cup freshly shredded Gouda cheese Add a creamy, slightly sweet smokiness and smooth meltability; shred and distribute to contribute to the sandwich’s gooey interior. Provide a milder counterpoint to sharp cheddar while enhancing overall mouthfeel.
- 1/2 cup freshly shredded Muenster cheese Introduce a mild, buttery flavor with excellent melting qualities; shred and layer to create stretchy, smooth cheese pull. Help bind the cheese mixture together and round out the flavor profile for a comforting finish.
- Garlic powder to taste Season lightly to introduce subtle savory garlic notes; sprinkle to taste to avoid overpowering delicate cheese flavors. Use sparingly to lift overall aroma and complement the roasted tomato elements in the focaccia.
- Salt to taste Enhance overall flavor balance and highlight savory components; add cautiously to taste so the saltiness doesn’t overwhelm cheeses or pesto. Use small adjustments during assembly to achieve a well-seasoned sandwich.
- Pesto optional Brighten and add herbaceous, nutty complexity if desired; spread a thin layer on bread interior or serve alongside as a dip. Optional inclusion that pairs particularly well with the roasted tomato and Parmesan in the focaccia.
Instructions
- Arrange a rack in the middle of the oven. Heat to high broil. Line a rimmed sheet pan with foil or high-heat parchment paper.: The moment the oven starts to heat you will notice a faint warmth and the metallic hum; placing the rack in the middle ensures even broiling distance and balanced heat exposure for the cut focaccia . Why this matters is the top of the loaf should toast quickly without burning the crumb, and the middle position gives you that controlled proximity. Watch for rapid color change during broiling as the sugars in the focaccia caramelize; a common mistake is leaving the loaf unattended, which can lead to blackened edges. If your oven broils unevenly, rotate the pan halfway to achieve uniform browning.
- Using a sharp serrated knife, cut the focaccia loaf in half horizontally. Place cut sides up on the prepared sheet pan. Spread softened butter all over the cut sides, then sprinkle lightly with garlic powder and salt.: As the oven reaches broil temperature you will hear a slight fan and feel a burst of hot air when you open the door; choose high broil to rapidly toast the cut surfaces. This quick, intense heat creates a crisp exterior and a toasted aroma that signals readiness. The why here is that initial searing helps form a protective crust, which keeps the interior from getting soggy when the cheese melts. A typical error is broiling from too far away or for too long, which can dry the bread; stand close by and watch closely for 1 to 3 minutes only.
- Broil on the middle rack for 2 minutes, or until lightly toasted. Watch closely so it doesn’t burn. Remove from the oven and reduce oven temperature to 400ºF.: The pan lining provides easy cleanup and reflects heat to help the underside of the bread brown slightly, producing that irresistible crunch. You will notice the foil catching any melted cheese, making it simple to salvage and avoid flare ups. A troubleshooting tip is to ensure the edges are flat so the loaf sits evenly; if the bread rocks it may brown unevenly.
- Sprinkle all three cheeses evenly over the bottom half of the bread. Place the top half back on to form a sandwich.: A sharp serrated knife glides through the airy crumb without compressing it, yielding two even cut surfaces for buttering. You can feel the knife tooth engage the crust, and a clean cut preserves the bread structure. The reason this technique matters is a smashed crumb will produce uneven toasting and a denser bite. Avoid pressing down hard, which compresses the interior and makes it harder for the cheese to heat evenly.
- Return to the oven and bake 15–18 minutes, or until the bread is crisp and the cheese is fully melted.: With the cut sides up, you can spread unsalted butter directly onto the exposed crumb, ensuring each crevice gets a touch. The butter will sink slightly into the pores, and when broiled it creates an appealing golden surface. If you skip spreading evenly, some spots will remain pale and not crisp properly, so take a moment to coat thoroughly but gently.
- Transfer to a cutting board, cool for 2 minutes, then cut crosswise into 6 sandwiches. If desired, gently lift the tops and spread with pesto. Serve warm and gooey!: The softened unsalted butter should glide across the crumb, imparting richness and aiding browning; the faint sizzle when it hits the hot pan is a good sign. The garlic powder and salt bloom in the heat, releasing aroma and seasoning the surface. This step matters because butter promotes Maillard reactions for color and flavor. A frequent mistake is using cold butter that tears the bread; make sure it is pliable but not melted.
- Broil on the middle rack for 2 minutes, or until lightly toasted: You will see the cut surfaces shift from pale to flecked gold, and the scent of toasted crust will make you eager to move to the next step. The quick broil gives initial structure and prevents sogginess during the bake. Since broilers differ, watch closely and be prepared to stop at the first sign of even golden color, avoiding deep browning that tastes bitter.
- Watch closely so it doesn’t burn: While broiling, the change happens fast; look for uniform color and remove the pan at the first hint of deep gold. The sensory cue is an increased toasty aroma and a visual of small browned spots across the crumb. If you let it char, the bitterness will overwhelm the cheeses, so vigilance is the best safeguard. If you notice uneven toasting, rotate the pan or move the rack slightly lower for the next attempt.
- Remove from the oven and reduce oven temperature to 400ºF: When you pull the pan out, the air will carry that toasty scent; lowering to 400ºF establishes a gentler environment for the cheese to melt without burning the crust. This step matters because extended exposure to broil heat can overbake the bread, while a moderate bake melts the cheeses evenly. A common pitfall is skipping the temperature drop, which risks a toasted top and unmelted center.
- Sprinkle all three cheeses evenly over the bottom half of the bread: As you scatter shredded sharp Cheddar cheese , Gouda , and Muenster cheese , notice how the pile forms a textured blanket on the crumb. Even distribution ensures every bite has the same melty experience. The why is that mixed melting characteristics create a silky, flavorful interior rather than a single dominant note. If you heap cheese in one spot you will get uneven melt and possible spillage during baking.
- Place the top half back on to form a sandwich: Lowering the top half creates a gentle press that brings heat and cheese into contact with both sides of the bread, encouraging an even melt. You should feel a slight give as the cheeses begin to warm, and steam may puff from the seam. This matters because it traps steam just long enough for the cheeses to melt fully, then the crust reestablishes crispness during baking. Avoid pressing too hard, which can expel melted cheese from the edges.
- Return to the oven and bake 15 to 18 minutes, or until the bread is crisp and the cheese is fully melted: During this bake the oven hums and the aroma deepens as the cheeses liquefy and mingle; watch for the crust to develop a deep golden tone and for the sandwich to feel warm through when touched carefully. The why is that sustained, moderate heat finishes melting without overbrowning. A common error is pulling the sandwich too early, leaving pockets of unmelted cheese; if in doubt, give it another few minutes and check again.
- Transfer to a cutting board, cool for 2 minutes, then cut crosswise into 6 sandwiches: Letting the sandwich rest lets the molten cheese settle slightly so you get clean cuts instead of molten streams across the counter. You will notice steam easing out and the cheese thickening just enough to hold shape. This pause matters because immediate slicing will cause the filling to gush and make the sandwiches harder to serve. Be cautious when cutting, using a serrated knife to avoid compressing the loaf.
- If desired, gently lift the tops and spread with pesto: A light smear of pesto adds a fresh herbal zing and a glossy finish; the aroma of basil and oil brightens the rich interior. This finishing touch provides contrast and lifts the overall profile. If you add pesto while the sandwich is piping hot, it will meld into the cheese quickly, so apply sparingly to maintain texture. The mistake to avoid is overloading with condiment, which can make the sandwich slippery and soggy.
- Serve warm and gooey: The ideal serving temperature is warm enough for the cheese to stretch but not so hot it scalds the mouth; you will notice a satisfying string when you pull a piece apart. Serving right away showcases the crisp crust and velvety interior at their peak. If you wait too long, the crust will soften as steam redistributes, so serve promptly for the best contrast.
Notes
- Try a different focaccia style Fresh focaccia with herbs or tomatoes shifts the flavor profile; choose a thinner loaf so the bread to cheese ratio stays balanced.
- Adjust the cheese ratio If you prefer a sharper bite, increase the sharp Cheddar cheese slightly, but keep Muenster for meltiness to avoid a crumbly texture.
- Use softened unsalted butter Soft butter spreads evenly and promotes an even golden crust, making broiling safer and more predictable.
- Add pesto sparingly A thin layer of pesto after baking brightens the sandwich without making it overly wet or heavy.
- Monitor oven times closely Since ovens vary, use visual cues like golden color and cheese melt rather than relying solely on minutes.
- Pack cheese into the cup when measuring Gently pressing shredded cheese into a measuring cup ensures accurate quantities and consistent results.
- Serve immediately for best contrast The crisp exterior and melty interior are at their peak right after cutting, so plan to serve as soon as slices are ready.