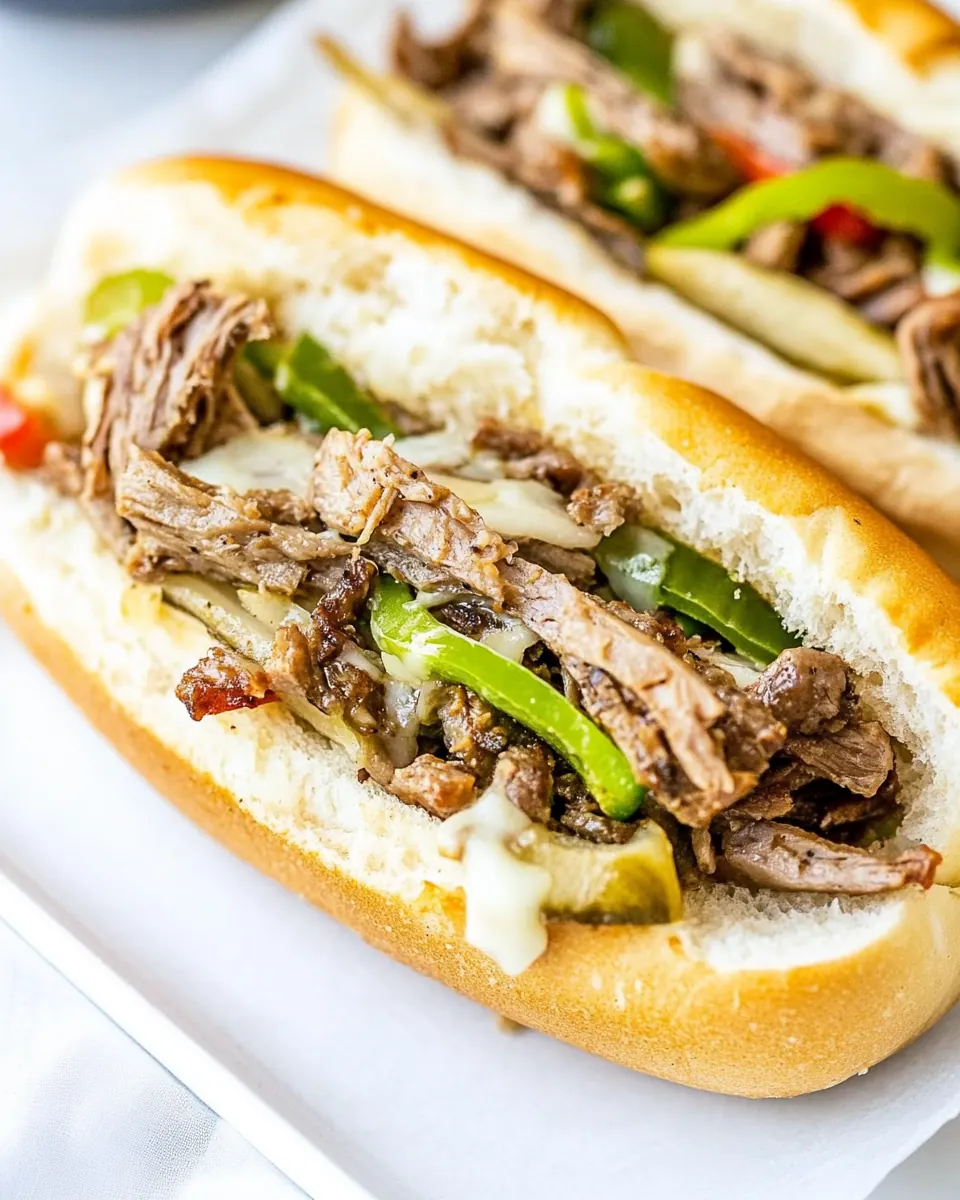
Philly Cheesesteak
Philly Cheesesteak has been my go to comfort sandwich on nights when I want something fast, savory, and utterly satisfying. Growing up near a busy deli, I learned to love the simple ritual of thinly sliced steak tossed with sweet onions and peppers, then melted under gooey cheese until everything sings together. I still remember the first time I tried to recreate that exact combo at home, nervously slicing a large steak into thin ribbons and praying the bread would hold all the juicy filling. That first homemade attempt was messy, loud, and deeply rewarding, and it taught me a few little habits that make a big difference every time I cook this sandwich.
What I love about this version of Philly Cheesesteak is how approachable it is. You do not need fancy tools, and the flavors are straightforward enough that friends always ask for seconds. Over the years I’ve tuned small things like how hot to get the skillet, when to add the peppers, and how long to melt the cheese so the sandwich is warm through but not soggy. There is a rhythm to the process: sauté the onions until they start to brown, sear the steak until it sings in the pan, then bring it all together with slices of provolone cheese for that quintessential stretch and melt.
Recipe Snapshot
25 mins
10 mins
15 mins
Easy
600 kcal
American
Keto, Gluten-Free
Dinner
Large Baking Sheet, 12-inch Cast Iron Skillet
The Magic of This Philly Cheesesteak
True comfort food that’s still fast
I love how Philly Cheesesteak manages to be indulgent and weeknight friendly at once. The short ingredient list and quick stovetop cooking make it perfect for an easy weeknight dinner, yet the result tastes like a treat you might find at a city deli. I often reach for this when I want something satisfying without a long list of prep steps.
Bold, layered flavors
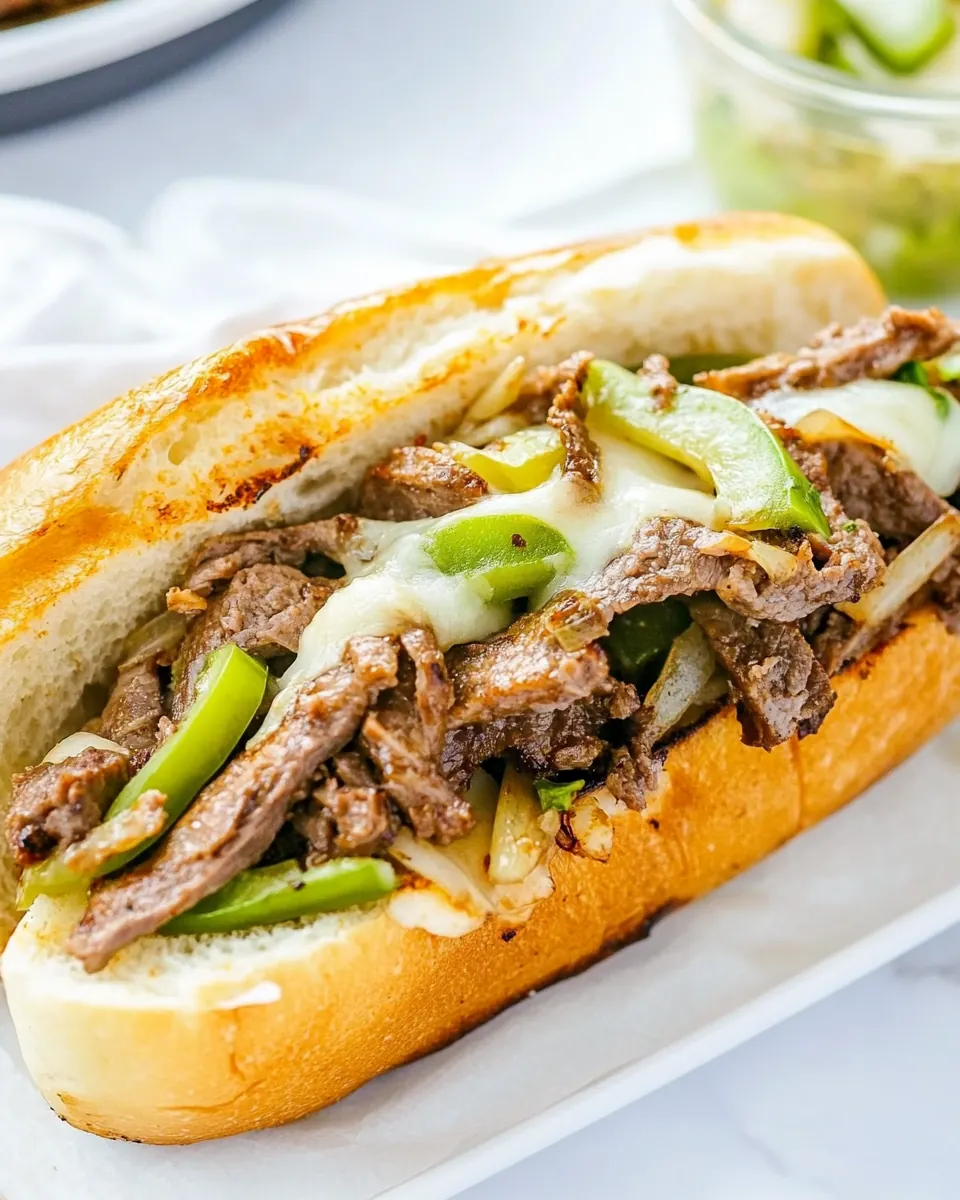
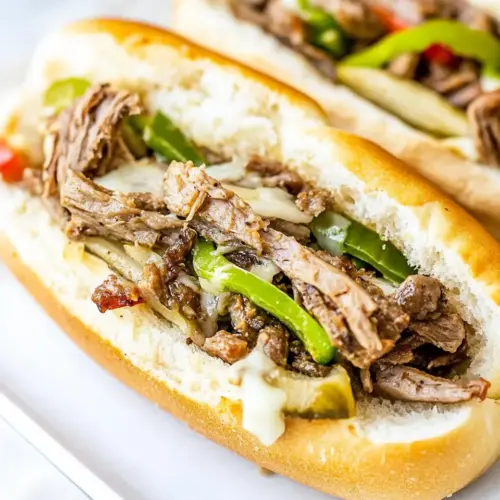
The combination of rib eye steak seared at high heat with sweet onion and bell pepper creates a balance of savory, sweet, and slightly charred notes. The melted provolone cheese ties everything together, adding creaminess that lets each bite feel cohesive and indulgent. I find that each component shines while still blending into a harmonious whole.
Highly customizable
I love recommending this recipe because you can tweak it easily for your tastes. If you prefer more char and texture, let the vegetables get a little deeper color. If you like it juicier, slice the steak thicker or add an extra pat of butter to the rolls. Small adjustments change the profile in meaningful ways without complicating the technique.
Hands on, unfussy technique
This recipe celebrates simple stovetop skills. Searing the steak and sautéing the vegetables are basic techniques that build confidence. I enjoy the immediacy of hearing the sizzle as the meat hits the pan, and I know many readers appreciate a recipe that teaches useful kitchen instincts while delivering a fantastic sandwich.
Perfect for sharing
Because it serves four, Philly Cheesesteak is great for casual meals with friends or family. You can make it all at once on a large skillet, and people always gather around as you pull the skillet lid off to reveal melted cheese and sizzling meat. That communal vibe is a wonderful reason to make this again and again.
Ingredients to Make Philly Cheesesteak
I believe the best sandwiches start with thoughtful ingredients that play well together. For this Philly Cheesesteak, the cast of characters is small but purposeful. The rib eye steak brings rich beefy flavor, the onion and bell pepper add sweet and slightly charred contrast, and the provolone cheese provides a silky finish. The oils and butter create mouthfeel and help the bread toast into a sturdy cradle for the filling.
- 4 tablespoon butter (unsalted, melted): Melted and used to enrich and brown the rolls and sauté vegetables, adding a rich mouthfeel and helping ingredients caramelize; contributes a subtle creamy flavor that complements the beef and cheese. Heat gently to avoid burning and brush onto the cut sides of the hoagies for a buttery finish. Also useful for kicking off the pan-searing process to develop golden edges on peppers and onions.
- 1 clove garlic (minced): Minced and incorporated to impart a sharp, aromatic background note that enhances the savory profile of the steak and vegetables. Add early to the pan or mix with melted butter to evenly distribute its flavor without overwhelming the sandwich. Provides a familiar garlicky lift that balances richness from the cheese and meat.
- 4 Hoagie rolls (sliced almost through): Sliced almost through to hold all fillings while allowing heat to penetrate and melty cheese to pool inside, creating the classic handheld format of the sandwich. Toast the cut sides briefly after buttering to add texture and prevent sogginess from juices. Serves as the structural base that contains steak, peppers, onions, and cheese.
- 2 tablespoon olive oil (divided): Divided between steps to control cooking: one portion used for browning the steak to develop a flavorful crust, and the other used for sautéing peppers and onions to achieve tender, caramelized vegetables. Provides a neutral fruity flavor and a higher smoke point than butter, helping achieve proper searing temperatures. Use sparingly to prevent greasiness while ensuring even cooking.
- 1 pound rib eye steak (one big 1 or 2 8 oz steaks, cut into thin strips): Cut into thin strips to maximize surface area for quick, even searing and to produce tender, juicy bites that meld with melted cheese. Season before or during cooking to develop savory crusts via the Maillard reaction, which enhances umami and overall depth. Use high heat and minimal handling to avoid overcooking and to preserve tenderness.
- 1/4 teaspoons salt (or to taste): Added sparingly to season the steak and vegetables and to enhance overall flavors without making the sandwich taste salty; adjust to personal preference. Sprinkle during cooking to help the meat release its juices and to build a balanced savory profile. Combine with pepper for a classic steakhouse seasoning.
- 1/2 teaspoon black pepper (or to taste): Ground and used to add mild heat and a fragrant spice that complements the richness of the beef and butter; helps lift and define other flavors. Apply during cooking to meld into the meat and vegetables for consistent seasoning throughout. Adjust quantity to taste to avoid overpowering the sandwich.
- 1 medium bell pepper (sliced): Sliced and sautéed to provide sweetness, bright color, and a tender-crisp texture that contrasts with the meaty filling and melted cheese. Cook until slightly caramelized to bring out natural sugars that balance savory components. Select firm peppers and slice uniformly for even cooking.
- 1 large onion (sliced): Sliced and caramelized to contribute sweet, savory depth and soft texture that pairs perfectly with seared steak and melted cheese. Cook low and slow or until browned to maximize sweetness and reduce sharpness, creating a rich layer of flavor. Also helps absorb some of the steak juices for added cohesion inside the roll.
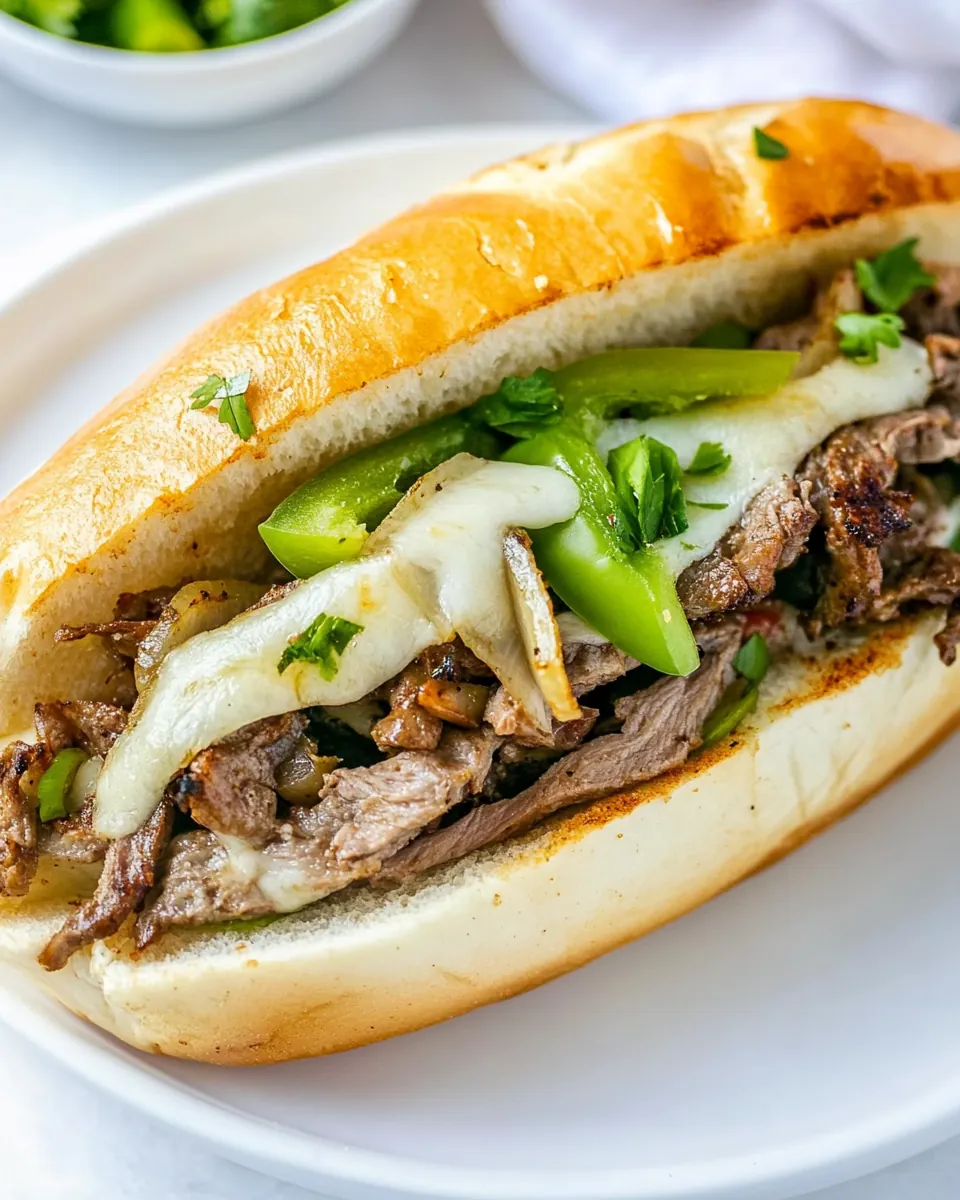
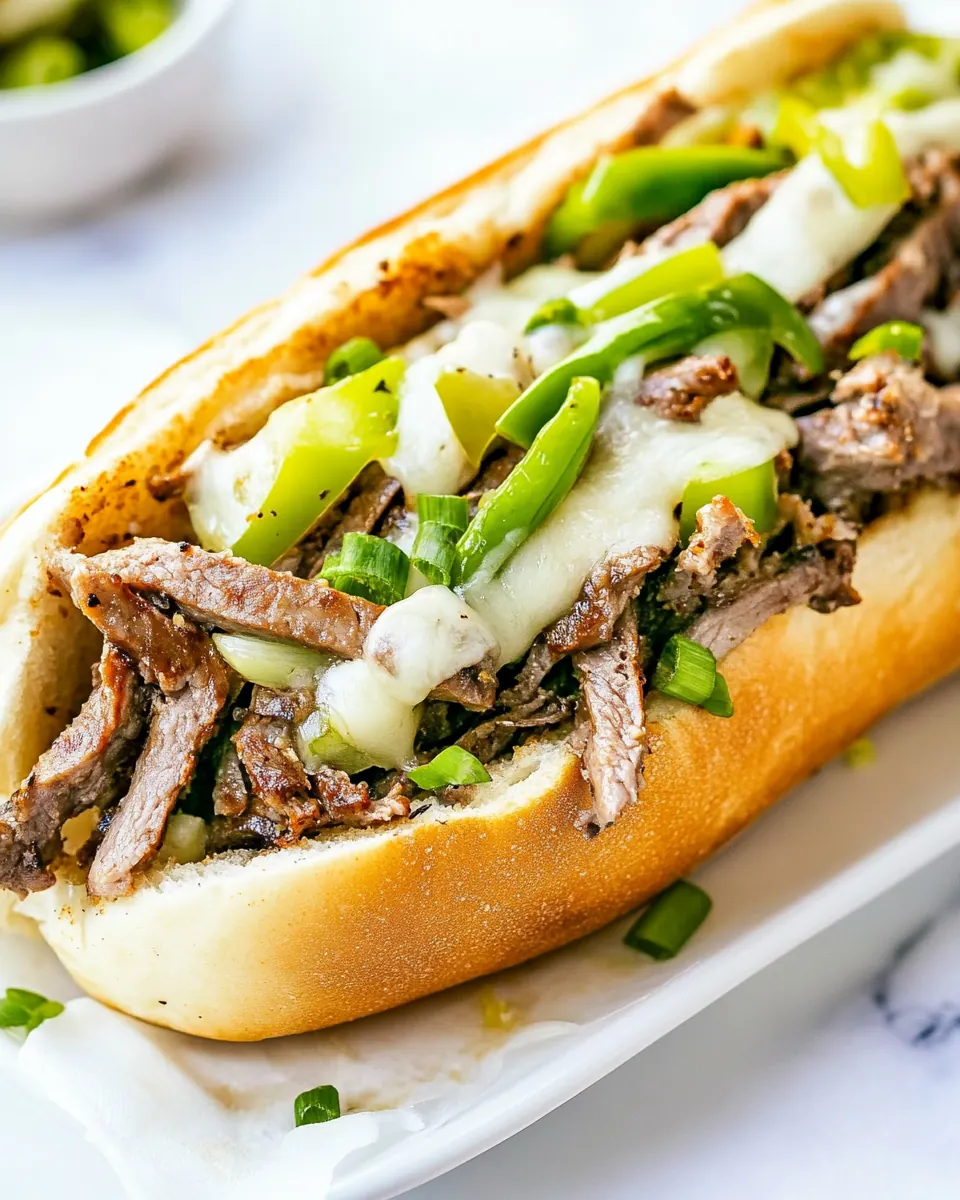
- 8 slices provolone cheese: Placed over the cooked steak and vegetables to melt into a creamy, stringy layer that binds the filling and adds milky, slightly salty flavor. Lay slices on top of the hot filling and cover briefly to encourage even melting. Choose provolone for its mild profile that won’t overpower the beef or peppers.
How to Cook Philly Cheesesteak
These steps are straightforward, but timing and attention make all the difference. Move with purpose, listen for the sizzle, and watch for visual cues so each component reaches the right level of caramelization and melt. The sequence of toasting, sautéing, searing, and melting brings everything together into a cohesive, juicy sandwich.
- Prep the rolls: Combine the butter with the garlic and then spread on both cut sides of the Hoagie rolls. Place them on a baking sheet with cut side up and transfer them to the oven under the broiler setting until the buns are toasted. Flip them over and toast on the other side, about 2 min per side.: Combine the butter with the garlic and then spread on both cut sides of the Hoagie rolls. Place them on a baking sheet with cut side up and transfer them to the oven under the broiler setting until the buns are toasted. Flip them over and toast on the other side, about 2 min per side. : As the broiler warms the buttered surfaces, you should smell the toasty garlic aroma and see the edges turn golden brown, which gives the sandwich a warm, savory foundation. This step matters because a well toasted roll resists sogginess from the filling while adding crisp contrast to the tender meat. Listen for a faint popping of butter as it hits the hot tray, and beware of overbrowning a few seconds too long can quickly go from golden to burnt. If your broiler runs hot, move the tray slightly farther from the element to control color.
- Cook the veggies: Heat 1 tbsp of the olive oil in a large skillet over medium heat. Add the sliced onion and peppers, season with salt and pepper and sauté for 5-7 minutes until the onions are translucent and start to brown. Transfer to a plate and set aside.: Heat 1 tbsp of the olive oil in a large skillet over medium heat. Add the sliced onion and peppers, season with salt and pepper and sauté for 5-7 minutes until the onions are translucent and start to brown. Transfer to a plate and set aside. : Youll notice a gentle sizzling as the onion and bell pepper hit the pan and a sweet fragrance as the sugars begin to caramelize, signaling deepening flavor. Achieving light browning is essential because it creates the sweet savory base that complements the beef. A common mistake is crowding the pan, which causes steaming rather than browning, so give the vegetables space to color and stir occasionally for even cooking.
- Cook steak: Add the remaining tbsp of olive oil to the skillet and the steak. Season with salt and pepper and cook for 2 to 4 minutes until the steak is cooked through. Add the onion/pepper mixture back to the skillet and toss. Turn the heat down to low.: Add the remaining tbsp of olive oil to the skillet and the steak. Season with salt and pepper and cook for 2 to 4 minutes until the steak is cooked through. Add the onion/pepper mixture back to the skillet and toss. Turn the heat down to low. : When the rib eye steak hits the hot skillet you should hear a pronounced sizzle and see seared edges develop quickly, creating rich, brown crust and intense beefy aroma. This crust locks in juices and builds savory depth that defines the sandwich. If you keep the heat too low, the steak will steam and lose that desirable caramelized flavor, while too high heat risks burning and toughness. After adding the vegetables back in, the mingled aromas tell you the flavors are marrying, so reduce the heat to avoid overcooking.
- Add cheese: Divide the mixture into 4 using a spatula in the skillet. Place 2 slices of cheese over each quarter, cover the skillet with a lid and leave it for about a minute until the cheese melts.: Divide the mixture into 4 using a spatula in the skillet. Place 2 slices of cheese over each quarter, cover the skillet with a lid and leave it for about a minute until the cheese melts. : As the lid traps heat, the provolone cheese will soften into a glossy, stretchy blanket, and youll see it gently ooze around the meat and vegetables, visually cueing the right moment to assemble. Melting the cheese this way ensures even coverage and prevents the sandwich from being dry. A frequent misstep is lifting the lid too soon, which prevents uniform melting; be patient for that cohesive, molten texture.
- Finish and serve: Using a spatula, spoon cheesesteak mixture into the toasted Hoagie rolls. Serve warm.: Using a spatula, spoon cheesesteak mixture into the toasted Hoagie rolls. Serve warm. : When you transfer the glossy filling into the toasted rolls, notice how the warm bread absorbs and amplifies the mixtures juices while keeping the exterior crisp. Serving immediately preserves the contrast between textured bread and tender filling. If you wait too long, the rolls can soften and lose the textural balance, so plan to serve right away for the ideal experience.
Recipe Notes about Philly Cheesesteak
Ive collected a few practical notes that I rely on every time I make Philly Cheesesteak. These tips cover timing, texture, and storage so your sandwich comes out great whether it is a casual family meal or a late night craving. Below are focused pointers to help you avoid common pitfalls and amplify flavor.
- Watch the broiler: Keep the rolls a few inches from the element and watch closely because the buttered surface can go from golden to burnt within seconds.
- Slice steak thin: For tender results, partially freeze the steak for 15 to 20 minutes before slicing to make thin, uniform strips that cook quickly and evenly.
- Divide oil usage: Using one tablespoon of oil for vegetables and one for the steak helps each component brown properly without becoming greasy.
- Layer cheese last: Place the provolone cheese over warmed filling and cover briefly so it melts evenly and creates that creamy binding texture.
- Keep components separate for storage: Store the filling and the hoagie rolls separately in the fridge to prevent sogginess and reheat the filling on the stove for best texture.
Serving Suggestions
This Philly Cheesesteak shines in relaxed settings, and with a few thoughtful accompaniments it becomes a full meal that feels both satisfying and shareable. Serve warm and build a casual spread so guests can customize toppings or sides to their liking. Below are detailed serving ideas, appropriate occasions, and storage tips presented as a list for easy scanning.
- Classic sides: Serve with crispy potato chips or fries for a traditional sandwich combo that adds crunch and salt contrast to the tender filling.
- Simple salad: A crisp green salad dressed lightly balances the richness of the sandwich and refreshes the palate between bites.
- Casual gatherings: This recipe is ideal for game nights or informal dinners where people can serve themselves and enjoy a warm, hearty sandwich.
- Family dinner: The four serving size makes it a great option for a family meal; prepare the filling on the stove and let everyone assemble at the table for a laid back dinner.
- Make ahead and store: Keep the sandwich components separate in the fridge, store the filling in an airtight container for 3 to 4 days, and toast the rolls just before serving to maintain texture.
- Seasonal pairing: This sandwich works year round, but it is especially satisfying in cooler months when warm, hearty food feels most comforting.
- Presentation tip: Serve each sandwich on a parchment lined tray and garnish with a few extra slices of raw bell pepper for color and crunch if desired.
FAQ
Conclusion
This recipe captures what makes the sandwich such a beloved classic: tender, seared rib eye paired with sweet sautéed onions and peppers, all bound together with melted provolone in a toasted hoagie roll. Give it a try on a busy weeknight or when you want something truly comforting that still comes together quickly. I hope this version becomes a dependable favorite in your kitchen, one you return to when you want big flavors with minimal fuss.
Philly Cheesesteak
Equipment
- Large Baking Sheet
- 12-inch Cast Iron Skillet
Ingredients
- 4 tablespoon butter (unsalted, melted) Melted and used to enrich and brown the rolls and sauté vegetables, adding a rich mouthfeel and helping ingredients caramelize; contributes a subtle creamy flavor that complements the beef and cheese. Heat gently to avoid burning and brush onto the cut sides of the hoagies for a buttery finish. Also useful for kicking off the pan-searing process to develop golden edges on peppers and onions.
- 1 clove garlic (minced) Minced and incorporated to impart a sharp, aromatic background note that enhances the savory profile of the steak and vegetables. Add early to the pan or mix with melted butter to evenly distribute its flavor without overwhelming the sandwich. Provides a familiar garlicky lift that balances richness from the cheese and meat.
- 4 Hoagie rolls (sliced almost through) Sliced almost through to hold all fillings while allowing heat to penetrate and melty cheese to pool inside, creating the classic handheld format of the sandwich. Toast the cut sides briefly after buttering to add texture and prevent sogginess from juices. Serves as the structural base that contains steak, peppers, onions, and cheese.
- 2 tablespoon olive oil (divided) Divided between steps to control cooking: one portion used for browning the steak to develop a flavorful crust, and the other used for sautéing peppers and onions to achieve tender, caramelized vegetables. Provides a neutral fruity flavor and a higher smoke point than butter, helping achieve proper searing temperatures. Use sparingly to prevent greasiness while ensuring even cooking.
- 1 pound rib eye steak (one big 1 or 2 8 oz steaks, cut into thin strips) Cut into thin strips to maximize surface area for quick, even searing and to produce tender, juicy bites that meld with melted cheese. Season before or during cooking to develop savory crusts via the Maillard reaction, which enhances umami and overall depth. Use high heat and minimal handling to avoid overcooking and to preserve tenderness.
- 1/4 teaspoons salt (or to taste) Added sparingly to season the steak and vegetables and to enhance overall flavors without making the sandwich taste salty; adjust to personal preference. Sprinkle during cooking to help the meat release its juices and to build a balanced savory profile. Combine with pepper for a classic steakhouse seasoning.
- 1/2 teaspoon black pepper (or to taste) Ground and used to add mild heat and a fragrant spice that complements the richness of the beef and butter; helps lift and define other flavors. Apply during cooking to meld into the meat and vegetables for consistent seasoning throughout. Adjust quantity to taste to avoid overpowering the sandwich.
- 1 medium bell pepper (sliced) Sliced and sautéed to provide sweetness, bright color, and a tender-crisp texture that contrasts with the meaty filling and melted cheese. Cook until slightly caramelized to bring out natural sugars that balance savory components. Select firm peppers and slice uniformly for even cooking.
- 1 large onion (sliced) Sliced and caramelized to contribute sweet, savory depth and soft texture that pairs perfectly with seared steak and melted cheese. Cook low and slow or until browned to maximize sweetness and reduce sharpness, creating a rich layer of flavor. Also helps absorb some of the steak juices for added cohesion inside the roll.
- 8 slices provolone cheese Placed over the cooked steak and vegetables to melt into a creamy, stringy layer that binds the filling and adds milky, slightly salty flavor. Lay slices on top of the hot filling and cover briefly to encourage even melting. Choose provolone for its mild profile that won’t overpower the beef or peppers.
Instructions
- Prep the rolls: Combine the butter with the garlic and then spread on both cut sides of the Hoagie rolls. Place them on a baking sheet with cut side up and transfer them to the oven under the broiler setting until the buns are toasted. Flip them over and toast on the other side, about 2 min per side.: Combine the butter with the garlic and then spread on both cut sides of the Hoagie rolls. Place them on a baking sheet with cut side up and transfer them to the oven under the broiler setting until the buns are toasted. Flip them over and toast on the other side, about 2 min per side. : As the broiler warms the buttered surfaces, you should smell the toasty garlic aroma and see the edges turn golden brown, which gives the sandwich a warm, savory foundation. This step matters because a well toasted roll resists sogginess from the filling while adding crisp contrast to the tender meat. Listen for a faint popping of butter as it hits the hot tray, and beware of overbrowning a few seconds too long can quickly go from golden to burnt. If your broiler runs hot, move the tray slightly farther from the element to control color.
- Cook the veggies: Heat 1 tbsp of the olive oil in a large skillet over medium heat. Add the sliced onion and peppers, season with salt and pepper and sauté for 5-7 minutes until the onions are translucent and start to brown. Transfer to a plate and set aside.: Heat 1 tbsp of the olive oil in a large skillet over medium heat. Add the sliced onion and peppers, season with salt and pepper and sauté for 5-7 minutes until the onions are translucent and start to brown. Transfer to a plate and set aside. : Youll notice a gentle sizzling as the onion and bell pepper hit the pan and a sweet fragrance as the sugars begin to caramelize, signaling deepening flavor. Achieving light browning is essential because it creates the sweet savory base that complements the beef. A common mistake is crowding the pan, which causes steaming rather than browning, so give the vegetables space to color and stir occasionally for even cooking.
- Cook steak: Add the remaining tbsp of olive oil to the skillet and the steak. Season with salt and pepper and cook for 2 to 4 minutes until the steak is cooked through. Add the onion/pepper mixture back to the skillet and toss. Turn the heat down to low.: Add the remaining tbsp of olive oil to the skillet and the steak. Season with salt and pepper and cook for 2 to 4 minutes until the steak is cooked through. Add the onion/pepper mixture back to the skillet and toss. Turn the heat down to low. : When the rib eye steak hits the hot skillet you should hear a pronounced sizzle and see seared edges develop quickly, creating rich, brown crust and intense beefy aroma. This crust locks in juices and builds savory depth that defines the sandwich. If you keep the heat too low, the steak will steam and lose that desirable caramelized flavor, while too high heat risks burning and toughness. After adding the vegetables back in, the mingled aromas tell you the flavors are marrying, so reduce the heat to avoid overcooking.
- Add cheese: Divide the mixture into 4 using a spatula in the skillet. Place 2 slices of cheese over each quarter, cover the skillet with a lid and leave it for about a minute until the cheese melts.: Divide the mixture into 4 using a spatula in the skillet. Place 2 slices of cheese over each quarter, cover the skillet with a lid and leave it for about a minute until the cheese melts. : As the lid traps heat, the provolone cheese will soften into a glossy, stretchy blanket, and youll see it gently ooze around the meat and vegetables, visually cueing the right moment to assemble. Melting the cheese this way ensures even coverage and prevents the sandwich from being dry. A frequent misstep is lifting the lid too soon, which prevents uniform melting; be patient for that cohesive, molten texture.
- Finish and serve: Using a spatula, spoon cheesesteak mixture into the toasted Hoagie rolls. Serve warm.: Using a spatula, spoon cheesesteak mixture into the toasted Hoagie rolls. Serve warm. : When you transfer the glossy filling into the toasted rolls, notice how the warm bread absorbs and amplifies the mixtures juices while keeping the exterior crisp. Serving immediately preserves the contrast between textured bread and tender filling. If you wait too long, the rolls can soften and lose the textural balance, so plan to serve right away for the ideal experience.
Notes
- Watch the broiler: Keep the rolls a few inches from the element and watch closely because the buttered surface can go from golden to burnt within seconds.
- Slice steak thin: For tender results, partially freeze the steak for 15 to 20 minutes before slicing to make thin, uniform strips that cook quickly and evenly.
- Divide oil usage: Using one tablespoon of oil for vegetables and one for the steak helps each component brown properly without becoming greasy.
- Layer cheese last: Place the provolone cheese over warmed filling and cover briefly so it melts evenly and creates that creamy binding texture.
- Keep components separate for storage: Store the filling and the hoagie rolls separately in the fridge to prevent sogginess and reheat the filling on the stove for best texture.