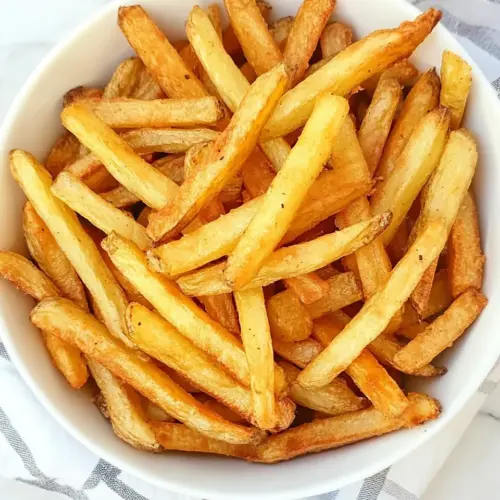
Perfect Homemade French Fries
Perfect Homemade French Fries have been my comfort food through countless kitchen experiments, rainy afternoons, and late night cravings. I remember the first time I tried to recreate that golden, crisp perfection at home, armed with a stubborn curiosity and a stack of russet potatoes. That day I learned very quickly that making truly great fries is less about luck and more about patience, technique, and respect for the humble potatoes.
Over the years I’ve refined the process so that friends call ahead asking for a batch the moment they arrive. I love the ritual of peeling, soaking, and frying, and how the kitchen fills with the warm, fragrant promise of crisp edges and tender centers. When you bite into a fresh fry from the pan, you should hear a soft crunch, feel a silky interior, and taste a clean, salted finish that makes every other side dish feel secondary. That satisfaction is why I keep returning to this recipe.
Along the way I’ve saved tricks that stop soggy fries in their tracks, tips for frying in manageable batches, and ways to store extras so they stay enjoyable the next day. I also discovered small gear choices, like a reliable deep fry thermometer, that turn guesswork into consistent results. If you enjoy hands on cooking, this method rewards your attention with the kind of fries that disappear before plates are passed around. Let’s walk through everything from ingredient philosophy to the technique that gives you crunchy exteriors and pillowy interiors.
Recipe Snapshot
2 hr 35 mins
135 mins
20 mins
Hard
350 kcal
American
Vegan, Gluten-Free
Side Dishes
candy and deep fry thermometer, fry scoop
What Sets This Perfect Homemade French Fries Apart
Crunch that lasts
I love fries that stay crisp for more than a minute on the plate. The two stage frying technique locks moisture into the interior while creating a durable outer crust. That contrast of textures makes each bite interesting and satisfying, and it is the single most important reason I make them this way.
Simple ingredients, big payoff
There is beauty in plain things. With only russet potatoes, vegetable or peanut oil, and sea salt, you can achieve complex mouthfeel and flavor. I appreciate how minimalism forces technique to carry the dish, and it keeps the fries versatile for different meals and palates.
Scalable for any gathering
Whether I am cooking for two or a dozen, this recipe scales gracefully. By controlling batch size and oil temperature, you avoid crowding the pot and maintain consistent results. I often double the quantities when friends arrive, and the method still produces even, golden fries every time.
Hands on, rewarding process
I find the prep soothing, from peeling to soaking, and then finally frying. There is satisfaction in doing each step with care; it feels like a small craft. For home cooks who enjoy tactile cooking, this recipe is endlessly rewarding and teaches reliable techniques you will use again and again.
Flexible end uses
These fries pair beautifully with simple dips or as a side for a wide range of mains. I often season them right after frying, but you can experiment with spice blends once you have the base method down. That adaptability is why I keep this recipe in my regular rotation.
What to Gather for Perfect Homemade French Fries
These ingredients are intentionally minimal. The goal is to let each component play a specific role: the russet potatoes provide the ideal starch structure for crisping, the frying oil conducts even heat to build a crunchy exterior, and the sea salt brightens and finishes the fries. Together they create a reliable, classic profile that highlights technique more than tricks.
- 5 pounds russet potatoes: Peelable and starchy, provides the ideal texture for crispy exteriors and fluffy interiors when cut and fried; choose large russets for uniform sizing and consistent cooking; rinse and dry thoroughly to remove excess surface starch and prevent oil spatter while frying.
- vegetable or peanut oil, for frying: High-smoke-point oil used to fully submerge and evenly cook the fries, enabling rapid Maillard browning without burning; select neutral-flavored vegetable or peanut oil and heat to the recommended temperature for deep frying; maintain consistent oil temperature between batches to ensure crispness.
- sea salt: Coarse sea salt used to season immediately after frying to enhance and balance the natural potato flavor; sprinkle while fries are hot so crystals adhere and dissolve slightly, improving taste and mouthfeel; adjust quantity to preference for finishing.
Cooking Method for Perfect Homemade French Fries
This technique is deliberate and hands on. Start with patient prep, soak to remove excess starch, then use a two stage fry process for texture. I will guide you through sensory cues and common pitfalls so your fries turn out consistently crisp and fluffy.
- Peel potatoes. Cut them into slices lengthwise then cut each slice into french fry-sized sticks.: When you peel the potatoes , you should notice the fresh, earthy aroma of raw tuber and a firm, cool texture under the knife. The peel will come away cleanly if the potatoes are fresh, and uniform peeling helps each piece cook evenly. A frequent error is leaving bits of skin that create irregular browning, so take a moment to smooth the surface. If the flesh darkens slightly, it simply means a little oxidation; it will not affect flavor after soaking.
- To remove excess starch, add the potatoes to a large bowl and cover with cold water, soak 2-3 hours, then pat dry with a clean kitchen towel.: As you slice, listen for the crisp snap of the knife, and aim for consistent thickness so the fries cook at the same rate. Visual uniformity is the key to even color and texture, and the ideal fries are about a half inch thick for a classic balance of crust to interior. A common problem is uneven cuts, which cause some pieces to overbrown while others remain pale. Use a steady motion and a sharp knife to prevent tearing and ragged edges.
- When ready to cook, drain the water and lay the potatoes out on a baking sheet lined with paper towels. Blot with additional paper towels to dry.: During soaking you will see the water cloud as starch leaves the potatoes . That cloudy water is normal, and it is what you want to remove so the exterior crisps instead of gumming up. After soaking the pieces should feel slightly firm and not sticky; drying thoroughly on a towel is crucial because stray water will cause violent spitting when it hits hot oil. A typical mistake is rushing the soak or skipping drying, which results in soggy or dangerous splattering during frying.
- Heat a few inches of oil in a heavy large pot to 300°F. Add the potato pieces in 3-4 batches so as not to crowd the pot. Cook 4-5 minutes. (The potatoes will still be pale and not fully cooked.): As you drain and blot, notice any residual moisture on the surface disappearing under the towel. The fries should be nearly dry to the touch before they meet hot oil, because surface water lowers oil temperature and causes splatter. If you still see beads of water, keep blotting. People often underestimate how dry the pieces must be, so double check each batch before frying.
- Remove the potatoes from the pot with a slotted spoon and drain on fresh paper towels, then cook the remaining batches.: At 300°F the oil will shimmer gently and give off a faint sweet aroma without smoking. As the fries cook you will notice small bubbles form steadily around each piece, and the texture will change from glassy to slightly opaque, indicating internal softening. This low temp par cook sets up the interior. Crowding the pot cools the oil and prevents crisping, so fry in measured batches. Avoid leaving them in too long, because that can overcook the interior and make them limp when you finish at higher heat.
- When all of the potatoes have been cooked at 300°F, turn the heat up to 400°F. Add the potatoes again in batches, cooking until golden brown and crisp. Drain the fries on paper towels.: When you lift the pieces, they may feel a touch soft, and you might see small oil beads clinging to the surface. Draining on fresh towels absorbs excess oil and prevents puddles that make fries soggy. A common oversight is stacking drained fries too deep, trapping steam and collapsing crispness, so spread them into a single layer while you finish par frying all batches.
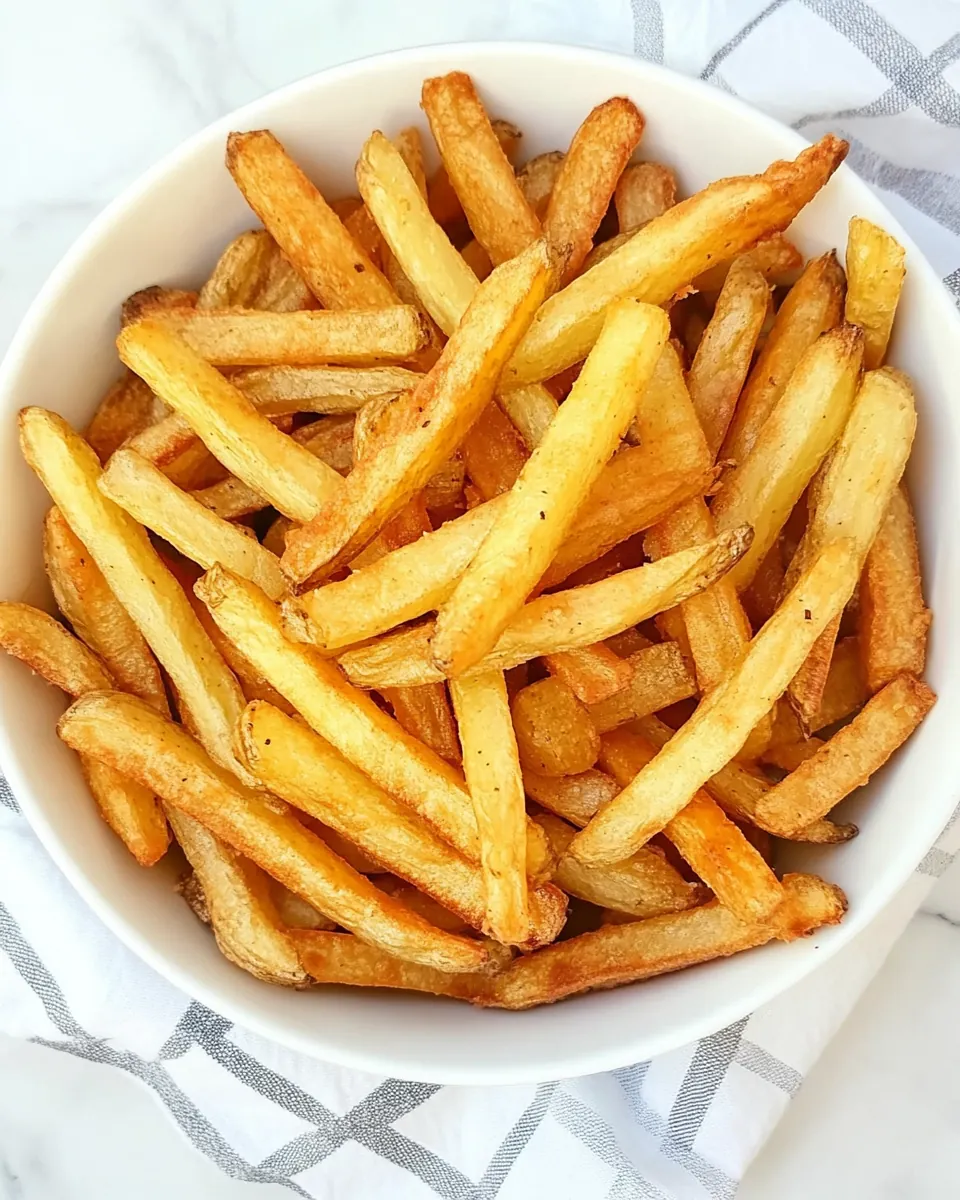
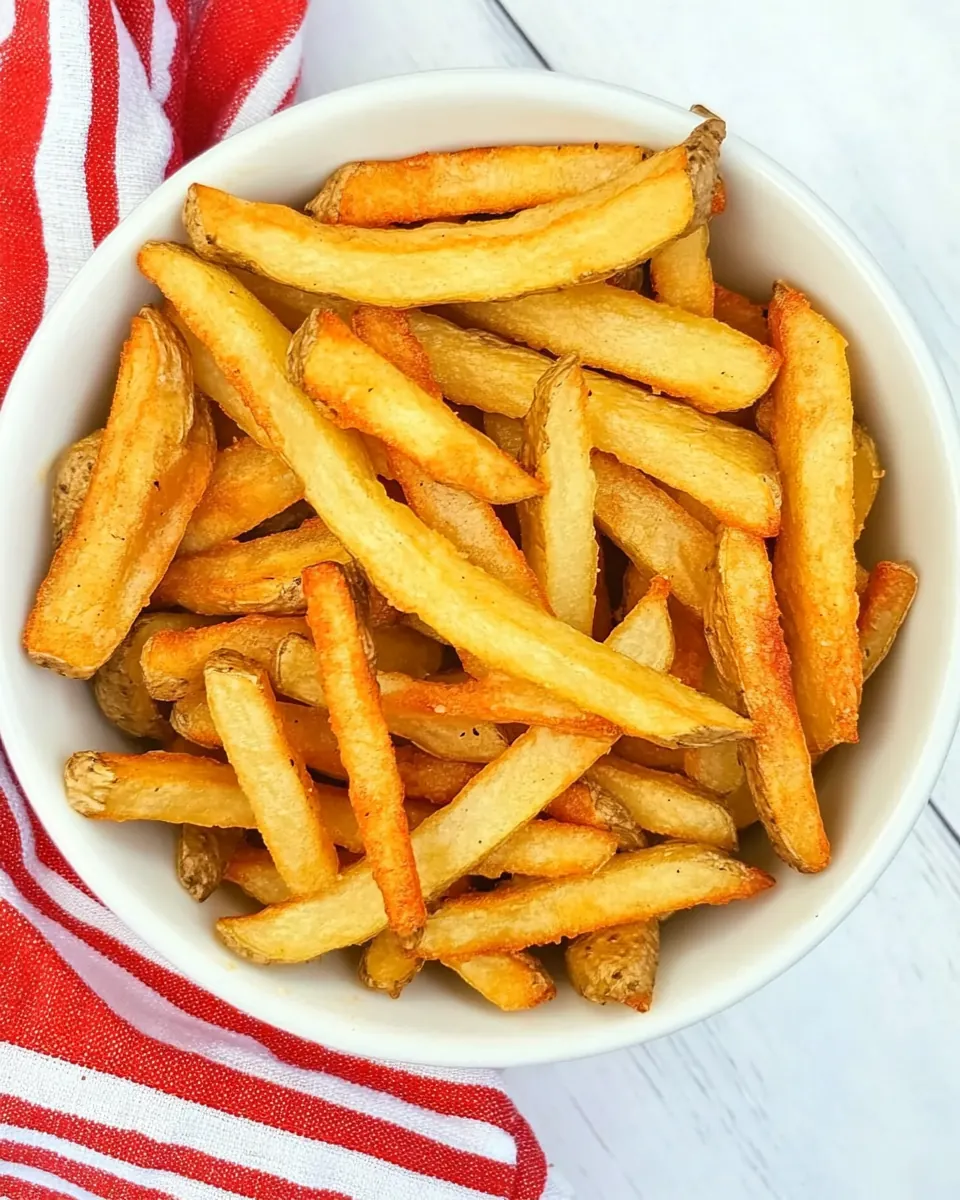
- Sprinkle with sea salt. Serve immediately.: At 400°F the oil will roar quietly with livelier bubbling, and the fries will quickly take on a golden hue. Watch for a uniform golden brown and an audible crisping sound as moisture rapidly leaves the surface. This second fry is where texture is won, so do not rush it and avoid overcrowding which lowers the oil temperature. A slip here is leaving fries in too long, which pushes them from golden to burnt in moments, so stay attentive and remove when they reach the desired color.
- Sprinkle with sea salt Serve immediately: Right after frying, the surface is warm and slightly tacky, perfect for the sea salt to adhere. The first bite should offer a crisp snap followed by a soft, steaming interior and a clean, salted finish. Serve without delay because fries begin to lose their optimal texture within minutes. A preventable mistake is letting them sit too long before salting, which allows steam to soften the crust and reduces the impact of seasoning.
Ways to Customize
I like to keep the base method simple and then add small finishing touches to change the profile. Below are practical, tested ideas that let you vary seasoning, texture, and serving style while preserving the core method that yields crisp, tender fries.
- Seasoning blends Try sprinkling the fries with a mix of spices immediately after frying to help the flavors adhere. Use the hot surface as an adhesive and toss quickly so the spices coat evenly. Be cautious with salt quantity if your blend contains salty elements.
- Double frying timing Adjust the initial par fry time depending on thickness. Thicker fries benefit from a slightly longer first fry to ensure the interior softens, while thinner fries need less time to avoid collapsing when crisped. Watch visual cues rather than the clock for best results.
- Oil choice Use neutral oils with a high smoke point for safety and clean taste. Peanut oil is excellent if you are not restricted by allergies, while vegetable oil is a dependable, accessible option for home cooks.
- Batch management Keep cooked fries warm in a single layer on a baking sheet in a low oven while you finish other batches. This preserves crispness without overcooking. Do not stack fries, as trapped steam will soften them.
- Storage and reheating For leftovers, flash freeze and store in an airtight bag. Reheat at 400°F in the oven until crisp, which revives texture better than microwaving. Expect some loss of peak freshness, but proper reheating brings them back to enjoyable status.
Great Combinations for Perfect Homemade French Fries
Fries are wonderfully adaptable, moving easily from casual snacks to composed sides. Below are serving ideas, pairing notes, and storage suggestions to help you decide how to present them for different occasions.
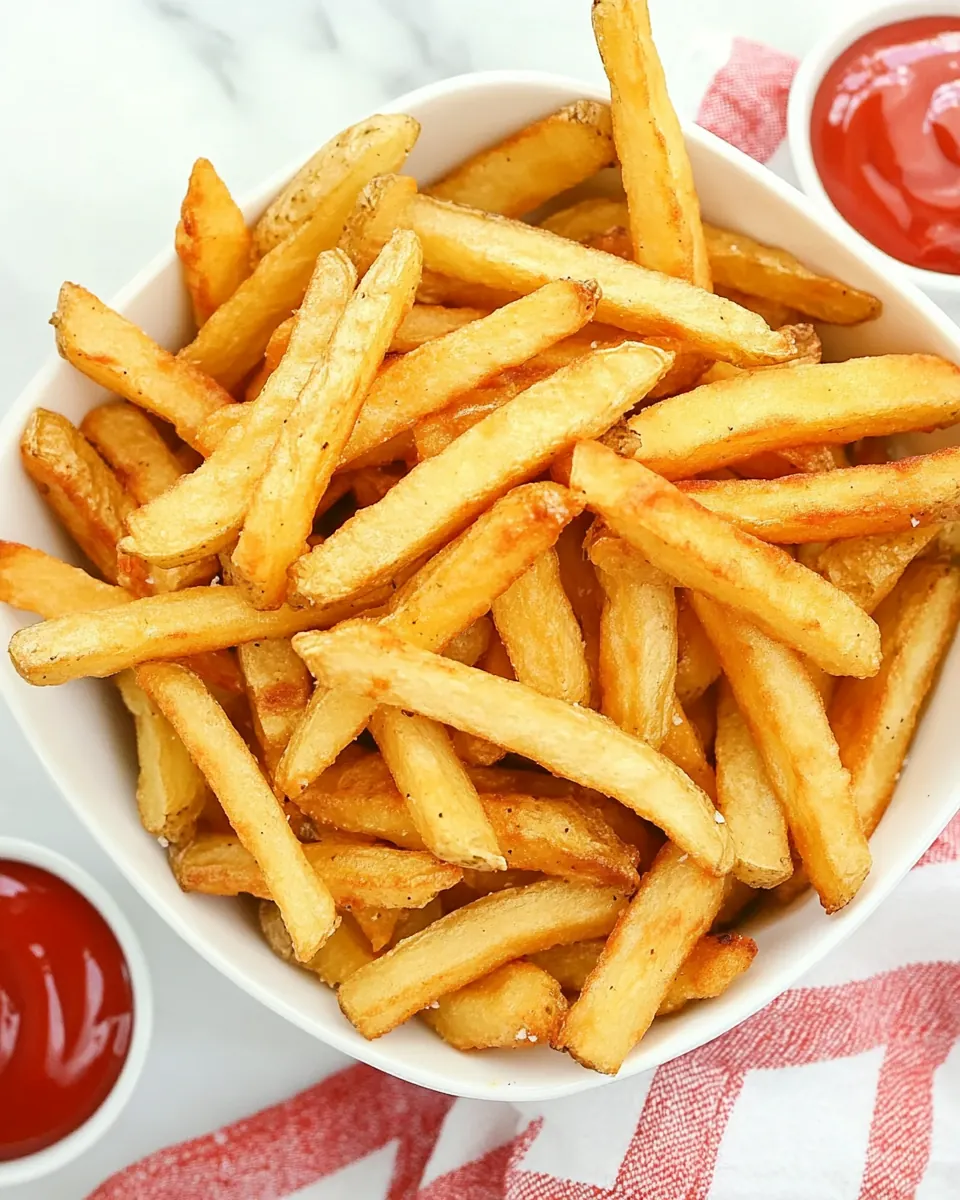
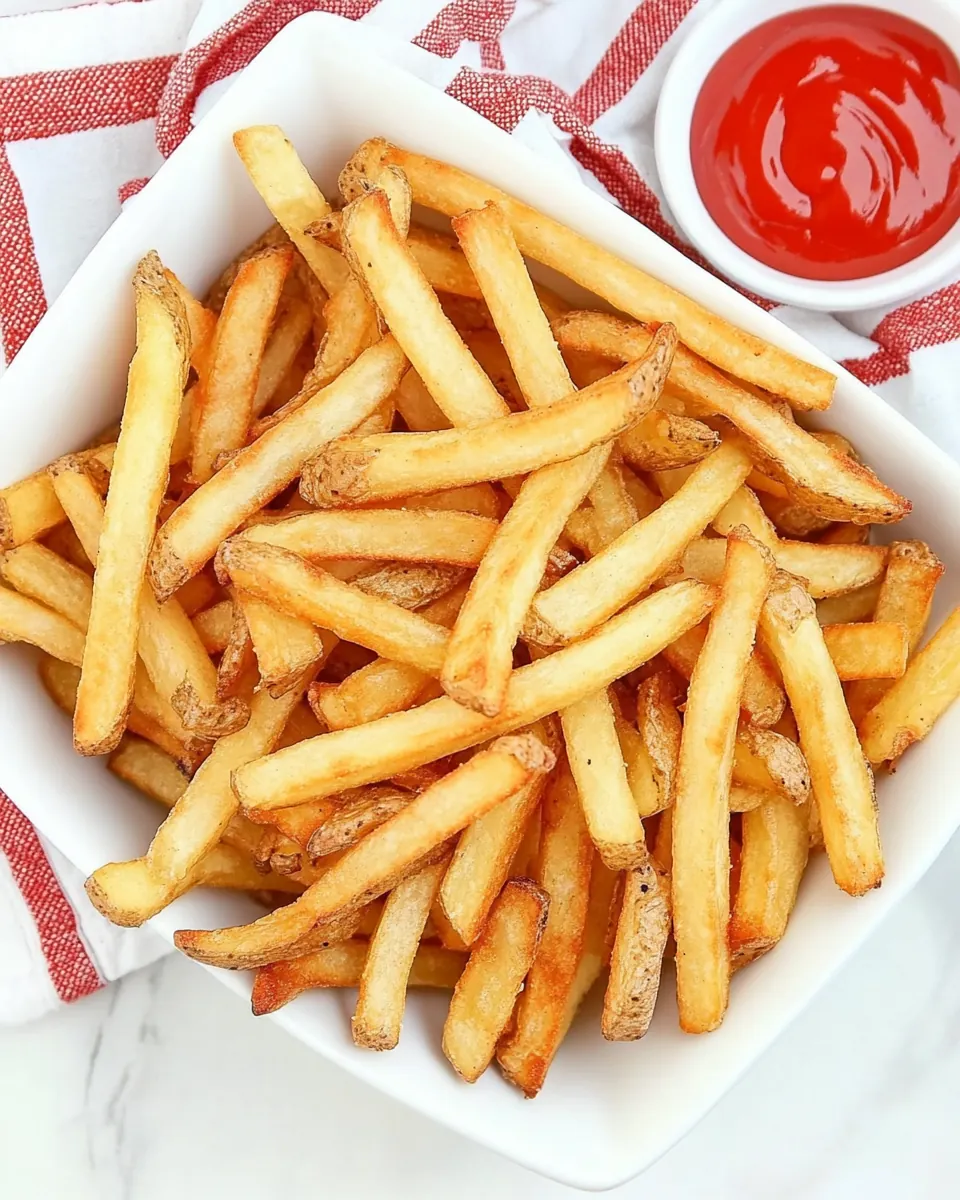
- Classic dipping Serve with simple dips like ketchup or mayonnaise for a casual snack. These familiar condiments amplify the salty and crunchy qualities of the fries and are perfect for movie nights or game day.
- Sandwich companion Pair the fries with a hearty sandwich for lunch, adding a satisfying crunchy contrast to soft bread and fillings. The fries work especially well with salty or saucy mains where texture matters.
- Family dinner side Use as a side for a weeknight family meal, where Perfect Homemade French Fries bring a crowd pleasing element everyone enjoys. They complement simple proteins and vegetable mains alike, making them a versatile choice.
- Party platter Offer fries on a platter with multiple dipping options and seasoning stations for guests to personalize. This setup encourages sharing and lets each person tailor their experience.
- Storage tips Refrigerate leftovers for up to 4 to 5 days, and freeze longer term by flash freezing then sealing in a bag for 2 to 3 months. Reheat in a hot oven at 400°F to restore crispness, checking to avoid overbrowning.
- Seasonal pairings In cooler months, pair fries with warm, savory mains and hearty sauces. In warmer months, they complement lighter grilled proteins and fresh salads, making them a year round choice.
FAQ
Conclusion
These Perfect Homemade French Fries stand out because they combine simple ingredients with a thoughtful technique to produce reliably crisp, golden results. If you follow the soak and two stage fry approach, you will notice a delightful contrast between a crunchy exterior and a soft, steaming interior that makes every bite satisfying. Give this method a try on your next cozy night in or when friends stop by, and enjoy the little ritual of turning basic potatoes into something unexpectedly special.
Perfect Homemade French Fries
Equipment
- candy and deep fry thermometer
- fry scoop
Ingredients
- 5 pounds russet potatoes Peelable and starchy, provides the ideal texture for crispy exteriors and fluffy interiors when cut and fried; choose large russets for uniform sizing and consistent cooking; rinse and dry thoroughly to remove excess surface starch and prevent oil spatter while frying.
- vegetable or peanut oil, for frying High-smoke-point oil used to fully submerge and evenly cook the fries, enabling rapid Maillard browning without burning; select neutral-flavored vegetable or peanut oil and heat to the recommended temperature for deep frying; maintain consistent oil temperature between batches to ensure crispness.
- sea salt Coarse sea salt used to season immediately after frying to enhance and balance the natural potato flavor; sprinkle while fries are hot so crystals adhere and dissolve slightly, improving taste and mouthfeel; adjust quantity to preference for finishing.
Instructions
- Peel potatoes. Cut them into slices lengthwise then cut each slice into french fry-sized sticks.: When you peel the potatoes , you should notice the fresh, earthy aroma of raw tuber and a firm, cool texture under the knife. The peel will come away cleanly if the potatoes are fresh, and uniform peeling helps each piece cook evenly. A frequent error is leaving bits of skin that create irregular browning, so take a moment to smooth the surface. If the flesh darkens slightly, it simply means a little oxidation; it will not affect flavor after soaking.
- To remove excess starch, add the potatoes to a large bowl and cover with cold water, soak 2-3 hours, then pat dry with a clean kitchen towel.: As you slice, listen for the crisp snap of the knife, and aim for consistent thickness so the fries cook at the same rate. Visual uniformity is the key to even color and texture, and the ideal fries are about a half inch thick for a classic balance of crust to interior. A common problem is uneven cuts, which cause some pieces to overbrown while others remain pale. Use a steady motion and a sharp knife to prevent tearing and ragged edges.
- When ready to cook, drain the water and lay the potatoes out on a baking sheet lined with paper towels. Blot with additional paper towels to dry.: During soaking you will see the water cloud as starch leaves the potatoes . That cloudy water is normal, and it is what you want to remove so the exterior crisps instead of gumming up. After soaking the pieces should feel slightly firm and not sticky; drying thoroughly on a towel is crucial because stray water will cause violent spitting when it hits hot oil. A typical mistake is rushing the soak or skipping drying, which results in soggy or dangerous splattering during frying.
- Heat a few inches of oil in a heavy large pot to 300°F. Add the potato pieces in 3-4 batches so as not to crowd the pot. Cook 4-5 minutes. (The potatoes will still be pale and not fully cooked.): As you drain and blot, notice any residual moisture on the surface disappearing under the towel. The fries should be nearly dry to the touch before they meet hot oil, because surface water lowers oil temperature and causes splatter. If you still see beads of water, keep blotting. People often underestimate how dry the pieces must be, so double check each batch before frying.
- Remove the potatoes from the pot with a slotted spoon and drain on fresh paper towels, then cook the remaining batches.: At 300°F the oil will shimmer gently and give off a faint sweet aroma without smoking. As the fries cook you will notice small bubbles form steadily around each piece, and the texture will change from glassy to slightly opaque, indicating internal softening. This low temp par cook sets up the interior. Crowding the pot cools the oil and prevents crisping, so fry in measured batches. Avoid leaving them in too long, because that can overcook the interior and make them limp when you finish at higher heat.
- When all of the potatoes have been cooked at 300°F, turn the heat up to 400°F. Add the potatoes again in batches, cooking until golden brown and crisp. Drain the fries on paper towels.: When you lift the pieces, they may feel a touch soft, and you might see small oil beads clinging to the surface. Draining on fresh towels absorbs excess oil and prevents puddles that make fries soggy. A common oversight is stacking drained fries too deep, trapping steam and collapsing crispness, so spread them into a single layer while you finish par frying all batches.
- Sprinkle with sea salt. Serve immediately.: At 400°F the oil will roar quietly with livelier bubbling, and the fries will quickly take on a golden hue. Watch for a uniform golden brown and an audible crisping sound as moisture rapidly leaves the surface. This second fry is where texture is won, so do not rush it and avoid overcrowding which lowers the oil temperature. A slip here is leaving fries in too long, which pushes them from golden to burnt in moments, so stay attentive and remove when they reach the desired color.
- Sprinkle with sea salt Serve immediately: Right after frying, the surface is warm and slightly tacky, perfect for the sea salt to adhere. The first bite should offer a crisp snap followed by a soft, steaming interior and a clean, salted finish. Serve without delay because fries begin to lose their optimal texture within minutes. A preventable mistake is letting them sit too long before salting, which allows steam to soften the crust and reduces the impact of seasoning.
Notes
- Seasoning blends Try sprinkling the fries with a mix of spices immediately after frying to help the flavors adhere. Use the hot surface as an adhesive and toss quickly so the spices coat evenly. Be cautious with salt quantity if your blend contains salty elements.
- Double frying timing Adjust the initial par fry time depending on thickness. Thicker fries benefit from a slightly longer first fry to ensure the interior softens, while thinner fries need less time to avoid collapsing when crisped. Watch visual cues rather than the clock for best results.
- Oil choice Use neutral oils with a high smoke point for safety and clean taste. Peanut oil is excellent if you are not restricted by allergies, while vegetable oil is a dependable, accessible option for home cooks.
- Batch management Keep cooked fries warm in a single layer on a baking sheet in a low oven while you finish other batches. This preserves crispness without overcooking. Do not stack fries, as trapped steam will soften them.
- Storage and reheating For leftovers, flash freeze and store in an airtight bag. Reheat at 400°F in the oven until crisp, which revives texture better than microwaving. Expect some loss of peak freshness, but proper reheating brings them back to enjoyable status.