Peeps Rice Krispie Treats
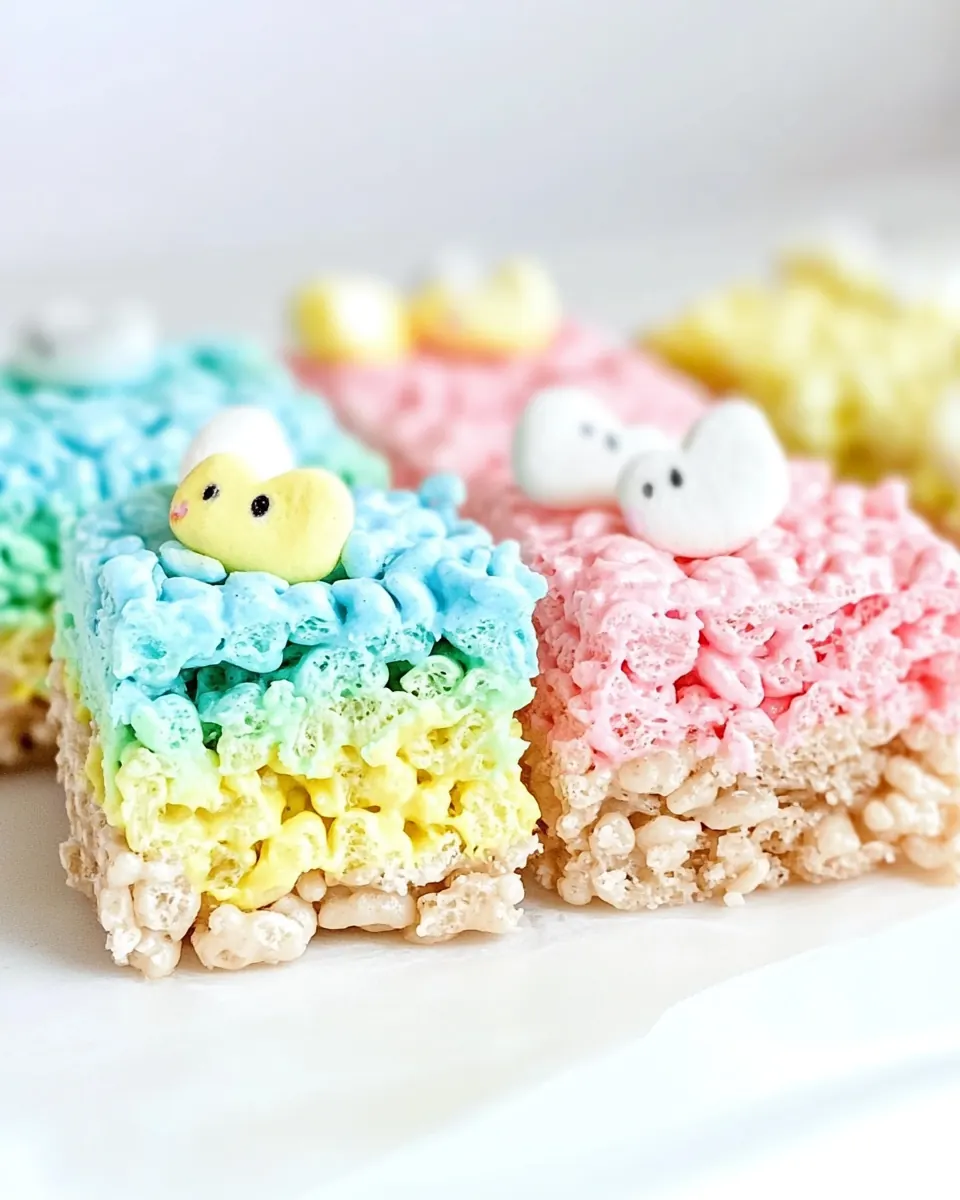
Peeps Rice Krispie Treats always takes me back to sticky fingers and backyard gatherings when I was a kid, and every time I make them now I feel that same playful excitement. The first bite brings a rush of sweet, airy marshmallow and toasted cereal crunch, and I love how the colorful Peeps make these bars feel like a tiny celebration on a plate.
I remember the first time I swapped plain marshmallows for PEEPS and how the kitchen filled with a sugary aroma that made everyone wander in. We laughed about the ridiculous colors, but those layers turned out to be the most fun part. I like to make them in batches so each color gets its own moment, and I always press the layers gently so they stay nicely defined when sliced.
Over the years I have adjusted technique and timing to keep the texture perfect, because nothing beats a Rice Krispie treat that is chewy but still holds its shape. These Peeps Rice Krispie Treats are simple to pull together, but they reward a little care and quick work while the marshmallow is warm. For holiday gatherings or school parties they’re always a hit, and they travel well as long as you let them chill first.
Recipe Snapshot
50 mins
20 mins
30 mins
Medium
180 kcal
American
Gluten-Free, Low FODMAP
Desserts
Microwave safe mixing bowls, 9×13 inch baking pan, Spatula, Refrigerator
What Makes This Peeps Rice Krispie Treats Special
They are joyful and nostalgic
I adore these treats because they tap into childhood memories, while letting us play with color and texture. When I make Peeps Rice Krispie Treats, the bright layers bring instant smiles, and that playful look makes guests excited before they even taste one.
Simple technique, big payoff
What I love is how straightforward the method is. You only need a few basic steps repeated four times, and the repeatable process lets you focus on getting each layer just right. Because the procedure is consistent, it’s forgiving for cooks at every level.
Customizable color and vibe
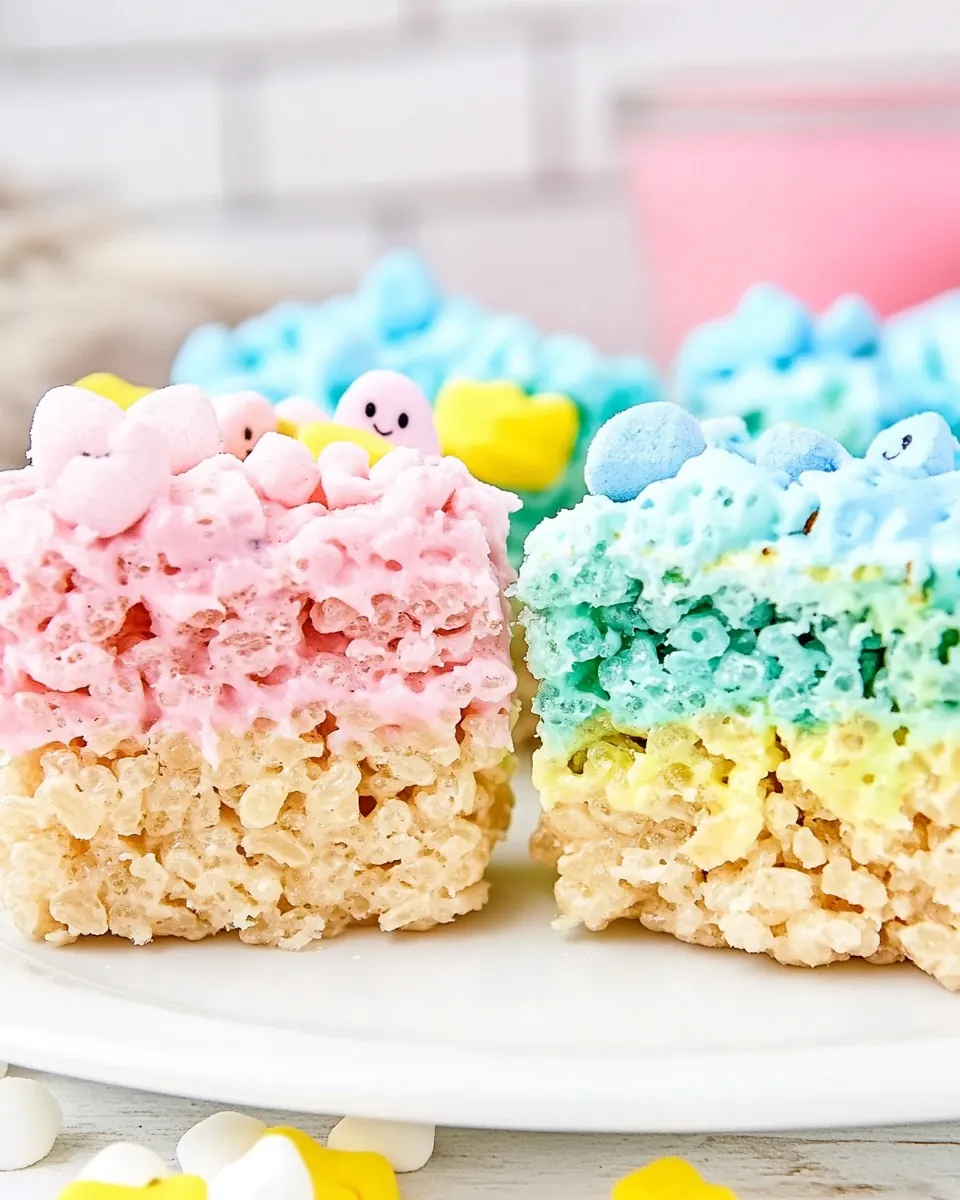
Each batch can be tailored by choosing which PEEPS colors you use or by intensifying color with a drop of food coloring. I often vary the palette to match a party theme, and that small twist makes these bars feel bespoke without changing the beloved flavor.
Perfect for crowds and gifting
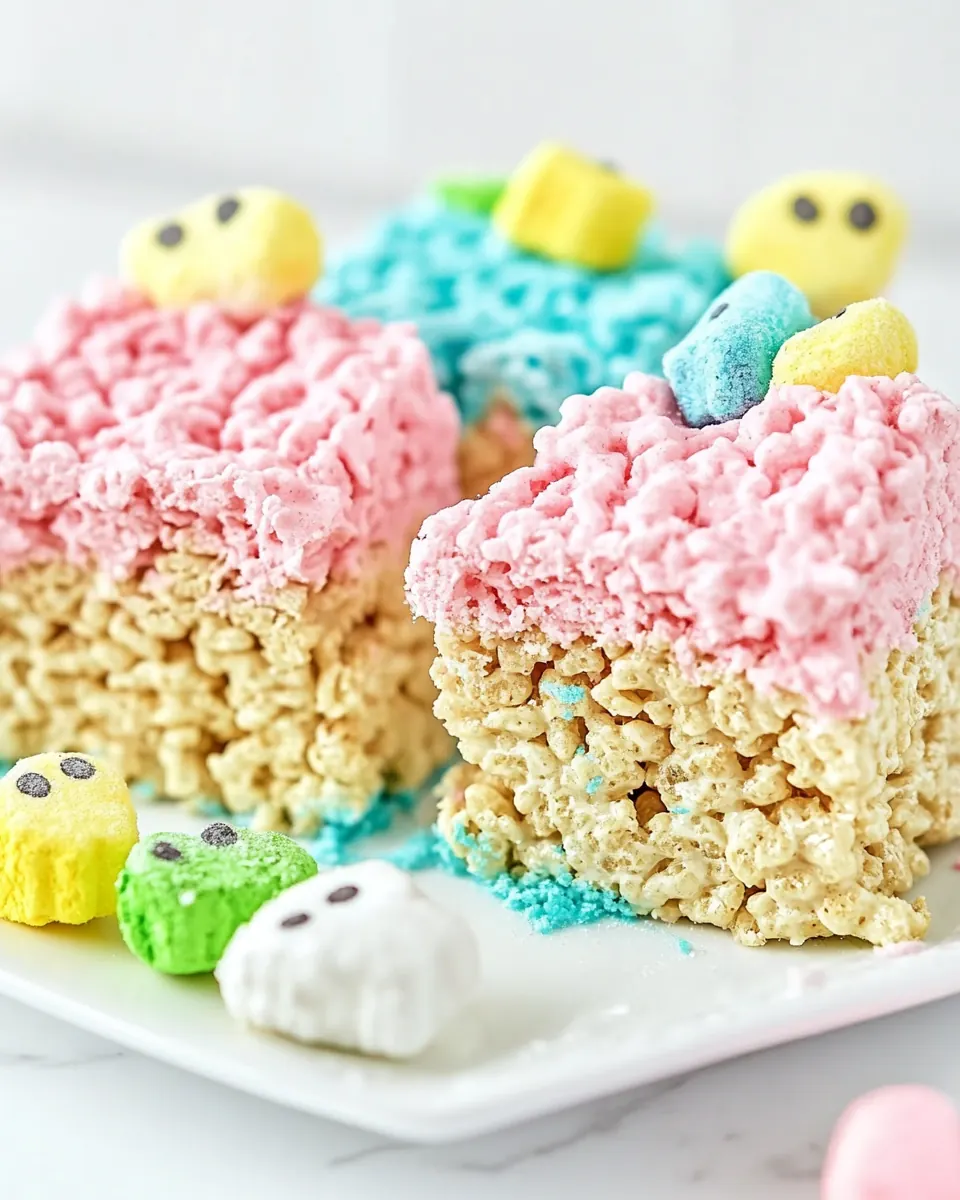
These bars scale well since you make them in four layers, and they slice into neat squares that are easy to share. I like to wrap a few in parchment for neighbors, and they always go fast because they’re portable and universally appealing.
Texture that surprises
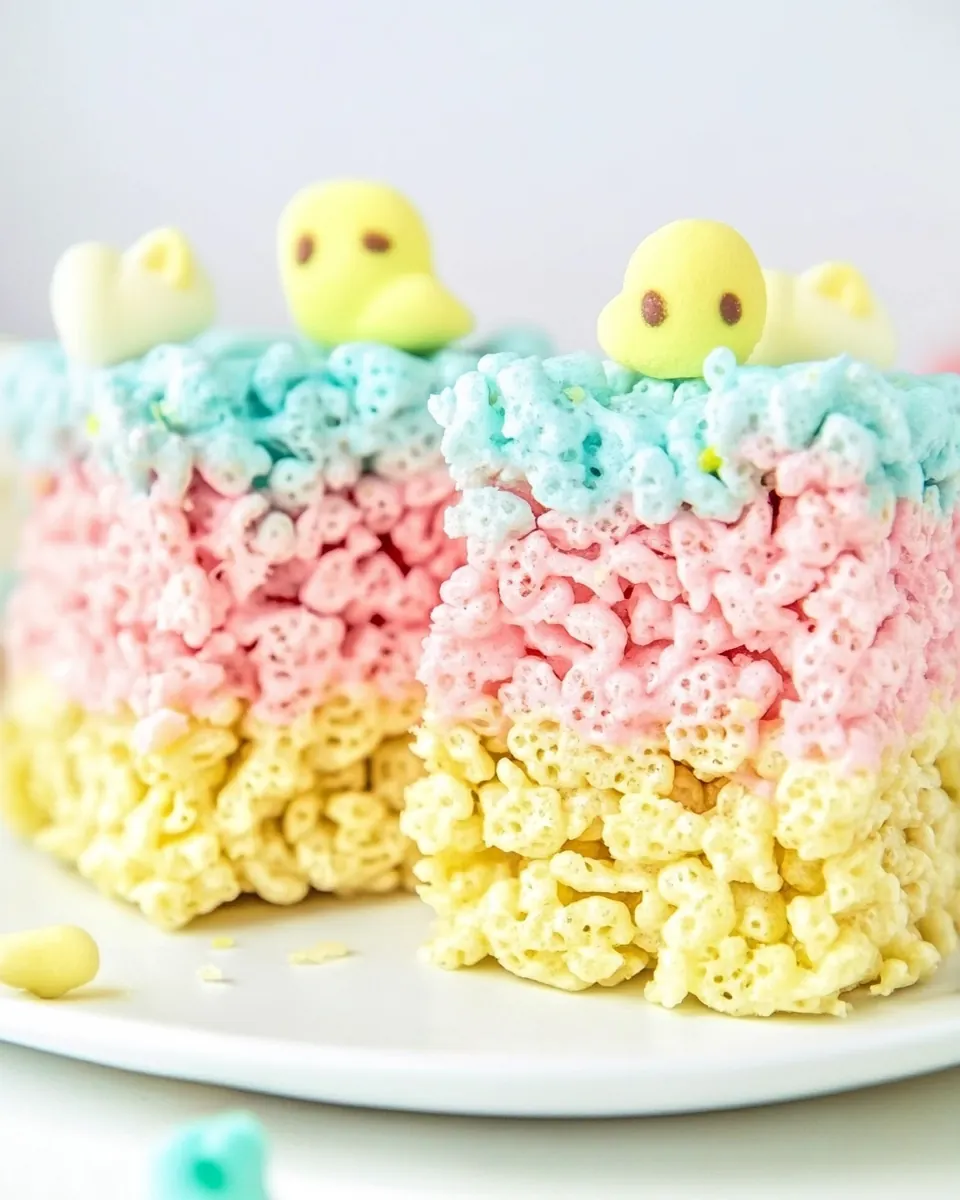
The mix of airy PEEPS marshmallow and crisp Rice Krispies cereal creates a chewy but crisp bite that is oddly sophisticated for such a simple dessert. I find that small technique choices, like gentle pressing and a chill, preserve those textural contrasts that make each mouthful satisfying.
Ingredients Required for Peeps Rice Krispie Treats
These ingredients are intentionally uncomplicated, and each one plays a clear role. The marshmallow based PEEPS and mini marshmallows provide flavor and binding, the butter adds richness and mouthfeel, the vanilla extract gives a warm background note, and the Rice Krispies cereal supplies the crisp structure. Together they create a delicate balance of chew and crunch that defines a great Rice Krispie treat.
- 81.38 ounce PEEPS Rainbow pops (4 colors of peeps in each pop – pink, blue, green & yellow): Provide intense, colorful candy flavor and decorative appeal; use the PEEPS Rainbow pops to infuse vibrant pastel hues and sweet marshmallow texture into the treats, melting or chopping as needed to distribute color evenly throughout the bars.
- 2 cups mini marshmallows (divided into four 1/2-cup portions): Contribute soft, chewy marshmallow structure and sweetness; incorporate mini marshmallows to bind the cereal together and create the classic gooey texture, adding them in stages as directed so they melt uniformly.
- 3/4 cups salted butter (room temperature and divided into four 3-tablespoon portions): Supply creamy fat for melting and flavor; soften salted butter to help dissolve marshmallows smoothly and lend a rich, slightly salty balance that enhances overall sweetness and improves mouthfeel.
- 2 teaspoons vanilla extract (divided into four 1/2-cup portions): Enhance overall flavor with warm, aromatic notes; add vanilla extract to round out the sugary profile and deepen the dessert’s complexity without overpowering the marshmallow and cereal components.
- 8 cups Rice Krispies cereal (divided into four 2-cup portions): Provide crunchy cereal bulk and crisp texture; fold in Rice Krispies to give the treats their iconic snap and light structure, ensuring even coating with melted marshmallow for cohesive bars.
Instructions for Peeps Rice Krispie Treats
These steps are best done assembly line style, working with one color at a time so the marshmallow mixture stays pliable. Read each instruction through before you begin so you can move quickly when the marshmallow is warm and easy to shape.
- Spray a 9×13-inch baking pan with baking spray and set aside. Prepare all your ingredients before you start making these Peeps Rice Krispie squares because you will need to work quickly with each peeps color batch.: As you assemble, you'll notice the toasted butter scent wafting through the kitchen if your pan is prepped and ready, and having the pan sprayed prevents sticking so you can press layers confidently. Why this matters, the nonstick surface ensures clean removal and neat edges when you slice. Common mistake, forgetting to spray thoroughly can make the bottom cling and tear when removing pieces, so take a moment to coat corners and sides well.
- You will need 4 medium-sized microwave-safe mixing bowls for this recipe. If you only have one or two mixing bowls, then you will need to wash the bowls between mixing each colored batch of marshmallow Peeps. Remove the Peeps from their lollipop stick and sort them into colors.: The kitchen will smell sweet and intense once you begin melting, and mise en place keeps you from rushing. Why this matters, pre-measured portions keep each layer consistent and prevent marshmallow from setting before you finish. Troubleshooting tip, if you get distracted the marshmallow can firm up, so have everything within reach and a damp cloth nearby to clean any spills.
- To a medium-sized microwave-safe bowl, add 1/2 cup of mini marshmallows, 3 tablespoons of butter, and all 8 green Peeps. Microwave on high for 45 seconds to 1 minute. Add 1/2 teaspoon vanilla extract and stir to completely combine all the ingredients into a smooth consistency.: When you line up bowls, the visual organization helps you move from color to color without cross contamination, and you will hear a quiet simmer as the marshmallows soften. Why this matters, using separate bowls preserves color purity and avoids muddying the layers. A common issue is reusing a bowl without washing, which can carry color or set lumps, so plan for four bowls or wash rapidly between batches.
- Fold in 2 cups of Rice Krispie cereal until all the cereal is coated in the colored marshmallow mixture.: While washing, warm water helps dissolve sticky residue, and the bowls will come away glossy so your next batch melts cleanly. Why this matters, clean bowls prevent color bleeding into subsequent batches. Mistake to avoid, soaking in cold water may not loosen tacky marshmallow, so rinse with hot water and a little soap before drying.
- Layer the green-colored marshmallow coated Rice Krispie cereal mixture into the bottom of the prepared baking dish. Using your hands, gently press the mixture into an even layer.: As you separate each color, you may notice a faint candy scent that varies by hue, and arranging colors side by side helps you plan the layering visually. Why this matters, sorting avoids accidental mixing and keeps each layer pure and bright. Common mistake, leaving sticks attached can obstruct melting and create a mess, so fully remove and discard sticks first.
- Repeat steps 2 and 3 for the yellow-colored Peeps followed by the blue Peeps and pink Peeps until you have 4 layers of Peeps-colored Rice Krispie cereal layered one on top of the other. Gently press down on the final layer to make sure that your Peeps Rice Krispie squares are tightly packed.: Once heated, the mixture will bubble and release a warm, sweet aroma, and you should see the marshmallows collapse into a glossy, viscous mass. Why this matters, the proportions ensure the marshmallow is both flavorful and the right consistency to coat cereal. Troubleshooting involves overheating which can make the candy grainy, so heat in short bursts and stir in between to smooth the mixture.
- Place the baking dish into the refrigerator for 30 minutes to allow the Peeps Rice Krispies to cool and set completely before slicing and serving them.: You will hear gentle bubbling and see the mixture become glossy and fluid; remove when mostly melted and stir to finish. Why this matters, microwaving just enough prevents scorching and preserves smooth texture. Mistake to avoid, microwaving too long creates a scorched smell and a stiff, hard candy that will not coat cereal properly.
- Add 1/2 teaspoon vanilla extract and stir to completely combine all the ingredients into a smooth consistency: Stirring releases a comforting scent of vanilla and helps the melted PEEPS and mini marshmallows form a cohesive, silky binder. Why this matters, vanilla balances sweetness and gives depth to each layer. Troubleshooting tip, if the mixture cools and thickens quickly, microwave for a few seconds and stir to re-liquefy before proceeding.
- Fold in 2 cups of Rice Krispie cereal until all the cereal is coated in the colored marshmallow mixture: You will notice the cereal take on a glossy sheen and hear a soft crackle as you fold, and the bowl will fill with flecks of colored marshmallow. Why this matters, gently folding preserves crispness and prevents the cereal from becoming mushy. A common mistake is overmixing which crushes the cereal, so fold with a spatula just until evenly coated.
- Layer the green-colored marshmallow coated Rice Krispie cereal mixture into the bottom of the prepared baking dish: As you press, you will feel the warm marshmallow spread and the mixture will glisten under the kitchen light, forming a coherent layer. Why this matters, even layers create a pleasing striped appearance and consistent texture in every bite. Troubleshooting, pressing too hard will compress the cereal and make the texture dense, so press firmly but gently for a balanced chew.
- Using your hands, gently press the mixture into an even layer: Wetting your hands slightly or using a piece of parchment to press will keep the mixture from sticking and allow you to smooth the surface, giving straight edges to each layer. Why this matters, gentle pressing ensures the bars hold together without becoming overly compact. Mistake to avoid, using dry hands will cause sticking and tearing, so keep your hands lightly damp or greased.
- Repeat steps 2 and 3 for the yellow-colored Peeps followed by the blue Peeps and pink Peeps until you have 4 layers of Peeps-colored Rice Krispie cereal layered one on top of the other: As you build layers you will see the dessert become visually striking, and a faint scent of warm sugar will follow each added color. Why this matters, repeating the exact measurements preserves uniformity of flavor and texture across layers. Troubleshooting tip, if a previous layer cools too much, briefly warm it with a hand to help the next layer adhere, but avoid melting it.
- Gently press down on the final layer to make sure that your Peeps Rice Krispie squares are tightly packed: The top should be smooth and slightly glossy, and the sides should show clean bands of color when chilled. Why this matters, compacting the final layer helps the bars slice neatly without crumbling. Common mistake, pressing unevenly creates gaps and fragile slices, so apply even pressure across the surface.
- Place the baking dish into the refrigerator for 30 minutes to allow the Peeps Rice Krispies to cool and set completely before slicing and serving them: Cooling produces a firmer texture and a cooled sugary scent that is less sticky to the touch, and chilled bars release cleanly from the dish. Why this matters, refrigeration helps the marshmallow bind fully so bars keep their shape when cut. Troubleshooting detail, slicing too soon yields sticky, misshapen pieces, so be patient and chill the full 30 minutes.
Substitutions and Tips
I like to keep tips practical so your kitchen time is fun rather than fussy. Below are expanded notes and tricks from real tests I do every time I make these bars. They cover color consistency, handling, and presentation so you can make confident choices.
- Use fresh marshmallows: Fresh mini marshmallows melt more evenly, creating a smooth binder that coats the Rice Krispies cereal without graininess.
- Wet or grease hands: Wetting your hands with warm water or using cooking spray prevents the sticky mixture from clinging while you press each layer into the pan.
- Work in short microwave bursts: Heat the mixture for short intervals and stir between bursts to avoid scorching the sugar, which keeps the texture glossy and smooth.
- Divide portions equally: Measure out the mini marshmallows, butter, and cereal into four even portions to ensure uniform layers and consistent slicing.
- Add food coloring sparingly: If you want deeper colors, add 2 to 3 drops of gel or liquid coloring at a time, testing intensity because a little goes a long way.
- Chill before slicing: Refrigerating for the full suggested time firms the bars so slices are neat, and cold bars are less sticky to handle when packing or gifting.
Best Served With
These treats are a fun, colorful dessert or party sweet that pair well with light beverages and seasonal celebrations. They are portable and kid friendly, making them suitable for school parties, spring picnics, or Easter brunch spreads. Below are serving ideas and context for when they shine.
- Party platters: Arrange Peeps Rice Krispie Treats on a platter for a bright centerpiece at a spring or Easter gathering.
- Picnic snacks: Pack chilled squares in a container lined with parchment for an easy picnic dessert that travels well.
- School celebrations: Cut into small squares for classroom parties, keeping them covered to avoid sticky hands.
- Gift packaging: Wrap individual squares in parchment or cellophane tied with ribbon for neighbor or teacher gifts.
- Seasonal displays: Use color-coordinated plates and pastel napkins to emphasize the spring palette at brunch or a baby shower.
- Storage tips: Keep the bars in an airtight container at room temperature for up to two days, or refrigerate to extend freshness and ensure firmer slices.
- Serving temperature: Serve slightly chilled for cleaner cuts, or at room temperature if you prefer a softer, chewier bite.
FAQ
Conclusion
These Peeps Rice Krispie Treats stand out because they pair effortless technique with joyful presentation, creating colorful bars that are both nostalgic and crowd pleasing. I encourage you to try them for your next spring party or holiday gathering, because the layered colors and chewy crisp texture are simple to achieve and always bring smiles. Make them with fresh marshmallows and a little patience while pressing and chilling, and you will be rewarded with tidy, vibrant squares that travel well and taste even better when shared.
Peeps Rice Krispie Treats
Equipment
- Microwave safe mixing bowls
- 9x13-inch Baking Pan
- Spatula
- Refrigerator
Ingredients
- 81.38 -ounce PEEPS Rainbow pops (4 colors of peeps in each pop – pink, blue, green & yellow) Provide intense, colorful candy flavor and decorative appeal; use the PEEPS Rainbow pops to infuse vibrant pastel hues and sweet marshmallow texture into the treats, melting or chopping as needed to distribute color evenly throughout the bars.
- 2 cups mini marshmallows (divided into four 1/2-cup portions) Contribute soft, chewy marshmallow structure and sweetness; incorporate mini marshmallows to bind the cereal together and create the classic gooey texture, adding them in stages as directed so they melt uniformly.
- 3/4 cups salted butter (room temperature and divided into four 3-tablespoon portions) Supply creamy fat for melting and flavor; soften salted butter to help dissolve marshmallows smoothly and lend a rich, slightly salty balance that enhances overall sweetness and improves mouthfeel.
- 2 teaspoons vanilla extract (divided into four 1/2-cup portions) Enhance overall flavor with warm, aromatic notes; add vanilla extract to round out the sugary profile and deepen the dessert’s complexity without overpowering the marshmallow and cereal components.
- 8 cups Rice Krispies cereal (divided into four 2-cup portions) Provide crunchy cereal bulk and crisp texture; fold in Rice Krispies to give the treats their iconic snap and light structure, ensuring even coating with melted marshmallow for cohesive bars.
Instructions
- Spray a 9×13-inch baking pan with baking spray and set aside. Prepare all your ingredients before you start making these Peeps Rice Krispie squares because you will need to work quickly with each peeps color batch.: As you assemble, you'll notice the toasted butter scent wafting through the kitchen if your pan is prepped and ready, and having the pan sprayed prevents sticking so you can press layers confidently. Why this matters, the nonstick surface ensures clean removal and neat edges when you slice. Common mistake, forgetting to spray thoroughly can make the bottom cling and tear when removing pieces, so take a moment to coat corners and sides well.
- You will need 4 medium-sized microwave-safe mixing bowls for this recipe. If you only have one or two mixing bowls, then you will need to wash the bowls between mixing each colored batch of marshmallow Peeps. Remove the Peeps from their lollipop stick and sort them into colors.: The kitchen will smell sweet and intense once you begin melting, and mise en place keeps you from rushing. Why this matters, pre-measured portions keep each layer consistent and prevent marshmallow from setting before you finish. Troubleshooting tip, if you get distracted the marshmallow can firm up, so have everything within reach and a damp cloth nearby to clean any spills.
- To a medium-sized microwave-safe bowl, add 1/2 cup of mini marshmallows, 3 tablespoons of butter, and all 8 green Peeps. Microwave on high for 45 seconds to 1 minute. Add 1/2 teaspoon vanilla extract and stir to completely combine all the ingredients into a smooth consistency.: When you line up bowls, the visual organization helps you move from color to color without cross contamination, and you will hear a quiet simmer as the marshmallows soften. Why this matters, using separate bowls preserves color purity and avoids muddying the layers. A common issue is reusing a bowl without washing, which can carry color or set lumps, so plan for four bowls or wash rapidly between batches.
- Fold in 2 cups of Rice Krispie cereal until all the cereal is coated in the colored marshmallow mixture.: While washing, warm water helps dissolve sticky residue, and the bowls will come away glossy so your next batch melts cleanly. Why this matters, clean bowls prevent color bleeding into subsequent batches. Mistake to avoid, soaking in cold water may not loosen tacky marshmallow, so rinse with hot water and a little soap before drying.
- Layer the green-colored marshmallow coated Rice Krispie cereal mixture into the bottom of the prepared baking dish. Using your hands, gently press the mixture into an even layer.: As you separate each color, you may notice a faint candy scent that varies by hue, and arranging colors side by side helps you plan the layering visually. Why this matters, sorting avoids accidental mixing and keeps each layer pure and bright. Common mistake, leaving sticks attached can obstruct melting and create a mess, so fully remove and discard sticks first.
- Repeat steps 2 and 3 for the yellow-colored Peeps followed by the blue Peeps and pink Peeps until you have 4 layers of Peeps-colored Rice Krispie cereal layered one on top of the other. Gently press down on the final layer to make sure that your Peeps Rice Krispie squares are tightly packed.: Once heated, the mixture will bubble and release a warm, sweet aroma, and you should see the marshmallows collapse into a glossy, viscous mass. Why this matters, the proportions ensure the marshmallow is both flavorful and the right consistency to coat cereal. Troubleshooting involves overheating which can make the candy grainy, so heat in short bursts and stir in between to smooth the mixture.
- Place the baking dish into the refrigerator for 30 minutes to allow the Peeps Rice Krispies to cool and set completely before slicing and serving them.: You will hear gentle bubbling and see the mixture become glossy and fluid; remove when mostly melted and stir to finish. Why this matters, microwaving just enough prevents scorching and preserves smooth texture. Mistake to avoid, microwaving too long creates a scorched smell and a stiff, hard candy that will not coat cereal properly.
- Add 1/2 teaspoon vanilla extract and stir to completely combine all the ingredients into a smooth consistency: Stirring releases a comforting scent of vanilla and helps the melted PEEPS and mini marshmallows form a cohesive, silky binder. Why this matters, vanilla balances sweetness and gives depth to each layer. Troubleshooting tip, if the mixture cools and thickens quickly, microwave for a few seconds and stir to re-liquefy before proceeding.
- Fold in 2 cups of Rice Krispie cereal until all the cereal is coated in the colored marshmallow mixture: You will notice the cereal take on a glossy sheen and hear a soft crackle as you fold, and the bowl will fill with flecks of colored marshmallow. Why this matters, gently folding preserves crispness and prevents the cereal from becoming mushy. A common mistake is overmixing which crushes the cereal, so fold with a spatula just until evenly coated.
- Layer the green-colored marshmallow coated Rice Krispie cereal mixture into the bottom of the prepared baking dish: As you press, you will feel the warm marshmallow spread and the mixture will glisten under the kitchen light, forming a coherent layer. Why this matters, even layers create a pleasing striped appearance and consistent texture in every bite. Troubleshooting, pressing too hard will compress the cereal and make the texture dense, so press firmly but gently for a balanced chew.
- Using your hands, gently press the mixture into an even layer: Wetting your hands slightly or using a piece of parchment to press will keep the mixture from sticking and allow you to smooth the surface, giving straight edges to each layer. Why this matters, gentle pressing ensures the bars hold together without becoming overly compact. Mistake to avoid, using dry hands will cause sticking and tearing, so keep your hands lightly damp or greased.
- Repeat steps 2 and 3 for the yellow-colored Peeps followed by the blue Peeps and pink Peeps until you have 4 layers of Peeps-colored Rice Krispie cereal layered one on top of the other: As you build layers you will see the dessert become visually striking, and a faint scent of warm sugar will follow each added color. Why this matters, repeating the exact measurements preserves uniformity of flavor and texture across layers. Troubleshooting tip, if a previous layer cools too much, briefly warm it with a hand to help the next layer adhere, but avoid melting it.
- Gently press down on the final layer to make sure that your Peeps Rice Krispie squares are tightly packed: The top should be smooth and slightly glossy, and the sides should show clean bands of color when chilled. Why this matters, compacting the final layer helps the bars slice neatly without crumbling. Common mistake, pressing unevenly creates gaps and fragile slices, so apply even pressure across the surface.
- Place the baking dish into the refrigerator for 30 minutes to allow the Peeps Rice Krispies to cool and set completely before slicing and serving them: Cooling produces a firmer texture and a cooled sugary scent that is less sticky to the touch, and chilled bars release cleanly from the dish. Why this matters, refrigeration helps the marshmallow bind fully so bars keep their shape when cut. Troubleshooting detail, slicing too soon yields sticky, misshapen pieces, so be patient and chill the full 30 minutes.
Notes
- Use fresh marshmallows: Fresh mini marshmallows melt more evenly, creating a smooth binder that coats the Rice Krispies cereal without graininess.
- Wet or grease hands: Wetting your hands with warm water or using cooking spray prevents the sticky mixture from clinging while you press each layer into the pan.
- Work in short microwave bursts: Heat the mixture for short intervals and stir between bursts to avoid scorching the sugar, which keeps the texture glossy and smooth.
- Divide portions equally: Measure out the mini marshmallows, butter, and cereal into four even portions to ensure uniform layers and consistent slicing.
- Add food coloring sparingly: If you want deeper colors, add 2 to 3 drops of gel or liquid coloring at a time, testing intensity because a little goes a long way.
- Chill before slicing: Refrigerating for the full suggested time firms the bars so slices are neat, and cold bars are less sticky to handle when packing or gifting.