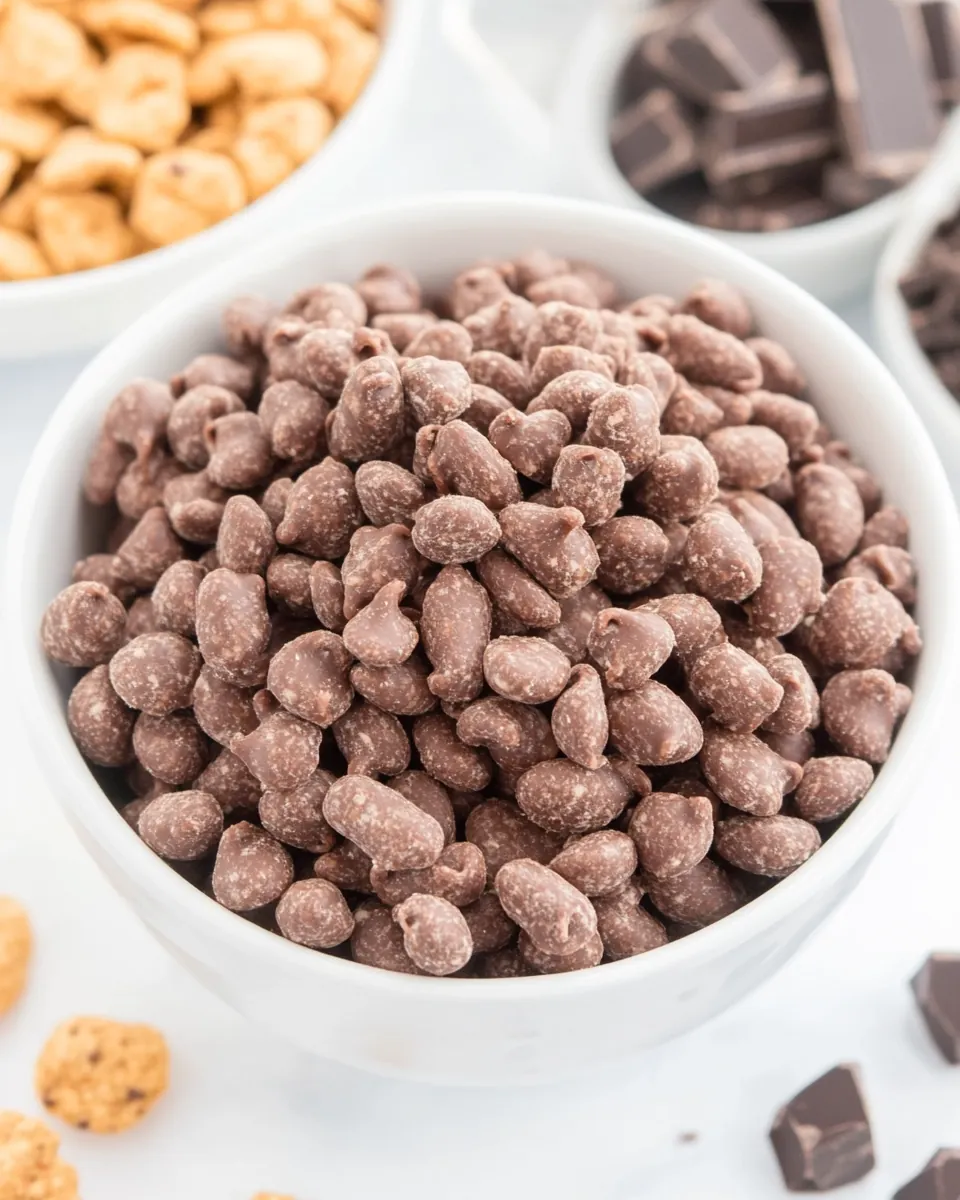
Reindeer Poop Chocolate Snack Mix
Reindeer Poop Chocolate Snack Mix is one of those recipes I reach for when I want something playful, nostalgic, and impossibly simple to throw together. The first time I made it, I was wrapping gifts late at night and needed a silly edible stocking stuffer, so I mixed a bowl of crunchy cereal with a glossy chocolate coating, dusted it in cocoa and powdered sugar, and suddenly the living room smelled like warm chocolate and childhood. That night felt cozy and chaotic in the best way, with paper scraps everywhere and a tray of treats cooling on the counter.
I love how Reindeer Poop Chocolate Snack Mix brings people together without any fuss. You do not need special skills to get gorgeous, crunchy clusters that taste indulgent but are straightforward to make. I often double the batch when company is coming, because guests keep coming back for more, and I enjoy watching them try to guess the secret inside each bite. It turns out a simple combination of peanut butter and chocolate chips can feel magically festive when tossed with cereal and dusted with cocoa and powdered sugar.
Recipe Snapshot
18 mins
15 mins
3 mins
Easy
200 kcal
American
Gluten-Free, Vegan
Desserts
Microwave, Large microwave safe bowl, Baking sheet, Parchment paper, Gallon size zip top bag or large container
The Appeal of This Reindeer Poop Chocolate Snack Mix
It is wildly easy to assemble
I adore recipes that respect a busy schedule, and this one does exactly that. With just a few minutes in the microwave and a quick shake in a bag, you get snackable clusters. I value that I can make this between chores or while watching a show, and it still tastes like I spent much longer on it.
Texture that keeps you coming back
I am constantly surprised how the crunchy corn pops cereal holds up under a glossy chocolate coat, delivering a crisp snap followed by a melt in your mouth. The dusting of cocoa powder and powdered sugar gives a delicate exterior that balances the richness of peanut butter.
Playful and giftable
We love gifting this in little jars or cellophane bags. The name brings smiles, and the flavor makes it disappear fast. It is an ideal last minute edible present when you want something homemade without the fuss of baking.
Flexible and forgiving
I’ve found small variations do not break the recipe. A touch more honey or a different melting technique still gives you that glossy coating. This forgiving nature makes it a great recipe to bring kids into the kitchen for a hands on treat.
Seasonal and nostalgic
For me, Reindeer Poop Chocolate Snack Mix triggers holiday memories, but it is equally at home on a movie night or a potluck table. It pairs nostalgic comfort with straightforward technique, which is why I keep coming back to it year after year.
Shopping List for Reindeer Poop Chocolate Snack Mix
These ingredients are intentionally simple, each playing a clear role. The cereal provides crunch and volume, the peanut butter and chocolate chips create the binding, and the cocoa powder plus powdered sugar give a dusty, chocolatey finish. Together they produce clusters that are crispy, rich, and festive.
- 6 cups Corn Pops cereal or similar cereal: Provides a crunchy base and bulk for the snack mix, absorbing coatings and carrying flavors throughout each bite. Works well with sweet coatings and gives a light, airy texture that balances denser ingredients. Offers familiar cereal sweetness that complements chocolate and peanut butter components.
- 1 cup peanut butter I used creamy peanut butter: Adds creamy richness and acts as the binding agent to coat the cereal and chocolate, helping powders adhere evenly. Contributes savory, nutty flavor and smooth mouthfeel that contrasts the sweet elements. Helps create clusters and ensures the mix holds together without becoming hard.
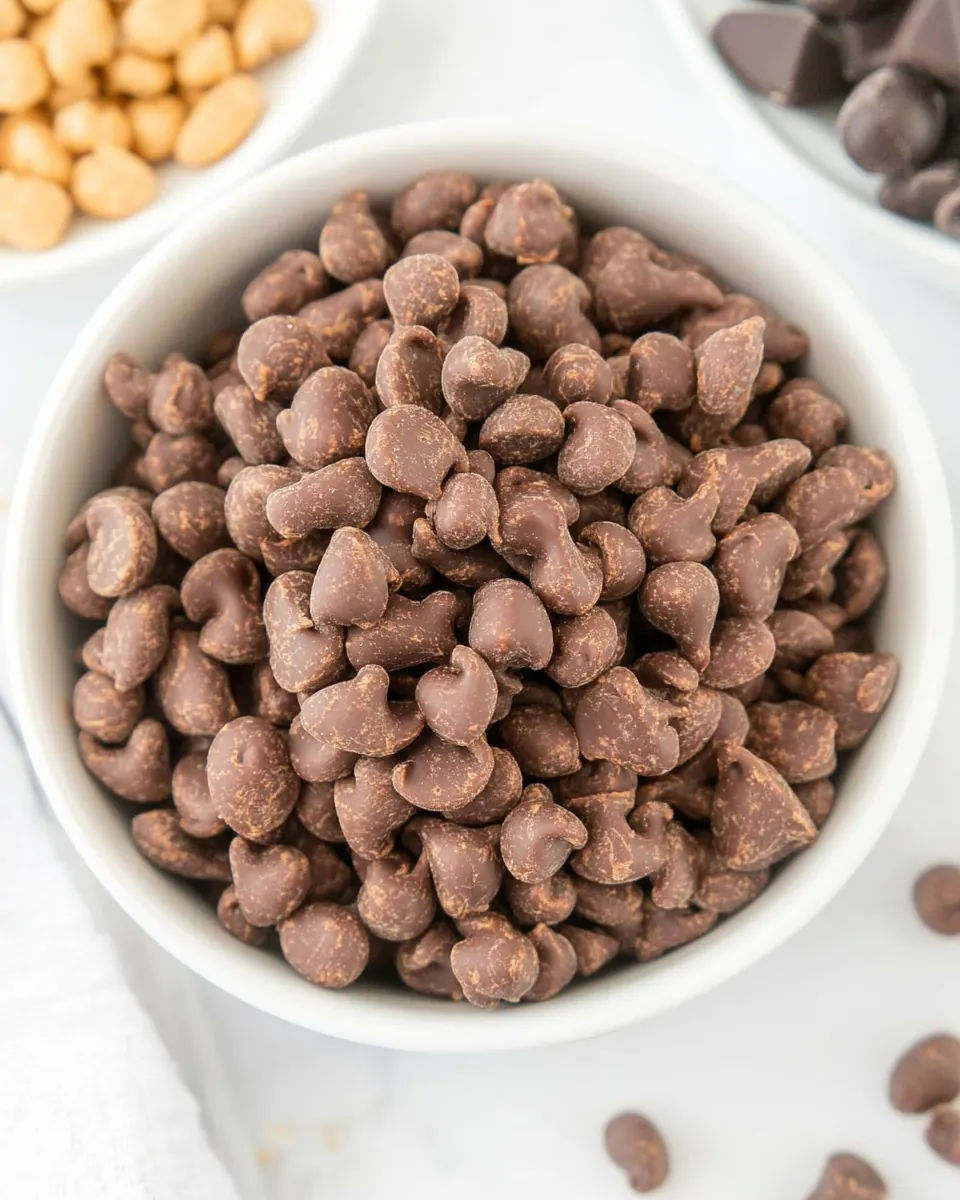
- 1 cup chocolate chips semi-sweet chocolate chips: Melts into the peanut butter to create a glossy coating that envelopes the cereal pieces, contributing deep chocolate flavor and sweetness. Supplies structure when combined with oil and honey, forming the matrix that powdered sugar clings to. Enhances overall chocolate intensity and provides a familiar dessert note.
- 1 teaspoon vegetable oil: Thins melted chocolate slightly to make a smoother, more pourable coating and to prevent seizing when heated. Promotes shine and improves spreadability so the chocolate evenly covers cereal pieces. Helps achieve a silky texture without altering flavor significantly.
- 1/2 teaspoon honey: Acts as a mild sweetening emulsifier and helps keep the chocolate–peanut butter coating smooth and cohesive. Adds a subtle sticky element to aid in adhesion of cocoa and powdered sugar to the cereal. Contributes a hint of floral sweetness that complements the peanut and chocolate flavors.
- 1 cup cocoa powder: Adds concentrated chocolate flavor and deepens the cocoa profile when dusted onto the coated cereal mix. Provides dry, intense chocolate bitterness that balances sweetness from sugar and chocolate chips. Helps create a richer, more complex chocolate character throughout the snack mix.
- 3/4 cup powdered sugar: Creates a sweet, powdery exterior that forms when tossed with the coated cereal, offering a snowy finish and extra sweetness. Absorbs any excess oil and prevents pieces from sticking together, resulting in individual, lightly dusted clusters. Enhances visual appeal and delivers a pleasant first-sip sweetness.
Directions for Reindeer Poop Chocolate Snack Mix
This method is straightforward and comforting. You will melt a glossy chocolate and peanut butter sauce, fold in the cereal by small amounts so everything gets evenly coated, toss everything in a cocoa and powdered sugar mixture, and let it set. Keep a bowl and a sheet of parchment handy for quick transfer and cooling.
- Line a baking sheet with parchment paper. In a large microwave-safe bowl, add peanut butter, chocolate chips and vegetable oil. Heat on half power in the microwave for one minute, then stir. Continue heating at half power in 30 second increments until the smooth chocolate sauce forms, about 2-3 minutes.: As you begin, breathe in the faint smell of clean paper and recall how a lined sheet prevents sticking, which saves time later. The parchment creates a nonstick surface so clusters firm up without tearing, keeping the tray easy to clean. A common misstep is skipping the parchment and finding pieces stuck to the metal, so always line the tray.
- Pour honey into the chocolate mixture and stir. Add about two cups of the cereal and stir well until coated. Continue adding cereal two cups at a time and stirring until all of the cereal is evenly coated.: Once combined in the bowl, you may notice the glossy sheen of the oil catching the light, promising smoothness. This combination melts uniformly, and the oil prevents grainy chocolate, allowing the peanut butter and chocolate chips to form a cohesive sauce. If you mix too vigorously before melting, it can trap air and create a slightly dull finish, so keep agitation minimal at this stage.
- In a large container or a gallon-size freeze zip top bag, add the cocoa powder and powdered sugar, then mix together.: The first heating softens the chips and warms the peanut butter , releasing a warm, nutty aroma. Stirring distributes heat and checks consistency, helping avoid spots of unmelted chocolate. Overheating can burn the chocolate, leading to a grainy texture, so stop to stir on schedule.
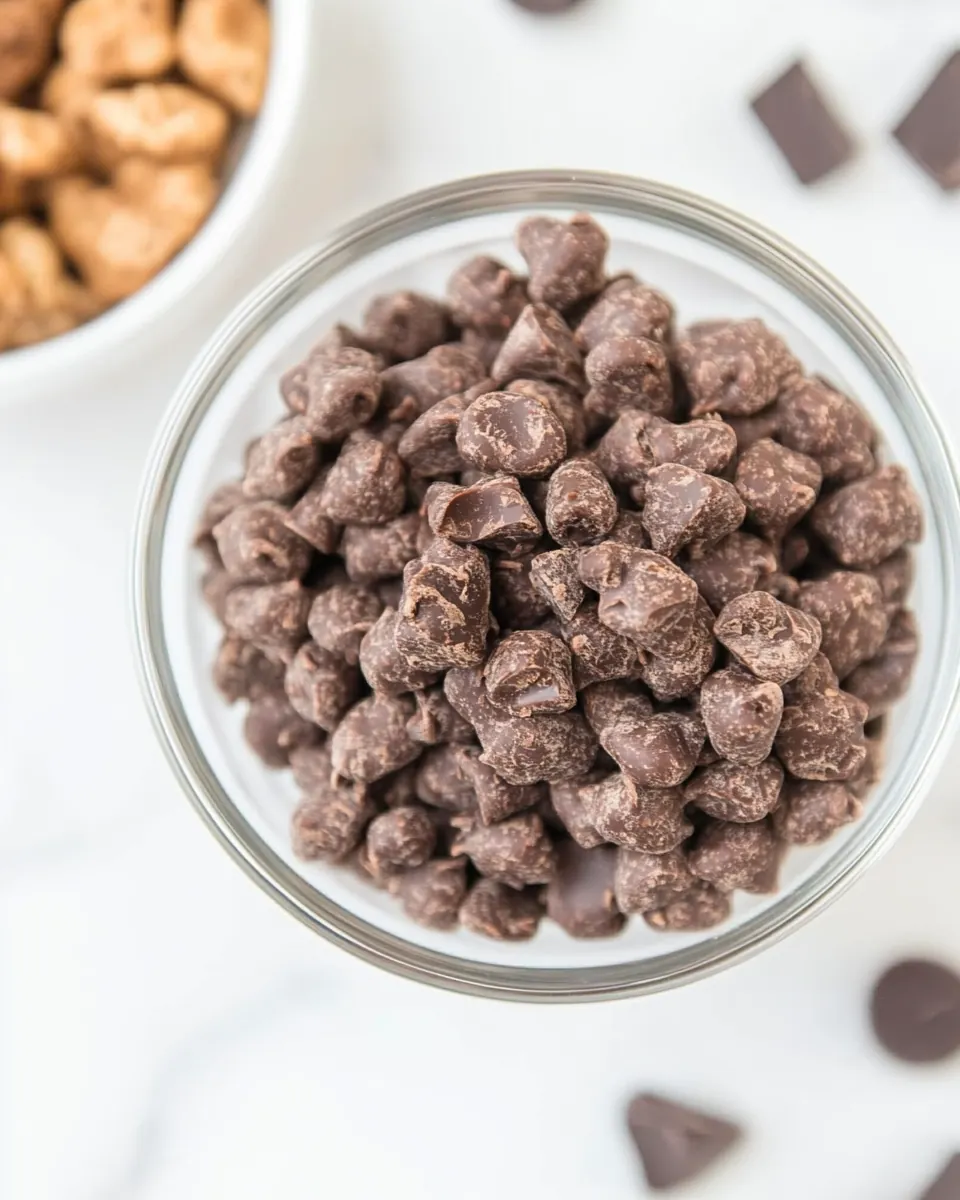
- Add the chocolate-coated cereal into the cocoa powder mix. Close the container well, then shake until the cereal is fully coated.: Pay attention to the sound and texture as it softens, and watch for a velvety flow when stirred, indicating smoothness. The small increments prevent overheating and seizing, and they allow you to control the final gloss of the sauce. A frequent error is rushing with full power, which scorches chocolate and ruins the sauce.
- Pour the mixture onto a baking sheet lined with parchment paper to allow the chocolate to set. Then enjoy!: When you add the honey , the aroma becomes slightly floral and the sauce takes on a silkier sheen, which improves adhesion to the cereal. Stir thoroughly so the sticky sweetness distributes evenly, helping the mixture cling to each piece. If you add too much honey, the coating can become overly sticky and attract clumps, so measure carefully.
- Add about two cups of the cereal and stir well until coated: The first addition is crucial for building an even coating. The cereal will make a low crackling sound as you fold it in, and you should see each piece take on a thin, glossy film. Stir gently to avoid crushing delicate pieces, and avoid dumping all the cereal at once, which can result in uneven coverage.
- Continue adding cereal two cups at a time and stirring until all of the cereal is evenly coated: With each addition, the bowl will grow lighter and the mixing becomes more tactile, as clusters start to form. This staged approach ensures every piece gets attention and prevents dry pockets. Rushing can leave some cereal uncoated, producing inconsistent bites, so be patient and thorough.
- In a large container or a gallon size freeze zip top bag, add the cocoa powder and powdered sugar, then mix together: When you combine the cocoa powder and powdered sugar , you create a balanced dust that mellows bitterness and adds sweetness. Shake or stir until uniform, and notice the fine texture that will cling to the chocolate. If not mixed well, the coating can look patchy, so ensure an even blend.
- Add the chocolate coated cereal into the cocoa powder mix: Pouring the warm, glossy clusters into the dry mixture produces a faint puff of dust and a cloud of chocolate scent. Close the container tightly and shake to coat; the motion helps the dry mix reach every crevice. A common mistake is not sealing the bag, causing powder to escape and creating a mess, so seal before shaking.
- Close the container well, then shake until the cereal is fully coated: The shaking sound changes from a hollow rattle to a denser thud as the cereal becomes enveloped, and you will feel the mixture settle. Shaking also helps break up large clumps into perfectly coated bites. Avoid over shaking which can pulverize delicate pieces, creating too much dust and tiny fragments.
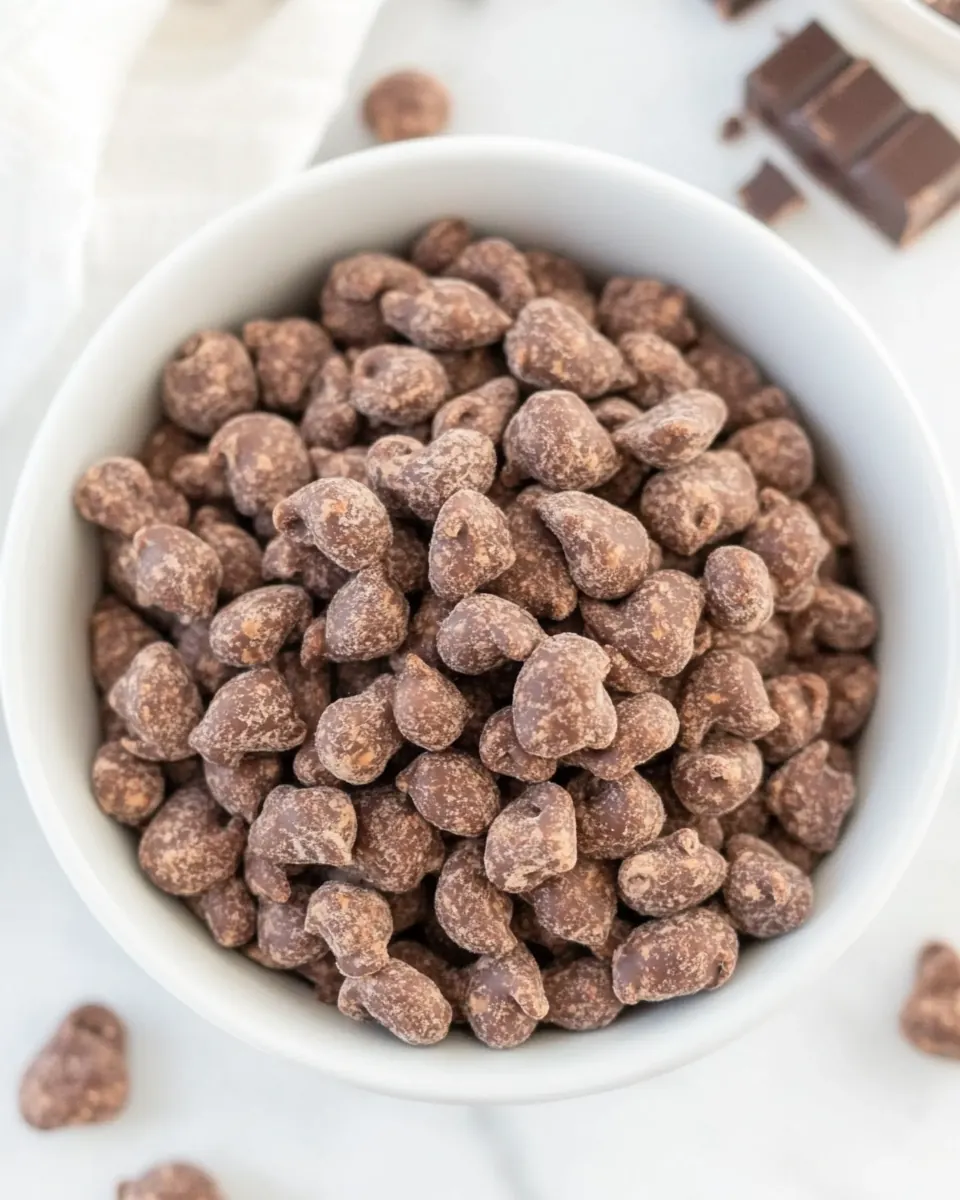
- Pour the mixture onto a baking sheet lined with parchment paper to allow the chocolate to set: As you spread the clusters on parchment, they will cool and the glossy sheen will dull slightly to a pleasant matte finish, signaling readiness. Laying them out prevents sticking and gives them room to firm up uniformly. A common oversight is leaving them piled, which yields uneven cooling and sticky clumps, so space them out when possible.
- Then enjoy: Once cooled, the clusters offer a crisp snap and a delicate powdery exterior that melts into rich chocolate and nutty warmth. Serve in bowls or package in small bags; either way, listen for compliments. If stored improperly in a humid place, the coating can soften, so keep them in an airtight container away from moisture.
Variations to Try
These variations let you tailor texture and flavor while keeping the easy technique intact. Below I expand on ways to tweak the mix and presentation.
- Swap the cereal — Try a puffed rice or an airy corn cereal with similar texture to Corn Pops for a lighter crunch, but keep the same volume so the coating proportions stay balanced.
- Use crunchy peanut butter — If you like a little extra bite, crunchy peanut butter adds nutty shards that amplify texture, though the coating may cling differently than with creamy.
- Adjust the sweetness — Tweak the ratio of powdered sugar and cocoa powder to shift between sweeter and more chocolate forward profiles, but keep the total dry weight similar for coating behavior.
- Package for gifting — Place portions in small jars or cellophane bags tied with ribbon, this makes an instant festive present and keeps the clusters protected.
- Double the batch — If you need more, prepare two bowls and work in parallel to maintain even coating and prevent the chocolate from setting while you still have cereal to coat.
- Chill briefly to set — If your kitchen is warm, a short chilling period on the baking sheet helps the coating firm faster, but avoid leaving it in the fridge too long to prevent condensation.
Perfect Matches for Reindeer Poop Chocolate Snack Mix
This snack mix pairs well with casual occasions and festive gatherings. Below are curated serving ideas, storage suggestions, and occasion notes to help you enjoy it fully.
- Holiday gift jars — Fill small jars with the snack mix, add a festive label, and present as homemade gifts during Christmas or winter parties.
- Party snack table — Place the mix in a large bowl with scoops for guests to help themselves during movie nights or neighborhood get together s, it holds up well on a buffet.
- Kid friendly treat — Because it is easy to make and fun to name, this is perfect for classroom parties or family baking activities where kids can help shake the bag.
- Storage tips — Keep in an airtight container at room temperature to maintain crunch; if humidity is a concern, include a small food safe desiccant or store in a cool place.
- Seasonal pairing — This feels right for fall and winter gatherings when rich chocolate snacks are especially welcome, and it complements warm drinks and cozy movie nights.
- Travel friendly — Pack in sealed bags for potlucks or road trips, the clusters travel well and don t require refrigeration for short periods.
FAQ
Conclusion
What makes this recipe special is its playful name and truly effortless technique that delivers satisfying, chocolatey clusters every time. It comes together with minimal equipment and few ingredients, yet yields something that feels homemade and celebratory. Give it a try when you want a quick, crowd pleasing snack or a last minute edible gift. You ll likely find it becomes one of those go to treats you make again and again.
Reindeer Poop Chocolate Snack Mix
Equipment
- Microwave
- Large microwave-safe bowl
- Baking Sheet
- Parchment Paper
- Gallon size zip top bag or large container
Ingredients
- 6 cups Corn Pops cereal or similar cereal Provides a crunchy base and bulk for the snack mix, absorbing coatings and carrying flavors throughout each bite. Works well with sweet coatings and gives a light, airy texture that balances denser ingredients. Offers familiar cereal sweetness that complements chocolate and peanut butter components.
- 1 cup peanut butter I used creamy peanut butter Adds creamy richness and acts as the binding agent to coat the cereal and chocolate, helping powders adhere evenly. Contributes savory, nutty flavor and smooth mouthfeel that contrasts the sweet elements. Helps create clusters and ensures the mix holds together without becoming hard.
- 1 cup chocolate chips semi-sweet chocolate chips Melts into the peanut butter to create a glossy coating that envelopes the cereal pieces, contributing deep chocolate flavor and sweetness. Supplies structure when combined with oil and honey, forming the matrix that powdered sugar clings to. Enhances overall chocolate intensity and provides a familiar dessert note.
- 1 teaspoon vegetable oil Thins melted chocolate slightly to make a smoother, more pourable coating and to prevent seizing when heated. Promotes shine and improves spreadability so the chocolate evenly covers cereal pieces. Helps achieve a silky texture without altering flavor significantly.
- 1/2 teaspoon honey Acts as a mild sweetening emulsifier and helps keep the chocolate-peanut butter coating smooth and cohesive. Adds a subtle sticky element to aid in adhesion of cocoa and powdered sugar to the cereal. Contributes a hint of floral sweetness that complements the peanut and chocolate flavors.
- 1 cup cocoa powder Adds concentrated chocolate flavor and deepens the cocoa profile when dusted onto the coated cereal mix. Provides dry, intense chocolate bitterness that balances sweetness from sugar and chocolate chips. Helps create a richer, more complex chocolate character throughout the snack mix.
- 3/4 cup powdered sugar Creates a sweet, powdery exterior that forms when tossed with the coated cereal, offering a snowy finish and extra sweetness. Absorbs any excess oil and prevents pieces from sticking together, resulting in individual, lightly dusted clusters. Enhances visual appeal and delivers a pleasant first-sip sweetness.
Instructions
- Line a baking sheet with parchment paper. In a large microwave-safe bowl, add peanut butter, chocolate chips and vegetable oil. Heat on half power in the microwave for one minute, then stir. Continue heating at half power in 30 second increments until the smooth chocolate sauce forms, about 2-3 minutes.: As you begin, breathe in the faint smell of clean paper and recall how a lined sheet prevents sticking, which saves time later. The parchment creates a nonstick surface so clusters firm up without tearing, keeping the tray easy to clean. A common misstep is skipping the parchment and finding pieces stuck to the metal, so always line the tray.
- Pour honey into the chocolate mixture and stir. Add about two cups of the cereal and stir well until coated. Continue adding cereal two cups at a time and stirring until all of the cereal is evenly coated.: Once combined in the bowl, you may notice the glossy sheen of the oil catching the light, promising smoothness. This combination melts uniformly, and the oil prevents grainy chocolate, allowing the peanut butter and chocolate chips to form a cohesive sauce. If you mix too vigorously before melting, it can trap air and create a slightly dull finish, so keep agitation minimal at this stage.
- In a large container or a gallon-size freeze zip top bag, add the cocoa powder and powdered sugar, then mix together.: The first heating softens the chips and warms the peanut butter , releasing a warm, nutty aroma. Stirring distributes heat and checks consistency, helping avoid spots of unmelted chocolate. Overheating can burn the chocolate, leading to a grainy texture, so stop to stir on schedule.
- Add the chocolate-coated cereal into the cocoa powder mix. Close the container well, then shake until the cereal is fully coated.: Pay attention to the sound and texture as it softens, and watch for a velvety flow when stirred, indicating smoothness. The small increments prevent overheating and seizing, and they allow you to control the final gloss of the sauce. A frequent error is rushing with full power, which scorches chocolate and ruins the sauce.
- Pour the mixture onto a baking sheet lined with parchment paper to allow the chocolate to set. Then enjoy!: When you add the honey , the aroma becomes slightly floral and the sauce takes on a silkier sheen, which improves adhesion to the cereal. Stir thoroughly so the sticky sweetness distributes evenly, helping the mixture cling to each piece. If you add too much honey, the coating can become overly sticky and attract clumps, so measure carefully.
- Add about two cups of the cereal and stir well until coated: The first addition is crucial for building an even coating. The cereal will make a low crackling sound as you fold it in, and you should see each piece take on a thin, glossy film. Stir gently to avoid crushing delicate pieces, and avoid dumping all the cereal at once, which can result in uneven coverage.
- Continue adding cereal two cups at a time and stirring until all of the cereal is evenly coated: With each addition, the bowl will grow lighter and the mixing becomes more tactile, as clusters start to form. This staged approach ensures every piece gets attention and prevents dry pockets. Rushing can leave some cereal uncoated, producing inconsistent bites, so be patient and thorough.
- In a large container or a gallon size freeze zip top bag, add the cocoa powder and powdered sugar, then mix together: When you combine the cocoa powder and powdered sugar , you create a balanced dust that mellows bitterness and adds sweetness. Shake or stir until uniform, and notice the fine texture that will cling to the chocolate. If not mixed well, the coating can look patchy, so ensure an even blend.
- Add the chocolate coated cereal into the cocoa powder mix: Pouring the warm, glossy clusters into the dry mixture produces a faint puff of dust and a cloud of chocolate scent. Close the container tightly and shake to coat; the motion helps the dry mix reach every crevice. A common mistake is not sealing the bag, causing powder to escape and creating a mess, so seal before shaking.
- Close the container well, then shake until the cereal is fully coated: The shaking sound changes from a hollow rattle to a denser thud as the cereal becomes enveloped, and you will feel the mixture settle. Shaking also helps break up large clumps into perfectly coated bites. Avoid over shaking which can pulverize delicate pieces, creating too much dust and tiny fragments.
- Pour the mixture onto a baking sheet lined with parchment paper to allow the chocolate to set: As you spread the clusters on parchment, they will cool and the glossy sheen will dull slightly to a pleasant matte finish, signaling readiness. Laying them out prevents sticking and gives them room to firm up uniformly. A common oversight is leaving them piled, which yields uneven cooling and sticky clumps, so space them out when possible.
- Then enjoy: Once cooled, the clusters offer a crisp snap and a delicate powdery exterior that melts into rich chocolate and nutty warmth. Serve in bowls or package in small bags; either way, listen for compliments. If stored improperly in a humid place, the coating can soften, so keep them in an airtight container away from moisture.
Notes
- Swap the cereal — Try a puffed rice or an airy corn cereal with similar texture to Corn Pops for a lighter crunch, but keep the same volume so the coating proportions stay balanced.
- Use crunchy peanut butter — If you like a little extra bite, crunchy peanut butter adds nutty shards that amplify texture, though the coating may cling differently than with creamy.
- Adjust the sweetness — Tweak the ratio of powdered sugar and cocoa powder to shift between sweeter and more chocolate forward profiles, but keep the total dry weight similar for coating behavior.
- Package for gifting — Place portions in small jars or cellophane bags tied with ribbon, this makes an instant festive present and keeps the clusters protected.
- Double the batch — If you need more, prepare two bowls and work in parallel to maintain even coating and prevent the chocolate from setting while you still have cereal to coat.
- Chill briefly to set — If your kitchen is warm, a short chilling period on the baking sheet helps the coating firm faster, but avoid leaving it in the fridge too long to prevent condensation.