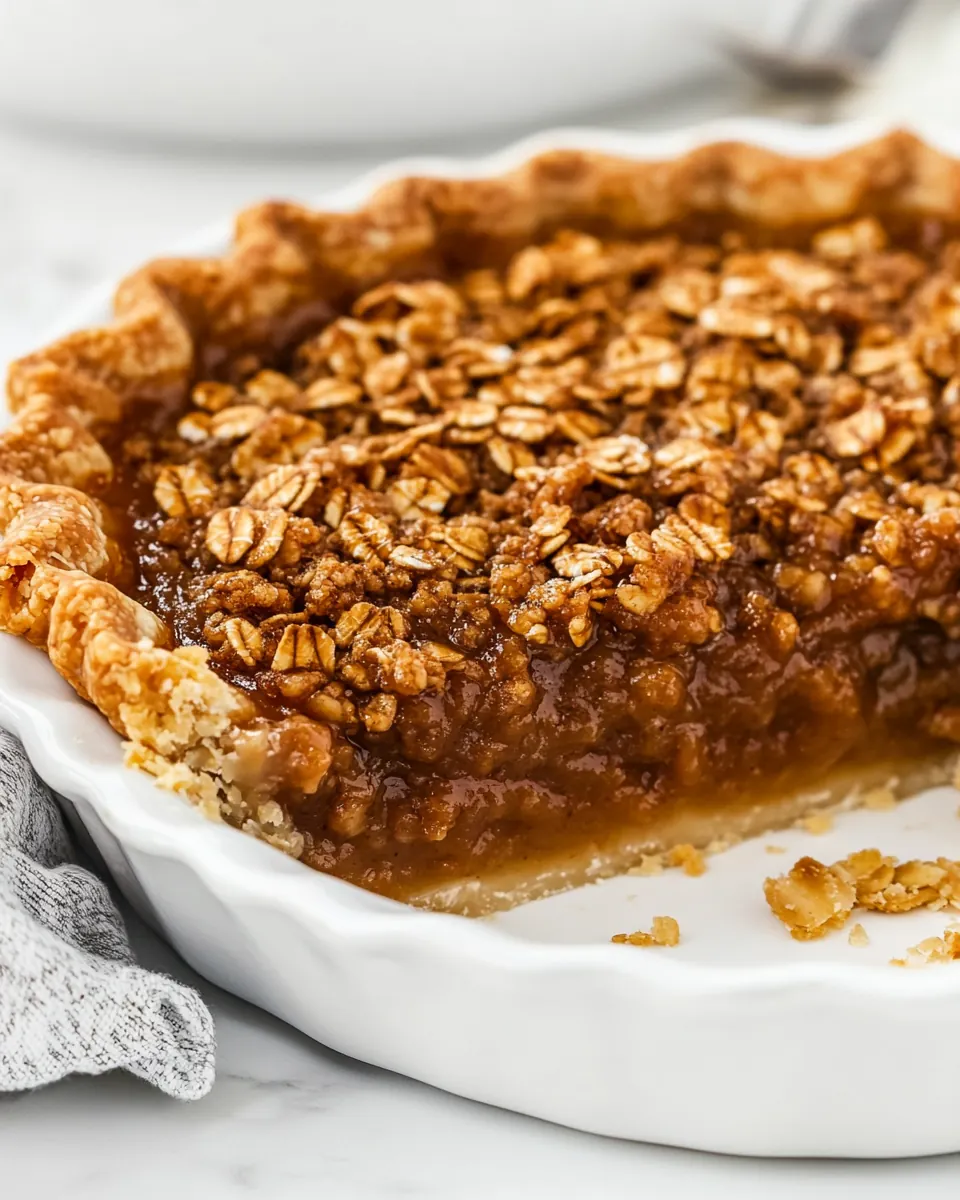
Oatmeal Pie
Oatmeal Pie is one of those recipes I reach for when I want something comforting that feels like a warm memory on a plate. The first time I made this pie I was chasing a flavor I remembered from grandmother’s kitchen, that slightly chewy oat texture meeting a glossy, caramel like filling. Right away I knew the combination of quick oats and a sweet, syrupy custard would become a favorite for casual get togethers and quiet Sunday afternoons.
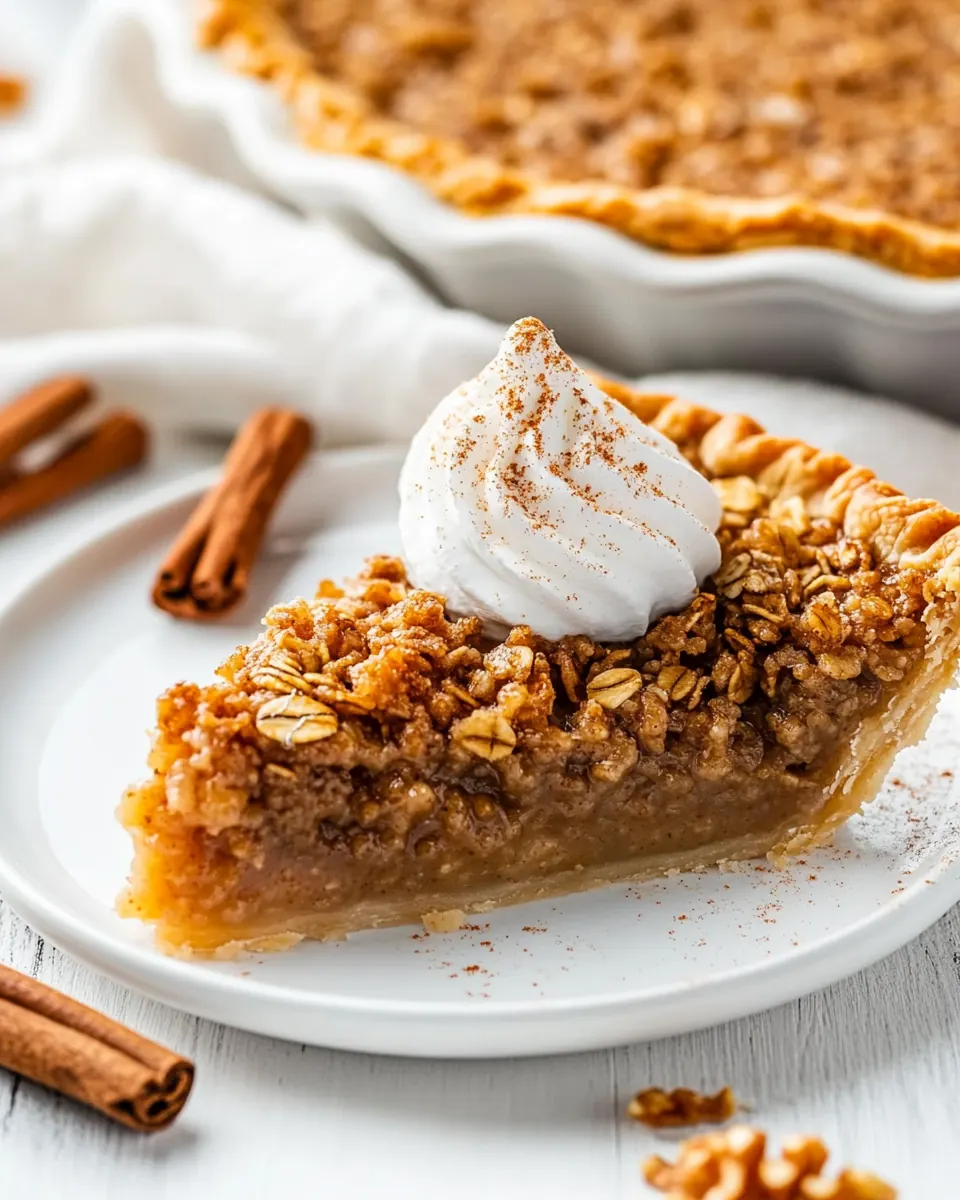
I still remember the small rituals that make this pie special, the way I flour the counter and feel the cool dough under my palms, or the soft scent of cinnamon that lifts the whole kitchen as the filling bakes. I like making it when guests arrive early, because it bakes into something homey and not fussy. Often I will chat while the pie cools on the counter, teasing the edges until they look just right.
Over the years I have learned little tricks that keep the filling glossy and the crust from getting soggy, and that’s the joy of this recipe, simple ingredients like brown sugar and butter coming together to make more than the sum of their parts. If you love pies that are a little rustic, with texture from oats and the kind of sweetness that isn’t sharp but round and comforting, you will find this recipe rewarding and reliably satisfying.
Recipe Snapshot
1 hr 10 mins
15 mins
55 mins
Medium
350 kcal
American
Gluten-Free, Low FODMAP
Desserts
9 inch pie plate, Mixing bowls, Whisk, Rolling pin, Oven
The Charm of This Oatmeal Pie
I love the nostalgia factor
Oatmeal Pie taps into a warm, homey vibe I always chase in baking. The combination of quick oats and a syrupy filling brings back kitchen memories, and I find people smile as soon as a slice is on the table. It feels familiar, but not overly predictable.
The texture is everything
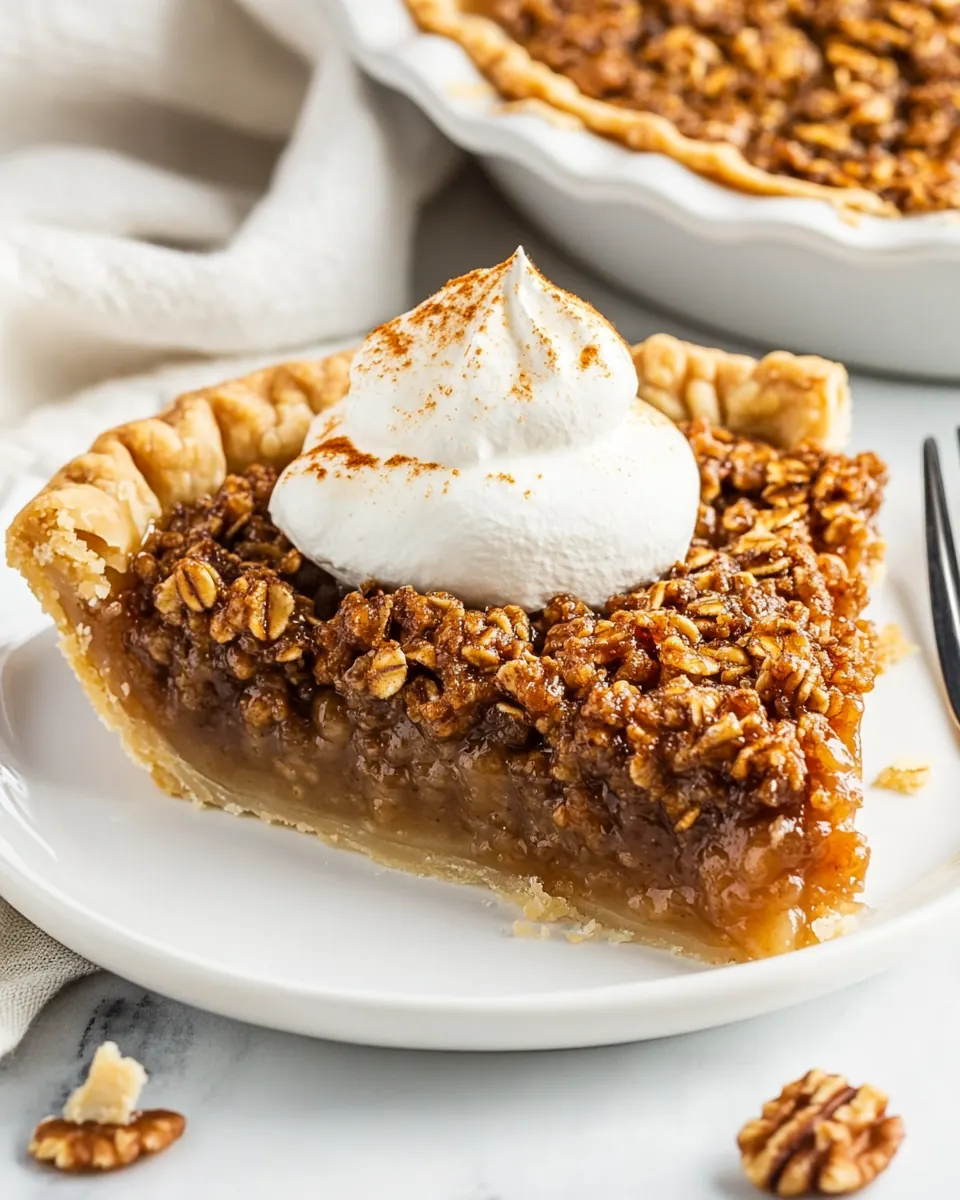
The chewy bite from the quick oats contrasted with the silky filling creates a wonderful mouthfeel. I appreciate that every forkful has a little chew and a smooth note, which makes it more interesting than a plain custard pie.
Simple pantry ingredients
What I adore is how accessible the ingredient list is. Staples like brown sugar, eggs, and butter mean you can often pull this together without a special grocery run. That makes it my go to for last minute gatherings.
Great for make ahead
I often bake this pie the day before company arrives. It holds shape well when chilled, and the flavors deepen overnight. This flexibility makes it practical for holidays and busy weekends, giving you breathing room the day of serving.
Versatile serving
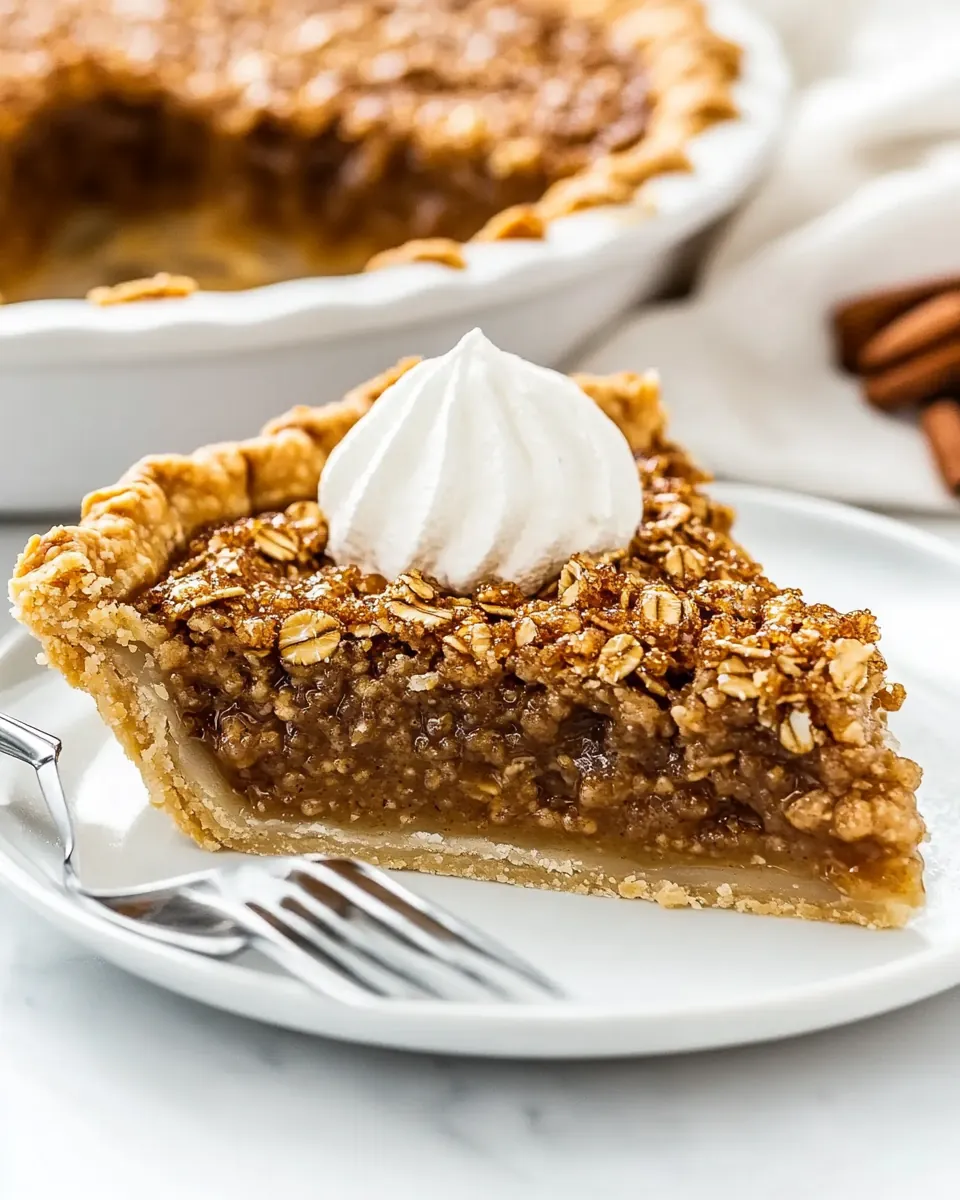
Serve it slightly warm, at room temperature, or chilled, and it still shines. I like it with a dollop of whipped cream or just plain, and you can adapt it for a cozy dessert after a relaxed dinner. That flexibility is one of the reasons I keep this recipe in my regular rotation.
Ingredients Overview for Oatmeal Pie
These ingredients form a classic, comforting pie where texture and sweetness play leading roles. The quick oats add chew and structure, while the combination of brown sugar and corn syrup builds a glossy, caramel like filling. Eggs and cornstarch stabilize the custard so it sets without becoming rubbery, and a touch of cinnamon and salt round out the flavor. The unbaked pie crust is the silent partner that provides flakiness and a buttery contrast to the filling.
- 19 " unbaked pie crust: Provide a sturdy, flaky vessel that holds the pie filling and bakes to a golden brown; ensures structure and easy slicing while contrasting textures with the filling. Blind-bake briefly if recipe requires to prevent a soggy bottom and maintain a crisp edge.
- 3 large eggs: Bind the filling together and create a rich, custard-like texture when beaten and incorporated; contributes to the pie's richness and helps set the filling during baking. Whisk thoroughly to incorporate air for a smoother, more uniform consistency.
- 1 cup brown sugar: Sweeten the filling with deep, molasses-like flavor and add moisture to the filling; brown sugar contributes a caramel undertone that complements oats and cinnamon. Pack lightly when measuring for accurate sweetness and consistent texture.
- 2 tablespoons cornstarch: Thicken the filling and stabilize the custard so it sets properly without being runny; cornstarch gives a glossy finish and prevents separation during baking. Dissolve in a small amount of liquid first to avoid lumps when mixing into the filling.
- 1 teaspoon cinnamon: Warm the filling with aromatic spice and enhance overall flavor complexity; cinnamon pairs especially well with oats and brown sugar to create a classic, cozy profile. Use measured amounts to avoid overpowering the other flavors.
- 1/4 teaspoons salt: Balance and enhance flavors while suppressing sweetness slightly; salt intensifies aromatics and rounds out the filling. Sprinkle measured quantity evenly to prevent any salty hotspots in the pie.
- 3/4 cup corn syrup: Provide a smooth, sweet backbone with a mild corn flavor and viscous texture that helps bind the filling components; corn syrup adds chewiness and sheen to the baked filling. Stir in thoroughly so it integrates evenly with sugars and eggs.
- 1/4 cup butter, melted: Add richness and a silky mouthfeel while contributing buttery flavor notes; melted butter helps incorporate fats evenly into the filling for tenderness. Cool slightly before adding to prevent cooking the eggs prematurely when combined.
- 1 teaspoon vanilla extract: Enhance and round out the overall flavor profile with warm, aromatic vanilla notes; vanilla deepens sweetness perception and complements brown sugar and cinnamon. Add toward the end of mixing to preserve its delicate aroma.
- 1 cup quick oats: Provide chewy texture and nutty whole-grain character that contrasts the smooth custard; quick oats absorb moisture and help create a satisfying bite. Stir in evenly so oats hydrate fully and distribute throughout the filling.
How to Assemble Oatmeal Pie
These steps will guide you through building a stable, flavorful pie. Read each part slowly, and pay attention to the sensory clues as you mix and bake. The order matters here because it ensures even texture and prevents a soggy crust.
- Preheat the oven to 350°F.: You should feel the warmth build in the kitchen as the oven approaches temperature, and the consistent heat is essential for even baking so the filling sets without overbrowning. An oven that is not properly preheated can cause the filling to take longer to set, leading to uneven texture. A common error is placing the pie in a cool oven, which can make the crust absorb more moisture and become soggy. For accuracy, use an oven thermometer and wait until it reads a steady 350°F before sliding the pie in.
- On a floured surface, roll out the pie crust into a circle about 12 inches in diameter.: Rolling creates a thin, even sheet that will drape into the pan without tearing; when you roll, you should see smooth, even edges and feel the dough relax under gentle pressure. If the dough resists or becomes sticky, give it a short rest in the fridge, because chilled dough rolls more cleanly. Rolling too thin risks tearing the crust during transfer, while too thick will create a bulky edge that bakes unevenly.
- Transfer the pie dough to a 9-inch glass or ceramic pie plate. Fold the edges under and crimp all the way around.: As you transfer, the dough should settle into the dish easily, and the crimping creates a decorative seal that also helps anchor the crust against the filling. Press gently to avoid compressing the dough, which can make the edge tough. One trap is stretching the dough while fitting it, which causes shrinkage during baking; ease it into the pan without pulling.
- Lightly dust the pie dough with flour then place it in the fridge as you make the filling.: Chilling firms the butter in the crust so it flares up and becomes flaky while baking, and the flour dust prevents sticking when handling. You will notice the dough firming as it chills and becoming less tacky to the touch. Skipping this chill step can lead to a shrunken or misshapen crust once it heats up in the oven.
- Whisk the eggs in a large bowl.: When you whisk, you create a uniform base that will bind the filling ingredients, and you should see the eggs lighten slightly in color and become smooth. The sound of the whisk is key, a steady whipping that breaks any clumps. Over whisking can incorporate too much air, leading to unwanted bubbles in the final bake, so stop once the eggs are homogeneous.
- In a separate bowl stir together the brown sugar, cornstarch, cinnamon, and salt to ensure no lumps in the brown sugar.: Mixing these dry components first removes pockets of cornstarch and blends the spices so the filling thickens evenly and there's no concentrated starchy taste. Run the back of a spoon through the sugar to break any clumps. If you skip this step, you risk finding gritty spots or streaks of starch in the baked filling.
- Whisk the sugar mixture, corn syrup, melted butter, and vanilla extract into the eggs until combined.: As you combine these, the mixture will shine and thicken slightly, smelling sweet and buttery with a warm vanilla note; this is when the filling transforms into a glossy batter. Whisk until smooth so the corn syrup and melted butter are fully integrated. A mistake is adding cold butter straight from the fridge, which can cause the mixture to seize and not blend smoothly.
- Stir in the oats.: When you fold in the quick oats , they will absorb some of the liquid and give the batter a textured look, with flecks of oats suspended throughout. Let the mixture sit briefly so the oats hydrate, which helps the interior set with pleasant chew. Forgetting to let the oats hydrate can produce a filling with uneven moisture, where the oats remain too dry in the finished pie.
- Pour the batter into the pie crust.: Watch the way the filling glides into the crust, spreading to the edges and creating an even surface. The batter should fill the shell neatly, and slight smoothing with a spatula ensures a flat top that sets attractively. Overfilling the crust will cause spillage and uneven baking, so leave a small margin under the rim to allow for slight rising.
- Bake the pie for 45-55 minutes or until the top is set and the middle no longer wobbles when given a nudge.: As it bakes you will see the top take on a golden caramel sheen and hear a gentle settling sound as the filling firms, and the aroma of cinnamon and brown sugar will fill the kitchen. Test by giving the pie a gentle shake; if the center still ripples, it needs more time. Avoid opening the oven repeatedly, which can cause temperature fluctuations and extend bake time, resulting in an under set center.
- Remove from the oven and cool fully before serving.: Cooling lets the filling finish setting, and you will notice the surface tighten and the internal temperature fall, which makes slicing cleaner. The smell will mellow and the textures will become cohesive during this rest. Cutting too soon leads to a runny center and messy slices, so be patient and allow the pie to reach room temperature before serving.
Pro Tips and Tweaks
I like to tuck small tricks into my routine that elevate a simple pie into something memorable. These tips will help with texture, timing, and storing so the results are consistent.
- Use room temperature eggs: They incorporate more smoothly into the batter, producing a uniform filling and better texture.
- Warm the corn syrup slightly: Gently warming the corn syrup makes it pourable and easier to blend, preventing streaks in the filling.
- Chill the crust: Refrigerating the shaped crust before baking helps the butter stay cold so the crust bakes up flaky and does not shrink.
- Don’t overmix oats: Stir until just combined so the quick oats hydrate without breaking down and becoming mushy.
- Test with a gentle nudge: Check the center by a light shake rather than relying solely on a timer, because ovens can run hot or cool.
- Make ahead and chill: Baking the pie a day ahead allows flavors to meld and makes slicing neater after chilling.
What to Serve Alongside Oatmeal Pie
This pie pairs well with simple accompaniments and can fit different occasions easily, from afternoon tea to holiday dessert tables. Think about temperature contrasts and textures to complement the chewy filling.
- Whipped cream on the side: A spoonful of lightly sweetened whipped cream adds a cool, airy contrast to the dense filling and enhances each bite.
- Fresh fruit platter: Slices of crisp apple or pear bring acidity and texture that cut through the pie’s sweetness, refreshing the palate between forkfuls.
- Warm tea or coffee: A hot beverage complements the warm spice notes, making it ideal for an afternoon gathering or a relaxed breakfast treat.
- Holiday table centerpiece: This pie travels well and can be a make ahead dessert for celebrations like fall gatherings, providing a rustic option amid richer sweets.
- Storage tips: Cover and refrigerate for up to three days, or freeze tightly for up to two months; thaw in the fridge and bring to room temperature before serving.
FAQ
Conclusion
What makes this Oatmeal Pie special is its balance of chewy oats and a glossy, caramel like filling that feels both comforting and a little nostalgic. I encourage you to give it a try for a relaxed dessert that travels well for gatherings or a quiet afternoon treat. It’s approachable, uses simple pantry staples, and rewards a little patience with a slice that looks and tastes like something homemade. Enjoy the process and the warm memories this pie tends to spark.
Oatmeal Pie
Equipment
- 9-inch pie plate
- Mixing Bowls
- Whisk
- Rolling Pin
- Oven
Ingredients
- 19 " unbaked pie crust Provide a sturdy, flaky vessel that holds the pie filling and bakes to a golden brown; ensures structure and easy slicing while contrasting textures with the filling. Blind-bake briefly if recipe requires to prevent a soggy bottom and maintain a crisp edge.
- 3 large eggs Bind the filling together and create a rich, custard-like texture when beaten and incorporated; contributes to the pie's richness and helps set the filling during baking. Whisk thoroughly to incorporate air for a smoother, more uniform consistency.
- 1 cup brown sugar Sweeten the filling with deep, molasses-like flavor and add moisture to the filling; brown sugar contributes a caramel undertone that complements oats and cinnamon. Pack lightly when measuring for accurate sweetness and consistent texture.
- 2 tablespoons cornstarch Thicken the filling and stabilize the custard so it sets properly without being runny; cornstarch gives a glossy finish and prevents separation during baking. Dissolve in a small amount of liquid first to avoid lumps when mixing into the filling.
- 1 teaspoon cinnamon Warm the filling with aromatic spice and enhance overall flavor complexity; cinnamon pairs especially well with oats and brown sugar to create a classic, cozy profile. Use measured amounts to avoid overpowering the other flavors.
- 1/4 teaspoons salt Balance and enhance flavors while suppressing sweetness slightly; salt intensifies aromatics and rounds out the filling. Sprinkle measured quantity evenly to prevent any salty hotspots in the pie.
- 3/4 cup corn syrup Provide a smooth, sweet backbone with a mild corn flavor and viscous texture that helps bind the filling components; corn syrup adds chewiness and sheen to the baked filling. Stir in thoroughly so it integrates evenly with sugars and eggs.
- 1/4 cup butter, melted Add richness and a silky mouthfeel while contributing buttery flavor notes; melted butter helps incorporate fats evenly into the filling for tenderness. Cool slightly before adding to prevent cooking the eggs prematurely when combined.
- 1 teaspoon vanilla extract Enhance and round out the overall flavor profile with warm, aromatic vanilla notes; vanilla deepens sweetness perception and complements brown sugar and cinnamon. Add toward the end of mixing to preserve its delicate aroma.
- 1 cup quick oats Provide chewy texture and nutty whole-grain character that contrasts the smooth custard; quick oats absorb moisture and help create a satisfying bite. Stir in evenly so oats hydrate fully and distribute throughout the filling.
Instructions
- Preheat the oven to 350°F.: You should feel the warmth build in the kitchen as the oven approaches temperature, and the consistent heat is essential for even baking so the filling sets without overbrowning. An oven that is not properly preheated can cause the filling to take longer to set, leading to uneven texture. A common error is placing the pie in a cool oven, which can make the crust absorb more moisture and become soggy. For accuracy, use an oven thermometer and wait until it reads a steady 350°F before sliding the pie in.
- On a floured surface, roll out the pie crust into a circle about 12 inches in diameter.: Rolling creates a thin, even sheet that will drape into the pan without tearing; when you roll, you should see smooth, even edges and feel the dough relax under gentle pressure. If the dough resists or becomes sticky, give it a short rest in the fridge, because chilled dough rolls more cleanly. Rolling too thin risks tearing the crust during transfer, while too thick will create a bulky edge that bakes unevenly.
- Transfer the pie dough to a 9-inch glass or ceramic pie plate. Fold the edges under and crimp all the way around.: As you transfer, the dough should settle into the dish easily, and the crimping creates a decorative seal that also helps anchor the crust against the filling. Press gently to avoid compressing the dough, which can make the edge tough. One trap is stretching the dough while fitting it, which causes shrinkage during baking; ease it into the pan without pulling.
- Lightly dust the pie dough with flour then place it in the fridge as you make the filling.: Chilling firms the butter in the crust so it flares up and becomes flaky while baking, and the flour dust prevents sticking when handling. You will notice the dough firming as it chills and becoming less tacky to the touch. Skipping this chill step can lead to a shrunken or misshapen crust once it heats up in the oven.
- Whisk the eggs in a large bowl.: When you whisk, you create a uniform base that will bind the filling ingredients, and you should see the eggs lighten slightly in color and become smooth. The sound of the whisk is key, a steady whipping that breaks any clumps. Over whisking can incorporate too much air, leading to unwanted bubbles in the final bake, so stop once the eggs are homogeneous.
- In a separate bowl stir together the brown sugar, cornstarch, cinnamon, and salt to ensure no lumps in the brown sugar.: Mixing these dry components first removes pockets of cornstarch and blends the spices so the filling thickens evenly and there's no concentrated starchy taste. Run the back of a spoon through the sugar to break any clumps. If you skip this step, you risk finding gritty spots or streaks of starch in the baked filling.
- Whisk the sugar mixture, corn syrup, melted butter, and vanilla extract into the eggs until combined.: As you combine these, the mixture will shine and thicken slightly, smelling sweet and buttery with a warm vanilla note; this is when the filling transforms into a glossy batter. Whisk until smooth so the corn syrup and melted butter are fully integrated. A mistake is adding cold butter straight from the fridge, which can cause the mixture to seize and not blend smoothly.
- Stir in the oats.: When you fold in the quick oats , they will absorb some of the liquid and give the batter a textured look, with flecks of oats suspended throughout. Let the mixture sit briefly so the oats hydrate, which helps the interior set with pleasant chew. Forgetting to let the oats hydrate can produce a filling with uneven moisture, where the oats remain too dry in the finished pie.
- Pour the batter into the pie crust.: Watch the way the filling glides into the crust, spreading to the edges and creating an even surface. The batter should fill the shell neatly, and slight smoothing with a spatula ensures a flat top that sets attractively. Overfilling the crust will cause spillage and uneven baking, so leave a small margin under the rim to allow for slight rising.
- Bake the pie for 45-55 minutes or until the top is set and the middle no longer wobbles when given a nudge.: As it bakes you will see the top take on a golden caramel sheen and hear a gentle settling sound as the filling firms, and the aroma of cinnamon and brown sugar will fill the kitchen. Test by giving the pie a gentle shake; if the center still ripples, it needs more time. Avoid opening the oven repeatedly, which can cause temperature fluctuations and extend bake time, resulting in an under set center.
- Remove from the oven and cool fully before serving.: Cooling lets the filling finish setting, and you will notice the surface tighten and the internal temperature fall, which makes slicing cleaner. The smell will mellow and the textures will become cohesive during this rest. Cutting too soon leads to a runny center and messy slices, so be patient and allow the pie to reach room temperature before serving.
Notes
- Use room temperature eggs: They incorporate more smoothly into the batter, producing a uniform filling and better texture.
- Warm the corn syrup slightly: Gently warming the corn syrup makes it pourable and easier to blend, preventing streaks in the filling.
- Chill the crust: Refrigerating the shaped crust before baking helps the butter stay cold so the crust bakes up flaky and does not shrink.
- Don’t overmix oats: Stir until just combined so the quick oats hydrate without breaking down and becoming mushy.
- Test with a gentle nudge: Check the center by a light shake rather than relying solely on a timer, because ovens can run hot or cool.
- Make ahead and chill: Baking the pie a day ahead allows flavors to meld and makes slicing neater after chilling.