Paleo Russian Tea Cakes
Paleo Russian Tea Cakes come from one of those chilly afternoons when I wanted something tender, nutty, and lightly sweet without turning to traditional wheat or refined sugar. I remember first making these while listening to an old record, the kitchen smelling like warm butter and toasted nuts, and thinking I had finally captured the buttery melt of a classic cookie in a way that felt clean and honest.
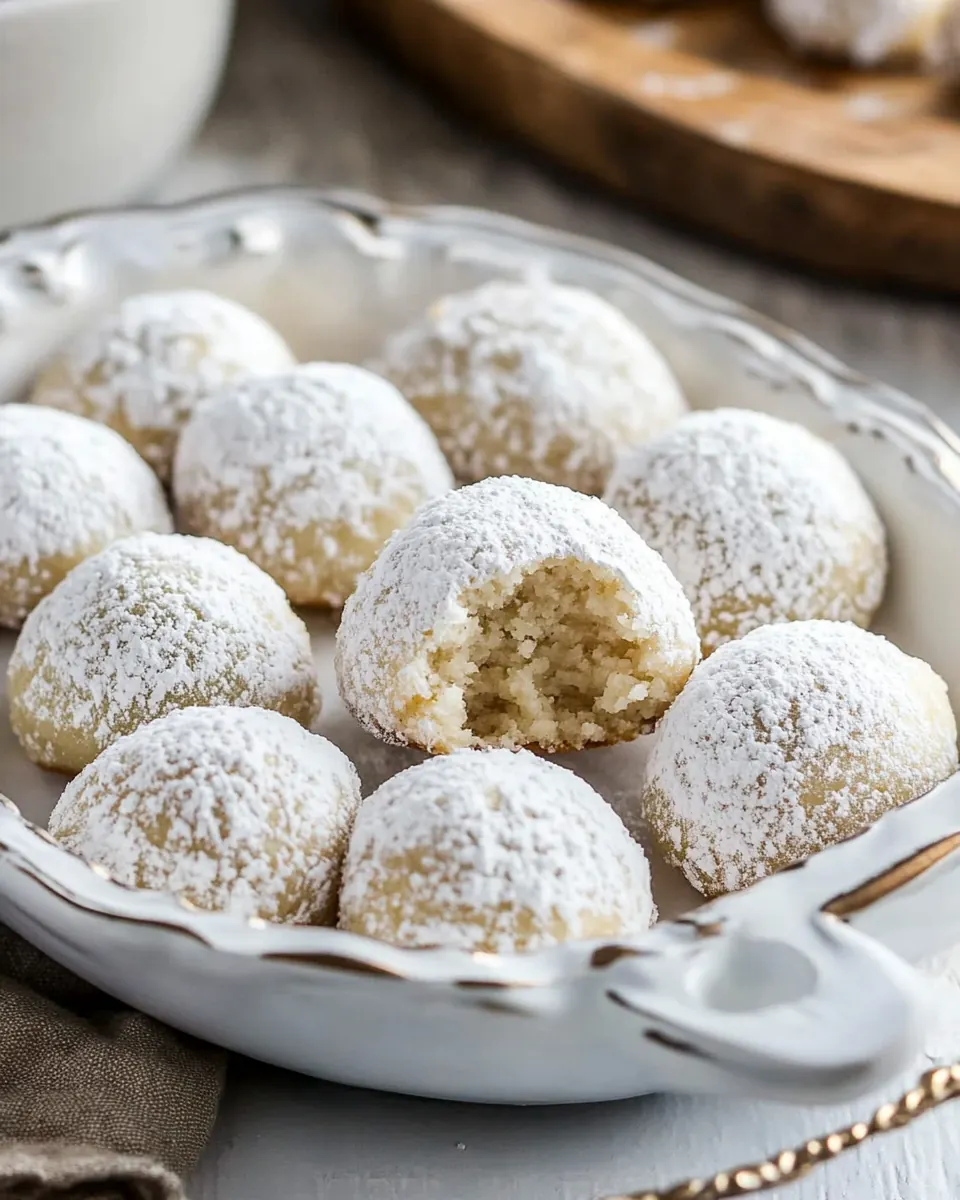
These cookies are a comfort food in miniature, crisp at the edges and tender inside, with a delicate powdered coating that makes them feel festive. I have a soft spot for recipes that rely on simple, whole ingredients, and Paleo Russian Tea Cakes fit the bill. Each bite gives you the almond richness from the flour, a whisper of maple sweetness, and the rustic crunch of chopped walnuts, all wrapped up in a buttery base.
Over the years I have tweaked the technique so the texture is consistently right, and I’ll share what I learned along the way. There is something quietly satisfying about forming dough into small rounds, freezing them briefly so they hold their shape, and then watching them bloom in the oven until the edges are just turning gold. When guests arrive and see these on the plate, they always ask for the recipe, and I love that they think these are an indulgence, when really they’re just honest ingredients handled with a little care.
Recipe Snapshot
20 mins
5 mins
15 mins
Easy
150 kcal
American
Gluten-Free, Paleo
Desserts
Stand mixer, Mixing bowl, Baking sheet, Parchment paper
The Beauty of This Paleo Russian Tea Cakes
1. Simple, wholesome ingredients that still feel indulgent
I love that Paleo Russian Tea Cakes let you enjoy a classic butter cookie experience using almond flour and natural sweeteners. The texture is rich and crumbly, and because the base relies on whole nut flour, the flavor is deeper and more satisfying than plain white flour cookies.
2. Texture that balances melt and crunch
The combination of superfine almond flour and a little tapioca flour gives these cookies a tender, almost melt in your mouth interior while the chopped walnuts add a pleasant crunch. I find that contrast makes every bite more interesting and keeps people coming back for another.
3. Flexible sweetness and an approachable technique
Because these cookies use pure maple syrup in the dough and a sugar alternative for rolling, they’re forgiving if you want to dial sweetness up or down. I often tweak the rolling sugar depending on company and occasion, and the dough handles substitutions like a champ.
4. Great for gifting and seasonal tables
These little rounds are inherently giftable. I like to make a batch, chill them, and then package them in small tins. The powdered finish makes them look festive without fuss, so they’re perfect for holidays or simple hostess gifts.
5. Predictable results once you know the small details
Once you master chilling the dough and the brief flash freeze before baking, you’ll get consistent shape and browning every time. I appreciate recipes that reward small attentions with flawless cookies, and Paleo Russian Tea Cakes definitely do.
What’s In This Paleo Russian Tea Cakes
The ingredient list for Paleo Russian Tea Cakes is deliberately short and focused. Each component plays an obvious role: the buttery base gives richness, nut flours supply structure and flavor, and a touch of sweetener ties everything together. When used together they produce a cookie that is crumbly yet cohesive, lightly toasted and sweet without being cloying.
- 1 cup 2 sticks grass-fed butter, softened: Softened and rich, provides the tender crumb and buttery mouthfeel that forms the base of the dough; helps bind dry ingredients and carries flavor throughout the cookies.
- 1/4 cup pure maple syrup: Sweetening and moistening agent that adds caramel-like depth while keeping the recipe Paleo-compliant; contributes to a slightly softer texture compared with granulated sugars.
- 1 tsp pure vanilla extract: Aromatic flavor booster that enhances overall sweetness and rounds out the buttery and nutty notes; adds warm vanilla complexity without additional moisture.
- 3 1/2 cups superfine almond flour: Fine and tender flour substitute that gives structure and a delicate, melt-in-your-mouth texture; contributes nutty flavor and helps absorb fats from the butter.
- 1/2 cup tapioca flour: Light, starchy flour that improves dough cohesion and creates a slightly crisp exterior; helps mimic the texture typically provided by wheat flour.
- 2/3 cup raw walnuts finely chopped: Crunchy chopped nuts adding texture contrast and toasty flavor; disperses throughout the dough to provide bite and richness.
- 1/4 tsp sea salt: Flavor enhancer that balances sweetness and brightens other flavors; a small amount prevents the cookies from tasting flat.
- 1/3 cup sugar-free confectioners sugar or maple sugar: Finishing dusting that provides a sweet coating and visual appeal; sugar–free option keeps the recipe lower in sugar while maple sugar adds a rustic sweetness.
How to Assemble Paleo Russian Tea Cakes
These steps move from mixing to chilling to baking, and the technique is straightforward but benefits from attention to texture and temperature. I’ll walk you through each step so you can rely on visual and sensory cues to get perfect cookies every time.
- Add all ingredients for the tea cakes to a stand mixer, and beat on medium speed until well-combined. Refrigerate cookie dough for 2 hours.: You will notice the bowl filling with a creamy, pale mixture with flecks of chopped walnuts , and a soft, slightly glossy texture from the butter and pure maple syrup . The sound is a steady, smooth whir, not a frantic clatter, which tells you the mixer speed is right. This stage matters because it evenly distributes the fat and sweetener, which creates the uniform crumb you want. A common mistake is overmixing, which can warm the butter and make the dough too loose, so stop as soon as the mixture looks homogeneous.
- Form balls out of the cookie dough, about 1 to 1.5 inches in diameter and place on a parchment-lined baking sheet. Place tray of dough balls in the freezer and freeze for 15 minutes.: After mixing, the dough will feel soft and pliable but slightly sticky to the touch. Placing it in the refrigerator firms the butter and lets the flours hydrate, resulting in improved shaping and less spread while baking. The chill also concentrates the flavors, so when you remove the dough it should be noticeably firmer and easier to handle. Avoid skipping this step, as the cookies may flatten and lose their tender interior if baked warm.
- When you’re ready to bake, preheat the oven to 350 degrees F.: Rolling the dough into small, uniform spheres creates consistent baking and even browning. You should feel a cool, cohesive dough that holds shape, and the surface will be smooth rather than cracked. Place them spaced apart so hot air can circulate. If the dough sticks to your hands, chill it briefly or dust with a little tapioca flour; sticky dough can lead to misshapen cookies.
- Add the sweetener of choice (for rolling) in a bowl and roll each ball of dough in the sweetener. Place the balls back onto the parchment-lined baking sheet. Bake 12 to 15 minutes, just until cookies begin turning slightly golden-brown.: A short freeze firms the exterior so the cookies retain their round shape and develop a tender interior as they bake. You will notice the outside becoming cold and slightly stiff to the touch. This step is important because it prevents excessive spreading and encourages a gentle rise. If you skip the quick freeze, expect wider, flatter cookies with less delicate texture.
- When you’re ready to bake, preheat the oven to 350 degrees F: The oven should be fully heated so the cookies start setting immediately and form a slight crust at the edges. As the oven warms you may smell a faint, toasty sweetness as any residual moisture evaporates from the tray. Proper oven temperature keeps interiors tender while producing light golden edges. A common pitfall is under preheating, which leads to chewy, undercooked middles.
- Add the sweetener of choice for rolling in a bowl and roll each ball of dough in the sweetener: When you roll the chilled balls in the coating, you will feel the contrast between the cold dough and the soft powder, which clings to the surface. This coating creates the signature snowy appearance and a subtle sweet touch on each bite. If the sweetener clumps or won’t adhere, the cookies might be too warm; a brief chill will fix that. Ensure even coating so every cookie looks and tastes consistent.
- Place the balls back onto the parchment lined baking sheet: Arrange the coated balls with enough space for air circulation. The parchment will prevent sticking and allow gentle browning without burning the bottoms. You should notice the coating sits atop the dough like a soft blanket, and it will slightly matte as it bakes. Crowding the tray will create uneven baking, so use multiple sheets if needed.
- Bake 12 to 15 minutes, just until cookies begin turning slightly golden brown: During baking you will see the edges take on a pale golden hue and the aroma will shift toward toasty, buttery notes. The tops may develop tiny fissures that give the cookies their rustic look. Remove them when the edges are set but the centers remain tender, as residual heat will continue to firm the cookies as they cool. A common error is overbaking; this dries them out and removes the melt in your mouth texture you want.
Tips for Success

These tips will help you get consistent, bakery quality results with Paleo Russian Tea Cakes. Small details like flour texture and chilling time make a big difference, so treat each tip as a quick habit to adopt.
- Measure accurately: Weighing the almond flour or spooning it into the cup prevents a dense cookie caused by packing too much flour into the scoop.
- Room temperature butter: Softened butter blends easiest, giving a smoother dough; avoid melting it into liquid which can cause spreading.
- Prefer superfine almond flour: The fine texture yields a delicate crumb; coarse meal leads to gritty or crumbly cookies.
- Chill times matter: Refrigerate the dough for the full two hours and freeze formed balls briefly to ensure the cookies hold shape during baking.
- Use parchment paper: It prevents sticking and helps bottoms bake evenly without burning or over browning.
- Cool completely before storing: Allow cookies to cool on the sheet for a few minutes, then transfer to a rack to finish; storing while warm can cause the coating to soften.
Serve This Paleo Russian Tea Cakes With
These little cookies can be enjoyed in many ways, from casual tea time to festive gatherings. I like to serve them with simple accompaniments that let their nutty flavor shine. Below are ideas for occasions, pairings, and storage that keep the cookies tasting their best.
- Afternoon tea: Arrange several on a small plate alongside a pot of hot tea for a cozy break.
- Holiday trays: Mix with other small cookies for a festive cookie box that looks elegant and tastes balanced.
- Gift tins: Layer parchment between rounds and pack into tins for friends, perfect for winter giving or hostess gifts.
- Storage: Keep in an airtight container at room temperature for up to three days, or freeze for longer storage; thaw gently before serving.
- Occasions: Great for tea, light dessert after dinner, or as a small treat during gatherings and celebrations.
FAQ
Conclusion
These cookies stand out because they deliver the classic, buttery melt of Russian tea cakes using wholesome, paleo friendly ingredients. Try them because they are simple to make, giftable, and offer a cozy nutty flavor that satisfies without heavy refinement. I hope you enjoy baking them as much as I do, and that they become one of your go to treats for tea time, holidays, or just a quiet afternoon when you want something comforting.
Paleo Russian Tea Cakes
Equipment
- Stand mixer
- Mixing Bowl
- Baking Sheet
- Parchment Paper
Ingredients
- 1 cup 2 sticks grass-fed butter, softened Softened and rich, provides the tender crumb and buttery mouthfeel that forms the base of the dough; helps bind dry ingredients and carries flavor throughout the cookies.
- 1/4 cup pure maple syrup Sweetening and moistening agent that adds caramel-like depth while keeping the recipe Paleo-compliant; contributes to a slightly softer texture compared with granulated sugars.
- 1 tsp pure vanilla extract Aromatic flavor booster that enhances overall sweetness and rounds out the buttery and nutty notes; adds warm vanilla complexity without additional moisture.
- 3 1/2 cups superfine almond flour Fine and tender flour substitute that gives structure and a delicate, melt-in-your-mouth texture; contributes nutty flavor and helps absorb fats from the butter.
- 1/2 cup tapioca flour Light, starchy flour that improves dough cohesion and creates a slightly crisp exterior; helps mimic the texture typically provided by wheat flour.
- 2/3 cup raw walnuts finely chopped Crunchy chopped nuts adding texture contrast and toasty flavor; disperses throughout the dough to provide bite and richness.
- 1/4 tsp sea salt Flavor enhancer that balances sweetness and brightens other flavors; a small amount prevents the cookies from tasting flat.
- 1/3 cup sugar-free confectioners sugar or maple sugar Finishing dusting that provides a sweet coating and visual appeal; sugar-free option keeps the recipe lower in sugar while maple sugar adds a rustic sweetness.
Instructions
- Add all ingredients for the tea cakes to a stand mixer, and beat on medium speed until well-combined. Refrigerate cookie dough for 2 hours.: You will notice the bowl filling with a creamy, pale mixture with flecks of chopped walnuts , and a soft, slightly glossy texture from the butter and pure maple syrup . The sound is a steady, smooth whir, not a frantic clatter, which tells you the mixer speed is right. This stage matters because it evenly distributes the fat and sweetener, which creates the uniform crumb you want. A common mistake is overmixing, which can warm the butter and make the dough too loose, so stop as soon as the mixture looks homogeneous.
- Form balls out of the cookie dough, about 1 to 1.5 inches in diameter and place on a parchment-lined baking sheet. Place tray of dough balls in the freezer and freeze for 15 minutes.: After mixing, the dough will feel soft and pliable but slightly sticky to the touch. Placing it in the refrigerator firms the butter and lets the flours hydrate, resulting in improved shaping and less spread while baking. The chill also concentrates the flavors, so when you remove the dough it should be noticeably firmer and easier to handle. Avoid skipping this step, as the cookies may flatten and lose their tender interior if baked warm.
- When you’re ready to bake, preheat the oven to 350 degrees F.: Rolling the dough into small, uniform spheres creates consistent baking and even browning. You should feel a cool, cohesive dough that holds shape, and the surface will be smooth rather than cracked. Place them spaced apart so hot air can circulate. If the dough sticks to your hands, chill it briefly or dust with a little tapioca flour; sticky dough can lead to misshapen cookies.
- Add the sweetener of choice (for rolling) in a bowl and roll each ball of dough in the sweetener. Place the balls back onto the parchment-lined baking sheet. Bake 12 to 15 minutes, just until cookies begin turning slightly golden-brown.: A short freeze firms the exterior so the cookies retain their round shape and develop a tender interior as they bake. You will notice the outside becoming cold and slightly stiff to the touch. This step is important because it prevents excessive spreading and encourages a gentle rise. If you skip the quick freeze, expect wider, flatter cookies with less delicate texture.
- When you’re ready to bake, preheat the oven to 350 degrees F: The oven should be fully heated so the cookies start setting immediately and form a slight crust at the edges. As the oven warms you may smell a faint, toasty sweetness as any residual moisture evaporates from the tray. Proper oven temperature keeps interiors tender while producing light golden edges. A common pitfall is under preheating, which leads to chewy, undercooked middles.
- Add the sweetener of choice for rolling in a bowl and roll each ball of dough in the sweetener: When you roll the chilled balls in the coating, you will feel the contrast between the cold dough and the soft powder, which clings to the surface. This coating creates the signature snowy appearance and a subtle sweet touch on each bite. If the sweetener clumps or won’t adhere, the cookies might be too warm; a brief chill will fix that. Ensure even coating so every cookie looks and tastes consistent.
- Place the balls back onto the parchment lined baking sheet: Arrange the coated balls with enough space for air circulation. The parchment will prevent sticking and allow gentle browning without burning the bottoms. You should notice the coating sits atop the dough like a soft blanket, and it will slightly matte as it bakes. Crowding the tray will create uneven baking, so use multiple sheets if needed.
- Bake 12 to 15 minutes, just until cookies begin turning slightly golden brown: During baking you will see the edges take on a pale golden hue and the aroma will shift toward toasty, buttery notes. The tops may develop tiny fissures that give the cookies their rustic look. Remove them when the edges are set but the centers remain tender, as residual heat will continue to firm the cookies as they cool. A common error is overbaking; this dries them out and removes the melt in your mouth texture you want.
Notes
- Measure accurately: Weighing the almond flour or spooning it into the cup prevents a dense cookie caused by packing too much flour into the scoop.
- Room temperature butter: Softened butter blends easiest, giving a smoother dough; avoid melting it into liquid which can cause spreading.
- Prefer superfine almond flour: The fine texture yields a delicate crumb; coarse meal leads to gritty or crumbly cookies.
- Chill times matter: Refrigerate the dough for the full two hours and freeze formed balls briefly to ensure the cookies hold shape during baking.
- Use parchment paper: It prevents sticking and helps bottoms bake evenly without burning or over browning.
- Cool completely before storing: Allow cookies to cool on the sheet for a few minutes, then transfer to a rack to finish; storing while warm can cause the coating to soften.