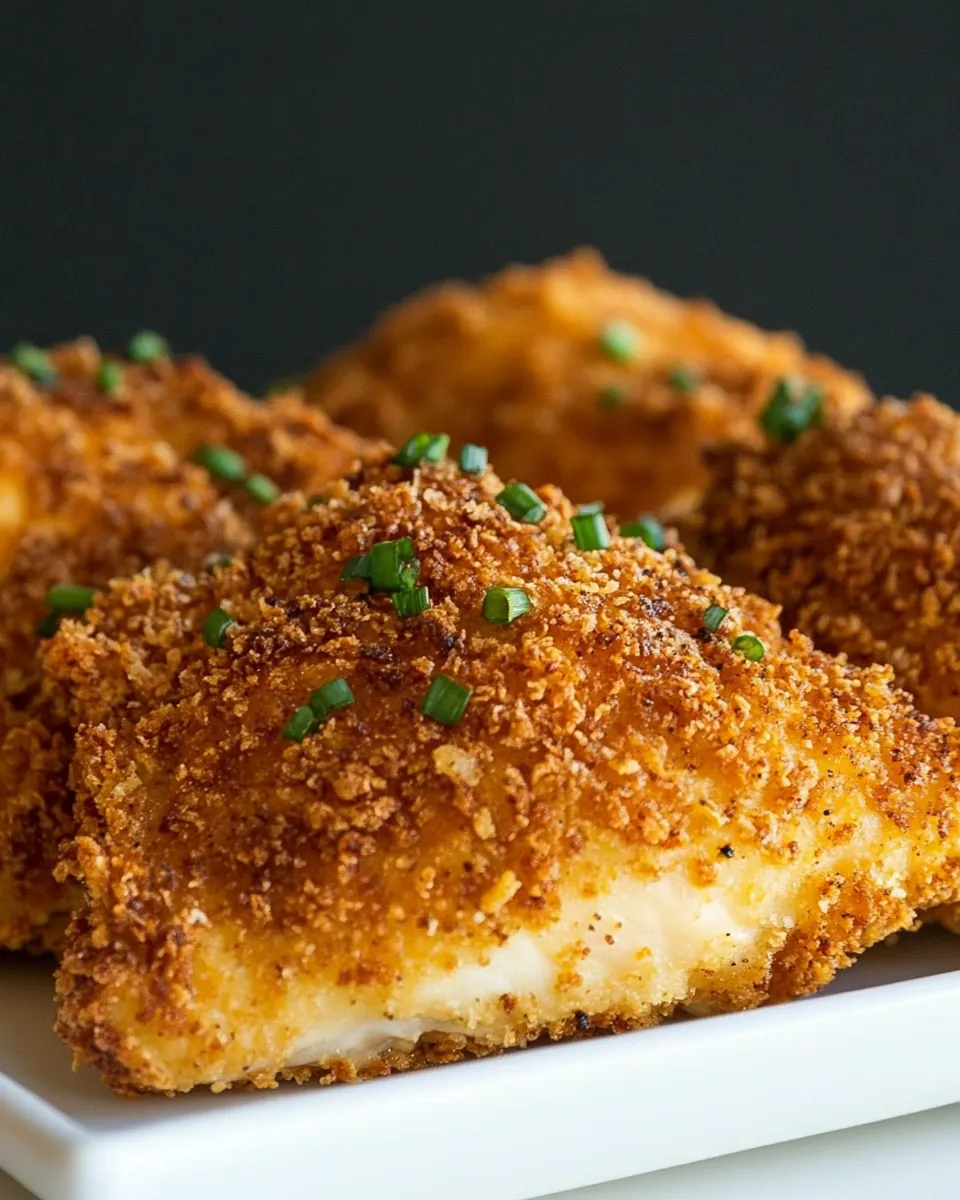
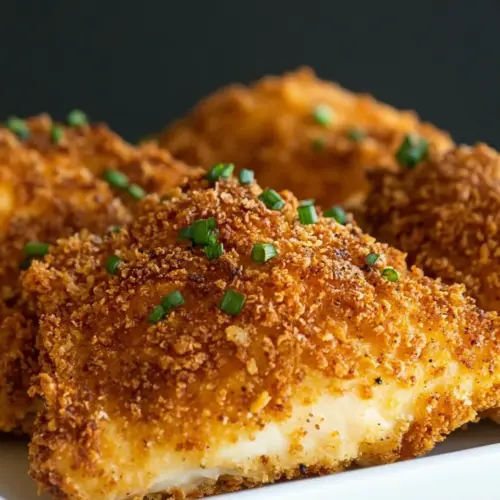
Oven Fried Chicken
Oven Fried Chicken has been my reliable weeknight hero ever since I learned how to coax a crunchy crust from the oven instead of a skillet full of oil.
I remember the first time I tested this version, juggling a busy evening and a hungry crowd, and watching the golden crumbs bake into a crisp shell while the kitchen filled with warm, roasted aroma. I was skeptical that an oven could deliver the satisfying crunch of frying, yet the combination of panko rubbed with olive oil and the gentle white of whisked eggs created a texture that made everyone pause. It felt like a small kitchen miracle, the pleasing sizzle quieted but the bite and flavor completely intact.
Over the years I tweaked spice levels, learned to press crumbs so they cling through baking, and found that trimming visible fat from the chicken thighs keeps the coating from sliding off. I love how this recipe travels easily from a casual family dinner to a fuss free gathering, and how leftovers reheat with almost as much charm as the first day. When I serve this, people reach for seconds without the post fry heaviness that usually follows deep frying, and I enjoy the simpler cleanup.
Recipe Snapshot
1 hr 10 mins
20 mins
50 mins
Medium
350 kcal
American
Paleo, Whole30
Dinner
Wire rack, Baking sheet, Mixing bowls, Instant read thermometer
Why We Love This Oven Fried Chicken
Crunch without the deep fry
I adore that Oven Fried Chicken gives you the same satisfying crisp as pan fried versions, without the hassle of large amounts of oil. The trick is rubbing panko with olive oil, which promotes even browning and a shattering texture when you bite in.
Flavor that is simple but layered
The spice mix of paprika, thyme, garlic powder, and a touch of cayenne pepper builds a rounded profile. I like how each spice plays a role, paprika for warmth, thyme for an herbal hint, garlic for savory depth, and cayenne for a subtle lift that does not overpower.
Hands on, but forgiving
This method is approachable, I often invite friends to help press the crumbs onto the pieces of chicken. There is a forgiving margin for small mistakes, because the oven slowly transforms the crust, giving you time to correct placement or add a few more crumbs where needed.
Great for batch cooking
I value recipes that scale, and this one thrives when you need to feed a group. Spacing pieces on a wire rack allows hot air to circulate, so every piece crisps evenly without becoming greasy. If you are serving company, the sheet pans free up a stovetop for sides.
Healthier comfort food
If you want the indulgence of fried chicken but a lighter result, this recipe balances both. Using egg whites reduces added fat while providing the perfect adhesive for the crunchy coating. I find that it keeps dinner feeling cozy, without the sleepy heaviness that follows deep fried meals.
What to Buy for Oven Fried Chicken
The ingredient list for Oven Fried Chicken is intentionally lean, focused on texture makers and bright flavor accents. The key players are the crunchy binder, the light binder from the egg whites, and the spice blend that turns simple crumbs into a savory crust. Each item plays a clear role, from providing crunch to enhancing color and aroma.
- 2 cups Panko bread crumbs: Provide a crunchy, airy coating that crisps in the oven; panko yields a lighter, flakier texture than regular breadcrumbs and helps achieve a restaurant-style crust. Combine with seasonings and a little oil to promote even browning and prevent dryness during baking.
- 2 tbsp olive oil: Moisten the panko and encourage browning; tossing breadcrumbs with olive oil helps crisp the exterior while adding a subtle fruity flavor. Use sparingly so the crust becomes golden without becoming greasy.
- 1 tsp paprika: Add warmth and mild smokiness that complements savory poultry; paprika deepens color and enhances overall flavor without overpowering. Sprinkle into the breadcrumb mix to balance other herbs and spices.
- 1/2 tsp dried thyme: Introduce an aromatic, slightly floral note that pairs well with chicken; dried thyme offers depth and a savory herbal backbone. Use in the coating blend where it will release flavor as it heats.
- 1/2 tsp garlic powder: Bring gentle savory garlic essence to the coating; garlic powder disperses evenly for consistent flavor throughout the crust. Use to enhance umami and round out the spice mix without adding moisture.
- 1/4 tsp cayenne pepper: Contribute a sharp, warming heat to the seasoning blend; cayenne pepper provides a controlled kick that livens the crust. Use a modest amount to avoid overpowering the herbs and paprika.
- Salt and freshly ground black pepper: Season to taste and balance flavors; salt enhances all other seasonings while black pepper adds a fragrant, mild heat. Apply evenly to the chicken and coating to ensure a well-seasoned finish.
- 3 large egg whites: Bind the dry coating to the chicken and help form a crisp exterior; egg whites create an adhesive, low-fat layer that allows crumbs to stick without added yolk fat. Whisk lightly before dredging and dip each piece thoroughly for even coverage.
- 8 (5 – 6 oz each) bone-in, skinless chicken thighs, visible excess fat trimmed: Provide the main protein and substantial portions for serving; bone-in, skinless thighs offer juicy, flavorful meat that stays moist during baking. Trim excess fat for a cleaner finish and ensure pieces are uniformly sized for even cooking.
How to Assemble Oven Fried Chicken
Assembling this dish is methodical and rewarding. I like to set up a small assembly line with separate bowls for the panko mix and for the whisked egg whites, then press the crumbs on firmly so they cling while baking. Pay attention to placement on the rack, because air circulation is what gives you all over crispness.
- Preheat oven to 400 degrees F. Place a large wire rack over an 18 by 13-inch baking sheet, spray wire rack with non-stick cooking spray.: The moment before you start to coat is when the oven needs to be ready, so preheating to 400 degrees F ensures the heat is consistent. You will notice warm air hitting the panko crust as soon as the pieces go in, which initiates browning. The wire rack allows hot air to circulate around each piece, preventing soggy bottoms and encouraging even color. A common mistake is skipping the rack and placing the chicken directly on the sheet, which often leads to steaming and a limp crust. If you do not have a rack, elevate the chicken slightly so air can flow beneath the pieces.
- Pour Panko into a shallow mixing bowl. Drizzle with olive oil and toss and rub with fingertips to evenly moisten.: Start by feeling the texture as you rub the olive oil into the panko . The crumbs should become slightly clustered and take on a faint sheen, which is the visual cue for even oil distribution. The oil promotes golden browning in the oven and helps the spices adhere. If the crumbs seem too oily, add a few more dry crumbs to rebalance. Avoid overworking them, because overly compacted crumbs will not produce the same airy crunch.
- Add paprika, thyme, garlic powder, cayenne pepper and season with salt and pepper to taste then toss.: Mix the spices through the crumbs until the color is uniform and you can smell the garlic and paprika when you lift the bowl. This aromatic signal tells you the seasoning is evenly distributed. Tossing ensures each flake of panko carries flavor, which translates into more depth in each bite. A typical oversight is not tasting a pinch of the seasoned crumbs; do this carefully to gauge salt and heat levels before coating the chicken .
- In a separate shallow mixing bowl, whisk together egg whites, salt and pepper until slightly frothy.: Whisking the egg whites until they are just frothy creates surface tension that helps crumbs stick. You want a light foam, not soft peaks. The texture should be slightly bubbly and easy to coat the meat with. If the egg whites are over whisked and stiff, they will not act the same as a binder. Seasoning the whites lightly ensures the coating is seasoned from the inside out.
- Working with one pieces of chicken at a time, dip both sides of chicken in egg white then transfer to Panko mixture and dredge both sides in mixture while pressing crumbs to adhere, sprinkle some crumbs over top as well and press.: When you pick up a piece, notice how the egg white clings and creates a tacky surface. Pressing the seasoned panko into the surface with your fingertips ensures thorough coverage and encourages the crumbs to remain attached during baking. Sprinkle extra crumbs on top for a more robust crust. A frequent error is shaking off excess eggs before pressing, which can lead to sparse adhesion. Be decisive when pressing, but avoid compressing the crumbs into a paste, you still want a light, fractured texture.
- Transfer to prepared wire rack spacing evenly apart.: As you place each coated piece on the rack, listen for the quiet clack of crumbs settling, and look for even spacing so hot air circulates. Crowding causes steaming, which will soften the crust and reduce browning. If your pan looks crowded, use a second sheet to give each piece room. Also, try to place thicker pieces toward the center of the sheet where heat is most consistent.
- Bake in preheated oven until golden brown and cooked through (center of thickest portion should register 165ºF on an instant read thermometer), about 50 minutes. Serve warm.: As the chicken bakes, you will see the panko turn a toasty golden brown and the kitchen will fill with roasted, savory aromas. The sound is more of a gentle crackle than a sizzle, and juices will run clear when the center reaches 165ºF . The internal temperature is the most reliable doneness cue, so use an instant read thermometer toward the thicker parts. A common slip is relying on color alone, which can be misleading with dark meat. If the crust is browning too quickly, tent loosely with foil and continue until the thermometer reads safe temperature.
Tips and Tricks about Oven Fried Chicken
I like to share practical tips that save time and improve texture. These tactics help the crust brown evenly and keep the chicken juicy. Follow them to avoid common pitfalls and to make the process smoother in a busy kitchen.
- Prep a shallow assembly station, with one bowl for the seasoned panko and another for the whisked egg whites, so you can move quickly and coat uniformly without overhandling the meat.
- Adjust spice to taste, start with the listed amounts and taste a tiny pinch of seasoned panko before coating to tweak salt or heat, this prevents surprises at the table.
- Use a reliable thermometer to confirm the thickest part of each thigh reaches 165ºF, which ensures safety and prevents overcooking that dries the meat.
- Space pieces evenly on the wire rack to allow hot air circulation; overcrowding leads to steaming and a limp crust instead of a crisp one.
- Tent with foil if necessary when the crust is browning faster than the meat cooks through, this stops further browning while allowing internal temperature to rise.
- Repurpose leftovers by warming in a 350 degree F oven to revive crispness, rather than microwaving which makes the crust soggy.
How to Serve Oven Fried Chicken
This Oven Fried Chicken is versatile and pairs well with simple sides. I like to keep the plating relaxed, offering vegetables, grains, or salads depending on the occasion. Serve warm for best texture, and include a small bowl of sauce if you prefer dipping.
- Weeknight family dinner, pair with roasted vegetables and a simple grain like rice or mashed potatoes for a comforting plate that satisfies quickly.
- Casual gathering, serve on a large platter with lemon wedges and pickles, letting guests help themselves to second portions.
- Lunch box option, cool completely before packing and include a crisp vegetable side for a balanced midday meal.
- Special occasions, arrange with a composed salad and warm bread to give a homestyle main that still feels festive.
- Storage tip, refrigerate cooled pieces in an airtight container for up to four days, and reheat in a hot oven to restore crispness.
- Seasonal pairings, in cooler months I like it with hearty root vegetables, while in warmer months a bright green salad keeps the plate light.
FAQ
Conclusion
Oven Fried Chicken is special because it hits the crunchy, savory notes of fried chicken without the mess and extra oil. Give it a try when you want a comforting, crowd pleasing main that is easier to make and cleanup friendly. Once you press the crumbs on and slide the tray into the oven, the scent of toasty panko and warm spices will tell you dinner is on its way. Share it with family or friends, and enjoy the simple pleasure of a crisp crust and juicy interior.
Oven Fried Chicken
Equipment
- Wire Rack
- Baking Sheet
- Mixing Bowls
- Instant read thermometer
Ingredients
- 2 cups Panko bread crumbs Provide a crunchy, airy coating that crisps in the oven; panko yields a lighter, flakier texture than regular breadcrumbs and helps achieve a restaurant-style crust. Combine with seasonings and a little oil to promote even browning and prevent dryness during baking.
- 2 tbsp olive oil Moisten the panko and encourage browning; tossing breadcrumbs with olive oil helps crisp the exterior while adding a subtle fruity flavor. Use sparingly so the crust becomes golden without becoming greasy.
- 1 tsp paprika Add warmth and mild smokiness that complements savory poultry; paprika deepens color and enhances overall flavor without overpowering. Sprinkle into the breadcrumb mix to balance other herbs and spices.
- 1/2 tsp dried thyme Introduce an aromatic, slightly floral note that pairs well with chicken; dried thyme offers depth and a savory herbal backbone. Use in the coating blend where it will release flavor as it heats.
- 1/2 tsp garlic powder Bring gentle savory garlic essence to the coating; garlic powder disperses evenly for consistent flavor throughout the crust. Use to enhance umami and round out the spice mix without adding moisture.
- 1/4 tsp cayenne pepper Contribute a sharp, warming heat to the seasoning blend; cayenne pepper provides a controlled kick that livens the crust. Use a modest amount to avoid overpowering the herbs and paprika.
- Salt and freshly ground black pepper Season to taste and balance flavors; salt enhances all other seasonings while black pepper adds a fragrant, mild heat. Apply evenly to the chicken and coating to ensure a well-seasoned finish.
- 3 large egg whites Bind the dry coating to the chicken and help form a crisp exterior; egg whites create an adhesive, low-fat layer that allows crumbs to stick without added yolk fat. Whisk lightly before dredging and dip each piece thoroughly for even coverage.
- 8 (5 - 6 oz each) bone-in, skinless chicken thighs, visible excess fat trimmed Provide the main protein and substantial portions for serving; bone-in, skinless thighs offer juicy, flavorful meat that stays moist during baking. Trim excess fat for a cleaner finish and ensure pieces are uniformly sized for even cooking.
Instructions
- Preheat oven to 400 degrees F. Place a large wire rack over an 18 by 13-inch baking sheet, spray wire rack with non-stick cooking spray.: The moment before you start to coat is when the oven needs to be ready, so preheating to 400 degrees F ensures the heat is consistent. You will notice warm air hitting the panko crust as soon as the pieces go in, which initiates browning. The wire rack allows hot air to circulate around each piece, preventing soggy bottoms and encouraging even color. A common mistake is skipping the rack and placing the chicken directly on the sheet, which often leads to steaming and a limp crust. If you do not have a rack, elevate the chicken slightly so air can flow beneath the pieces.
- Pour Panko into a shallow mixing bowl. Drizzle with olive oil and toss and rub with fingertips to evenly moisten.: Start by feeling the texture as you rub the olive oil into the panko . The crumbs should become slightly clustered and take on a faint sheen, which is the visual cue for even oil distribution. The oil promotes golden browning in the oven and helps the spices adhere. If the crumbs seem too oily, add a few more dry crumbs to rebalance. Avoid overworking them, because overly compacted crumbs will not produce the same airy crunch.
- Add paprika, thyme, garlic powder, cayenne pepper and season with salt and pepper to taste then toss.: Mix the spices through the crumbs until the color is uniform and you can smell the garlic and paprika when you lift the bowl. This aromatic signal tells you the seasoning is evenly distributed. Tossing ensures each flake of panko carries flavor, which translates into more depth in each bite. A typical oversight is not tasting a pinch of the seasoned crumbs; do this carefully to gauge salt and heat levels before coating the chicken .
- In a separate shallow mixing bowl, whisk together egg whites, salt and pepper until slightly frothy.: Whisking the egg whites until they are just frothy creates surface tension that helps crumbs stick. You want a light foam, not soft peaks. The texture should be slightly bubbly and easy to coat the meat with. If the egg whites are over whisked and stiff, they will not act the same as a binder. Seasoning the whites lightly ensures the coating is seasoned from the inside out.
- Working with one pieces of chicken at a time, dip both sides of chicken in egg white then transfer to Panko mixture and dredge both sides in mixture while pressing crumbs to adhere, sprinkle some crumbs over top as well and press.: When you pick up a piece, notice how the egg white clings and creates a tacky surface. Pressing the seasoned panko into the surface with your fingertips ensures thorough coverage and encourages the crumbs to remain attached during baking. Sprinkle extra crumbs on top for a more robust crust. A frequent error is shaking off excess eggs before pressing, which can lead to sparse adhesion. Be decisive when pressing, but avoid compressing the crumbs into a paste, you still want a light, fractured texture.
- Transfer to prepared wire rack spacing evenly apart.: As you place each coated piece on the rack, listen for the quiet clack of crumbs settling, and look for even spacing so hot air circulates. Crowding causes steaming, which will soften the crust and reduce browning. If your pan looks crowded, use a second sheet to give each piece room. Also, try to place thicker pieces toward the center of the sheet where heat is most consistent.
- Bake in preheated oven until golden brown and cooked through (center of thickest portion should register 165ºF on an instant read thermometer), about 50 minutes. Serve warm.: As the chicken bakes, you will see the panko turn a toasty golden brown and the kitchen will fill with roasted, savory aromas. The sound is more of a gentle crackle than a sizzle, and juices will run clear when the center reaches 165ºF . The internal temperature is the most reliable doneness cue, so use an instant read thermometer toward the thicker parts. A common slip is relying on color alone, which can be misleading with dark meat. If the crust is browning too quickly, tent loosely with foil and continue until the thermometer reads safe temperature.
Notes
- Prep a shallow assembly station, with one bowl for the seasoned panko and another for the whisked egg whites, so you can move quickly and coat uniformly without overhandling the meat.
- Adjust spice to taste, start with the listed amounts and taste a tiny pinch of seasoned panko before coating to tweak salt or heat, this prevents surprises at the table.
- Use a reliable thermometer to confirm the thickest part of each thigh reaches 165ºF, which ensures safety and prevents overcooking that dries the meat.
- Space pieces evenly on the wire rack to allow hot air circulation; overcrowding leads to steaming and a limp crust instead of a crisp one.
- Tent with foil if necessary when the crust is browning faster than the meat cooks through, this stops further browning while allowing internal temperature to rise.
- Repurpose leftovers by warming in a 350 degree F oven to revive crispness, rather than microwaving which makes the crust soggy.