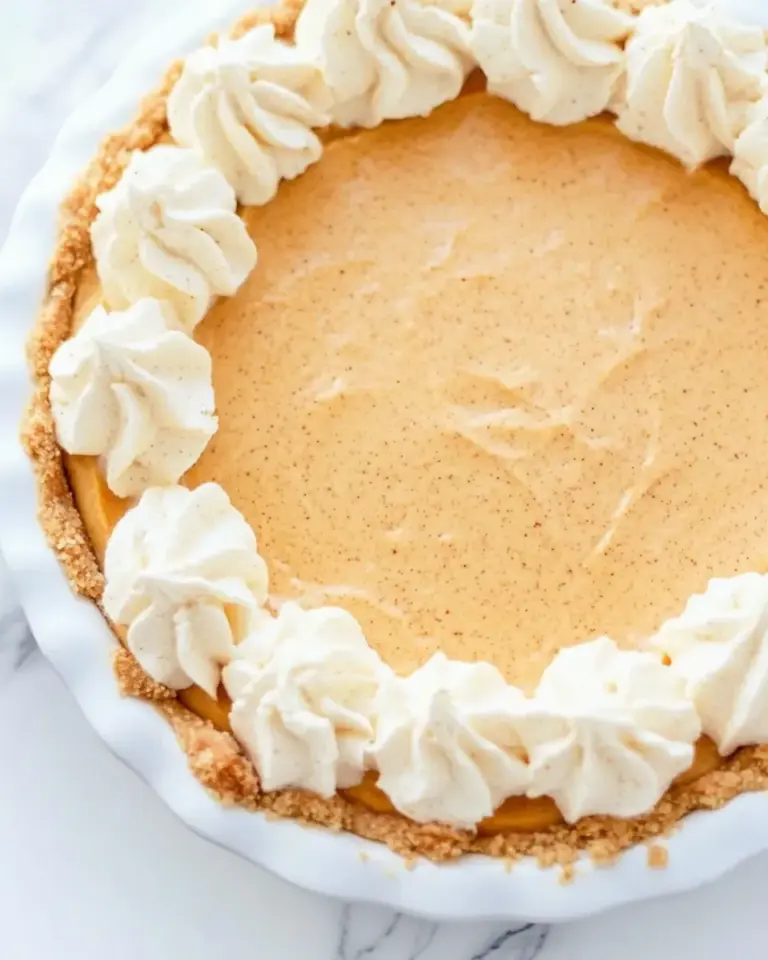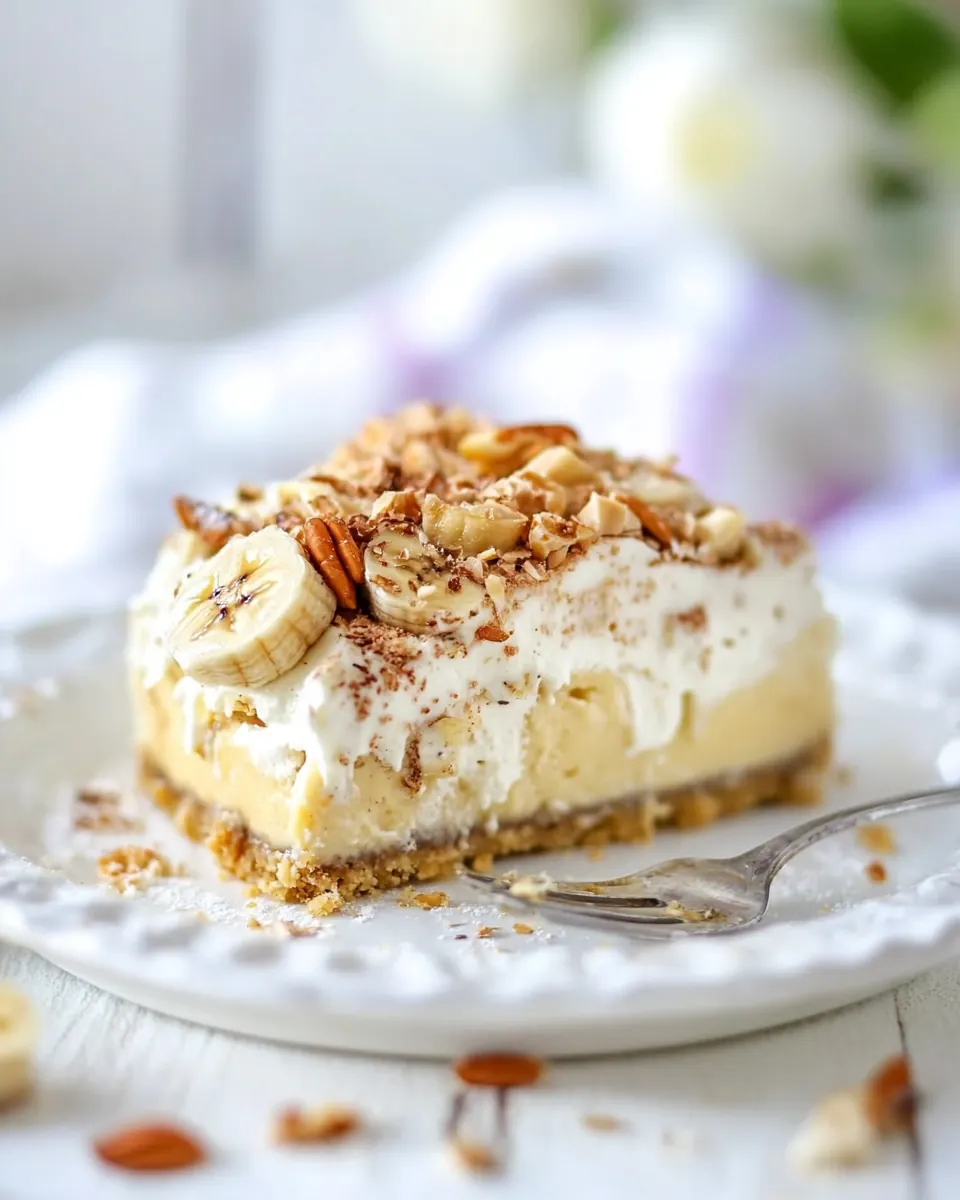
No Bake Vegan Banana Cream Pie
No Bake Vegan Banana Cream Pie became my go to when I wanted something creamy and comforting without turning on the oven.
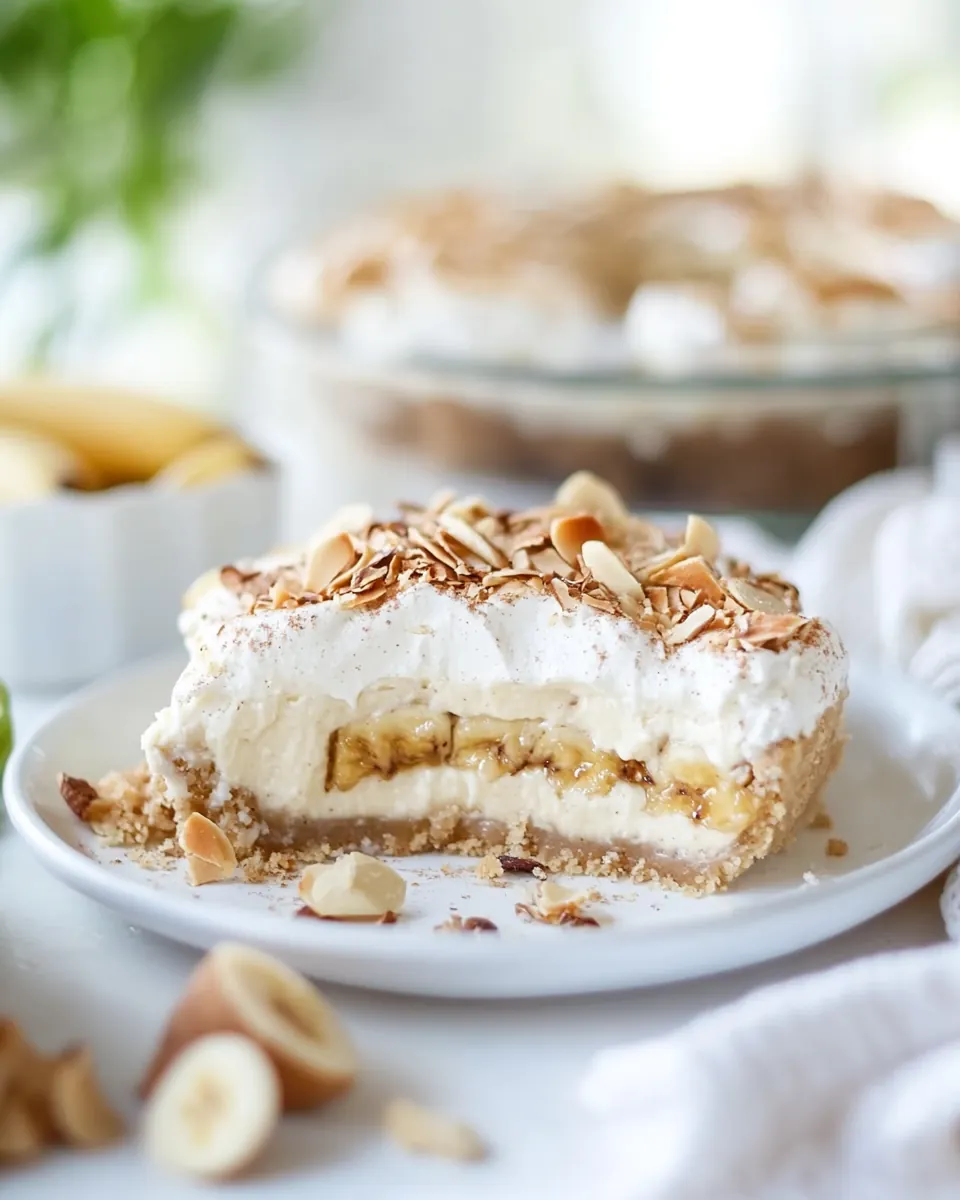
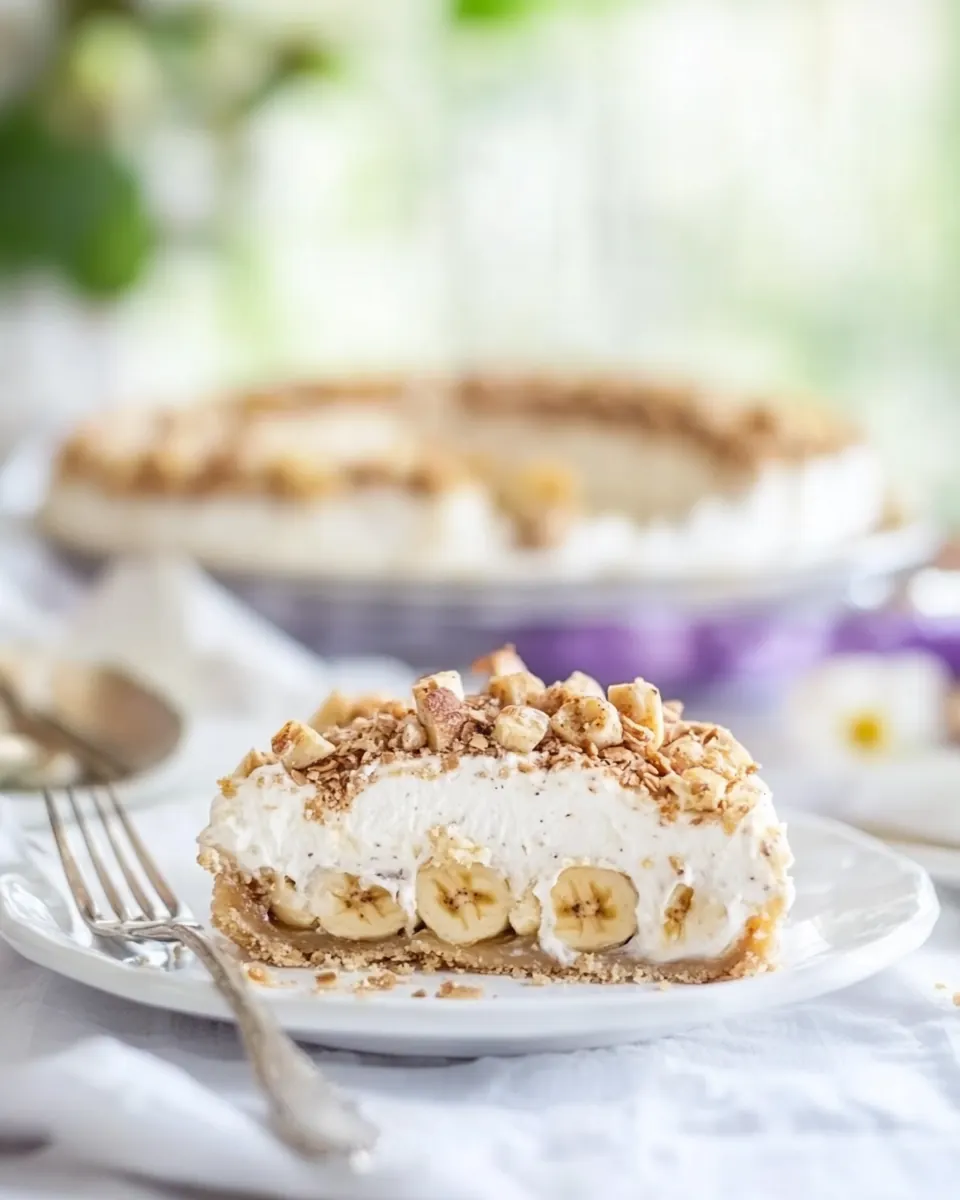
I remember the first time I layered the silky coconut cream over ripe bananas for friends who avoid dairy, and how everyone reached for seconds before I could even cut the next slice. The texture is lush, the crust has a lovely almond crunch, and it feels indulgent yet light at the same time. I like to tell people this is proof that desserts can be both simple and show stopping, because the flavors are pure and honest.
Over the years I tuned the recipe so the coconut cream whips up thick, and the dates in the crust give the base a caramel like note that pairs beautifully with bananas. Whenever I bring this pie to a gathering we end up talking about small things, like how ripe a banana should be, or which brand of canned coconut milk gives the best cream. I’ve found that with a few small decisions, the result is consistent and reliably crowd pleasing.
Recipe Snapshot
20 mins
20 mins
Easy
350 kcal
American
Paleo, Gluten-Free
Desserts
food processor, 8-inch springform pan, parchment paper, mixing bowl, hand mixer, rubber spatula
Why You’ll Love This No Bake Vegan Banana Cream Pie
Comfort without fuss
I love that No Bake Vegan Banana Cream Pie offers dessert level comfort without complicated steps. Because there is no baking involved, it’s perfect on busy days when you want something impressive but easy. I often make it when I want guests to linger, since the texture and flavors create a cozy, relaxed moment.
Pure, focused flavors
This pie centers on three stars: bananas, coconut cream, and a crunchy almond crust. Each element plays a clear role, so the palate experiences creamy, sweet, and nutty notes in harmony. I love how the medjool dates add a natural caramel touch to the crust, bringing balance to the bright banana.
Diet friendly and inclusive
Because the recipe is naturally vegan and free of common allergens like dairy, it’s easy to serve for mixed groups. I appreciate having a dessert that accommodates many dietary needs while still tasting indulgent. When people tell me they can’t believe it’s dairy free, I know I did something right.
Make ahead friendly
I’m a big fan of desserts you can make in advance. You can assemble the pie and chill it, which frees up your schedule on the day of an event. I usually refrigerate for a couple of hours, and it holds beautifully, which is a lifesaver when hosting.
Texture play
What keeps me coming back is how the recipe balances textures: creamy whipped coconut, soft bananas, and crunchy chopped almonds and pistachios. That contrast makes each bite interesting, and it’s a small detail that makes guests remark on the dessert.
Ingredients Overview for No Bake Vegan Banana Cream Pie
This ingredient list focuses on clean, whole food components that work together to build texture and flavor. The crust relies on nuts and dates for a natural sweetness and satisfying crunch, while the filling uses chilled full fat coconut milk whipped with maple syrup and vanilla to mimic the richness of traditional cream. The bananas provide freshness and a familiar banana cream profile, and the finishing touches of chopped nuts and grated dark chocolate add color and crunch.
- 1 1/2 cups raw almonds I used Bremner Farms’s almonds: Provide a crunchy, nutty base and healthy fats that help bind the crust when ground finely; toast lightly for deeper flavor before processing for best results.
- 8 large medjool dates pitted: Add a sticky, caramel-like sweetness that holds the crust together when blended with nuts; remove pits to ensure smooth texture and even sweetness.
- 3 tablespoons coconut oil melted: Contribute a rich, smooth fat that helps bind the crust and adds a subtle coconut aroma; melt gently to incorporate evenly into the nut-date mixture.
- 1/4 teaspoon ground cinnamon: Impart warm, aromatic notes to the crust mixture and balance sweetness; use sparingly to avoid overpowering the delicate flavors.
- 1/2 teaspoon pure vanilla extract: Enhance overall flavor by brightening and rounding sweet components; use pure extract for the cleanest, most authentic vanilla aroma.
- 1/4 tsp salt: Provide subtle savory balance that heightens sweetness and rounds flavors in both crust and filling; a small amount prevents blandness.
- 2 14-ounce cans full-fat coconut milk*, refrigerated overnight (see note): Supply creamy, full-bodied richness and structure to the filling when the solid coconut cream is separated and whipped; refrigerate to solidify the cream for best results.
- 1/4 cup pure maple syrup: Add natural sweetness and a smooth mouthfeel to the coconut filling; measure accurately to maintain desired sweetness and texture.
- 1 1/2 teaspoons pure vanilla extract: Boost depth and aromatic complexity of the filling with concentrated vanilla flavor; add during blending for even distribution.
- Pinch sea salt: Introduce a bright saline note that elevates sweetness and rounds the filling’s flavor profile; use only a pinch to avoid saltiness.
- 3 large ripe bananas peeled and sliced: Offer fresh banana flavor and natural sweetness that define the pie’s character; choose ripe bananas for optimal sweetness and creaminess when blended or layered.
- Raw almonds chopped: Contribute crunchy texture and visual contrast as a garnish or chopped layer; chop to desired size and sprinkle over the finished pie for added nutty flavor.
- Raw pistachios chopped: Provide a colorful, crunchy garnish with mild sweet flavor and buttery notes; chop finely to scatter over the pie for texture and visual appeal.
- 1 square dark chocolate grated: Add a rich, slightly bitter chocolate accent and decorative flair when grated over the top; use dark chocolate for contrast against the sweet, creamy filling.
Directions for No Bake Vegan Banana Cream Pie
I like to approach assembly with a calm rhythm, working from crust to filling to toppings. The process is straightforward, but small sensory cues tell you when each component is ready. Read through the steps, assemble your tools, and set aside time to chill the pie so the textures set perfectly.
- Add the ingredients for the crust to a food processor and process until the almonds are finely chopped (but still fairly chunky), and a sticky mixture is formed. Line an 8-inch springform pan with parchment paper and press the crust mixture into the bottom, creating an even layer. Refrigerate until ready to use.: The aroma of crushed raw almonds and sweet medjool dates is immediate, releasing a warm, toasty scent and a hint of caramel. You should hear short pulses, the mixture moving in clumps against the bowl, and see a cohesion that holds when pressed between your fingers. This texture is vital because it ensures the crust compresses well in the pan, creating a stable base that avoids crumbling. A common error is over processing until the nuts become oily, which makes the crust too dense and greasy. To prevent that, pulse in short bursts and scrape the sides if large pieces cling. If the mixture seems too dry, a tiny splash of the melted coconut oil can help, but add sparingly to avoid a soft, unstructured crust.
- Open the two cans of refrigerated coconut milk and scoop the thick coconut cream into a mixing bowl (or stand mixer fitted with the whisk attachment), leaving the clear water behind to use in smoothies or a different recipe.: When you press the crust into the pan, you want an even, compact layer that fills the bottom uniformly. Use the flat bottom of a measuring cup to press firmly, feeling for any air pockets or uneven spots. The crust should look cohesive, slightly shiny from the dates, and hold its shape when you lift a corner of the parchment. Pressing firmly matters because a loosely packed crust will fall apart when sliced. Avoid the temptation to make the crust too thick; this can overwhelm the filling. If edges are rough, smooth them gently with your fingers dipped in a little water to prevent sticking.
- Add the pure maple syrup, vanilla extract, and sea salt to the mixing bowl and use a hand mixer to beat the ingredients until thick and fluffy. It’s okay if the mixture doesn’t have the same consistency as regular homemade whipped cream, so long as it’s thick.: Chilling the pressed crust helps it firm up and bind together, producing a crisp, sliceable foundation. In the refrigerator you’ll notice the crust tightening and the aroma mellowing slightly, which is a good sign. Cooling also prevents the crust from becoming too soft when the filling is added. Do not skip refrigeration, as a warm crust will not set properly and can turn into a crumbly mess when you cut slices. If time is tight, ten to fifteen minutes in the freezer will accelerate the firming, but keep an eye on it so the crust does not become rock hard.
- Pour 1/4 to 1/2 of the coconut whipped cream onto the prepared crust and spread into an even layer. Layer the sliced bananas on top, followed by the remaining coconut whipped cream. Use a rubber spatula to evenly spread the coconut whipped cream.: You should see a firm, ivory cream separated from translucent water, and scooping it out reveals a luscious, dense texture similar to heavy cream. The sound is quiet, but visually you’ll notice the cream holding its shape, a critical cue that your filling will whip successfully. Leaving the liquid behind matters because it prevents a watery whipped cream that will not set. A common mistake is using warm coconut milk that hasn’t separated, which yields a loose, soupy mixture. Always chill cans overnight, and give them a gentle shake before opening to avoid mixing the layers unintentionally.
- Cover the pan with plastic wrap and refrigerate for 2 hours. When ready to serve, release the pie from its mold and garnish with grated dark chocolate and chopped almonds and pistachios. Use a sharp knife to cut into triangles and serve immediately.: As you whip, the mixture transforms, becoming lighter and taking on a pale sheen. You’ll hear the motor hum steadily and see soft peaks form, though the texture will be slightly different from dairy whipped cream. The aroma of pure maple syrup and vanilla extract will bloom, filling the kitchen with sweet, fragrant notes while the pinch of sea salt sharpens the flavors. This stage is important for creating a stable, airy filling that layers well with the bananas . If you overwhip, the cream can become grainy, so stop once the texture is thick and spreadable. If the cream seems too loose, chill it briefly and continue whipping with short bursts.
- Note: If you freeze the pie for longer than two hours, you may need to thaw it 8 to 10 minutes before cutting and serving, as the coconut milk will harden. Store leftover banana cream pie in the freezer.: Look for a smooth, glossy surface as you spread the cream over the chilled crust, feeling the cool silk under your spatula. This initial layer acts as a protective cushion so the sliced bananas do not sink into the crust. You’ll notice a faint coconut aroma mixing with the nutty base, and the evenness of this layer affects both presentation and texture. Rushing this step can create uneven layers and air pockets, so take a moment to smooth the cream. If the filling is too firm to spread, allow it to sit at room temperature for a couple of minutes to soften slightly without melting.
- Layer the sliced bananas on top, followed by the remaining coconut whipped cream: Arrange the bananas in an overlapping pattern for visual appeal, and their soft, fruity scent will mingle with the coconut. Bananas should be ripe enough to taste sweet, yet firm enough to hold their shape. After adding the fruit, spoon the remaining cream to fully cover the bananas and create a uniform top. This sandwiching keeps each bite balanced between fruit and cream. A frequent mistake is cutting the bananas too thick, which can make the texture clumsy, or too thin, which causes them to disappear into the cream. Aim for even slices to maintain consistent mouthfeel in every slice.
- Use a rubber spatula to evenly spread the coconut whipped cream: The spatula lets you smooth the surface without deflating the whipped texture. Work from the center outward, watching for a silky finish and small air bubbles that settle as you go. The final top should look polished, lightly textured, and inviting. Avoid pressing too hard, which can compact the cream and dull the airy quality you just whipped. If you encounter streaks, a quick hand smoothing in long strokes will produce a clean appearance.
- Cover the pan with plastic wrap and refrigerate for 2 hours: As the pie chills, flavors meld and the filling sets into a pleasantly firm, sliceable consistency. You may notice a subtle tightening of the cream and a deeper melding of maple and vanilla aromas within the filling. Two hours is typically enough for the pie to stabilize, though chilling longer is fine for firmer slices. One pitfall is chilling uncovered, which can result in skin forming on the surface or moisture loss. Keep it covered to maintain a glossy top and prevent the filling from absorbing fridge odors.
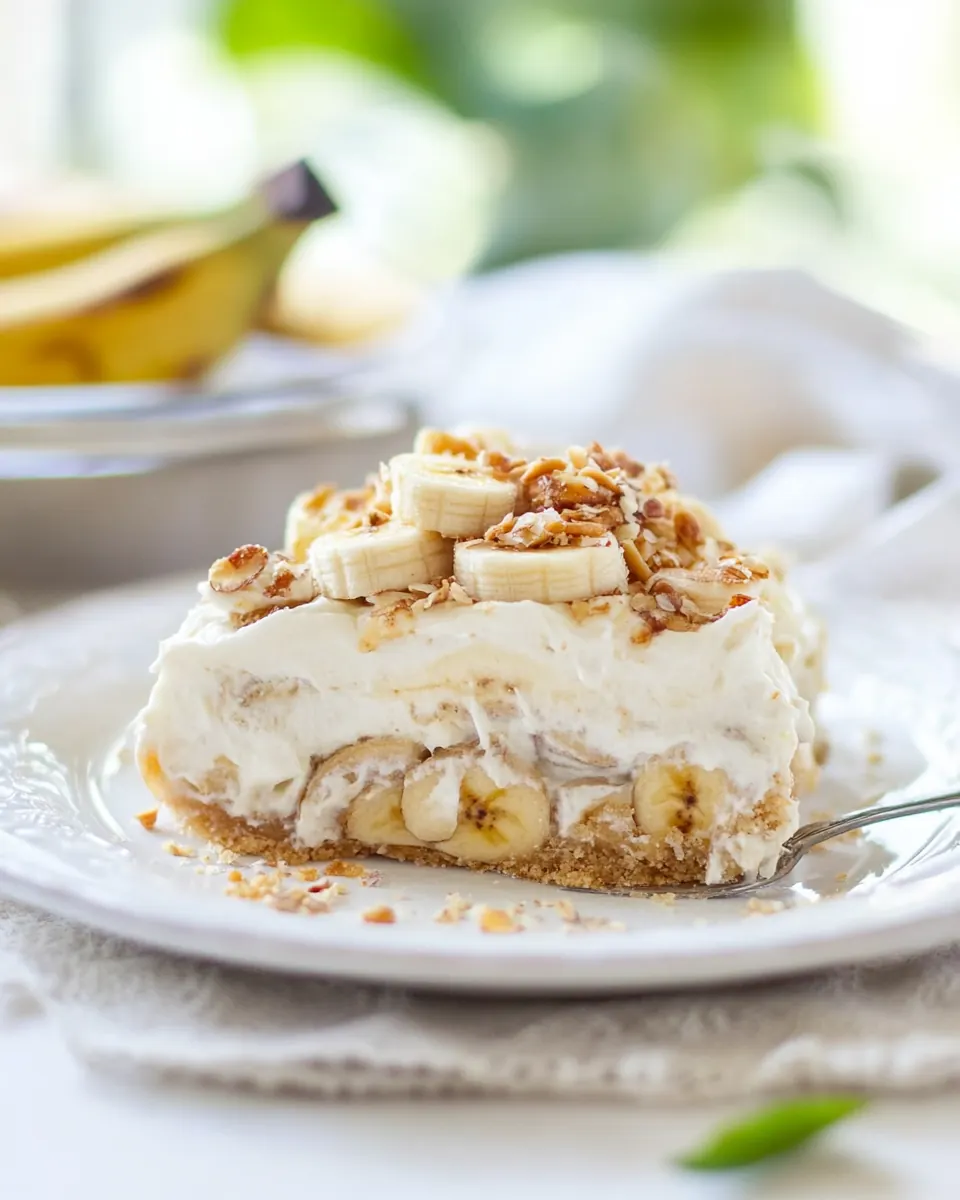
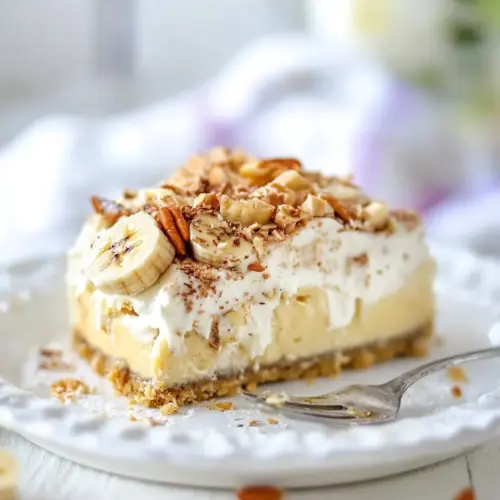
- When ready to serve, release the pie from its mold and garnish with grated dark chocolate and chopped almonds and pistachios: Unlocking the springform reveals a neat crust and layered filling, and adding the chopped almonds and pistachios brings immediate texture and color. The grated dark chocolate adds a fragrant, bittersweet note that contrasts the sweet cream. You’ll hear a gentle clink as you grate the chocolate, and the visual of green pistachio and brown almond against pale cream is delightful. Avoid over decorating which can obscure the elegant simplicity of the pie.
- Use a sharp knife to cut into triangles and serve immediately: For clean slices, dip a sharp knife in hot water and wipe it dry between cuts, which produces smooth edges and minimizes filling drag. The sound will be a soft glide as the knife passes through the crust and filling, and you should see defined layers in each triangle. Serving immediately preserves the airy texture of the cream and the freshness of the bananas . If the pie has been frozen, allow a short thaw so the coconut cream softens for easier slicing; a common mistake is trying to slice when too solid, which leads to cracking.
- Note: If you freeze the pie for longer than two hours, you may need to thaw it 8 to 10 minutes before cutting and serving, as the coconut milk will harden : When frozen, the coconut fat firms significantly and the pie will be quite solid to the touch; letting it rest briefly at room temperature allows the filling to soften so slices cut cleanly without crumbling. You’ll notice the surface lose its icy sheen and the texture regain a gentle give, signaling readiness. Freezing is useful for storage, but cutting too soon causes fractures and uneven wedges. Thawing too long will soften the filling excessively, making slices collapse, so watch the clock and check frequently.
- Store leftover banana cream pie in the freezer: Freezing preserves the pie well, and properly wrapped slices remain enjoyable for extended periods. When you reheat or thaw, follow the brief resting advice to return the texture to a pleasant consistency. Keep leftovers tightly wrapped to prevent freezer burn and to protect the delicate flavors. A typical mistake is storing uncovered in the fridge where the filling can dry and the crust can absorb moisture, so always wrap securely.
Pro Tips and Tweaks
I keep a short list of practical tips that make the assembly smoother and the outcome more consistent. These tweaks focus on texture, timing, and presentation so the pie looks and tastes impressive every time.
- Chill the coconut milk cans overnight to ensure the cream separates and whips up thick rather than watery.
- Soak dry dates briefly if they are firm, which helps them blend smoothly into a cohesive crust.
- Press the crust firmly with the bottom of a measuring cup to compact it and prevent crumbling when slicing.
- Use a hot, dry knife wiped between cuts for neat slices that showcase the layers.
- Reserve the can liquids for smoothies or baking so nothing goes to waste.
- Garnish just before serving to keep chopped nuts crisp and chocolate from melting into the cream.
Great Combinations for No Bake Vegan Banana Cream Pie
This pie pairs well with light beverages and simple sides that do not compete with its sweet creamy profile. It works across many occasions, from casual lunches to special holiday spreads, and stores well if you need to prepare ahead. Below are serving ideas and storage notes laid out to help you present this dessert beautifully.
- Serve with chilled herbal tea such as mint or chamomile to balance the richness of the coconut cream.
- Offer strong brewed coffee for guests who enjoy a bitter contrast to the pie’s sweetness, making each bite feel more refined.
- Bring to brunch where the pie acts as a sweet centerpiece after savory items, creating a satisfying contrast.
- Make ahead for gatherings by assembling the night before and refrigerating to save time on the event day.
- Store in the freezer for longer preservation, and thaw briefly before serving for best texture.
- Use as a celebratory dessert during holidays or special occasions when you need a crowd friendly, vegan option.
- Pack individual slices for picnics or potlucks, wrapping them securely to maintain shape and freshness.
FAQ
Conclusion
This No Bake Vegan Banana Cream Pie stands out for its creamy coconut filling, naturally sweet date almond crust, and the comforting familiarity of ripe bananas. It’s a dessert that feels indulgent yet light, approachable for both home bakers and hosts who need a reliable make ahead treat. Give it a try when you want a show stopping, dairy free dessert that requires no oven, and enjoy the way the textures and flavors come together to create slices people will ask about again and again.
No Bake Vegan Banana Cream Pie
Equipment
- Food Processor
- 8 inch springform pan
- Parchment Paper
- Mixing Bowl
- Hand Mixer
- Rubber spatula
Ingredients
- 1 1/2 cups raw almonds I used Bremner Farms’s almonds Provide a crunchy, nutty base and healthy fats that help bind the crust when ground finely; toast lightly for deeper flavor before processing for best results.
- 8 large medjool dates pitted Add a sticky, caramel-like sweetness that holds the crust together when blended with nuts; remove pits to ensure smooth texture and even sweetness.
- 3 tablespoons coconut oil melted Contribute a rich, smooth fat that helps bind the crust and adds a subtle coconut aroma; melt gently to incorporate evenly into the nut-date mixture.
- 1/4 teaspoon ground cinnamon Impart warm, aromatic notes to the crust mixture and balance sweetness; use sparingly to avoid overpowering the delicate flavors.
- 1/2 teaspoon pure vanilla extract Enhance overall flavor by brightening and rounding sweet components; use pure extract for the cleanest, most authentic vanilla aroma.
- 1/4 tsp salt Provide subtle savory balance that heightens sweetness and rounds flavors in both crust and filling; a small amount prevents blandness.
- 2 14-ounce cans full-fat coconut milk*, refrigerated overnight (see note) Supply creamy, full-bodied richness and structure to the filling when the solid coconut cream is separated and whipped; refrigerate to solidify the cream for best results.
- 1/4 cup pure maple syrup Add natural sweetness and a smooth mouthfeel to the coconut filling; measure accurately to maintain desired sweetness and texture.
- 1 1/2 teaspoons pure vanilla extract Boost depth and aromatic complexity of the filling with concentrated vanilla flavor; add during blending for even distribution.
- Pinch sea salt Introduce a bright saline note that elevates sweetness and rounds the filling’s flavor profile; use only a pinch to avoid saltiness.
- 3 large ripe bananas peeled and sliced Offer fresh banana flavor and natural sweetness that define the pie’s character; choose ripe bananas for optimal sweetness and creaminess when blended or layered.
- Raw almonds chopped Contribute crunchy texture and visual contrast as a garnish or chopped layer; chop to desired size and sprinkle over the finished pie for added nutty flavor.
- Raw pistachios chopped Provide a colorful, crunchy garnish with mild sweet flavor and buttery notes; chop finely to scatter over the pie for texture and visual appeal.
- 1 square dark chocolate grated Add a rich, slightly bitter chocolate accent and decorative flair when grated over the top; use dark chocolate for contrast against the sweet, creamy filling.
Instructions
- Add the ingredients for the crust to a food processor and process until the almonds are finely chopped (but still fairly chunky), and a sticky mixture is formed. Line an 8-inch springform pan with parchment paper and press the crust mixture into the bottom, creating an even layer. Refrigerate until ready to use.: The aroma of crushed raw almonds and sweet medjool dates is immediate, releasing a warm, toasty scent and a hint of caramel. You should hear short pulses, the mixture moving in clumps against the bowl, and see a cohesion that holds when pressed between your fingers. This texture is vital because it ensures the crust compresses well in the pan, creating a stable base that avoids crumbling. A common error is over processing until the nuts become oily, which makes the crust too dense and greasy. To prevent that, pulse in short bursts and scrape the sides if large pieces cling. If the mixture seems too dry, a tiny splash of the melted coconut oil can help, but add sparingly to avoid a soft, unstructured crust.
- Open the two cans of refrigerated coconut milk and scoop the thick coconut cream into a mixing bowl (or stand mixer fitted with the whisk attachment), leaving the clear water behind to use in smoothies or a different recipe.: When you press the crust into the pan, you want an even, compact layer that fills the bottom uniformly. Use the flat bottom of a measuring cup to press firmly, feeling for any air pockets or uneven spots. The crust should look cohesive, slightly shiny from the dates, and hold its shape when you lift a corner of the parchment. Pressing firmly matters because a loosely packed crust will fall apart when sliced. Avoid the temptation to make the crust too thick; this can overwhelm the filling. If edges are rough, smooth them gently with your fingers dipped in a little water to prevent sticking.
- Add the pure maple syrup, vanilla extract, and sea salt to the mixing bowl and use a hand mixer to beat the ingredients until thick and fluffy. It’s okay if the mixture doesn’t have the same consistency as regular homemade whipped cream, so long as it’s thick.: Chilling the pressed crust helps it firm up and bind together, producing a crisp, sliceable foundation. In the refrigerator you’ll notice the crust tightening and the aroma mellowing slightly, which is a good sign. Cooling also prevents the crust from becoming too soft when the filling is added. Do not skip refrigeration, as a warm crust will not set properly and can turn into a crumbly mess when you cut slices. If time is tight, ten to fifteen minutes in the freezer will accelerate the firming, but keep an eye on it so the crust does not become rock hard.
- Pour 1/4 to 1/2 of the coconut whipped cream onto the prepared crust and spread into an even layer. Layer the sliced bananas on top, followed by the remaining coconut whipped cream. Use a rubber spatula to evenly spread the coconut whipped cream.: You should see a firm, ivory cream separated from translucent water, and scooping it out reveals a luscious, dense texture similar to heavy cream. The sound is quiet, but visually you’ll notice the cream holding its shape, a critical cue that your filling will whip successfully. Leaving the liquid behind matters because it prevents a watery whipped cream that will not set. A common mistake is using warm coconut milk that hasn’t separated, which yields a loose, soupy mixture. Always chill cans overnight, and give them a gentle shake before opening to avoid mixing the layers unintentionally.
- Cover the pan with plastic wrap and refrigerate for 2 hours. When ready to serve, release the pie from its mold and garnish with grated dark chocolate and chopped almonds and pistachios. Use a sharp knife to cut into triangles and serve immediately.: As you whip, the mixture transforms, becoming lighter and taking on a pale sheen. You’ll hear the motor hum steadily and see soft peaks form, though the texture will be slightly different from dairy whipped cream. The aroma of pure maple syrup and vanilla extract will bloom, filling the kitchen with sweet, fragrant notes while the pinch of sea salt sharpens the flavors. This stage is important for creating a stable, airy filling that layers well with the bananas . If you overwhip, the cream can become grainy, so stop once the texture is thick and spreadable. If the cream seems too loose, chill it briefly and continue whipping with short bursts.
- Note: If you freeze the pie for longer than two hours, you may need to thaw it 8 to 10 minutes before cutting and serving, as the coconut milk will harden. Store leftover banana cream pie in the freezer.: Look for a smooth, glossy surface as you spread the cream over the chilled crust, feeling the cool silk under your spatula. This initial layer acts as a protective cushion so the sliced bananas do not sink into the crust. You’ll notice a faint coconut aroma mixing with the nutty base, and the evenness of this layer affects both presentation and texture. Rushing this step can create uneven layers and air pockets, so take a moment to smooth the cream. If the filling is too firm to spread, allow it to sit at room temperature for a couple of minutes to soften slightly without melting.
- Layer the sliced bananas on top, followed by the remaining coconut whipped cream: Arrange the bananas in an overlapping pattern for visual appeal, and their soft, fruity scent will mingle with the coconut. Bananas should be ripe enough to taste sweet, yet firm enough to hold their shape. After adding the fruit, spoon the remaining cream to fully cover the bananas and create a uniform top. This sandwiching keeps each bite balanced between fruit and cream. A frequent mistake is cutting the bananas too thick, which can make the texture clumsy, or too thin, which causes them to disappear into the cream. Aim for even slices to maintain consistent mouthfeel in every slice.
- Use a rubber spatula to evenly spread the coconut whipped cream: The spatula lets you smooth the surface without deflating the whipped texture. Work from the center outward, watching for a silky finish and small air bubbles that settle as you go. The final top should look polished, lightly textured, and inviting. Avoid pressing too hard, which can compact the cream and dull the airy quality you just whipped. If you encounter streaks, a quick hand smoothing in long strokes will produce a clean appearance.
- Cover the pan with plastic wrap and refrigerate for 2 hours: As the pie chills, flavors meld and the filling sets into a pleasantly firm, sliceable consistency. You may notice a subtle tightening of the cream and a deeper melding of maple and vanilla aromas within the filling. Two hours is typically enough for the pie to stabilize, though chilling longer is fine for firmer slices. One pitfall is chilling uncovered, which can result in skin forming on the surface or moisture loss. Keep it covered to maintain a glossy top and prevent the filling from absorbing fridge odors.
- When ready to serve, release the pie from its mold and garnish with grated dark chocolate and chopped almonds and pistachios: Unlocking the springform reveals a neat crust and layered filling, and adding the chopped almonds and pistachios brings immediate texture and color. The grated dark chocolate adds a fragrant, bittersweet note that contrasts the sweet cream. You’ll hear a gentle clink as you grate the chocolate, and the visual of green pistachio and brown almond against pale cream is delightful. Avoid over decorating which can obscure the elegant simplicity of the pie.
- Use a sharp knife to cut into triangles and serve immediately: For clean slices, dip a sharp knife in hot water and wipe it dry between cuts, which produces smooth edges and minimizes filling drag. The sound will be a soft glide as the knife passes through the crust and filling, and you should see defined layers in each triangle. Serving immediately preserves the airy texture of the cream and the freshness of the bananas . If the pie has been frozen, allow a short thaw so the coconut cream softens for easier slicing; a common mistake is trying to slice when too solid, which leads to cracking.
- Note: If you freeze the pie for longer than two hours, you may need to thaw it 8 to 10 minutes before cutting and serving, as the coconut milk will harden : When frozen, the coconut fat firms significantly and the pie will be quite solid to the touch; letting it rest briefly at room temperature allows the filling to soften so slices cut cleanly without crumbling. You’ll notice the surface lose its icy sheen and the texture regain a gentle give, signaling readiness. Freezing is useful for storage, but cutting too soon causes fractures and uneven wedges. Thawing too long will soften the filling excessively, making slices collapse, so watch the clock and check frequently.
- Store leftover banana cream pie in the freezer: Freezing preserves the pie well, and properly wrapped slices remain enjoyable for extended periods. When you reheat or thaw, follow the brief resting advice to return the texture to a pleasant consistency. Keep leftovers tightly wrapped to prevent freezer burn and to protect the delicate flavors. A typical mistake is storing uncovered in the fridge where the filling can dry and the crust can absorb moisture, so always wrap securely.
Notes
- Chill the coconut milk cans overnight to ensure the cream separates and whips up thick rather than watery.
- Soak dry dates briefly if they are firm, which helps them blend smoothly into a cohesive crust.
- Press the crust firmly with the bottom of a measuring cup to compact it and prevent crumbling when slicing.
- Use a hot, dry knife wiped between cuts for neat slices that showcase the layers.
- Reserve the can liquids for smoothies or baking so nothing goes to waste.
- Garnish just before serving to keep chopped nuts crisp and chocolate from melting into the cream.