
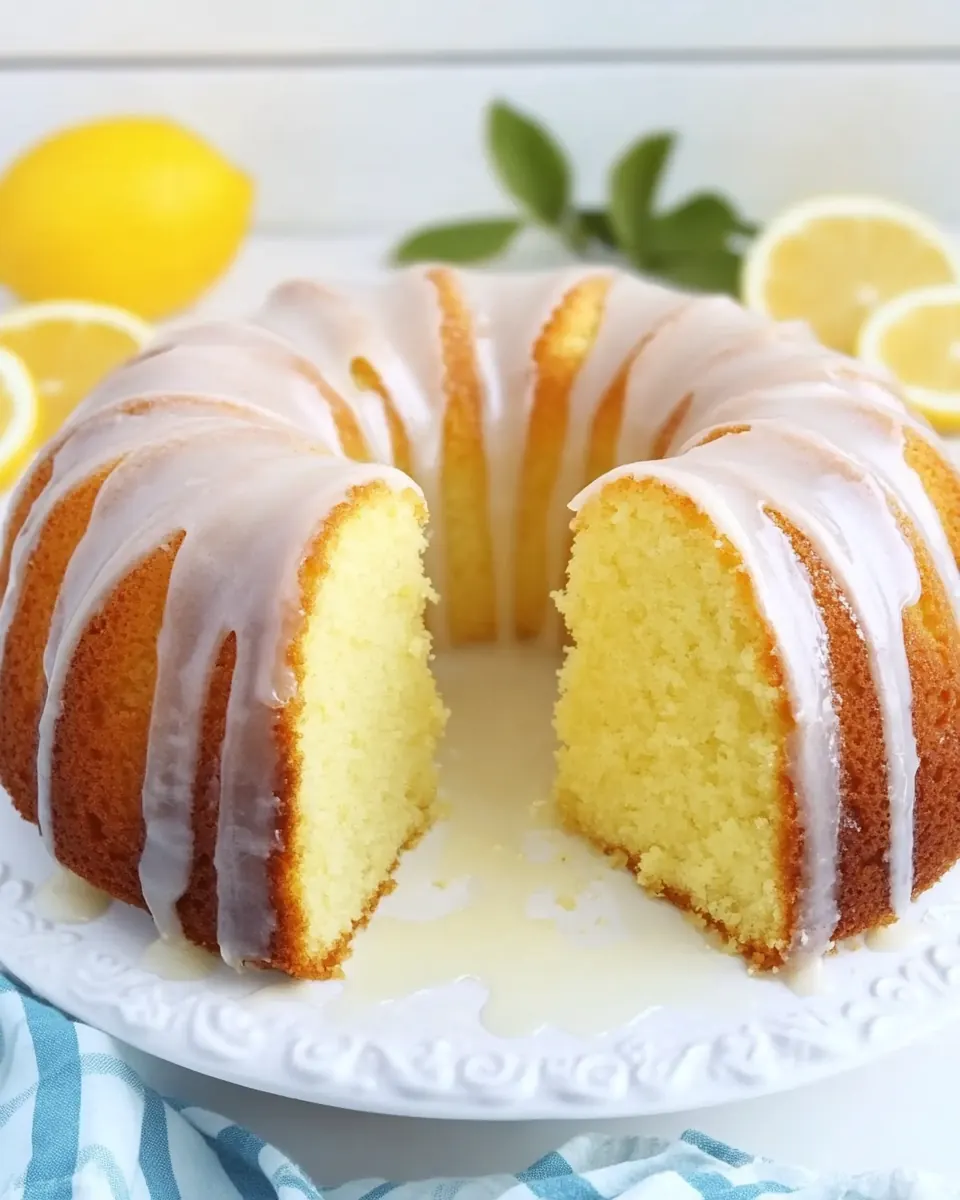
Lemon Pound Cake with Lemon Glaze
Lemon Pound Cake with Lemon Glaze has been my go to when I need a simple, bright dessert that somehow feels both comforting and celebratory.
Years ago I baked this for a neighbor who had just moved in and I arrived with a slice wrapped in parchment and a promise of friendly company. That first loaf filled the apartment with a warm, citrusy perfume that made us stop talking and just inhale. We laughed about the crumbs on the table and swapped stories while the cake cooled, and I promised myself I would never skip the lemon zest again, because that tiny bit of peel holds so much sunshine.
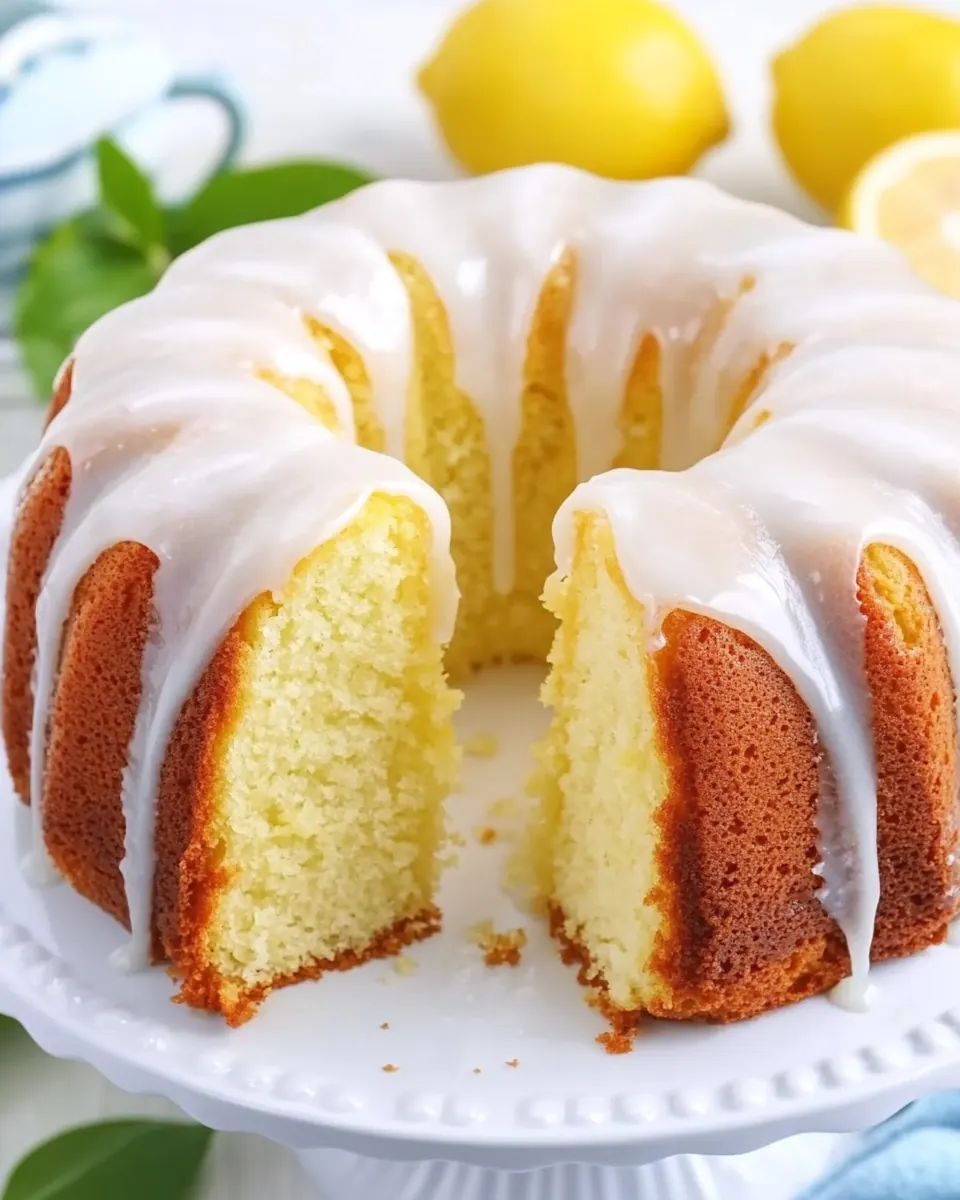
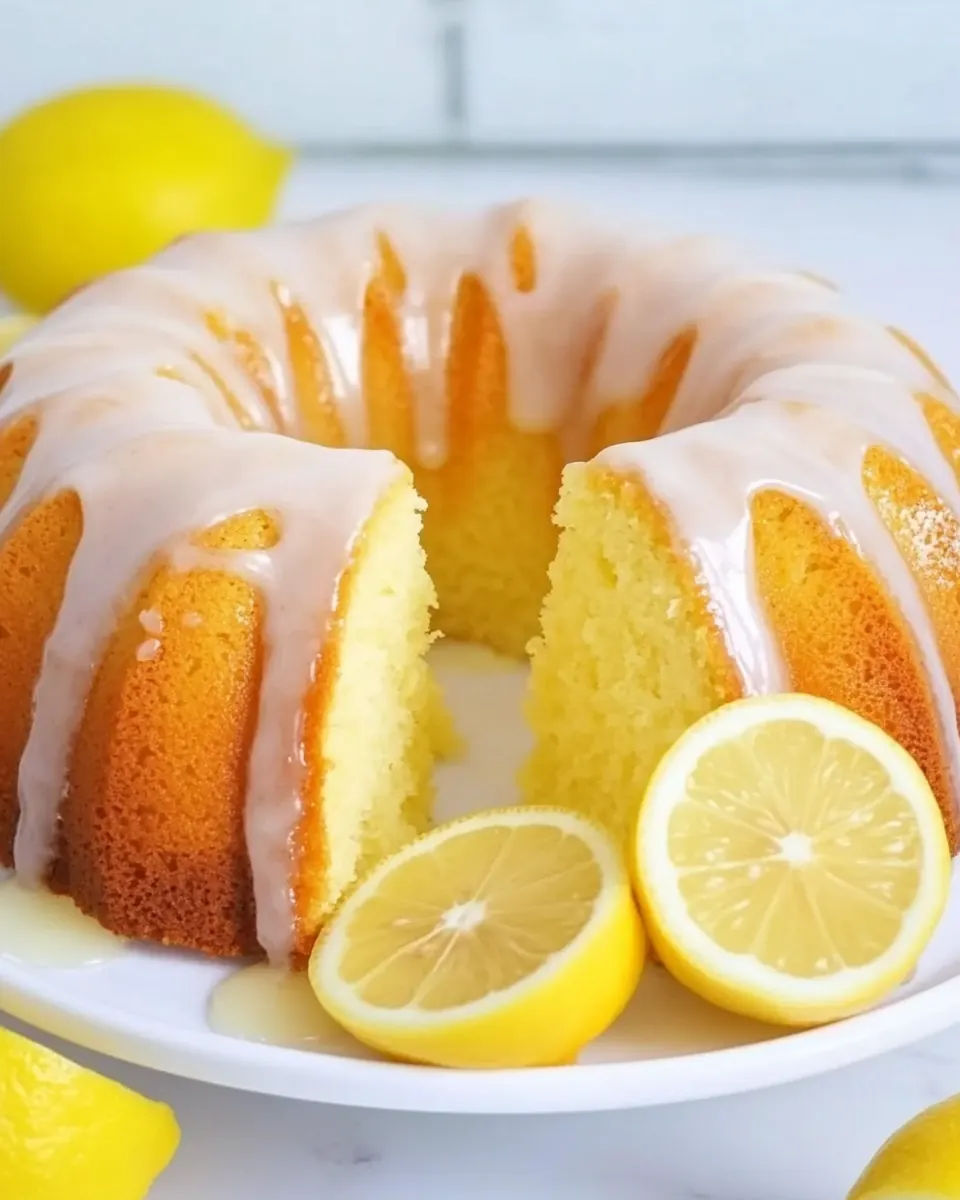
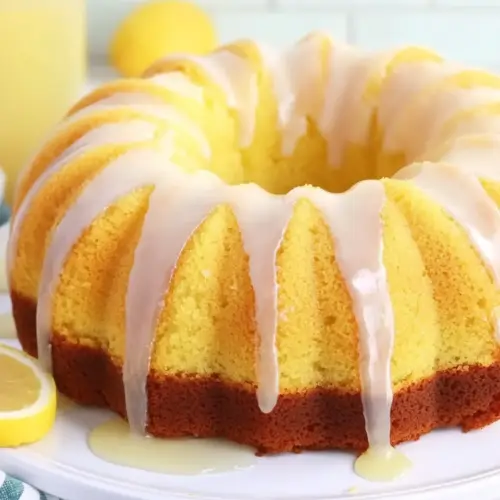
When I bake Lemon Pound Cake with Lemon Glaze now, I think about that afternoon, and I carve the slices a little thinner so the lemon glaze can shine on top. The texture is dense yet tender, and the crust develops just enough color to offer a gentle contrast to the soft interior. I enjoy the ritual of grating fresh lemon zest and tasting a whisper of tartness before I fold it into the batter. It connects me to simple kitchen joys: patience, good butter, and precise measuring.
Recipe Snapshot
1 hr 15 mins
10 mins
65 mins
Medium
400 kcal
American
Gluten-Free, Low FODMAP
Desserts
Bundt pan, Mixer, Mixing bowls, Measuring cups, Whisk
The Appeal of This Lemon Pound Cake with Lemon Glaze
Bright Citrus Flavor That Feels Homemade
I love how Lemon Pound Cake with Lemon Glaze delivers a clear citrus note without being sharp. The combination of lemon zest and lemon juice gives layered brightness that lifts the dense crumb, and when you bite in you get a warm, buttery mouthfeel balanced by a clean lemon finish.
Reliable Texture Every Time
Because the recipe uses classic ratios and a creaming method with butter and sugar, the cake reliably develops a fine, tender crumb. I appreciate a dessert that does not surprise me in a bad way, and this one rewards attention to temperature and mixing with consistent results.
Easy to Make Yet Impressive
This cake looks like it took effort, but most of the work is straightforward. You can make the batter in one bowl and the glaze in a few minutes, making it perfect when I want something pretty without fuss. Guests always ask if I baked it from scratch, and I love saying yes.
Flexible Serving Options
You can dress slices up with extra glaze, whipped cream, or fresh berries, or keep it simple and let the lemon glaze be the star. It suits everything from afternoon tea to weekend brunch, which is why I keep this recipe close at hand.
Comforting Memories and New Traditions
This loaf travels well, freezes beautifully, and slices cleanly, so it becomes part of rituals like neighbor visits, potlucks, or a small celebration. I’ve gifted it wrapped in wax paper tied with string more than once, and it never fails to make someone smile.
Ingredients for Lemon Pound Cake with Lemon Glaze
These ingredients are intentionally simple and focused, designed to create balance between richness and bright citrus. The key players are the butter and eggs which give structure and tenderness, the all purpose flour for a fine crumb, and the lemon zest and lemon juice to lift the overall profile. Little leaveners like baking powder and baking soda work together to give a gentle rise without creating large holes, while the buttermilk adds tang and moisture that keep each slice from feeling heavy.
- 1 cup butter, softened: Creamed to incorporate air and provide a tender, rich base for the cake batter while contributing moisture and structure from the butterfat.
- 2 cups sugar: Granulated to sweeten the batter, assist with creaming for leavening, and balance flavors while affecting the cake's texture and browning.
- 4 eggs: Beaten individually then combined to emulsify and bind the batter, add moisture, and contribute to leavening and richness.
- 3 cups all-purpose flour: Sifted or measured accurately to provide the primary structure through gluten and starch, giving the pound cake its crumb and volume.
- 1/2 teaspoon baking powder: Leavening-activated in small amount to help provide subtle lift and improve crumb lightness without altering flavor significantly.
- 1/2 teaspoon baking soda: Chemical leavening to react with acidic components and contribute additional rise, resulting in a lighter, more tender cake crumb.
- 1/2 teaspoons salt: Seasoning added sparingly to enhance overall flavor balance and strengthen the perception of sweetness and lemon notes.
- 3/4 cup buttermilk: Added to introduce acidity and moisture, helping react with baking soda while tenderizing the crumb and adding slight tang.
- 1 tablespoon lemon zest, freshly grated: Zested finely to deliver bright, concentrated citrus oils that amplify lemon aroma and flavor throughout the cake batter.
- 1 tablespoon lemon juice: Squeezed in to add fresh citrus acidity and brightness, balancing sweetness and activating leaveners when combined with buttermilk.
- 1 1/4 cups powdered sugar: Sifted or whisked for the glaze to provide sweetness and structure, dissolving into liquids to create a smooth, pourable icing.
- 2 teaspoons lemon juice: Measured to intensify the glaze's lemon flavor and add acidity for a tangy finish that balances the powdered sugar.
- 1 2 tablespoons milk: Stirred in to adjust glaze consistency, creating a smooth, spreadable or drizzling texture while adding a touch of dairy richness.
Putting Together Lemon Pound Cake with Lemon Glaze
Bringing this cake together is a cozy process I enjoy, from creaming the butter and sugar to the first whiff when the loaf comes out of the oven. Below I expand the directions into a step by step narrative so you can follow along with confidence and sense when things are progressing as they should.
- Heat oven to 325°F. Grease and flour a bundt pan; set aside.: As the oven warms, you will notice a gentle hum and eventual steady glow from the heating element, which creates the even environment this dense cake needs to rise slowly without cracking excessively. Greasing and flouring the bundt pan ensures the cake releases cleanly, and you should feel the smooth texture of your pan surface as you coat it. The why here is simple, the pan coating prevents sticking and protects the cake’s shape. A common mistake is insufficient greasing which causes the cake to tear when inverted, so take a minute to get full coverage and tap out excess flour.
- In a large bowl, combine sugar and butter at medium speed, scraping the bowl often, until creamy. Continue beating, adding 1 egg at a time, until well mixed.: You will hear the mixer change tone as the butter and sugar transform from grainy to silky and pale. The aroma will become buttery and slightly sweet, and the texture should look light and aerated, which traps tiny bubbles that expand in the oven to create structure. Adding eggs one at a time maintains a stable emulsion, avoiding separation. If you rush this stage the batter will not incorporate air properly, so resist the urge to speed up or skip scraping down the bowl edges.
- In a medium bowl, mix the flour, baking powder, baking soda, and salt.: When you whisk these dry components together you create a uniform distribution of leavening so the cake rises evenly. The visual cue is a homogenous pale mixture with no pockets of baking powder or baking soda. This is important because uneven leavening results in uneven texture or odd flavor pockets. A typical error is adding the leaveners directly without sifting or mixing, which risks having concentrated pockets.
- On low speed alternately add the flour mixture and the buttermilk and scrape the bowl often, until well mixed. Add lemon zest and 1 tablespoon of lemon juice. Continue beating until combined.: At this stage you will notice a rhythm, folding in dry, then liquid, so the batter becomes smooth and glossy. The buttermilk contributes to a tender crumb and reacts slightly with the leaveners, while the alternating additions prevent overworking gluten. Once the lemon zest and lemon juice are folded in you will get a bright citrus perfume. If you overmix after adding the flour the crumb will toughen, so mix just until no streaks of flour remain.
- Spoon batter into prepared pan. Bake for 55-65 minutes or until a toothpick inserted in the center comes out clean. Cool in pan for 10 minutes. Invert onto a serving plate; cool completely.: As the loaf bakes the top will slowly turn golden and a clean, sweet aroma will fill the kitchen. The batter’s surface will spring back gently to the touch when it is near done, and a toothpick should come out clean or with a few moist crumbs. Cooling in the pan for 10 minutes allows the structure to set so the loaf releases without collapsing, and inverting it onto a rack finishes the cooling. Cutting into the cake too early is the usual misstep that leads to a gummy interior, so be patient and let it cool fully before glazing.
- For the glaze, stir powdered sugar, 2 teaspoons of lemon juice, and enough milk for desired glazing consistency in a small bowl. Drizzle over the cooled cake.: The glaze should be mixed until smooth, glossy, and just pourable, and when you spoon it over the top it should form thin ribbons that slowly melt into the surface. The aroma of fresh lemon juice will lift the sweetness, and adjusting the milk a drop at a time lets you control how far the glaze runs. Avoid making the glaze too thin which will pool at the base and hide the cake’s top, or too thick which will crack when sliced.
Recipe Variations about Lemon Pound Cake with Lemon Glaze
This section offers helpful variations and tweaks so you can adapt Lemon Pound Cake with Lemon Glaze to different occasions and preferences. Each tip begins with a short bold phrase to make scanning easy.
- Make a thicker frosting by using less milk and more powdered sugar to pipe a decorative layer on top instead of a runny glaze.
- Add berries when serving by pairing slices with fresh berries on the plate, letting their natural juices complement the lemon.
- Use a loaf pan when you prefer individual loaves; divide batter between two 9 by 5 inch pans and bake at the same temperature, watching for the same visual cues.
- Store properly by wrapping cooled cake tightly in plastic wrap and keeping at room temperature for two days, or freeze slices for longer storage.
- Adjust sweetness by reducing the glaze powdered sugar slightly and balancing with a touch more lemon juice if you like a tangier finish.
Serving Ideas for Lemon Pound Cake with Lemon Glaze
This cake shines in many settings, and below I describe ways I like to present it. From casual tea to small celebrations, these serving ideas help you match the moment. Each suggestion highlights practical pairings and storage notes so you can plan ahead.
- Afternoon tea presentation Serve thin slices with a small dollop of whipped cream and a single berry on top for an elegant tea time offering.
- Brunch centerpiece Place the whole cake on a decorative platter with fresh citrus slices around it to anchor a brunch table; guests can slice as they please.
- Picnic friendly Wrap individual slices in parchment for easy transport, and keep chilled in a cooler to preserve freshness during outdoor gatherings.
- Holiday sharing For casual holiday meals, plate slices with a dusting of extra powdered sugar and pair with coffee or tea for a simple dessert course.
- Storage and make ahead Bake a day in advance, store wrapped at room temperature, and add the glaze the morning of serving to preserve its shine.
- Seasonal pairing During spring and summer, serve with a side of macerated berries, while in cooler months pair with a warm compote for contrast.
- Portion advice Cut thinner slices for larger groups to ensure everyone gets a taste, and thicker wedges when serving as part of a plated dessert.
- Occasion ideas Lovely for brunch, afternoon gatherings, baby showers, or anytime you want a crowd pleasing, bright dessert.
- Leftover use Crumble slices into a parfait with yogurt and fruit to transform leftovers into a fresh treat.
- Gifting tip Cool completely, wrap in parchment and twine, and include a note about reheating briefly for a fresh out of oven feel.
FAQ
Conclusion
This Lemon Pound Cake with Lemon Glaze stands out for its bright citrus balance and reliably tender, buttery crumb. The combination of fresh lemon zest and a simple glaze makes it both approachable and special, whether you are serving it at a casual brunch or gifting a neighbor. I encourage you to give it a try, savor the lemon aroma while it bakes, and enjoy the little ritual of slicing and sharing. It’s one of those recipes that rewards patience and becomes a warm memory at the table.
Lemon Pound Cake with Lemon Glaze
Equipment
- Bundt Pan
- Mixer
- Mixing Bowls
- Measuring Cups
- Whisk
Ingredients
- 1 cup butter, softened Creamed to incorporate air and provide a tender, rich base for the cake batter while contributing moisture and structure from the butterfat.
- 2 cups sugar Granulated to sweeten the batter, assist with creaming for leavening, and balance flavors while affecting the cake's texture and browning.
- 4 eggs Beaten individually then combined to emulsify and bind the batter, add moisture, and contribute to leavening and richness.
- 3 cups all-purpose flour Sifted or measured accurately to provide the primary structure through gluten and starch, giving the pound cake its crumb and volume.
- 1/2 teaspoon baking powder Leavening-activated in small amount to help provide subtle lift and improve crumb lightness without altering flavor significantly.
- 1/2 teaspoon baking soda Chemical leavening to react with acidic components and contribute additional rise, resulting in a lighter, more tender cake crumb.
- 1/2 teaspoons salt Seasoning added sparingly to enhance overall flavor balance and strengthen the perception of sweetness and lemon notes.
- 3/4 cup buttermilk Added to introduce acidity and moisture, helping react with baking soda while tenderizing the crumb and adding slight tang.
- 1 tablespoon lemon zest, freshly grated Zested finely to deliver bright, concentrated citrus oils that amplify lemon aroma and flavor throughout the cake batter.
- 1 tablespoon lemon juice Squeezed in to add fresh citrus acidity and brightness, balancing sweetness and activating leaveners when combined with buttermilk.
- 1 1/4 cups powdered sugar Sifted or whisked for the glaze to provide sweetness and structure, dissolving into liquids to create a smooth, pourable icing.
- 2 teaspoons lemon juice Measured to intensify the glaze's lemon flavor and add acidity for a tangy finish that balances the powdered sugar.
- 1 -2 tablespoons milk Stirred in to adjust glaze consistency, creating a smooth, spreadable or drizzling texture while adding a touch of dairy richness.
Instructions
- Heat oven to 325°F. Grease and flour a bundt pan; set aside.: As the oven warms, you will notice a gentle hum and eventual steady glow from the heating element, which creates the even environment this dense cake needs to rise slowly without cracking excessively. Greasing and flouring the bundt pan ensures the cake releases cleanly, and you should feel the smooth texture of your pan surface as you coat it. The why here is simple, the pan coating prevents sticking and protects the cake’s shape. A common mistake is insufficient greasing which causes the cake to tear when inverted, so take a minute to get full coverage and tap out excess flour.
- In a large bowl, combine sugar and butter at medium speed, scraping the bowl often, until creamy. Continue beating, adding 1 egg at a time, until well mixed.: You will hear the mixer change tone as the butter and sugar transform from grainy to silky and pale. The aroma will become buttery and slightly sweet, and the texture should look light and aerated, which traps tiny bubbles that expand in the oven to create structure. Adding eggs one at a time maintains a stable emulsion, avoiding separation. If you rush this stage the batter will not incorporate air properly, so resist the urge to speed up or skip scraping down the bowl edges.
- In a medium bowl, mix the flour, baking powder, baking soda, and salt.: When you whisk these dry components together you create a uniform distribution of leavening so the cake rises evenly. The visual cue is a homogenous pale mixture with no pockets of baking powder or baking soda. This is important because uneven leavening results in uneven texture or odd flavor pockets. A typical error is adding the leaveners directly without sifting or mixing, which risks having concentrated pockets.
- On low speed alternately add the flour mixture and the buttermilk and scrape the bowl often, until well mixed. Add lemon zest and 1 tablespoon of lemon juice. Continue beating until combined.: At this stage you will notice a rhythm, folding in dry, then liquid, so the batter becomes smooth and glossy. The buttermilk contributes to a tender crumb and reacts slightly with the leaveners, while the alternating additions prevent overworking gluten. Once the lemon zest and lemon juice are folded in you will get a bright citrus perfume. If you overmix after adding the flour the crumb will toughen, so mix just until no streaks of flour remain.
- Spoon batter into prepared pan. Bake for 55-65 minutes or until a toothpick inserted in the center comes out clean. Cool in pan for 10 minutes. Invert onto a serving plate; cool completely.: As the loaf bakes the top will slowly turn golden and a clean, sweet aroma will fill the kitchen. The batter’s surface will spring back gently to the touch when it is near done, and a toothpick should come out clean or with a few moist crumbs. Cooling in the pan for 10 minutes allows the structure to set so the loaf releases without collapsing, and inverting it onto a rack finishes the cooling. Cutting into the cake too early is the usual misstep that leads to a gummy interior, so be patient and let it cool fully before glazing.
- For the glaze, stir powdered sugar, 2 teaspoons of lemon juice, and enough milk for desired glazing consistency in a small bowl. Drizzle over the cooled cake.: The glaze should be mixed until smooth, glossy, and just pourable, and when you spoon it over the top it should form thin ribbons that slowly melt into the surface. The aroma of fresh lemon juice will lift the sweetness, and adjusting the milk a drop at a time lets you control how far the glaze runs. Avoid making the glaze too thin which will pool at the base and hide the cake’s top, or too thick which will crack when sliced.
Notes
- Make a thicker frosting by using less milk and more powdered sugar to pipe a decorative layer on top instead of a runny glaze.
- Add berries when serving by pairing slices with fresh berries on the plate, letting their natural juices complement the lemon.
- Use a loaf pan when you prefer individual loaves; divide batter between two 9 by 5 inch pans and bake at the same temperature, watching for the same visual cues.
- Store properly by wrapping cooled cake tightly in plastic wrap and keeping at room temperature for two days, or freeze slices for longer storage.
- Adjust sweetness by reducing the glaze powdered sugar slightly and balancing with a touch more lemon juice if you like a tangier finish.