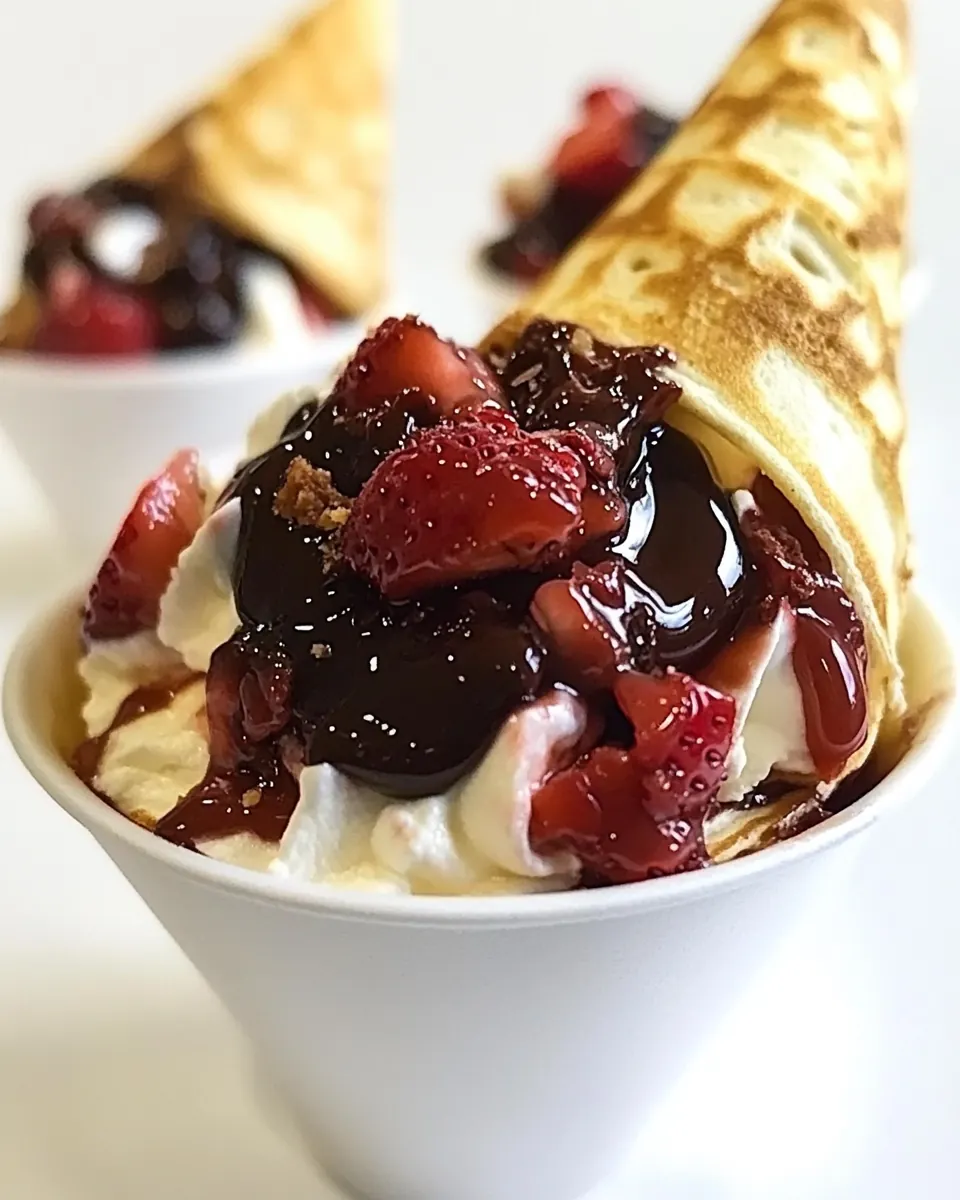
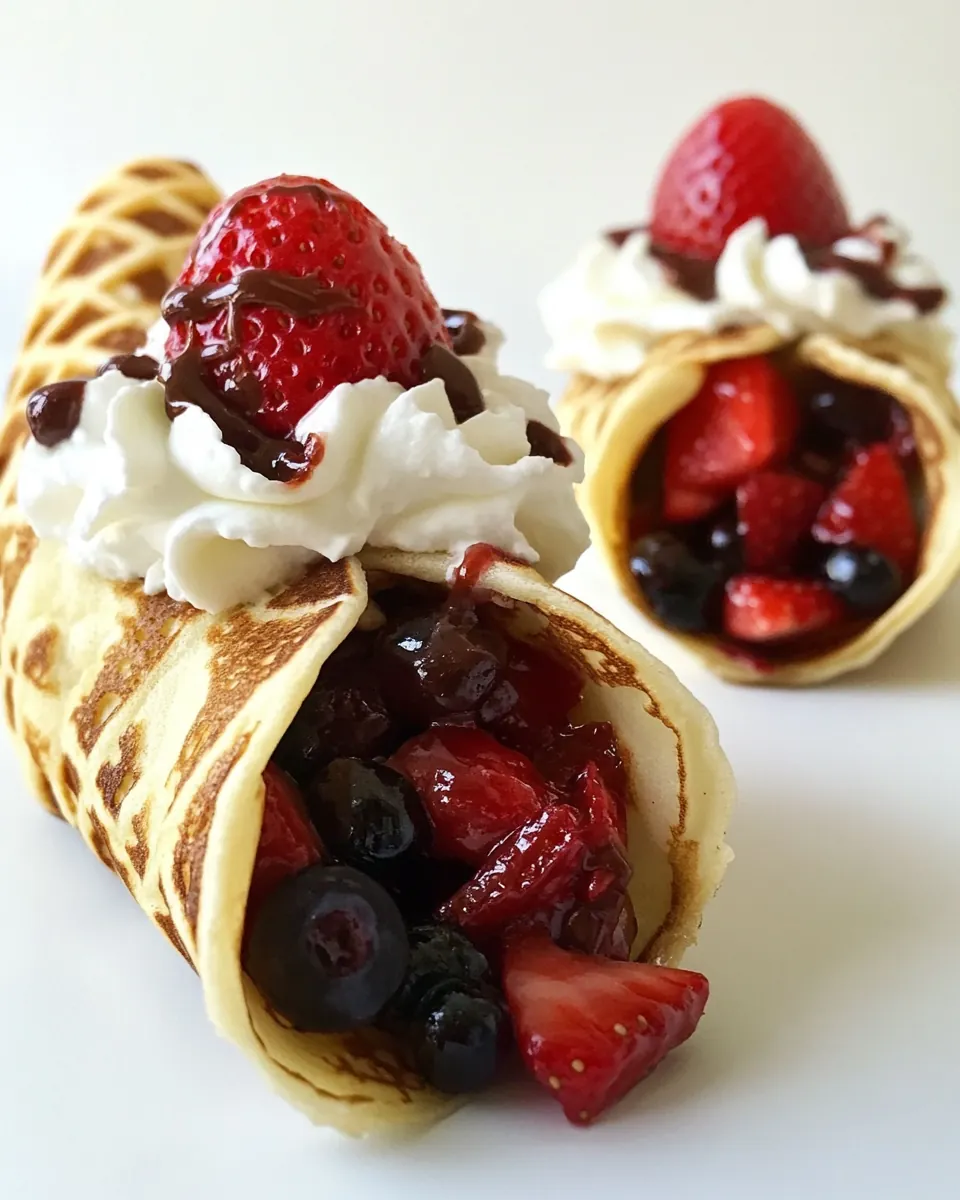
Strawberry Nutella Crepe Cones
Strawberry Nutella Crepe Cones are the kind of treat that makes a quiet afternoon feel like a little celebration. I remember the first time I assembled one for a friend who was visiting on a rainy afternoon, and the way the warm, glossy Nutella met the cold strawberry ice cream felt like pure magic. The contrast in temperature, texture, and flavor gave us both a smile and the perfect excuse to linger over coffee and conversation.
I make these whenever I want something quick yet impressive. They are unfussy to build, and they let each ingredient sing. The crisp edge of a thin crepe, the airy lift of whipped cream, and the bright burst of fresh strawberries come together into a handheld moment that tastes far more complicated than it is. I like to keep the assembly ritual small and slightly theatrical, so guests feel special even when the effort is minimal.
For two people, these feel intimate and generous at once. They are easy to adapt if you like more fruit or a bolder drizzle of Nutella, but I often stick to the original proportions because they balance so well. Making them always sparks a little creativity in me, and I hope you’ll feel the same joy as you prepare and eat them.
Recipe Snapshot
6 mins
5 mins
1 mins
Medium
350 kcal
American
Keto, Gluten-Free
Desserts
Microwave-safe bowl, Spoon
Why This Strawberry Nutella Crepe Cones Shines
1. Simple yet showstopping
I love that Strawberry Nutella Crepe Cones look like a bakery treat, yet they take almost no time. The assembly is quick, so you can produce something impressive without a lengthy prep. That contrast between ease and visual flair is why I reach for this recipe when friends drop by unannounced.
2. Play of temperatures and textures
One reason I adore these cones is how they pair warm, silky Nutella with cold, creamy strawberry ice cream. The soft crepe wraps it all together, and the whipped cream adds light, airy texture. Each bite hits multiple sensory notes, which keeps you coming back for one more.
3. Very customizable
We can easily adjust sweetness and portion sizes for different tastes. I often increase the strawberries for more freshness or add an extra drizzle of Nutella when I want something richer. The structure of the cone makes substitutions simple while preserving the overall experience.
4. Great for two and for sharing
This recipe is naturally portioned for two, which makes it perfect for a small celebration or a cozy dessert. I like that you can make both cones simultaneously and serve them warm, so everyone gets that lovely contrast of hot and cold. It also scales up in a straightforward way if you need more servings.
5. Minimal equipment and fuss
There is no complicated baking or long resting times. A small bowl to warm the milk and a spoon for drizzling are basically all you need. That simplicity makes it a go to when I want something delicious without a lot of cleanup.
What to Gather for Strawberry Nutella Crepe Cones
These ingredients are all about balance. The crepe is the tender carrier, the Nutella provides rich, chocolate hazelnut flavor, and the strawberries and strawberry ice cream bring brightness and cold creaminess. Whipped cream and a touch of milk or cream smooth everything so each bite is cohesive rather than muddled.
- 1 tablespoon milk or cream: Add gently to thin the batter or the filling, providing a touch of richness and helping achieve a smooth crepe texture when mixed with eggs and flour. Use milk for a lighter result or cream for extra silkiness, and adjust quantity slightly if batter seems too thick. Incorporate at room temperature to prevent lumps and to blend evenly into the mixture.
- 2 tablespoons Nutella: Spread evenly to create a sweet, chocolate-hazelnut layer that adds depth and sticky adhesion between crepe and fillings. Warm slightly for easier spreading if it’s firm, and use just enough to avoid overpowering the strawberry flavors. Combine with a thin swipe on the crepe surface so it serves both as flavor and a barrier to sogginess from the fruit.
- 28 inch crepes: Use individually to form handheld cones that hold fillings and create crisp, delicate edges when warmed. Choose thin 28-inch crepes to make large, foldable cones ideal for wrapping around ice cream and toppings. Warm briefly before filling to make them pliable and prevent cracking while assembling the cone shape.
- 2 small scoops strawberry ice cream: Scoop carefully to provide cold, creamy strawberry flavor that contrasts with warm crepes and Nutella, delivering a refreshing texture. Use two small scoops to keep the cone balanced and prevent melting overflow; place them centrally to maintain structural integrity. Serve immediately after scooping to preserve shape and temperature contrast.
- 1/4 cup thinly sliced strawberries: Slice thinly to add fresh, bright strawberry pieces that enhance aroma, texture, and visual appeal without weighing down the cone. Scatter evenly over the ice cream or tuck into crepe folds so juices mingle subtly with Nutella. Choose ripe but firm berries to avoid excess moisture that could make the crepe soggy.
- 1/2 cup whipped cream: Pipe or dollop to finish with light, airy sweetness that complements the denser Nutella and creamy ice cream. Use chilled whipped cream for stability and shape, adding a final decorative touch and a fluffy mouthfeel. Apply just before serving to keep it from melting into the other components.
Cooking Instructions for Strawberry Nutella Crepe Cones

The steps are quick but benefit from attention, especially when warming the milk and drizzling the Nutella. Move deliberately and enjoy the sensory cues as you assemble each cone, and you will end up with a perfectly balanced treat.
- In a small microwave-safe bowl, microwave milk for 20 to 30 seconds until steaming hot. Stir in Nutella and continue stirring until Nutella is thin enough to drizzle.: You will notice a warm, rising steam and a glossy sheen as the milk loosens the Nutella , releasing that nutty chocolate aroma that signals it is ready. Use a spoon to stir in slow circles so the mixture becomes smooth and viscous rather than clumpy, and stop when you can see it form ribbons as it falls back into the bowl. This step matters because a runny drizzle coats the fillings evenly, giving you pretty lines and consistent flavor. A common mistake is overheating the mixture, which can make it overly thin or cause scorching; warm just until steaming, not boiling.
- Spread whipped cream over 1/4 of your crepe. Add strawberry slices over the whipped cream, stopping at least an inch from the center of the crepe.: You will feel the cool, pillowy texture of the whipped cream spread easily across the tender crepe , and the strawberries will add a clean, slightly firm bite. Leave that one inch gap so the ice cream has room and the crepe can fold without crowding. This layering is important because the whipped cream creates a barrier that helps prevent the ice cream from melting directly into the crepe , preserving structure. Avoid overfilling here, which can make rolling messy and cause the cone to burst.
- Drizzle 1/4 of the Nutella mixture over them.: As the shiny Nutella drips over the fruit and cream, listen for the quiet, viscous plop and watch as it creates glossy streaks. This drizzle introduces rich chocolate notes that tie the fruit and cream together. Apply within easy, rhythmic motions so the lines look intentional and not splattered. The technique matters because an even distribution keeps each bite balanced rather than overly sweet in one spot. One frequent error is using too much at once, which can dominate the delicate strawberry flavor.
- Add one scoop of ice cream over your strawberries, near the edge of your crepe.: The cold strawberry ice cream will feel dense and slightly resistant as you place it, and you may hear a soft sigh as it nestles into the cream. Positioning the scoop near the edge helps when you fold and roll, creating a cone shape that encloses the ice cream securely. This placement is key so the cone forms properly and the filling stays put while you roll. A common problem is putting the scoop too close to the center, which makes rolling awkward and can squeeze the ice cream out while you shape the cone.
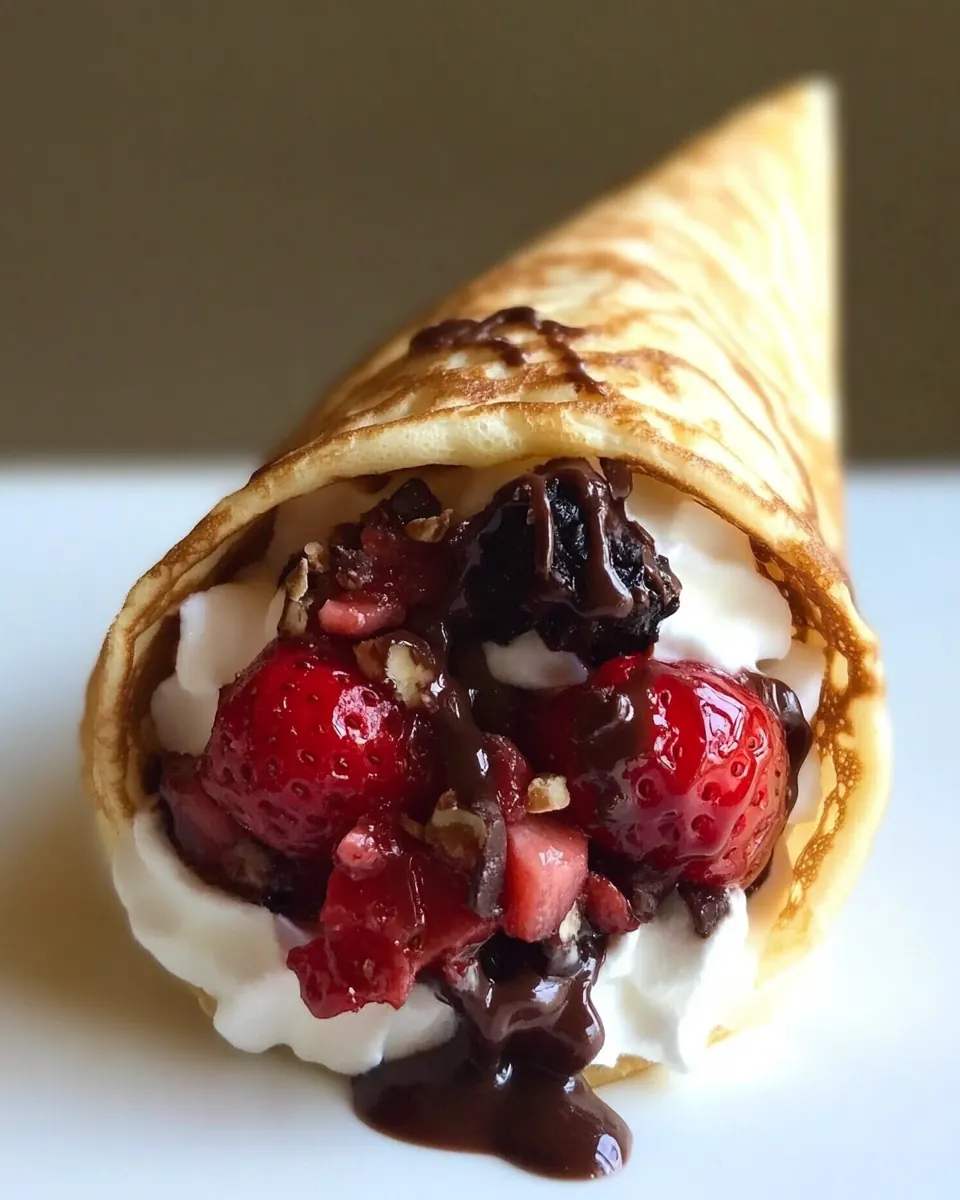
- Fold crepe in half, covering your ice cream and strawberries. Starting from the ice cream side, roll your crepe into a cone.: When you fold and begin rolling, the crepe will give a soft, pliant resistance and then slide around the filling into a tight cone. You should see the layers nestle together and the warmth from the Nutella slightly soften the exposed edge. Rolling tightly but gently ensures the cone holds its shape and the fillings stay enclosed. This technique matters because a loose roll will fall apart while a too tight roll can squeeze the ice cream out. Avoid rushing, which can tear the crepe or force fillings out.
- Drizzle another quarter of the Nutella mixture over the top.: The final drizzle adds visual appeal and a burst of extra flavor on the exterior, where you can see the glossy lines and smell the chocolate hazelnut. Work from the top down so the Nutella cascades in even ribbons and does not pool at the tip. This finishing touch elevates the presentation and ensures every bite has some of that rich, nutty character. A common oversight is applying this drizzle too late after assembly, which can allow the ice cream to melt more and reduce the contrast in temperatures.
- Repeat with the second crepe and eat!: As you build the second cone, notice how the aromas and textures repeat, offering consistency between portions. Eating right away maximizes the contrast of warm and cold and keeps the crepe tender rather than soggy. This finalization matters because timing is part of the enjoyment; delaying too long can let the ice cream soften excessively and the crepe lose its ideal texture. A common mistake is leaving the cones too long before serving, which diminishes the hot and cold interplay you want.
Tips for Success
These tips will help you get consistent results and beautiful presentation. Read them before you start and keep them in mind as you work through the steps.
- Warm the milk gently, this ensures the Nutella loosens without becoming too thin, so your drizzle looks glossy and holds its texture.
- Use room temperature crepes, cold crepes can crack when you fold them, while slightly warm ones bend more easily for rolling into cones.
- Slice strawberries thin, thin slices layer neatly and provide bursts of flavor without adding bulk that can make rolling difficult.
- Scoop the ice cream firmly, a compact scoop is easier to position and less likely to melt quickly during assembly.
- Work quickly when assembling, the contrast of warm drizzle and cold ice cream is at its best right after assembly, so serve immediately.
Serving This Strawberry Nutella Crepe Cones
These cones are best enjoyed fresh and can be styled for different occasions. Below are ideas for plating, pairings, and storage so you can make the most of this small indulgence.
- Serve immediately, place each crepe cone in a small dish or cone holder to catch drips and present them upright so the drizzle is visible.
- Perfect for a casual date, the recipe is shaped for two, making it an intimate dessert for occasions like Valentine’s Day or a cozy weekend treat.
- Pair with coffee, a small cup of espresso or strong coffee complements the sweetness and brings out the hazelnut notes of the Nutella.
- Seasonal variation, during summer use the ripest strawberries you can find for maximum brightness, which contrasts wonderfully with the chocolate hazelnut flavor.
- Storage advice, these are not ideal for long storage; assemble and serve within minutes. If you must prepare components ahead, keep the whipped cream chilled and the Nutella mixture at room temperature, then assemble at service time.
- Occasion ideas, they work well for casual brunches, romantic desserts, or small celebratory moments when you want something special without heavy preparation.
FAQ
Conclusion
Strawberry Nutella Crepe Cones combine warm, glossy Nutella with cold, creamy strawberry ice cream and fresh strawberries for a simple yet memorable dessert. The mix of textures, temperatures, and flavors makes each bite interesting, and the minimal equipment means you can make something impressive without a lot of fuss. Give these cones a try the next time you want a quick, romantic dessert or a small celebratory treat, and enjoy how easily they turn an ordinary moment into something special.

Strawberry Nutella Crepe Cones
Equipment
- Microwave-safe Bowl
- Spoon
Ingredients
- 1 tablespoon milk or cream Add gently to thin the batter or the filling, providing a touch of richness and helping achieve a smooth crepe texture when mixed with eggs and flour. Use milk for a lighter result or cream for extra silkiness, and adjust quantity slightly if batter seems too thick. Incorporate at room temperature to prevent lumps and to blend evenly into the mixture.
- 2 tablespoons Nutella Spread evenly to create a sweet, chocolate-hazelnut layer that adds depth and sticky adhesion between crepe and fillings. Warm slightly for easier spreading if it’s firm, and use just enough to avoid overpowering the strawberry flavors. Combine with a thin swipe on the crepe surface so it serves both as flavor and a barrier to sogginess from the fruit.
- 28 -inch crepes Use individually to form handheld cones that hold fillings and create crisp, delicate edges when warmed. Choose thin 28-inch crepes to make large, foldable cones ideal for wrapping around ice cream and toppings. Warm briefly before filling to make them pliable and prevent cracking while assembling the cone shape.
- 2 small scoops strawberry ice cream Scoop carefully to provide cold, creamy strawberry flavor that contrasts with warm crepes and Nutella, delivering a refreshing texture. Use two small scoops to keep the cone balanced and prevent melting overflow; place them centrally to maintain structural integrity. Serve immediately after scooping to preserve shape and temperature contrast.
- 1/4 cup thinly sliced strawberries Slice thinly to add fresh, bright strawberry pieces that enhance aroma, texture, and visual appeal without weighing down the cone. Scatter evenly over the ice cream or tuck into crepe folds so juices mingle subtly with Nutella. Choose ripe but firm berries to avoid excess moisture that could make the crepe soggy.
- 1/2 cup whipped cream Pipe or dollop to finish with light, airy sweetness that complements the denser Nutella and creamy ice cream. Use chilled whipped cream for stability and shape, adding a final decorative touch and a fluffy mouthfeel. Apply just before serving to keep it from melting into the other components.
Instructions
- In a small microwave-safe bowl, microwave milk for 20 to 30 seconds until steaming hot. Stir in Nutella and continue stirring until Nutella is thin enough to drizzle.: You will notice a warm, rising steam and a glossy sheen as the milk loosens the Nutella , releasing that nutty chocolate aroma that signals it is ready. Use a spoon to stir in slow circles so the mixture becomes smooth and viscous rather than clumpy, and stop when you can see it form ribbons as it falls back into the bowl. This step matters because a runny drizzle coats the fillings evenly, giving you pretty lines and consistent flavor. A common mistake is overheating the mixture, which can make it overly thin or cause scorching; warm just until steaming, not boiling.
- Spread whipped cream over 1/4 of your crepe. Add strawberry slices over the whipped cream, stopping at least an inch from the center of the crepe.: You will feel the cool, pillowy texture of the whipped cream spread easily across the tender crepe , and the strawberries will add a clean, slightly firm bite. Leave that one inch gap so the ice cream has room and the crepe can fold without crowding. This layering is important because the whipped cream creates a barrier that helps prevent the ice cream from melting directly into the crepe , preserving structure. Avoid overfilling here, which can make rolling messy and cause the cone to burst.
- Drizzle 1/4 of the Nutella mixture over them.: As the shiny Nutella drips over the fruit and cream, listen for the quiet, viscous plop and watch as it creates glossy streaks. This drizzle introduces rich chocolate notes that tie the fruit and cream together. Apply within easy, rhythmic motions so the lines look intentional and not splattered. The technique matters because an even distribution keeps each bite balanced rather than overly sweet in one spot. One frequent error is using too much at once, which can dominate the delicate strawberry flavor.
- Add one scoop of ice cream over your strawberries, near the edge of your crepe.: The cold strawberry ice cream will feel dense and slightly resistant as you place it, and you may hear a soft sigh as it nestles into the cream. Positioning the scoop near the edge helps when you fold and roll, creating a cone shape that encloses the ice cream securely. This placement is key so the cone forms properly and the filling stays put while you roll. A common problem is putting the scoop too close to the center, which makes rolling awkward and can squeeze the ice cream out while you shape the cone.
- Fold crepe in half, covering your ice cream and strawberries. Starting from the ice cream side, roll your crepe into a cone.: When you fold and begin rolling, the crepe will give a soft, pliant resistance and then slide around the filling into a tight cone. You should see the layers nestle together and the warmth from the Nutella slightly soften the exposed edge. Rolling tightly but gently ensures the cone holds its shape and the fillings stay enclosed. This technique matters because a loose roll will fall apart while a too tight roll can squeeze the ice cream out. Avoid rushing, which can tear the crepe or force fillings out.
- Drizzle another quarter of the Nutella mixture over the top.: The final drizzle adds visual appeal and a burst of extra flavor on the exterior, where you can see the glossy lines and smell the chocolate hazelnut. Work from the top down so the Nutella cascades in even ribbons and does not pool at the tip. This finishing touch elevates the presentation and ensures every bite has some of that rich, nutty character. A common oversight is applying this drizzle too late after assembly, which can allow the ice cream to melt more and reduce the contrast in temperatures.
- Repeat with the second crepe and eat!: As you build the second cone, notice how the aromas and textures repeat, offering consistency between portions. Eating right away maximizes the contrast of warm and cold and keeps the crepe tender rather than soggy. This finalization matters because timing is part of the enjoyment; delaying too long can let the ice cream soften excessively and the crepe lose its ideal texture. A common mistake is leaving the cones too long before serving, which diminishes the hot and cold interplay you want.
Notes
- Warm the milk gently, this ensures the Nutella loosens without becoming too thin, so your drizzle looks glossy and holds its texture.
- Use room temperature crepes, cold crepes can crack when you fold them, while slightly warm ones bend more easily for rolling into cones.
- Slice strawberries thin, thin slices layer neatly and provide bursts of flavor without adding bulk that can make rolling difficult.
- Scoop the ice cream firmly, a compact scoop is easier to position and less likely to melt quickly during assembly.
- Work quickly when assembling, the contrast of warm drizzle and cold ice cream is at its best right after assembly, so serve immediately.