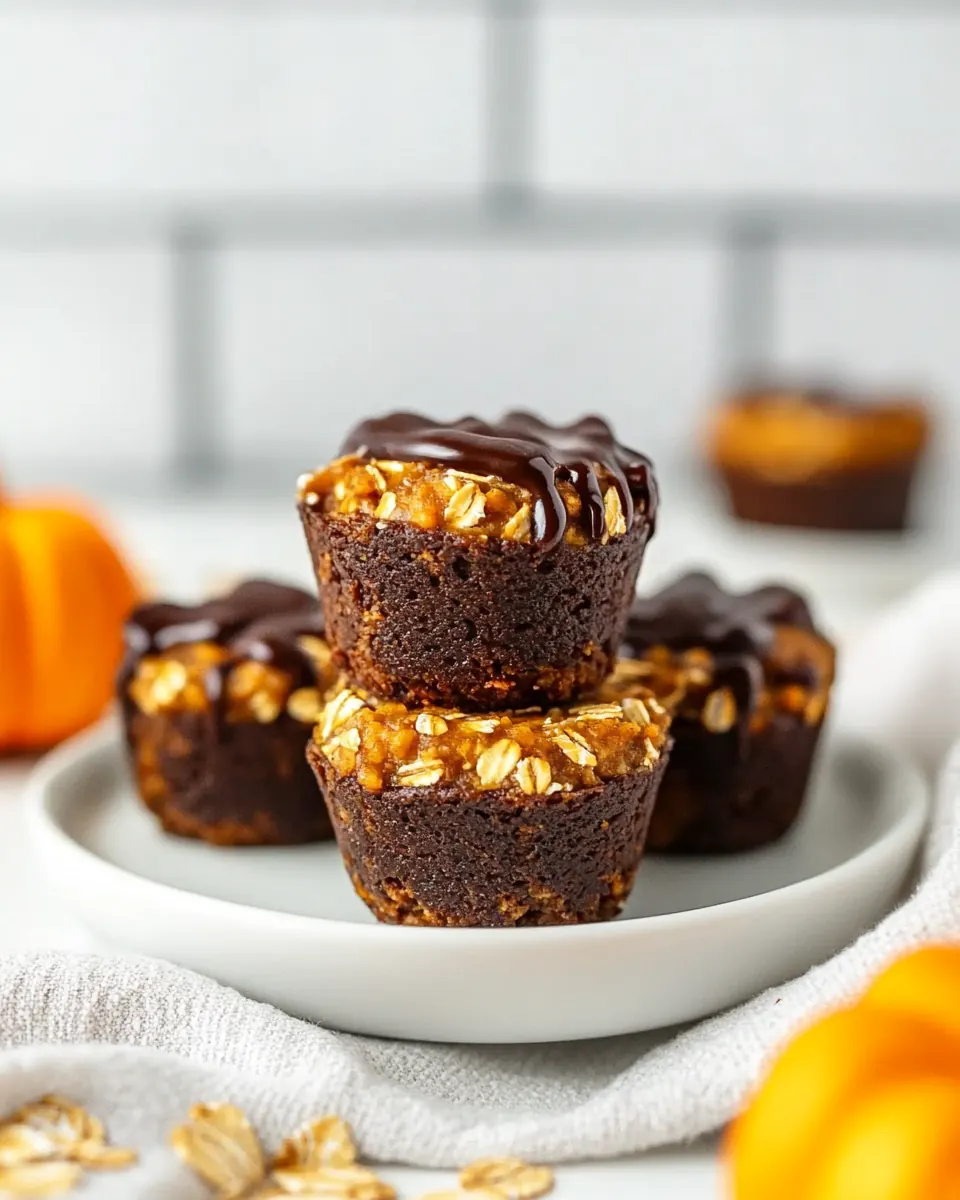
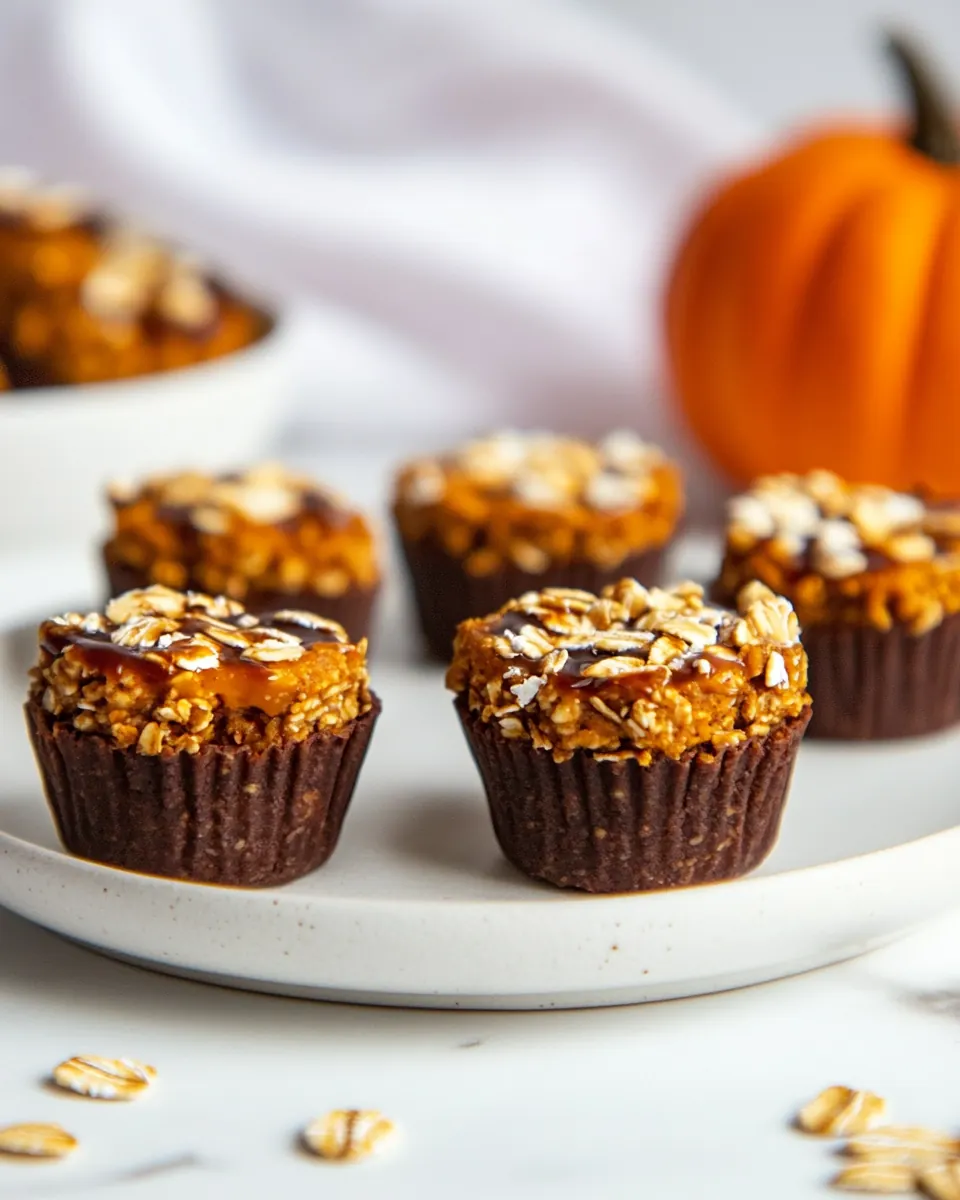
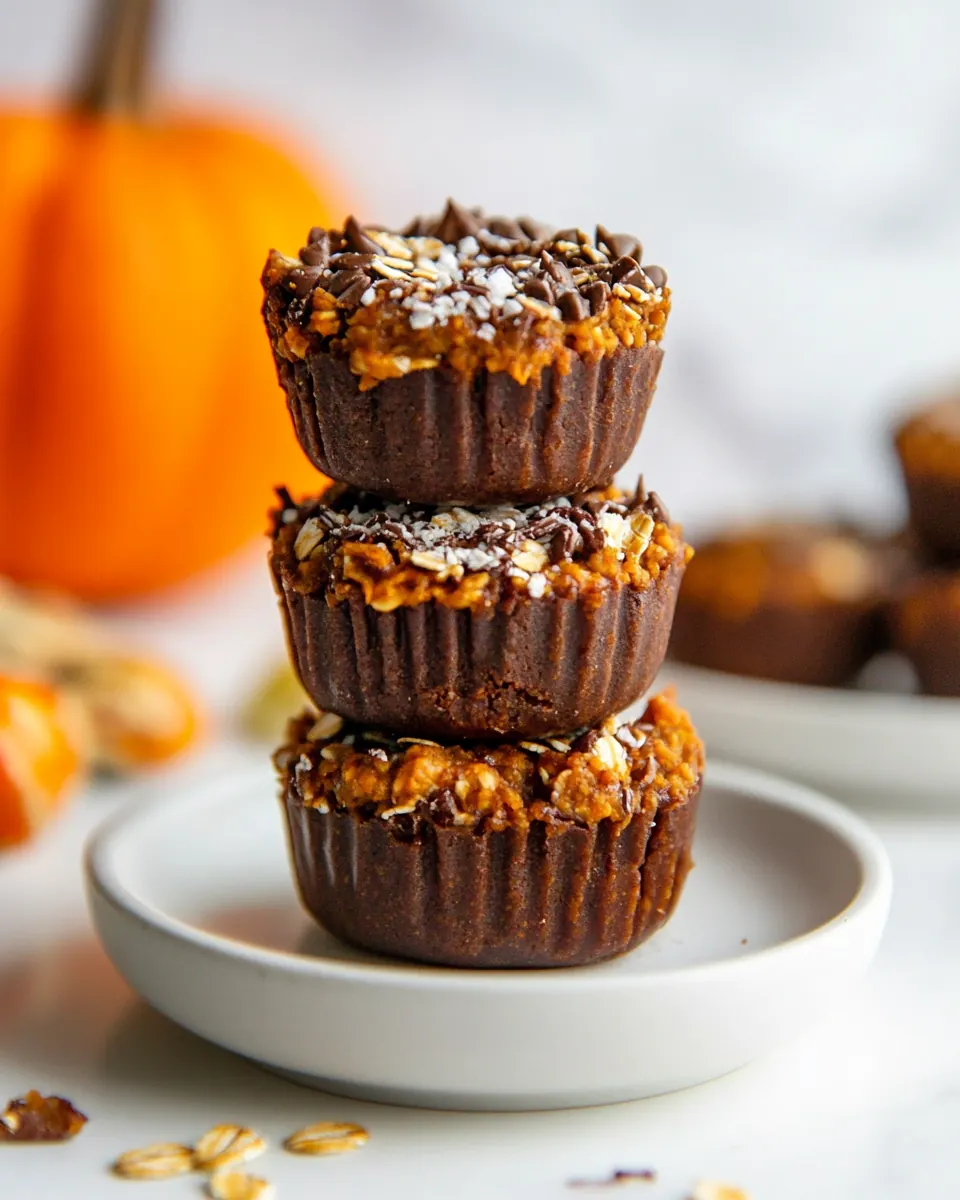
No Bake Pumpkin Oatmeal Cups
No Bake Pumpkin Oatmeal Cups have been my go to when fall cravings hit, and the first time I made them I remember how the kitchen filled with warm spice and the cozy scent of pumpkin that felt like a blanket on a chilly afternoon.
I was rushing to bring an easy, make ahead treat to a friend s potluck and wanted something that tasted homemade yet required almost no oven time. These little cups delivered comfort without fuss, and everyone kept asking if I d baked them. I love that they travel well, and they re something I can pull from the freezer whenever a last minute sweet craving appears.
Over the years I ve adapted the ratios to keep the texture chewy, and I often make a double batch to stash away. The mix of creamy pumpkin, nutty almond butter, and a touch of chocolate gives a balanced bite, and they re perfect for breakfast on the run, a snack, or a festive dessert at a holiday brunch. Making them became a ritual I look forward to when the leaves change, and I ve found little tweaks like warming the almond butter or pressing the cups firmly improve the final texture substantially.
Recipe Snapshot
11 mins
10 mins
1 mins
Medium
200 kcal
American
Gluten-Free, Vegan
Desserts
Muffin Tin
The Charm of This No Bake Pumpkin Oatmeal Cups
They re effortless to make
I genuinely appreciate recipes that let me get great flavor without complicated steps, and these No Bake Pumpkin Oatmeal Cups fit that bill. With a few bowls and a muffin tin, you can finish the work in well under 30 minutes of active time, so they re perfect for busy mornings or last minute hosts.
Nutrition that still feels indulgent
Because the recipe leans on pumpkin puree and rolled oats, it brings fiber and natural richness without relying on heavy baking. The use of almond butter provides healthy fats and keeps the cups satisfying, so they ll hold you until your next meal.
Make ahead friendly
I love recipes that reward planning, and these cups freeze beautifully. I often make a batch on a Sunday and keep portions ready for weekday breakfasts. They thaw quickly, and the chocolate top stays pleasantly firm when chilled.
Flavor that reads seasonal but stays versatile
The pumpkin pie spice provides that familiar fall profile, yet the base is neutral enough to swap the spice level or add mix ins if you re feeding picky eaters. They re cozy enough for Thanksgiving, but simple enough for a casual afternoon snack.
Kid and crowd approved
When I bring a tray to gatherings, the cups vanish fast. The combination of maple syrup and melted chocolate chips hits that perfect sweet spot without being overpowering, so both adults and kids love them.
Ingredients You’ll Need for No Bake Pumpkin Oatmeal Cups
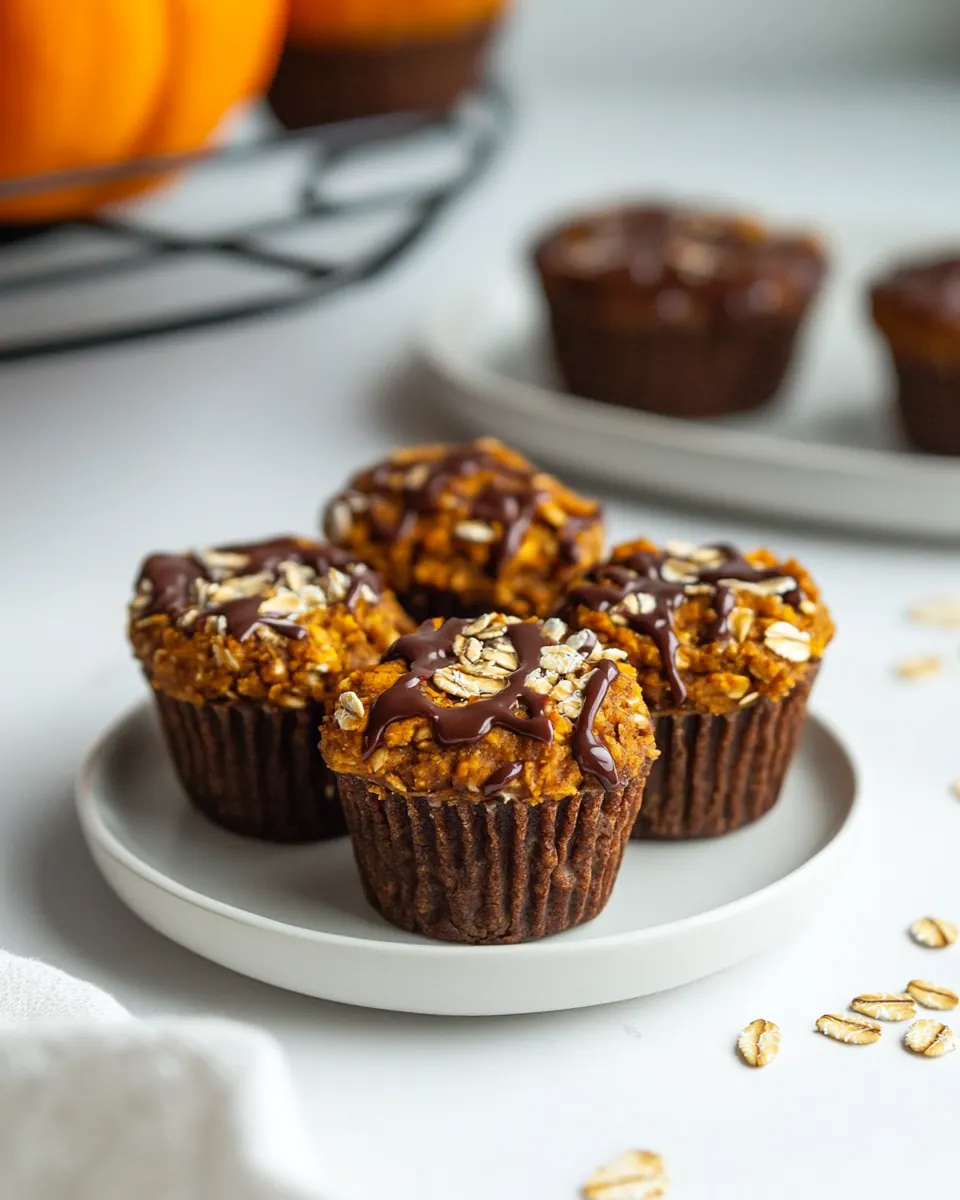
These ingredients are chosen to balance creaminess, spice, and structure. The pumpkin brings moisture and subtle sweetness, the almond butter binds and adds richness, and the oats provide chew and body. Chocolate and coconut milk create a glossy topping that contrasts the dense base. Together they form a make ahead, freezer friendly snack that still feels indulgent.
- 3/4 cup pumpkin puree: Adds creamy body and natural pumpkin flavor while providing moisture and a subtle sweetness; helps bind the oats and other ingredients together for easy no-bake shaping into cups. Contributes nutritional fiber and beta-carotene to enhance color and mouthfeel in each bite.
- 1 cup unsweetened almond butter: Provides rich, nutty creaminess and acts as the primary fat and binder to hold the oat mixture together without baking. Delivers plant-based protein and a smooth texture that helps the cups set and slice cleanly when chilled.
- 1/2 cup pure maple syrup: Sweetens and helps loosen the mixture so it mixes easily with the almond butter and pumpkin; contributes a clean, deep maple flavor that complements pumpkin spice. Also helps with texture by preventing the cups from becoming too dry when chilled.
- 1 tsp pure vanilla extract: Enhances the overall flavor with warm, floral vanilla aromatics that round out the sweetness and plant flavors; balances spice and chocolate notes. Adds a finishing layer of complexity so the pumpkin and maple taste more pronounced.
- 2 1/2 cups rolled oats or quick oats: Provides bulk, chew, and structure while absorbing moisture from the wet ingredients to create a firm, no-bake cup. Supplies whole-grain texture and nutrients that keep the cups substantial and satisfying.
- 2 tsp pumpkin pie spice: Infuses warm, autumnal spice and aromatic depth to the mixture while complementing the pumpkin flavor; balances the sweetness and adds complexity. Helps signal classic pumpkin-pie flavor profile so each bite tastes seasonal.
- 1/4 tsp sea salt: Balances sweetness and enhances all other flavors by providing a subtle contrast; also helps control overall seasoning so the cups are not cloying. A pinch heightens chocolate and spice notes while smoothing the palate.
- 1 1/4 cups chocolate chips: Melts into a luscious, chocolatey layer or pockets when gently warmed with coconut milk, creating luxurious texture and rich flavor contrast. Adds indulgent sweetness and helps form cohesive chocolate swirls or coatings in the cups.
- 1/2 cup full-fat canned coconut milk or half & half: Thins melted chocolate into a silky ganache-like consistency or adds creaminess to the filling while stabilizing texture; contributes richness and a slight coconut note if full-fat coconut milk is used. Helps the chocolate set smoothly when chilled and keeps the overall mouthfeel velvety.
- Flaky sea salt (optional): Provides a final crunchy, briny contrast that heightens chocolate and pumpkin flavors when sprinkled sparingly on top; optional for those who enjoy sweet-salty balance. Elevates presentation and adds a delicate finishing touch that complements richness.
No Bake Pumpkin Oatmeal Cups Instructions
We re keeping things straightforward and chatty here. Follow the steps to combine the wet and dry elements, press them into the tin, and finish with a melt and pour chocolate topping. The directions below expand on each line with sensory cues and troubleshooting notes so you can nail texture and flavor.
- Mix the pumpkin puree, almond butter, pure maple syrup, and vanilla extract (wet ingredients) together in a large bowl until everything is completely combined and creamy. Note: if your almond butter is cold or has been sitting in the refrigerator, microwave it for 20-second intervals until it is very easy to stir (about 40 seconds total). Taste the mixture for flavor and if you feel it needs to be sweeter, add 1 to 2 tablespoons of brown sugar or coconut sugar.: The bowl will begin to take on a uniform, glossy look as the pumpkin puree and almond butter emulsify with the maple syrup . You should sense a smooth, slightly viscous texture and smell warm vanilla and pumpkin spice notes if your almond butter carries toasted aromas. Stirring slowly at first prevents splatter, then increase speed to eliminate streaks. The why here is that even incorporation ensures every bite has consistent sweetness and binding. A common mistake is working with very cold almond butter which resists mixing, leaving clumps that prevent the cups from setting properly. If that happens, pause and microwave the bowl for 20 seconds, stir, then continue, being careful not to overheat. The mixture should be pourable yet tacky, not runny. If it seems too loose, add a tiny sprinkle of oats; if it s too stiff, warm briefly and stir in a teaspoon of coconut milk to loosen it. Keep your bowl scraped down so nothing sits unmixed on the sides, ensuring an even bake free result.
- Add the dry ingredients to the large mixing bowl (oats, pumpkin spice and sea salt) and stir well until a thick sticky mixture forms.: As you fold in the rolled oats , pumpkin pie spice , and sea salt , watch the texture change from glossy to dense and sticky. The oats will absorb moisture and swell, creating that desirable chew. You should hear the soft scrape of your spoon against the bowl and see the mixture pull away slightly from the sides when it s ready. This step matters because even distribution of the spice and salt ensures flavor balance in each cup. Over stirring can break down oat structure and lead to a gluey finish, so mix just until combined. If the combination appears dry and crumbly, add a teaspoon of maple syrup or a drop of coconut milk to reach the right tackiness. If it feels overly wet, a sprinkle of oats will correct it.
- Spray a muffin tin with cooking spray for ease of removing the cups later. You can use paper muffin liners instead if you prefer.: The tin should glint to show full coverage, or you can line it with muffin papers for an easier release. Proper greasing prevents the cups from tearing when you remove them and preserves their shape. I ve learned that even minimal sticking can ruin presentation, so take the extra moment to coat each well evenly. A common oversight is skipping this step, which leads to cups crumbling during extraction. If you re using paper liners, press them in firmly to avoid air pockets that can deform the base.
- Divide the pumpkin oatmeal mixture between the 12 holes of the muffin pan and use a fork or the back of a spoon to press the mixture into an even layer.: When pressing, you want to create a compact, uniform surface that will set firmly in the freezer. The motion should be deliberate, with rhythmic pressure to remove any air pockets and build density. You ll notice the surface gets smoother as you press, and the mixture will feel firm under the utensil. This technique matters because an evenly packed cup will release cleanly and hold together when eaten. A frequent error is leaving the cups loosely packed, which causes them to crumble or fall apart. If one hole seems less packed than the rest, press again to match the others so they all set at the same rate.
- Transfer the chocolate chips and coconut milk (or half and half) to a microwave-safe bowl. Microwave for 20-second intervals, stirring well between each interval, until the chocolate mixture has melted, about 60 seconds total.: As the chocolate warms, you ll see it soften then become glossy as you stir. The sound is minimal, but pay attention to the sheen; when smooth and free of lumps, it s ready. The coconut milk melds with the chocolate chips to form a silky ganache that will firm into a shiny top when chilled. This melting method prevents scorching, which can make chocolate seize and become grainy. If you overheat, the chocolate may separate or burn; stop heating as soon as it is mostly melted and finish by stirring until smooth.
- Spread the chocolate mixture on top of each pumpkin oatmeal cup and sprinkle with flaky sea salt if you’d like.: Use the back of a spoon to smooth the ganache over each cup, watching for a mirror like finish. The contrast between the matte oat base and glossy chocolate is visually appealing, and the flaky salt adds tiny bursts of savory crunch. Spreading evenly also helps the chocolate adhere and set uniformly. Avoid slathering too thickly, which can make the top brittle when frozen. If the chocolate begins to thicken before you finish, warm it for a few seconds and stir to restore a pourable consistency.
- Freeze for 2 hours or until the pumpkin cups have set up entirely and the chocolate has hardened. Use a paring knife or butter knife to pop the pumpkin oatmeal cups out of the muffin tin. Serve and enjoy!: You ll know they re ready when the chocolate is firm to the touch and the base feels solid. The freezer will give the cups a clean snap when removed, and the texture should be pleasantly chewy rather than icy. Freezing stabilizes the fats and helps the oats bind, making storage simple. One common mistake is not freezing long enough, which results in soft cups that sag when you try to remove them. Allow the full time, and if you re in a hurry, chill for 30 minutes then return to the freezer for the remaining time.
- Use a paring knife or butter knife to pop the pumpkin oatmeal cups out of the muffin tin. Serve and enjoy: Run the knife gently around the edge to loosen any stuck spots, then lift the cups out cleanly. You should hear a small pop as air releases and the cup comes free. Serving from the freezer keeps texture intact, but if you prefer a slightly softer bite, let them sit at room temperature for a few minutes first. Avoid prying aggressively, which can crack the chocolate or crumble the base; patience yields the best presentation. If one cup clings, chill a few more minutes and try again.
Recipe Notes about No Bake Pumpkin Oatmeal Cups
These notes expand on storage, small swaps, and ways to rescue texture or flavor issues. They re written to be practical and actionable, so you can get the best result whether you re making a single batch or scaling up.
- Storage in the freezer: Store the cups in a single layer on a baking sheet until solid, then transfer them to a zip lock bag or airtight container. Layer with parchment if stacking. Properly stored, they will keep for up to four months and thaw quickly when you need one.
- Refrigerator option: If you prefer a softer bite, keep the cups in the refrigerator for short term storage, but note they will soften and may not hold shape as well as when frozen. Consume within a few days.
- Warming chilled almond butter: If your almond butter separates or is too firm to stir, microwave in 15 to 20 second bursts, stirring between each, until it s smooth. Overheating can change texture, so warm gently.
- Adjusting sweetness: Taste the mixed batter before setting and add an extra tablespoon of maple syrup if you prefer it sweeter. Remember the chocolate adds sweetness too, so balance carefully.
- Substitutions for dairy: Use full fat canned coconut milk to make the chocolate topping dairy free. It creates a glossy ganache and stores well when chilled.
- Make ahead strategy: Make a double batch and freeze extras in labeled bags for quick breakfasts or snacks. They re portable and perfect for packed lunches.
Serving This No Bake Pumpkin Oatmeal Cups
These cups work well across occasions from breakfast and snacks to holiday dessert tables. Here are thoughtful serving suggestions, pairings, and storage practices to make the most of them.
- Breakfast on the go: Serve chilled with a steaming cup of coffee or tea for an energizing, transportable morning option. The cups are dense enough to stave off hunger yet indulgent enough to feel like a treat.
- Snack pack: Pack individual cups in a lunch box with a piece of fruit for a balanced snack. They re sturdy and freeze friendly, making them practical for busy afternoons.
- Holiday platter: Arrange a tray of the cups at a Thanksgiving brunch or fall gathering. Their seasonal spices fit well alongside savory quiches or fruit salads.
- Party dessert: Serve them as part of a dessert spread, with small labels for dietary notes. Because they re bite sized, guests can sample without committing to a large slice.
- Serving temperature: For the best texture, keep the cups chilled until serving. Allow a few minutes at room temperature if you prefer a softer bite, but avoid leaving them out too long so they maintain structure.
- Storage reminder: Store leftovers in a sealed container in the freezer for up to four months. Thaw in the refrigerator or at room temperature for several minutes before serving for the ideal chew.
- Seasonal pairings: Pair with warm drinks like spiced tea or hot apple cider during fall, or serve with yogurt for a lighter breakfast twist.
FAQ
Conclusion
These No Bake Pumpkin Oatmeal Cups shine because they combine seasonal pumpkin flavor with simple, pantry friendly ingredients and require no baking. They re easy to assemble, freeze well, and deliver satisfying texture thanks to the oats and almond butter. Give them a try for a fuss free breakfast, portable snack, or holiday treat, and you ll likely find yourself making them often when pumpkin season arrives.

No Bake Pumpkin Oatmeal Cups
Equipment
- Muffin Tin
Ingredients
- 3/4 cup pumpkin puree Adds creamy body and natural pumpkin flavor while providing moisture and a subtle sweetness; helps bind the oats and other ingredients together for easy no-bake shaping into cups. Contributes nutritional fiber and beta-carotene to enhance color and mouthfeel in each bite.
- 1 cup unsweetened almond butter Provides rich, nutty creaminess and acts as the primary fat and binder to hold the oat mixture together without baking. Delivers plant-based protein and a smooth texture that helps the cups set and slice cleanly when chilled.
- 1/2 cup pure maple syrup Sweetens and helps loosen the mixture so it mixes easily with the almond butter and pumpkin; contributes a clean, deep maple flavor that complements pumpkin spice. Also helps with texture by preventing the cups from becoming too dry when chilled.
- 1 tsp pure vanilla extract Enhances the overall flavor with warm, floral vanilla aromatics that round out the sweetness and plant flavors; balances spice and chocolate notes. Adds a finishing layer of complexity so the pumpkin and maple taste more pronounced.
- 2 1/2 cups rolled oats or quick oats Provides bulk, chew, and structure while absorbing moisture from the wet ingredients to create a firm, no-bake cup. Supplies whole-grain texture and nutrients that keep the cups substantial and satisfying.
- 2 tsp pumpkin pie spice Infuses warm, autumnal spice and aromatic depth to the mixture while complementing the pumpkin flavor; balances the sweetness and adds complexity. Helps signal classic pumpkin-pie flavor profile so each bite tastes seasonal.
- 1/4 tsp sea salt Balances sweetness and enhances all other flavors by providing a subtle contrast; also helps control overall seasoning so the cups are not cloying. A pinch heightens chocolate and spice notes while smoothing the palate.
- 1 1/4 cups chocolate chips Melts into a luscious, chocolatey layer or pockets when gently warmed with coconut milk, creating luxurious texture and rich flavor contrast. Adds indulgent sweetness and helps form cohesive chocolate swirls or coatings in the cups.
- 1/2 cup full-fat canned coconut milk or half & half Thins melted chocolate into a silky ganache-like consistency or adds creaminess to the filling while stabilizing texture; contributes richness and a slight coconut note if full-fat coconut milk is used. Helps the chocolate set smoothly when chilled and keeps the overall mouthfeel velvety.
- Flaky sea salt optional Provides a final crunchy, briny contrast that heightens chocolate and pumpkin flavors when sprinkled sparingly on top; optional for those who enjoy sweet-salty balance. Elevates presentation and adds a delicate finishing touch that complements richness.
Instructions
- Mix the pumpkin puree, almond butter, pure maple syrup, and vanilla extract (wet ingredients) together in a large bowl until everything is completely combined and creamy. Note: if your almond butter is cold or has been sitting in the refrigerator, microwave it for 20-second intervals until it is very easy to stir (about 40 seconds total). Taste the mixture for flavor and if you feel it needs to be sweeter, add 1 to 2 tablespoons of brown sugar or coconut sugar.: The bowl will begin to take on a uniform, glossy look as the pumpkin puree and almond butter emulsify with the maple syrup . You should sense a smooth, slightly viscous texture and smell warm vanilla and pumpkin spice notes if your almond butter carries toasted aromas. Stirring slowly at first prevents splatter, then increase speed to eliminate streaks. The why here is that even incorporation ensures every bite has consistent sweetness and binding. A common mistake is working with very cold almond butter which resists mixing, leaving clumps that prevent the cups from setting properly. If that happens, pause and microwave the bowl for 20 seconds, stir, then continue, being careful not to overheat. The mixture should be pourable yet tacky, not runny. If it seems too loose, add a tiny sprinkle of oats; if it s too stiff, warm briefly and stir in a teaspoon of coconut milk to loosen it. Keep your bowl scraped down so nothing sits unmixed on the sides, ensuring an even bake free result.
- Add the dry ingredients to the large mixing bowl (oats, pumpkin spice and sea salt) and stir well until a thick sticky mixture forms.: As you fold in the rolled oats , pumpkin pie spice , and sea salt , watch the texture change from glossy to dense and sticky. The oats will absorb moisture and swell, creating that desirable chew. You should hear the soft scrape of your spoon against the bowl and see the mixture pull away slightly from the sides when it s ready. This step matters because even distribution of the spice and salt ensures flavor balance in each cup. Over stirring can break down oat structure and lead to a gluey finish, so mix just until combined. If the combination appears dry and crumbly, add a teaspoon of maple syrup or a drop of coconut milk to reach the right tackiness. If it feels overly wet, a sprinkle of oats will correct it.
- Spray a muffin tin with cooking spray for ease of removing the cups later. You can use paper muffin liners instead if you prefer.: The tin should glint to show full coverage, or you can line it with muffin papers for an easier release. Proper greasing prevents the cups from tearing when you remove them and preserves their shape. I ve learned that even minimal sticking can ruin presentation, so take the extra moment to coat each well evenly. A common oversight is skipping this step, which leads to cups crumbling during extraction. If you re using paper liners, press them in firmly to avoid air pockets that can deform the base.
- Divide the pumpkin oatmeal mixture between the 12 holes of the muffin pan and use a fork or the back of a spoon to press the mixture into an even layer.: When pressing, you want to create a compact, uniform surface that will set firmly in the freezer. The motion should be deliberate, with rhythmic pressure to remove any air pockets and build density. You ll notice the surface gets smoother as you press, and the mixture will feel firm under the utensil. This technique matters because an evenly packed cup will release cleanly and hold together when eaten. A frequent error is leaving the cups loosely packed, which causes them to crumble or fall apart. If one hole seems less packed than the rest, press again to match the others so they all set at the same rate.
- Transfer the chocolate chips and coconut milk (or half and half) to a microwave-safe bowl. Microwave for 20-second intervals, stirring well between each interval, until the chocolate mixture has melted, about 60 seconds total.: As the chocolate warms, you ll see it soften then become glossy as you stir. The sound is minimal, but pay attention to the sheen; when smooth and free of lumps, it s ready. The coconut milk melds with the chocolate chips to form a silky ganache that will firm into a shiny top when chilled. This melting method prevents scorching, which can make chocolate seize and become grainy. If you overheat, the chocolate may separate or burn; stop heating as soon as it is mostly melted and finish by stirring until smooth.
- Spread the chocolate mixture on top of each pumpkin oatmeal cup and sprinkle with flaky sea salt if you’d like.: Use the back of a spoon to smooth the ganache over each cup, watching for a mirror like finish. The contrast between the matte oat base and glossy chocolate is visually appealing, and the flaky salt adds tiny bursts of savory crunch. Spreading evenly also helps the chocolate adhere and set uniformly. Avoid slathering too thickly, which can make the top brittle when frozen. If the chocolate begins to thicken before you finish, warm it for a few seconds and stir to restore a pourable consistency.
- Freeze for 2 hours or until the pumpkin cups have set up entirely and the chocolate has hardened. Use a paring knife or butter knife to pop the pumpkin oatmeal cups out of the muffin tin. Serve and enjoy!: You ll know they re ready when the chocolate is firm to the touch and the base feels solid. The freezer will give the cups a clean snap when removed, and the texture should be pleasantly chewy rather than icy. Freezing stabilizes the fats and helps the oats bind, making storage simple. One common mistake is not freezing long enough, which results in soft cups that sag when you try to remove them. Allow the full time, and if you re in a hurry, chill for 30 minutes then return to the freezer for the remaining time.
- Use a paring knife or butter knife to pop the pumpkin oatmeal cups out of the muffin tin. Serve and enjoy: Run the knife gently around the edge to loosen any stuck spots, then lift the cups out cleanly. You should hear a small pop as air releases and the cup comes free. Serving from the freezer keeps texture intact, but if you prefer a slightly softer bite, let them sit at room temperature for a few minutes first. Avoid prying aggressively, which can crack the chocolate or crumble the base; patience yields the best presentation. If one cup clings, chill a few more minutes and try again.
Notes
- Storage in the freezer: Store the cups in a single layer on a baking sheet until solid, then transfer them to a zip lock bag or airtight container. Layer with parchment if stacking. Properly stored, they will keep for up to four months and thaw quickly when you need one.
- Refrigerator option: If you prefer a softer bite, keep the cups in the refrigerator for short term storage, but note they will soften and may not hold shape as well as when frozen. Consume within a few days.
- Warming chilled almond butter: If your almond butter separates or is too firm to stir, microwave in 15 to 20 second bursts, stirring between each, until it s smooth. Overheating can change texture, so warm gently.
- Adjusting sweetness: Taste the mixed batter before setting and add an extra tablespoon of maple syrup if you prefer it sweeter. Remember the chocolate adds sweetness too, so balance carefully.
- Substitutions for dairy: Use full fat canned coconut milk to make the chocolate topping dairy free. It creates a glossy ganache and stores well when chilled.
- Make ahead strategy: Make a double batch and freeze extras in labeled bags for quick breakfasts or snacks. They re portable and perfect for packed lunches.