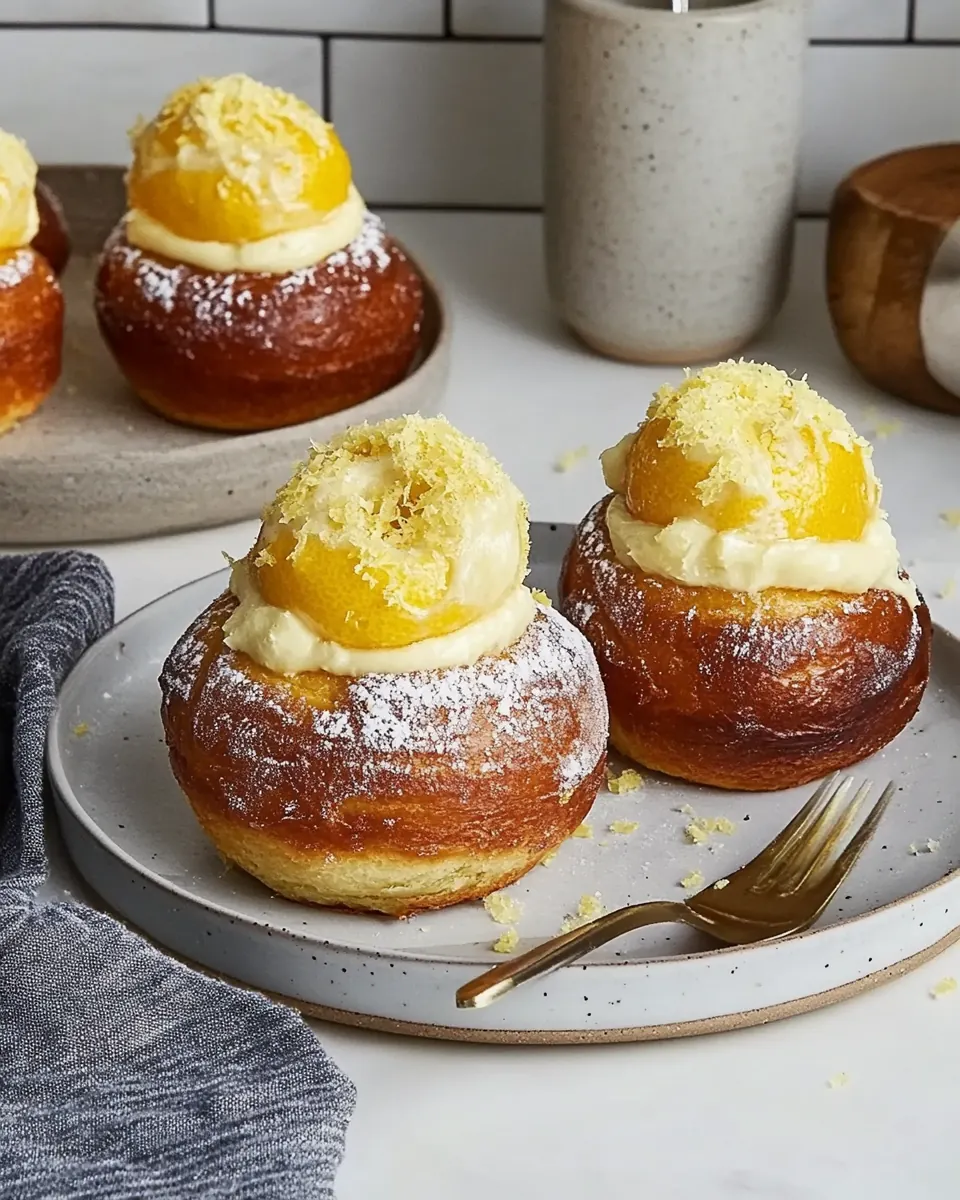
Edd Kimber’s Stuffed Lemon Brioche Buns
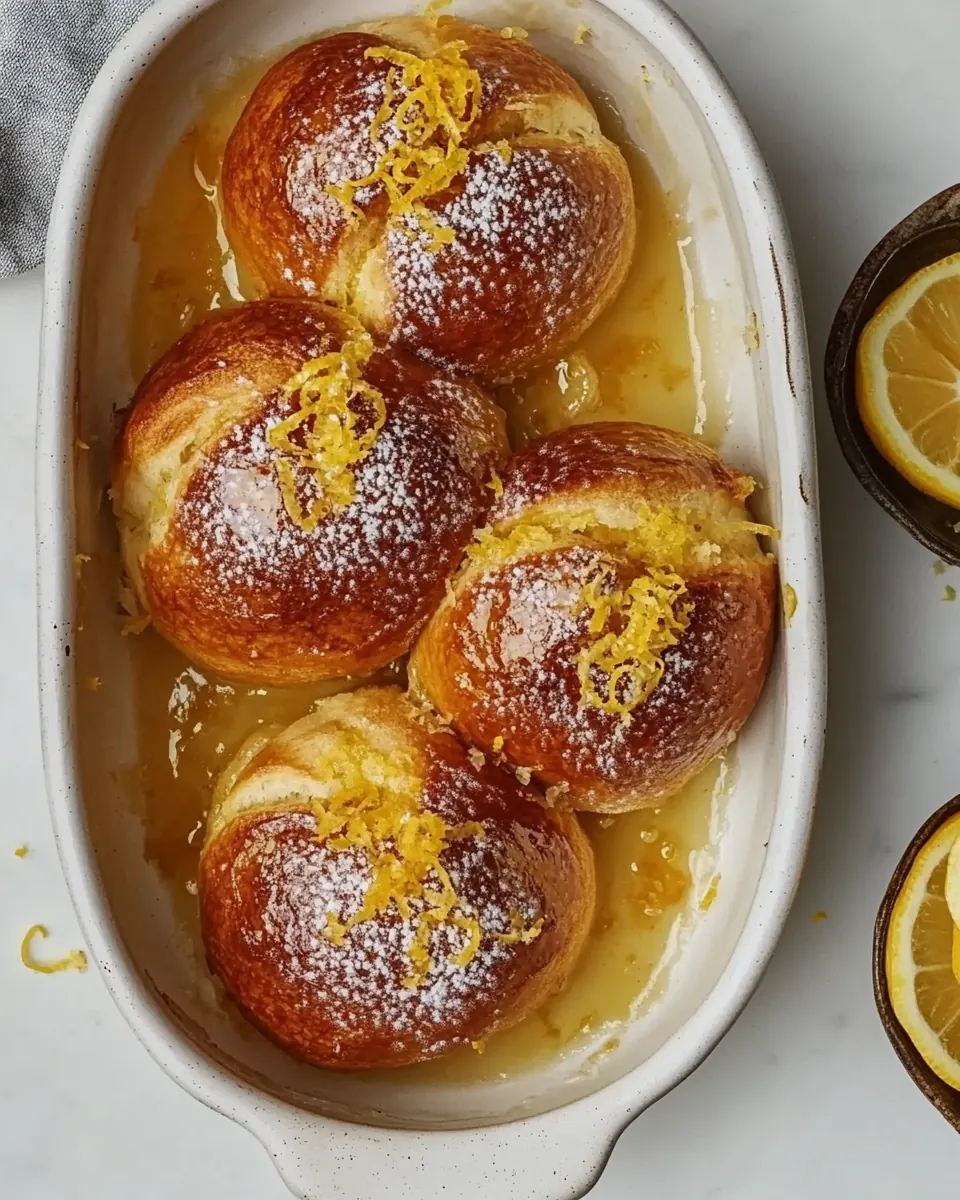
Edd Kimber’s Stuffed Lemon Brioche Buns came into my kitchen on a blustery spring morning when I wanted something bright and comforting all at once. I remember the first bite, a pillowy crumb giving way to a tart lemon curd center and a silky icing on top, and how the contrast surprised me in the best way. That morning I was nursing a slow cup of tea and thinking about how small pleasures make a day better, so I set out to perfect these buns until the texture and flavor felt just right.
There is something very tactile about shaping dough into rounds and watching them puff up in a cozy oven. I like to pause between steps, feeling the dough cool under my hands, smelling the gentle rise of butter and milk. Making Edd Kimber’s Stuffed Lemon Brioche Buns is restorative for me, partly because it asks for patience and partly because the payoff is immediate when you pipe in the lemon curd and see the glossy icing catch the light. It’s the kind of recipe that invites conversation, whether you are sharing them at brunch or saving one for a late afternoon treat.
Over the years I’ve tweaked timings and techniques to keep the crumb soft without being overly sweet. I’ll never forget a batch where I rushed the second rise and ended up with dense centers, which taught me to respect each proof. When you follow the rhythm of mixing, kneading, resting, and baking, the results feel almost effortless. These buns are approachable enough for an afternoon baking session, and elegant enough to bring to a friend’s gathering.
Recipe Snapshot
57 mins
45 mins
12 mins
Medium
250 kcal
American
Gluten-Free, Low FODMAP
Desserts
Stand mixer, Dough hook, Baking pan, Parchment paper, Piping bag
Why This Edd Kimber’s Stuffed Lemon Brioche Buns Hits Different
1. Buttery, Tender Texture
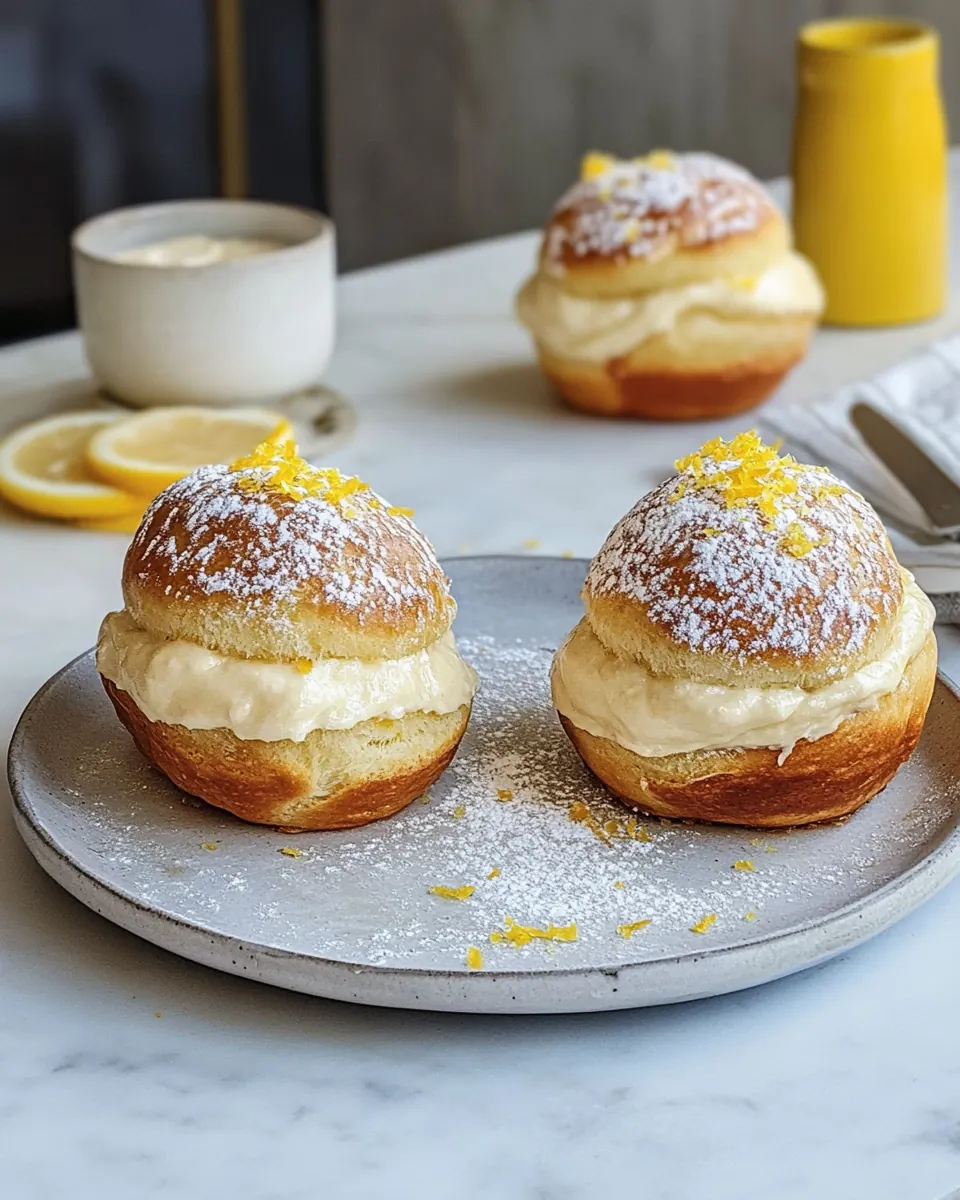
I love how Edd Kimber’s Stuffed Lemon Brioche Buns deliver a rich, soft crumb thanks to the combination of white bread flour, whole milk, egg, and unsalted butter. The enriched dough yields a plush interior that feels luxurious without being heavy. That cushiony texture cradles the lemon curd beautifully, making each bite balanced and memorable.
2. Bright, Balanced Lemon Flavor
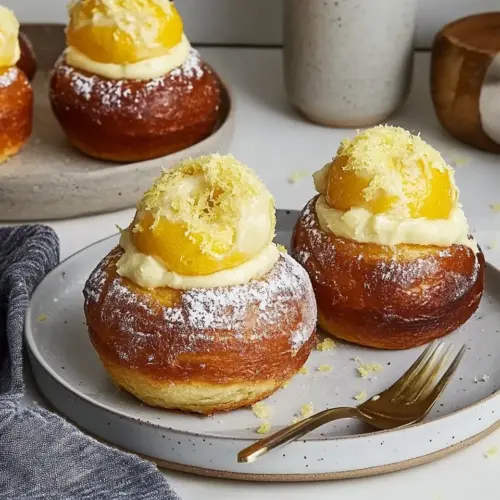
The lemon curd filling and the lemon icing, plus a sprinkle of zest, create layers of citrus interest. I’m always chasing that clean, tangy note that cuts through the buttery dough, and these buns do it right. The acidity keeps the pastry from tasting cloying, so you get a lingering freshness after each mouthful.
3. Manageable Technique for Home Bakers
Even though enriched dough can seem intimidating, this recipe is designed for home baking. The steps are clear, and with a stand mixer or some elbow grease, you’ll reach a smooth, elastic dough. I appreciate recipes that teach technique while remaining forgiving, and this one lets you learn without pressure.
4. Versatile for Occasions
These buns work for casual breakfasts, special brunches, or as a sweet treat to bring along when visiting friends. I value recipes that travel well and keep their charm on the go. The lemon profile feels seasonal in spring, but the comforting brioche crumb makes them welcome any time you want a little sunshine in pastry form.
5. Visual and Textural Contrast
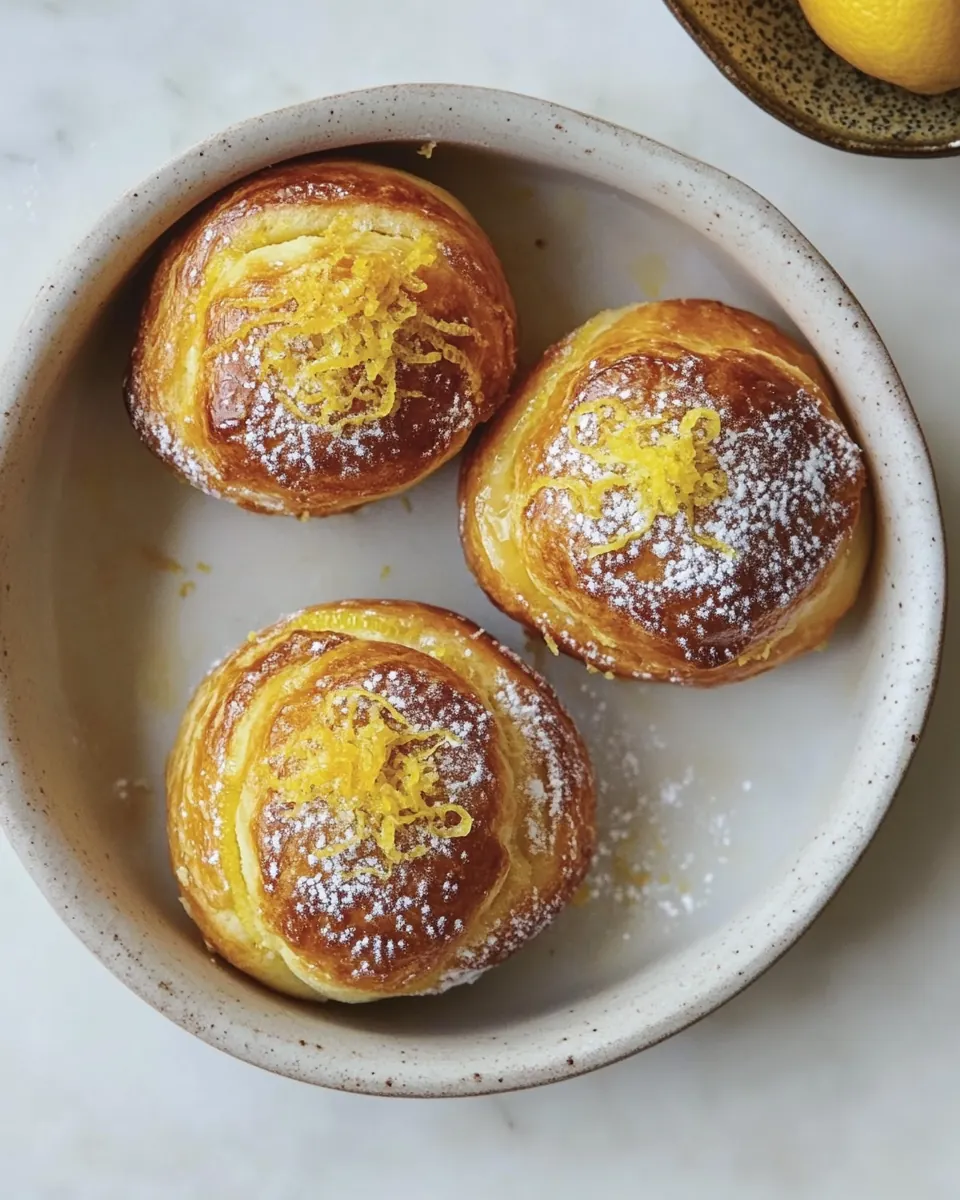
There is something satisfying about a glossy, pale icing topping a golden bun with a hint of zest. That visual contrast draws people in, and the textural interplay between soft bread, smooth curd, and silky icing makes every bite interesting. I always end up making an extra batch because they disappear so quickly.
Edd Kimber’s Stuffed Lemon Brioche Buns Shopping List
When I shop for Edd Kimber’s Stuffed Lemon Brioche Buns, I focus on quality and balance. The philosophy is simple: a few strong players create depth, and each ingredient plays a distinct role. The flour and yeast build the structure, the dairy and butter add tenderness and flavor, while the lemon elements bring brightness. Together they form a classic enriched-yeast profile that supports a vivid citrus filling.
- 2 cups (254 grams) white bread flour: Provide strong gluten structure and elasticity to create a tender yet chewy brioche crumb; measure accurately by weight for consistent dough hydration and kneading time. Combine with other dry ingredients before adding liquids to ensure even distribution of yeast and salt. Contribute mild flavor and light color to the rolls while supporting rise during proofing.
- 1 teaspoon (3 grams) kosher salt: Regulate yeast activity and strengthen dough flavor balance by controlling fermentation rate; dissolve or mix into dry ingredients to avoid direct contact with yeast. Enhance overall flavor complexity without overwhelming the sweet elements, and help promote proper gluten development during kneading.
- 21/4 teaspoons (7 grams) instant yeast: Leaven the dough quickly and reliably to create light, airy buns with even crumb; sprinkle into flour and proof at an appropriate temperature for predictable rise. Choose instant yeast for its fast activation and tolerance to direct blending with flour and other dry components.
- 1 tablespoon (12 grams) granulated sugar: Add fermentable sugar that feeds the yeast and contributes subtle sweetness to the brioche; dissolve into warm milk to distribute evenly and encourage yeast activity. Also promotes browning during baking, giving the buns a glossy, caramelized crust when combined with egg wash.
- 1/2 cup (120ml) whole milk, room temperature: Provide liquid and fat to enrich the dough, aiding tenderness and mouthfeel while helping dissolve sugar and activate yeast; keep at room temperature to mix smoothly with butter and eggs. Contribute a slight natural sweetness and help create steam during baking for light crumb structure.
- 1 large egg (50 grams), room temperature, plus one for egg wash: Enrich the dough with fat, color, and emulsification for a rich brioche texture; bring to room temperature to ensure smooth incorporation and even mixing. Reserve one egg for an egg wash to produce a glossy, golden finish on the baked buns.
- 3 tablespoons (42 grams) unsalted butter, room temperature: Supply additional fat that tenderizes the crumb and adds richness and flavor; soften to room temperature to blend seamlessly into the dough for an even, silky texture. Improve dough handling and create a finer, more brioche-like crumb through proper emulsification.
- 6 tablespoons (120 grams) lemon curd: Provide a concentrated citrus-sweet filling that delivers bright lemon flavor and a glossy, spreadable texture for stuffing the buns; use measured portions to ensure consistent filling distribution. Balance tartness and sweetness against the rich brioche, creating a vibrant contrast in each bite.
- 11/2 cups (180 grams) confectioners’ sugar: Create a smooth, sweet glaze or frosting base with fine texture that dissolves easily for piping or spooning; sift if necessary to remove lumps and achieve a silky finish. Combine with butter and lemon components to make a glossy, sweet topping that complements the citrus filling.
- 2 tablespoons (28 grams) unsalted butter, very soft: Contribute creamy richness and structure to the glaze while helping to emulsify the confectioners’ sugar for a smooth, spreadable consistency; use very soft butter to prevent lumps. Add depth of flavor and a luxurious mouthfeel to the icing that pairs well with the lemon curd.
- Pinch kosher salt: Enhance flavor by balancing sweetness and brightening the lemon elements while minimizing bitterness; add a tiny pinch to the glaze to amplify overall taste complexity. Help round out the confectioners’ sugar and lemon components for a well-balanced finishing glaze.
- 2 tablespoons (30ml) lemon juice: Introduce fresh acidity that cuts through the richness of the brioche and butter in the glaze, brightening flavors and loosening texture for easier spreading. Combine with confectioners’ sugar and butter to create a tangy, smooth icing that complements the lemon curd filling.
- Zest of 1/2 lemon: Impart concentrated citrus aroma and essential oils that elevate the lemon flavor profile in both the filling and glaze; finely grate and mix into the glaze for maximum fragrance. Provide subtle bitterness and freshness that enhances complexity without adding liquid.
Edd Kimber’s Stuffed Lemon Brioche Buns Instructions
These directions will take you through mixing, kneading, proofing, shaping, baking, and filling the buns. I recommend reading them once straight through to get the rhythm, then tackling each step without rushing. Keep your workspace tidy and have the lemon curd and icing components ready before you bake.
- For small-batch brioche: Add the flour, salt, yeast, and sugar to the bowl of a stand mixer fitted with the dough hook, and mix together briefly to combine. Add the milk and 1 egg, and mix to form a shaggy dough.: Add the flour, salt, yeast, and sugar to the bowl of a stand mixer fitted with the dough hook, and mix together briefly to combine : The moment you combine the dry ingredients, you should notice a faint floury scent that will soon be replaced by a richer, yeasted aroma as liquids are introduced; this initial mixing ensures even distribution of the instant yeast and granulated sugar so the dough ferments uniformly. Use a whisk or paddle briefly to break up any clumps, and scrape the bowl sides so everything integrates, which prevents pockets of salt or yeast from concentrating in one spot. A common mistake here is adding wet ingredients to an unmeasured bowl, which can cause inconsistent hydration; always level your measures and keep the mixer speed low during this stage to avoid creating a dusty cloud of flour.
- On medium-low speed, knead the dough until smooth and elastic, about 10 minutes. With the mixer still running, add the butter 1 tablespoon at a time. Continue kneading until the dough is once again smooth and silky, up to 10 minutes more.: As the whole milk and egg come together with the dry mix, the dough will transition from lumps to a rough, slightly sticky mass, and you should see a patchy, shaggy texture that signals the start of gluten development. At this point the scent shifts toward a faint dairy sweetness and you can tell the dough is hydrated when it clings to the hook and pulls away from the bowl in loose ribbons. If the dough feels too dry, add a teaspoon of warm milk at a time; if it is overly wet, a dusting of flour helps, but avoid overcorrecting which can tighten the crumb. One pitfall is mixing at too high a speed, which can overwork surface gluten and make it difficult for butter to be incorporated later.
- Turn the dough out onto the work surface, and form into a smooth round. Place the ball of dough into a lightly greased bowl, and cover and let rise in a warm, draft-free place (75°F/24°C) until doubled in size, 45 minutes to 1 hour.: During this kneading phase you will witness the dough smooth out, becoming glossy and elastic, and you can test readiness with the windowpane test or by stretching a small piece to see if it holds without tearing. The sound changes too, from thumps to a softer slap as the dough becomes more cohesive, and the texture should feel slightly tacky but resilient. Kneading develops the structure that traps gas from fermentation, which is why it matters for light crumb; inadequate kneading results in a dense interior, while over-kneading can make the dough tough. A common mistake is rushing this step, so keep an eye on texture rather than strictly timing it.
- Line a large baking pan with a piece of parchment paper.: As you add each small amount of unsalted butter , watch the dough absorb it and go from shaggy to silky; it may look like it will never come together, but patience pays off as the fat incorporates gradually into the gluten network and the dough regains smoothness. The aroma will become rich and buttery, and the dough should feel softer and more supple as it does so. If you add all the butter too quickly, it can separate and leave greasy pockets, so keep additions slow. A typical error is using butter that is too cold, which resists emulsification and delays incorporation; room temperature butter solves this.
- Lightly punch down the dough. Divide into 6 evenly sized pieces of dough, and roll each into a smooth round. Press each ball of dough into a 3-inch/7.5 cm disc, and place on the baking pan. Cover and let rise in a warm, draft-free place (75°F/24°C) until doubled in size, about 45 minutes to 1 hour.: As you continue to work the dough, it should return to a satiny texture that stretches and springs back, an indication that the fat has been fully integrated. The tactile feedback here is crucial; your hands or the mixer will sense when the dough feels elastic and cohesive. This stage deepens flavor as fermentation continues slowly under the warmth generated by kneading, and it prevents a dense final crumb. Avoid skipping this extended knead, since underworked enriched dough often collapses during proofing.
- Preheat the oven to 390°F (200°C).: When you shape the dough into a tight round, you are creating surface tension that helps it rise upward rather than spreading, and you will notice a quieter, doughy scent that signals readiness to rest. Use a bench scraper to lift and fold, creating a taut skin which yields even proofing. A typical mistake is leaving the dough too slack, which can lead to flat rolls; take a few extra turns to build tension for a nicely domed bun.
- Brush each bun with beaten egg. Bake the buns for 10 to 12 minutes or until they are golden brown. Remove and set aside until fully cooled.: During this first proof the dough will visibly expand and develop a yeasty, slightly sweet aroma; the surface should feel pillowy when you gently press a fingertip and see a slow, partial rebound. This bulk fermentation builds flavor and increases gas retention for good structure. Keep the dough covered to prevent a dry skin and avoid placing it near cold drafts, which can slow fermentation and lengthen the rise. A common error is overproofing, where the dough becomes too airy and then collapses in the oven, so monitor rather than strictly timing if your kitchen temperature varies.
- Using a chopstick, poke a hole in the top of the buns, wiggling around slightly to make a little room for the filling. Scrape the lemon curd into a piping bag fitted with a small round piping tip, and pipe about 1 tablespoon (20 grams) curd into each bun.: Lining the pan ensures easy transfer and prevents sticking, and the paper will also help reflect heat for even browning. Take a moment to position your rounds with adequate spacing so they can expand without merging into one another excessively. If the parchment is wrinkled, smooth it to avoid indenting the buns. A frequent oversight is crowding the pan, which results in uneven bakes and fused edges.
- For lemon icing: Add all the ingredients except the lemon zest to a bowl, and beat together until smooth. Spoon a little icing onto each bun, and spread on the top of the buns, finishing with a light sprinkling of lemon zest. Best served the day they’re baked.: Deflating gently evens out the crumb and redistributes the yeast and gas for a second rise, giving the buns a more uniform interior. You will feel the dough relax under your hands, and the aroma becomes more nuanced as carbon dioxide is released and fermentation resets. Overpunching to the point of degassing entirely will reduce lift in the final bake, so be gentle and purposeful.
- Divide into 6 evenly sized pieces of dough, and roll each into a smooth round: When you portion and roll, the tactile process of smoothing each piece creates those seam-free tops that brown beautifully. The dough should feel springy, and you can judge evenness by weighing or visually matching sizes, which ensures consistent bake times across the batch. Uneven portions lead to some buns finishing much earlier than others, so take the extra minute to match sizes carefully.
- Press each ball of dough into a 3-inch/7.5 cm disc, and place on the baking pan: Flattening into discs gives you a nice base for piping the curd later, and you should see the dough relax and spread slightly on the pan; the edges should remain smooth. The discs will puff during the second rise and in the oven, so start with a modest thickness. If the discs are too thin, the buns may not hold enough filling and can bake dry; too thick and they might not bake through in the center.
- Cover and let rise in a warm, draft-free place 75°F/24°C until doubled in size, about 45 minutes to 1 hour: The second rise builds size and a tender crumb; expect a soft, pillowy expansion and a gentle yeasty scent. Test for readiness by giving a light poke; it should partially spring back, indicating appropriate proof. Underproofing will yield dense interiors, while overproofing can cause collapse in the oven, so keep an eye on texture rather than strict timing if conditions vary.
- Preheat the oven to 390°F (200°C): Preheating ensures the oven is hot enough to give the buns an immediate oven spring and encourage browning; you will notice the kitchen warming and a dry heat that crisps the exterior. Use an oven thermometer if you suspect your oven runs hot or cold, as inaccurate temperatures can cause uneven rise or overbrowning. A common mistake is placing the buns into an oven that has not reached temperature, which reduces oven spring and yields denser results.
- Brush each bun with beaten egg: The egg wash imparts color and shine, creating that appealing golden top that contrasts with the pale icing. Brush gently and evenly to avoid pooling in seams, and if you want extra gloss, use only the white or whole egg depending on preference. Be cautious not to overapply, as excess wash can drip and create darker spots on the bake.
- Bake the buns for 10 to 12 minutes or until they are golden brown: As the buns bake, listen for a faint crackling and watch the color shift to a warm golden hue; the aroma will be a rich, buttery bread scent with a hint of caramelization. Rotate the pan halfway if your oven has hot spots to ensure even coloring. Overbaking dries the crumb, so aim for the lower end of the time if your oven runs hot, and remove them once they are richly colored and sound hollow when tapped on the bottom.
- Remove and set aside until fully cooled: Cooling is critical so the crumb sets and steam disperses, which prevents the filling or icing from becoming watery. Place the buns on a rack to allow air circulation underneath; if you fill them while too warm, the curd can melt and leak. Resist the temptation to rush this step, since warm buns are fragile and prone to collapse when filled.
- Using a chopstick, poke a hole in the top of the buns, wiggling around slightly to make a little room for the filling: The tactile act of creating a cavity is satisfying and precise; you will feel resistance when you reach the center and a small pocket form for the lemon curd . Move the chopstick in a twisting motion to widen the hole without tearing the crumb. Avoid inserting the tool too deeply or you may pierce the base, which can cause curd to leak out during serving.
- Scrape the lemon curd into a piping bag fitted with a small round piping tip, and pipe about 1 tablespoon (20 grams) curd into each bun: When you pipe the lemon curd , watch the bun gently swell and listen for a soft settling sound as the curd finds its space; the bright citrus smell should be immediate and uplifting. Pipe slowly so the curd seats neatly in the cavity without overflowing. A common error is overfilling, which leads to messy tops and leaking during storage, so measure by eye or use a small scoop to keep portions consistent.
- For lemon icing: Add all the ingredients except the lemon zest to a bowl, and beat together until smooth : The icing will come together into a glossy, creamy texture when the confectioners’ sugar , soft unsalted butter , lemon juice , and pinch of salt are combined, and you should taste for balance so it is bright but not overly sweet. Beat until no sugar granules remain, and adjust thickness with tiny amounts of lemon juice if it seems too stiff; a silky spreadable consistency is ideal. Overbeating can incorporate air and make the icing thin, so stop when smooth.
- Spoon a little icing onto each bun, and spread on the top of the buns, finishing with a light sprinkling of lemon zest: The final assembly is where the buns become irresistible; the cool, slightly tangy icing contrasts with the warm crumb and lemon curd. Use a small offset spatula or the back of a spoon to create a neat, thin layer, and finish with the bright sheen of lemon zest for aroma. If the buns are still warm, the icing may soften and slide, so ensure they are fully cooled to maintain a tidy appearance. These are best served the day they’re baked to preserve texture and flavor.
Making Adjustments
If you want to tweak Edd Kimber’s Stuffed Lemon Brioche Buns for personal preference, there are simple, reliable adjustments you can make without changing the soul of the recipe. Below I expand practical notes and variants that keep the process approachable while improving outcomes.
- Adjust proofing for room temperature: If your kitchen is cooler than 75°F/24°C, allow extra rising time. Cooler environments slow yeast activity, so plan for 10 to 20 more minutes per rise and watch for visual cues rather than relying solely on the clock.
- Measure flour by weight: For consistent texture, weigh the white bread flour. Volume measures vary by how the flour is scooped, while grams give reliable results and a predictable crumb every bake.
- Soft butter for dough vs icing: Use room temperature butter in the dough for smooth incorporation, and very soft butter in the icing for a creamy finish. If the baking butter is too warm, it can make the dough greasy and affect rise.
- Keep curd piping friendly: If your lemon curd is too thick, warm it slightly to make it pliable, or if too thin, chill for 15 minutes. Piping control ensures neat fills and prevents leaking during storage or transport.
- Use an oven thermometer: Oven temperatures vary widely. An inexpensive thermometer helps you hit 390°F/200°C accurately for perfect oven spring and golden color without overbaking.
- Work with room temperature eggs: Cold eggs tighten the dough and slow mixing. Bring eggs to room temperature to help emulsify fats and liquids for a smooth, cohesive dough.
What to Pair With Edd Kimber’s Stuffed Lemon Brioche Buns
These buns are versatile enough to fit several serving scenarios, from relaxed brunch to a festive coffee break. I like to serve them with simple accompaniments that complement their buttery, citrus profile. Below are ideas for occasions, sides, and storage that help you get the most out of the recipe.
- Brunch Spread: Pair with a selection of jams, softened butter, and a bowl of fresh fruit to contrast the rich buns with bright, juicy notes. These buns add an elegant pastry to a relaxed morning meal.
- Afternoon Tea: Serve alongside light sandwiches and herbal teas for a refined teatime. The lemon profile pairs particularly well with green or floral teas, offering a cleansing finish between bites.
- Casual Coffee Break: A strong brewed coffee or espresso balances the sweet glaze and citrus curd, creating a satisfying pick me up. The bun’s tender crumb holds up well alongside a steaming cup.
- Special Occasion: Bring these to a spring brunch or small gathering; their visual appeal and bright flavor make them suitable for celebrations. Arrange them on a platter with a dusting of extra zest for a festive touch.
- Storage Tip: Keep leftover buns in an airtight container at room temperature for up to 24 hours to preserve texture, or freeze unfilled buns for longer storage. If frozen, thaw fully and refresh in a 300°F/150°C oven for a few minutes to restore softness before filling.
- Seasonal Pairing: These shine in spring when citrus feels appropriate, but they are lovely anytime you want a bright, buttery pastry. Serve with seasonal berries for added contrast and color on the plate.
FAQ
Conclusion
These buns pair tender, buttery brioche with bright lemon curd and a glossy icing, which is what makes them so special. If you enjoy contrasts between rich pastry and citrus tang, you should definitely give this recipe a try. Baking them asks for a little attention to timing and texture, but the process is rewarding and the results are impressive for guests or a quiet, satisfying treat at home. I hope you find the same small joys I do in shaping, proofing, and finally sharing these lovely lemon filled buns.
Edd Kimber’s Stuffed Lemon Brioche Buns
Equipment
- Stand mixer
- Dough Hook
- Baking Pan
- Parchment Paper
- Piping Bag
Ingredients
- 2 cups (254 grams) white bread flour Provide strong gluten structure and elasticity to create a tender yet chewy brioche crumb; measure accurately by weight for consistent dough hydration and kneading time. Combine with other dry ingredients before adding liquids to ensure even distribution of yeast and salt. Contribute mild flavor and light color to the rolls while supporting rise during proofing.
- 1 teaspoon (3 grams) kosher salt Regulate yeast activity and strengthen dough flavor balance by controlling fermentation rate; dissolve or mix into dry ingredients to avoid direct contact with yeast. Enhance overall flavor complexity without overwhelming the sweet elements, and help promote proper gluten development during kneading.
- 21/4 teaspoons (7 grams) instant yeast Leaven the dough quickly and reliably to create light, airy buns with even crumb; sprinkle into flour and proof at an appropriate temperature for predictable rise. Choose instant yeast for its fast activation and tolerance to direct blending with flour and other dry components.
- 1 tablespoon (12 grams) granulated sugar Add fermentable sugar that feeds the yeast and contributes subtle sweetness to the brioche; dissolve into warm milk to distribute evenly and encourage yeast activity. Also promotes browning during baking, giving the buns a glossy, caramelized crust when combined with egg wash.
- 1/2 cup (120ml) whole milk, room temperature Provide liquid and fat to enrich the dough, aiding tenderness and mouthfeel while helping dissolve sugar and activate yeast; keep at room temperature to mix smoothly with butter and eggs. Contribute a slight natural sweetness and help create steam during baking for light crumb structure.
- 1 large egg (50 grams), room temperature, plus one for egg wash Enrich the dough with fat, color, and emulsification for a rich brioche texture; bring to room temperature to ensure smooth incorporation and even mixing. Reserve one egg for an egg wash to produce a glossy, golden finish on the baked buns.
- 3 tablespoons (42 grams) unsalted butter, room temperature Supply additional fat that tenderizes the crumb and adds richness and flavor; soften to room temperature to blend seamlessly into the dough for an even, silky texture. Improve dough handling and create a finer, more brioche-like crumb through proper emulsification.
- 6 tablespoons (120 grams) lemon curd Provide a concentrated citrus-sweet filling that delivers bright lemon flavor and a glossy, spreadable texture for stuffing the buns; use measured portions to ensure consistent filling distribution. Balance tartness and sweetness against the rich brioche, creating a vibrant contrast in each bite.
- 11/2 cups (180 grams) confectioners’ sugar Create a smooth, sweet glaze or frosting base with fine texture that dissolves easily for piping or spooning; sift if necessary to remove lumps and achieve a silky finish. Combine with butter and lemon components to make a glossy, sweet topping that complements the citrus filling.
- 2 tablespoons (28 grams) unsalted butter, very soft Contribute creamy richness and structure to the glaze while helping to emulsify the confectioners’ sugar for a smooth, spreadable consistency; use very soft butter to prevent lumps. Add depth of flavor and a luxurious mouthfeel to the icing that pairs well with the lemon curd.
- Pinch kosher salt Enhance flavor by balancing sweetness and brightening the lemon elements while minimizing bitterness; add a tiny pinch to the glaze to amplify overall taste complexity. Help round out the confectioners’ sugar and lemon components for a well-balanced finishing glaze.
- 2 tablespoons (30ml) lemon juice Introduce fresh acidity that cuts through the richness of the brioche and butter in the glaze, brightening flavors and loosening texture for easier spreading. Combine with confectioners’ sugar and butter to create a tangy, smooth icing that complements the lemon curd filling.
- Zest of 1/2 lemon Impart concentrated citrus aroma and essential oils that elevate the lemon flavor profile in both the filling and glaze; finely grate and mix into the glaze for maximum fragrance. Provide subtle bitterness and freshness that enhances complexity without adding liquid.
Instructions
- For small-batch brioche: Add the flour, salt, yeast, and sugar to the bowl of a stand mixer fitted with the dough hook, and mix together briefly to combine. Add the milk and 1 egg, and mix to form a shaggy dough.: Add the flour, salt, yeast, and sugar to the bowl of a stand mixer fitted with the dough hook, and mix together briefly to combine : The moment you combine the dry ingredients, you should notice a faint floury scent that will soon be replaced by a richer, yeasted aroma as liquids are introduced; this initial mixing ensures even distribution of the instant yeast and granulated sugar so the dough ferments uniformly. Use a whisk or paddle briefly to break up any clumps, and scrape the bowl sides so everything integrates, which prevents pockets of salt or yeast from concentrating in one spot. A common mistake here is adding wet ingredients to an unmeasured bowl, which can cause inconsistent hydration; always level your measures and keep the mixer speed low during this stage to avoid creating a dusty cloud of flour.
- On medium-low speed, knead the dough until smooth and elastic, about 10 minutes. With the mixer still running, add the butter 1 tablespoon at a time. Continue kneading until the dough is once again smooth and silky, up to 10 minutes more.: As the whole milk and egg come together with the dry mix, the dough will transition from lumps to a rough, slightly sticky mass, and you should see a patchy, shaggy texture that signals the start of gluten development. At this point the scent shifts toward a faint dairy sweetness and you can tell the dough is hydrated when it clings to the hook and pulls away from the bowl in loose ribbons. If the dough feels too dry, add a teaspoon of warm milk at a time; if it is overly wet, a dusting of flour helps, but avoid overcorrecting which can tighten the crumb. One pitfall is mixing at too high a speed, which can overwork surface gluten and make it difficult for butter to be incorporated later.
- Turn the dough out onto the work surface, and form into a smooth round. Place the ball of dough into a lightly greased bowl, and cover and let rise in a warm, draft-free place (75°F/24°C) until doubled in size, 45 minutes to 1 hour.: During this kneading phase you will witness the dough smooth out, becoming glossy and elastic, and you can test readiness with the windowpane test or by stretching a small piece to see if it holds without tearing. The sound changes too, from thumps to a softer slap as the dough becomes more cohesive, and the texture should feel slightly tacky but resilient. Kneading develops the structure that traps gas from fermentation, which is why it matters for light crumb; inadequate kneading results in a dense interior, while over-kneading can make the dough tough. A common mistake is rushing this step, so keep an eye on texture rather than strictly timing it.
- Line a large baking pan with a piece of parchment paper.: As you add each small amount of unsalted butter , watch the dough absorb it and go from shaggy to silky; it may look like it will never come together, but patience pays off as the fat incorporates gradually into the gluten network and the dough regains smoothness. The aroma will become rich and buttery, and the dough should feel softer and more supple as it does so. If you add all the butter too quickly, it can separate and leave greasy pockets, so keep additions slow. A typical error is using butter that is too cold, which resists emulsification and delays incorporation; room temperature butter solves this.
- Lightly punch down the dough. Divide into 6 evenly sized pieces of dough, and roll each into a smooth round. Press each ball of dough into a 3-inch/7.5 cm disc, and place on the baking pan. Cover and let rise in a warm, draft-free place (75°F/24°C) until doubled in size, about 45 minutes to 1 hour.: As you continue to work the dough, it should return to a satiny texture that stretches and springs back, an indication that the fat has been fully integrated. The tactile feedback here is crucial; your hands or the mixer will sense when the dough feels elastic and cohesive. This stage deepens flavor as fermentation continues slowly under the warmth generated by kneading, and it prevents a dense final crumb. Avoid skipping this extended knead, since underworked enriched dough often collapses during proofing.
- Preheat the oven to 390°F (200°C).: When you shape the dough into a tight round, you are creating surface tension that helps it rise upward rather than spreading, and you will notice a quieter, doughy scent that signals readiness to rest. Use a bench scraper to lift and fold, creating a taut skin which yields even proofing. A typical mistake is leaving the dough too slack, which can lead to flat rolls; take a few extra turns to build tension for a nicely domed bun.
- Brush each bun with beaten egg. Bake the buns for 10 to 12 minutes or until they are golden brown. Remove and set aside until fully cooled.: During this first proof the dough will visibly expand and develop a yeasty, slightly sweet aroma; the surface should feel pillowy when you gently press a fingertip and see a slow, partial rebound. This bulk fermentation builds flavor and increases gas retention for good structure. Keep the dough covered to prevent a dry skin and avoid placing it near cold drafts, which can slow fermentation and lengthen the rise. A common error is overproofing, where the dough becomes too airy and then collapses in the oven, so monitor rather than strictly timing if your kitchen temperature varies.
- Using a chopstick, poke a hole in the top of the buns, wiggling around slightly to make a little room for the filling. Scrape the lemon curd into a piping bag fitted with a small round piping tip, and pipe about 1 tablespoon (20 grams) curd into each bun.: Lining the pan ensures easy transfer and prevents sticking, and the paper will also help reflect heat for even browning. Take a moment to position your rounds with adequate spacing so they can expand without merging into one another excessively. If the parchment is wrinkled, smooth it to avoid indenting the buns. A frequent oversight is crowding the pan, which results in uneven bakes and fused edges.
- For lemon icing: Add all the ingredients except the lemon zest to a bowl, and beat together until smooth. Spoon a little icing onto each bun, and spread on the top of the buns, finishing with a light sprinkling of lemon zest. Best served the day they’re baked.: Deflating gently evens out the crumb and redistributes the yeast and gas for a second rise, giving the buns a more uniform interior. You will feel the dough relax under your hands, and the aroma becomes more nuanced as carbon dioxide is released and fermentation resets. Overpunching to the point of degassing entirely will reduce lift in the final bake, so be gentle and purposeful.
- Divide into 6 evenly sized pieces of dough, and roll each into a smooth round: When you portion and roll, the tactile process of smoothing each piece creates those seam-free tops that brown beautifully. The dough should feel springy, and you can judge evenness by weighing or visually matching sizes, which ensures consistent bake times across the batch. Uneven portions lead to some buns finishing much earlier than others, so take the extra minute to match sizes carefully.
- Press each ball of dough into a 3-inch/7.5 cm disc, and place on the baking pan: Flattening into discs gives you a nice base for piping the curd later, and you should see the dough relax and spread slightly on the pan; the edges should remain smooth. The discs will puff during the second rise and in the oven, so start with a modest thickness. If the discs are too thin, the buns may not hold enough filling and can bake dry; too thick and they might not bake through in the center.
- Cover and let rise in a warm, draft-free place 75°F/24°C until doubled in size, about 45 minutes to 1 hour: The second rise builds size and a tender crumb; expect a soft, pillowy expansion and a gentle yeasty scent. Test for readiness by giving a light poke; it should partially spring back, indicating appropriate proof. Underproofing will yield dense interiors, while overproofing can cause collapse in the oven, so keep an eye on texture rather than strict timing if conditions vary.
- Preheat the oven to 390°F (200°C): Preheating ensures the oven is hot enough to give the buns an immediate oven spring and encourage browning; you will notice the kitchen warming and a dry heat that crisps the exterior. Use an oven thermometer if you suspect your oven runs hot or cold, as inaccurate temperatures can cause uneven rise or overbrowning. A common mistake is placing the buns into an oven that has not reached temperature, which reduces oven spring and yields denser results.
- Brush each bun with beaten egg: The egg wash imparts color and shine, creating that appealing golden top that contrasts with the pale icing. Brush gently and evenly to avoid pooling in seams, and if you want extra gloss, use only the white or whole egg depending on preference. Be cautious not to overapply, as excess wash can drip and create darker spots on the bake.
- Bake the buns for 10 to 12 minutes or until they are golden brown: As the buns bake, listen for a faint crackling and watch the color shift to a warm golden hue; the aroma will be a rich, buttery bread scent with a hint of caramelization. Rotate the pan halfway if your oven has hot spots to ensure even coloring. Overbaking dries the crumb, so aim for the lower end of the time if your oven runs hot, and remove them once they are richly colored and sound hollow when tapped on the bottom.
- Remove and set aside until fully cooled: Cooling is critical so the crumb sets and steam disperses, which prevents the filling or icing from becoming watery. Place the buns on a rack to allow air circulation underneath; if you fill them while too warm, the curd can melt and leak. Resist the temptation to rush this step, since warm buns are fragile and prone to collapse when filled.
- Using a chopstick, poke a hole in the top of the buns, wiggling around slightly to make a little room for the filling: The tactile act of creating a cavity is satisfying and precise; you will feel resistance when you reach the center and a small pocket form for the lemon curd . Move the chopstick in a twisting motion to widen the hole without tearing the crumb. Avoid inserting the tool too deeply or you may pierce the base, which can cause curd to leak out during serving.
- Scrape the lemon curd into a piping bag fitted with a small round piping tip, and pipe about 1 tablespoon (20 grams) curd into each bun: When you pipe the lemon curd , watch the bun gently swell and listen for a soft settling sound as the curd finds its space; the bright citrus smell should be immediate and uplifting. Pipe slowly so the curd seats neatly in the cavity without overflowing. A common error is overfilling, which leads to messy tops and leaking during storage, so measure by eye or use a small scoop to keep portions consistent.
- For lemon icing: Add all the ingredients except the lemon zest to a bowl, and beat together until smooth : The icing will come together into a glossy, creamy texture when the confectioners’ sugar , soft unsalted butter , lemon juice , and pinch of salt are combined, and you should taste for balance so it is bright but not overly sweet. Beat until no sugar granules remain, and adjust thickness with tiny amounts of lemon juice if it seems too stiff; a silky spreadable consistency is ideal. Overbeating can incorporate air and make the icing thin, so stop when smooth.
- Spoon a little icing onto each bun, and spread on the top of the buns, finishing with a light sprinkling of lemon zest: The final assembly is where the buns become irresistible; the cool, slightly tangy icing contrasts with the warm crumb and lemon curd. Use a small offset spatula or the back of a spoon to create a neat, thin layer, and finish with the bright sheen of lemon zest for aroma. If the buns are still warm, the icing may soften and slide, so ensure they are fully cooled to maintain a tidy appearance. These are best served the day they’re baked to preserve texture and flavor.
Notes
- Adjust proofing for room temperature: If your kitchen is cooler than 75°F/24°C, allow extra rising time. Cooler environments slow yeast activity, so plan for 10 to 20 more minutes per rise and watch for visual cues rather than relying solely on the clock.
- Measure flour by weight: For consistent texture, weigh the white bread flour. Volume measures vary by how the flour is scooped, while grams give reliable results and a predictable crumb every bake.
- Soft butter for dough vs icing: Use room temperature butter in the dough for smooth incorporation, and very soft butter in the icing for a creamy finish. If the baking butter is too warm, it can make the dough greasy and affect rise.
- Keep curd piping friendly: If your lemon curd is too thick, warm it slightly to make it pliable, or if too thin, chill for 15 minutes. Piping control ensures neat fills and prevents leaking during storage or transport.
- Use an oven thermometer: Oven temperatures vary widely. An inexpensive thermometer helps you hit 390°F/200°C accurately for perfect oven spring and golden color without overbaking.
- Work with room temperature eggs: Cold eggs tighten the dough and slow mixing. Bring eggs to room temperature to help emulsify fats and liquids for a smooth, cohesive dough.