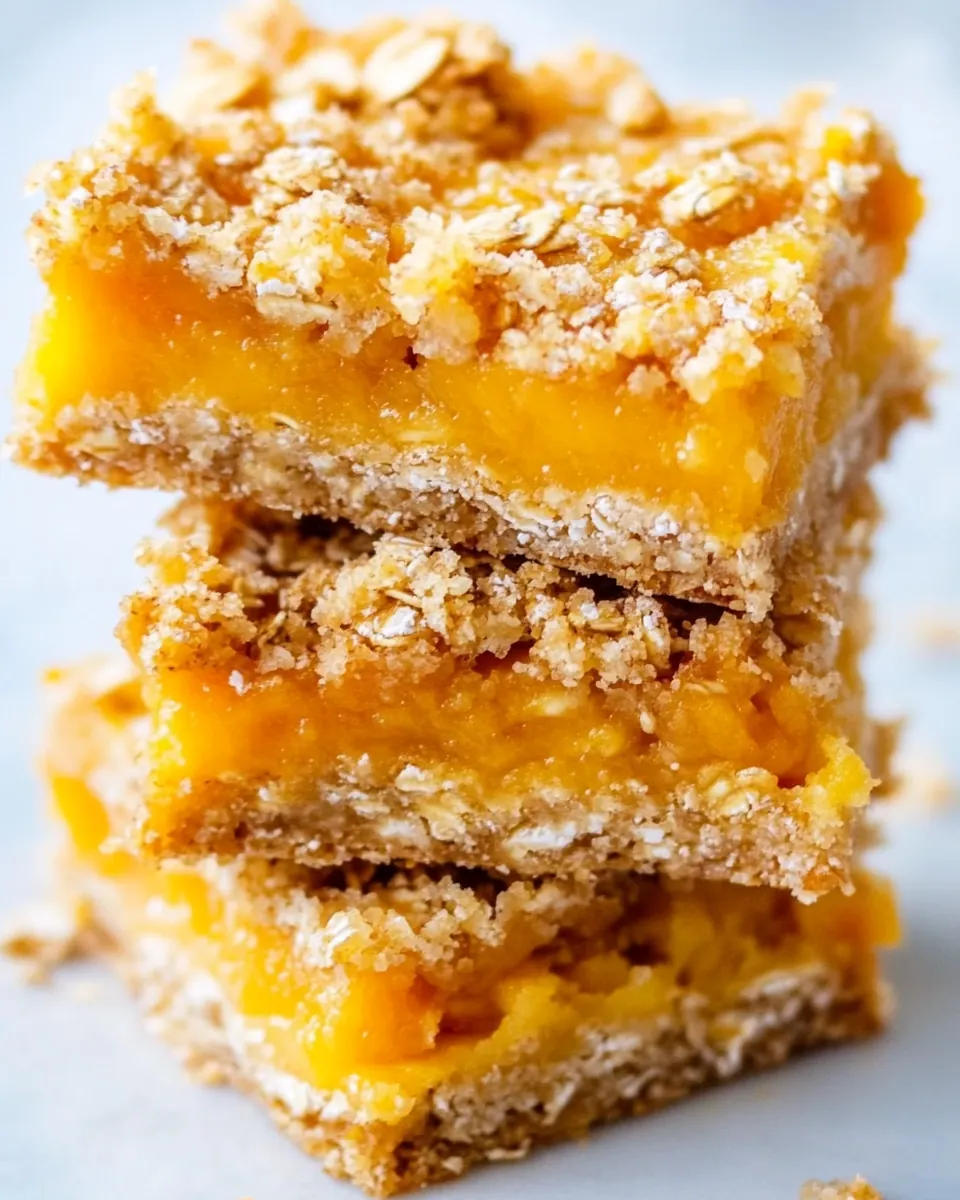
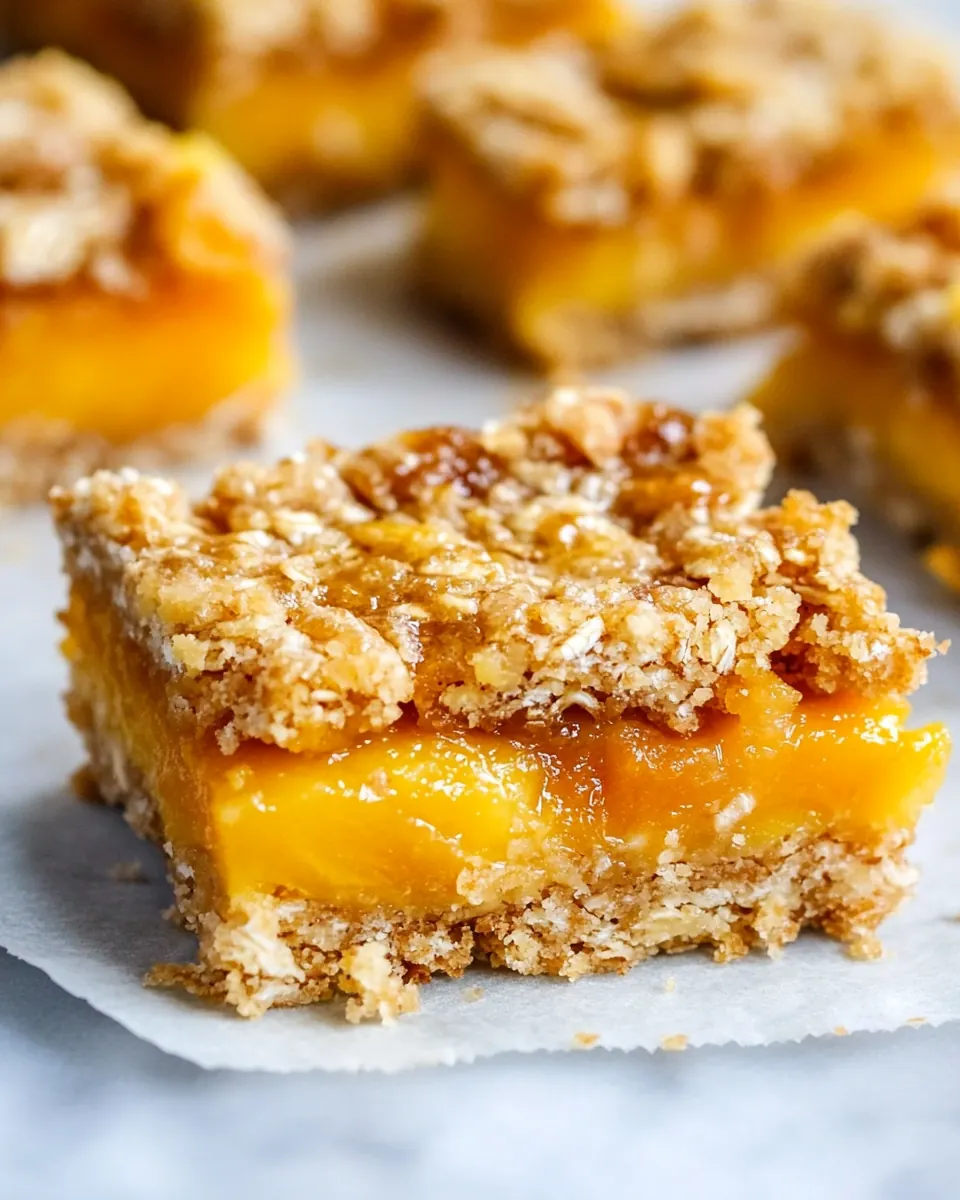
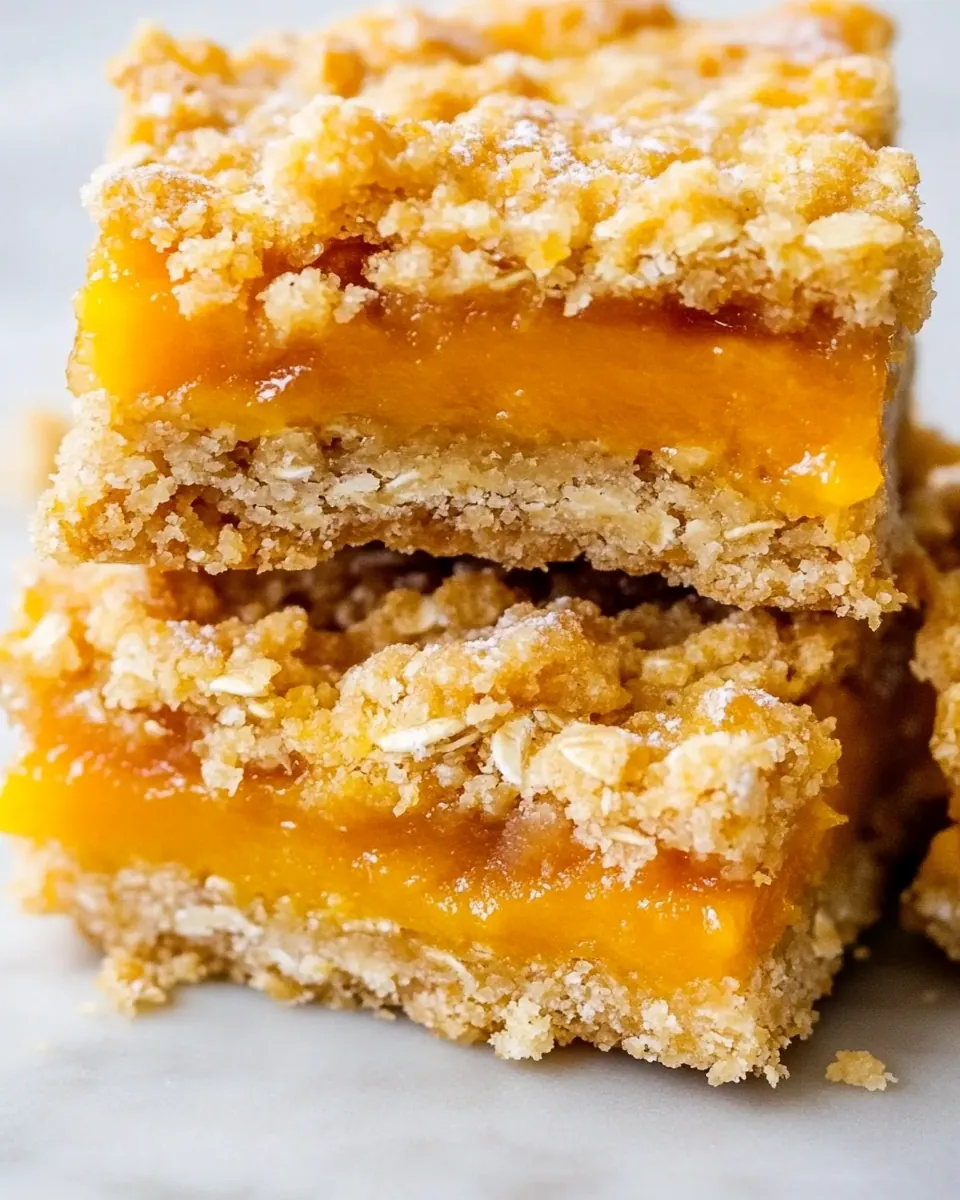
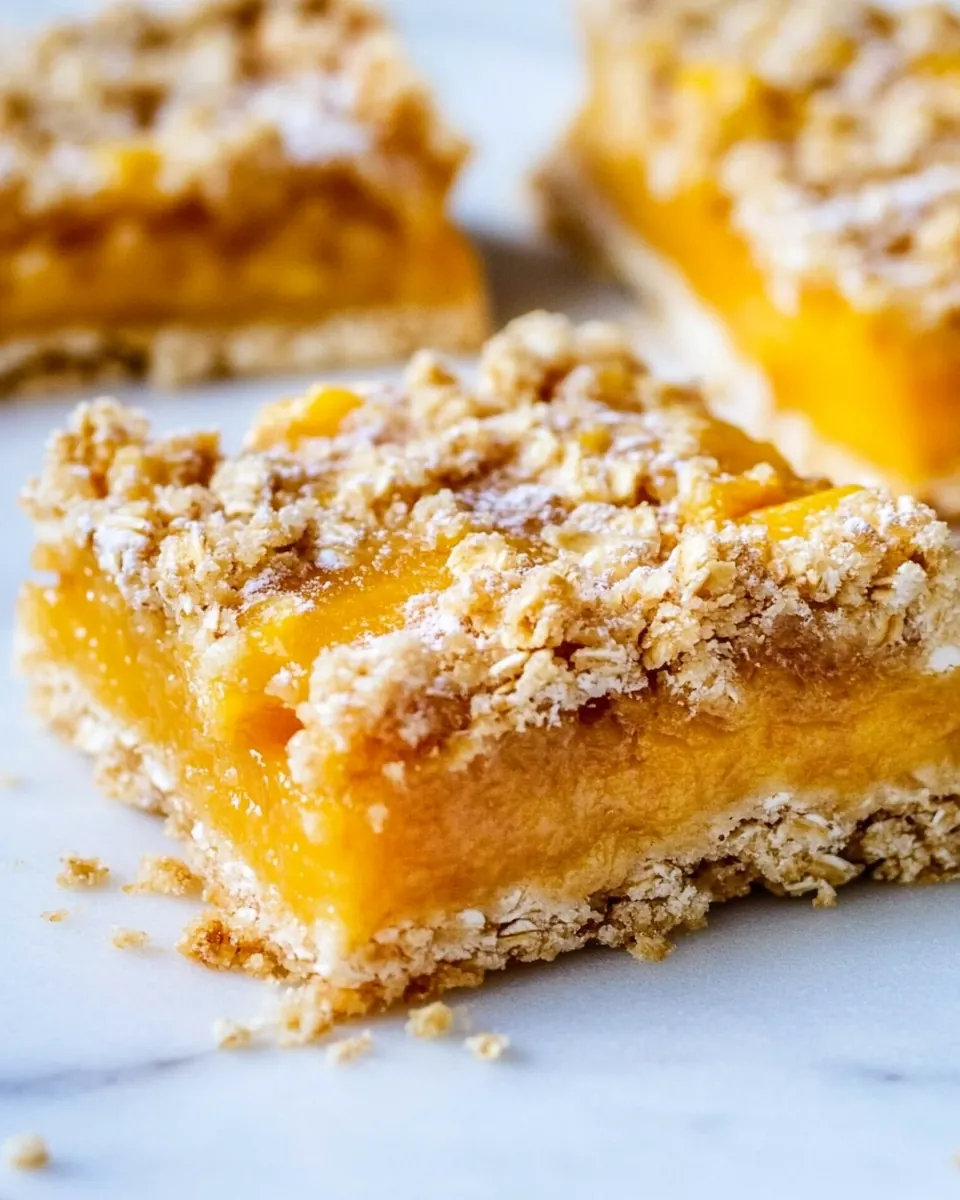
Mango Oatmeal Crumble Bars
Mango Oatmeal Crumble Bars are one of those recipes I reach for when mango season arrives and my kitchen table is piled with fruit that will not wait. The first time I made these, I had a bowl of ataulfo mangoes that smelled like sunshine, and I wanted something that kept that bright, tender fruit front and center while giving it a buttery, toasty frame. I remember pressing the oat and flour mixture into the pan, the grainy sound under my fingertips, and the way the mango juices started to simmer and perfume the oven as the bars baked.
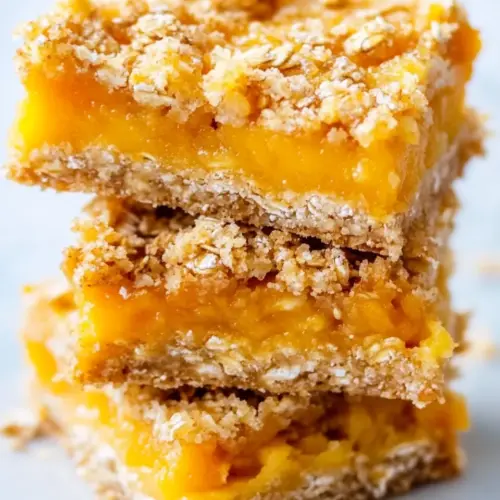
What keeps me coming back to Mango Oatmeal Crumble Bars is how approachable they are, yet they always feel special enough to bring to a brunch or pack into a picnic basket. I like that the crust is sturdy but still tender, the crumble top gives little pockets of crunch, and the mango filling stays juicy without becoming too runny. Every time I slice through a cooled bar and lift a square, the balance of buttery crumb and sweet fruit makes me smile.
Recipe Snapshot
60 mins
10 mins
50 mins
Medium
200 kcal
American
Gluten-Free, Low FODMAP
Desserts
1 (8 inch) Square Pan, 1 Large, Microwave-Safe Bowl, 1 Wire Rack
Why This Mango Oatmeal Crumble Bars Hits Different
They showcase fresh seasonal fruit
I love recipes that let the produce lead, and with Mango Oatmeal Crumble Bars the mango is undeniably the star. Using ripe mango gives a natural sweetness and a silky texture that a sauce or canned filling just cannot match. I always say use the ripest mangoes you can find, because their aroma and juice are what make the filling sing.
Comforting textures that contrast
The combination of a tender, pressed oat crust and a coarser crumble topping creates a satisfying contrast. The base is dense enough to hold the filling, while the crumble adds a buttery crunch. I find that this textural play keeps people coming back for another piece, and it also makes the bars versatile for snacking or dessert.
Simple, pantry friendly ingredients
What makes these bars reliable is their short ingredient list, mostly pantry staples like all purpose flour, old fashioned whole rolled oats, and granulated sugar. That means I can make them on short notice when I have fresh fruit but not a long shopping list. The technique is straightforward, and the payoff is huge for the effort.
Make ahead and travel well
One of my favorite reasons to make Mango Oatmeal Crumble Bars is that they hold up well. They keep at room temperature or in the fridge, and they freeze beautifully. That makes them an excellent option for busy weekends or when I want to prep for a gathering. They store cleanly, and slices stay moist without becoming soggy.
Flexible and forgiving
I appreciate a recipe that forgives minor missteps, and these bars do. If your mangoes are a touch juicier, just bake a little longer and the filling will set. If your crumble is more sandy than clumpy, pressing firmly for the crust and reserving more for topping solves it. That forgiving nature makes them a go to when I want reliability and excellent flavor.
Ingredients You’ll Need for Mango Oatmeal Crumble Bars
These ingredients work together to build a simple, sturdy oat crust, a juicy mango filling, and a buttery crumble topping. The key players are the old fashioned whole rolled oats for texture, the all purpose flour for structure, and the unsalted butter for richness. I rely on a touch of corn starch and lemon juice to help the mango filling set and remain bright.
- 1/2 cup unsalted butter, melted: Provide rich fat and moisture to bind the crumble base, helping create a tender, slightly crisp texture when melted into the dry ingredients; contributes flavor and helps the bars hold together once cooled.
- 1 cup all-purpose flour: Add structure and bulk to the bars by forming the base of the crumble mixture; develops light gluten for a cohesive but tender crumb when combined with fats and mixed gently.
- 3/4 cup old-fashioned whole-rolled oats, don’t use quick cook or instant, they’re finer and behave like flour and will make the mixture too dry: Introduce rustic texture and nutty flavor while absorbing some moisture; contribute chewiness and visible oat flecks that balance the buttery crumble topping and filling.
- 1/2 cup granulated sugar: Sweeten the crumble with clean, neutral sweetness and assist in creating a crisp, lightly caramelized texture when baked; also helps balance the tartness of the mango filling.
- 1/4 cup light brown sugar, packed: Provide deeper, molasses-like sweetness and a touch of moisture to the dough; enhance flavor complexity and help the mixture brown slightly for richer taste.
- 1/2 teaspoons salt, or to taste: Enhance overall flavor by balancing sweetness and brightening other ingredients; help control fermentation and preserve freshness while subtly intensifying flavors.
- 2 cups coarsely chopped fresh ripe mango, I used fresh ataúlfo mango; frozen mango may be substituted, thaw fully and drain excess liquid before using: Offer juicy, tropical fruit flavor and body for the filling with natural sweetness and tender texture; deliver fresh mango character and bright color to the bars.
- 1/3 cup granulated sugar: Add additional sweetness to the fruit filling, helping to balance acidity and intensify the mango's natural sugars for a jammy consistency when cooked or baked.
- 2 tablespoons lemon juice: Brighten and lift the fruit filling with acidity, helping to balance sweetness and enhance the mango's flavor while contributing subtle freshness to each bite.
- 2 teaspoons corn starch: Thicken the mango filling by absorbing excess juices and creating a slightly gelled, spoonable consistency; help prevent a soggy crust by stabilizing the fruit.
The Method for Mango Oatmeal Crumble Bars
These directions move from preparing the pan and crust through building the filling and baking to a cool down period. The steps are straightforward, and a little attention to detail at each stage ensures clear, neat bars with a set filling and a pale golden crumble top.
- Preheat oven to 350 F. Line an 8-inch square pan with aluminum foil and spray with cooking spray; set aside. Lining the pan helps with cleanup and is recommended.: As the oven warms you will notice a gentle dry heat filling the kitchen, and the lined pan ensures easy removal and clean edges later; this helps the bars cool evenly. A common mistake is skipping the spray after lining, which can lead to sticking along the foil seams. If you sense uneven heating in your oven, rotate the pan halfway through baking to promote uniform browning. The reason this step matters is even, preheated heat helps the crust set as soon as it goes in, preventing a soggy base.
- Crust and Crumble Topping– In a large, microwave-safe bowl melt the butter, about 1 minute on high power.: You'll hear a low bubbling as the butter liquefies and smell a warm, dairy aroma, which makes it easier to combine with dry ingredients; melted butter coats the oats and flour for a cohesive crumb. Be careful not to overheat the butter so it begins to brown, unless you want a nuttier flavor. Stir briefly to even out the temperature so the dry ingredients do not clump when added. If the butter is too hot, it can slightly cook the sugars or cause uneven mixing, so allow it to settle for a few seconds before adding dry components.
- Add the flour, oats, sugars, optional salt, and stir to combine. Mixture will be dry and sandy with some larger, well-formed crumble pieces.: The tactile cue here is a coarse, sandy feel with occasional larger pieces that will form the crumble top, which is exactly what you want. Work quickly but gently so the crumb pieces remain irregular, creating pockets of crunch after baking. A frequent error is overmixing, which yields a tighter, less crumbly texture; stop once ingredients are evenly moistened. This technique matters because the contrast between sandy bits and chunkier pieces builds the bars textural interest.
- Set 1 heaping cup mixture aside to be sprinkled on later as crumble topping.: Reserve the chunkier pieces for the top so they can toast independently and produce that pale golden crispness, and keep the remaining mixture finer for a compact crust. You should feel slightly larger clusters in the reserved portion when you squeeze a handful. A common oversight is setting aside too small a portion, leaving insufficient topping. Reserving properly ensures you get a distinct, crunchy layer that contrasts with the tender crust and filling.
- Transfer remaining mixture to prepared pan, and using a spatula or your fingers, hard-pack the mixture to create an even, smooth, flat crust; set aside.: Pressing firmly produces a compact base that prevents the filling from seeping through and makes for clean slices later; you may hear a soft compressing sound and feel resistance under your palms. Aim for a uniform thickness so the bars bake evenly. Avoid leaving it loose and sandy, which yields a crumbly base that falls apart when cut. The reason for hard packing is structure, ensuring that during baking the crust becomes a cohesive layer supporting the mango filling.
- Mango Layer– In a large mixing bowl (same one used for crust and crumble is okay), add all ingredients and toss to combine. If sugar hasn’t dissolved fully that’s okay because it liquifies while baking.: Tossing the mango with granulated sugar , lemon juice , and corn starch softens the fruit slightly and releases juices that will thicken in the oven; you should see glossy, syrupy fruit pieces coated evenly. The aroma will brighten with citrus notes. A potential misstep is overmashing the mango during tossing, which creates a puree rather than chunks; keep the pieces chunky for texture. The mixing matters because it helps the starch and acid disperse, so the filling sets with the right consistency.
- Evenly distribute mango mixture over the crust.: Spoon the glossy mango pieces across the packed crust and gently spread so there are no large gaps, watching for small pools of juice that indicate ripeness. You will see the bright orange fruit contrasted against the pale base, and the wetness should be evenly spread. Avoid piling fruit in one spot, which can create uneven baking and soggy areas. This even distribution ensures each bite contains fruit balanced with crust and crumble.
- Evenly sprinkle with the reserved heaping 1 cup crumble topping mixture. Before sprinkling, I squeeze the mixture in my palm to encourage bigger crumble pieces to form.: As you scatter the reserved topping, larger clusters provide crunch while smaller granules fill gaps, giving an appealing mosaic on top; you may hear soft clinks as clusters land on the mango. Resist the urge to press the topping down, because leaving it loose allows it to toast into crisp pockets. A common mistake is compacting the topping which reduces its crunch. Keeping the topping airy ensures a delicate contrast to the moist filling beneath.
- Bake for about 50 minutes, or until edges are set and center has just set. Crumble topping should appear set and very pale golden and the mango filling mixture may be bubbling along the edges. Bars may take longer than 50 to 55 minutes if the mangos are very juicy. Watch your bars, not the clock, when evaluating doneness.: During baking the kitchen will fill with a warm, fruity perfume and you may see gentle bubbling at the edges as the fruit juices thicken; the crumble should remain pale gold, not dark brown. If the top browns too quickly, tent with foil to prevent overbrowning while the center finishes setting. Underbaking results in a runny center, while overbaking can dry the filling; use visual cues rather than strict minutes for best results. The texture and appearance at this stage determine how cleanly the bars will slice once cooled.
- Place pan on a wire rack and allow bars to cool for at least 1 hour before slicing and serving. If you try to slice bars before they’ve cooled completely, they’ll be extremely messy and could fall apart. Bars will keep airtight at room temperature for up to 1 week, in the fridge for up to 10 days, or in the freezer for up to 6 months.: Cooling allows the corn starch to finish setting, the juices to thicken, and the crumb to firm so slices hold together; you will notice the steam subside and the filling become less jiggly. A common temptation is to cut right away, but that yields sloppy squares that crumble. Resting matters because chilled bars slice with clean edges and maintain the intended texture balance between crisp topping and tender filling.
- Adapted from Blueberry Oatmeal Crumble Bars and Strawberry Oatmeal Crumble Bars: This credit acknowledges the recipe lineage and hints at the flexible nature of the formula, showing how different fruits can be substituted for the same oat crumble base. When adapting, expect slight changes in bake time depending on fruit juiciness. One mistake people make is substituting very watery fruit without adjusting bake time, causing a soggy result; always watch the visual doneness cues. Understanding this background helps you adapt the recipe while preserving texture and flavor.
Make It Your Own
These tips help you personalize Mango Oatmeal Crumble Bars while keeping the recipe reliable. Small adjustments make a big difference to texture and flavor, and each suggestion below opens up a way to adapt the bars to your pantry and taste.
- Choose your mango wisely, use firm ripe ataulfo or similar varieties for a balance of sweetness and fleshiness; softer varieties may be easier to chop but can release more juice during baking.
- Adjust sweetness gently, if your mangoes are ultra sweet, reduce the sugar in the mango layer by a tablespoon to keep the flavor balanced and not cloying.
- Use whole rolled oats, they provide texture and structure; avoid quick oats which will absorb differently and can make the bars dry.
- Control topping texture, squeeze handfuls of the reserved crumble to form larger clusters for more crunch, or keep it loose for a finer, sandier top.
- Watch bake time for juicier fruit, if your mangoes are especially juicy, expect an extra 5 to 10 minutes of baking and check for bubbling edges as the doneness cue.
- Cool completely before slicing, chilling the bars for at least an hour helps the filling firm and yields tidy squares for serving or packing.
Great Combinations for Mango Oatmeal Crumble Bars
These serving ideas and pairings help you present Mango Oatmeal Crumble Bars for different occasions. The bars travel well, pair with both warm and cool accompaniments, and suit casual snacks or more intentional gatherings.
- Casual coffee break, serve slightly warm with a mug of strong coffee or tea for a morning or afternoon treat that balances fruity sweetness with a toasty oat profile.
- Brunch spread, include the bars alongside scones and fruit salad for an easy buffet style brunch where guests can help themselves to handheld sweets.
- Picnic friendly, pack bars in a single layer in a box or tin, they hold up well at room temperature and make portable desserts for park gatherings.
- Ramadan and special meals, offer bars as a sweet option after breaking fast, they store well and provide quick energy with comforting textures.
- Storage tips, keep the bars airtight at room temperature for up to one week, refrigerate up to ten days for longer freshness, or freeze for up to six months for make ahead convenience.
- Seasonal pairings, these bars shine in summer with fresh mangoes, but the same oat crumble base works with other stone fruits when mangoes are out of season.
FAQ
Conclusion
Mango Oatmeal Crumble Bars shine because they combine juicy, fragrant mango with a buttery oat base and a crunchy crumble top that feels both homey and special. I encourage you to try them when mangoes are at their peak, because the fruit flavor transforms the simple oat crust into something vibrant and memorable. These bars are forgiving, travel well, and are a lovely contribution to brunches, picnics, or casual gatherings. Make a pan, share with friends, and enjoy how a few pantry staples paired with ripe fruit create an irresistible treat.
Mango Oatmeal Crumble Bars
Equipment
- 1 (8 inch) Square Pan
- 1 Large, Microwave-Safe Bowl
- 1 Wire Rack
Ingredients
- 1/2 cup unsalted butter, melted Provide rich fat and moisture to bind the crumble base, helping create a tender, slightly crisp texture when melted into the dry ingredients; contributes flavor and helps the bars hold together once cooled.
- 1 cup all-purpose flour Add structure and bulk to the bars by forming the base of the crumble mixture; develops light gluten for a cohesive but tender crumb when combined with fats and mixed gently.
- 3/4 cup old-fashioned whole-rolled oats, don’t use quick cook or instant, they’re finer and behave like flour and will make the mixture too dry Introduce rustic texture and nutty flavor while absorbing some moisture; contribute chewiness and visible oat flecks that balance the buttery crumble topping and filling.
- 1/2 cup granulated sugar Sweeten the crumble with clean, neutral sweetness and assist in creating a crisp, lightly caramelized texture when baked; also helps balance the tartness of the mango filling.
- 1/4 cup light brown sugar, packed Provide deeper, molasses-like sweetness and a touch of moisture to the dough; enhance flavor complexity and help the mixture brown slightly for richer taste.
- 1/2 teaspoons salt, or to taste Enhance overall flavor by balancing sweetness and brightening other ingredients; help control fermentation and preserve freshness while subtly intensifying flavors.
- 2 cups coarsely chopped fresh ripe mango, I used fresh ataúlfo mango; frozen mango may be substituted, thaw fully and drain excess liquid before using Offer juicy, tropical fruit flavor and body for the filling with natural sweetness and tender texture; deliver fresh mango character and bright color to the bars.
- 1/3 cup granulated sugar Add additional sweetness to the fruit filling, helping to balance acidity and intensify the mango's natural sugars for a jammy consistency when cooked or baked.
- 2 tablespoons lemon juice Brighten and lift the fruit filling with acidity, helping to balance sweetness and enhance the mango's flavor while contributing subtle freshness to each bite.
- 2 teaspoons corn starch Thicken the mango filling by absorbing excess juices and creating a slightly gelled, spoonable consistency; help prevent a soggy crust by stabilizing the fruit.
Instructions
- Preheat oven to 350 F. Line an 8-inch square pan with aluminum foil and spray with cooking spray; set aside. Lining the pan helps with cleanup and is recommended.: As the oven warms you will notice a gentle dry heat filling the kitchen, and the lined pan ensures easy removal and clean edges later; this helps the bars cool evenly. A common mistake is skipping the spray after lining, which can lead to sticking along the foil seams. If you sense uneven heating in your oven, rotate the pan halfway through baking to promote uniform browning. The reason this step matters is even, preheated heat helps the crust set as soon as it goes in, preventing a soggy base.
- Crust and Crumble Topping– In a large, microwave-safe bowl melt the butter, about 1 minute on high power.: You'll hear a low bubbling as the butter liquefies and smell a warm, dairy aroma, which makes it easier to combine with dry ingredients; melted butter coats the oats and flour for a cohesive crumb. Be careful not to overheat the butter so it begins to brown, unless you want a nuttier flavor. Stir briefly to even out the temperature so the dry ingredients do not clump when added. If the butter is too hot, it can slightly cook the sugars or cause uneven mixing, so allow it to settle for a few seconds before adding dry components.
- Add the flour, oats, sugars, optional salt, and stir to combine. Mixture will be dry and sandy with some larger, well-formed crumble pieces.: The tactile cue here is a coarse, sandy feel with occasional larger pieces that will form the crumble top, which is exactly what you want. Work quickly but gently so the crumb pieces remain irregular, creating pockets of crunch after baking. A frequent error is overmixing, which yields a tighter, less crumbly texture; stop once ingredients are evenly moistened. This technique matters because the contrast between sandy bits and chunkier pieces builds the bars textural interest.
- Set 1 heaping cup mixture aside to be sprinkled on later as crumble topping.: Reserve the chunkier pieces for the top so they can toast independently and produce that pale golden crispness, and keep the remaining mixture finer for a compact crust. You should feel slightly larger clusters in the reserved portion when you squeeze a handful. A common oversight is setting aside too small a portion, leaving insufficient topping. Reserving properly ensures you get a distinct, crunchy layer that contrasts with the tender crust and filling.
- Transfer remaining mixture to prepared pan, and using a spatula or your fingers, hard-pack the mixture to create an even, smooth, flat crust; set aside.: Pressing firmly produces a compact base that prevents the filling from seeping through and makes for clean slices later; you may hear a soft compressing sound and feel resistance under your palms. Aim for a uniform thickness so the bars bake evenly. Avoid leaving it loose and sandy, which yields a crumbly base that falls apart when cut. The reason for hard packing is structure, ensuring that during baking the crust becomes a cohesive layer supporting the mango filling.
- Mango Layer– In a large mixing bowl (same one used for crust and crumble is okay), add all ingredients and toss to combine. If sugar hasn’t dissolved fully that’s okay because it liquifies while baking.: Tossing the mango with granulated sugar , lemon juice , and corn starch softens the fruit slightly and releases juices that will thicken in the oven; you should see glossy, syrupy fruit pieces coated evenly. The aroma will brighten with citrus notes. A potential misstep is overmashing the mango during tossing, which creates a puree rather than chunks; keep the pieces chunky for texture. The mixing matters because it helps the starch and acid disperse, so the filling sets with the right consistency.
- Evenly distribute mango mixture over the crust.: Spoon the glossy mango pieces across the packed crust and gently spread so there are no large gaps, watching for small pools of juice that indicate ripeness. You will see the bright orange fruit contrasted against the pale base, and the wetness should be evenly spread. Avoid piling fruit in one spot, which can create uneven baking and soggy areas. This even distribution ensures each bite contains fruit balanced with crust and crumble.
- Evenly sprinkle with the reserved heaping 1 cup crumble topping mixture. Before sprinkling, I squeeze the mixture in my palm to encourage bigger crumble pieces to form.: As you scatter the reserved topping, larger clusters provide crunch while smaller granules fill gaps, giving an appealing mosaic on top; you may hear soft clinks as clusters land on the mango. Resist the urge to press the topping down, because leaving it loose allows it to toast into crisp pockets. A common mistake is compacting the topping which reduces its crunch. Keeping the topping airy ensures a delicate contrast to the moist filling beneath.
- Bake for about 50 minutes, or until edges are set and center has just set. Crumble topping should appear set and very pale golden and the mango filling mixture may be bubbling along the edges. Bars may take longer than 50 to 55 minutes if the mangos are very juicy. Watch your bars, not the clock, when evaluating doneness.: During baking the kitchen will fill with a warm, fruity perfume and you may see gentle bubbling at the edges as the fruit juices thicken; the crumble should remain pale gold, not dark brown. If the top browns too quickly, tent with foil to prevent overbrowning while the center finishes setting. Underbaking results in a runny center, while overbaking can dry the filling; use visual cues rather than strict minutes for best results. The texture and appearance at this stage determine how cleanly the bars will slice once cooled.
- Place pan on a wire rack and allow bars to cool for at least 1 hour before slicing and serving. If you try to slice bars before they’ve cooled completely, they’ll be extremely messy and could fall apart. Bars will keep airtight at room temperature for up to 1 week, in the fridge for up to 10 days, or in the freezer for up to 6 months.: Cooling allows the corn starch to finish setting, the juices to thicken, and the crumb to firm so slices hold together; you will notice the steam subside and the filling become less jiggly. A common temptation is to cut right away, but that yields sloppy squares that crumble. Resting matters because chilled bars slice with clean edges and maintain the intended texture balance between crisp topping and tender filling.
- Adapted from Blueberry Oatmeal Crumble Bars and Strawberry Oatmeal Crumble Bars: This credit acknowledges the recipe lineage and hints at the flexible nature of the formula, showing how different fruits can be substituted for the same oat crumble base. When adapting, expect slight changes in bake time depending on fruit juiciness. One mistake people make is substituting very watery fruit without adjusting bake time, causing a soggy result; always watch the visual doneness cues. Understanding this background helps you adapt the recipe while preserving texture and flavor.
Notes
- Choose your mango wisely, use firm ripe ataulfo or similar varieties for a balance of sweetness and fleshiness; softer varieties may be easier to chop but can release more juice during baking.
- Adjust sweetness gently, if your mangoes are ultra sweet, reduce the sugar in the mango layer by a tablespoon to keep the flavor balanced and not cloying.
- Use whole rolled oats, they provide texture and structure; avoid quick oats which will absorb differently and can make the bars dry.
- Control topping texture, squeeze handfuls of the reserved crumble to form larger clusters for more crunch, or keep it loose for a finer, sandier top.
- Watch bake time for juicier fruit, if your mangoes are especially juicy, expect an extra 5 to 10 minutes of baking and check for bubbling edges as the doneness cue.
- Cool completely before slicing, chilling the bars for at least an hour helps the filling firm and yields tidy squares for serving or packing.