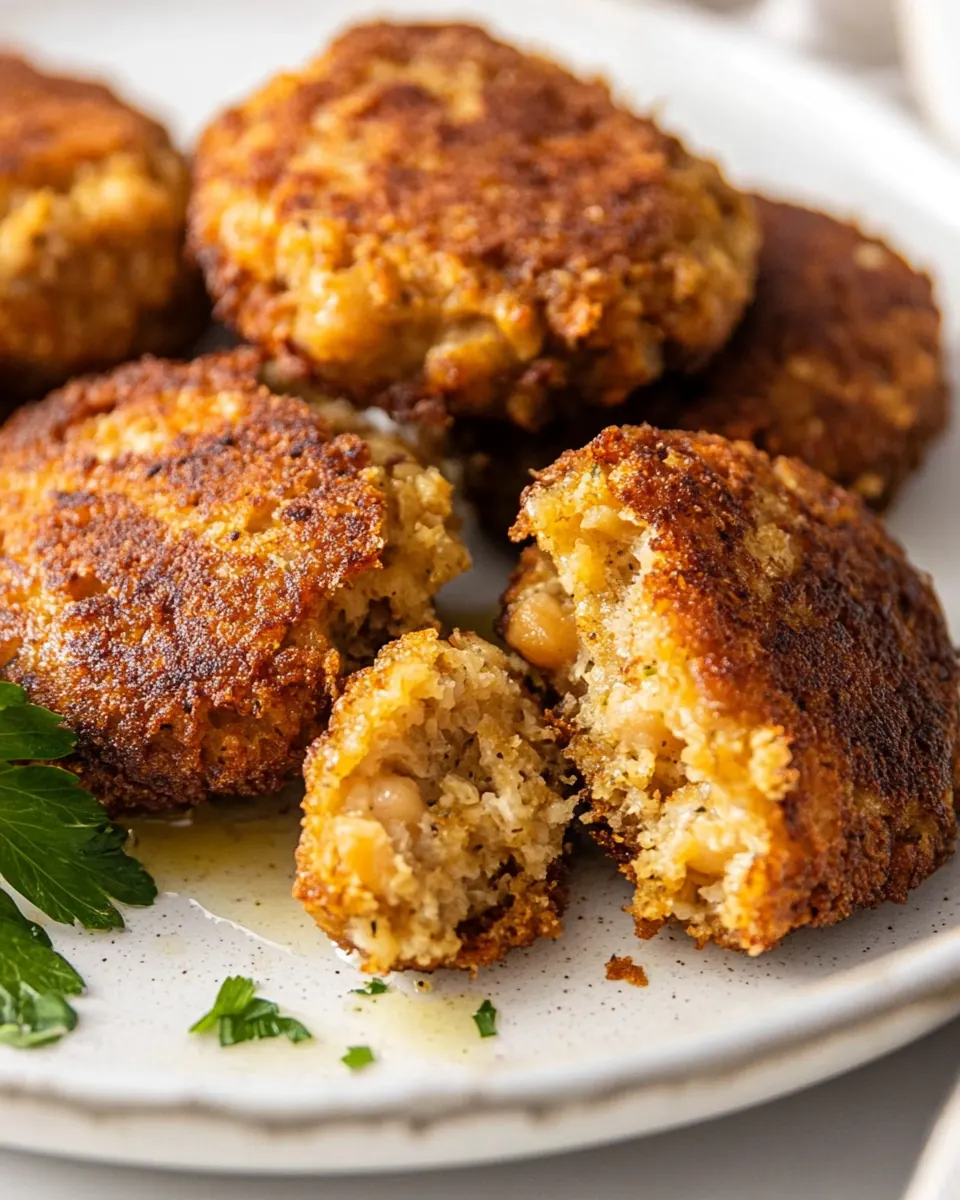
Chickpea Fritters
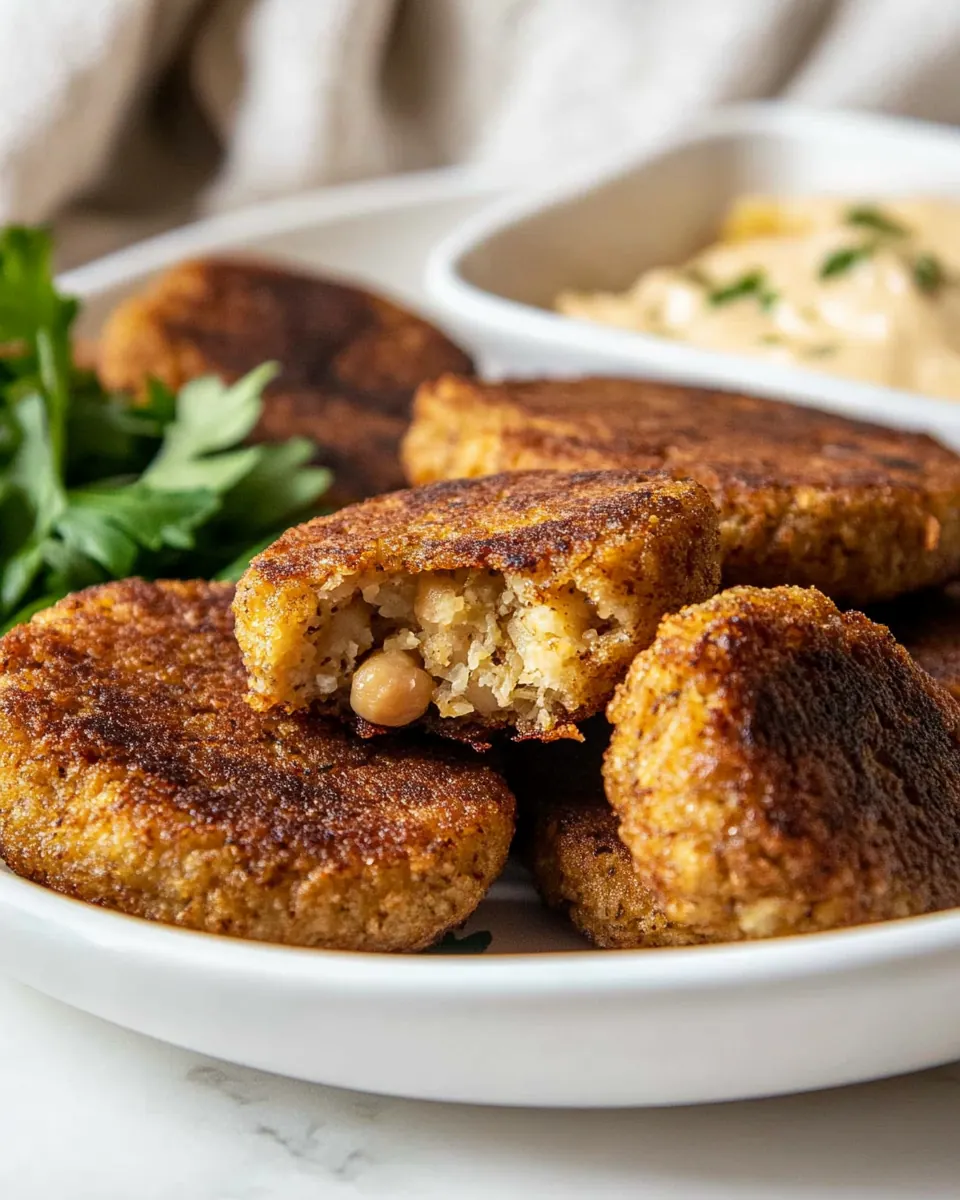
Chickpea Fritters have been a weekday favorite in my kitchen for years, a recipe I reach for when I want something satisfying, crispy, and unfussy. The first time I made these I was racing the clock after work, juggling a ringing phone and a hungry friend at the door, and these little patties came together faster than I expected. They browned up into golden rounds that smelled warm and toasty, and we kept stealing bites before plating them properly.
I remember the texture most of all, the contrast between the crunchy exterior and the tender, slightly creamy center. Over time I’ve tweaked the seasoning to hit that sweet spot of savory and bright, and now this version feels balanced every single time. I like that they are portable, easy to reheat, and pair with lots of sauces, so they work for snacking, a light lunch, or a simple weeknight dinner. You will notice how the aroma of chickpea and cumin fills the kitchen as they sizzle, and how quickly your confidence grows with each flip.
Recipe Snapshot
16 mins
10 mins
6 mins
Easy
200 kcal
Mediterranean
Gluten-Free, Vegan
Appetizers
Skillet, Mixing bowl, Fork or potato masher, Spatula
The Beauty of This Chickpea Fritters
Quick to Make
I love how Chickpea Fritters come together in under half an hour, which makes them perfect for busy evenings. I often appreciate recipes that let me spend less time cooking and more time enjoying company, and these fritters deliver that freedom. Because the ingredients are simple, preparation is straightforward, and you can have them sizzling in about ten to fifteen minutes after you start.
Simple Pantry Staples
One of my favorite things is that these fritters use basic items I usually have on hand. The humble chickpeas, a bit of flour, and a touch of Parmesan cheese create a sturdy, well seasoned base. That practicality means I rarely need a grocery run, which feels like a small but meaningful victory on a hectic day.
Versatile Serving Options
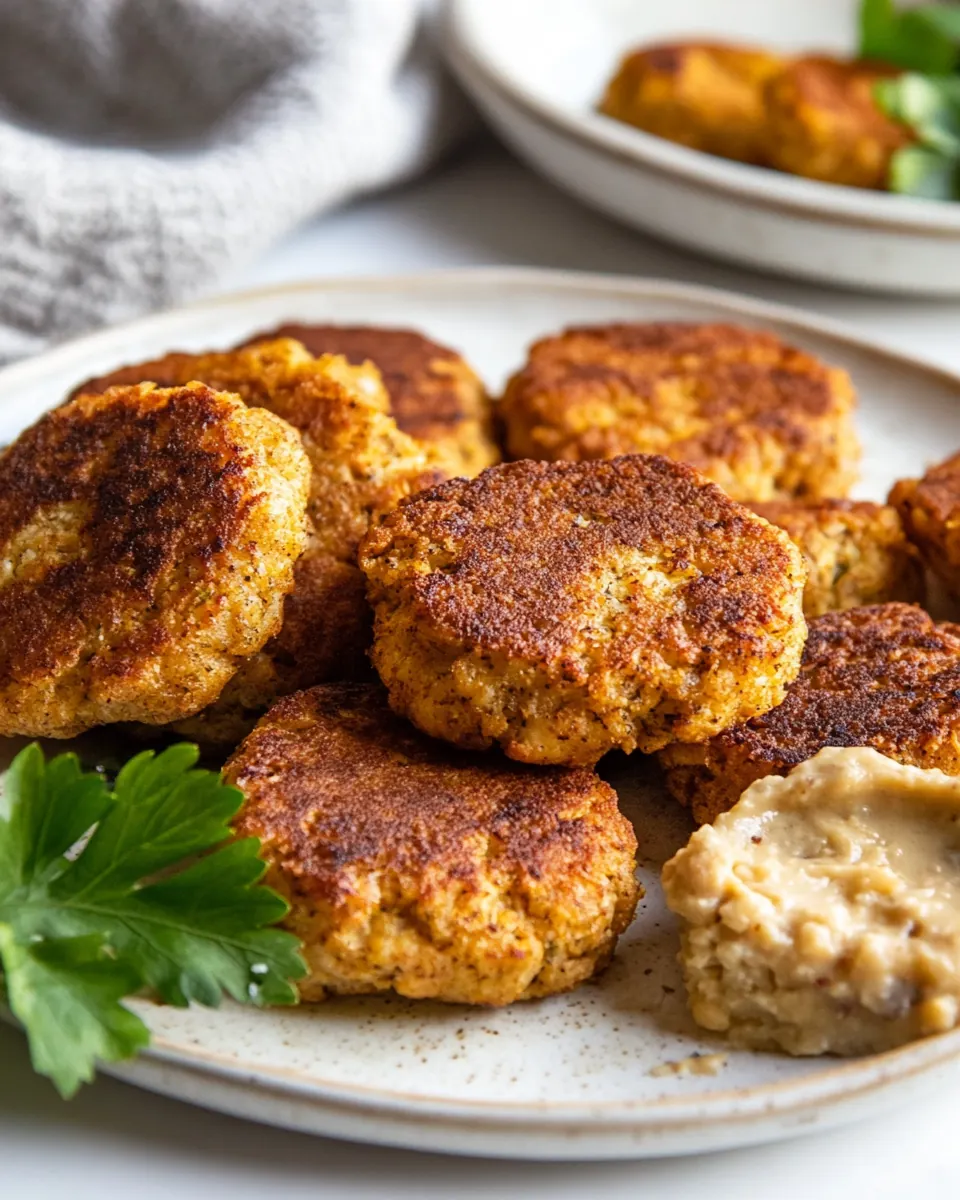
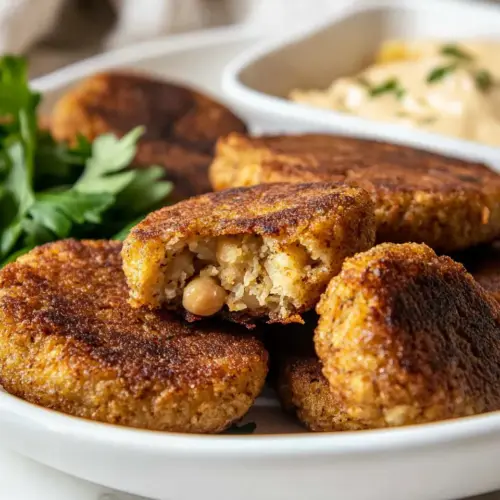
I find these fritters versatile, because they pair beautifully with cool, creamy dips or bright citrus. I like serving them alongside a zippy yogurt sauce or a smooth hummus, which softens the crisp surface and adds moisture. They also stand up well as a protein-forward snack, so you can scale portions for appetizers or light meals.
Texture Contrast
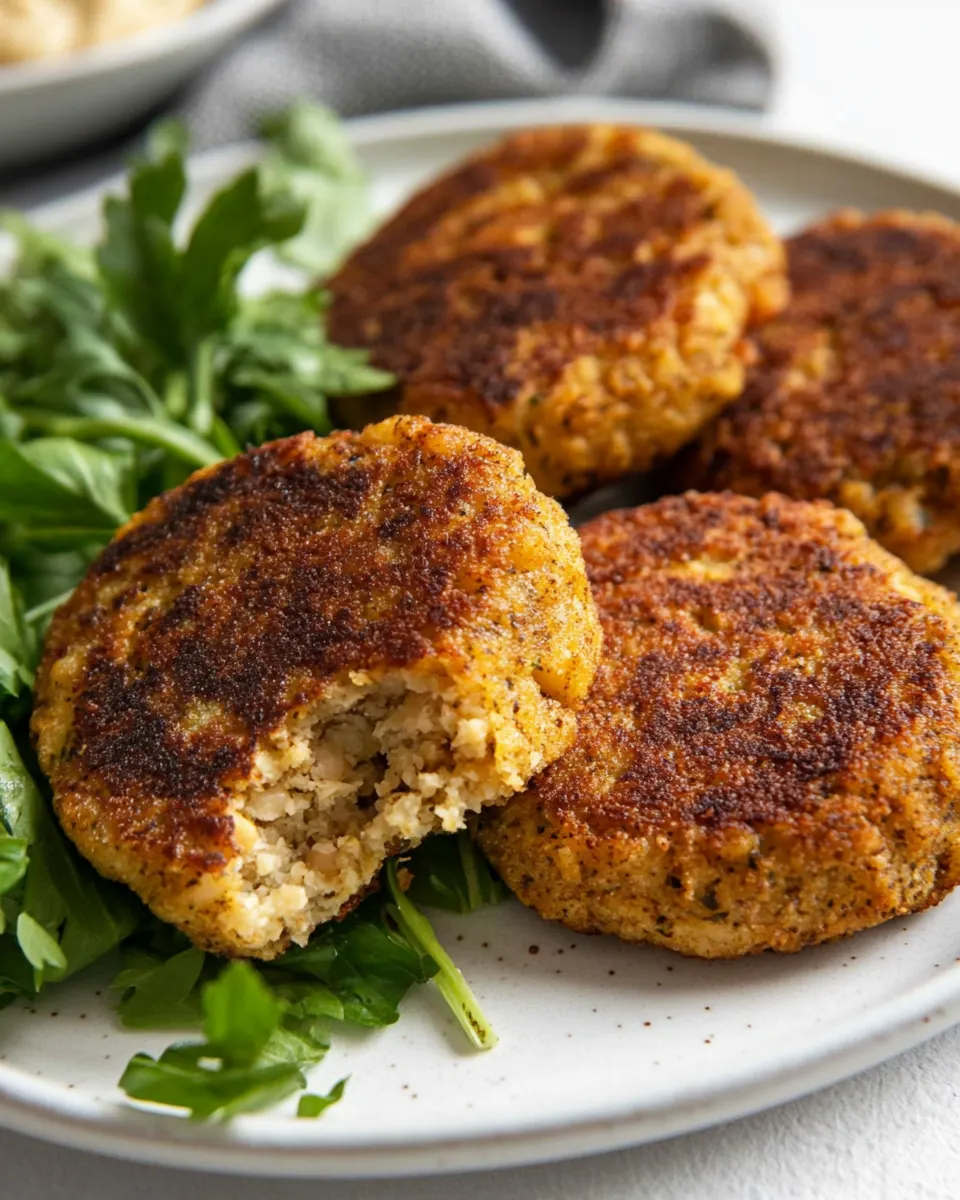
What really sells these for me is the textural play: a golden crisp exterior gives way to a tender interior. When I press a spatula down lightly and hear that gentle sizzle, I know the Maillard reaction is doing its work. That crunch provides a delightful contrast to the soft center, and it makes each bite feel more satisfying than a plain mash.
Kid Friendly and Crowd Approved
These fritters often sneak onto party platters at my gatherings because they are finger friendly and familiar. People tend to like the approachable flavors, and I enjoy watching plates empty quickly. They are a reliable crowd pleaser that require minimal fuss and maximum flavor.
What You Need for Chickpea Fritters
These ingredients reflect a philosophy of simplicity and balance. Each item plays an essential role: the chickpeas provide body and creaminess, the flour binds and gives structure, and the Parmesan cheese contributes savory depth. Aromatics and seasonings like cumin and garlic powder build flavor without overpowering the humble base, while a little olive oil creates that irresistible golden crust.
- 1 15-ounce can chickpeas: Drained and mashed to provide a creamy, protein-rich base and hearty texture for the fritters. Offers nutty flavor and helps bind other ingredients when partially mashed while retaining some whole chickpeas for bite.
- 1/4 cup all-purpose flour: Combined to absorb moisture and create structure, helping the fritters hold together during shaping and frying. Adds lightness and prevents overly wet batter while contributing neutral flavor.
- 1/4 cup grated Parmesan cheese: Grated finely to add savory umami and a hint of saltiness that enhances overall flavor. Helps with binding by contributing a slightly oily texture and melts slightly when cooked for richness.
- 1 teaspoon ground cumin: Ground finely to introduce warm, earthy notes that complement the chickpeas and elevate the spice profile. Works well in small amounts to add depth without overpowering the other seasonings.
- 1/2 teaspoon garlic powder: Used in powdered form to impart a mild, mellow garlic flavor evenly throughout the mixture. Provides aromatic sharpness without fresh garlic’s moisture, helping maintain batter consistency.
- 1/2 teaspoon salt: Added to season the mixture and bring out the savory elements of the fritters. Balances flavors and enhances the taste of the chickpeas and cheese when mixed evenly.
- 2 4 tablespoons water: Stirred in gradually to adjust the consistency of the batter, allowing control over moisture so the mixture can be shaped and fried. Helps dissolve and distribute dry ingredients for a cohesive texture.
- 2 tablespoons olive oil: Heated in a skillet to fry the fritters until golden and crisp, contributing to browning and a pleasant mouthfeel. Adds fruity, savory notes while preventing sticking and creating a crisp exterior.
Making This Chickpea Fritters
I like to think of this cooking process as quick and tactile, a chance to engage with texture and aroma. The directions are simple, but each stage rewards attention to sensory cues so you end up with crisp, flavorful fritters. Below I expand each step to help you succeed with confidence.
- Prepare the chickpeas by draining and rinsing them thoroughly to reduce sodium content.: As you rinse the chickpeas under running water you will notice the water run clearer and the beans become less briny. The rinsing softens canning liquid residues and helps prevent an overly salty result. A common mistake here is not draining long enough, which leaves excess liquid that dilutes flavor and makes the mixture wetter than desired. Pat them dry briefly with a clean towel to remove surface moisture, because too much water will mean you need more flour and risk dense fritters.
- In a mixing bowl, combine chickpeas with flour, Parmesan cheese, cumin, garlic powder, salt, and 2 tablespoons of water. Mash the mixture with a fork or a potato masher until smooth, adding more water if necessary to achieve a thick, moldable consistency.: When you add the flour and Parmesan cheese to the mashed chickpeas , you will see a grainy but cohesive mixture forming. The aroma of cumin will start to come forward, and the dry ingredients will absorb initial moisture. If the mixture seems crumbly, add a splash more water to bring it together, but avoid making it runny. A typical slip up is adding too much water at once, so err on the side of less and adjust slowly to reach a moldable texture.
- Form the mixture into small, flat patties, about 1/2 inch thick.: As you mash, the mixture transforms from whole beans into a cohesive paste with small bits for texture. The sound is quiet but the visual change is satisfying as the mix becomes pliable. The reason this matters is that a smooth yet slightly textured interior yields a better mouthfeel after frying. Avoid overmashing to the point of complete puree, because then the fritters may be gummy. If you see dry pockets, sprinkle in another teaspoon of water at a time to integrate.
- Heat olive oil in a skillet over medium heat. Cook the patties for 2-3 minutes on each side until they are golden brown and crispy.: When shaping, press gently so the edges adhere and the surface is compact without being compressed to stiffness. You should feel a cohesive mass that holds shape when picked up. The ideal thickness allows the center to warm through while the exterior crisps to golden brown. A common error is making patties too thick, which leads to undercooked interiors, or too thin, which causes excessive drying. If the mixture sticks to your hands, lightly wet them or dust with a touch of flour .
- Serve the fritters warm with your choice of dip, such as tzatziki or hummus, or with fresh lemon wedges.: As the olive oil warms you will notice a faint shimmer on its surface and a slight aroma, which signals it is ready. Medium heat is important here because it allows the exterior to brown without burning quickly. If the oil smokes, the pan is too hot and will burn the coating before the center cooks, so reduce heat and let it cool slightly. Too low a temperature will result in greasy, pale fritters that never crisp properly.
- Cook the patties for 2 to 3 minutes on each side until they are golden brown and crispy: When the fritters hit the hot oil you should hear a gentle sizzle and see edges set up, turning a warm golden brown in a couple of minutes. The smell will become toasty and nutty, especially from the Parmesan cheese . Flip carefully with a spatula and cook the other side to match. A frequent misstep is overcrowding the pan, which drops the oil temperature and leads to uneven browning, so give each patty breathing room.
- Serve the fritters warm with your choice of dip, such as tzatziki or hummus, or with fresh lemon wedges: Serving immediately ensures the contrast between the crisp outside and tender center is at its peak. Squeezing a little citrus brightens the flavors and a cool dip adds moisture and balance. If you plan to hold them, keep them in a single layer in a low oven set to warm to preserve texture. Reheating directly in a skillet restores crispness better than a microwave, which can make them soggy.
Customization Ideas
These ideas let you personalize the fritters for different meals and preferences. Small changes can shift texture, spice level, and presentation, while keeping the core method intact. Below are detailed tips to inspire your variations and help you troubleshoot along the way.
- Boost the herb profile Add chopped fresh herbs into the batter for brightness, but fold them in gently to keep the mixture cohesive.
- Adjust the cheese level Increase or decrease the Parmesan cheese to control saltiness and depth, tasting as you go.
- Make them oil light Bake the patties on a greased sheet at moderate heat if you prefer fewer calories, though the texture will be less crisp than skillet frying.
- Increase binding If the mixture is too loose, add another teaspoon of flour at a time until you reach a stable consistency for shaping.
- Serve warmed Hold finished fritters in a low oven to keep them crisp until serving, arranging them in a single layer to avoid steam build up.
Best Served With
These fritters pair well with cooling dips and bright accents, making them adaptable to many occasions from snacks to casual dinners. The list below covers side ideas, serving styles, and storage approaches to help you present them with confidence.
- Fresh dips Serve with a yogurt based sauce or a smooth hummus to complement the crisp texture and add moisture.
- Citrus finish Offer lemon wedges so diners can squeeze fresh juice, which lifts the flavors and cuts through richness.
- Light salads Pair with a simple green salad dressed in a tangy vinaigrette for a balanced plate that adds freshness.
- Occasion flexibility These work well for casual lunches, appetizer platters, or informal dinners, and they travel nicely for picnics.
- Storage tips Refrigerate in an airtight container for up to three days, and reheat in a skillet to restore crispness rather than microwaving.
- Seasonal pairings In warmer months serve with cool accompaniments like cucumbers and yogurt, and in cooler months pair with warm salads or roasted vegetables.
FAQ
Conclusion
These Chickpea Fritters shine because they deliver crisp, savory satisfaction with minimal fuss and everyday ingredients. I encourage you to give them a try, whether as a snack, appetizer, or a light meal, because they come together quickly and reward attention to simple techniques. You might find they become one of your go to recipes for busy nights and casual gatherings, offering reliability and comfort in each golden bite.
Chickpea Fritters
Equipment
- Skillet
- Mixing Bowl
- Fork or Potato Masher
- Spatula
Ingredients
- 1 15-ounce can chickpeas Drained and mashed to provide a creamy, protein-rich base and hearty texture for the fritters. Offers nutty flavor and helps bind other ingredients when partially mashed while retaining some whole chickpeas for bite.
- 1/4 cup all-purpose flour Combined to absorb moisture and create structure, helping the fritters hold together during shaping and frying. Adds lightness and prevents overly wet batter while contributing neutral flavor.
- 1/4 cup grated Parmesan cheese Grated finely to add savory umami and a hint of saltiness that enhances overall flavor. Helps with binding by contributing a slightly oily texture and melts slightly when cooked for richness.
- 1 teaspoon ground cumin Ground finely to introduce warm, earthy notes that complement the chickpeas and elevate the spice profile. Works well in small amounts to add depth without overpowering the other seasonings.
- 1/2 teaspoon garlic powder Used in powdered form to impart a mild, mellow garlic flavor evenly throughout the mixture. Provides aromatic sharpness without fresh garlic’s moisture, helping maintain batter consistency.
- 1/2 teaspoon salt Added to season the mixture and bring out the savory elements of the fritters. Balances flavors and enhances the taste of the chickpeas and cheese when mixed evenly.
- 2 -4 tablespoons water Stirred in gradually to adjust the consistency of the batter, allowing control over moisture so the mixture can be shaped and fried. Helps dissolve and distribute dry ingredients for a cohesive texture.
- 2 tablespoons olive oil Heated in a skillet to fry the fritters until golden and crisp, contributing to browning and a pleasant mouthfeel. Adds fruity, savory notes while preventing sticking and creating a crisp exterior.
Instructions
- Prepare the chickpeas by draining and rinsing them thoroughly to reduce sodium content.: As you rinse the chickpeas under running water you will notice the water run clearer and the beans become less briny. The rinsing softens canning liquid residues and helps prevent an overly salty result. A common mistake here is not draining long enough, which leaves excess liquid that dilutes flavor and makes the mixture wetter than desired. Pat them dry briefly with a clean towel to remove surface moisture, because too much water will mean you need more flour and risk dense fritters.
- In a mixing bowl, combine chickpeas with flour, Parmesan cheese, cumin, garlic powder, salt, and 2 tablespoons of water. Mash the mixture with a fork or a potato masher until smooth, adding more water if necessary to achieve a thick, moldable consistency.: When you add the flour and Parmesan cheese to the mashed chickpeas , you will see a grainy but cohesive mixture forming. The aroma of cumin will start to come forward, and the dry ingredients will absorb initial moisture. If the mixture seems crumbly, add a splash more water to bring it together, but avoid making it runny. A typical slip up is adding too much water at once, so err on the side of less and adjust slowly to reach a moldable texture.
- Form the mixture into small, flat patties, about 1/2 inch thick.: As you mash, the mixture transforms from whole beans into a cohesive paste with small bits for texture. The sound is quiet but the visual change is satisfying as the mix becomes pliable. The reason this matters is that a smooth yet slightly textured interior yields a better mouthfeel after frying. Avoid overmashing to the point of complete puree, because then the fritters may be gummy. If you see dry pockets, sprinkle in another teaspoon of water at a time to integrate.
- Heat olive oil in a skillet over medium heat. Cook the patties for 2-3 minutes on each side until they are golden brown and crispy.: When shaping, press gently so the edges adhere and the surface is compact without being compressed to stiffness. You should feel a cohesive mass that holds shape when picked up. The ideal thickness allows the center to warm through while the exterior crisps to golden brown. A common error is making patties too thick, which leads to undercooked interiors, or too thin, which causes excessive drying. If the mixture sticks to your hands, lightly wet them or dust with a touch of flour .
- Serve the fritters warm with your choice of dip, such as tzatziki or hummus, or with fresh lemon wedges.: As the olive oil warms you will notice a faint shimmer on its surface and a slight aroma, which signals it is ready. Medium heat is important here because it allows the exterior to brown without burning quickly. If the oil smokes, the pan is too hot and will burn the coating before the center cooks, so reduce heat and let it cool slightly. Too low a temperature will result in greasy, pale fritters that never crisp properly.
- Cook the patties for 2 to 3 minutes on each side until they are golden brown and crispy: When the fritters hit the hot oil you should hear a gentle sizzle and see edges set up, turning a warm golden brown in a couple of minutes. The smell will become toasty and nutty, especially from the Parmesan cheese . Flip carefully with a spatula and cook the other side to match. A frequent misstep is overcrowding the pan, which drops the oil temperature and leads to uneven browning, so give each patty breathing room.
- Serve the fritters warm with your choice of dip, such as tzatziki or hummus, or with fresh lemon wedges: Serving immediately ensures the contrast between the crisp outside and tender center is at its peak. Squeezing a little citrus brightens the flavors and a cool dip adds moisture and balance. If you plan to hold them, keep them in a single layer in a low oven set to warm to preserve texture. Reheating directly in a skillet restores crispness better than a microwave, which can make them soggy.
Notes
- Boost the herb profile Add chopped fresh herbs into the batter for brightness, but fold them in gently to keep the mixture cohesive.
- Adjust the cheese level Increase or decrease the Parmesan cheese to control saltiness and depth, tasting as you go.
- Make them oil light Bake the patties on a greased sheet at moderate heat if you prefer fewer calories, though the texture will be less crisp than skillet frying.
- Increase binding If the mixture is too loose, add another teaspoon of flour at a time until you reach a stable consistency for shaping.
- Serve warmed Hold finished fritters in a low oven to keep them crisp until serving, arranging them in a single layer to avoid steam build up.