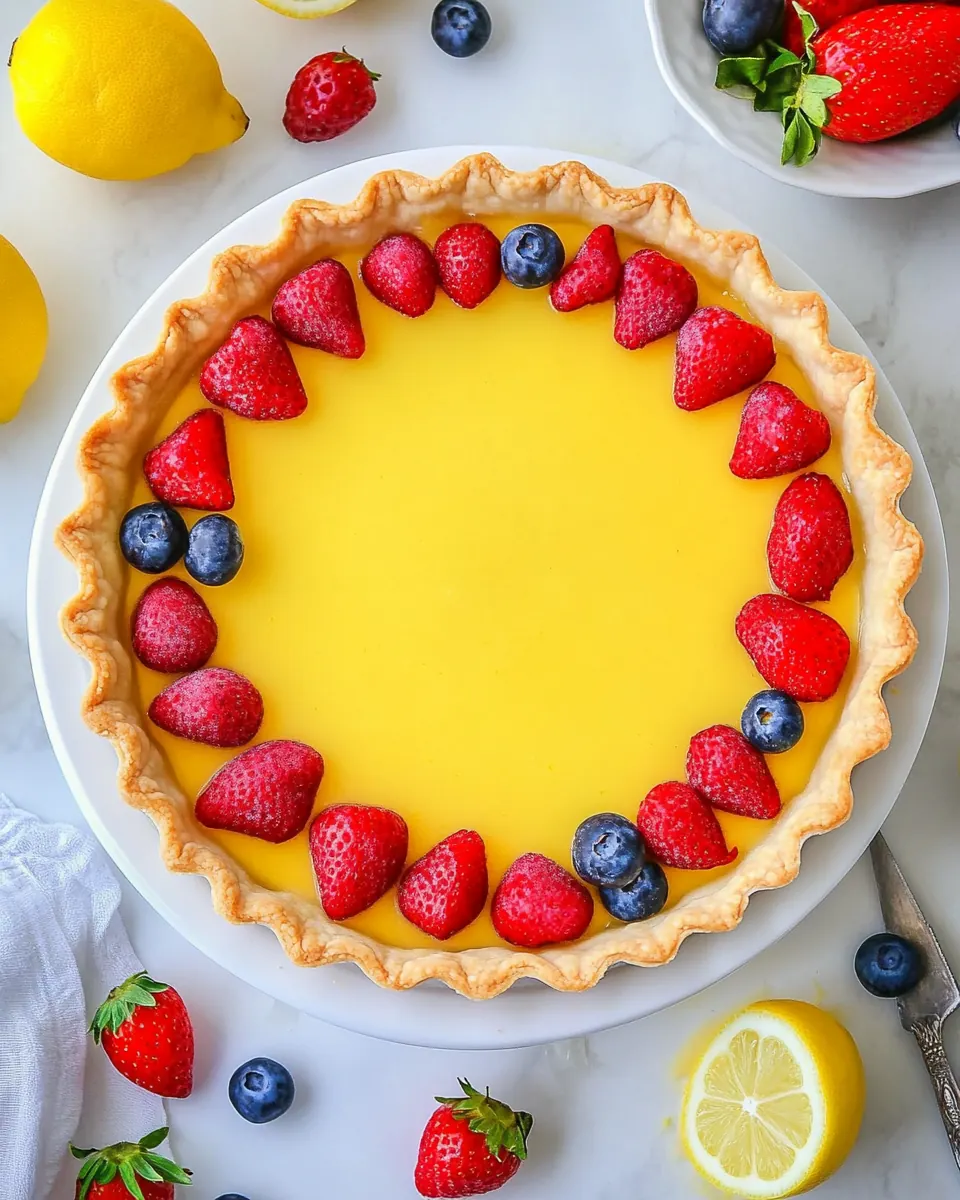
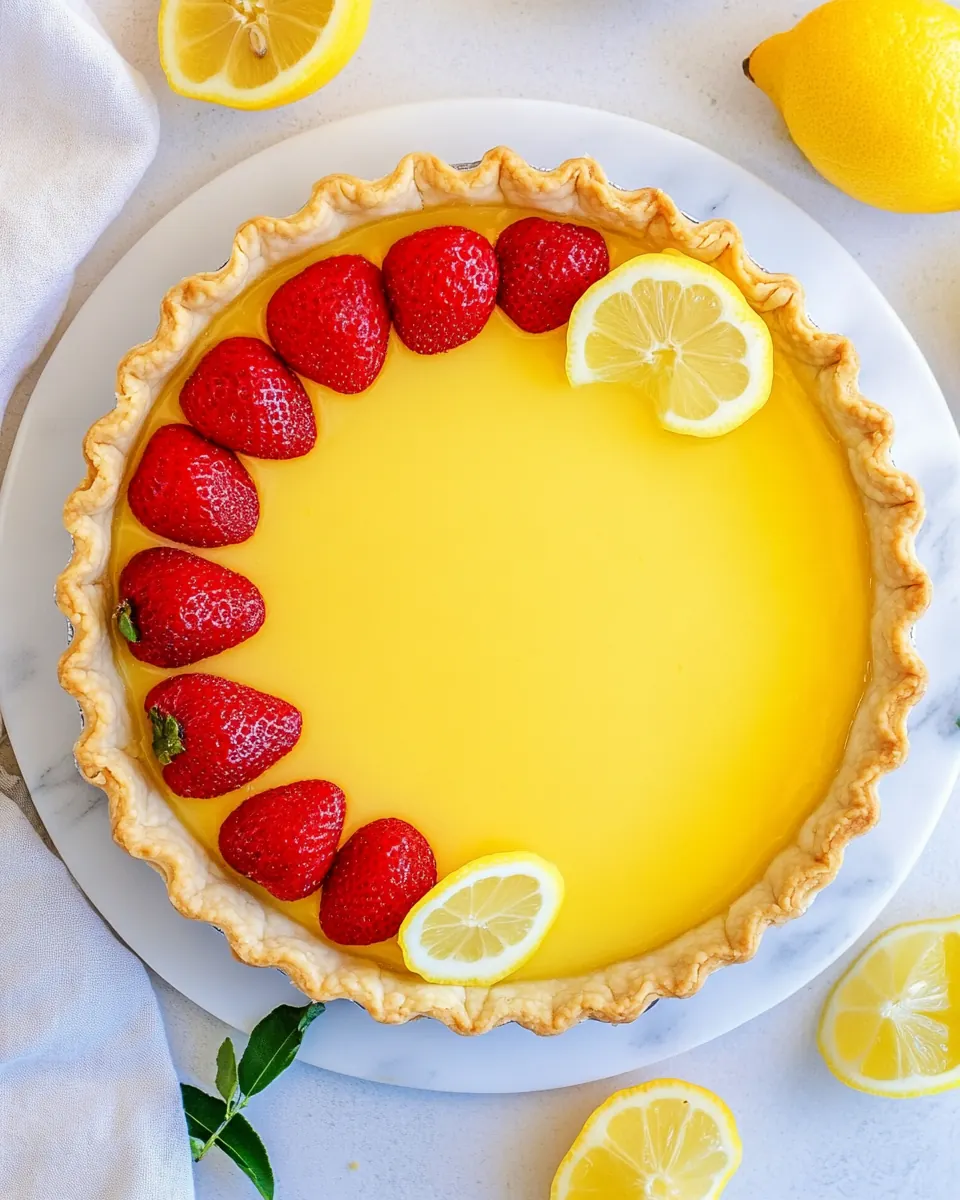
Lemon Tart
Lemon Tart has been my go to for whenever I need a dessert that feels both breezy and special. The first time I baked one I remember the bright snap of citrus filling the kitchen, and how everyone at the table leaned in as if the aroma itself were an invitation. That memory stuck with me, and over the years I learned small tricks that make a crisp crust and a velvety curd that hold together perfectly.
I love the ritual of this recipe, the way simple ingredients like all-purpose flour, butter, eggs, and lemon juice transform into something that tastes elevated yet approachable. There are evenings when I’ll bake it just to have a slice with strong coffee, and other times I’ll bring it to a friend’s gathering where it vanishes before the plates are cleared. Every bake taught me something different about texture and timing, and I enjoy nudging the technique to suit the moment.
Because this tart balances bright citrus with a tender, buttery shell, it’s flexible. I’ll sometimes dust it with powdered sugar or arrange fresh berries along one edge for color. The process feels meditative to me, rolling between careful pressing of the crust and the instant gratification of pouring warm curd into the pre baked shell. If you follow a few sensory cues and trust the recipe, you’ll end up with a tart that looks elegant and tastes like it belonged on the best bakery shelf. I’m excited to walk you through each step so you can recreate this slice of sunshine in your own kitchen.
Recipe Snapshot
1 hr 10 mins
35 mins
35 mins
Medium
290 kcal
American
Gluten-Free, Low FODMAP
Desserts
Measuring cups and spoons, Mixing Bowl, 9 inch tart pan
Why You’ll Love This Lemon Tart
Bright citrus flavor that wakes the palate
I adore how Lemon Tart centers on pure lemon aroma, the kind that perks up every bite. When I add freshly grated lemon zest and freshly squeezed lemon juice, the filling delivers a vivid, clean acidity that brightens desserts and balances the rich butter. I find that using fresh citrus rather than bottled juice gives a lift you can taste immediately, and it makes the tart feel homemade in the best way.
Buttery, crisp crust that supports the curd
The crust recipe included here pre bakes and presses for a firm base that stays crisp under the filling. I love that the texture contrasts with the custardy center, creating layers of interest in every forkful. Over the years I learned to press the dough evenly into the pan so there are no thin spots that bake faster, and that small detail pays off when slicing.
Silky lemon curd with luxurious mouthfeel
The curd is cooked slowly and strained for an ultra smooth finish. When you whisk the hot lemon mixture into the beaten eggs slowly, you avoid scrambling and end up with a custard that sets yet remains creamy. I always stir until the curd coats the back of a spoon, which tells me the texture will hold without becoming rubbery.
Flexible serving and elegant presentation
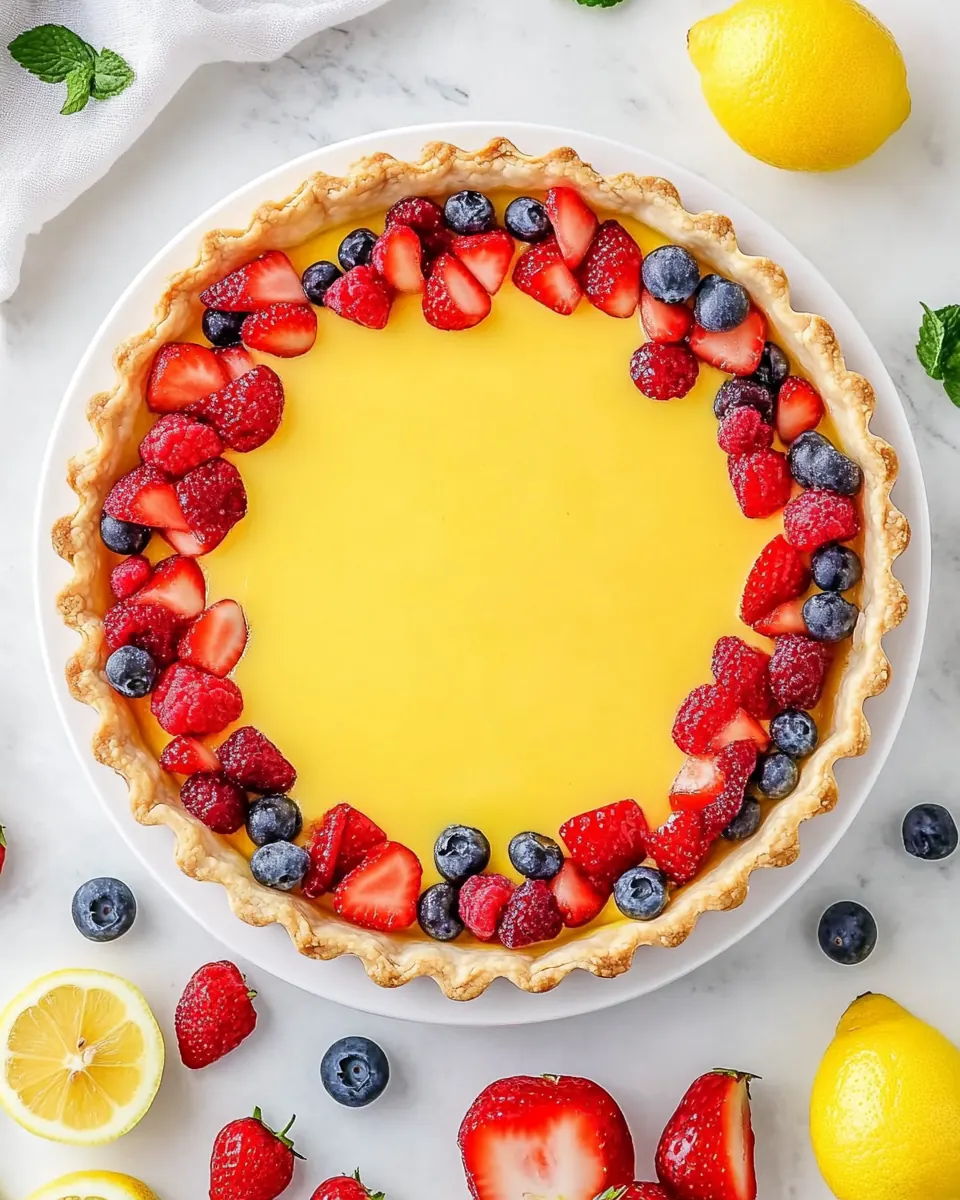
I often serve Lemon Tart plain with a dusting of powdered sugar, or scallop fresh berries along one side for a pop of color. It’s easy to dress up for celebrations or keep simple for weekday dessert. Because it can be served at room temperature or chilled, it works with many menus and occasions.
Techniques that are forgiving yet precise
The method uses straightforward steps, like pre baking the crust and tempering the eggs, which feel technical but are forgiving once you understand the sensory cues. I’ll walk you through each cue so you can avoid common pitfalls like a soggy bottom or a curd that overcooks. These small skills make the recipe reliably excellent every time I bake it.
What to Buy for Lemon Tart
This ingredient list is focused on clarity and balance. The key players are the pastry foundation and the citrus curd. The crust ingredients make a crisp, buttery shell that offers structure, while the curd ingredients combine acidity, richness, and body to form a glossy filling. Each item contributes to texture, stability, or flavor intensity, and together they create a dessert that is both elegant and homey.
- 1 1/2 cup (180 g) all-purpose flour: Provide structure and a tender crumb to the tart shell; combine with fat and liquid to form a workable dough, and help absorb moisture during baking to ensure the crust holds its shape.
- 1/2 cup (100 g) powdered sugar: Add fine sweetness and promote a delicate texture in the pastry; sift with flour to prevent lumps and keep the crust light without adding graininess.
- 1/2 teaspoon salt: Enhance overall flavor balance and bolster other ingredients; stabilize the dough by regulating gluten development and subtly brightening the pastry's taste.
- 10 tablespoons (140 g) unsalted butter melted: Contribute rich fat and moisture to the crust; when melted and mixed with flour and sugar, create flakiness and help bind the dough for easy pressing into the tart pan.
- 5 large egg yolks at room temperature: Provide concentrated richness and a silky texture to the lemon custard; enrich the filling, add color, and help thicken when combined with other eggs and heat.
- 3 large eggs at room temperature: Supply body and additional thickening power to the curd-like filling; add volume, creaminess, and structure to ensure a smooth, set lemon tart interior.
- 1 cup (200 g) granulated sugar: Sweeten and balance the tart's acidity; dissolve with eggs and lemon juice to create a glossy, stable filling while controlling sweetness level.
- 2 teaspoons cornstarch cornflour in the UK: Act as a thickening agent to stabilize the lemon filling; prevent curd from becoming runny by binding liquids and creating a smooth, satiny texture once heated.
- 1/2 teaspoon salt: Round out flavor and season both crust and filling; when used sparingly, improve taste perception and enhance the contrast between sweet and tart components.
- 2 tablespoons grated lemon zest: Deliver concentrated lemon oil and aromatic intensity to the filling; incorporate finely into the custard to boost bright citrus flavor without adding extra liquid.
- 1/2 cup + 2 tablespoons (150 ml) lemon juice freshly squeezed (about 4-5 lemons, depending on the size): Provide the primary tart and acidic component for the curd; react with eggs and sugar to set the filling and create the signature lemon flavor profile.
- 10 tablespoons (140 g) unsalted butter: Add creaminess and a glossy, smooth finish to the filling; when melted into the curd, contribute richness, body, and a slightly softer set for a luscious bite.
- 3 tablespoons (45 ml) heavy whipping cream: Increase richness and slightly loosen the filling for a silkier texture; whipping cream folded or stirred in tempers sharpness and enhances mouthfeel.
- Fresh berries, whipped cream, or powdered sugar , to garnish (optional): Offer optional garnish and finishing touches to the plated tart; add color, freshness, or light sweetness that complements the lemon filling and enhances presentation.
Cooking Instructions for Lemon Tart

This recipe flows from pressing a crisp shell to creating a glossy lemon curd and finishing with a brief bake to set the tart. The steps require attention to visual and textural cues, so I describe the sensory signals you should watch for. Keep tools ready and taste attentively as you go.
- Preheat the oven to 350°F (180°C), or 160°C fan oven.: You should feel the kitchen warm as the oven comes up to temperature, and a reliable preheat ensures the crust begins baking immediately for a crisp base. I always place the rack in the lower third so the bottom gets direct heat, helping avoid a soggy center. A common mistake is skipping preheat, which can cause uneven baking. If your oven runs hot or cold, use an oven thermometer to check accuracy.
- In a medium bowl, whisk together flour, sugar and salt. Add melted butter and using a spatula, mix until combined.: The mixture should smell faintly of sweet butter and feel like coarse crumbs as you stir. This step builds the foundation for a tender crust; the melted butter binds the dry ingredients without chilling, which makes pressing easier. If you overmix, the dough can become dense, so stop once it comes together. Watch for greasy pockets of butter which indicate uneven distribution.
- Add 1/2 of the flour mixture to a 9-inch (23 cm) tart pan with a removable bottom. Using your hands and the flat bottom of a measuring cup, press the mixture evenly into the bottom of the pan and just starting up the sides. Press the remainder of the mixture into the fluted sides, connecting to the bottom crust. Use your hands to make sure the crust is evenly spread in the edges of the pan, even on top, and with the aid of the measuring cup, even on the bottom. The measuring cup can be used to ensure the joint of the sides and bottom are straight against the pan.: As you press, you should hear a faint brushing sound and feel the dough compact under firm pressure, forming a uniform layer. A well pressed crust ensures slices keep their shape. Take care to make the thickness consistent, since thin areas will bake faster and risk burning. If the dough sticks to your hands, chill briefly rather than adding more flour, which would dry the crust.
- Line the crust dough with parchment paper or aluminum foil and fill with pie weights, dried beans or rice work well. Bake the crust for 15 minutes, remove the paper and weights, and continue to bake for an additional 10 minutes. Carefully remove from the oven and set on a cooling rack.: While baking you will notice the edges turn a pale golden tone and the aroma of toasted butter will rise. Removing the weights lets the bottom brown and crisp fully. A frequent pitfall is skipping the second bake, which leaves the bottom underdone. Allow the crust to cool on a rack so steam can escape and the base keeps crispness rather than steaming against the pan.
- In a medium bowl, whisk eggs and egg yolks together and set aside.: The eggs should look smooth and slightly pale when whisked, with no pockets of yolk remaining. This uniformity helps them temper evenly when introduced to the warm lemon mixture. Use room temperature eggs so they integrate without shocking them into curdling. If eggs are cold, tempering will be harder and can lead to lumps.
- In a small saucepan, whisk together sugar, cornstarch, salt, and lemon zest. Add lemon juice and butter and cook on medium heat, stirring often until the mixture just starts to bubble.: The mixture will smell intensely lemony from the zest and you will see small bubbles around the edge as the liquid heats. Stirring prevents scorching and ensures the cornstarch dissolves fully. You want it to bubble briefly, not boil vigorously, because too high heat can over thicken or change the flavor. If it thickens too rapidly or sticks to the pan, lower the heat and whisk continuously.
- Remove the pan from heat and slowly pour the lemon mixture into the eggs, whisking constantly. Transfer curd to a new small or medium saucepan, whisking constantly over medium-low heat until the curd starts to thicken and coat the back of a spoon, this takes several minutes.: As you temper, the combined aroma of warm citrus and butter becomes richer and more rounded. Coating the back of a spoon is the visual cue that signals proper thickness. Continuous whisking prevents ribbons of cooked egg and keeps the texture silky. A common error is adding hot liquid too fast, which cooks the eggs into scrambled bits; go slowly and stir without stopping.
- Place a fine-meshed sieve over a medium-sized bowl and strain the curd into the bowl. Stir in the cream and pour the curd into the warm crust.: Straining removes any tiny cooked particles, producing a glossy, pillowy curd. After passing through the sieve, the curd should glide like custard and smell fragrant and balanced. Stirring in the heavy whipping cream adds silk and softens the tang, making the texture luxurious. If the curd seems grainy after straining, it may have overheated; gentle whisking off heat can help smooth it.
- Bake the filled tart in the 350°F/180°C oven for 10 minutes to set the tart. Take it out of the oven and place on a cooling rack to cool to room temperature, for about 1-2 hours.: During this brief bake the surface should look just set and retain a glossy sheen, not cracked or dry. Cooling on a rack prevents trapped steam and keeps the crust from getting soggy. If you rush to chill it while it is still very warm, condensation may form under the wrap, making the filling watery. Be patient and allow the tart to reach room temperature before chilling further.
- Serve at room temperature or carefully cover with plastic wrap, refrigerate for 3-4 hours or overnight, and serve chilled. Once cooled, before serving, remove the outer ring from the pan and using a thin metal spatula, slide it between the bottom crust and the tart pan bottom and carefully transfer it to the serving plate.: Chilled slices hold cleaner shapes and the flavors round out after resting. When unmolding, you should feel a slight slip as the removable rim lifts away, and the tart will look glossy and smooth. Avoid forcing the tart from the pan if it resists; chilling a bit longer usually helps. Use a thin, flexible spatula and steady hands to prevent cracking.
- The lemon tart can be served plain, sprinkled with powdered sugar, garnished with fruit, or with whipped cream and fruit.: The final presentation is where you add personality, whether that is a dusting of powdered sugar or a neat crescent of fresh berries . The contrast of tart filling and light garnish enhances both appearance and taste. One mistake is overdoing heavy toppings which can mask the lemon’s brightness; keep garnishes balanced and complementary.
Tips for Success
These tips expand on small technique points that consistently improve the final tart. They focus on timing, texture, and presentation, helping you avoid common errors and achieve bakery level results at home.
- Measure ingredients accurately, especially the flour and butter, to maintain the right dough consistency; spoon the flour into the cup instead of scooping to prevent compacting.
- Keep the butter warm but not hot when combining with dry ingredients, so it binds without cooking the mixture and makes pressing into the pan easier.
- Temper the eggs slowly by pouring the warm lemon mixture into the eggs in a slow stream while whisking, which prevents curdling and keeps the filling smooth.
- Use fresh lemon juice and zest for the most vibrant flavor, and strain the juice to remove any pulp that might create texture in the curd.
- Sieve the curd after cooking to remove any tiny cooked bits and to ensure a silky finish that will set and slice cleanly.
- Chill for cleaner slices by refrigerating for at least three hours, and remove the tart ring gently with a thin spatula to transfer it without cracking.
Serving Ideas for Lemon Tart
This Lemon Tart is versatile and easy to pair, whether you are assembling a dessert for a casual afternoon or a festive dinner. Here are ideas for plating, occasions to serve, and tips for storage and seasonal pairings.
- Simple slice: Serve a clean slice at room temperature with a light dusting of powdered sugar to highlight the glossy curd and crisp crust.
- With fresh berries: Arrange fresh berries such as raspberries or blueberries on one side of the tart for color contrast and a complementary tartness.
- With whipped cream: A small dollop of softly whipped cream on the side adds richness that balances the lemon’s brightness without overpowering it.
- For festive occasions: This tart is elegant for birthdays, afternoon tea, or holiday gatherings; it pairs well with light tea or coffee and occupies a bright place on the dessert table.
- Seasonal pairing: In spring, serve with early berries and edible flowers; in summer, add a scatter of mint leaves for freshness and aroma.
- Storage tips: Cover loosely with plastic wrap and refrigerate for up to three days; add any delicate garnishes just before serving to keep them fresh.
- Portioning: For a crowd, cut into smaller wedges and serve with a tiny spoon of jam or a berry on top to make each slice look special.
FAQ
Conclusion
This Lemon Tart shines because it balances a crisp, buttery crust with a silky, intensely lemony curd that feels both elegant and homey. The combination of fresh zest, freshly squeezed lemon juice, and careful tempering creates a glossy filling with bright flavor, while pre baking the shell ensures a satisfying crunch. I hope you give this recipe a try, whether for a casual dessert or a special gathering. It rewards attention to small technique points, and the results are reliably impressive, making it a dessert I return to again and again.

Lemon Tart
Equipment
- Measuring Cups and Spoons
- Mixing Bowl
- 9 inch tart pan
Ingredients
- 1 1/2 cup (180 g) all-purpose flour Provide structure and a tender crumb to the tart shell; combine with fat and liquid to form a workable dough, and help absorb moisture during baking to ensure the crust holds its shape.
- 1/2 cup (100 g) powdered sugar Add fine sweetness and promote a delicate texture in the pastry; sift with flour to prevent lumps and keep the crust light without adding graininess.
- 1/2 teaspoon salt Enhance overall flavor balance and bolster other ingredients; stabilize the dough by regulating gluten development and subtly brightening the pastry's taste.
- 10 tablespoons (140 g) unsalted butter melted Contribute rich fat and moisture to the crust; when melted and mixed with flour and sugar, create flakiness and help bind the dough for easy pressing into the tart pan.
- 5 large egg yolks at room temperature Provide concentrated richness and a silky texture to the lemon custard; enrich the filling, add color, and help thicken when combined with other eggs and heat.
- 3 large eggs at room temperature Supply body and additional thickening power to the curd-like filling; add volume, creaminess, and structure to ensure a smooth, set lemon tart interior.
- 1 cup (200 g) granulated sugar Sweeten and balance the tart's acidity; dissolve with eggs and lemon juice to create a glossy, stable filling while controlling sweetness level.
- 2 teaspoons cornstarch cornflour in the UK Act as a thickening agent to stabilize the lemon filling; prevent curd from becoming runny by binding liquids and creating a smooth, satiny texture once heated.
- 1/2 teaspoon salt Round out flavor and season both crust and filling; when used sparingly, improve taste perception and enhance the contrast between sweet and tart components.
- 2 tablespoons grated lemon zest Deliver concentrated lemon oil and aromatic intensity to the filling; incorporate finely into the custard to boost bright citrus flavor without adding extra liquid.
- 1/2 cup + 2 tablespoons (150 ml) lemon juice freshly squeezed (about 4-5 lemons, depending on the size) Provide the primary tart and acidic component for the curd; react with eggs and sugar to set the filling and create the signature lemon flavor profile.
- 10 tablespoons (140 g) unsalted butter Add creaminess and a glossy, smooth finish to the filling; when melted into the curd, contribute richness, body, and a slightly softer set for a luscious bite.
- 3 tablespoons (45 ml) heavy whipping cream Increase richness and slightly loosen the filling for a silkier texture; whipping cream folded or stirred in tempers sharpness and enhances mouthfeel.
- Fresh berries, whipped cream, or powdered sugar optional, to garnish Offer optional garnish and finishing touches to the plated tart; add color, freshness, or light sweetness that complements the lemon filling and enhances presentation.
Instructions
- Preheat the oven to 350°F (180°C), or 160°C fan oven.: You should feel the kitchen warm as the oven comes up to temperature, and a reliable preheat ensures the crust begins baking immediately for a crisp base. I always place the rack in the lower third so the bottom gets direct heat, helping avoid a soggy center. A common mistake is skipping preheat, which can cause uneven baking. If your oven runs hot or cold, use an oven thermometer to check accuracy.
- In a medium bowl, whisk together flour, sugar and salt. Add melted butter and using a spatula, mix until combined.: The mixture should smell faintly of sweet butter and feel like coarse crumbs as you stir. This step builds the foundation for a tender crust; the melted butter binds the dry ingredients without chilling, which makes pressing easier. If you overmix, the dough can become dense, so stop once it comes together. Watch for greasy pockets of butter which indicate uneven distribution.
- Add 1/2 of the flour mixture to a 9-inch (23 cm) tart pan with a removable bottom. Using your hands and the flat bottom of a measuring cup, press the mixture evenly into the bottom of the pan and just starting up the sides. Press the remainder of the mixture into the fluted sides, connecting to the bottom crust. Use your hands to make sure the crust is evenly spread in the edges of the pan, even on top, and with the aid of the measuring cup, even on the bottom. The measuring cup can be used to ensure the joint of the sides and bottom are straight against the pan.: As you press, you should hear a faint brushing sound and feel the dough compact under firm pressure, forming a uniform layer. A well pressed crust ensures slices keep their shape. Take care to make the thickness consistent, since thin areas will bake faster and risk burning. If the dough sticks to your hands, chill briefly rather than adding more flour, which would dry the crust.
- Line the crust dough with parchment paper or aluminum foil and fill with pie weights, dried beans or rice work well. Bake the crust for 15 minutes, remove the paper and weights, and continue to bake for an additional 10 minutes. Carefully remove from the oven and set on a cooling rack.: While baking you will notice the edges turn a pale golden tone and the aroma of toasted butter will rise. Removing the weights lets the bottom brown and crisp fully. A frequent pitfall is skipping the second bake, which leaves the bottom underdone. Allow the crust to cool on a rack so steam can escape and the base keeps crispness rather than steaming against the pan.
- In a medium bowl, whisk eggs and egg yolks together and set aside.: The eggs should look smooth and slightly pale when whisked, with no pockets of yolk remaining. This uniformity helps them temper evenly when introduced to the warm lemon mixture. Use room temperature eggs so they integrate without shocking them into curdling. If eggs are cold, tempering will be harder and can lead to lumps.
- In a small saucepan, whisk together sugar, cornstarch, salt, and lemon zest. Add lemon juice and butter and cook on medium heat, stirring often until the mixture just starts to bubble.: The mixture will smell intensely lemony from the zest and you will see small bubbles around the edge as the liquid heats. Stirring prevents scorching and ensures the cornstarch dissolves fully. You want it to bubble briefly, not boil vigorously, because too high heat can over thicken or change the flavor. If it thickens too rapidly or sticks to the pan, lower the heat and whisk continuously.
- Remove the pan from heat and slowly pour the lemon mixture into the eggs, whisking constantly. Transfer curd to a new small or medium saucepan, whisking constantly over medium-low heat until the curd starts to thicken and coat the back of a spoon, this takes several minutes.: As you temper, the combined aroma of warm citrus and butter becomes richer and more rounded. Coating the back of a spoon is the visual cue that signals proper thickness. Continuous whisking prevents ribbons of cooked egg and keeps the texture silky. A common error is adding hot liquid too fast, which cooks the eggs into scrambled bits; go slowly and stir without stopping.
- Place a fine-meshed sieve over a medium-sized bowl and strain the curd into the bowl. Stir in the cream and pour the curd into the warm crust.: Straining removes any tiny cooked particles, producing a glossy, pillowy curd. After passing through the sieve, the curd should glide like custard and smell fragrant and balanced. Stirring in the heavy whipping cream adds silk and softens the tang, making the texture luxurious. If the curd seems grainy after straining, it may have overheated; gentle whisking off heat can help smooth it.
- Bake the filled tart in the 350°F/180°C oven for 10 minutes to set the tart. Take it out of the oven and place on a cooling rack to cool to room temperature, for about 1-2 hours.: During this brief bake the surface should look just set and retain a glossy sheen, not cracked or dry. Cooling on a rack prevents trapped steam and keeps the crust from getting soggy. If you rush to chill it while it is still very warm, condensation may form under the wrap, making the filling watery. Be patient and allow the tart to reach room temperature before chilling further.
- Serve at room temperature or carefully cover with plastic wrap, refrigerate for 3-4 hours or overnight, and serve chilled. Once cooled, before serving, remove the outer ring from the pan and using a thin metal spatula, slide it between the bottom crust and the tart pan bottom and carefully transfer it to the serving plate.: Chilled slices hold cleaner shapes and the flavors round out after resting. When unmolding, you should feel a slight slip as the removable rim lifts away, and the tart will look glossy and smooth. Avoid forcing the tart from the pan if it resists; chilling a bit longer usually helps. Use a thin, flexible spatula and steady hands to prevent cracking.
- The lemon tart can be served plain, sprinkled with powdered sugar, garnished with fruit, or with whipped cream and fruit.: The final presentation is where you add personality, whether that is a dusting of powdered sugar or a neat crescent of fresh berries . The contrast of tart filling and light garnish enhances both appearance and taste. One mistake is overdoing heavy toppings which can mask the lemon’s brightness; keep garnishes balanced and complementary.
Notes
- Measure ingredients accurately, especially the flour and butter, to maintain the right dough consistency; spoon the flour into the cup instead of scooping to prevent compacting.
- Keep the butter warm but not hot when combining with dry ingredients, so it binds without cooking the mixture and makes pressing into the pan easier.
- Temper the eggs slowly by pouring the warm lemon mixture into the eggs in a slow stream while whisking, which prevents curdling and keeps the filling smooth.
- Use fresh lemon juice and zest for the most vibrant flavor, and strain the juice to remove any pulp that might create texture in the curd.
- Sieve the curd after cooking to remove any tiny cooked bits and to ensure a silky finish that will set and slice cleanly.
- Chill for cleaner slices by refrigerating for at least three hours, and remove the tart ring gently with a thin spatula to transfer it without cracking.