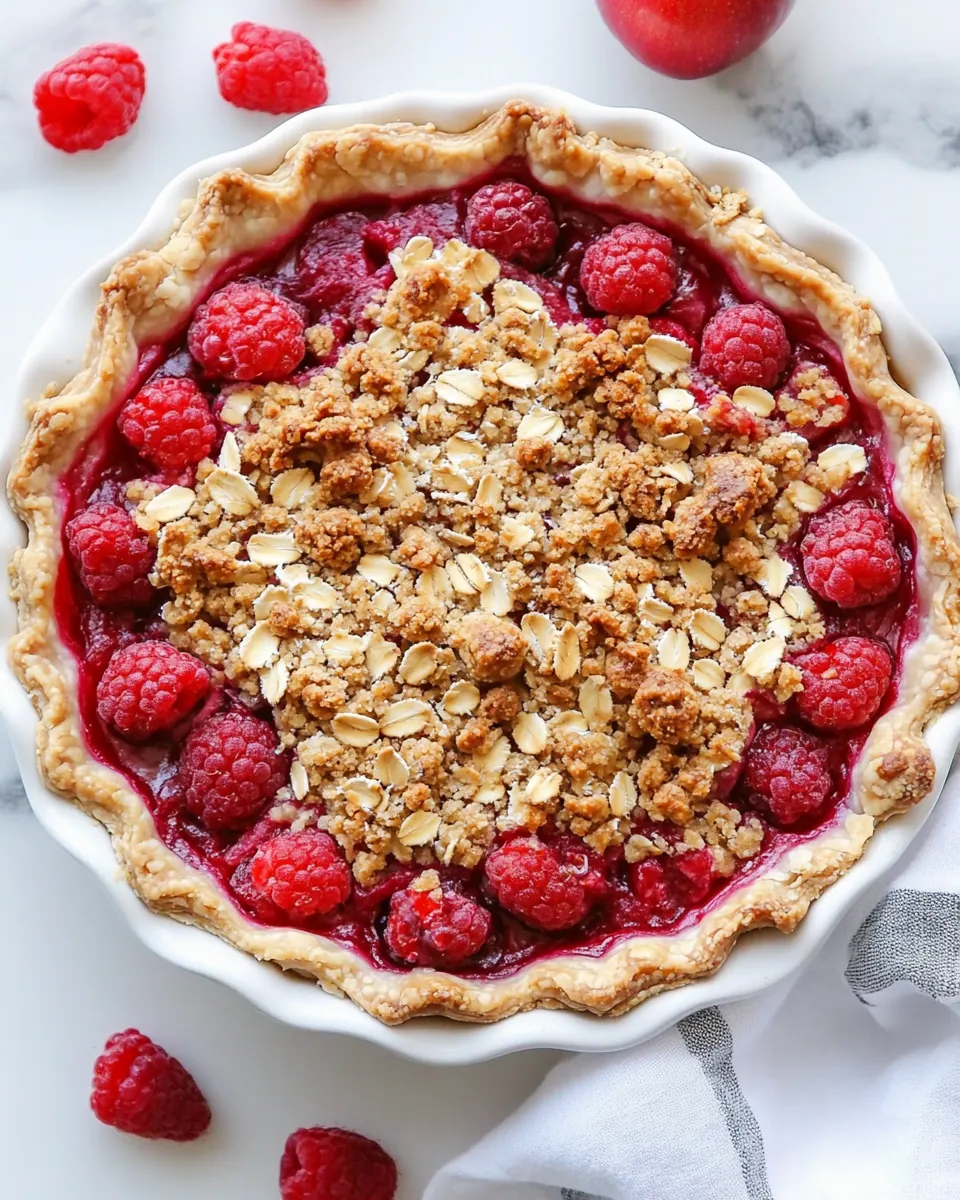
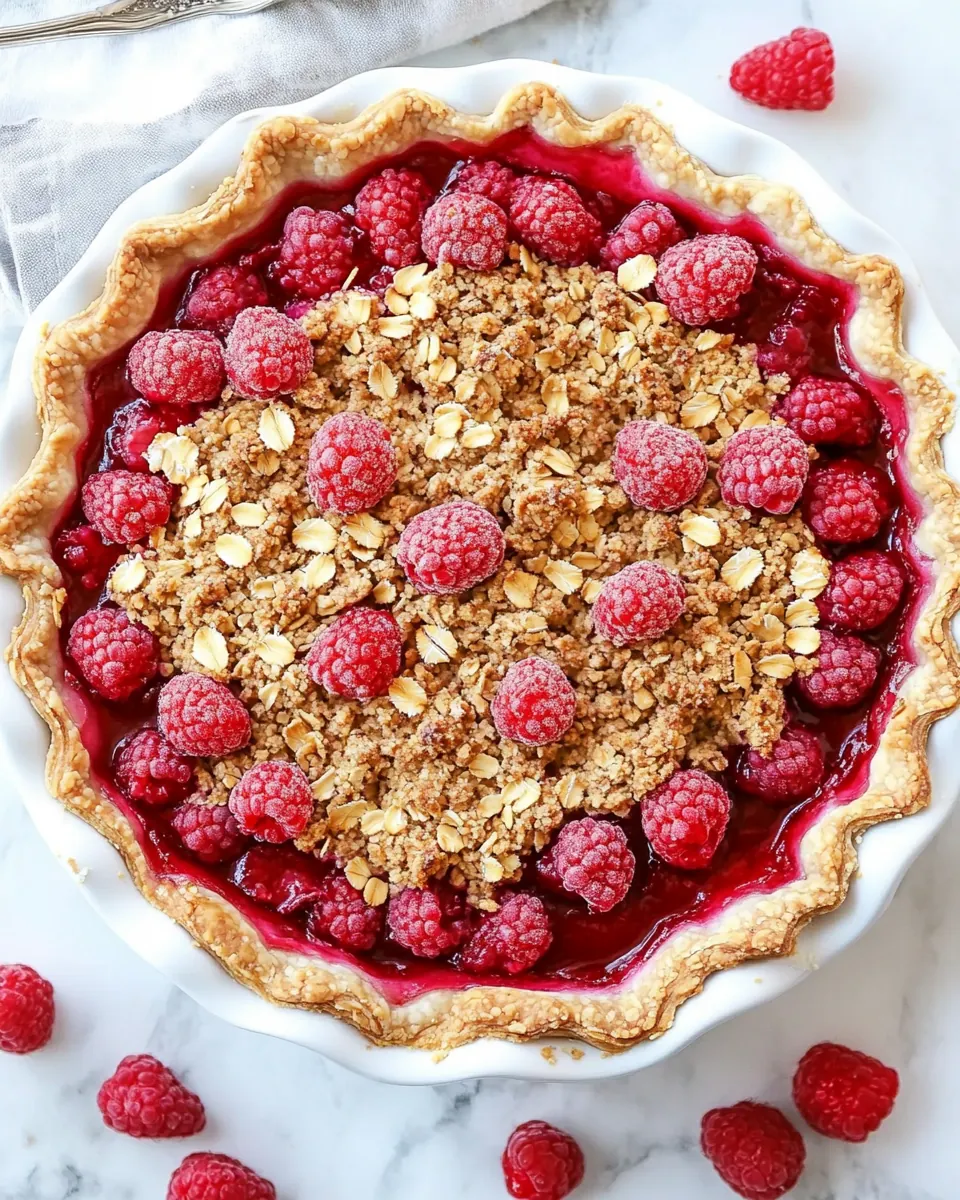
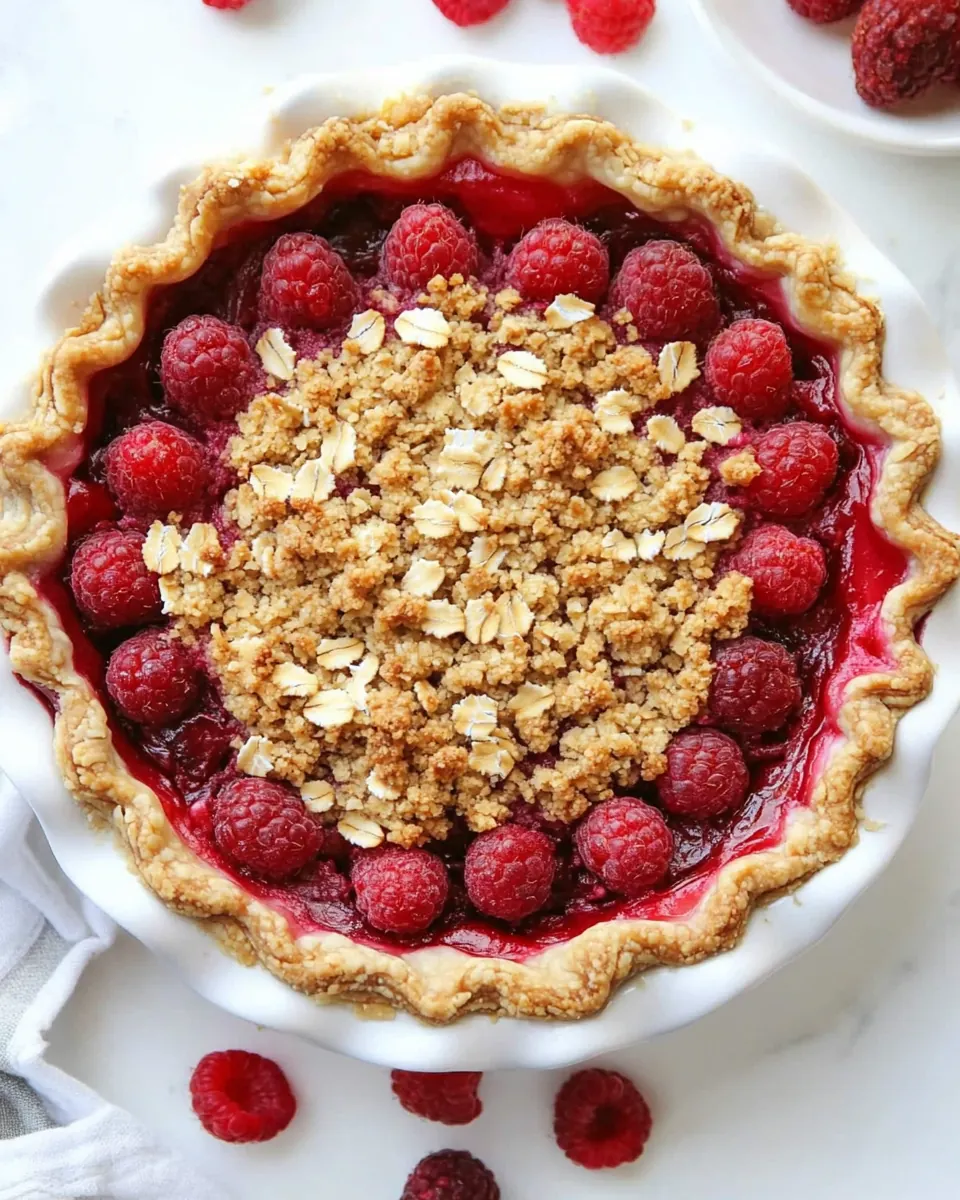
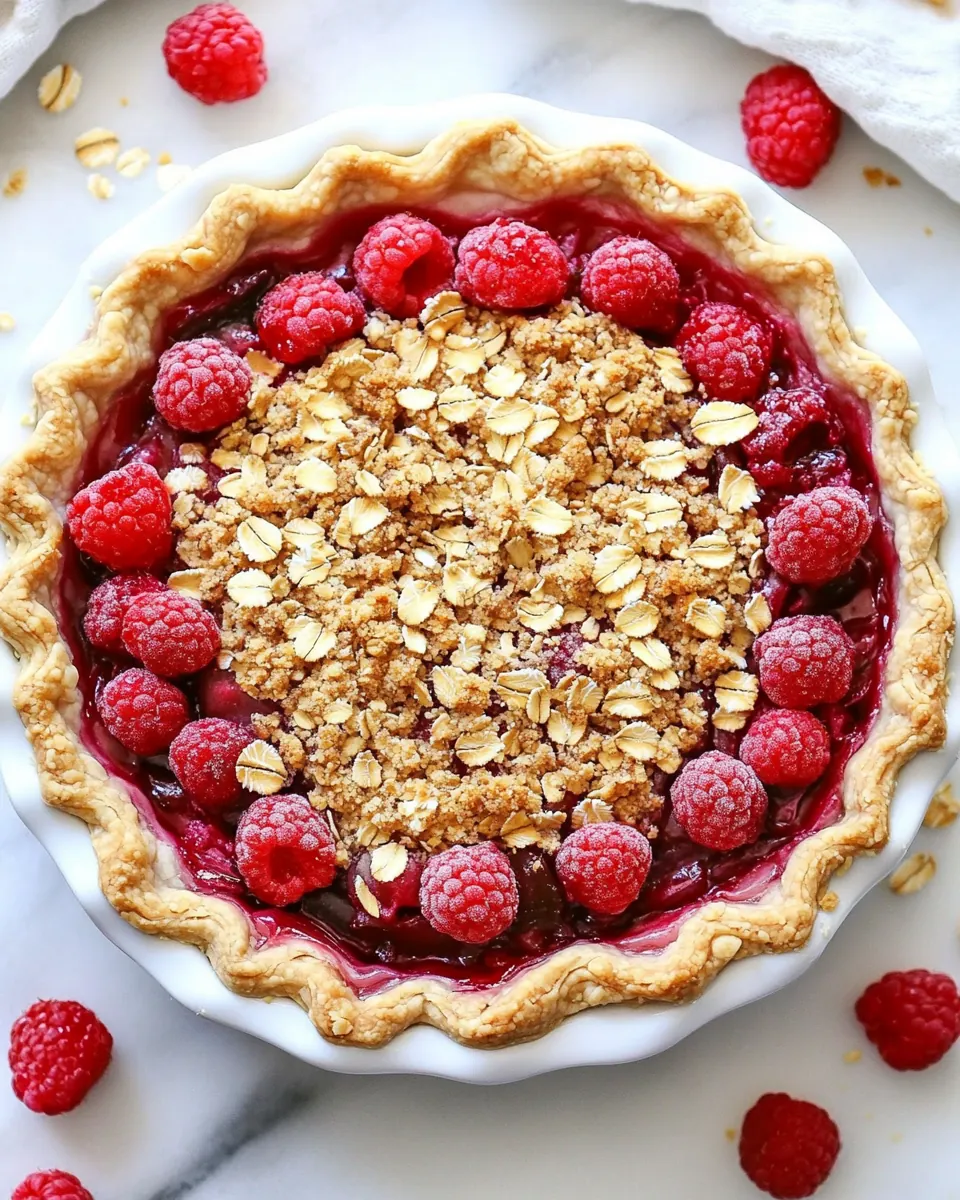
Rhubarb and Raspberry Pie With Oatmeal Crumble
Rhubarb and Raspberry Pie With Oatmeal Crumble is the kind of dessert that reminds me of warm afternoons in my grandmother’s kitchen, when the windows were cracked and the scent of fruit and butter drifted through the house. The first time I made this pie I was nervous about the tartness of rhubarb pairing with the bright sweetness of raspberries, but the oatmeal crumble brought everything into balance with a toasty, buttery finish. I still remember the satisfying crunch as I cut the first slice, and the way the filling bubbled and sent tiny, jewel like droplets of syrup around the edges of the crust.
Over the years I have tweaked this recipe for texture and timing so the filling is jammy but not soupy, and the crumble holds its shape while offering a soft chew. I love serving it slightly warm so the aromas of lime zest and cardamom are front and center, and the contrast between flaky pie crust and the rustic oatmeal topping is always a hit. When friends drop by, this pie is the one I reach for because it looks impressive, yet it comes together without fuss.
Recipe Snapshot
5 hr 35 mins
285 mins
50 mins
Hard
350 kcal
American
Gluten-Free, Low FODMAP
Desserts
Pie dish, Mixing bowls, Baking sheet, Aluminum foil
The Beauty of This Rhubarb and Raspberry Pie With Oatmeal Crumble
Flavor Contrast That Sings
I adore how the tartness of rhubarb plays off the bright sweetness of raspberries. The interplay makes each bite layered and interesting, not one dimensional. I find that the small pinch of cardamom and the zing of lime zest elevate the fruit without stealing the show, giving the filling a subtle floral note that lingers pleasantly.
Texture From Top to Bottom
The oatmeal crumble gives you a dual textural experience, where toasted oats and buttery bits create a crunchy top, while the interior stays soft and jammy. I like that the crumble clumps into big pieces so you can get a spoonful of crumble with each slice. That contrast is what keeps people coming back for more, in my experience.
Approachable But Impressive
People often tell me they felt intimidated by pies until they tried this one. Using a store bought pie crust or your favorite homemade version streamlines the process, and the crumble is forgiving. The method gives a pie that looks like it took all afternoon, but it respects busy schedules.
Seasonal Celebration
This recipe really shines in spring, when rhubarb is at its peak and raspberries are abundant. I like serving it at backyard gatherings and casual meals, because it reads as both homey and slightly fancy. It’s a surefire way to showcase seasonal produce.
Comfort With a Twist
Finally, the combination of classic pie techniques with a rustic oatmeal topping feels nostalgic and fresh at once. I often get asked for the recipe because people love that it is familiar, yet the flavors are a little unexpected. For me, that balance is the reason this pie keeps appearing at our table.
Shopping List for Rhubarb and Raspberry Pie With Oatmeal Crumble
These ingredients are chosen to create harmony between bright fruit, structure, and a crunchy topping. The key players are the fruit filling for flavor and juiciness, the instant tapioca to thicken the filling without cloudiness, and the oatmeal crumble to add a toasty, buttery counterpoint to the tart fruit. Together they produce a pie that is balanced, textured, and satisfying.
- 1 single pie crust, store bought or this is my favorite recipe: Use as a ready-made base to hold the filling and crumble; press gently into the pie dish and crimp the edges for a neat presentation. Blind-bake slightly if you prefer a crisper bottom to prevent a soggy crust from the juicy filling.
- For the Crumble Topping: Label the section for the crumble mixture so components are grouped; introduce the topping ingredients and assembly steps clearly before combining them. Clarify that these items will be mixed and sprinkled over the fruit filling to create a textured, crunchy layer.
- 3/4 cup old fashioned oats: Provide chewy texture and oat flavor to the crumble while absorbing some fruit juices during baking; combine with flour and sugars for structure and sweetness. Choose old fashioned oats for a hearty bite that contrasts with soft fruit.
- 1/2 cup all-purpose flour: Contribute structure and a tender crumb to the topping by forming the dry base that binds with butter and oats. Measure accurately to maintain the crumble’s balance between cakey and crumbly textures.
- 1/2 cup packed light brown sugar: Impart deep, caramel-like sweetness and moisture to the crumble; pack firmly to measure consistently and blend evenly with dry ingredients. Adjust slightly if you prefer a less sweet topping, but brown sugar also helps with browning.
- 1/2 teaspoons salt: Enhance overall flavor balance by cutting sweetness and emphasizing other spices; sprinkle evenly into the crumble mix to avoid salty pockets. Use measured salt to boost fruit and butter flavors without overpowering them.
- 1/2 teaspoon cinnamon: Add warm, aromatic notes that complement the tart rhubarb and bright raspberries; stir into the crumble for an integrated spice profile. Use moderate amounts so cinnamon supports but doesn’t dominate the fruit flavors.
- 1/4 teaspoon ground ginger: Introduce a subtle warmth and complexity to the crumble when combined with cinnamon; incorporate sparingly to avoid overpowering delicate fruit. Ground ginger pairs well with the tangy filling and brings depth to the topping.
- 6 tablespoons cold salted butter, cut into small pieces: Provide fat that binds the dry crumble ingredients and creates tender, golden clusters when cut into small pieces and worked into the mix. Keep cold until mixing to ensure flaky texture and avoid melting before baking.
- For the Pie Filling: Indicate the section for the fruit filling components so readers can prepare the fruit separately from the topping; list these ingredients together for clarity. Specify that these items will be combined and cooked down slightly if desired before filling the crust.
- 4 cups rhubarb, sliced into 1/4-inch pieces: Supply bright, tart flavor and a firm texture that holds up when baked; slice uniformly to ensure even cooking and consistent mouthfeel. Rhubarb’s acidity balances the sweetness of sugars and complements the raspberries.
- 3 pints raspberries, 18 ounces: Offer juicy sweetness and vibrant color that soften during baking, blending with rhubarb for a balanced filling. Handle gently when folding into the mixture to avoid excessive crushing and maintain some whole berries for texture.
- 1/2 cup packed light brown sugar: Add moist, mellow sweetness to balance tart fruit; measure packed to maintain consistent sweetness levels in the filling. Brown sugar also contributes to a deeper flavor and slightly sticky mouthfeel in the cooked filling.
- 1/4 cup granulated sugar: Contribute clean, granular sweetness that helps draw juices from the fruit and balance tartness; sprinkle evenly and taste-adjust as needed. Granulated sugar promotes a clear, glossy filling when dissolved and baked.
- 1/4 cup instant tapioca: Act as a thickening agent that absorbs fruit juices and helps the filling set without becoming runny; stir in and allow to hydrate briefly before filling the crust. Instant tapioca creates a smooth, slightly translucent filling with good slices when cooled.
- 1 lime, zested: Provide bright citrus aroma and subtle acidity through finely grated zest to elevate the fruit flavors; add just the green outer layer and avoid bitter pith. Lime zest complements both rhubarb and raspberries with fresh, zesty notes.
- 1/2 teaspoon ground cardamom: Introduce a floral, slightly citrusy spice note that enhances the filling’s complexity; measure carefully as cardamom can be potent. Blend into the fruit mixture to create an intriguing background flavor that pairs well with the lime zest.
Recipe Directions for Rhubarb and Raspberry Pie With Oatmeal Crumble
I like to approach the directions as a sequence of small, mindful actions that together yield a beautifully balanced pie. Work methodically and keep ingredients chilled when the notes call for it. Read all steps before you begin so you can prepare bowls and tools for a smooth assembly.
- Roll the pie dough into a 12-inch round. Fit into an 8-inch deep pie dish or regular 9-inch pie pan and crimp the edges then place in the refrigerator.: As the warm kitchen air brushes your hands, you should feel a slight resistance in the dough, which signals elasticity and good gluten development, though you do not want to overwork it. The visual cue is a smooth, even surface without tears. Chilling the dough briefly after rolling helps it retain flake during baking. One common mistake is handling the dough too much, which warms the butter and yields a denser crust rather than a flaky one, so work quickly and cool the dough if it starts to get soft.
- In a medium bowl, combine the oats, flour, brown sugar, salt, cinnamon and ginger. Work the crumbs of butter into the mixture until it forms big clumps. Refrigerate until needed.: When you press the dough into the pan, listen for a faint soft thud as it settles into the corners, and look for even thickness around the rim. Crimping sets the crust shape and creates those pretty edges that brown attractively. Refrigerating firms the butter and helps prevent shrinking during baking. A typical error is skipping the chill step, which can cause bubbling or a misshapen crust as the fat softens too soon.
- Place the rack in the oven to the lower third. Place a piece of aluminum foil or a baking sheet in the oven over the rack and preheat the oven to 400ºF.: When you whisk these dry elements together, the aroma shifts as the spices bloom, filling the bowl with warm, inviting scents. Mixing evenly ensures consistent sweetness and seasoning in the crumble. Use a fork to fluff the mixture so the dry ingredients coat the oat flakes uniformly. Poorly mixed dry ingredients can lead to bits of under seasoned crumble that taste flat.
- In a large bowl, gently mix the rhubarb, raspberries, brown sugar, granulated sugar, instant tapioca, lime zest and cardamom in a large bowl. Gently stir and allow to sit for 15 minutes.: The butter should be cold and diced, and when you cut it in the pieces remain visible, producing a mixture that ranges from sandy to chunky. These clumps are crucial because they melt and create pockets of crisp, buttery texture as the crumble bakes. If the butter is too warm you'll end up with a greasy, flat topping, so chill the bowl if needed to maintain those chunks.
- Pull the crust from the refrigerator and fill with the rhubarb raspberry mixture. Top evenly with the crumble topping. Place the pie on the piece of aluminum foil or on the hot baking sheet in the oven. Check the pie at 30 minutes to see how browned the crumble topping is getting and tent if needed. Continue baking up to 45-55 minutes or until the fruit filling is bubbling around the edges. Remove from the oven and allow to cool for at least 4 hours. Store in the refrigerator and serve with ice cream or whip cream.: Cooling the crumble tightens the butter and helps the topping hold together in large, appealing clusters when you scatter it over the filling. You can evaluate readiness by pressing a small handful to see if it sticks together. Not chilling the topping can cause it to spread too quickly in the oven and prevent crisp, distinct pieces from forming.
- Place the rack in the oven to the lower third: Positioning the rack lower encourages the bottom crust to crisp as the filling begins to bubble, yielding a well cooked base. The visual cue is a steadily browning bottom and a bubbling filling around the edges. A common oversight is placing the rack too high, which browns the top before the filling fully bubbles and the crust cooks through.
- Place a piece of aluminum foil or a baking sheet in the oven over the rack and preheat the oven to 400ºF: The foil or baking sheet acts as a heat buffer and makes it easy to place the pie onto a hot surface, which promotes even baking and prevents hot spots. As the oven preheats you'll notice the kitchen air warming and the scent of butterless dough intensifying. Forgetting to preheat fully can extend baking time and affect texture, so wait for the oven to reach temperature before inserting the pie.
- In a large bowl, gently mix the rhubarb, raspberries, brown sugar, granulated sugar, instant tapioca, lime zest and cardamom in a large bowl: Gently folding these together preserves some of the raspberry shape, while the instant tapioca starts absorbing fruit juices for a jam like consistency. You should see sugar crystals dissolve slightly and the colors deepen as fruit juices tint the bowl. Over mixing can pulverize the raspberries, producing a uniformly colored filling rather than pretty pockets of berry, so use a light hand.
- Gently stir and allow to sit for 15 minutes: Letting the mixture rest lets the sugars and tapioca draw out juices from the fruit, creating a glossy bath that will thicken when baked. You'll notice the bowl become slightly syrupy and fragrant, with citrusy notes from the lime zest surfacing. A common mistake is skipping this rest, which can leave the filling underdeveloped and less cohesive once baked.
- Pull the crust from the refrigerator and fill with the rhubarb raspberry mixture: Spoon the filling into the chilled crust and watch as the colors and textures layer; the bowl to plate transfer should be steady, avoiding drips. The weight of the filling should settle evenly without compacting the crust. If you mound the filling too high it may bubble over excessively, so aim for an even, level distribution.
- Top evenly with the crumble topping: Scatter the chilled crumble so it covers the fruit in irregular clusters, allowing steam to escape between pieces while providing substantial crunchy bits in each slice. The contrast between the raw fruit and raw crumble is visible, and as it bakes the crumble will brown and crisp. Pressing the topping down will reduce its loft and lead to a denser texture, so keep it loose for best results.
- Place the pie on the piece of aluminum foil or on the hot baking sheet in the oven: Setting the pie on a hot surface ensures immediate heat contact for the bottom crust, helping it set and crisp early in the bake. You should hear a faint settling sound as the pie meets the hot metal. A missed step here can lead to a soggy bottom if the pie is placed on a cold surface inside the oven.
- Check the pie at 30 minutes to see how browned the crumble topping is getting and tent if needed: Look for golden brown clusters and edges that are developing color, and tent with foil if the topping risks overbrowning while the filling still needs time. The visual cue is a deepening of the crumble's hue without burnt spots. Not checking can result in an overdone top while the filling remains underbaked.
- Continue baking up to 45-55 minutes or until the fruit filling is bubbling around the edges: The telltale sign of doneness is active bubbling near the crust edges and a deeply golden crumble. You'll notice a sweet steam escaping and a fragrant mix of spice and fruit wafting from the oven. If you remove the pie before it bubbles you risk a runny filling, while overbaking can dry out the fruit and harden the crumble.
- Remove from the oven and allow to cool for at least 4 hours: Cooling lets the filling set and firm up into slices that hold together. As it cools, the bubbling slows and the aroma mellows into a warmer, more rounded profile. Cutting too soon is a frequent error, leading to the filling oozing from slices instead of clean pieces.
- Store in the refrigerator and serve with ice cream or whip cream: Chilling keeps the pie safe and helps texture; serve slightly chilled or at cool room temperature with a scoop of cold ice cream or a dollop of whip cream for contrast. The cold topping against the warm notes of the pie is a delightful contrast. Leaving it at room temperature for too long can shorten shelf life, so refrigerate within two hours.
How to Switch It Up
Small changes can shift the personality of this pie while keeping the core technique intact. Below are careful adjustments and presentation ideas that respect the original flavor profile while offering variety for different occasions.
- Make it gluten free by swapping the all-purpose flour and pie crust for certified gluten free versions, keeping the same measurements and watching for slightly different browning times.
- Boost oat crunch by toasting the old fashioned oats for a few minutes before mixing into the crumble, which intensifies nuttiness and adds an extra layer of aroma.
- Adjust sweetness by reducing the granulated sugar in the filling by one to two tablespoons if your raspberries are particularly sweet, preserving the bright tart quality of the rhubarb.
- Make ahead by preparing the filling and crumble a day ahead and storing them separately in the refrigerator, then assemble and bake when ready to serve for fresher texture.
- Presentation flourish by brushing a light sugar glaze on the crumble as soon as the pie comes out of the oven for an attractive shimmer and slightly crisped surface.
What to Pair With Rhubarb and Raspberry Pie With Oatmeal Crumble
This pie plays well with casual gatherings and celebratory meals alike. Serve it slightly warm or chilled, and consider accompaniments that complement the tart fruit and toasty crumble. Below are pairing ideas, occasions, and storage tips to help you serve it with confidence.
- Serve with vanilla ice cream for a classic contrast of cold creamy texture against the warm, jammy pie filling.
- Offer whipped cream for a lighter finish that enhances the pie without adding too much sweetness, ideal for afternoon tea or brunch.
- Bring to spring gatherings where seasonal rhubarb shines, such as garden parties, Mother’s Day, or casual potlucks.
- Store in the refrigerator for up to four days in an airtight container; reheat gently for a few minutes if you prefer it warm before serving.
- Slice for dessert platters at dinner parties, pairing with a small scoop of ice cream and a sprig of mint for a refined touch.
FAQ
Conclusion
This pie stands out because it balances tart rhubarb and bright raspberries with a toasty oatmeal crumble that adds texture and warmth. Give it a try for seasonal gatherings or a comforting weekend dessert, and you may find it becomes your new favorite to bring to potlucks. I hope you enjoy the layers of flavor and the joyful contrast of crisp topping and jammy filling as much as I do.

Rhubarb and Raspberry Pie With Oatmeal Crumble
Equipment
- Pie Dish
- Mixing Bowls
- Baking Sheet
- Aluminum Foil
Ingredients
- 1 single pie crust, store bought or this is my favorite recipe Use as a ready-made base to hold the filling and crumble; press gently into the pie dish and crimp the edges for a neat presentation. Blind-bake slightly if you prefer a crisper bottom to prevent a soggy crust from the juicy filling.
- For the Crumble Topping Label the section for the crumble mixture so components are grouped; introduce the topping ingredients and assembly steps clearly before combining them. Clarify that these items will be mixed and sprinkled over the fruit filling to create a textured, crunchy layer.
- 3/4 cup old fashioned oats Provide chewy texture and oat flavor to the crumble while absorbing some fruit juices during baking; combine with flour and sugars for structure and sweetness. Choose old fashioned oats for a hearty bite that contrasts with soft fruit.
- 1/2 cup all-purpose flour Contribute structure and a tender crumb to the topping by forming the dry base that binds with butter and oats. Measure accurately to maintain the crumble’s balance between cakey and crumbly textures.
- 1/2 cup packed light brown sugar Impart deep, caramel-like sweetness and moisture to the crumble; pack firmly to measure consistently and blend evenly with dry ingredients. Adjust slightly if you prefer a less sweet topping, but brown sugar also helps with browning.
- 1/2 teaspoons salt Enhance overall flavor balance by cutting sweetness and emphasizing other spices; sprinkle evenly into the crumble mix to avoid salty pockets. Use measured salt to boost fruit and butter flavors without overpowering them.
- 1/2 teaspoon cinnamon Add warm, aromatic notes that complement the tart rhubarb and bright raspberries; stir into the crumble for an integrated spice profile. Use moderate amounts so cinnamon supports but doesn’t dominate the fruit flavors.
- 1/4 teaspoon ground ginger Introduce a subtle warmth and complexity to the crumble when combined with cinnamon; incorporate sparingly to avoid overpowering delicate fruit. Ground ginger pairs well with the tangy filling and brings depth to the topping.
- 6 tablespoons cold salted butter, cut into small pieces Provide fat that binds the dry crumble ingredients and creates tender, golden clusters when cut into small pieces and worked into the mix. Keep cold until mixing to ensure flaky texture and avoid melting before baking.
- For the Pie Filling Indicate the section for the fruit filling components so readers can prepare the fruit separately from the topping; list these ingredients together for clarity. Specify that these items will be combined and cooked down slightly if desired before filling the crust.
- 4 cups rhubarb, sliced into 1/4-inch pieces Supply bright, tart flavor and a firm texture that holds up when baked; slice uniformly to ensure even cooking and consistent mouthfeel. Rhubarb’s acidity balances the sweetness of sugars and complements the raspberries.
- 3 pints raspberries, 18 ounces Offer juicy sweetness and vibrant color that soften during baking, blending with rhubarb for a balanced filling. Handle gently when folding into the mixture to avoid excessive crushing and maintain some whole berries for texture.
- 1/2 cup packed light brown sugar Add moist, mellow sweetness to balance tart fruit; measure packed to maintain consistent sweetness levels in the filling. Brown sugar also contributes to a deeper flavor and slightly sticky mouthfeel in the cooked filling.
- 1/4 cup granulated sugar Contribute clean, granular sweetness that helps draw juices from the fruit and balance tartness; sprinkle evenly and taste-adjust as needed. Granulated sugar promotes a clear, glossy filling when dissolved and baked.
- 1/4 cup instant tapioca Act as a thickening agent that absorbs fruit juices and helps the filling set without becoming runny; stir in and allow to hydrate briefly before filling the crust. Instant tapioca creates a smooth, slightly translucent filling with good slices when cooled.
- 1 lime, zested Provide bright citrus aroma and subtle acidity through finely grated zest to elevate the fruit flavors; add just the green outer layer and avoid bitter pith. Lime zest complements both rhubarb and raspberries with fresh, zesty notes.
- 1/2 teaspoon ground cardamom Introduce a floral, slightly citrusy spice note that enhances the filling’s complexity; measure carefully as cardamom can be potent. Blend into the fruit mixture to create an intriguing background flavor that pairs well with the lime zest.
Instructions
- Roll the pie dough into a 12-inch round. Fit into an 8-inch deep pie dish or regular 9-inch pie pan and crimp the edges then place in the refrigerator.: As the warm kitchen air brushes your hands, you should feel a slight resistance in the dough, which signals elasticity and good gluten development, though you do not want to overwork it. The visual cue is a smooth, even surface without tears. Chilling the dough briefly after rolling helps it retain flake during baking. One common mistake is handling the dough too much, which warms the butter and yields a denser crust rather than a flaky one, so work quickly and cool the dough if it starts to get soft.
- In a medium bowl, combine the oats, flour, brown sugar, salt, cinnamon and ginger. Work the crumbs of butter into the mixture until it forms big clumps. Refrigerate until needed.: When you press the dough into the pan, listen for a faint soft thud as it settles into the corners, and look for even thickness around the rim. Crimping sets the crust shape and creates those pretty edges that brown attractively. Refrigerating firms the butter and helps prevent shrinking during baking. A typical error is skipping the chill step, which can cause bubbling or a misshapen crust as the fat softens too soon.
- Place the rack in the oven to the lower third. Place a piece of aluminum foil or a baking sheet in the oven over the rack and preheat the oven to 400ºF.: When you whisk these dry elements together, the aroma shifts as the spices bloom, filling the bowl with warm, inviting scents. Mixing evenly ensures consistent sweetness and seasoning in the crumble. Use a fork to fluff the mixture so the dry ingredients coat the oat flakes uniformly. Poorly mixed dry ingredients can lead to bits of under seasoned crumble that taste flat.
- In a large bowl, gently mix the rhubarb, raspberries, brown sugar, granulated sugar, instant tapioca, lime zest and cardamom in a large bowl. Gently stir and allow to sit for 15 minutes.: The butter should be cold and diced, and when you cut it in the pieces remain visible, producing a mixture that ranges from sandy to chunky. These clumps are crucial because they melt and create pockets of crisp, buttery texture as the crumble bakes. If the butter is too warm you'll end up with a greasy, flat topping, so chill the bowl if needed to maintain those chunks.
- Pull the crust from the refrigerator and fill with the rhubarb raspberry mixture. Top evenly with the crumble topping. Place the pie on the piece of aluminum foil or on the hot baking sheet in the oven. Check the pie at 30 minutes to see how browned the crumble topping is getting and tent if needed. Continue baking up to 45-55 minutes or until the fruit filling is bubbling around the edges. Remove from the oven and allow to cool for at least 4 hours. Store in the refrigerator and serve with ice cream or whip cream.: Cooling the crumble tightens the butter and helps the topping hold together in large, appealing clusters when you scatter it over the filling. You can evaluate readiness by pressing a small handful to see if it sticks together. Not chilling the topping can cause it to spread too quickly in the oven and prevent crisp, distinct pieces from forming.
- Place the rack in the oven to the lower third: Positioning the rack lower encourages the bottom crust to crisp as the filling begins to bubble, yielding a well cooked base. The visual cue is a steadily browning bottom and a bubbling filling around the edges. A common oversight is placing the rack too high, which browns the top before the filling fully bubbles and the crust cooks through.
- Place a piece of aluminum foil or a baking sheet in the oven over the rack and preheat the oven to 400ºF: The foil or baking sheet acts as a heat buffer and makes it easy to place the pie onto a hot surface, which promotes even baking and prevents hot spots. As the oven preheats you'll notice the kitchen air warming and the scent of butterless dough intensifying. Forgetting to preheat fully can extend baking time and affect texture, so wait for the oven to reach temperature before inserting the pie.
- In a large bowl, gently mix the rhubarb, raspberries, brown sugar, granulated sugar, instant tapioca, lime zest and cardamom in a large bowl: Gently folding these together preserves some of the raspberry shape, while the instant tapioca starts absorbing fruit juices for a jam like consistency. You should see sugar crystals dissolve slightly and the colors deepen as fruit juices tint the bowl. Over mixing can pulverize the raspberries, producing a uniformly colored filling rather than pretty pockets of berry, so use a light hand.
- Gently stir and allow to sit for 15 minutes: Letting the mixture rest lets the sugars and tapioca draw out juices from the fruit, creating a glossy bath that will thicken when baked. You'll notice the bowl become slightly syrupy and fragrant, with citrusy notes from the lime zest surfacing. A common mistake is skipping this rest, which can leave the filling underdeveloped and less cohesive once baked.
- Pull the crust from the refrigerator and fill with the rhubarb raspberry mixture: Spoon the filling into the chilled crust and watch as the colors and textures layer; the bowl to plate transfer should be steady, avoiding drips. The weight of the filling should settle evenly without compacting the crust. If you mound the filling too high it may bubble over excessively, so aim for an even, level distribution.
- Top evenly with the crumble topping: Scatter the chilled crumble so it covers the fruit in irregular clusters, allowing steam to escape between pieces while providing substantial crunchy bits in each slice. The contrast between the raw fruit and raw crumble is visible, and as it bakes the crumble will brown and crisp. Pressing the topping down will reduce its loft and lead to a denser texture, so keep it loose for best results.
- Place the pie on the piece of aluminum foil or on the hot baking sheet in the oven: Setting the pie on a hot surface ensures immediate heat contact for the bottom crust, helping it set and crisp early in the bake. You should hear a faint settling sound as the pie meets the hot metal. A missed step here can lead to a soggy bottom if the pie is placed on a cold surface inside the oven.
- Check the pie at 30 minutes to see how browned the crumble topping is getting and tent if needed: Look for golden brown clusters and edges that are developing color, and tent with foil if the topping risks overbrowning while the filling still needs time. The visual cue is a deepening of the crumble's hue without burnt spots. Not checking can result in an overdone top while the filling remains underbaked.
- Continue baking up to 45-55 minutes or until the fruit filling is bubbling around the edges: The telltale sign of doneness is active bubbling near the crust edges and a deeply golden crumble. You'll notice a sweet steam escaping and a fragrant mix of spice and fruit wafting from the oven. If you remove the pie before it bubbles you risk a runny filling, while overbaking can dry out the fruit and harden the crumble.
- Remove from the oven and allow to cool for at least 4 hours: Cooling lets the filling set and firm up into slices that hold together. As it cools, the bubbling slows and the aroma mellows into a warmer, more rounded profile. Cutting too soon is a frequent error, leading to the filling oozing from slices instead of clean pieces.
- Store in the refrigerator and serve with ice cream or whip cream: Chilling keeps the pie safe and helps texture; serve slightly chilled or at cool room temperature with a scoop of cold ice cream or a dollop of whip cream for contrast. The cold topping against the warm notes of the pie is a delightful contrast. Leaving it at room temperature for too long can shorten shelf life, so refrigerate within two hours.
Notes
- Make it gluten free by swapping the all-purpose flour and pie crust for certified gluten free versions, keeping the same measurements and watching for slightly different browning times.
- Boost oat crunch by toasting the old fashioned oats for a few minutes before mixing into the crumble, which intensifies nuttiness and adds an extra layer of aroma.
- Adjust sweetness by reducing the granulated sugar in the filling by one to two tablespoons if your raspberries are particularly sweet, preserving the bright tart quality of the rhubarb.
- Make ahead by preparing the filling and crumble a day ahead and storing them separately in the refrigerator, then assemble and bake when ready to serve for fresher texture.
- Presentation flourish by brushing a light sugar glaze on the crumble as soon as the pie comes out of the oven for an attractive shimmer and slightly crisped surface.