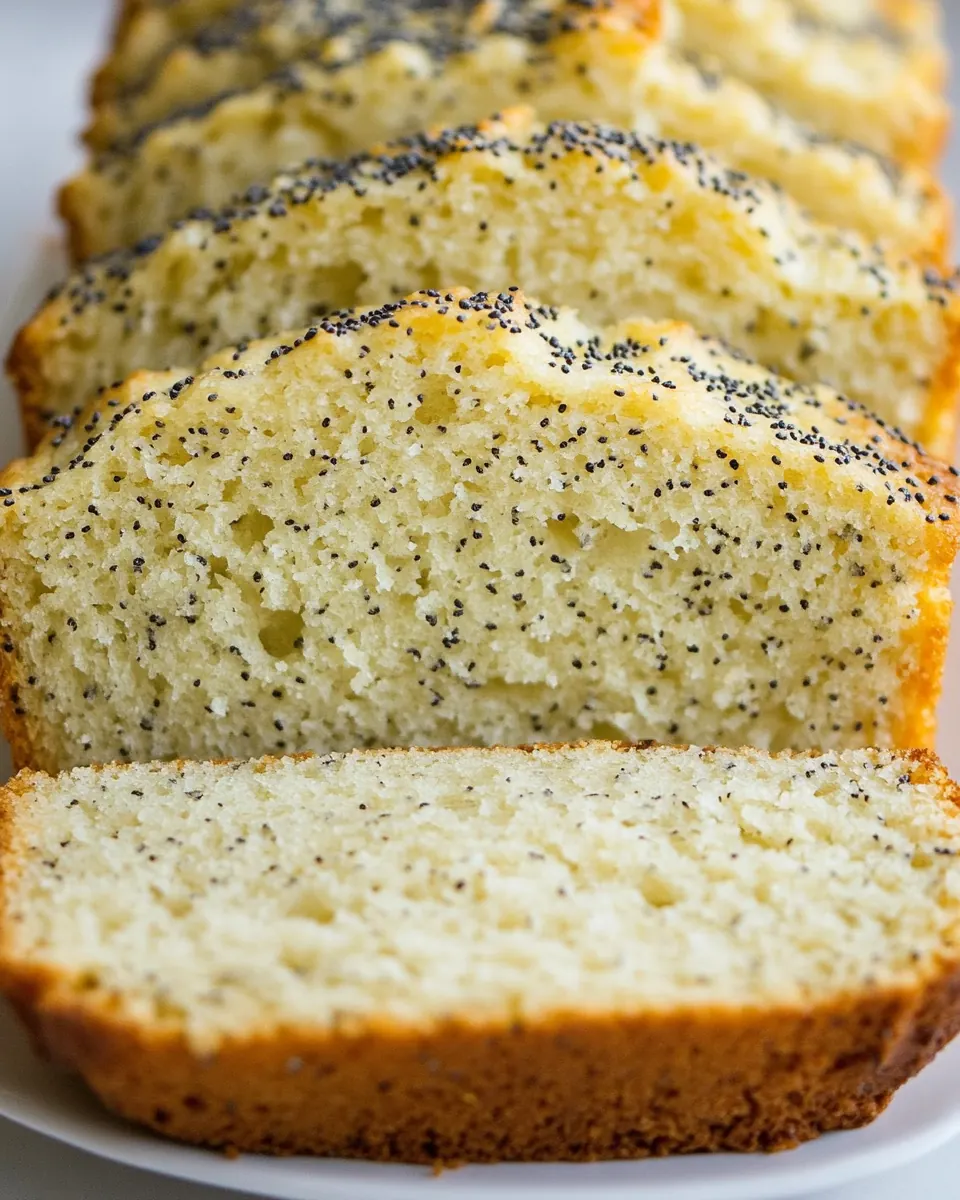
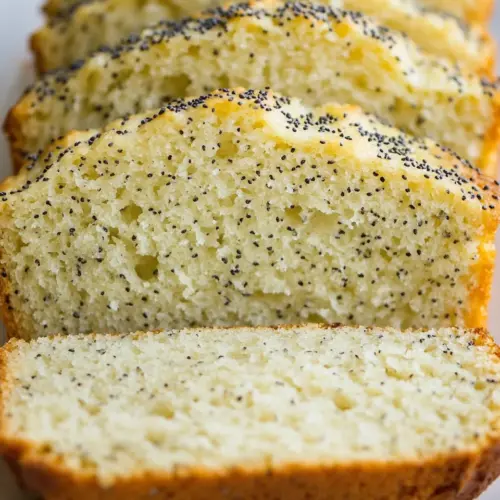
Lemon Poppy Seed Bread
Lemon Poppy Seed Bread has been a small, sunny ritual in my kitchen for years, the kind of loaf I turn to when I want a bright, tender treat that doubles as breakfast and snack. The first time I baked it I was chasing a memory of a bakery slice that melted in my mouth, and after a few experiments I landed on a version that balances tangy citrus with a tender crumb, studded with little pops of texture from the poppy seeds. Every time I pull a warm loaf from the oven, the house fills with a sharp, sweet lemon perfume that immediately lifts my mood.
I love how straightforward Lemon Poppy Seed Bread is, it never feels fussy even when I slow down to savor the process. I often make it on a quiet weekend morning, stirring the all purpose flour and poppy seeds together while the kettle hisses and sunlight streams through the window. Then I rub the lemon zest with the granulated sugar, a small ritual that releases oils and perfumes the sugar until it looks pale and fragrant. That little step always makes me feel like I am coaxing extra flavor into the loaf.
There are comfort moments tied to this bread for me, like passing slices around a table with coffee when friends drop by, or wrapping a slice in parchment to take on a picnic. I find it forgiving for bakers at any level, and it rewards patience with a crumb that is moist and just dense enough to be satisfying. Over time I learned to watch for visual cues, like the golden top and the way the loaf gives when you press the sides gently. These are the things that turn a good loaf into a great one, and I enjoy sharing those tiny pointers as I hand over a warm slice.
Recipe Snapshot
1 hr 10 mins
25 mins
45 mins
Medium
250 kcal
American
Gluten-Free, Low FODMAP
Desserts
Stand mixer, Paddle attachment, Loaf pan, Wire rack, Measuring cup, Microwave, Mixing bowls, Brush
Why You Need This Lemon Poppy Seed Bread
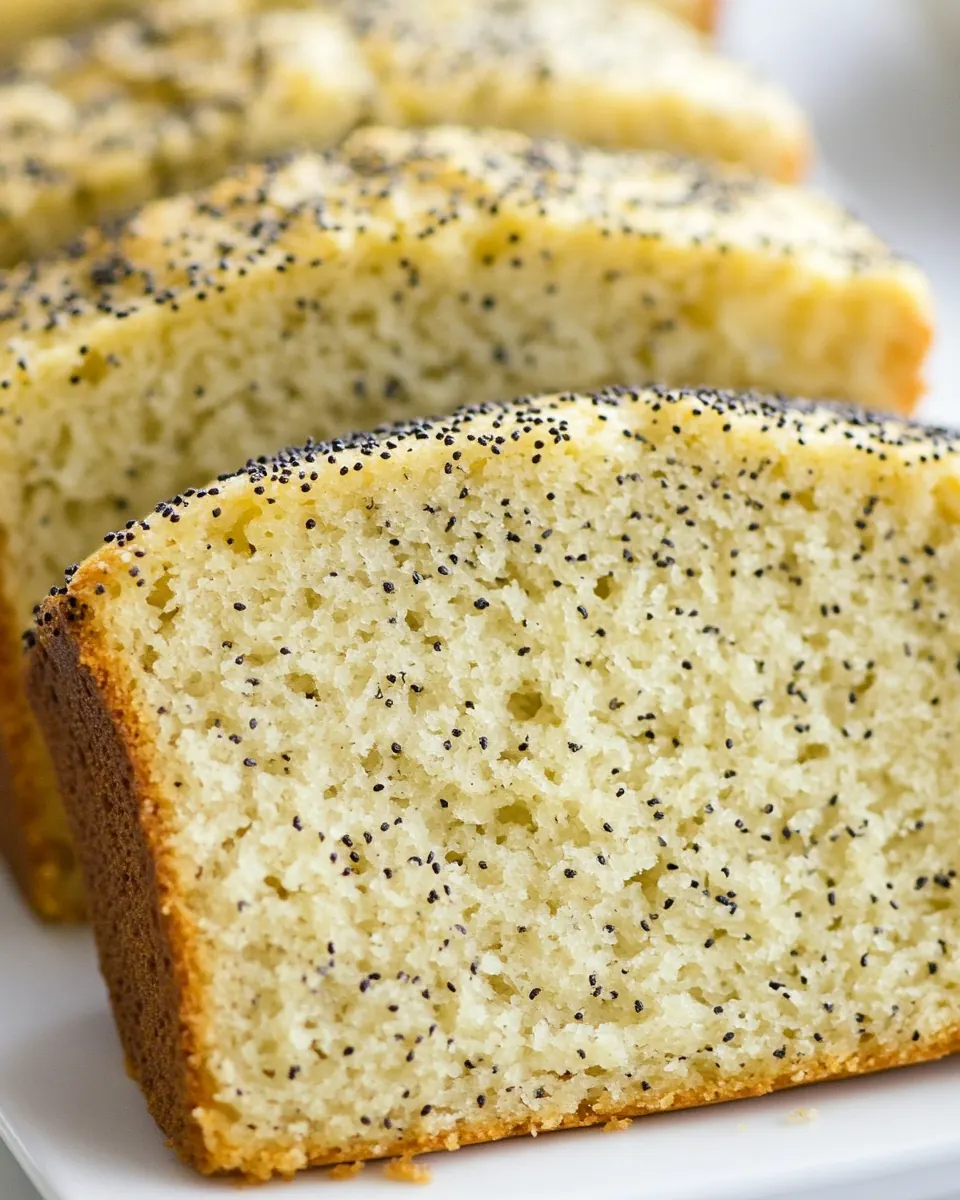
Bright, balanced flavor
I adore how Lemon Poppy Seed Bread manages to be both zesty and soothing. The interplay of fresh lemon juice, lemon zest, and the sweet glaze creates layers of citrus that never overpower. I like to say the lemon sings while the rest of the loaf hums along, giving you a lively but well tempered bite.
Wonderful texture contrast
The tiny crunch of the poppy seeds against the soft, tender crumb keeps each bite interesting. I often nibble on the crust first to enjoy the slightly caramelized sugar edges, then sink into the moist interior. That contrast is one reason I come back to this recipe again and again.
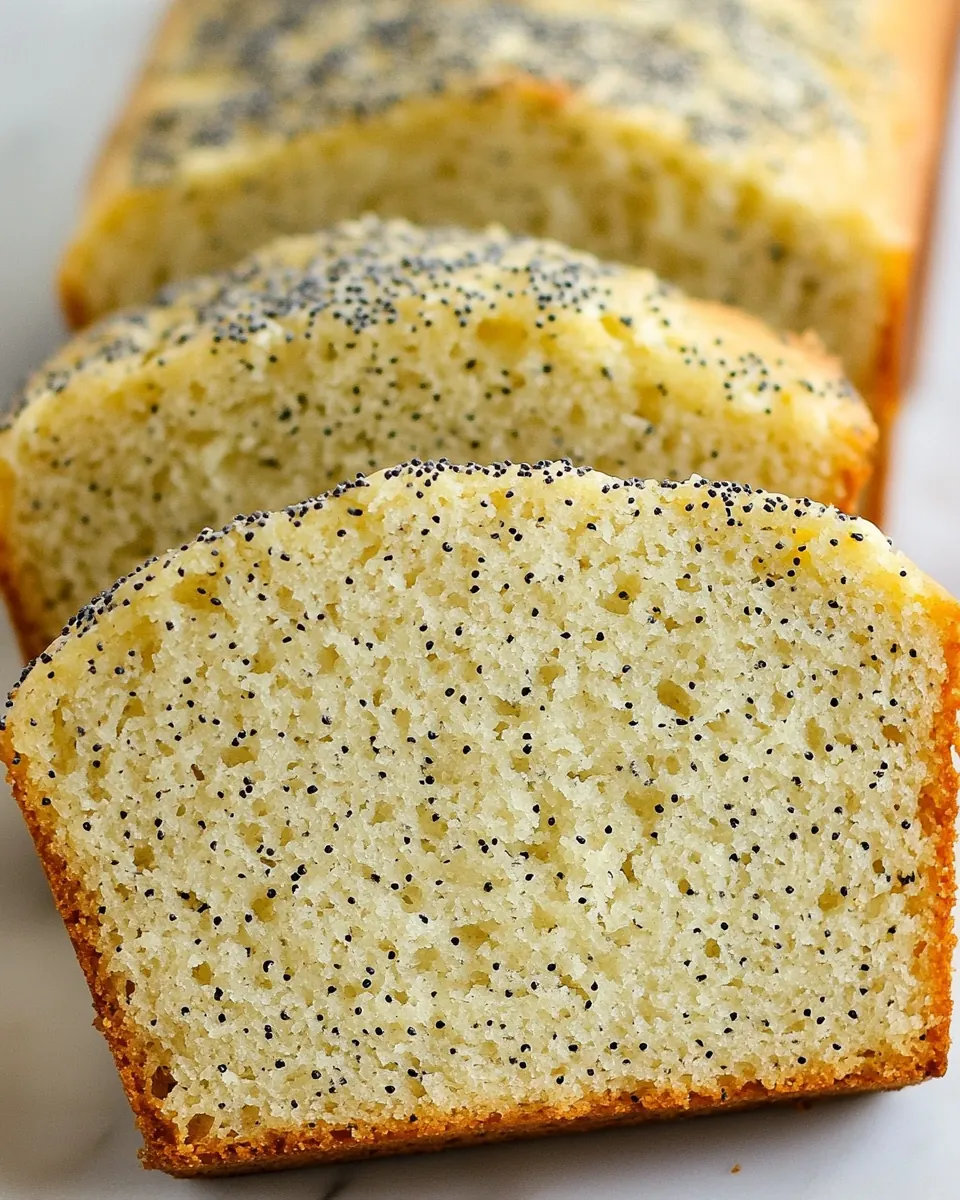
Great for many occasions
Whether I need a simple breakfast, a hostess gift, or something to serve at a casual brunch, Lemon Poppy Seed Bread fits the bill. I can slice it thin for coffee service or cut hearty wedges for a relaxed gathering. Its bright flavor feels especially right in spring, when citrus and light treats are welcome.
Easy to make and forgiving
This recipe is straightforward, and I love how forgiving it is if you follow a few basic cues. From creaming the unsalted butter and granulated sugar to alternating additions of dry and wet ingredients, the method encourages mindfulness more than precision. I reassure novice bakers that small timing or mixing variances rarely ruin the loaf.
Customizable finishing touch
The simple lemon glaze gives you room to play, and I enjoy brushing multiple thin coats until the top takes on a glossy sheen. You can dial the tang up or down by adjusting how much glaze you soak into the loaf. For me the glaze is the final flourish that makes this loaf feel special and bakery worthy.
Ingredients to Make Lemon Poppy Seed Bread
I think of the ingredient list for Lemon Poppy Seed Bread as a small orchestra where every part has a job. The all purpose flour builds structure, the baking powder and baking soda offer lift, and the eggs and unsalted butter enrich the crumb. The lemon zest and juices bring brightness, while the poppy seeds add a subtle textural note. Together they create a loaf that is both tender and lively.
- 1 2/3 cups all-purpose flour: Provide structure and bulk to the batter, creating the crumb and holding air bubbles during baking; sift or whisk to remove lumps and ensure even incorporation with dry ingredients.
- 2 tbsp poppy seeds: Add small crunchy pops and a subtle nutty flavor throughout the loaf; toast lightly beforehand for a deeper aroma if desired.
- 1 1/2 tsp baking powder: Lighten the texture and help the bread rise by releasing carbon dioxide when heated; evenly distribute with the flour to prevent pockets of rising agent.
- 1/8 tsp baking soda: Contribute additional leavening and help tenderize the crumb in coordination with baking powder; measure precisely due to its concentrated raising power.
- 1/2 tsp salt: Enhance overall flavor balance by accentuating sweetness and controlling bitterness; dissolve thoroughly into the dry mix to ensure even seasoning.
- 1 cup granulated sugar: Provide sweetness and moisture while aiding in browning of the crust during baking; cream with butter to incorporate air for a lighter texture.
- 2 tbsp lemon zest (from about 3 lemons): Impart bright citrus oil and strong lemon aroma to the batter, intensifying lemon flavor; finely grate only the yellow peel to avoid bitter pith.
- 1/2 cup unsalted butter, at room temperature: Add richness, moisture, and flavor while contributing to the cake's tender crumb; cream with sugar to trap air for a lighter loaf.
- 3 large eggs, at room temperature: Bind the batter, add moisture, and enrich flavor while helping with emulsion; bring to room temperature to ensure smooth incorporation and even texture.
- 1/2 tsp vanilla extract: Contribute a subtle background warmth and enhance other flavors; add with wet ingredients to distribute aroma evenly.
- 1/4 cup + 2 tbsp sour cream: Provide tanginess and extra moisture while tenderizing the crumb through mild acidity; fold in gently for an even batter consistency.
- 1/4 cup milk: Adjust batter consistency and add additional moisture to produce a tender crumb; use room–temperature milk for smoother mixing and even texture.
- 2 tbsp fresh lemon juice: Introduce fresh bright lemon acidity and enhance overall lemon flavor; mix with other wet ingredients to distribute the citrus evenly.
- 1/4 cup granulated sugar: Create a glossy, sweet finish or simple syrup component that adds extra sweetness; dissolve into warm liquid if making a glaze or brush onto the loaf.
- 3 tbsp fresh lemon juice: Offer intense lemon juice for a finishing glaze or drizzle to boost acidity and brightness; use fresh juice for the cleanest flavor and vibrant aroma.
How to Make Lemon Poppy Seed Bread
I like to approach the baking process with calm focus, paying attention to small cues that make a difference. This loaf relies on classic creaming and alternating additions, and I always take time to watch the batter and the oven as the bread transforms from a pale batter to a golden loaf. Below are the cleaned steps expanded into rich, sensory guidance and troubleshooting pointers.
- Preheat oven to 350 degrees. Butter and flour an 8 by 4-inch baking dish, set aside.: The warm, steady heat is essential for a uniform rise and a golden top, you should hear a soft hum from the oven as it stabilizes. The oven should feel like a cozy, consistent heatwave when you open it, not bursty or wildly hot, which would brown the top too quickly. If your oven runs hot, reduce the temperature by a few degrees or rotate the pan halfway through baking. A common error is skipping preheat which can make the loaf dense, since the leaveners get less immediate lift.
- In a mixing bowl whisk together flour, poppy seeds, baking powder, baking soda and salt for 20 seconds, set aside.: The dry mixture should look evenly speckled with poppy seeds and free of lumps, and you should catch a faint wheaty scent from the all purpose flour . Whisking distributes small pockets of leavening and seeds so you get a consistent rise and texture. Avoid overwhisking which can introduce too much air into the flour, causing a drier crumb, and be careful not to add wet ingredients before this mixing is complete.
- Add sugar and lemon zest to the bowl of an electric stand mixer fitted with the paddle attachment. Rub lemon zest with sugar using your fingertips, until the mixture becomes moist and pale yellow.: When you rub the lemon zest into the granulated sugar the sugar will turn moist and pale yellow, releasing citrus oils that create an aromatic, sunny base. The smell should be bright and floral, hinting at the flavor to come. If you skip this rubbing step you lose a big layer of aroma, so take the minute to do it thoroughly.
- Add butter to sugar mixture and whip on medium speed until pale and fluffy. Mix in eggs one at a time, adding in vanilla with last egg.: As you cream in the unsalted butter , the bowl will fill with a light, billowy mass that looks almost whipped cream like, and you should hear a steady, rhythmic whir. This creaming traps tiny air pockets that give the loaf lift and tenderness, and the color will shift to a lighter, pale yellow. Overcreaming can lead to collapse in the oven, and undercreaming leaves a dense crumb, so aim for a soft, pale texture.
- In (microwave safe) liquid measuring cup used to measure milk, whisk together the milk with sour cream. Heat mixture in microwave just until no longer cold (about room temp).: Each egg should be incorporated fully so the batter looks smooth and glossy, emitting a rich, warm aroma. Adding eggs one at a time ensures the batter emulsifies properly, preventing separation. If the mixture looks curdled after an egg, slow the mixer and scrape the bowl, then gently continue, since rushing can cause a split batter that affects texture.
- Working in three separate batches, beginning and ending with flour mixture, add 1/3 of the flour mixture (to the butter/sugar mixture) alternating with 1/2 of the milk mixture and 1 tbsp lemon juice (each time), and mixing just until combined after each addition.: The mixture should be homogenous and slightly thick, and after gentle warming it will feel closer to room temperature and easier to incorporate. Heating just until no longer cold helps keep the batter smooth and prevents sudden solidification of the butter. Do not overheat, or you risk breaking the emulsion and creating lumps in the batter.
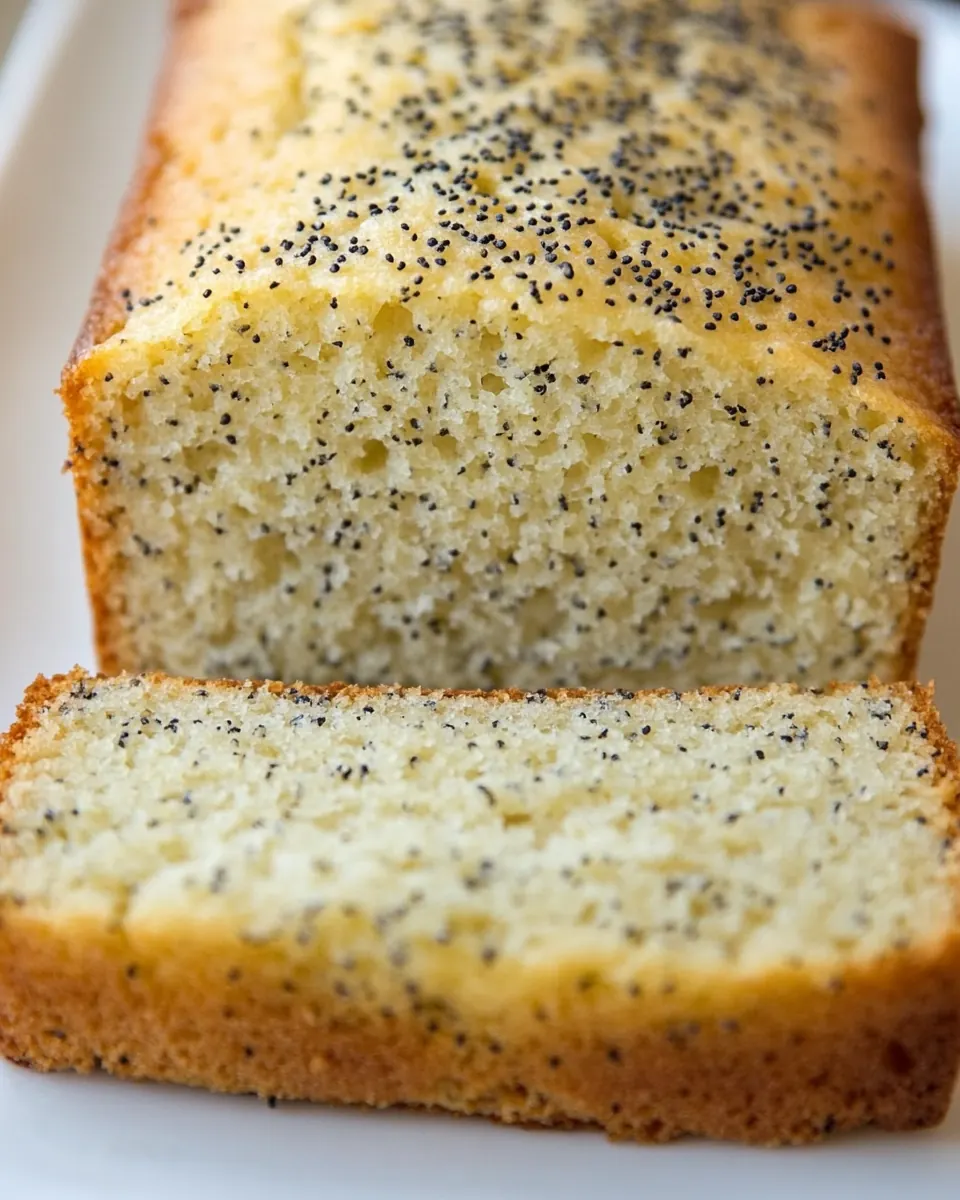
- Bake in preheated oven 45 – 55 minutes, tenting with foil at 40 minutes (don't let foil touch loaf), until toothpick inserted into center comes out clean (or with a few small crumbs).: This rhythm yields a silky batter, and you should stop mixing as soon as streaks disappear to avoid developing too much gluten. The batter will look glossy, and you will notice the lemon peeking through in pale flecks. Overmixing here is the common pitfall, leading to a tight, chewy loaf, so fold or mix on low speed until just combined.
- Remove from oven and allow to cool 5 minutes in loaf pan, then invert loaf onto a wire rack.: During baking the top will turn a deep golden color and the kitchen will fill with a warm citrus scent. At around 40 minutes I tent with foil to prevent the top from overbrowning while the center finishes rising and setting. You want the toothpick to come out clean or with a few moist crumbs, not wet batter, which indicates underbaking. A common misstep is opening the oven too often which causes the middle to sink, so limit peeks to the tent moment.
- Combine lemon juice and sugar in a bowl and heat in microwave on HIGH power and heat in 15 second intervals, whisking between intervals until sugar has dissolved and mixture is hot.: The loaf will settle and continue to set as it cools slightly, and you might notice a faint steam rising from the top as residual heat escapes. This short rest helps the crumb firm enough so it does not tear when inverted. If you rush and invert immediately the loaf may stick or crumble, so give it these few minutes.
- Brush top of bread with the lemon glaze (it will take several coats but use it all. Give it a second between coats to absorb as needed).: The act of flipping releases the loaf cleanly, and you should hear a slight sigh as it detaches, revealing a golden underside. Cooling on a rack prevents the bottom from trapping steam and becoming soggy, keeping the crust pleasantly textured. Leaving it in the pan too long can create excess moisture at the base.
- Let loaf cool on wire rack (I also recommend covering it with an extra large bowl if you have one to seal in some of the moisture), then cut into slices. Store in an airtight container.: The glaze should be clear and glossy with a bright lemon aroma, not cloudy or gritty. Warming helps the sugar dissolve quickly so the syrup penetrates the loaf. Overheating can caramelize the sugar and change the flavor, so use short intervals and whisk between each stint.
- Brush top of bread with the lemon glaze: When you brush the first thin coat the loaf will glisten and you may hear a soft sizzle as the warm syrup meets the warm bread. Apply several thin coats, allowing absorption time between each, to avoid soaking the crumb unevenly. Too generous a single pour can make the loaf soggy, so patience yields the best glossy finish.
- Let loaf cool on wire rack then cut into slices: As it cools the crumb firms just enough to slice neatly, and the aroma will mellow slightly into a comforting lemon note. I often cover with a large bowl to trap a bit of moisture if I prefer an especially tender slice. Cutting while too warm risks gummy slices, so wait until mostly cooled for clean cuts.
- Store in an airtight container: Proper storage keeps the loaf soft and prevents it from drying out, especially if you plan to keep it several days. The stored loaf will stay moist and flavorful for up to a few days at room temperature, or it can be wrapped and frozen for longer preservation. Leaving it exposed to air is the usual culprit for stale, dry slices.
Pro Tips and Tweaks
I like to keep a few reliable tricks in my back pocket when I bake Lemon Poppy Seed Bread. These small adjustments can elevate the texture, enhance the citrus aroma, and help you recover if something does not go exactly as planned. Here are several practical tips I use and recommend.
- Room temperature ingredients: Make sure the eggs, butter, and dairy are at room temperature so they combine into a smooth, homogenous batter, which leads to a tender crumb.
- Measure flour correctly: Spoon and level the all purpose flour into your measuring cup instead of scooping, or better yet, weigh for accuracy to prevent a dry, dense loaf.
- Don’t overmix: Once you add the flour mixture, mix just until combined to avoid developing excess gluten which makes the bread chewy rather than tender.
- Fresh leavening matters: Ensure your baking powder and baking soda are fresh, stale leavening can result in a flat, heavy loaf.
- Warm the milk and sour cream slightly: Bringing the dairy mixture close to room temperature helps it incorporate smoothly and prevents the butter from seizing when combined.
- Multiple glaze coats: Brush the warm syrup onto the hot loaf in thin layers, waiting briefly between coats so the glaze sinks in without saturating the crumb.
- Storage suggestion: Keep the loaf in an airtight container at room temperature for up to three days, or freeze wrapped slices for longer storage.
Perfect Matches for Lemon Poppy Seed Bread
Lemon Poppy Seed Bread is versatile to serve in many settings, from a casual weekday breakfast to a cheerful brunch spread. The loaf pairs beautifully with both simple beverages and light sides, and it adapts to seasonal celebrations without fuss. Below are thoughtful serving ideas and practical storage notes to help you present this bread well.
- Breakfast service: Slice thin and serve with hot coffee or tea for a bright morning treat, the lemon lifts and pairs especially well with a medium roast.
- Brunch platter: Arrange slices on a board alongside fresh fruit and simple yogurt for a balanced midmorning spread that feels effortless and polished.
- Picnic option: Wrap slices in parchment for an easy portable snack, the loaf travels well and stays moist when kept in a cooler or insulated bag.
- Occasions: Ideal for spring gatherings, baby showers, or a casual weekend brunch, its fresh citrus notes suit daytime celebrations particularly well.
- Storage tips: Store in an airtight container at room temperature for up to three days, or freeze individual slices wrapped tightly to keep them fresh longer; thaw at room temperature or warm briefly in a low oven.
- Seasonal pairing: During spring, serve with bright berries or a light citrus salad to echo the lemon notes, creating a harmonious seasonal plate.
FAQ
Conclusion
This bread shines because it pairs bright lemon flavor with a tender, moist crumb studded with delicate poppy seed texture. I encourage you to give this loaf a try, whether for a relaxed weekend breakfast or to share at a small gathering. The steps are straightforward and forgiving, and the payoff is a loaf that feels both comforting and celebratory. Enjoy the process of rubbing zest into sugar and brushing on the glossy glaze, those little rituals yield big flavor rewards.
Lemon Poppy Seed Bread
Equipment
- Stand mixer
- Paddle attachment
- Loaf Pan
- Wire Rack
- Measuring Cup
- Microwave
- Mixing Bowls
- Brush
Ingredients
- 1 2/3 cups all-purpose flour Provide structure and bulk to the batter, creating the crumb and holding air bubbles during baking; sift or whisk to remove lumps and ensure even incorporation with dry ingredients.
- 2 tbsp poppy seeds Add small crunchy pops and a subtle nutty flavor throughout the loaf; toast lightly beforehand for a deeper aroma if desired.
- 1 1/2 tsp baking powder Lighten the texture and help the bread rise by releasing carbon dioxide when heated; evenly distribute with the flour to prevent pockets of rising agent.
- 1/8 tsp baking soda Contribute additional leavening and help tenderize the crumb in coordination with baking powder; measure precisely due to its concentrated raising power.
- 1/2 tsp salt Enhance overall flavor balance by accentuating sweetness and controlling bitterness; dissolve thoroughly into the dry mix to ensure even seasoning.
- 1 cup granulated sugar Provide sweetness and moisture while aiding in browning of the crust during baking; cream with butter to incorporate air for a lighter texture.
- 2 tbsp lemon zest (from about 3 lemons) Impart bright citrus oil and strong lemon aroma to the batter, intensifying lemon flavor; finely grate only the yellow peel to avoid bitter pith.
- 1/2 cup unsalted butter, at room temperature Add richness, moisture, and flavor while contributing to the cake's tender crumb; cream with sugar to trap air for a lighter loaf.
- 3 large eggs, at room temperature Bind the batter, add moisture, and enrich flavor while helping with emulsion; bring to room temperature to ensure smooth incorporation and even texture.
- 1/2 tsp vanilla extract Contribute a subtle background warmth and enhance other flavors; add with wet ingredients to distribute aroma evenly.
- 1/4 cup + 2 tbsp sour cream Provide tanginess and extra moisture while tenderizing the crumb through mild acidity; fold in gently for an even batter consistency.
- 1/4 cup milk Adjust batter consistency and add additional moisture to produce a tender crumb; use room-temperature milk for smoother mixing and even texture.
- 2 tbsp fresh lemon juice Introduce fresh bright lemon acidity and enhance overall lemon flavor; mix with other wet ingredients to distribute the citrus evenly.
- 1/4 cup granulated sugar Create a glossy, sweet finish or simple syrup component that adds extra sweetness; dissolve into warm liquid if making a glaze or brush onto the loaf.
- 3 tbsp fresh lemon juice Offer intense lemon juice for a finishing glaze or drizzle to boost acidity and brightness; use fresh juice for the cleanest flavor and vibrant aroma.
Instructions
- Preheat oven to 350 degrees. Butter and flour an 8 by 4-inch baking dish, set aside.: The warm, steady heat is essential for a uniform rise and a golden top, you should hear a soft hum from the oven as it stabilizes. The oven should feel like a cozy, consistent heatwave when you open it, not bursty or wildly hot, which would brown the top too quickly. If your oven runs hot, reduce the temperature by a few degrees or rotate the pan halfway through baking. A common error is skipping preheat which can make the loaf dense, since the leaveners get less immediate lift.
- In a mixing bowl whisk together flour, poppy seeds, baking powder, baking soda and salt for 20 seconds, set aside.: The dry mixture should look evenly speckled with poppy seeds and free of lumps, and you should catch a faint wheaty scent from the all purpose flour . Whisking distributes small pockets of leavening and seeds so you get a consistent rise and texture. Avoid overwhisking which can introduce too much air into the flour, causing a drier crumb, and be careful not to add wet ingredients before this mixing is complete.
- Add sugar and lemon zest to the bowl of an electric stand mixer fitted with the paddle attachment. Rub lemon zest with sugar using your fingertips, until the mixture becomes moist and pale yellow.: When you rub the lemon zest into the granulated sugar the sugar will turn moist and pale yellow, releasing citrus oils that create an aromatic, sunny base. The smell should be bright and floral, hinting at the flavor to come. If you skip this rubbing step you lose a big layer of aroma, so take the minute to do it thoroughly.
- Add butter to sugar mixture and whip on medium speed until pale and fluffy. Mix in eggs one at a time, adding in vanilla with last egg.: As you cream in the unsalted butter , the bowl will fill with a light, billowy mass that looks almost whipped cream like, and you should hear a steady, rhythmic whir. This creaming traps tiny air pockets that give the loaf lift and tenderness, and the color will shift to a lighter, pale yellow. Overcreaming can lead to collapse in the oven, and undercreaming leaves a dense crumb, so aim for a soft, pale texture.
- In (microwave safe) liquid measuring cup used to measure milk, whisk together the milk with sour cream. Heat mixture in microwave just until no longer cold (about room temp).: Each egg should be incorporated fully so the batter looks smooth and glossy, emitting a rich, warm aroma. Adding eggs one at a time ensures the batter emulsifies properly, preventing separation. If the mixture looks curdled after an egg, slow the mixer and scrape the bowl, then gently continue, since rushing can cause a split batter that affects texture.
- Working in three separate batches, beginning and ending with flour mixture, add 1/3 of the flour mixture (to the butter/sugar mixture) alternating with 1/2 of the milk mixture and 1 tbsp lemon juice (each time), and mixing just until combined after each addition.: The mixture should be homogenous and slightly thick, and after gentle warming it will feel closer to room temperature and easier to incorporate. Heating just until no longer cold helps keep the batter smooth and prevents sudden solidification of the butter. Do not overheat, or you risk breaking the emulsion and creating lumps in the batter.
- Bake in preheated oven 45 - 55 minutes, tenting with foil at 40 minutes (don't let foil touch loaf), until toothpick inserted into center comes out clean (or with a few small crumbs).: This rhythm yields a silky batter, and you should stop mixing as soon as streaks disappear to avoid developing too much gluten. The batter will look glossy, and you will notice the lemon peeking through in pale flecks. Overmixing here is the common pitfall, leading to a tight, chewy loaf, so fold or mix on low speed until just combined.
- Remove from oven and allow to cool 5 minutes in loaf pan, then invert loaf onto a wire rack.: During baking the top will turn a deep golden color and the kitchen will fill with a warm citrus scent. At around 40 minutes I tent with foil to prevent the top from overbrowning while the center finishes rising and setting. You want the toothpick to come out clean or with a few moist crumbs, not wet batter, which indicates underbaking. A common misstep is opening the oven too often which causes the middle to sink, so limit peeks to the tent moment.
- Combine lemon juice and sugar in a bowl and heat in microwave on HIGH power and heat in 15 second intervals, whisking between intervals until sugar has dissolved and mixture is hot.: The loaf will settle and continue to set as it cools slightly, and you might notice a faint steam rising from the top as residual heat escapes. This short rest helps the crumb firm enough so it does not tear when inverted. If you rush and invert immediately the loaf may stick or crumble, so give it these few minutes.
- Brush top of bread with the lemon glaze (it will take several coats but use it all. Give it a second between coats to absorb as needed).: The act of flipping releases the loaf cleanly, and you should hear a slight sigh as it detaches, revealing a golden underside. Cooling on a rack prevents the bottom from trapping steam and becoming soggy, keeping the crust pleasantly textured. Leaving it in the pan too long can create excess moisture at the base.
- Let loaf cool on wire rack (I also recommend covering it with an extra large bowl if you have one to seal in some of the moisture), then cut into slices. Store in an airtight container.: The glaze should be clear and glossy with a bright lemon aroma, not cloudy or gritty. Warming helps the sugar dissolve quickly so the syrup penetrates the loaf. Overheating can caramelize the sugar and change the flavor, so use short intervals and whisk between each stint.
- Brush top of bread with the lemon glaze: When you brush the first thin coat the loaf will glisten and you may hear a soft sizzle as the warm syrup meets the warm bread. Apply several thin coats, allowing absorption time between each, to avoid soaking the crumb unevenly. Too generous a single pour can make the loaf soggy, so patience yields the best glossy finish.
- Let loaf cool on wire rack then cut into slices: As it cools the crumb firms just enough to slice neatly, and the aroma will mellow slightly into a comforting lemon note. I often cover with a large bowl to trap a bit of moisture if I prefer an especially tender slice. Cutting while too warm risks gummy slices, so wait until mostly cooled for clean cuts.
- Store in an airtight container: Proper storage keeps the loaf soft and prevents it from drying out, especially if you plan to keep it several days. The stored loaf will stay moist and flavorful for up to a few days at room temperature, or it can be wrapped and frozen for longer preservation. Leaving it exposed to air is the usual culprit for stale, dry slices.
Notes
- Room temperature ingredients: Make sure the eggs, butter, and dairy are at room temperature so they combine into a smooth, homogenous batter, which leads to a tender crumb.
- Measure flour correctly: Spoon and level the all purpose flour into your measuring cup instead of scooping, or better yet, weigh for accuracy to prevent a dry, dense loaf.
- Don’t overmix: Once you add the flour mixture, mix just until combined to avoid developing excess gluten which makes the bread chewy rather than tender.
- Fresh leavening matters: Ensure your baking powder and baking soda are fresh, stale leavening can result in a flat, heavy loaf.
- Warm the milk and sour cream slightly: Bringing the dairy mixture close to room temperature helps it incorporate smoothly and prevents the butter from seizing when combined.
- Multiple glaze coats: Brush the warm syrup onto the hot loaf in thin layers, waiting briefly between coats so the glaze sinks in without saturating the crumb.
- Storage suggestion: Keep the loaf in an airtight container at room temperature for up to three days, or freeze wrapped slices for longer storage.