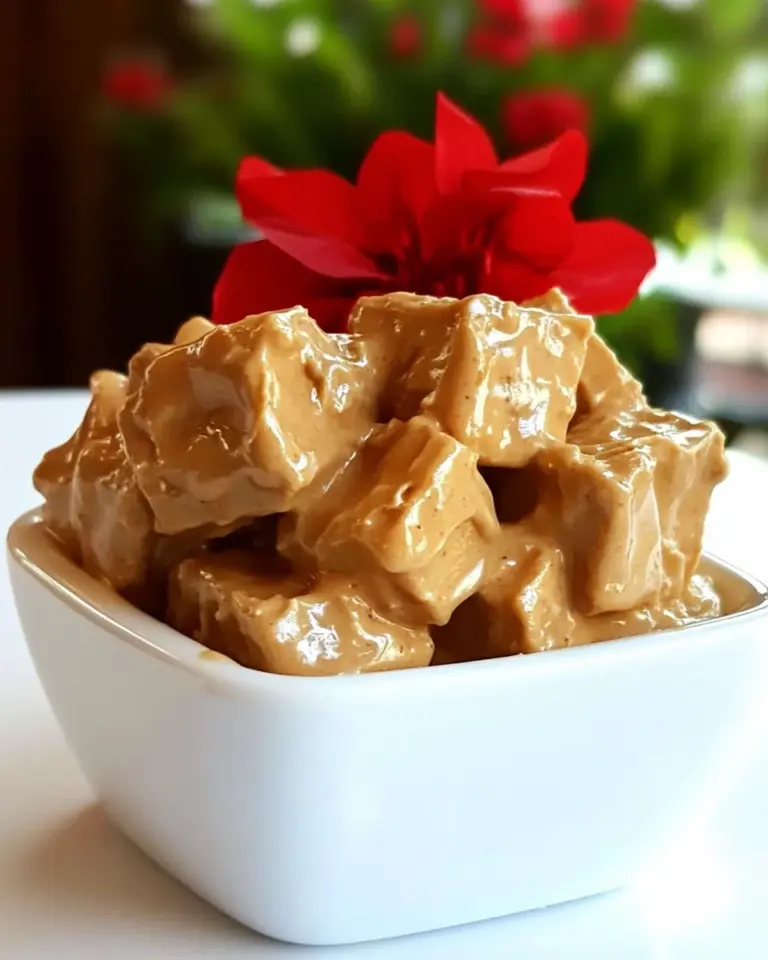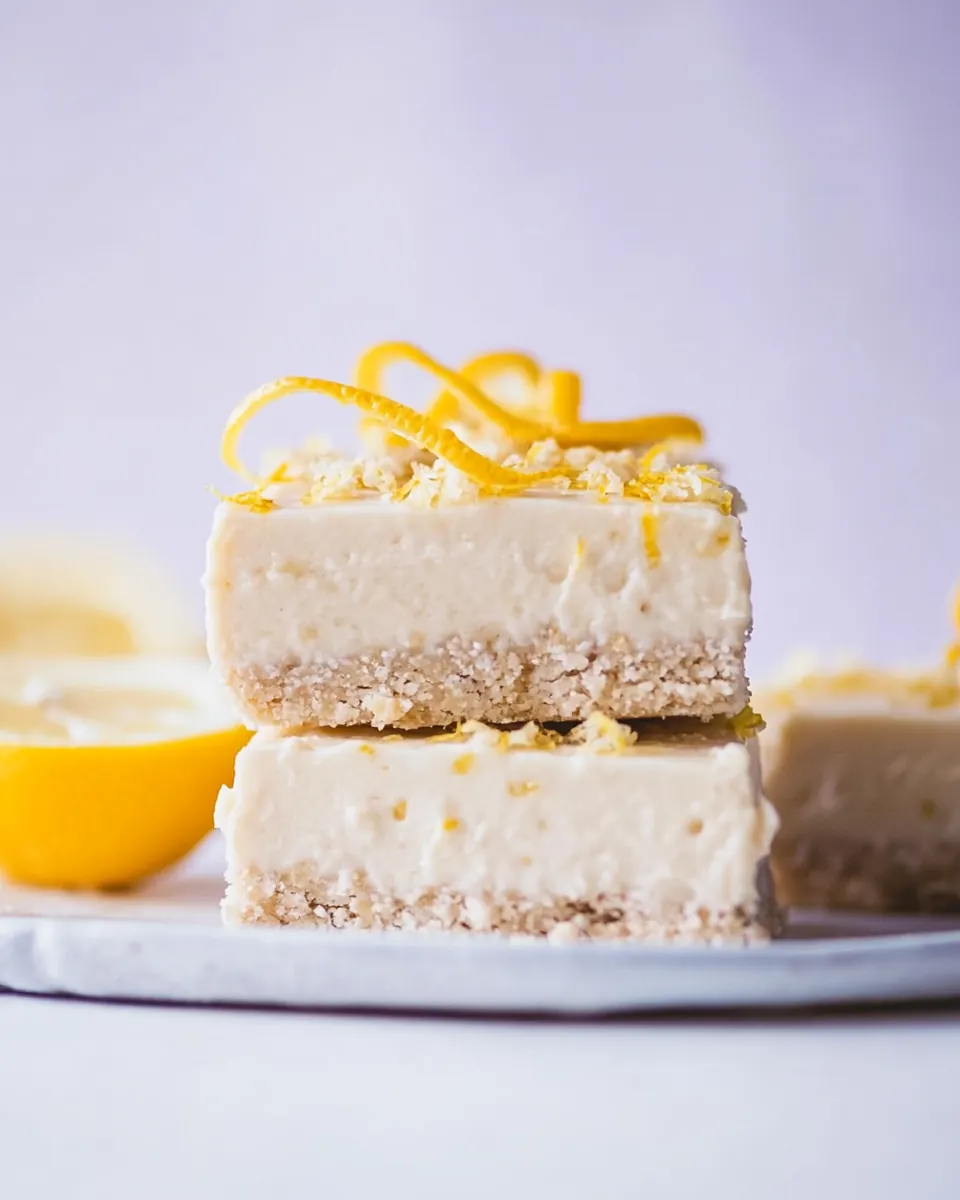
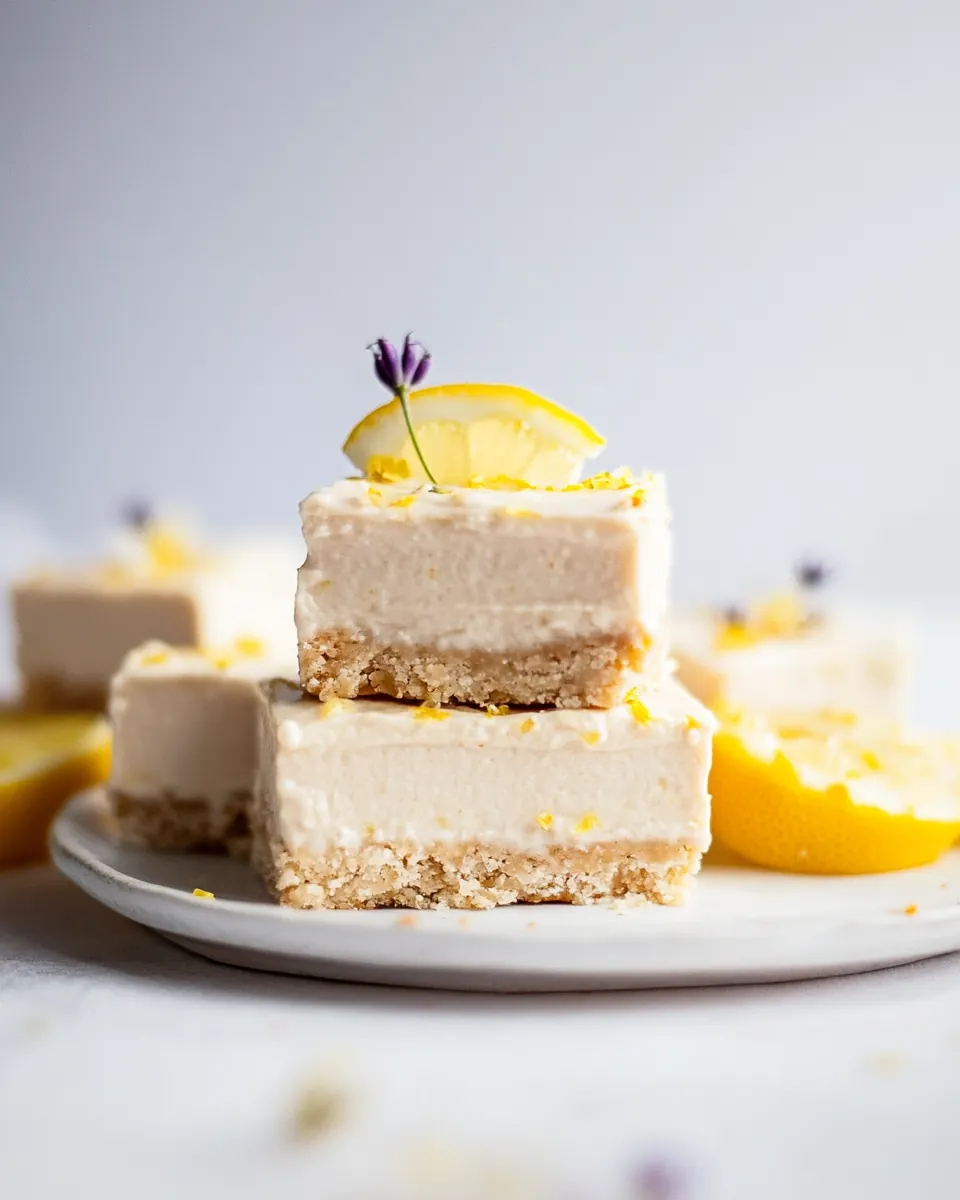
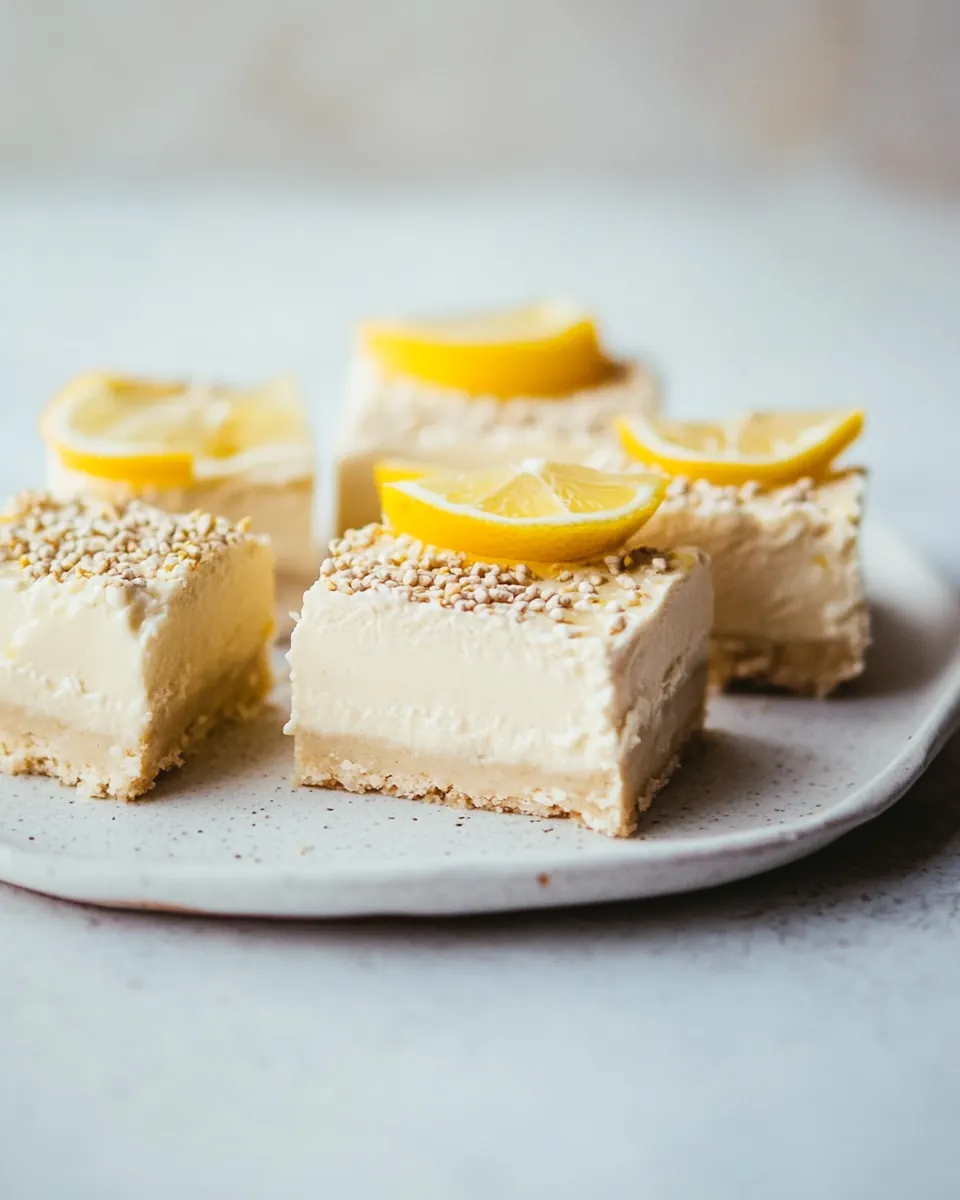
Creamy Vegan Lemon Bars
Creamy Vegan Lemon Bars feel like sunshine folded into a bite, and I first met them on a rainy spring afternoon when I needed something bright to lift my mood. I was juggling a stack of mail and a slow kettle, and the idea of a tart, smooth bar that was also plant based sounded like the perfect small rebellion against gloom. Right away I was taken by how approachable the flavors are, and how the texture manages to be both silky and substantial.
I remember setting up the blender on the counter, feeling oddly ceremonial as I zested lemons while the house smelled faintly of citrus. The contrast between the sticky date and walnut crust and the cool, lemony filling felt like a tiny celebration. Friends kept popping in that day, drawn by the scent, and it turned into an impromptu tasting where everyone guessed the secret of the filling. Spoiler, it is the coconut cream and cashews teaming up to create that lush mouthfeel.
Recipe Snapshot
8 hr 25 mins
25 mins
480 mins
Hard
200 kcal
American
Vegan, Gluten-Free
Desserts
Food Processor, Blender
Why This Creamy Vegan Lemon Bars Hits Different
1. A texture that surprises
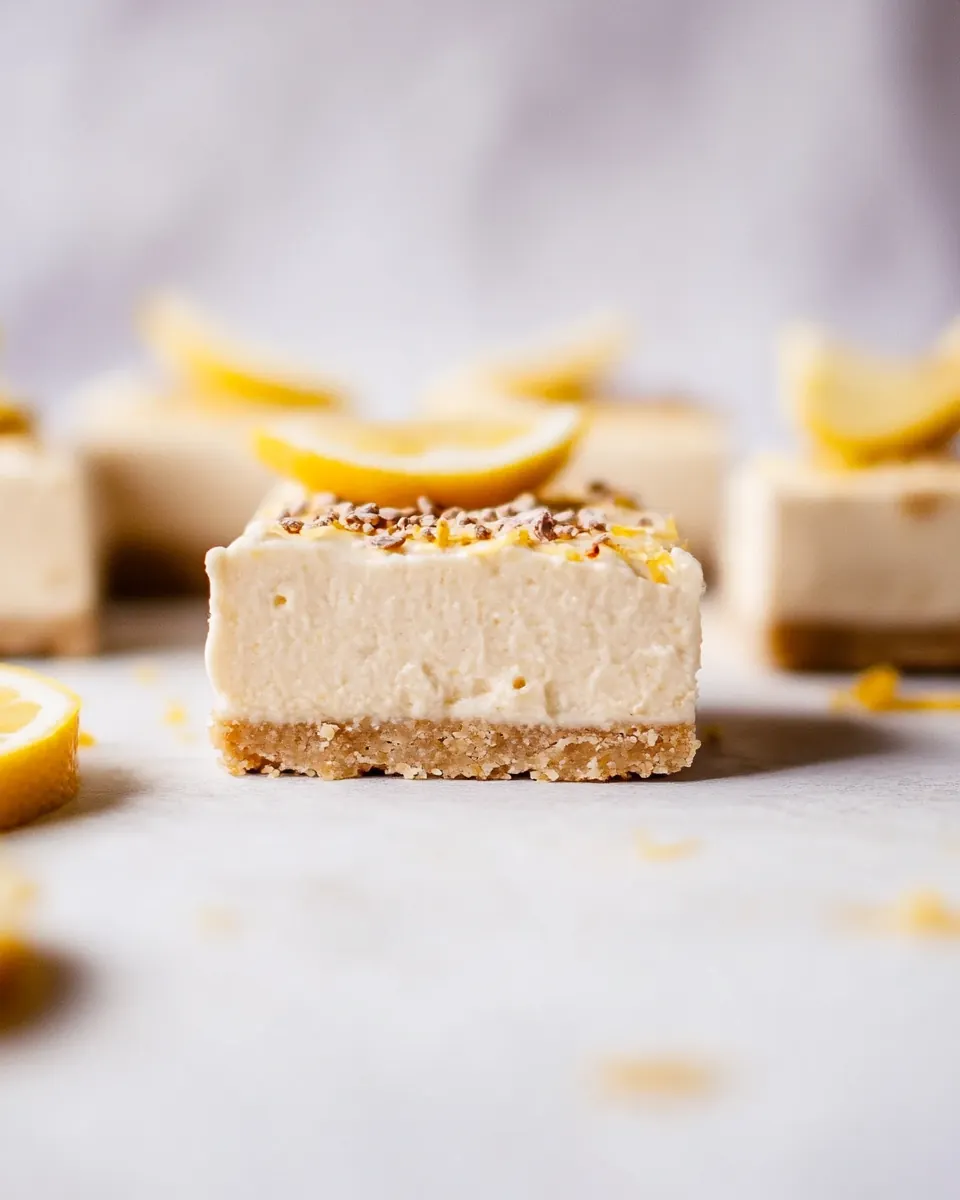
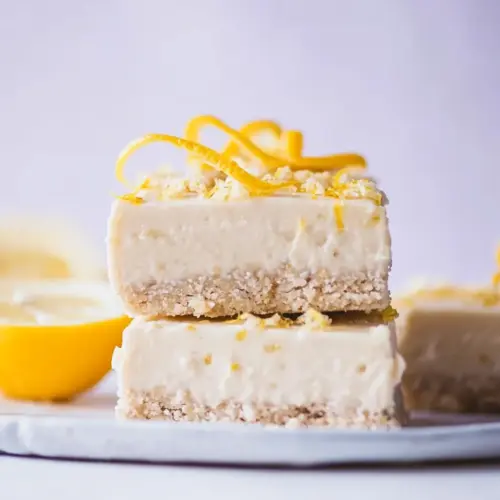
I love how Creamy Vegan Lemon Bars deliver a velvety, almost custard like filling without any dairy. The combination of coconut cream and soaked cashews emulates richness, while lemon juice and lemon zest keep the bite lively. When you press a fork into the slice, you should notice a clean, smooth give, not a crumbly collapse, and that balance makes each bite feel indulgent yet light.
2. Simple pantry heroes
These bars are powered by everyday ingredients like dates, walnuts, and rolled oats, so you do not need specialty pantry items to impress. I often reach for this recipe when I want something that reads fancy but comes together with minimal fuss. The sweetener choice of maple syrup pairs beautifully with the nutty base, and the recipe scales well if you want to make more for guests.
3. Textural contrast that sings
The sticky, slightly chewy crust plays against the silky filling, and that interplay is what keeps people coming back for another piece. When I press the crust into the pan I aim for an even thickness so every bite has both textures. The date and walnut base also adds warmth and depth, which offsets the bright acidity of the citrus.
4. Foolproof for gatherings
I trust this recipe for potlucks because it holds up well when sliced, and it travels without losing shape if it has had enough time to set in the freezer. I usually freeze overnight and let it sit at room temperature before serving, which yields the perfect sliceability. Guests rarely guess it is vegan, which delights me each time.
5. Clean flavors, adaptable method
The flavor profile is clean enough to be a canvas, so you can tinker with zest intensity or maple amount to suit your taste. I sometimes add more lemon zest when the fruit is especially fragrant, and I always taste the filling before freezing to adjust sweetness. That small habit saves many a remake and keeps the bars perfectly balanced.
Ingredient List for Creamy Vegan Lemon Bars
These ingredients are chosen to play harmonious roles: the crust is built for texture and chew, while the filling is engineered for silkiness and bright acidity. Together, they create a bar that holds up for slicing yet melts on the tongue. The key players are the dates and walnuts for the base, and the duo of coconut cream and cashews for a creamy, dairy free custard.
- 9 soft Medjool dates, pitted: Soak and sweeten: soft Medjool dates provide natural sweetness and stickiness to bind the crust while adding caramel-like flavor; pulse finely to create a cohesive base for the bars.
- 1 cup walnuts: Toast and texture: walnuts lend a rich, nutty depth and crunchy texture to the crust; pulse with dates and oats to form a flavorful, sturdy foundation.
- 3/4 cup gluten-free whole rolled oats: Add body and chew: gluten–free whole rolled oats contribute bulk, chewiness, and a wholesome texture to the crust while keeping the recipe gluten–free; grind lightly for better cohesion if desired.
- 1/4 teaspoons ea salt: Season and enhance: a small amount of salt balances sweetness and amplifies the flavors throughout both crust and filling; dissolve evenly when mixing.
- 1 to 2 tablespoons filtered water: Adjust consistency: filtered water is used sparingly to help bind the crust mixture or thin the filling as needed without altering flavor; add gradually until desired texture is reached.
- 1 14-ounce can coconut cream, see notes!: Cream and stabilize: coconut cream supplies a rich, creamy base and coconut flavor to the filling while helping it set into a smooth, luscious layer; chill for best firmness as noted.
- 1 1/4 cups raw cashews: Provide richness: raw cashews create a silky, creamy texture in the filling when soaked and blended, contributing healthy fats and a neutral, nutty flavor that supports the lemon profile.
- 2 tablespoons lemon zest: Brighten and perfume: lemon zest adds concentrated citrus oils and aromatic brightness to the filling, enhancing overall lemon flavor and providing a fresh, zesty note.
- 1/3 cup fresh lemon juice: Add acidity: fresh lemon juice delivers essential tartness and bright acidity to balance sweetness and help the filling set, creating the signature lemon bar tang.
- 1/3 cup maple syrup: Sweeten naturally: maple syrup acts as the primary sweetener in the filling, offering a delicate, nuanced sweetness that complements the lemon and coconut cream.
- 1/8 teaspoons ea salt: Balance and depth: an additional pinch of salt deepens flavor complexity and sharpens the sweet-tart balance in the finished bars when mixed into the filling.
Cooking Method for Creamy Vegan Lemon Bars
These directions take you through building the crust and crafting the silky filling, then bringing them together for a perfect set. You will rely mainly on a food processor and blender, and patience during blending yields the creamiest result. Follow the sensory cues and don t rush the freezing step, as chilling overnight is essential for clean slices.
- Make the crust: In a food processor, place the dates, walnuts, oats, and salt and process until the mixture comes together into a sticky ball. If necessary, gradually add 1 to 2 tablespoons of water.: Start by noticing the sound change in your food processor, from an initial fast chop to a softer, more cohesive whir that signals the ingredients are binding. You should see a sticky ball forming, glossy from the dates , with flecks of walnut and oats distributed throughout. The aroma will turn warm and nutty, which reassures you the crust is developing depth. The reason you pulse rather than blitz is to prevent the nuts from releasing too much oil, which would create a paste instead of a textured crust. If the mixture seems dry, add a single tablespoon of filtered water , process again, and only then decide if a second tablespoon is necessary. A common mistake is adding too much water at once, which produces a soggy crust that will not firm up; if that happens briefly chill the mixture to make it easier to handle.
- Line a 7 x 9-inch or 8 x 8-inch baking pan with parchment paper and press the crust to the edges of the pan. The crust is very sticky, so I like to use a sheet of parchment paper on top to help smooth it out. Place the pan in the freezer while you make the filling.: When transferring the crust to the pan, press firmly and evenly so each edge has consistent thickness, which ensures uniform baking or setting and makes slicing predictable. The surface will feel tacky to the touch, so lay a piece of parchment over the top to smooth with your hands or a flat-bottomed cup, applying steady pressure until the surface is even. The cold from the freezer firms the fats in the walnuts and dates , stabilizing the base while you prepare the filling. Visually, you want a dense, cohesive layer with no visible gaps or loose crumb pockets. A frequent error is pressing too thin in some places, which leads to slices that fall apart at the corners; aim for an even press from center to edge.
- Make the filling: In a high-speed blender, puree the coconut cream, cashews, lemon zest, lemon juice, maple syrup, and salt until smooth. Pour the filling over the crust and freeze overnight. Let thaw at room temperature for 20 minutes before slicing into bars and serving.: As you blend, listen for the motor to move from a burbling phase to a steady hum, indicating the cashews and coconut cream are fully emulsifying. The mixture should transform from grainy to silk like, and the smell will shift from nut forward to bright citrus. Use a tamper or pause and scrape down the sides to ensure no cashew fragments remain, especially if your blender is not top of the line. This step is crucial because under blended cashews create a gritty mouthfeel that undermines the creamy illusion. If the filling seems too thick for your blender, add a touch of the reserved liquid from the coconut can, but add sparingly since added liquid affects set time. A common misstep is assuming the filling is done before it is actually smooth; patience here pays off when you taste the first spoonful.
- Pour the filling over the crust and freeze overnight: When you pour the filling, do so slowly and aim for an even spread across the chilled crust to avoid trapped air pockets that can make slices crumble. The filling should look glossy and hold its shape briefly before settling into a uniform layer. Freezing overnight allows the fats and nut matrix to firm so you can achieve clean slices; shorter freezing yields a softer, messier bar. The sensory cue of a properly frozen bar is a firm but yielding texture when pressed gently at the center. Avoid slicing straight from the freezer unless you prefer a very firm bite; letting it sit at room temperature before cutting produces cleaner edges. One mistake is trying to move the pan before the filling has mostly set, which can cause ripples and an uneven surface.
- Let thaw at room temperature for 20 minutes before slicing into bars and serving: Allowing the bars to sit at room temperature for about 20 minutes softens the filling just enough to reveal a creamy, sliceable texture, and the lemon aroma will become more pronounced as the chill lifts. Use the sensory cue of a slight give when you press the top with your finger; it should not be rock hard nor overly soft. When slicing, run a sharp knife under hot water and dry it between cuts for cleaner edges because the warm blade glides through the filling, reducing tearing. A common oversight is cutting immediately from frozen which leads to cracked edges and crumbly pieces, so patience here ensures beautiful presentation and a balanced mouthfeel.
Substitutions and Tips
I like to keep substitutions simple and honest with this recipe so the integrity of the texture remains intact. Below are practical tips and variations that preserve the creamy filling and sturdy crust. Each tip starts with a bold phrase to help you scan easily and decide what to try next.
- If you cannot find coconut cream scoop the thick top from a chilled can of full fat coconut milk, but be aware it may contain slightly more water which could extend freeze time.
- To speed up cashew prep boil raw cashews for 10 minutes then drain, this softens them quickly and saves overnight soaking without sacrificing smoothness.
- For a nuttier crust toast the walnuts lightly in a dry skillet for 3 to 4 minutes until fragrant, watching constantly to prevent burning, which will deepen the base flavor.
- Adjust sweetness confidently taste the filling before freezing and add more maple syrup a teaspoon at a time until it hits your preferred balance against the lemon juice.
- Prevent a soggy crust press the crust very firmly and chill it first in the freezer so it sets quicker when the filling is added, keeping layers distinct.
- Make ahead guidance freeze the assembled bars for storage, then thaw in the refrigerator overnight before serving to preserve texture and flavor.
Serving Ideas for Creamy Vegan Lemon Bars
These bars shine when served simply, letting the citrus and creamy texture take center stage. Below I share detailed serving approaches for different occasions, from casual coffee breaks to festive gatherings. Each idea includes practical notes about storage and pairing to make planning easy.
- Casual coffee break serve one or two bars alongside a small cup of black coffee or herbal tea, the acidity of the lemon juice cuts through the nutty sweetness, creating a balanced bite that uplifts a morning routine.
- Brunch spread arrange the bars on a platter with fresh fruit like berries and sliced stone fruit, the bright colors complement the pale yellow filling and offer guests a variety of textures and flavors during a leisurely mid day meal.
- Potluck or picnic keep the frozen slab in a cooler and slice just before serving once slightly thawed, this prevents squishing; individually wrap slices for easy transport and hygienic distribution.
- Seasonal gatherings for spring events emphasize fresh garnishes such as additional lemon zest or thinly sliced candied peel, which echo the citrus theme and add visual elegance without overpowering the bars.
- Storage tips store bars in an airtight container in the freezer for up to 2 months, and transfer to the refrigerator for a few hours before serving to achieve that ideal creamy but firm texture.
- Serving size guidance with the recipe yielding about 16 bars, plan for 1 to 2 pieces per guest depending on the other desserts offered; the bars are rich so a smaller portion feels satisfying.
FAQ
Conclusion
These bars stand out because they deliver a truly creamy, citrus forward experience without any dairy, marrying a chewy date walnut crust with a luscious coconut cashew filling. I encourage you to give Creamy Vegan Lemon Bars a try whether you re serving guests or treating yourself, because the texture contrast and bright lemon notes are reliably satisfying. They re forgiving, adaptable, and impressive to serve, and once you experience the balance of sweet, tart, and nutty layers you ll likely keep this recipe in your repertoire for many gatherings.
Creamy Vegan Lemon Bars
Equipment
- Food Processor
- Blender
Ingredients
- 9 soft Medjool dates, pitted Soak and sweeten: soft Medjool dates provide natural sweetness and stickiness to bind the crust while adding caramel-like flavor; pulse finely to create a cohesive base for the bars.
- 1 cup walnuts Toast and texture: walnuts lend a rich, nutty depth and crunchy texture to the crust; pulse with dates and oats to form a flavorful, sturdy foundation.
- 3/4 cup gluten-free whole rolled oats Add body and chew: gluten-free whole rolled oats contribute bulk, chewiness, and a wholesome texture to the crust while keeping the recipe gluten-free; grind lightly for better cohesion if desired.
- 1/4 teaspoons ea salt Season and enhance: a small amount of salt balances sweetness and amplifies the flavors throughout both crust and filling; dissolve evenly when mixing.
- 1 to 2 tablespoons filtered water Adjust consistency: filtered water is used sparingly to help bind the crust mixture or thin the filling as needed without altering flavor; add gradually until desired texture is reached.
- 1 14-ounce can coconut cream, see notes! Cream and stabilize: coconut cream supplies a rich, creamy base and coconut flavor to the filling while helping it set into a smooth, luscious layer; chill for best firmness as noted.
- 1 1/4 cups raw cashews Provide richness: raw cashews create a silky, creamy texture in the filling when soaked and blended, contributing healthy fats and a neutral, nutty flavor that supports the lemon profile.
- 2 tablespoons lemon zest Brighten and perfume: lemon zest adds concentrated citrus oils and aromatic brightness to the filling, enhancing overall lemon flavor and providing a fresh, zesty note.
- 1/3 cup fresh lemon juice Add acidity: fresh lemon juice delivers essential tartness and bright acidity to balance sweetness and help the filling set, creating the signature lemon bar tang.
- 1/3 cup maple syrup Sweeten naturally: maple syrup acts as the primary sweetener in the filling, offering a delicate, nuanced sweetness that complements the lemon and coconut cream.
- 1/8 teaspoons ea salt Balance and depth: an additional pinch of salt deepens flavor complexity and sharpens the sweet-tart balance in the finished bars when mixed into the filling.
Instructions
- Make the crust: In a food processor, place the dates, walnuts, oats, and salt and process until the mixture comes together into a sticky ball. If necessary, gradually add 1 to 2 tablespoons of water.: Start by noticing the sound change in your food processor, from an initial fast chop to a softer, more cohesive whir that signals the ingredients are binding. You should see a sticky ball forming, glossy from the dates , with flecks of walnut and oats distributed throughout. The aroma will turn warm and nutty, which reassures you the crust is developing depth. The reason you pulse rather than blitz is to prevent the nuts from releasing too much oil, which would create a paste instead of a textured crust. If the mixture seems dry, add a single tablespoon of filtered water , process again, and only then decide if a second tablespoon is necessary. A common mistake is adding too much water at once, which produces a soggy crust that will not firm up; if that happens briefly chill the mixture to make it easier to handle.
- Line a 7 x 9-inch or 8 x 8-inch baking pan with parchment paper and press the crust to the edges of the pan. The crust is very sticky, so I like to use a sheet of parchment paper on top to help smooth it out. Place the pan in the freezer while you make the filling.: When transferring the crust to the pan, press firmly and evenly so each edge has consistent thickness, which ensures uniform baking or setting and makes slicing predictable. The surface will feel tacky to the touch, so lay a piece of parchment over the top to smooth with your hands or a flat-bottomed cup, applying steady pressure until the surface is even. The cold from the freezer firms the fats in the walnuts and dates , stabilizing the base while you prepare the filling. Visually, you want a dense, cohesive layer with no visible gaps or loose crumb pockets. A frequent error is pressing too thin in some places, which leads to slices that fall apart at the corners; aim for an even press from center to edge.
- Make the filling: In a high-speed blender, puree the coconut cream, cashews, lemon zest, lemon juice, maple syrup, and salt until smooth. Pour the filling over the crust and freeze overnight. Let thaw at room temperature for 20 minutes before slicing into bars and serving.: As you blend, listen for the motor to move from a burbling phase to a steady hum, indicating the cashews and coconut cream are fully emulsifying. The mixture should transform from grainy to silk like, and the smell will shift from nut forward to bright citrus. Use a tamper or pause and scrape down the sides to ensure no cashew fragments remain, especially if your blender is not top of the line. This step is crucial because under blended cashews create a gritty mouthfeel that undermines the creamy illusion. If the filling seems too thick for your blender, add a touch of the reserved liquid from the coconut can, but add sparingly since added liquid affects set time. A common misstep is assuming the filling is done before it is actually smooth; patience here pays off when you taste the first spoonful.
- Pour the filling over the crust and freeze overnight: When you pour the filling, do so slowly and aim for an even spread across the chilled crust to avoid trapped air pockets that can make slices crumble. The filling should look glossy and hold its shape briefly before settling into a uniform layer. Freezing overnight allows the fats and nut matrix to firm so you can achieve clean slices; shorter freezing yields a softer, messier bar. The sensory cue of a properly frozen bar is a firm but yielding texture when pressed gently at the center. Avoid slicing straight from the freezer unless you prefer a very firm bite; letting it sit at room temperature before cutting produces cleaner edges. One mistake is trying to move the pan before the filling has mostly set, which can cause ripples and an uneven surface.
- Let thaw at room temperature for 20 minutes before slicing into bars and serving: Allowing the bars to sit at room temperature for about 20 minutes softens the filling just enough to reveal a creamy, sliceable texture, and the lemon aroma will become more pronounced as the chill lifts. Use the sensory cue of a slight give when you press the top with your finger; it should not be rock hard nor overly soft. When slicing, run a sharp knife under hot water and dry it between cuts for cleaner edges because the warm blade glides through the filling, reducing tearing. A common oversight is cutting immediately from frozen which leads to cracked edges and crumbly pieces, so patience here ensures beautiful presentation and a balanced mouthfeel.
Notes
- If you cannot find coconut cream scoop the thick top from a chilled can of full fat coconut milk, but be aware it may contain slightly more water which could extend freeze time.
- To speed up cashew prep boil raw cashews for 10 minutes then drain, this softens them quickly and saves overnight soaking without sacrificing smoothness.
- For a nuttier crust toast the walnuts lightly in a dry skillet for 3 to 4 minutes until fragrant, watching constantly to prevent burning, which will deepen the base flavor.
- Adjust sweetness confidently taste the filling before freezing and add more maple syrup a teaspoon at a time until it hits your preferred balance against the lemon juice.
- Prevent a soggy crust press the crust very firmly and chill it first in the freezer so it sets quicker when the filling is added, keeping layers distinct.
- Make ahead guidance freeze the assembled bars for storage, then thaw in the refrigerator overnight before serving to preserve texture and flavor.