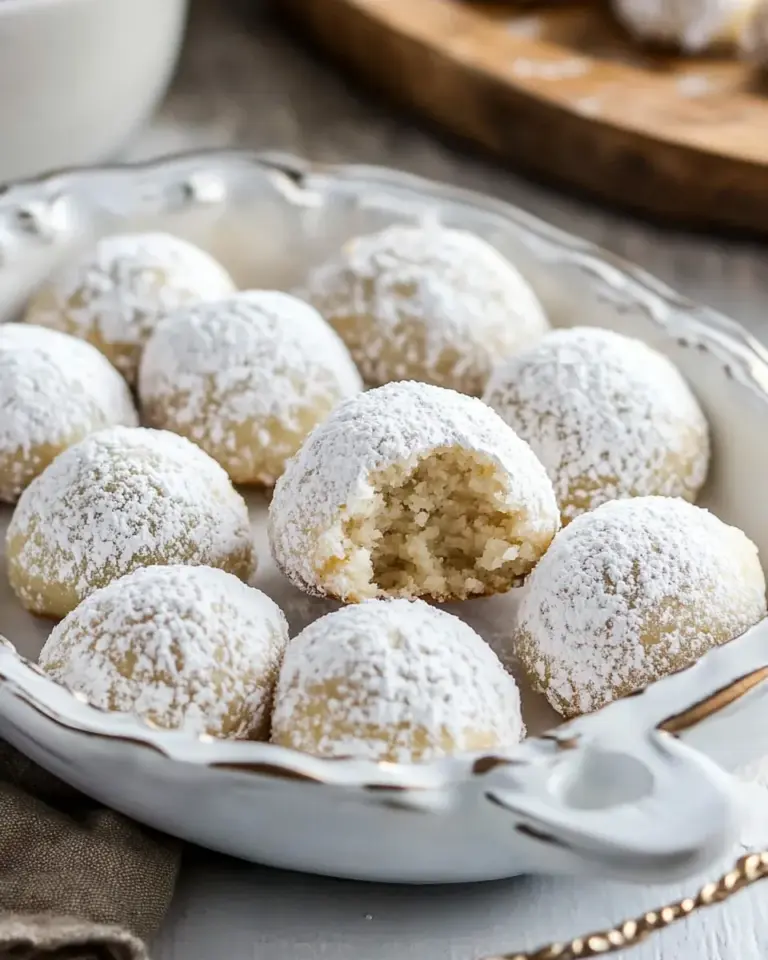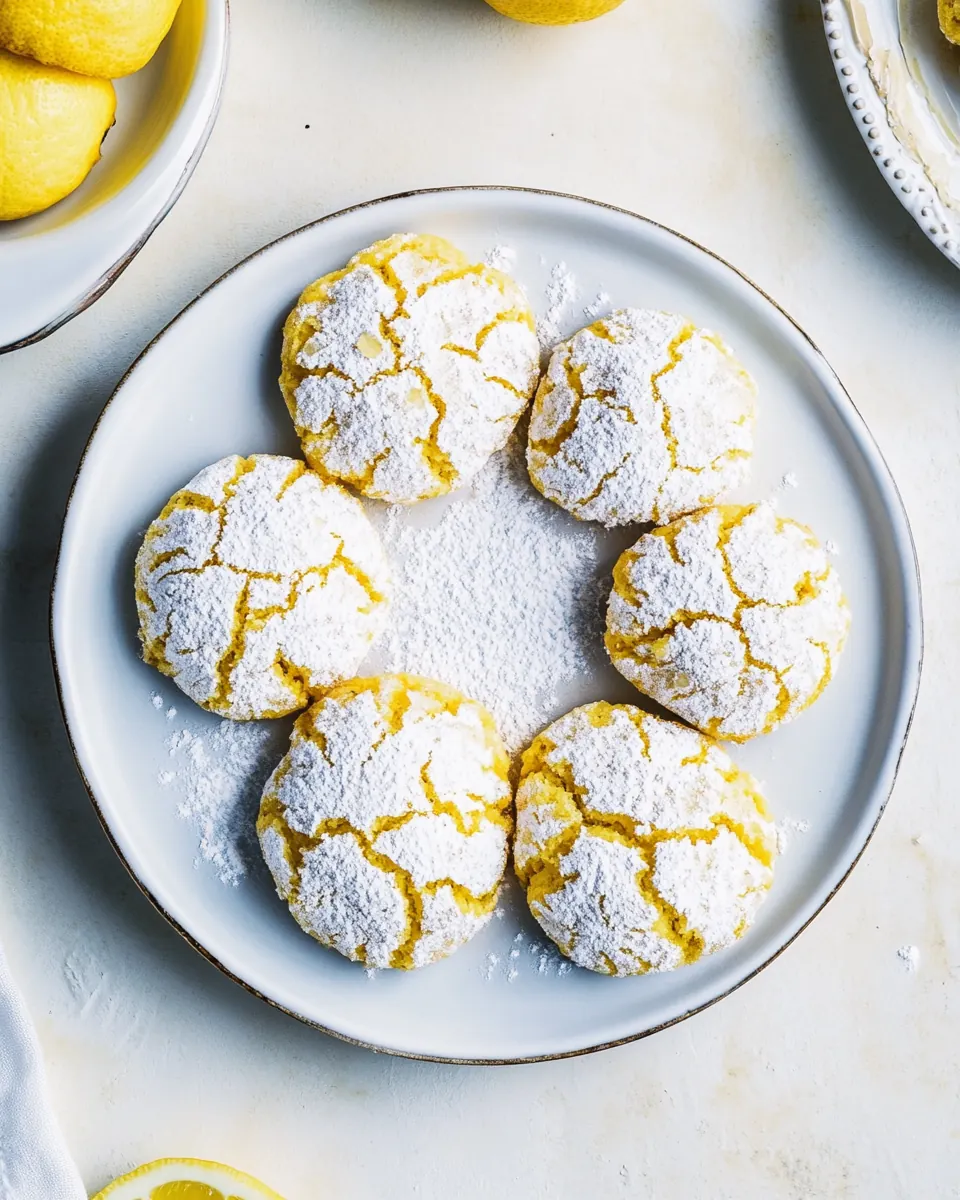
Lemon Crinkle Cookies
Lemon Crinkle Cookies have been my cheerful go to whenever I need a bright, nostalgic treat that travels well and instantly lifts the mood.
I first made these cookies on a rainy afternoon when I wanted something sunny to bring to a neighbors gathering. I remember zesting lemons with the windows fogged and the kitchen filling with that fresh citrus perfume, while the simple dough came together quickly. Rolling the dough into sugar coated spheres felt almost meditative, and the first batch cracked open in the oven into crinkled little moons that were soft inside and slightly crisp at the edges. That balance of texture became my favorite part, and I started swapping in more zest or extra juice depending on how bold I wanted the citrus flavor.
Over the years I have baked them for picnics, school bake sales, and quiet Saturday brunches. Each time someone asks for the recipe, I tell the same short story about a friend who called them tiny sunshine cookies. They are forgiving, which I adore, and the ingredients are pantry friendly enough to riff on when life gets busy. If you like bright, tender cookies with a sugary crackle on top, these will feel like a small celebration in your mouth.
Recipe Snapshot
25 mins
10 mins
15 mins
Easy
150 kcal
American
Gluten-Free, Low FODMAP
Desserts
Stand mixer, Paddle attachment, Medium bowl, Whisk, Ice cream scoop, Baking sheet, Parchment paper, Wire rack
The Charm of This Lemon Crinkle Cookies
Bright citrus flavor that sings
I love how the grated lemon zest and fresh lemon juice combine to give a layered citrus profile. The zest carries concentrated aromatic oils that hit your nose first, while the juice adds a fresh, tangy note that keeps the cookie from feeling cloying. For me, that contrast is irresistible and makes these cookies stand out from simpler sugar cookies.
Perfect texture contrast
The texture is a big reason I keep coming back to this recipe. The dough chills until firm, so when it hits the oven the cookies spread and form delicate crackles on top yet stay soft and tender inside. That slight edge crispness against a pillowy interior creates a delightful bite that I find endlessly satisfying.
Simple technique, reliable results
I appreciate recipes that are both accessible and dependable, and these cookies fit that bill. The method is straightforward, so I can focus on small adjustments like adding a touch more zest or chilling the dough a bit longer. When I have a crowd to feed, this reliability means I can scale and still get consistent outcomes.
Visually cheerful and versatile
Crumbling sugar cracking across a pale yellow surface looks joyful, and the optional gel coloring lets you brighten the hue for special occasions. These cookies are lovely on a dessert plate, in a cookie tin, or as part of a tea spread, and that versatility keeps me reaching for this recipe time and again.
Family friendly and crowd pleasing
People of all ages tend to love these, which is why I stash this recipe in my go to collection. Kids love rolling the dough in confectioners sugar, and adults comment on the fresh lemon punch. It is one of those recipes that sparks compliments without requiring fuss, so I always have it ready when I need a dependable treat.
Ingredients for Lemon Crinkle Cookies
These ingredients form a straightforward orchestra where each player has a clear role. The dry ingredients provide structure, the butter and sugars build richness and chew, and the fresh lemon zest and lemon juice deliver bright flavor. The confectioners‘ sugar finish gives the signature crinkle look while a short chill firms the dough for better spread control. Together, they create a balanced, tender cookie that holds a citrus punch without being overly sweet.
- 2 cups (240 grams) all purpose flour: Provide structure and bulk to the cookie dough, producing a tender crumb when properly measured and not overworked. Combine with leavening and fats to create the base texture that holds flavors and add-ins. Sift or whisk before mixing to ensure even distribution and aeration.
- 1 teaspoon baking powder: Lightly leaven cookies by releasing carbon dioxide during baking, contributing gentle lift and a slightly lighter texture. Balance with acidic ingredients to ensure proper rise without off-flavors. Measure accurately to prevent an overly cakey or flat result.
- 1/2 teaspoon fine grain sea salt: Enhance overall flavor by bringing out sweetness and balancing lemon brightness, while also influencing dough hydration slightly. Support gluten development control and help highlight other seasonings in the cookie. Use fine grain to ensure even distribution without gritty texture.
- 1 stick (1/2 cup) unsalted butter, at room temperature: Provide rich flavor, tenderizing the dough by coating flour proteins and inhibiting excessive gluten development for a melt-in-the-mouth bite. Add moisture and help carry butter-soluble flavors like lemon zest and vanilla. Soften to room temperature to ensure smooth creaming with sugars.
- 1/2 cup sugar: Sweeten and aerate when creamed with butter, contributing to cookie spread and a crisp edge. Help dissolve into the butter for even sweetness and structure. Adjust quantity cautiously to control browning and caramelization during baking.
- 1/2 cup (96 grams) packed light brown sugar: Add deep, molasses-like sweetness and additional moisture that yields a chewier texture and darker color. Help retain softness over time due to its hygroscopic nature. Pack firmly when measuring to maintain recipe balance and consistent results.
- 1 large egg: Bind ingredients together, add moisture and richness, and assist with leavening through steam and protein structure. Provide flavor depth and contribute to the cookie's color and tenderness. Beat in sufficiently with sugars to create a cohesive, aerated mixture.
- 1/2 teaspoon vanilla extract: Add aromatic sweetness and support other flavors by providing warm, rounded notes that complement lemon. Enhance the overall flavor profile without adding extra sweetness. Measure to maintain flavor balance and avoid overpowering the citrus.
- 2 tablespoons finely grated lemon zest (from 4 to 5 lemons): Deliver concentrated citrus oil and intense lemon flavor, boosting aroma and brightness throughout the dough. Provide texture contrast in small flecks and intensify the cookie's lemon character without adding more liquid. Grate finely to avoid bitter pith and ensure even distribution.
- 3 tablespoons lemon juice (from 2 lemons): Contribute fresh acidity and clear lemon flavor, helping balance sweetness and activate leavening slightly for lift. Add moisture and tang that brighten the cookie profile. Use freshly squeezed juice for the best aromatic and flavor impact.
- 4 drops yellow gel food coloring () (optional): Impart a vivid yellow hue to the dough for visual appeal when desired, without affecting flavor when used sparingly. Provide optional coloration for presentation, allowing the cookies to look more vibrant and festive. Use a few drops at a time to reach the desired shade.
- 1/2 cup confectioners' sugar: Coat the cooled cookies in a sweet, powdery outer layer that softens slightly on contact, creating the classic crinkle appearance. Add a bright white finish and a delicate, melt-in-the-mouth sweetness that contrasts with the cookie interior. Sift before rolling to prevent clumps and ensure even coverage.
Preparation Steps for Lemon Crinkle Cookies
These instructions take you from dry mixing to the cooling rack, and I like to move deliberately so the dough chills properly and the cookies develop that perfect crinkle. I suggest prepping your baking sheets and sugar station ahead, then following the steps in order for the most reliable results.
- Add flour, baking powder and salt to a medium bowl, whisking to combine.: As you whisk the all purpose flour , baking powder , and salt , notice how the dry mix looks uniform and slightly aerated, which helps the ingredients blend smoothly into the wet mixture later. The sound is a soft rustle as the whisk moves through the flour, and the surface takes on a lighter, dustier appearance. This step matters because evenly distributed leavening ensures uniform rise and predictable crackling. A common mistake is skipping this step, which can leave pockets of baking powder causing uneven texture. If your baking powder is clumpy, break it up against the bowl edge before whisking.
- Add butter, sugar and brown sugar to the bowl of a stand mixer fitted with the paddle attachment. Beat on medium until light and fluffy, scraping the sides of the bowl as needed (about 2 minutes). Add the egg and beat until incorporated. Add the vanilla, lemon zest, lemon juice and food coloring and beat until incorporated (it will look a bit lumpy at this point). Add the flour mixture and beat on low until just combined. Cover the bowl and refrigerate until firm (at least 2 hours and up to overnight).: The moment you start beating the butter , sugar , and brown sugar , you will hear a change from heavy thudding to a lighter, airy beat as the mixture becomes pale and fluffy. This aeration traps tiny air bubbles that help with lift and create a tender crumb. The smell will be sweet with warm toffee notes from the brown sugar. If the butter is too soft the mixture will look greasy instead of fluffy, so chill briefly and restart the creaming if needed. Scrape the bowl to prevent uneven incorporation.
- Put the confectioners' sugar in a small bowl. Using a tablespoon or ice cream scoop, scoop 1-ounce portions of cookie dough and roll into a ball using your hands. Toss each ball in the confectioners' sugar, giving each of them a generous coating. Transfer the balls to a parchment-lined baking sheet, leaving about 1 inch of space in between each ball (I fit 11 balls on 1 baking sheet). Transfer baking sheet to the fridge and let chill for 20 minutes. You can prepare another baking sheet of cookies while the first chills or put the rest of the cookie dough back in the fridge.: When beaten properly, the mixture should ribbon from the paddle and hold some shape, indicating enough air has been incorporated. You will see a pale, almost creamy texture and feel the mixture lighten when you lift the paddle. This technique helps the cookies rise evenly and keeps them tender. A frequent error is overbeating after adding eggs; stop once light and fluffy to maintain structure. Pause to scrape the sides so no unincorporated butter remains stuck on the bowl.
- Preheat an oven to 350°F and set an oven rack to the middle position. Bake until the cookies spread and the tops crack (14 to 16 minutes). Let cool on the baking sheet for 5 minutes, then transfer to a wire rack to cool completely.: After adding the egg , the batter will look glossier and smoother, and the consistency should even out. The egg helps bind the dough and adds moisture. If you add a cold egg to softened butter, the mixture can seize and look curdled, which affects texture. If curdling happens, beat briefly until smooth or let the mixture sit for a moment at room temperature and then continue, scraping down the paddle so the egg distributes evenly.
- Add the vanilla, lemon zest, lemon juice and food coloring and beat until incorporated (it will look a bit lumpy at this point): As you mix in vanilla , the fragrant background warms; the freshly grated lemon zest releases aromatic oils that smell intensely citrusy; and the lemon juice adds tang and thins the batter slightly. If using gel coloring, the tint will deepen as you fold it in. Expect some lumpiness from zest flecks or slight curdling from the juice, which is normal and will resolve when the flour is added. A mistake to avoid is over mixing here, which can break down emulsification. Use medium speed and stop once ingredients appear evenly dispersed.
- Add the flour mixture and beat on low until just combined: When you fold in the dry mix on low, the dough transitions from sticky to a smooth, slightly tacky dough. You will notice the sound from the mixer change to a quieter thud and the dough will pull away from the bowl slightly. This gentle mixing prevents overdeveloping gluten, which would make the cookies tough. Be sure to stop as soon as streaks of flour disappear. Overmixing here is the most common cause of dense cookies, so be cautious and use a spatula to finish if needed.
- Cover the bowl and refrigerate until firm (at least 2 hours and up to overnight): Chilling is crucial, because cold dough spreads less and yields the crinkled surface as the cookies bake. In the fridge the dough firms, and you may smell a deepening lemon aroma as ingredients meld. Texturally, chilled dough yields a chewier interior with defined edges. Rushing this step will produce flatter cookies, so plan ahead. If your kitchen is warm and the dough softens, return it to the fridge for an extra 15 to 30 minutes before scooping.
- Put the confectioners' sugar in a small bowl: Preparing the confectioners' sugar station means you can quickly coat each dough ball, creating a uniform powdery surface that leads to dramatic cracking. The sugar feels soft and silky between your fingers, and a generous roll ensures good coverage. If the sugar gets damp from handling, sift it and replace as needed. A pitfall is undercoating, which reduces the crinkle effect, so be generous and even in coating each ball.
- Using a tablespoon or ice cream scoop, scoop 1 ounce portions of cookie dough and roll into a ball using your hands: Portioning consistently yields uniform baking times and even appearance. A 1 ounce scoop keeps cookies small and slightly snappy at the edge while tender inside. Rolling warms the dough slightly and smooths the surface. If your hands stick, lightly flour them or chill the dough scoop between batches. Uneven portions lead to uneven bake times, so aim for consistent weights.
- Toss each ball in the confectioners' sugar, giving each of them a generous coating: As you toss the dough balls in sugar, they take on a snowy cloak that will crack and reveal lemony ridges during baking. The tactile sense of sugar dusting is satisfying and gives visual contrast after baking. Ensure full coverage for the best crackle. Wet or sticky dough may cause clumping; in that case, chill the shaped balls briefly before re-coating to maintain the powdery finish.
- Transfer the balls to a parchment-lined baking sheet, leaving about 1 inch of space in between each ball (I fit 11 balls on 1 baking sheet): Spacing prevents the cookies from joining as they spread, and the parchment keeps bottoms from browning too quickly. You will see a neat grid of sugared spheres, ready for the oven. Too close together causes merging, while too sparse wastes oven real estate; aim for the suggested spacing for even bakes. If your baking sheet is dark, reduce oven time slightly to prevent overbrowning.
- Transfer baking sheet to the fridge and let chill for 20 minutes: A short chill on the sheet firms the outer layer and helps preserve shape while baking, improving the crackle pattern. Cooling this way reduces spread and keeps edges delicate. Forgetting this step can make cookies overly flat, so I recommend using this quick chill even if the dough is already cold. If you are doing multiple trays, rotate chilled sheets in and out so each gets its 20 minutes.
- Preheat an oven to 350°F and set an oven rack to the middle position: A fully preheated oven at 350°F ensures even heat so cookies rise and set properly. The middle rack gives the most even browning across the cookie surface. You will hear the oven click and feel a steady warmth when you open it. Baking in an underheated oven will yield pale, undercooked cookies; in an overheated oven they may brown too quickly. Always confirm temperature with an oven thermometer if yours runs hot or cold.
- Bake until the cookies spread and the tops crack (14 to 16 minutes): In the oven the dough puffs slightly, the tops split into crinkles, and a faint golden tint appears at the edges. You will smell an inviting citrus sugar aroma and see the texture shift from glossy to set. This is the key visual cue that they are done. Watch closely toward the end; overbaking dries them out. If centers still look very wet at 16 minutes, give an extra minute but know residual heat will continue to set them as they rest.
- Let cool on the baking sheet for 5 minutes, then transfer to a wire rack to cool completely: After baking, the cookies finish setting on the warm sheet; this is when they reach their perfect chew. The centers will firm as they cool and the edges stay slightly crisp. Transfer to a wire rack to avoid soggy bottoms from trapped steam. A common mistake is moving them too soon, which can cause breakage, so let them rest undisturbed for the suggested five minutes before relocating.
Helpful Notes about Lemon Crinkle Cookies
I keep these notes concise and practical so you can get the best results without fuss. Each tip expands on the method or ingredients, and I highlight the opening phrase so it stands out when skimming. Read them through before you begin baking.
- Chill time matters, plan for at least two hours to let the dough firm up, which helps the cookies hold their shape and form the classic crinkles in the oven.
- Fresh lemons for best flavor, zest before juicing and use the zest immediately to capture the aromatic oils that give the cookies their bright lemon character.
- Measure flour carefully, spoon into your cup and level or weigh it to avoid adding too much which can make the cookies dry and heavy.
- Generous sugar coating, roll each dough ball well in the confectioners’ sugar so the exterior cracks attractively and creates contrast with the soft interior.
- Watch baking time closely, 14 to 16 minutes is the typical window, but ovens vary so begin checking at 14 minutes and remove when crackles are set and edges are faintly golden.
Serving Ideas for Lemon Crinkle Cookies
These cookies are wonderfully adaptable, from casual afternoons to celebratory spreads. They pair well with light beverages and are bright enough to be the star on a dessert platter. Serve them slightly warm or at room temperature depending on preference.
- Tea time pairing: Serve a stack of Lemon Crinkle Cookies with hot tea or a mild coffee for a lovely afternoon break, the citrus cutting through the warmth of the drink.
- Picnic friendly: Pack these in a cookie tin lined with parchment for a portable sweet that travels well, making them ideal for outdoor lunches and potlucks.
- Holiday tray: These visually cheerful cookies are excellent on a dessert platter during spring gatherings or Ramadan if you are assembling an assortment of sweets for guests.
- Gift giving: Wrap a dozen in a box or cellophane with a ribbon for a homemade gift that feels personal and festive, especially with the optional pale yellow tint for presentation.
- Make ahead and store: Baked cookies keep in an airtight container at room temperature for about five days, or freeze unbaked dough balls on a tray then transfer to a bag for baking later, which preserves freshness.
- Serving temperature: These cookies can be enjoyed warm for a soft center or at room temperature for a slightly chewier bite, so plan serving based on your texture preference.
FAQ
Conclusion
Lemon Crinkle Cookies stand out because they pair bright citrus flavor with a tender, slightly chewy interior and a pretty crackled sugar exterior. They are forgiving, adaptable, and perfect for gifting, gatherings, or a small everyday treat. Try them the next time you want a simple but impressive cookie, and enjoy how a few fresh lemons can transform a basic cookie into something vibrant and memorable. I hope you have fun baking them and that they bring a little bright cheer to your table.
Lemon Crinkle Cookies
Equipment
- Stand mixer
- Paddle attachment
- Medium Bowl
- Whisk
- Ice Cream Scoop
- Baking Sheet
- Parchment Paper
- Wire Rack
Ingredients
- 2 cups (240 grams) all purpose flour Provide structure and bulk to the cookie dough, producing a tender crumb when properly measured and not overworked. Combine with leavening and fats to create the base texture that holds flavors and add-ins. Sift or whisk before mixing to ensure even distribution and aeration.
- 1 teaspoon baking powder Lightly leaven cookies by releasing carbon dioxide during baking, contributing gentle lift and a slightly lighter texture. Balance with acidic ingredients to ensure proper rise without off-flavors. Measure accurately to prevent an overly cakey or flat result.
- 1/2 teaspoon fine grain sea salt Enhance overall flavor by bringing out sweetness and balancing lemon brightness, while also influencing dough hydration slightly. Support gluten development control and help highlight other seasonings in the cookie. Use fine grain to ensure even distribution without gritty texture.
- 1 stick (1/2 cup) unsalted butter, at room temperature Provide rich flavor, tenderizing the dough by coating flour proteins and inhibiting excessive gluten development for a melt-in-the-mouth bite. Add moisture and help carry butter-soluble flavors like lemon zest and vanilla. Soften to room temperature to ensure smooth creaming with sugars.
- 1/2 cup sugar Sweeten and aerate when creamed with butter, contributing to cookie spread and a crisp edge. Help dissolve into the butter for even sweetness and structure. Adjust quantity cautiously to control browning and caramelization during baking.
- 1/2 cup (96 grams) packed light brown sugar Add deep, molasses-like sweetness and additional moisture that yields a chewier texture and darker color. Help retain softness over time due to its hygroscopic nature. Pack firmly when measuring to maintain recipe balance and consistent results.
- 1 large egg Bind ingredients together, add moisture and richness, and assist with leavening through steam and protein structure. Provide flavor depth and contribute to the cookie's color and tenderness. Beat in sufficiently with sugars to create a cohesive, aerated mixture.
- 1/2 teaspoon vanilla extract Add aromatic sweetness and support other flavors by providing warm, rounded notes that complement lemon. Enhance the overall flavor profile without adding extra sweetness. Measure to maintain flavor balance and avoid overpowering the citrus.
- 2 tablespoons finely grated lemon zest (from 4 to 5 lemons) Deliver concentrated citrus oil and intense lemon flavor, boosting aroma and brightness throughout the dough. Provide texture contrast in small flecks and intensify the cookie's lemon character without adding more liquid. Grate finely to avoid bitter pith and ensure even distribution.
- 3 tablespoons lemon juice (from 2 lemons) Contribute fresh acidity and clear lemon flavor, helping balance sweetness and activate leavening slightly for lift. Add moisture and tang that brighten the cookie profile. Use freshly squeezed juice for the best aromatic and flavor impact.
- 4 drops yellow gel food coloring (optional) Impart a vivid yellow hue to the dough for visual appeal when desired, without affecting flavor when used sparingly. Provide optional coloration for presentation, allowing the cookies to look more vibrant and festive. Use a few drops at a time to reach the desired shade.
- 1/2 cup confectioners' sugar Coat the cooled cookies in a sweet, powdery outer layer that softens slightly on contact, creating the classic crinkle appearance. Add a bright white finish and a delicate, melt-in-the-mouth sweetness that contrasts with the cookie interior. Sift before rolling to prevent clumps and ensure even coverage.
Instructions
- Add flour, baking powder and salt to a medium bowl, whisking to combine.: As you whisk the all purpose flour , baking powder , and salt , notice how the dry mix looks uniform and slightly aerated, which helps the ingredients blend smoothly into the wet mixture later. The sound is a soft rustle as the whisk moves through the flour, and the surface takes on a lighter, dustier appearance. This step matters because evenly distributed leavening ensures uniform rise and predictable crackling. A common mistake is skipping this step, which can leave pockets of baking powder causing uneven texture. If your baking powder is clumpy, break it up against the bowl edge before whisking.
- Add butter, sugar and brown sugar to the bowl of a stand mixer fitted with the paddle attachment. Beat on medium until light and fluffy, scraping the sides of the bowl as needed (about 2 minutes). Add the egg and beat until incorporated. Add the vanilla, lemon zest, lemon juice and food coloring and beat until incorporated (it will look a bit lumpy at this point). Add the flour mixture and beat on low until just combined. Cover the bowl and refrigerate until firm (at least 2 hours and up to overnight).: The moment you start beating the butter , sugar , and brown sugar , you will hear a change from heavy thudding to a lighter, airy beat as the mixture becomes pale and fluffy. This aeration traps tiny air bubbles that help with lift and create a tender crumb. The smell will be sweet with warm toffee notes from the brown sugar. If the butter is too soft the mixture will look greasy instead of fluffy, so chill briefly and restart the creaming if needed. Scrape the bowl to prevent uneven incorporation.
- Put the confectioners' sugar in a small bowl. Using a tablespoon or ice cream scoop, scoop 1-ounce portions of cookie dough and roll into a ball using your hands. Toss each ball in the confectioners' sugar, giving each of them a generous coating. Transfer the balls to a parchment-lined baking sheet, leaving about 1 inch of space in between each ball (I fit 11 balls on 1 baking sheet). Transfer baking sheet to the fridge and let chill for 20 minutes. You can prepare another baking sheet of cookies while the first chills or put the rest of the cookie dough back in the fridge.: When beaten properly, the mixture should ribbon from the paddle and hold some shape, indicating enough air has been incorporated. You will see a pale, almost creamy texture and feel the mixture lighten when you lift the paddle. This technique helps the cookies rise evenly and keeps them tender. A frequent error is overbeating after adding eggs; stop once light and fluffy to maintain structure. Pause to scrape the sides so no unincorporated butter remains stuck on the bowl.
- Preheat an oven to 350°F and set an oven rack to the middle position. Bake until the cookies spread and the tops crack (14 to 16 minutes). Let cool on the baking sheet for 5 minutes, then transfer to a wire rack to cool completely.: After adding the egg , the batter will look glossier and smoother, and the consistency should even out. The egg helps bind the dough and adds moisture. If you add a cold egg to softened butter, the mixture can seize and look curdled, which affects texture. If curdling happens, beat briefly until smooth or let the mixture sit for a moment at room temperature and then continue, scraping down the paddle so the egg distributes evenly.
- Add the vanilla, lemon zest, lemon juice and food coloring and beat until incorporated (it will look a bit lumpy at this point): As you mix in vanilla , the fragrant background warms; the freshly grated lemon zest releases aromatic oils that smell intensely citrusy; and the lemon juice adds tang and thins the batter slightly. If using gel coloring, the tint will deepen as you fold it in. Expect some lumpiness from zest flecks or slight curdling from the juice, which is normal and will resolve when the flour is added. A mistake to avoid is over mixing here, which can break down emulsification. Use medium speed and stop once ingredients appear evenly dispersed.
- Add the flour mixture and beat on low until just combined: When you fold in the dry mix on low, the dough transitions from sticky to a smooth, slightly tacky dough. You will notice the sound from the mixer change to a quieter thud and the dough will pull away from the bowl slightly. This gentle mixing prevents overdeveloping gluten, which would make the cookies tough. Be sure to stop as soon as streaks of flour disappear. Overmixing here is the most common cause of dense cookies, so be cautious and use a spatula to finish if needed.
- Cover the bowl and refrigerate until firm (at least 2 hours and up to overnight): Chilling is crucial, because cold dough spreads less and yields the crinkled surface as the cookies bake. In the fridge the dough firms, and you may smell a deepening lemon aroma as ingredients meld. Texturally, chilled dough yields a chewier interior with defined edges. Rushing this step will produce flatter cookies, so plan ahead. If your kitchen is warm and the dough softens, return it to the fridge for an extra 15 to 30 minutes before scooping.
- Put the confectioners' sugar in a small bowl: Preparing the confectioners' sugar station means you can quickly coat each dough ball, creating a uniform powdery surface that leads to dramatic cracking. The sugar feels soft and silky between your fingers, and a generous roll ensures good coverage. If the sugar gets damp from handling, sift it and replace as needed. A pitfall is undercoating, which reduces the crinkle effect, so be generous and even in coating each ball.
- Using a tablespoon or ice cream scoop, scoop 1 ounce portions of cookie dough and roll into a ball using your hands: Portioning consistently yields uniform baking times and even appearance. A 1 ounce scoop keeps cookies small and slightly snappy at the edge while tender inside. Rolling warms the dough slightly and smooths the surface. If your hands stick, lightly flour them or chill the dough scoop between batches. Uneven portions lead to uneven bake times, so aim for consistent weights.
- Toss each ball in the confectioners' sugar, giving each of them a generous coating: As you toss the dough balls in sugar, they take on a snowy cloak that will crack and reveal lemony ridges during baking. The tactile sense of sugar dusting is satisfying and gives visual contrast after baking. Ensure full coverage for the best crackle. Wet or sticky dough may cause clumping; in that case, chill the shaped balls briefly before re-coating to maintain the powdery finish.
- Transfer the balls to a parchment-lined baking sheet, leaving about 1 inch of space in between each ball (I fit 11 balls on 1 baking sheet): Spacing prevents the cookies from joining as they spread, and the parchment keeps bottoms from browning too quickly. You will see a neat grid of sugared spheres, ready for the oven. Too close together causes merging, while too sparse wastes oven real estate; aim for the suggested spacing for even bakes. If your baking sheet is dark, reduce oven time slightly to prevent overbrowning.
- Transfer baking sheet to the fridge and let chill for 20 minutes: A short chill on the sheet firms the outer layer and helps preserve shape while baking, improving the crackle pattern. Cooling this way reduces spread and keeps edges delicate. Forgetting this step can make cookies overly flat, so I recommend using this quick chill even if the dough is already cold. If you are doing multiple trays, rotate chilled sheets in and out so each gets its 20 minutes.
- Preheat an oven to 350°F and set an oven rack to the middle position: A fully preheated oven at 350°F ensures even heat so cookies rise and set properly. The middle rack gives the most even browning across the cookie surface. You will hear the oven click and feel a steady warmth when you open it. Baking in an underheated oven will yield pale, undercooked cookies; in an overheated oven they may brown too quickly. Always confirm temperature with an oven thermometer if yours runs hot or cold.
- Bake until the cookies spread and the tops crack (14 to 16 minutes): In the oven the dough puffs slightly, the tops split into crinkles, and a faint golden tint appears at the edges. You will smell an inviting citrus sugar aroma and see the texture shift from glossy to set. This is the key visual cue that they are done. Watch closely toward the end; overbaking dries them out. If centers still look very wet at 16 minutes, give an extra minute but know residual heat will continue to set them as they rest.
- Let cool on the baking sheet for 5 minutes, then transfer to a wire rack to cool completely: After baking, the cookies finish setting on the warm sheet; this is when they reach their perfect chew. The centers will firm as they cool and the edges stay slightly crisp. Transfer to a wire rack to avoid soggy bottoms from trapped steam. A common mistake is moving them too soon, which can cause breakage, so let them rest undisturbed for the suggested five minutes before relocating.
Notes
- Chill time matters, plan for at least two hours to let the dough firm up, which helps the cookies hold their shape and form the classic crinkles in the oven.
- Fresh lemons for best flavor, zest before juicing and use the zest immediately to capture the aromatic oils that give the cookies their bright lemon character.
- Measure flour carefully, spoon into your cup and level or weigh it to avoid adding too much which can make the cookies dry and heavy.
- Generous sugar coating, roll each dough ball well in the confectioners' sugar so the exterior cracks attractively and creates contrast with the soft interior.
- Watch baking time closely, 14 to 16 minutes is the typical window, but ovens vary so begin checking at 14 minutes and remove when crackles are set and edges are faintly golden.