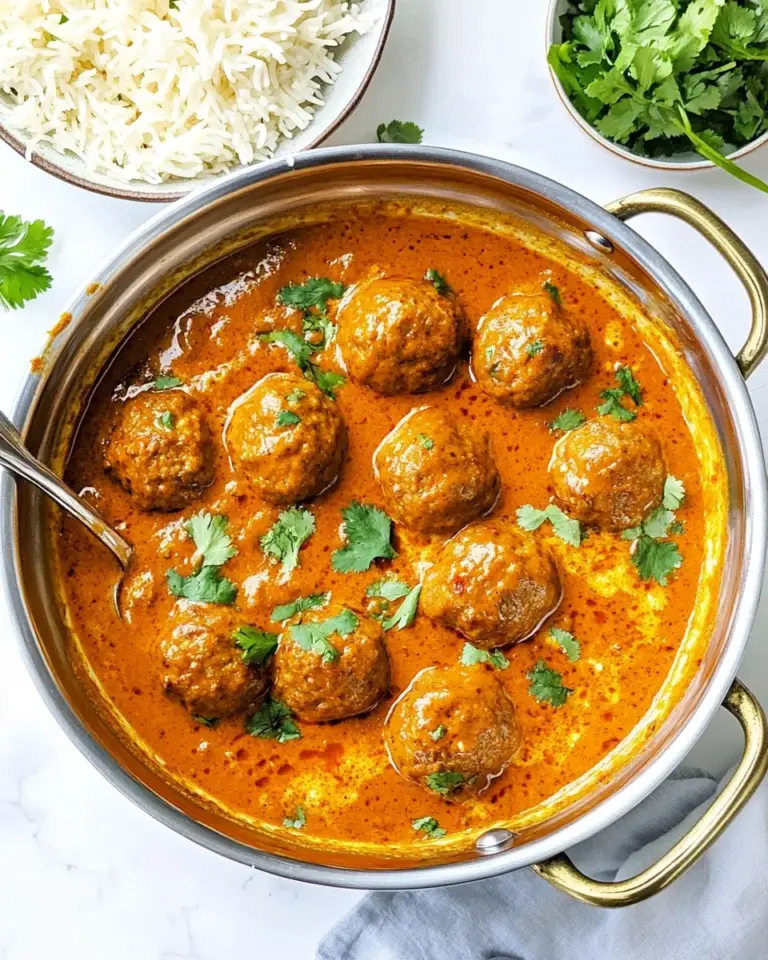
Instant Pot Chicken Tortilla Soup
Instant Pot Chicken Tortilla Soup is the kind of bowl I reach for when the house feels chilly and everyone needs something warm and comforting. The very first time I made this soup I was coming home from a late shift, tired and foggy, and a single spoonful snapped me awake in the best way, that balance of bright tomato, smoky spices, and tender chicken that feels like a hug from the inside.
Over the years I have adapted the recipe to suit quick weeknights and slow weekends alike. Some nights I shortchange the toppings and still get rave reviews, other times I go all in with crispy tortilla strips and creamy diced avocado. I love that it scales easily, and that the chicken stays succulent whether I use thighs or breasts.
What keeps me coming back is the texture play, the little crunch from tortilla strips next to silky broth and soft beans, and that smoky, warming spice signature. I often think about how this soup became a staple when friends needed a comforting meal after long days, and now it sits in my regular rotation for simple, satisfying dinners. There is something about the way the aromas fill the kitchen during pressure build up that just announces, you are in for a treat.
Recipe Snapshot
40 mins
10 mins
30 mins
Medium
350 kcal
Mexican
Gluten-Free, Low FODMAP
Soups
Instant Pot, Large nonstick skillet, Cutting board, Sharp knife
The Charm of This Instant Pot Chicken Tortilla Soup
Deep, layered flavor in under an hour
I adore how Instant Pot Chicken Tortilla Soup manages to taste slow cooked even though it comes together quickly. The pressure brings the essence of spices and tomatoes together fast, so you get that rich, developed flavor without an all day commitment.
Comfort with brightness
I like dishes that are cozy but not cloying. The mix of crushed tomatoes, lime bright notes from optional wedges, and fresh toppings keeps each bite lively, so it never feels heavy or one note.
Textural contrast
One reason this recipe stands out for me is the crunchy tortilla strips paired with tender shredded chicken, soft black beans, and sweet corn. That contrast keeps every spoonful interesting and satisfying.
Flexible and forgiving
Whether you pick chicken thighs for richness or chicken breasts for a leaner bowl, the method is forgiving. The Instant Pot makes it hard to overcook, and if you let it naturally release a bit longer the chicken becomes almost fall apart tender.
Great for meal prep and company
I’m a fan of recipes that get tastier the next day, and this one does exactly that. Make a double batch, refrigerate, and the flavors deepen, giving you an easy week of great lunches or a stress free dinner when friends drop by.
Shopping List for Instant Pot Chicken Tortilla Soup

These ingredients are chosen to build a bold, warming bowl with layers of spice, acidity, and texture. The core players are the chicken for body, crushed tomatoes for savory depth, and the aromatics and spices to lift the profile. Toppings like avocado and shredded cheese finish it with creaminess while tortilla strips add crunch and personality.
- 1 tbsp avocado oil: Heat and coat the pot to prevent sticking while building flavor; avocado oil tolerates high heat and helps sauté aromatics evenly, contributing a neutral, slightly buttery note that complements Mexican-style spices.
- 1 medium-sized yellow onion chopped: Provide savory sweetness and body by softening when cooked; chopped yellow onion adds a mellow onion flavor and releases natural sugars that balance acidity in the soup.
- 4 cloves garlic minced: Add pungent depth and aromatic sharpness when minced; garlic infuses the broth with savory umami and enhances the overall complexity of the soup during sautéing and simmering.
- 2 tsp chili powder: Impart warm, earthy heat and classic taco-style flavor; chili powder seasons the base with a blend of chilies and spices that define the soup’s Southwestern profile.
- 1 tsp ground cumin: Bring smoky, slightly bitter warmth and enhance other spices; ground cumin ties together chili and tomato notes while adding savory depth to the broth.
- 1/2 tsp ground paprika: Contribute mild smokiness and color; ground paprika supports the chili powder and cumin without overpowering, adding subtle warmth and richness to the soup.
- 1/2 tsp dried oregano: Deliver herbal, slightly peppery notes with a Mediterranean touch; dried oregano lifts the tomato and chili flavors and rounds out the savory profile when simmered.
- 1 tsp sea salt: Season and enhance all flavors while controlling overall taste balance; sea salt brings out the natural flavors of vegetables, chicken, and beans throughout cooking.
- 1 to 1.5 lbs boneless skinless chicken thighs or chicken breasts: Provide tender protein and body to the soup; boneless skinless chicken thighs or breasts cook in the broth, shred or slice easily, and absorb spices for hearty texture.
- 128 oz can crushed tomatoes: Add bright tomato acidity and thick body to the base; crushed tomatoes create a rich, tangy foundation that complements spices and helps form the soup’s broth.
- 17 oz can diced green chilis: Introduce mild roasted pepper heat and a tangy vegetal note; diced green chilis bring subtle heat and Southwestern character without overwhelming the other flavors.
- 3 cups chicken broth: Form the flavorful liquid backbone and deglaze the pot; chicken broth supplies savory depth, salt balance, and a cooking medium for the chicken and vegetables.
- 1 cup corn: Contribute sweet, crisp kernels and texture contrast; corn adds pops of sweetness and color that lighten the soup and pair well with beans and tortillas.
- 15 oz can black beans, drained: Supply creamy, earthy protein and fiber while adding hearty texture; drained black beans bulk up the soup and complement the corn and spices for a filling meal.
- 1/4 cup avocado oil: Fry or bake to crisp tortillas and for finishing oil; avocado oil provides a neutral, high-heat frying medium that enhances tortilla chips or crisped strips for topping.
- 6 to 8 corn tortillas sliced: Offer crunchy, absorbent garnish that soaks up broth and adds corn flavor; sliced corn tortillas become tortilla strips or chips to provide texture and traditional appeal.
- Avocado diced: Deliver creamy, buttery richness and cooling contrast when diced; avocado adds luscious mouthfeel and fresh flavor as a finishing garnish on each bowl.
- Shredded cheese: Provide melty, savory richness and gooey texture when sprinkled; shredded cheese adds indulgence and complements the spicy, tomato-forward soup base.
- Fresh cilantro: Add fresh, bright herbal aroma and a citrusy edge when chopped; fresh cilantro lightens the soup’s richness and complements the Mexican-inspired flavors.
- Sour cream: Supply cool, tangy creaminess and balance spicy heat when dolloped; sour cream smooths the broth and enhances mouthfeel while tempering bold flavors.
The Process for Making Instant Pot Chicken Tortilla Soup
These directions follow the Instant Pot method to build concentrated flavor quickly. I will walk you through each step with sensory cues and common pitfalls so you know exactly how the soup should look, smell, and feel at every stage.
- Press the Sauté button on your Instant Pot and add the chopped onion. Sauté, stirring occasionally, until the onion begins to soften, about 5 to 8 minutes.: As the pot heats you should hear a gentle sizzle when the avocado oil hits the surface, and within moments the aroma of softened onion will rise, sweet and slightly caramelized. Stir occasionally so the pieces cook evenly and don’t cling to the bottom, watching for translucent edges and glossy surfaces as your cue that they are softening. The why here is simple, sautéing develops sugars and deepens flavor which forms a richer base for the soup, and skipping this would leave the broth flatter. A common mistake is turning the heat too high which browns or burns the onion prematurely, so keep the sauté steady and adjust if you smell any sharp burnt notes.
- Stir in the minced garlic, chili powder, ground cumin, paprika, dried oregano and sea salt. Allow this mixture to cook for 1 to 2 minutes to let the flavors of the spices open up.: As soon as the garlic hits the pan you’ll smell that fragrant pop, and within a minute the spices will release an inviting toasted aroma that smells warm and slightly smoky. This quick bloom of spices oils helps them integrate into the broth, creating a more dimensional flavor profile. Be careful not to let the garlic brown too long, because it will go bitter, and avoid dumping spices in all at once without stirring, which can lead to sticky clumps. The sensory cue to watch is a glossy, fragrant spice coating on the onion , not a burnt smell.
- Scoot the onions off to the side and add the boneless chicken thighs to the pot. Cook for 3 minutes per side.: When you add the chicken you should hear a soft sear as it contacts the hot surface, and the meat will begin to develop a light golden exterior. This brief browning improves texture and flavor, giving the final shredded chicken extra depth. Cook for about 3 minutes per side until there is a slight color but not fully cooked through. The important why is that surface browning initiates Maillard reactions which boost savory complexity. A typical issue here is overcrowding the pot which prevents browning, so give pieces room or work in batches if needed.
- Add the remaining ingredients to the pressure cooker (crushed tomatoes, diced green chilis, chicken broth, corn, and black beans).: When you pour in the crushed tomatoes and chicken broth you will see the pan deglaze, lifting browned bits from the bottom and dissolving them into the liquid, which is crucial for flavor. The aroma becomes more tomato forward with faint chile and corn sweetness, and visually the pot should look saucy and well combined. This step ensures the chicken cooks evenly in seasoned liquid. Avoid pouring too quickly and splashing the sides, and don’t forget to scrape the bottom so nothing remains stuck which can trigger a burn error on the Instant Pot.
- Secure the lid on the Instant Pot, press ‘Manual’ or ‘Pressure Cook’ and set the time for 15 minutes. Make sure the pressure release valve is set to the ‘Sealing’ or closed position.: As you close the lid you will hear the latch click and feel a reassuring snugness, and setting the 15 minute high pressure timer begins the conversion of flavors under steam. The pressurized environment forces the liquid into the chicken fibers, rendering them tender and infused with spice. The why is that gentle, even pressure shortens cooking time while maximizing tenderness. A common mistake is forgetting to set the pressure valve to sealing, which will prevent proper pressurization, so check that before walking away.
- The pressure cooker will take about 10-15 minutes to build the pressure, but once the pressure has built, it will go into its 15 minute high pressure cook cycle.: While it builds you may hear occasional clicks and steady warmth emanating, and the kitchen will begin to carry the scent of slow cooked tomato and spice. This warm wait allows connective tissues in the chicken to begin softening, a slow audible sigh before the real magic happens. Expect a calm, steady hum rather than loud noises; sudden hissing indicates an issue. The key pitfall is impatience, quick releasing too early can leave the chicken under tenderized.
- Once the 15 minutes is over, allow the instant pot to naturally release for at least 10 minutes (ideally longer. I let mine completely release for about 40 minutes. This process generates the most tender chicken).: During natural release you may notice the aroma deepen and the broth settle into a richer sheen, and the internal juices redistribute which makes shredding easier and keeps the meat moist. The why here is texture preservation, a gentle pressure drop keeps fibers intact and prevents drying. A frequent misstep is rushing to quick release every time, which can tighten the meat and remove nuance, so give it a restful window when possible.
- Release any remaining pressure using the quick release valve and open the lid of the instant pot.: When you open the valve steam will hiss out and the room will fill with the full scent of the soup, bright and savory. After the float valve drops you can open the lid and see a bubbling, fragrant pot, the surface glossy with tomato and spice. The why is to safely equalize pressure before accessing the contents. Avoid placing your face or hands over the valve while releasing steam to prevent burns.
- Transfer the chicken thighs to a cutting board and use two forks to shred the chicken.: The chicken should pull apart easily, fibers separating into ribbons while releasing juicy steam and a rich meaty scent. Shredding creates texture that soaks up broth and spices, dispersing savory pockets throughout the soup. If the meat resists shredding it likely needs a few more minutes of rest or additional natural release. A mistake people make is shredding when too hot to handle, so use tongs and forks carefully or let it rest briefly.
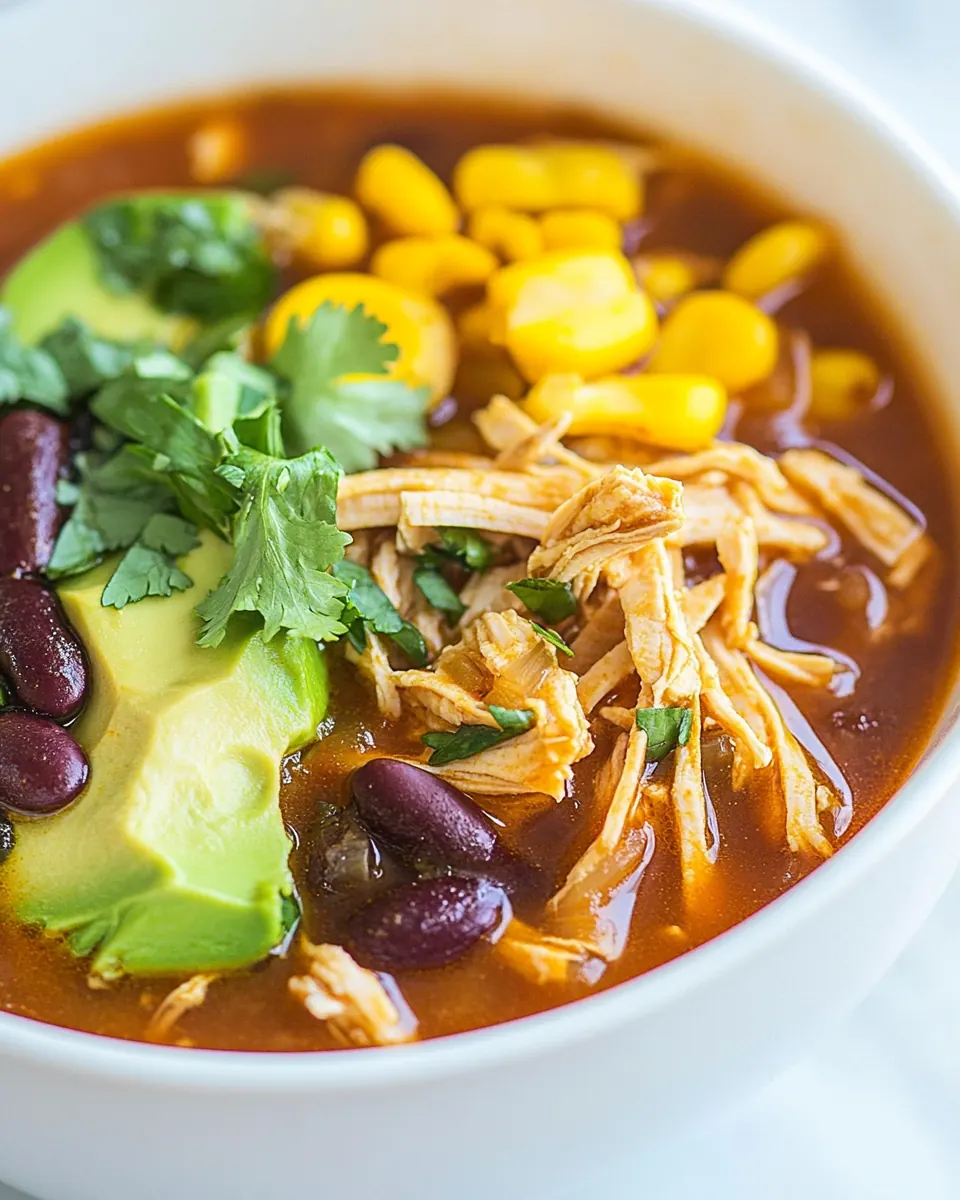
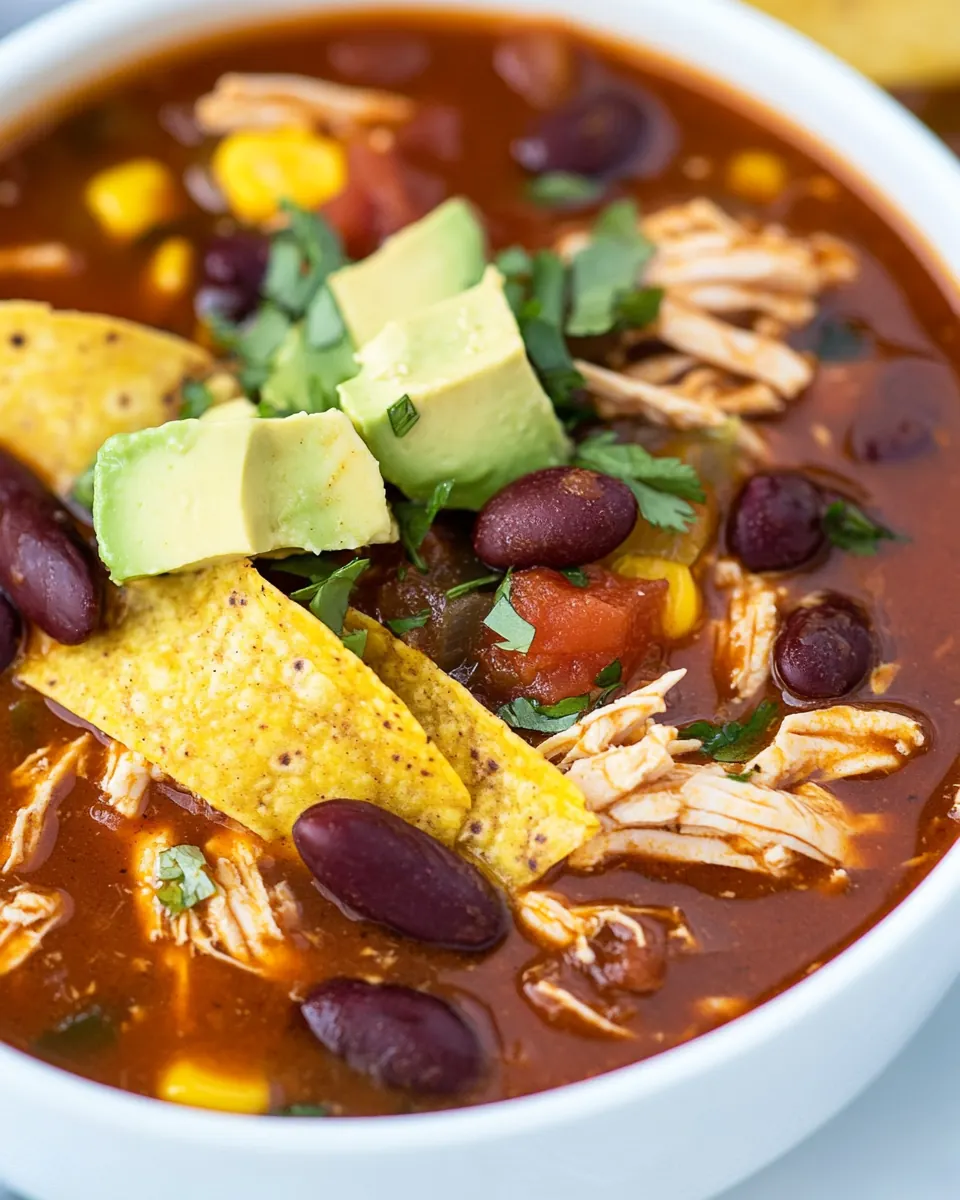
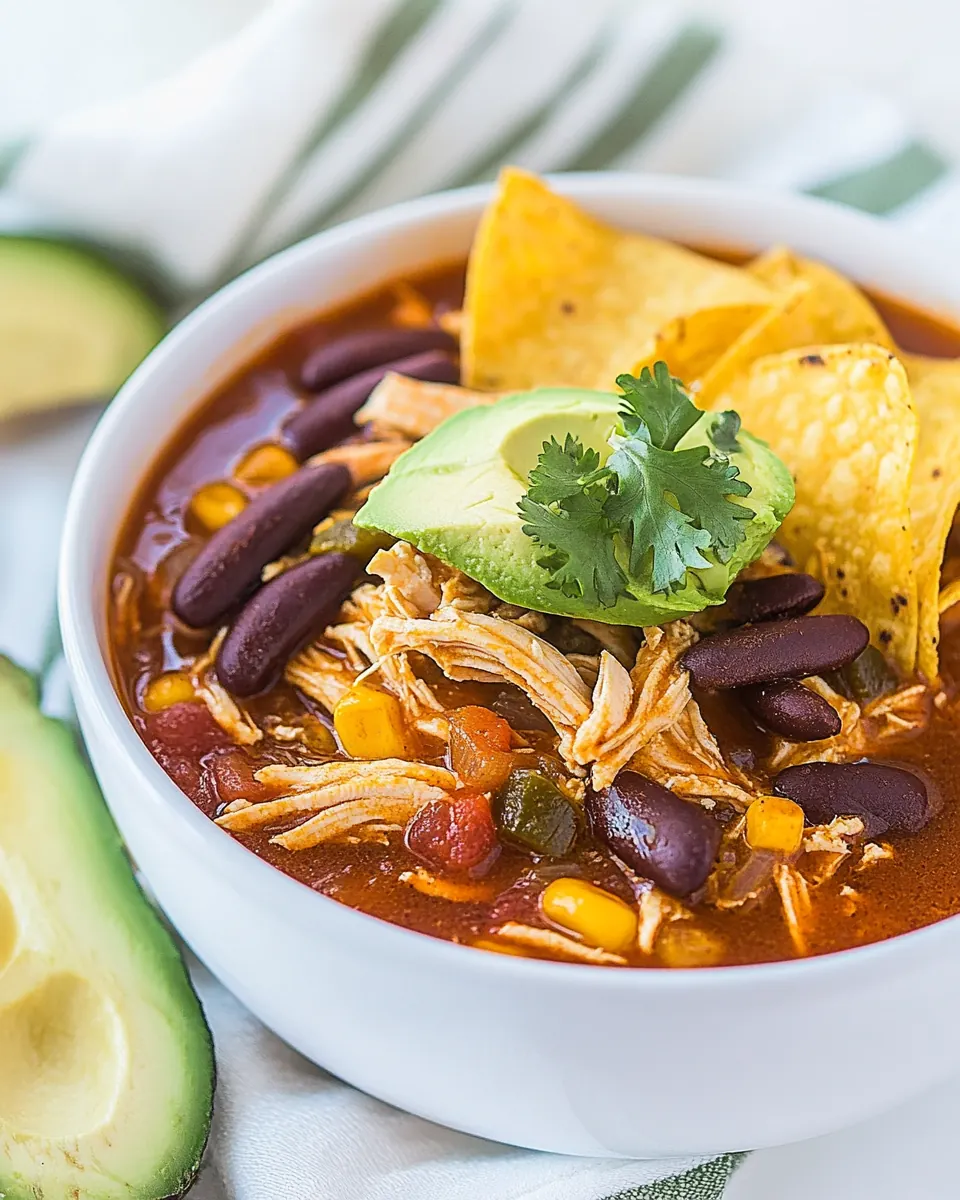
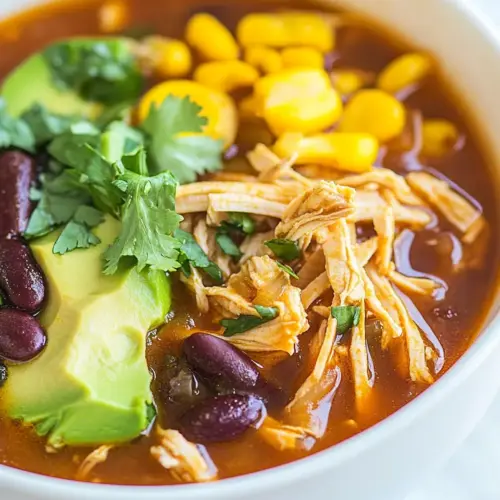
- Place the shredded chicken back into the Instant Pot and give everything a big stir. Serve immediately with fried corn strips (instructions below), fresh diced avocado, and any other toppings you like such as grated cheese or sour cream. You can serve with fresh lime wedges for a drizzle of fresh lime juice as well.: As you reintroduce the shredded chicken into the pot it will absorb the surrounding broth, and the soup becomes cohesive with threads of meat threaded through beans and corn. Stirring distributes the heat and flavors, creating uniform taste in every spoonful. The caution is stirring too vigorously which can mash beans; be gentle and ensure everything is warmed through. Watch for a glossy, integrated surface and a balanced aroma.
- Stack 6 to 8 corn tortillas on a cutting board and use a sharp knife to cut them into strips that are about 1/4” to 1/2” wide.: The final presentation is sensory rich, the crunch of tortillas against tender chicken , the cool creaminess of avocado , and the salty melt of shredded cheese . Build bowls so each person can customize textures and heat. A common error is adding toppings too early which lose their freshness, so serve them on the side when possible so each bite retains contrast.
- Heat 1/4 cup of high temperature cooking oil (I use avocado oil) in a large nonstick skillet over medium-high heat. Once the oil is sizzling hot, carefully add 4 to 6 strips of corn tortillas at a time to the oil. Cook for 2 to 3 minutes per side or until the strips are golden brown and have reached your desired level of crisp.: When you slice the tortillas the edges should be clean and even, and the thin strips create the ideal surface area for frying to crispness. Using a sharp knife ensures neat strips which fry uniformly, producing consistent golden color. The why is even thickness for predictable cooking; uneven strips will brown unevenly. Take care cutting away from your hand to avoid injury.
- Transfer the crispy tortilla strips to a paper towel-lined plate and repeat for the remaining tortilla strips. For the best result, serve immediately on top of chicken tortilla soup with any additional toppings.: As the oil shimmers and starts to ripple you know it is ready, and when a single test strip sizzles on contact you have the right temperature. Add a few strips at a time so the oil temperature remains stable, and fry until the strips are golden and crisp, about 2 to 3 minutes per side. The sensory cues are steady sizzling and a warm, toasty corn smell. Overcrowding will drop the oil temperature and make limp strips, so work in batches.
- Transfer the crispy tortilla strips to a paper towel-lined plate and repeat for the remaining tortilla strips: Draining on paper towels will remove excess oil and keep them crisp, with the aroma of warm fried corn and a satisfying fragile crunch. Repeat until all strips are golden, then use them to top bowls immediately for peak texture. A common mistake is leaving fried strips in the hot pan which continues to brown them, so move them promptly to the towel lined plate.
Recipe Variations about Instant Pot Chicken Tortilla Soup
This section explores variations and helpful notes so you can adapt the recipe to your pantry and preferences. Below are expanded tips and notes to guide substitutions, storage, and presentation without changing the core ingredients.
- Use thighs or breasts — Choose chicken thighs for richer, more forgiving meat that shreds easily, or pick chicken breasts for leaner protein; both work well with pressure cooking and will absorb the broth flavors.
- Make the tortilla strips ahead — Fry the corn tortilla strips just before serving for best texture, or crisp them ahead and store in an airtight container for up to a day to preserve crunch.
- Adjust spice level — If you prefer milder heat reduce the chili powder slightly, or add more if you like it spicy; subtle changes here shift the soup’s personality without altering the ingredient list.
- Batch and store — This soup refrigerates beautifully for up to seven days and often tastes even better the next day, making it an ideal make ahead meal for busy weeks.
- Blend for creamier texture — If you like a velvety base, blend a portion of the soup for a few seconds before adding shredded chicken back in, which thickens the broth while keeping some bean and corn texture.
Best Served With
This soup is versatile for weeknight dinners, casual gatherings, and seasonal meals. Below are serving suggestions that highlight pairings, occasions, and storage tips presented as a practical list.
- Serve with extra toppings — Offer bowls with diced avocado, shredded cheese, chopped cilantro, and sour cream so guests can tailor each spoonful.
- Great for weeknight dinner — The recipe’s speed and make ahead potential make it a reliable easy weeknight dinner option when time is tight.
- Perfect for winter or Ramadan evenings — The warming spices and hearty ingredients make it especially comforting during cold weather or for breaking fast.
- Storage tip — Refrigerate leftovers in an airtight container for up to seven days; reheat gently and add fresh toppings when serving to restore contrast.
- Occasion pairing — Serve at casual dinner parties or family gatherings where a customizable bowl format is appreciated, and provide lime wedges for a zesty finish.
- Seasonal notes — Use this year round, with sweet fresh corn in summer or frozen corn in winter without changing the core flavor profile.
FAQ
Conclusion
This Instant Pot Chicken Tortilla Soup stands out because it blends deep, slow cooked flavor with speedy convenience, delivering tender shredded chicken in a bright, spice kissed tomato broth. I encourage you to try it on a busy evening when you want something nourishing and flexible, and to experiment with toppings to make it your own. It’s a warm, comforting bowl that comes together easily and rewards leftovers with even more layered taste the next day.
Instant Pot Chicken Tortilla Soup
Equipment
- Instant Pot
- Large Nonstick Skillet
- Cutting Board
- Sharp Knife
Ingredients
- 1 tbsp avocado oil Heat and coat the pot to prevent sticking while building flavor; avocado oil tolerates high heat and helps sauté aromatics evenly, contributing a neutral, slightly buttery note that complements Mexican-style spices.
- 1 medium-sized yellow onion chopped Provide savory sweetness and body by softening when cooked; chopped yellow onion adds a mellow onion flavor and releases natural sugars that balance acidity in the soup.
- 4 cloves garlic minced Add pungent depth and aromatic sharpness when minced; garlic infuses the broth with savory umami and enhances the overall complexity of the soup during sautéing and simmering.
- 2 tsp chili powder Impart warm, earthy heat and classic taco-style flavor; chili powder seasons the base with a blend of chilies and spices that define the soup’s Southwestern profile.
- 1 tsp ground cumin Bring smoky, slightly bitter warmth and enhance other spices; ground cumin ties together chili and tomato notes while adding savory depth to the broth.
- 1/2 tsp ground paprika Contribute mild smokiness and color; ground paprika supports the chili powder and cumin without overpowering, adding subtle warmth and richness to the soup.
- 1/2 tsp dried oregano Deliver herbal, slightly peppery notes with a Mediterranean touch; dried oregano lifts the tomato and chili flavors and rounds out the savory profile when simmered.
- 1 tsp sea salt Season and enhance all flavors while controlling overall taste balance; sea salt brings out the natural flavors of vegetables, chicken, and beans throughout cooking.
- 1 to 1.5 lbs boneless skinless chicken thighs or chicken breasts Provide tender protein and body to the soup; boneless skinless chicken thighs or breasts cook in the broth, shred or slice easily, and absorb spices for hearty texture.
- 128 -oz can crushed tomatoes Add bright tomato acidity and thick body to the base; crushed tomatoes create a rich, tangy foundation that complements spices and helps form the soup’s broth.
- 17 -oz can diced green chilis Introduce mild roasted pepper heat and a tangy vegetal note; diced green chilis bring subtle heat and Southwestern character without overwhelming the other flavors.
- 3 cups chicken broth Form the flavorful liquid backbone and deglaze the pot; chicken broth supplies savory depth, salt balance, and a cooking medium for the chicken and vegetables.
- 1 cup corn Contribute sweet, crisp kernels and texture contrast; corn adds pops of sweetness and color that lighten the soup and pair well with beans and tortillas.
- 15 -oz can black beans, drained Supply creamy, earthy protein and fiber while adding hearty texture; drained black beans bulk up the soup and complement the corn and spices for a filling meal.
- 1/4 cup avocado oil Fry or bake to crisp tortillas and for finishing oil; avocado oil provides a neutral, high-heat frying medium that enhances tortilla chips or crisped strips for topping.
- 6 to 8 corn tortillas sliced Offer crunchy, absorbent garnish that soaks up broth and adds corn flavor; sliced corn tortillas become tortilla strips or chips to provide texture and traditional appeal.
- Avocado diced Deliver creamy, buttery richness and cooling contrast when diced; avocado adds luscious mouthfeel and fresh flavor as a finishing garnish on each bowl.
- Shredded cheese Provide melty, savory richness and gooey texture when sprinkled; shredded cheese adds indulgence and complements the spicy, tomato-forward soup base.
- Fresh cilantro Add fresh, bright herbal aroma and a citrusy edge when chopped; fresh cilantro lightens the soup’s richness and complements the Mexican-inspired flavors.
- Sour cream Supply cool, tangy creaminess and balance spicy heat when dolloped; sour cream smooths the broth and enhances mouthfeel while tempering bold flavors.
Instructions
- Press the Sauté button on your Instant Pot and add the chopped onion. Sauté, stirring occasionally, until the onion begins to soften, about 5 to 8 minutes.: As the pot heats you should hear a gentle sizzle when the avocado oil hits the surface, and within moments the aroma of softened onion will rise, sweet and slightly caramelized. Stir occasionally so the pieces cook evenly and don’t cling to the bottom, watching for translucent edges and glossy surfaces as your cue that they are softening. The why here is simple, sautéing develops sugars and deepens flavor which forms a richer base for the soup, and skipping this would leave the broth flatter. A common mistake is turning the heat too high which browns or burns the onion prematurely, so keep the sauté steady and adjust if you smell any sharp burnt notes.
- Stir in the minced garlic, chili powder, ground cumin, paprika, dried oregano and sea salt. Allow this mixture to cook for 1 to 2 minutes to let the flavors of the spices open up.: As soon as the garlic hits the pan you’ll smell that fragrant pop, and within a minute the spices will release an inviting toasted aroma that smells warm and slightly smoky. This quick bloom of spices oils helps them integrate into the broth, creating a more dimensional flavor profile. Be careful not to let the garlic brown too long, because it will go bitter, and avoid dumping spices in all at once without stirring, which can lead to sticky clumps. The sensory cue to watch is a glossy, fragrant spice coating on the onion , not a burnt smell.
- Scoot the onions off to the side and add the boneless chicken thighs to the pot. Cook for 3 minutes per side.: When you add the chicken you should hear a soft sear as it contacts the hot surface, and the meat will begin to develop a light golden exterior. This brief browning improves texture and flavor, giving the final shredded chicken extra depth. Cook for about 3 minutes per side until there is a slight color but not fully cooked through. The important why is that surface browning initiates Maillard reactions which boost savory complexity. A typical issue here is overcrowding the pot which prevents browning, so give pieces room or work in batches if needed.
- Add the remaining ingredients to the pressure cooker (crushed tomatoes, diced green chilis, chicken broth, corn, and black beans).: When you pour in the crushed tomatoes and chicken broth you will see the pan deglaze, lifting browned bits from the bottom and dissolving them into the liquid, which is crucial for flavor. The aroma becomes more tomato forward with faint chile and corn sweetness, and visually the pot should look saucy and well combined. This step ensures the chicken cooks evenly in seasoned liquid. Avoid pouring too quickly and splashing the sides, and don’t forget to scrape the bottom so nothing remains stuck which can trigger a burn error on the Instant Pot.
- Secure the lid on the Instant Pot, press ‘Manual’ or ‘Pressure Cook’ and set the time for 15 minutes. Make sure the pressure release valve is set to the ‘Sealing’ or closed position.: As you close the lid you will hear the latch click and feel a reassuring snugness, and setting the 15 minute high pressure timer begins the conversion of flavors under steam. The pressurized environment forces the liquid into the chicken fibers, rendering them tender and infused with spice. The why is that gentle, even pressure shortens cooking time while maximizing tenderness. A common mistake is forgetting to set the pressure valve to sealing, which will prevent proper pressurization, so check that before walking away.
- The pressure cooker will take about 10-15 minutes to build the pressure, but once the pressure has built, it will go into its 15 minute high pressure cook cycle.: While it builds you may hear occasional clicks and steady warmth emanating, and the kitchen will begin to carry the scent of slow cooked tomato and spice. This warm wait allows connective tissues in the chicken to begin softening, a slow audible sigh before the real magic happens. Expect a calm, steady hum rather than loud noises; sudden hissing indicates an issue. The key pitfall is impatience, quick releasing too early can leave the chicken under tenderized.
- Once the 15 minutes is over, allow the instant pot to naturally release for at least 10 minutes (ideally longer. I let mine completely release for about 40 minutes. This process generates the most tender chicken).: During natural release you may notice the aroma deepen and the broth settle into a richer sheen, and the internal juices redistribute which makes shredding easier and keeps the meat moist. The why here is texture preservation, a gentle pressure drop keeps fibers intact and prevents drying. A frequent misstep is rushing to quick release every time, which can tighten the meat and remove nuance, so give it a restful window when possible.
- Release any remaining pressure using the quick release valve and open the lid of the instant pot.: When you open the valve steam will hiss out and the room will fill with the full scent of the soup, bright and savory. After the float valve drops you can open the lid and see a bubbling, fragrant pot, the surface glossy with tomato and spice. The why is to safely equalize pressure before accessing the contents. Avoid placing your face or hands over the valve while releasing steam to prevent burns.
- Transfer the chicken thighs to a cutting board and use two forks to shred the chicken.: The chicken should pull apart easily, fibers separating into ribbons while releasing juicy steam and a rich meaty scent. Shredding creates texture that soaks up broth and spices, dispersing savory pockets throughout the soup. If the meat resists shredding it likely needs a few more minutes of rest or additional natural release. A mistake people make is shredding when too hot to handle, so use tongs and forks carefully or let it rest briefly.
- Place the shredded chicken back into the Instant Pot and give everything a big stir. Serve immediately with fried corn strips (instructions below), fresh diced avocado, and any other toppings you like such as grated cheese or sour cream. You can serve with fresh lime wedges for a drizzle of fresh lime juice as well.: As you reintroduce the shredded chicken into the pot it will absorb the surrounding broth, and the soup becomes cohesive with threads of meat threaded through beans and corn. Stirring distributes the heat and flavors, creating uniform taste in every spoonful. The caution is stirring too vigorously which can mash beans; be gentle and ensure everything is warmed through. Watch for a glossy, integrated surface and a balanced aroma.
- Stack 6 to 8 corn tortillas on a cutting board and use a sharp knife to cut them into strips that are about 1/4” to 1/2” wide.: The final presentation is sensory rich, the crunch of tortillas against tender chicken , the cool creaminess of avocado , and the salty melt of shredded cheese . Build bowls so each person can customize textures and heat. A common error is adding toppings too early which lose their freshness, so serve them on the side when possible so each bite retains contrast.
- Heat 1/4 cup of high temperature cooking oil (I use avocado oil) in a large nonstick skillet over medium-high heat. Once the oil is sizzling hot, carefully add 4 to 6 strips of corn tortillas at a time to the oil. Cook for 2 to 3 minutes per side or until the strips are golden brown and have reached your desired level of crisp.: When you slice the tortillas the edges should be clean and even, and the thin strips create the ideal surface area for frying to crispness. Using a sharp knife ensures neat strips which fry uniformly, producing consistent golden color. The why is even thickness for predictable cooking; uneven strips will brown unevenly. Take care cutting away from your hand to avoid injury.
- Transfer the crispy tortilla strips to a paper towel-lined plate and repeat for the remaining tortilla strips. For the best result, serve immediately on top of chicken tortilla soup with any additional toppings.: As the oil shimmers and starts to ripple you know it is ready, and when a single test strip sizzles on contact you have the right temperature. Add a few strips at a time so the oil temperature remains stable, and fry until the strips are golden and crisp, about 2 to 3 minutes per side. The sensory cues are steady sizzling and a warm, toasty corn smell. Overcrowding will drop the oil temperature and make limp strips, so work in batches.
- Transfer the crispy tortilla strips to a paper towel-lined plate and repeat for the remaining tortilla strips: Draining on paper towels will remove excess oil and keep them crisp, with the aroma of warm fried corn and a satisfying fragile crunch. Repeat until all strips are golden, then use them to top bowls immediately for peak texture. A common mistake is leaving fried strips in the hot pan which continues to brown them, so move them promptly to the towel lined plate.
Notes
- Use thighs or breasts — Choose chicken thighs for richer, more forgiving meat that shreds easily, or pick chicken breasts for leaner protein; both work well with pressure cooking and will absorb the broth flavors.
- Make the tortilla strips ahead — Fry the corn tortilla strips just before serving for best texture, or crisp them ahead and store in an airtight container for up to a day to preserve crunch.
- Adjust spice level — If you prefer milder heat reduce the chili powder slightly, or add more if you like it spicy; subtle changes here shift the soup’s personality without altering the ingredient list.
- Batch and store — This soup refrigerates beautifully for up to seven days and often tastes even better the next day, making it an ideal make ahead meal for busy weeks.
- Blend for creamier texture — If you like a velvety base, blend a portion of the soup for a few seconds before adding shredded chicken back in, which thickens the broth while keeping some bean and corn texture.