Instant Pot Black Beans
Instant Pot Black Beans has been my go to pantry hero on nights when time is tight and flavor matters.
I first learned to rely on Instant Pot Black Beans during a college week when I was juggling late classes and part time work, and a slow simmer was a luxury I could not afford. What began as a pragmatic solution turned into comfort food that I reach for whenever I want something honest, nourishing, and versatile. Over the years I tweaked the aromatics, learned the precise water to bean balance, and discovered that a short hands off pressure cook yields creamy beans with just the right bite. I still remember opening the lid after that first natural release and being greeted by an earthy, slightly sweet scent, with little glossy black beans bobbing in a fragrant broth.
These days I keep the ingredients for Instant Pot Black Beans in my pantry and freezer rotation. They become a quick taco filling, a salad topper, or a simple bowl with rice and a squeeze of lime. I like them plain enough to let the bean flavor sing, but seasoned so they can stand on their own. Family and friends comment on the texture, how the skins stay intact yet yield buttery interiors. I love how forgiving the method is, and how it rewards patience with a natural pressure release.
Every time I make Instant Pot Black Beans I feel like I am doing something small but meaningful for my weeknight routine, building meals that are economical, healthy, and deeply satisfying. This recipe is one of those reliable anchors in my kitchen, the sort of dish that invites variations yet always delivers comfort.
Recipe Snapshot
30 mins
5 mins
25 mins
Easy
150 kcal
Mexican
Vegan, Gluten-Free
Side Dishes
Instant Pot Duo Plus
Why This Instant Pot Black Beans Works
Flavor that develops with gentle pressure
I adore how pressure cooking amplifies the black bean aroma while locking in moisture. The high heat under sealed conditions helps the beans absorb the seasoning, creating a broth that tastes layered, not flat. When I open the lid after a natural release I often pause just to inhale the savory steam. This method saves time, without sacrificing depth, which is why these beans often become the backbone of my weeknight dinners.
Textural perfection, every time
One of the main reasons I return to this recipe is the texture. The beans come out tender yet intact, with a creamy center that contrasts nicely with the glossy skins. I prefer them cooked on high for 25 minutes for a softer result, or 20 minutes when I want a bit more bite. That flexibility lets me match the beans to the dish I am planning, whether mashed for spreads or kept whole for salads.
Simple, pantry friendly ingredients
We use everyday staples: dried beans, water, onion, garlic, and a few dried spices. I love recipes that rely on what you already have, and this one fits the bill. The limited ingredient list means less prep, less shopping, and more creativity when plating. I often toss these beans into bowls, tacos, or grain salads, and they always elevate the meal.
Hands off cooking with big payoffs
The pressure cooker does the heavy lifting, freeing you to prep sides or relax. After a short active time of sorting and rinsing, the Instant Pot does the rest. The natural pressure release step is key, and I appreciate how it rewards patience with deeper flavors and a creamier texture. It is the perfect set it and forget it companion.
Versatility on the table
These beans are incredibly adaptable. I use them as a side dish, a main for vegetarian bowls, or as an ingredient in other recipes. A final squeeze of lime brightens the whole pot, while extra salt or chili powder lets you tune the heat and savor profile. For me, that flexibility is what makes this recipe a keeper.
Shopping List for Instant Pot Black Beans
These ingredients are intentionally straightforward, chosen to coax deep flavor from humble pantry staples. The key players are the dried beans, which provide creamy body, and the aromatics like onion and garlic that layer in savory complexity. Spices such as chili powder, cumin, and oregano add warmth and earthiness, while sea salt ties everything together. Water is the medium that allows the beans to hydrate and develop their characteristic texture.
- 2 cups dried black beans: Provide hearty body and the primary protein and fiber content for the dish; dried black beans absorb liquid and soften during pressure cooking to create creamy, tender beans with rich flavor.
- 6 cups water: Contribute the necessary cooking liquid and help hydrate the beans; water creates steam pressure in the Instant Pot and dilutes and balances concentrated flavors as the beans cook.
- Heaping 1/2 cup diced white onion: Add savory, aromatic sweetness and layers of flavor when sautéed or cooked with the beans; diced white onion softens and melds into the broth to enhance overall depth.
- 2 large garlic cloves, chopped: Introduce pungent, aromatic heat and savory complexity; chopped garlic releases oils while cooking that brighten and deepen the beans' flavor profile.
- 2 teaspoons sea salt: Provide essential seasoning and mineral flavor; sea salt enhances and balances the natural bean taste and helps bring out other spices.
- 1 teaspoon chili powder: Deliver mild warmth and a smoky, earthy kick; chili powder adds a rounded peppery flavor that complements the beans and other seasonings.
- 1 teaspoon ground cumin: Add warm, slightly bitter earthiness and aromatic notes; ground cumin pairs with chili powder to create classic Latin-style seasoning for black beans.
- 1 teaspoon dried oregano: Offer herbal, slightly minty and lemony undertones; dried oregano contributes a subtle savory brightness that supports the other spices.
- Freshly ground black pepper: Impart sharp, savory balance and accentuate other flavors; freshly ground black pepper adds mild heat and complexity when adjusted to taste.
- Fresh lime juice (optional): Provide bright acidity and a fresh finish when desired; fresh lime juice lifts the rich, earthy beans and balances seasoning for serving.
Directions for Instant Pot Black Beans
These directions are straightforward and forgiving, but attention to a couple of details will make a big difference in texture and flavor. Read through the steps, prepare the ingredients, and let the Instant Pot do the heavy lifting while you plan the rest of your meal.
- Place the beans in a large colander and sort through them to remove and discard any stones or debris.: As you run your hands through the beans you will feel the difference between smooth beans and any irregular pebbles or shriveled bits, which helps avoid unpleasant surprises later. This step produces a clean pot and prevents damage to your teeth, and it also removes anything that could add bitterness. A common mistake is to skip this, which can result in hard bits in your finished dish, so take the extra two to three minutes to sort carefully.
- Rinse the beans and transfer them to the Instant Pot. Add the water, onion, garlic, salt, chili powder, cumin, oregano, and several grinds of pepper. Secure the lid on the Instant Pot and Pressure Cook on High for 25 minutes, or 20 minutes if you prefer firmer beans.: Rinsing removes dust and loose starch, which keeps the cooking liquid clearer and prevents foaming. When you pour the rinsed beans into the inner pot you will notice their color darkens slightly as water clings to each bean, and the movement creates a soft swishing sound that signals cleanliness. If you skip rinsing the broth may become cloudy and foamy, and pressure release can be inconsistent, so do not rush this.
- Allow the Instant Pot to release pressure naturally. This will take 20 to 30 minutes. When the float valve drops, remove the lid.: Adding these ingredients together fills the pot with layered aromas, the sharpness of raw garlic and the sweetness of onion mixing with dried spices. The water level should sit about an inch above the beans, allowing them space to expand without exposing them. Stir briefly to distribute the seasonings. A frequent error is adding too little water, which can lead to undercooked beans or a burnt bottom, so measure carefully.
- Use the beans in your favorite black bean recipes or season to taste with more salt, pepper, and squeezes of lime juice, if desired, and serve as a side dish.: As the pot builds pressure you will hear a steady hum and occasional clicks as the cooker regulates heat. The sealed environment forces heat into the beans, softening them quickly while deepening flavor. Choosing 25 minutes produces creamier beans, while 20 minutes keeps them slightly firmer for salads or tacos. One pitfall is trying to open the lid early, which can interrupt cooking and yield uneven texture, so resist the urge to peek.
- Allow the Instant Pot to release pressure naturally: During natural release the steam slowly dissipates and the beans continue to cook gently, which helps prevent splitting and creates a silkier broth. Expect this to take about 20 to 30 minutes, and you will notice the sound of simmering quiet as pressure decreases. When the float valve drops, the lid will lift easily. Forcing a quick release here risks blasting tender beans and making them mushy, so patience pays off.
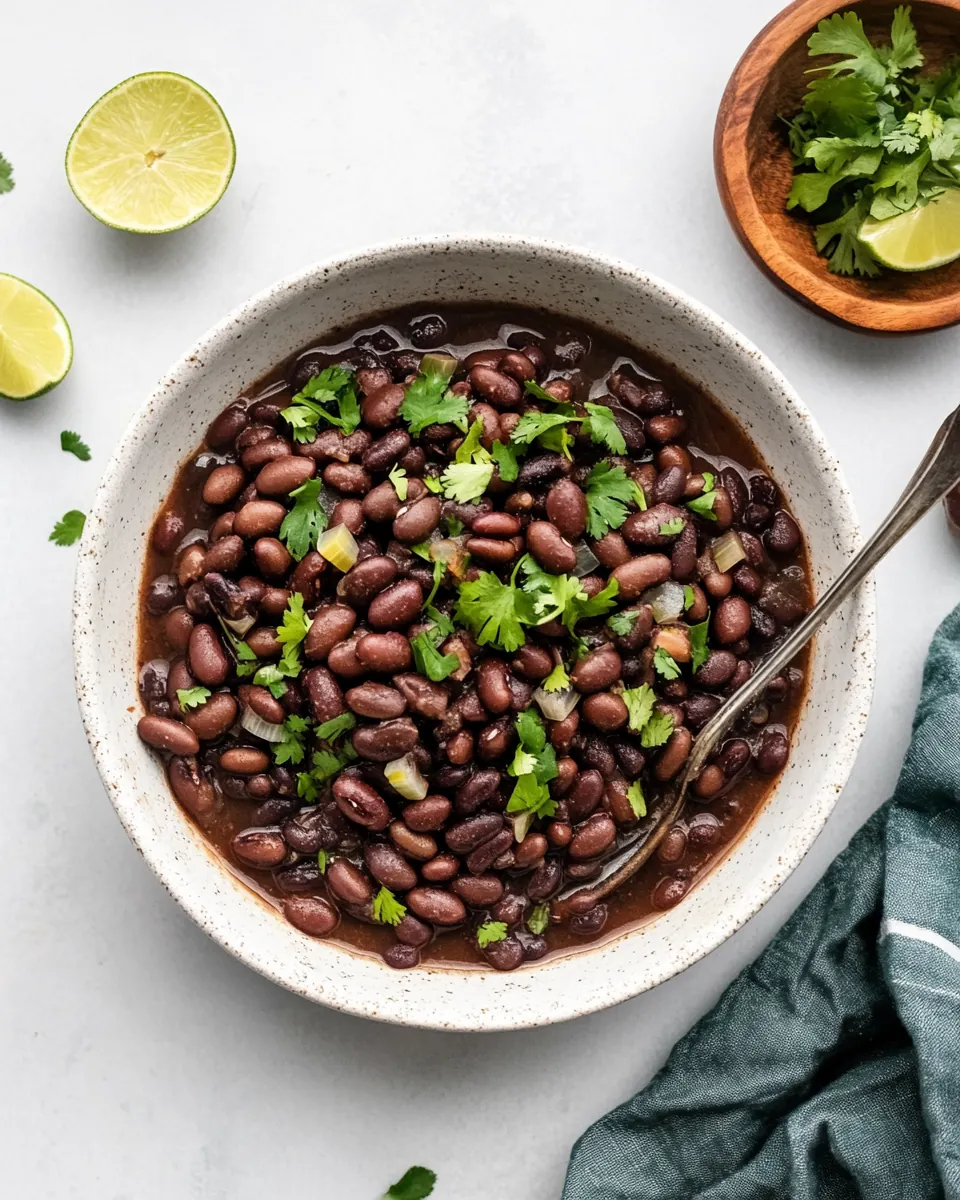
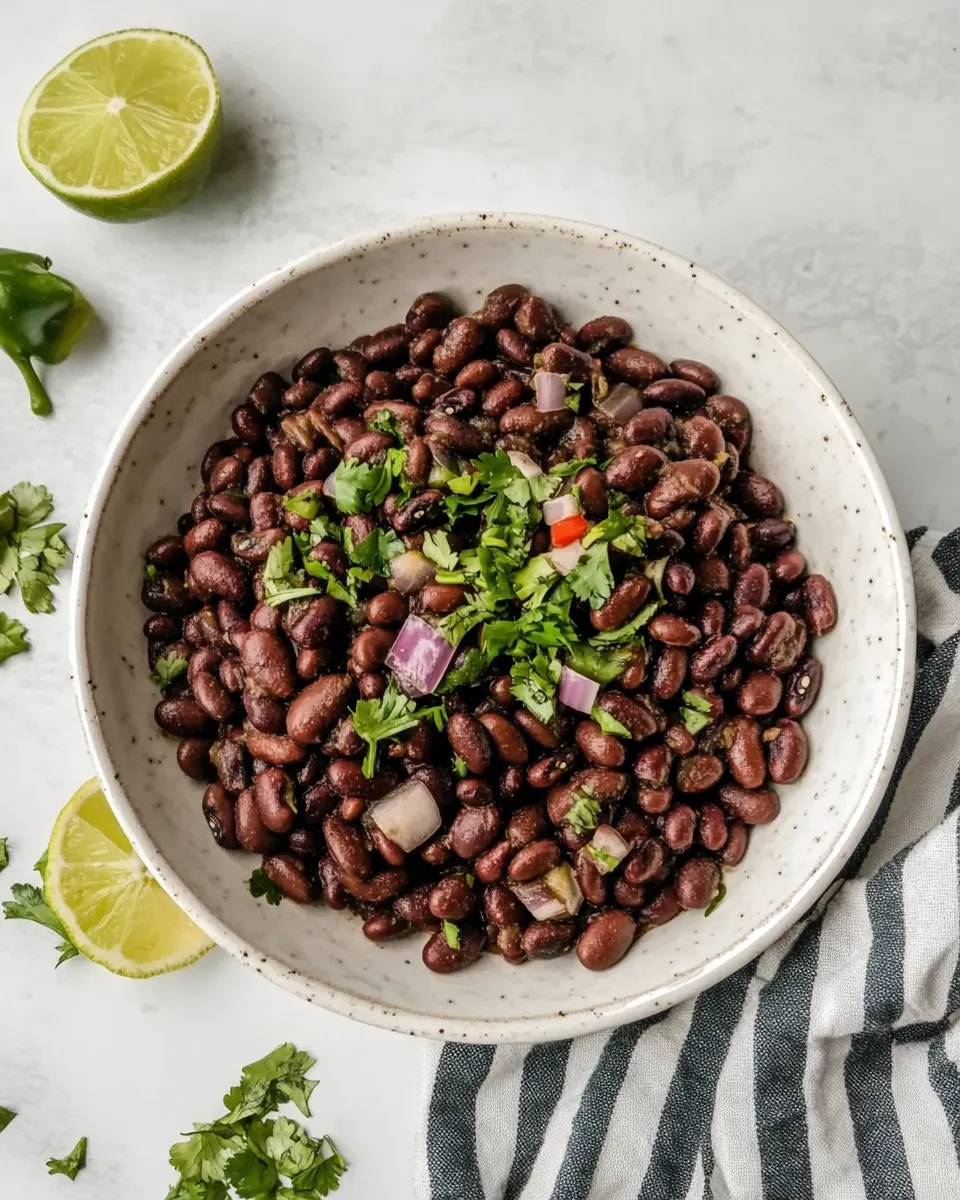
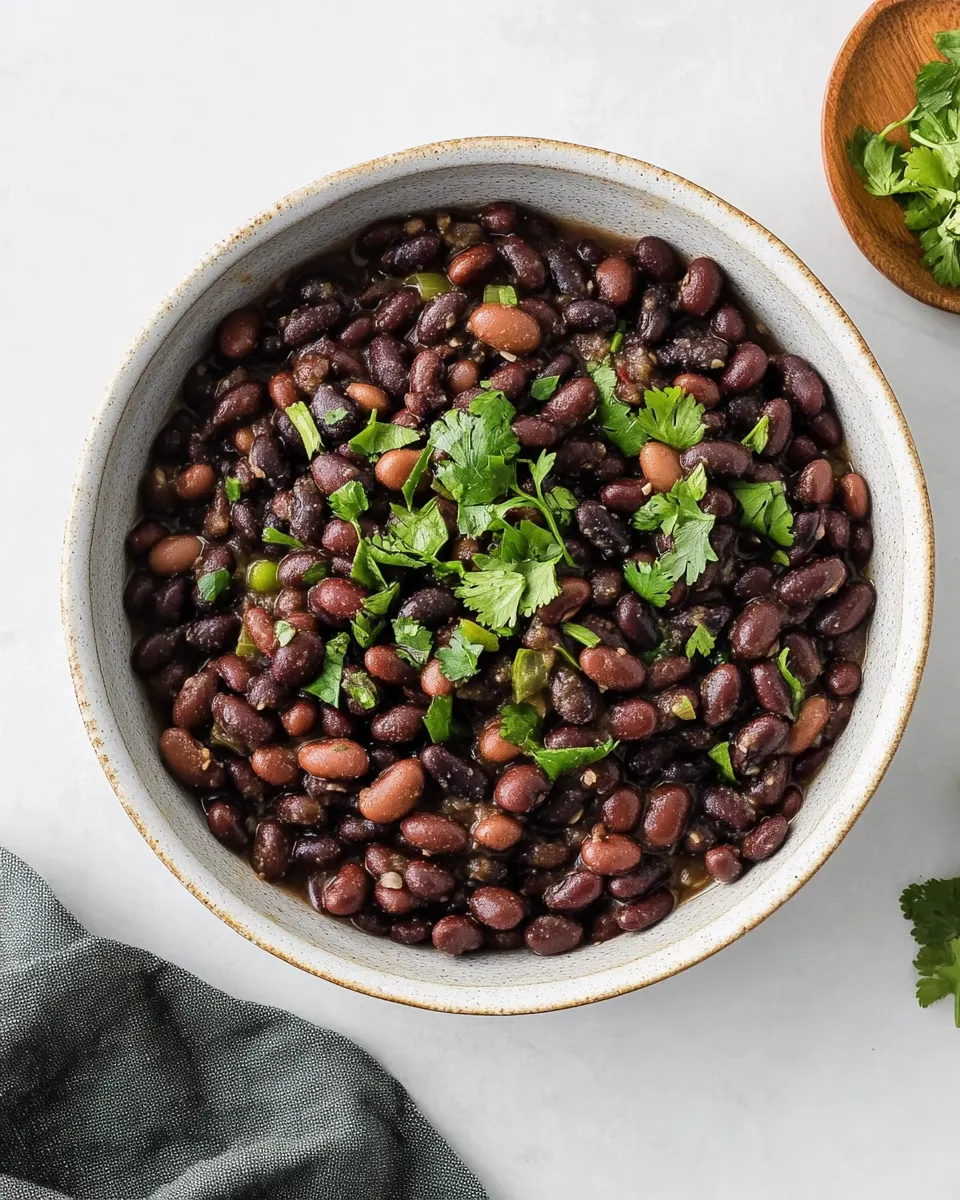
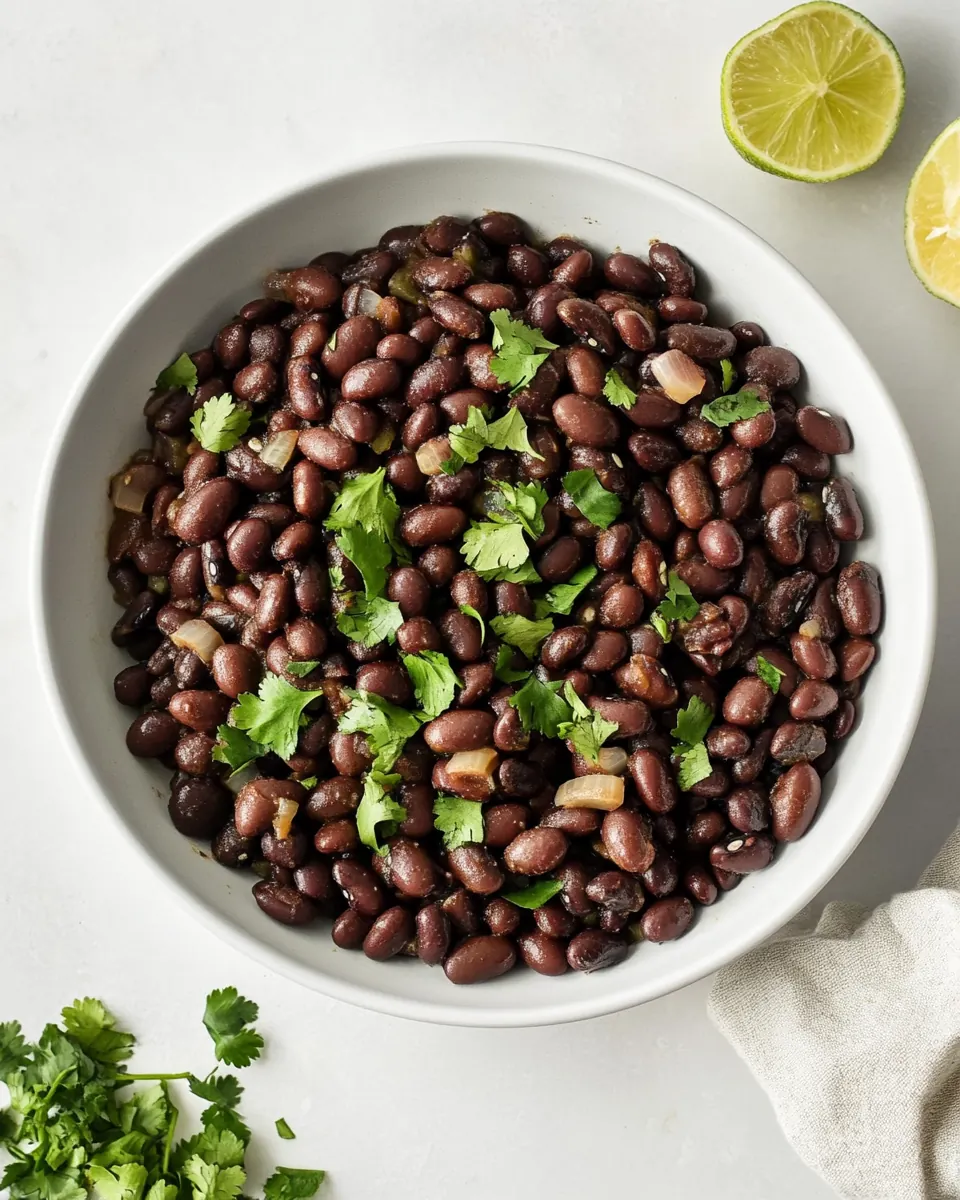
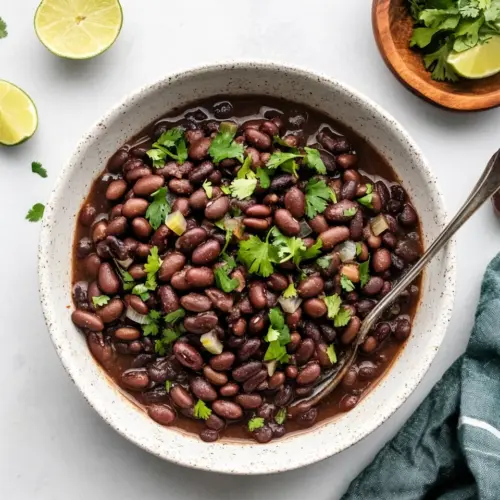
- When the float valve drops, remove the lid: Opening the pot releases a fragrant plume of steam, rich with cooked garlic and spice scents. Visually, the beans should appear glossy and plump, swimming in a slightly thickened liquid. Use a spoon to check texture; they should break gently under pressure. A common oversight is failing to taste and adjust seasoning now, so plan to add more sea salt , pepper, or a squeeze of lime juice to brighten the flavors.
- Use the beans in your favorite black bean recipes or season to taste with more salt, pepper, and squeezes of lime juice, if desired, and serve as a side dish: The final pot offers versatility, from mashed refried style to whole beans in a bowl. Fresh lime juice adds a citrus lift, and additional salt can deepen the savory profile. If you plan to store them, let them cool slightly before refrigerating to protect texture. Avoid over seasoning early, as flavors concentrate as the beans sit, so adjust in small increments.
Tips for Success
These tips will help you get consistent results and make the most of your Instant Pot Black Beans. Small habits during prep and finishing transform a good pot into a great one.
- Sort first: Carefully inspect and remove any stones or shriveled beans to avoid unpleasant surprises and protect your teeth.
- Rinse well: Rinsing reduces surface dust and excess starch, producing a clearer broth and minimizing foam while pressure cooking.
- Measure water: Stick to the 6 cups for 2 cups of dried beans to ensure they have room to swell and cook evenly without scorching.
- Mind the time: Choose 25 minutes for creamy beans and 20 for firmer beans, depending on whether you want them for mashing or salads.
- Natural release matters: Allow 20 to 30 minutes for natural release to preserve texture and prevent splitting, do not force a quick release.
- Finish with acid: A squeeze of lime brightens flavors at the end, lifting the earthy notes and adding balance to the pot.
What to Serve Alongside Instant Pot Black Beans
These beans are adaptable across meals and occasions, from simple weeknights to shared holiday buffets. Below are complementary pairings, serving ideas, and storage notes to help you plan.
- Rice bowls: Serve the beans over white or brown rice for a classic, filling meal, adding chopped herbs or a squeeze of lime to finish.
- Tacos and burritos: Use the beans as a robust filling for tacos or burritos, pairing them with fresh vegetables and your favorite tortillas.
- Salad topper: Spoon cooled beans onto a grain or green salad to add protein and texture, enhancing the salad with a citrusy dressing.
- Side for grilled vegetables: Pair with roasted or grilled vegetables for a vegetarian dinner that feels complete and satisfying.
- Meal prep bowls: Divide beans into containers with grains and veggies for easy grab and go lunches during the week.
- Occasions: Suitable for everyday dinners, casual entertaining, or seasonal gatherings like Ramadan if you seek nourishing plant based protein options.
- Storage tips: Cool beans slightly before refrigerating in airtight containers, where they will keep for four to five days; freeze portions for up to three months.
- Seasonal pairings: In cooler months, combine with warm grains and roasted squash; in warmer months, serve chilled over salads with bright herbs.
- Serving style: Offer lime wedges, extra salt, and pepper at the table so guests can personalize their bowls to taste.
- Portioning: For a side dish expect about half a cup to one cup per person, adjusting based on appetite and accompanying dishes.
FAQ
Conclusion
What makes this recipe special is its ability to turn a few pantry staples into a deeply flavored, versatile dish that fits many meals. The pressure cooking method creates a rich broth and creamy texture while saving time, and the simple spice blend allows the bean flavor to shine. Give these beans a try this week, and you might find they become a foundation for lunches, dinners, and easy meal prep. I hope you enjoy how reliably satisfying they are, and that they earn a regular spot in your kitchen rotation.
Instant Pot Black Beans
Equipment
- Instant Pot Duo Plus
Ingredients
- 2 cups dried black beans Provide hearty body and the primary protein and fiber content for the dish; dried black beans absorb liquid and soften during pressure cooking to create creamy, tender beans with rich flavor.
- 6 cups water Contribute the necessary cooking liquid and help hydrate the beans; water creates steam pressure in the Instant Pot and dilutes and balances concentrated flavors as the beans cook.
- Heaping 1/2 cup diced white onion Add savory, aromatic sweetness and layers of flavor when sautéed or cooked with the beans; diced white onion softens and melds into the broth to enhance overall depth.
- 2 large garlic cloves, chopped Introduce pungent, aromatic heat and savory complexity; chopped garlic releases oils while cooking that brighten and deepen the beans' flavor profile.
- 2 teaspoons sea salt Provide essential seasoning and mineral flavor; sea salt enhances and balances the natural bean taste and helps bring out other spices.
- 1 teaspoon chili powder Deliver mild warmth and a smoky, earthy kick; chili powder adds a rounded peppery flavor that complements the beans and other seasonings.
- 1 teaspoon ground cumin Add warm, slightly bitter earthiness and aromatic notes; ground cumin pairs with chili powder to create classic Latin-style seasoning for black beans.
- 1 teaspoon dried oregano Offer herbal, slightly minty and lemony undertones; dried oregano contributes a subtle savory brightness that supports the other spices.
- Freshly ground black pepper Impart sharp, savory balance and accentuate other flavors; freshly ground black pepper adds mild heat and complexity when adjusted to taste.
- Fresh lime juice, optional Provide bright acidity and a fresh finish when desired; fresh lime juice lifts the rich, earthy beans and balances seasoning for serving.
Instructions
- Place the beans in a large colander and sort through them to remove and discard any stones or debris.: As you run your hands through the beans you will feel the difference between smooth beans and any irregular pebbles or shriveled bits, which helps avoid unpleasant surprises later. This step produces a clean pot and prevents damage to your teeth, and it also removes anything that could add bitterness. A common mistake is to skip this, which can result in hard bits in your finished dish, so take the extra two to three minutes to sort carefully.
- Rinse the beans and transfer them to the Instant Pot. Add the water, onion, garlic, salt, chili powder, cumin, oregano, and several grinds of pepper. Secure the lid on the Instant Pot and Pressure Cook on High for 25 minutes, or 20 minutes if you prefer firmer beans.: Rinsing removes dust and loose starch, which keeps the cooking liquid clearer and prevents foaming. When you pour the rinsed beans into the inner pot you will notice their color darkens slightly as water clings to each bean, and the movement creates a soft swishing sound that signals cleanliness. If you skip rinsing the broth may become cloudy and foamy, and pressure release can be inconsistent, so do not rush this.
- Allow the Instant Pot to release pressure naturally. This will take 20 to 30 minutes. When the float valve drops, remove the lid.: Adding these ingredients together fills the pot with layered aromas, the sharpness of raw garlic and the sweetness of onion mixing with dried spices. The water level should sit about an inch above the beans, allowing them space to expand without exposing them. Stir briefly to distribute the seasonings. A frequent error is adding too little water, which can lead to undercooked beans or a burnt bottom, so measure carefully.
- Use the beans in your favorite black bean recipes or season to taste with more salt, pepper, and squeezes of lime juice, if desired, and serve as a side dish.: As the pot builds pressure you will hear a steady hum and occasional clicks as the cooker regulates heat. The sealed environment forces heat into the beans, softening them quickly while deepening flavor. Choosing 25 minutes produces creamier beans, while 20 minutes keeps them slightly firmer for salads or tacos. One pitfall is trying to open the lid early, which can interrupt cooking and yield uneven texture, so resist the urge to peek.
- Allow the Instant Pot to release pressure naturally: During natural release the steam slowly dissipates and the beans continue to cook gently, which helps prevent splitting and creates a silkier broth. Expect this to take about 20 to 30 minutes, and you will notice the sound of simmering quiet as pressure decreases. When the float valve drops, the lid will lift easily. Forcing a quick release here risks blasting tender beans and making them mushy, so patience pays off.
- When the float valve drops, remove the lid: Opening the pot releases a fragrant plume of steam, rich with cooked garlic and spice scents. Visually, the beans should appear glossy and plump, swimming in a slightly thickened liquid. Use a spoon to check texture; they should break gently under pressure. A common oversight is failing to taste and adjust seasoning now, so plan to add more sea salt , pepper, or a squeeze of lime juice to brighten the flavors.
- Use the beans in your favorite black bean recipes or season to taste with more salt, pepper, and squeezes of lime juice, if desired, and serve as a side dish: The final pot offers versatility, from mashed refried style to whole beans in a bowl. Fresh lime juice adds a citrus lift, and additional salt can deepen the savory profile. If you plan to store them, let them cool slightly before refrigerating to protect texture. Avoid over seasoning early, as flavors concentrate as the beans sit, so adjust in small increments.
Notes
- Sort first: Carefully inspect and remove any stones or shriveled beans to avoid unpleasant surprises and protect your teeth.
- Rinse well: Rinsing reduces surface dust and excess starch, producing a clearer broth and minimizing foam while pressure cooking.
- Measure water: Stick to the 6 cups for 2 cups of dried beans to ensure they have room to swell and cook evenly without scorching.
- Mind the time: Choose 25 minutes for creamy beans and 20 for firmer beans, depending on whether you want them for mashing or salads.
- Natural release matters: Allow 20 to 30 minutes for natural release to preserve texture and prevent splitting, do not force a quick release.
- Finish with acid: A squeeze of lime brightens flavors at the end, lifting the earthy notes and adding balance to the pot.