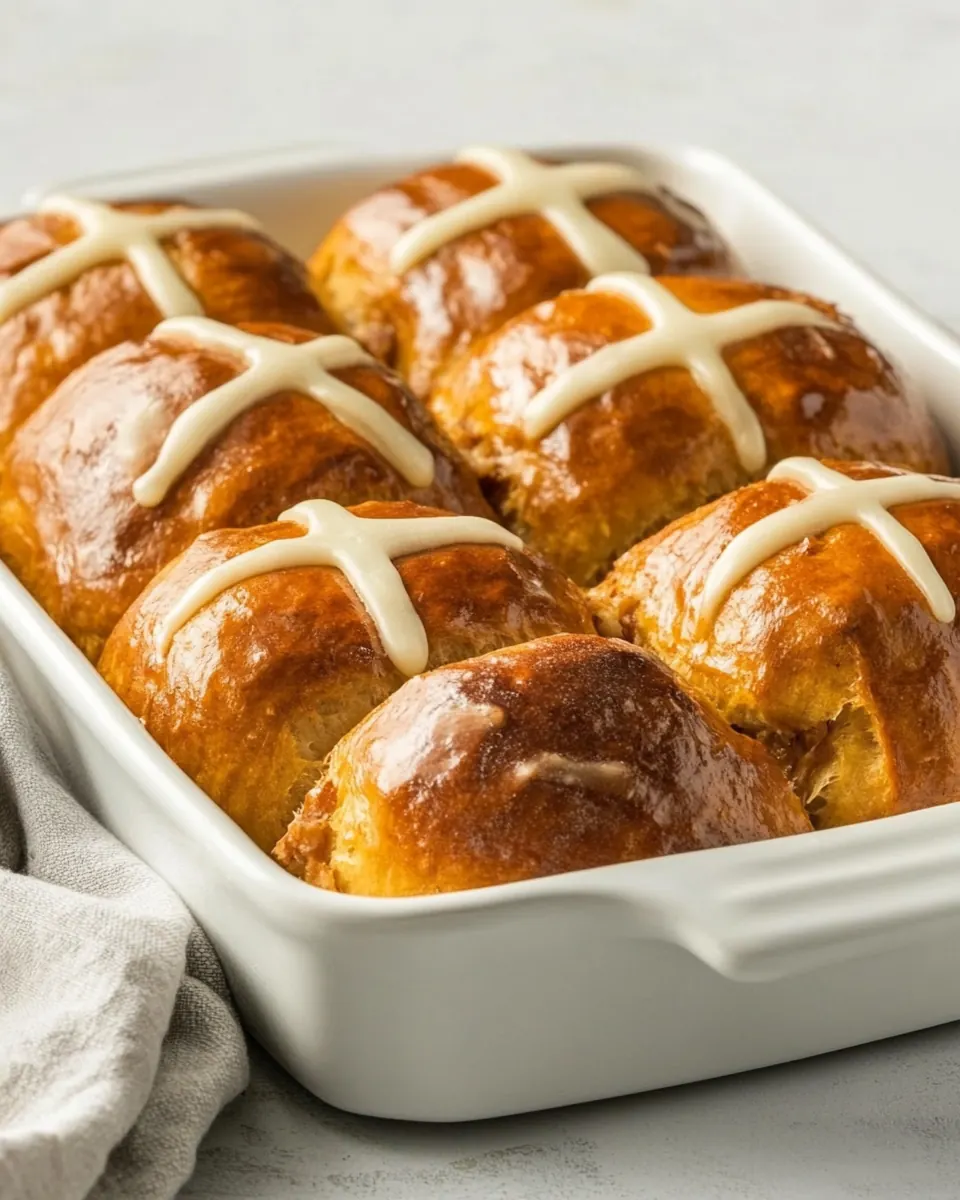
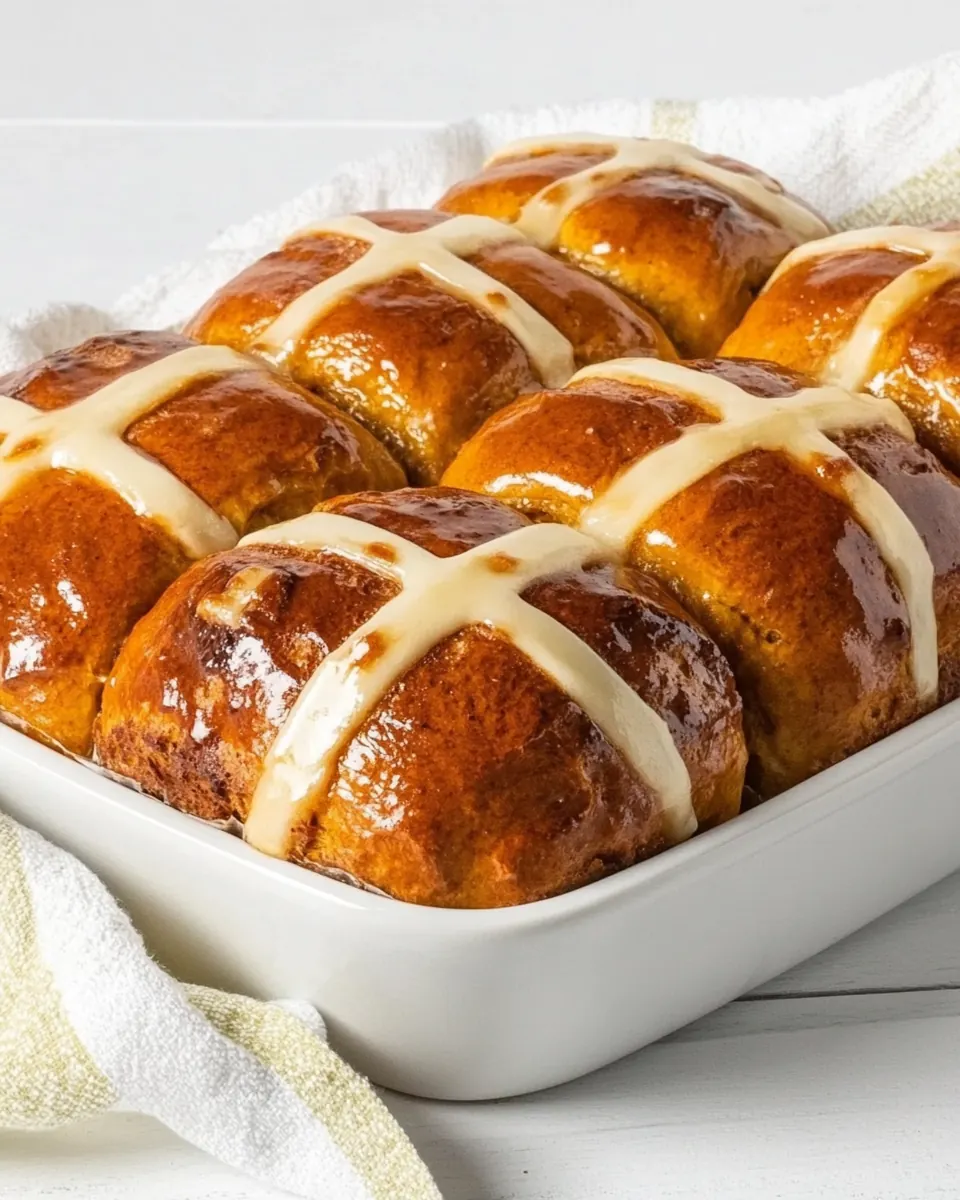
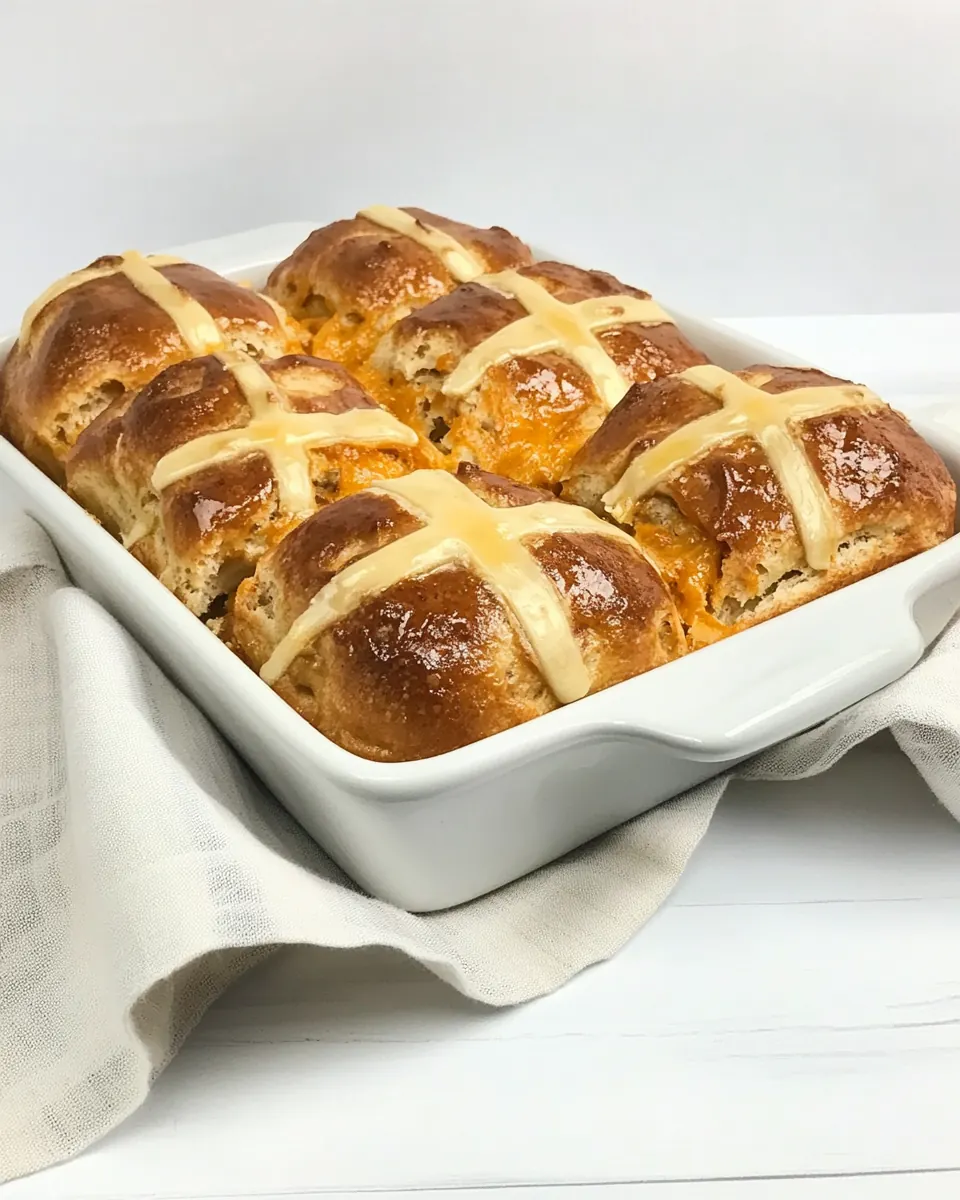
Hot Cross Buns
Hot Cross Buns are the kind of baking memory that keeps me reaching for the mixing bowl when the sky turns gray and the house needs a warm, fragrant lift.
Years ago I learned these rolls on a wet afternoon, hands dusted in flour while radio chatter hummed in the background. I was drawn to the comforting rhythm of folding in currants and the tiny pops of candied peel, and that first golden tray right out of the oven felt like a small triumph. The buns have a gentle spice note that reminds me of holiday gatherings, yet they are unfussy enough for a quiet Sunday breakfast. Over time I tuned the dough to be tender and slightly springy, so each bite is pillowy without being dense.
What I love most is how the cross paste turns simple rolls into something festive, and how brushing with egg gives a glossy finish that makes them irresistible. When guests arrive, the scent of butter and orange drifts through the rooms, and conversation seems to slow as everyone reaches for a warm bun. I still remember the first time I served them for an Easter brunch, the way the currants glistened like tiny jewels, and how a smear of softened butter made them disappear in minutes.
Recipe Snapshot
1 hr 30 mins
60 mins
30 mins
Medium
230 kcal
American
Gluten-Free, Low FODMAP
Desserts
Stand mixer, Dough hook, Paddle attachment, 13×9-inch rimmed baking sheet, Pastry bag, Fine-mesh sieve, Instant-read thermometer
Why This Hot Cross Buns Shines
Classic, comforting flavor
I adore Hot Cross Buns because they balance warm spices with bright citrus and juicy currants. The combination is familiar yet nuanced, and I find the aroma alone draws people into the kitchen. This flavor profile is both nostalgic and versatile, making the buns suitable for special mornings or casual gatherings.
Textural harmony
These buns manage to be airy and tender while still offering a slight chew from the currants and candied peel. I aim for a dough that yields a soft crumb, and when the exterior browns properly it creates a thin, satisfying crust that contrasts nicely with the interior. That contrast is what keeps them from tasting flat or heavy.
Hands on, rewarding process
Baking Hot Cross Buns is a hands on experience that I relish. From proofing the yeast to piping the crosses, each stage invites small rituals and attention. I like that the process is forgiving for home bakers, yet precise enough to teach useful skills like gauging dough tackiness or reading visual proofing cues.
Visually festive
The signature cross paste elevates the buns from simple rolls to a celebratory treat. I enjoy piping the crosses, and seeing the lines bake to crisp, pale edges is deeply satisfying. They look special on a brunch table, and the golden, glossy tops make them immediately appealing to kids and grown ups alike.
Adaptable and shareable
I often tweak these buns subtly, doubling the batch for company or adapting the fruit if I have something on hand. They travel well for potlucks and gift baskets, and they keep for a day or two at room temperature, making them practical as well as delicious. Sharing a warm tray of Hot Cross Buns always feels like offering comfort and a small celebration.
What You’ll Need for Hot Cross Buns

The ingredients here are chosen to build a tender, richly flavored enriched dough. The starch and gluten structure from the all purpose flour provides the framework, while the eggs and butter enrich the crumb for softness. The warm liquids, yeast, and sugar work together to activate fermentation, bringing rise and aroma. Spices and candied peel add the character notes that make these rolls unmistakable.
- 1 cup (128 grams) currants: Soaked to plump and sweeten, provides bursts of fruity flavor and chewy texture throughout the buns, and contributes natural sweetness that balances the dough.
- 3/4 cup (180 grams) hot fresh orange juice (180°F/82°C to 185°F/85°C): Heated to a very warm temperature to activate yeast and infuse a bright citrus aroma, contributes liquid for dough hydration while imparting subtle orange flavor.
- 3/4 cup (180 grams) warm whole milk (105°F/41°C to 110°F/43°C): Warmed to an ideal temperature to help activate the yeast and create a tender crumb, adds richness and moisture from the milk solids and fats.
- 1/2 cup (120 grams) warm water (105°F/41°C to 110°F/43°C): Warmed to a similar temperature as the milk to properly dissolve yeast and sugar, supplies necessary hydration for gluten development and helps regulate dough temperature.
- 1/2 cup (100 grams) granulated sugar, divided: Divided to both feed and activate the yeast early and sweeten the dough later, contributes bulk sweetness and helps with browning of the crust when used in baking.
- 4 1/2 teaspoons (14 grams) active dry yeast: Measured to precisely leaven the dough, activates with warm liquids and produces carbon dioxide that lightens the buns and creates their characteristic rise.
- 5 cups (708 grams) plus 1/2 cup (63 grams) all-purpose flour, divided: Portioned into the dough and reserved for dusting or additional structure, supplies the bulk of the flour for gluten formation and overall structure of the buns.
- 1 teaspoon (3 grams) kosher salt: Dissolved in the dough to enhance flavor and regulate yeast activity, strengthens gluten networks while balancing sweetness and contributing a slight savory note.
- 1 teaspoon (2 grams) ground cinnamon: Sprinkled into the dough for warm aromatic spice, complements the citrus and dried fruit flavors while adding depth and traditional hot cross bun character.
- 1/2 teaspoon (1 gram) ground nutmeg: Added in a small amount to introduce warm, nutty, slightly sweet spice that rounds out the spice mix and enhances the overall aroma of the buns.
- 1/4 teaspoon ground allspice: Used sparingly to introduce a warm, slightly peppery and clove-like nuance, helps create the classic spiced profile typically associated with hot cross buns.
- 1/2 cup (76 grams) unsalted butter, melted: Melted and incorporated for richness and tenderness, adds fat to soften the crumb, improve shelf life, and contribute a subtle buttery flavor throughout the buns.
- 3 large eggs (150 grams), room temperature and divided: Beaten and divided to enrich the dough and provide structure and color, binds ingredients, adds moisture and helps achieve a golden-brown crust when baked.
- 1/3 cup (90 grams) chopped candied orange peel: Chopped and folded into the dough to lend concentrated citrus sweetness and chew, adds texture contrast and complements the currants and orange notes.
- 5 tablespoons (70 grams) unsalted butter, room temperature: Softened and mixed into the dough for additional buttery richness and spreadability, contributes to a tender crumb and helps produce a delicate mouthfeel.
- 1 teaspoon (4 grams) orange blossom water: Added for a floral and aromatic accent that heightens the citrus notes, contributes a subtle perfume that elevates the overall flavor profile of the buns.
- 1/2 teaspoon (2.5 grams) water: Measured precisely as a small amount of liquid to adjust glaze or dough hydration, used to achieve the correct consistency for finishing or flavor balancing.
Instructions for Hot Cross Buns
This recipe moves through stages from soaking fruit to proofing dough to baking, and each step rewards attention to detail. Follow the sequence and rely on the sensory cues described below so you can tell when each stage is just right, rather than only watching the clock.
- In a large bowl, combine currants and hot orange juice. Cover with plastic wrap, and let stand for 20 minutes. Using a fine-mesh sieve, strain currants, discarding excess liquid.: The aroma of warm orange juice releasing into the currants will be floral and bright, and you will notice the berries plump and darken as they absorb the liquid. This rehydration softens the currants and infuses them with citrus so they remain tender after baking rather than shriveling. A common misstep is letting the mixture cool completely before straining, which can trap excess moisture; strain while still warm but handle gently. If the currants feel dry after straining, dab them with paper towel so they do not flood the dough with liquid.
- In the bowl of a stand mixer, combine warm milk, 1/2 cup (120 grams) warm water, 1/4 cup (50 grams) sugar, and yeast. Let stand until foamy, about 10 minutes.: You will see a creamy foam forming on the surface and smell a yeasty, slightly sweet scent that signals active fermentation. This foaming indicates the yeast is alive and ready to make the dough rise, producing carbon dioxide and a light aroma reminiscent of fresh bread. If no foam appears, the yeast may be old or the liquid too hot or too cold; start over with fresh yeast and ensure the temperature is within the listed range. Avoid stirring aggressively during this rest as it can disturb the initial foam development.
- In a large bowl, whisk together 2 1/2 cups (333 grams) flour, salt, cinnamon, nutmeg, allspice, and remaining 1/4 cup (50 grams) sugar. Add flour mixture to yeast mixture, and using the paddle attachment, beat at low speed just until combined. Beat in melted butter and 2 eggs (100 grams). Add currants and candied orange peel, and beat until combined. Gradually add 2 1/2 cups (333 grams) flour, beating until combined; scrape sides of bowl.: The scent of spices will become more pronounced as they mingle with the enriched mixture, creating a warm, inviting aroma. The dough will start sticky and shaggy; beating with the paddle helps incorporate fat and eggs without overworking gluten initially. When you add the currants and candied orange peel , they should distribute evenly, and you will see flecks of orange throughout. A frequent error is adding all the flour at once which can lead to uneven hydration; adding gradually ensures a smooth, cohesive mass.
- Switch to the dough hook attachment. Beat at low speed until a smooth, elastic, slightly tacky dough forms, 4 to 6 minutes, adding up to 1/2 cup (42 grams) flour, 1 tablespoon (8 grams) at a time, if dough is too sticky. Turn out dough onto a lightly floured surface, and shape into a smooth round.: As the mixer works, you will hear the dough change pitch, becoming quieter and springing back when prodded; visually it will pull away from the bowl and form a cohesive, elastic ball. The dough should be slightly tacky but not clingy, and when stretched gently it should show some translucency without tearing. Over flouring here makes a dry crumb, so only add small amounts if the dough truly sticks to your fingers. If the dough feels too tight, let it rest five minutes to relax the gluten before kneading more.
- Spray a large bowl with cooking spray. Place dough in bowl, turning to grease top. Loosely cover and let rise in a warm, draft-free place (75°F/24°C) until doubled in size, about 1 hour.: During the first rise the dough will smell faintly sweet and yeasty, and the surface should become slightly domed and soft to the touch. The doubled volume is the best visual cue, and when pressed gently your finger should leave an indentation that springs back slowly. Avoid placing dough in a cold or drafty spot, which can stall fermentation; if your kitchen is cool, set the bowl in an oven with the light on to maintain warmth. Overproofing can lead to collapsed buns, so check before the full hour if your dough is particularly active.
- Spray a 13×9-inch rimmed baking sheet with baking spray with flour.: The prepared pan helps the buns release smoothly and promotes even bottom browning, and you will notice the difference when the buns slide off cleanly after baking. A sticky pan can mar the bottoms and make serving awkward. If you do not have the spray, line the pan with parchment for similar nonstick results. Be sure the pan is rimmed to contain any spread as the buns proof and touch.
- Lightly punch down dough, and let stand for 5 minutes. Turn out dough onto a lightly floured surface, and divide into 12 portions (about 128 grams each). Roll each portion into a ball. Place about 1/4 inch apart on prepared pan. Cover and let rise in a warm, draft-free place (75°F/24°C) until puffed, buns are touching, and dough holds an indentation when poked, about 40 minutes.: When you punch down, expect a soft sigh of air and the dough to deflate slightly; this relaxes the gluten and redistributes gases. Rolling into smooth balls creates surface tension, helping them rise uniformly. During the second rise, buns will swell and develop glossy, taut skins, and the touch test will confirm readiness. Avoid placing them too close together if you want distinct rolls, but for pull apart buns place them an inch apart. A common slip is skipping the short rest after punching down which can make shaping harder and create uneven tops.
- Preheat oven to 375°F (190°C).: The oven should be fully up to temperature before the buns go in so they receive an immediate oven spring, which helps set their shape and create lift. You will notice a warm, dry heat and the faint smell of metal and air as it reaches temp. If the oven is cooler than listed, buns may bake longer and dry out; too hot and they will brown excessively before the centers finish. Use an oven thermometer if you suspect your oven runs off.
- In a small bowl, whisk remaining 1 egg (50 grams). Brush tops of rolls with egg.: Brushing with egg yields a glossy, golden finish and enhances color contrast for the crosses. The egg wash should go on with a light hand, covering evenly without pooling in seams. If you skip this step, the tops will bake paler and lack shine. If the egg is lumpy, strain or whisk until smooth to avoid uneven sheen.
- Clean bowl of stand mixer and paddle attachment. Using the paddle attachment, beat room temperature butter and remaining 1/2 cup (63 grams) flour at medium-low speed; slowly add orange blossom water and 1/2 teaspoon (2.5 grams) water, beating until a thick paste forms and stopping to scrape sides of bowl. Spoon paste into a pastry bag, and cut a 1/4-inch opening in tip. (Alternatively, use a pastry bag fitted with a 1/4-inch round piping tip [Ateco #802].) Pipe paste on top of buns in continuous lines following curves of rolls to form a cross over each.: The paste will be smooth and fragrant from the orange blossom water , with a texture similar to a thick frosting that holds shape when piped. When piping, the paste should glide and form defined lines without collapsing; this visual cue ensures crisp, pale crosses. If the paste is too stiff, a tiny extra splash of water will loosen it, and if too runny chill briefly. A common mistake is piping too much pressure and creating thick, lumpy crosses that bake into heavy ridges.
- Bake until golden brown and an instant-read thermometer inserted in center of a bun registers 190°F (88°C) to 200°F (93°C), 24 to 30 minutes, loosely covering with foil during final 2 to 5 minutes of baking to prevent excess browning. Serve warm or at room temperature.: As they bake you will smell butter and spice intensifying, and the tops will shift from pale to rich golden brown while the edges crisp slightly. The internal temperature ensures a fully cooked interior with a tender crumb, and the thermometer reading is the most reliable cue. If the tops brown too quickly, tent with foil to finish cooking without burning. Let cool slightly before slicing to avoid compressing the crumb, and enjoy warm for the best texture and aroma.
Pro Tips and Tweaks
I like to share practical adjustments that improve both process and flavor. Below you will find tips that address timing, texture, and small flavor boosts without changing ingredients.
- Warm liquids precisely: Use a thermometer to keep milk and water within the recommended range so the yeast activates reliably without being shocked by temperature extremes.
- Soak currants briefly: Plumping currants in hot orange juice ensures they remain juicy after baking, which prevents them from leaching moisture from the dough during proofing.
- Measure flour by weight: Weighing all purpose flour leads to consistent dough hydration and prevents the variability that spoons and scoops introduce.
- Watch dough feel over time: Slight tackiness is desirable; adding small amounts of flour by tablespoon is safer than large adjustments that dry the dough.
- Protect early browning: If the tops brown too fast in your oven, tent with foil during the last few minutes to allow the interior to reach proper temperature without overcoloring.
- Use an instant-read thermometer: Checking for 190°F to 200°F inside a bun is the most reliable way to confirm doneness rather than relying on color alone.
Perfect Matches for Hot Cross Buns
These buns shine with simple accompaniments and at relaxed, communal meals. Think morning gatherings or holiday brunches when warm bread and conversation pair perfectly.
- Soft butter or spread: Serve warm with softened butter so guests can smear and enjoy the contrast between glossy crust and tender crumb.
- Tea or coffee service: Offer hot beverages for dunking and to complement the spice and citrus notes, ideal for breakfast or afternoon tea.
- Brunch occasions: Place these buns on a brunch table alongside fruit and simple egg dishes for a festive Easter spread or weekend gathering.
- Gift or picnic: Pack cooled buns in a box for neighbors or take them to a potluck; they transport well and present attractively.
- Storage tips: Keep at room temperature in an airtight container for up to 48 hours, or freeze individual buns for longer storage and thaw gently before warming.
- Seasonal pairings: The citrus and spice profile works well in spring and holiday seasons, pairing with light cheeses or fruit compotes if you wish to expand the spread.
FAQ
Conclusion
What makes these Hot Cross Buns special is their balance of tender enriched dough, warm spices, and bright citrus notes, all crowned with the characteristic piped cross. They reward patient attention, yet remain approachable for a home baker seeking a satisfying, festive bake. I encourage you to give them a try, enjoy that warm aroma filling your kitchen, and share the results with friends or family for a memorable breakfast or holiday moment.
Hot Cross Buns
Equipment
- Stand mixer
- Dough Hook
- Paddle attachment
- 13x9-inch rimmed baking sheet
- Pastry bag
- Fine mesh sieve
- Instant read thermometer
Ingredients
- 1 cup (128 grams) currants Soaked to plump and sweeten, provides bursts of fruity flavor and chewy texture throughout the buns, and contributes natural sweetness that balances the dough.
- 3/4 cup (180 grams) hot fresh orange juice (180°F/82°C to 185°F/85°C) Heated to a very warm temperature to activate yeast and infuse a bright citrus aroma, contributes liquid for dough hydration while imparting subtle orange flavor.
- 3/4 cup (180 grams) warm whole milk (105°F/41°C to 110°F/43°C) Warmed to an ideal temperature to help activate the yeast and create a tender crumb, adds richness and moisture from the milk solids and fats.
- 1/2 cup (120 grams) warm water (105°F/41°C to 110°F/43°C) Warmed to a similar temperature as the milk to properly dissolve yeast and sugar, supplies necessary hydration for gluten development and helps regulate dough temperature.
- 1/2 cup (100 grams) granulated sugar, divided Divided to both feed and activate the yeast early and sweeten the dough later, contributes bulk sweetness and helps with browning of the crust when used in baking.
- 4 1/2 teaspoons (14 grams) active dry yeast Measured to precisely leaven the dough, activates with warm liquids and produces carbon dioxide that lightens the buns and creates their characteristic rise.
- 5 cups (708 grams) plus 1/2 cup (63 grams) all-purpose flour, divided Portioned into the dough and reserved for dusting or additional structure, supplies the bulk of the flour for gluten formation and overall structure of the buns.
- 1 teaspoon (3 grams) kosher salt Dissolved in the dough to enhance flavor and regulate yeast activity, strengthens gluten networks while balancing sweetness and contributing a slight savory note.
- 1 teaspoon (2 grams) ground cinnamon Sprinkled into the dough for warm aromatic spice, complements the citrus and dried fruit flavors while adding depth and traditional hot cross bun character.
- 1/2 teaspoon (1 gram) ground nutmeg Added in a small amount to introduce warm, nutty, slightly sweet spice that rounds out the spice mix and enhances the overall aroma of the buns.
- 1/4 teaspoon ground allspice Used sparingly to introduce a warm, slightly peppery and clove-like nuance, helps create the classic spiced profile typically associated with hot cross buns.
- 1/2 cup (76 grams) unsalted butter, melted Melted and incorporated for richness and tenderness, adds fat to soften the crumb, improve shelf life, and contribute a subtle buttery flavor throughout the buns.
- 3 large eggs (150 grams), room temperature and divided Beaten and divided to enrich the dough and provide structure and color, binds ingredients, adds moisture and helps achieve a golden-brown crust when baked.
- 1/3 cup (90 grams) chopped candied orange peel Chopped and folded into the dough to lend concentrated citrus sweetness and chew, adds texture contrast and complements the currants and orange notes.
- 5 tablespoons (70 grams) unsalted butter, room temperature Softened and mixed into the dough for additional buttery richness and spreadability, contributes to a tender crumb and helps produce a delicate mouthfeel.
- 1 teaspoon (4 grams) orange blossom water Added for a floral and aromatic accent that heightens the citrus notes, contributes a subtle perfume that elevates the overall flavor profile of the buns.
- 1/2 teaspoon (2.5 grams) water Measured precisely as a small amount of liquid to adjust glaze or dough hydration, used to achieve the correct consistency for finishing or flavor balancing.
Instructions
- In a large bowl, combine currants and hot orange juice. Cover with plastic wrap, and let stand for 20 minutes. Using a fine-mesh sieve, strain currants, discarding excess liquid.: The aroma of warm orange juice releasing into the currants will be floral and bright, and you will notice the berries plump and darken as they absorb the liquid. This rehydration softens the currants and infuses them with citrus so they remain tender after baking rather than shriveling. A common misstep is letting the mixture cool completely before straining, which can trap excess moisture; strain while still warm but handle gently. If the currants feel dry after straining, dab them with paper towel so they do not flood the dough with liquid.
- In the bowl of a stand mixer, combine warm milk, 1/2 cup (120 grams) warm water, 1/4 cup (50 grams) sugar, and yeast. Let stand until foamy, about 10 minutes.: You will see a creamy foam forming on the surface and smell a yeasty, slightly sweet scent that signals active fermentation. This foaming indicates the yeast is alive and ready to make the dough rise, producing carbon dioxide and a light aroma reminiscent of fresh bread. If no foam appears, the yeast may be old or the liquid too hot or too cold; start over with fresh yeast and ensure the temperature is within the listed range. Avoid stirring aggressively during this rest as it can disturb the initial foam development.
- In a large bowl, whisk together 2 1/2 cups (333 grams) flour, salt, cinnamon, nutmeg, allspice, and remaining 1/4 cup (50 grams) sugar. Add flour mixture to yeast mixture, and using the paddle attachment, beat at low speed just until combined. Beat in melted butter and 2 eggs (100 grams). Add currants and candied orange peel, and beat until combined. Gradually add 2 1/2 cups (333 grams) flour, beating until combined; scrape sides of bowl.: The scent of spices will become more pronounced as they mingle with the enriched mixture, creating a warm, inviting aroma. The dough will start sticky and shaggy; beating with the paddle helps incorporate fat and eggs without overworking gluten initially. When you add the currants and candied orange peel , they should distribute evenly, and you will see flecks of orange throughout. A frequent error is adding all the flour at once which can lead to uneven hydration; adding gradually ensures a smooth, cohesive mass.
- Switch to the dough hook attachment. Beat at low speed until a smooth, elastic, slightly tacky dough forms, 4 to 6 minutes, adding up to 1/2 cup (42 grams) flour, 1 tablespoon (8 grams) at a time, if dough is too sticky. Turn out dough onto a lightly floured surface, and shape into a smooth round.: As the mixer works, you will hear the dough change pitch, becoming quieter and springing back when prodded; visually it will pull away from the bowl and form a cohesive, elastic ball. The dough should be slightly tacky but not clingy, and when stretched gently it should show some translucency without tearing. Over flouring here makes a dry crumb, so only add small amounts if the dough truly sticks to your fingers. If the dough feels too tight, let it rest five minutes to relax the gluten before kneading more.
- Spray a large bowl with cooking spray. Place dough in bowl, turning to grease top. Loosely cover and let rise in a warm, draft-free place (75°F/24°C) until doubled in size, about 1 hour.: During the first rise the dough will smell faintly sweet and yeasty, and the surface should become slightly domed and soft to the touch. The doubled volume is the best visual cue, and when pressed gently your finger should leave an indentation that springs back slowly. Avoid placing dough in a cold or drafty spot, which can stall fermentation; if your kitchen is cool, set the bowl in an oven with the light on to maintain warmth. Overproofing can lead to collapsed buns, so check before the full hour if your dough is particularly active.
- Spray a 13×9-inch rimmed baking sheet with baking spray with flour.: The prepared pan helps the buns release smoothly and promotes even bottom browning, and you will notice the difference when the buns slide off cleanly after baking. A sticky pan can mar the bottoms and make serving awkward. If you do not have the spray, line the pan with parchment for similar nonstick results. Be sure the pan is rimmed to contain any spread as the buns proof and touch.
- Lightly punch down dough, and let stand for 5 minutes. Turn out dough onto a lightly floured surface, and divide into 12 portions (about 128 grams each). Roll each portion into a ball. Place about 1/4 inch apart on prepared pan. Cover and let rise in a warm, draft-free place (75°F/24°C) until puffed, buns are touching, and dough holds an indentation when poked, about 40 minutes.: When you punch down, expect a soft sigh of air and the dough to deflate slightly; this relaxes the gluten and redistributes gases. Rolling into smooth balls creates surface tension, helping them rise uniformly. During the second rise, buns will swell and develop glossy, taut skins, and the touch test will confirm readiness. Avoid placing them too close together if you want distinct rolls, but for pull apart buns place them an inch apart. A common slip is skipping the short rest after punching down which can make shaping harder and create uneven tops.
- Preheat oven to 375°F (190°C).: The oven should be fully up to temperature before the buns go in so they receive an immediate oven spring, which helps set their shape and create lift. You will notice a warm, dry heat and the faint smell of metal and air as it reaches temp. If the oven is cooler than listed, buns may bake longer and dry out; too hot and they will brown excessively before the centers finish. Use an oven thermometer if you suspect your oven runs off.
- In a small bowl, whisk remaining 1 egg (50 grams). Brush tops of rolls with egg.: Brushing with egg yields a glossy, golden finish and enhances color contrast for the crosses. The egg wash should go on with a light hand, covering evenly without pooling in seams. If you skip this step, the tops will bake paler and lack shine. If the egg is lumpy, strain or whisk until smooth to avoid uneven sheen.
- Clean bowl of stand mixer and paddle attachment. Using the paddle attachment, beat room temperature butter and remaining 1/2 cup (63 grams) flour at medium-low speed; slowly add orange blossom water and 1/2 teaspoon (2.5 grams) water, beating until a thick paste forms and stopping to scrape sides of bowl. Spoon paste into a pastry bag, and cut a 1/4-inch opening in tip. (Alternatively, use a pastry bag fitted with a 1/4-inch round piping tip [Ateco #802].) Pipe paste on top of buns in continuous lines following curves of rolls to form a cross over each.: The paste will be smooth and fragrant from the orange blossom water , with a texture similar to a thick frosting that holds shape when piped. When piping, the paste should glide and form defined lines without collapsing; this visual cue ensures crisp, pale crosses. If the paste is too stiff, a tiny extra splash of water will loosen it, and if too runny chill briefly. A common mistake is piping too much pressure and creating thick, lumpy crosses that bake into heavy ridges.
- Bake until golden brown and an instant-read thermometer inserted in center of a bun registers 190°F (88°C) to 200°F (93°C), 24 to 30 minutes, loosely covering with foil during final 2 to 5 minutes of baking to prevent excess browning. Serve warm or at room temperature.: As they bake you will smell butter and spice intensifying, and the tops will shift from pale to rich golden brown while the edges crisp slightly. The internal temperature ensures a fully cooked interior with a tender crumb, and the thermometer reading is the most reliable cue. If the tops brown too quickly, tent with foil to finish cooking without burning. Let cool slightly before slicing to avoid compressing the crumb, and enjoy warm for the best texture and aroma.
Notes
- Warm liquids precisely: Use a thermometer to keep milk and water within the recommended range so the yeast activates reliably without being shocked by temperature extremes.
- Soak currants briefly: Plumping currants in hot orange juice ensures they remain juicy after baking, which prevents them from leaching moisture from the dough during proofing.
- Measure flour by weight: Weighing all purpose flour leads to consistent dough hydration and prevents the variability that spoons and scoops introduce.
- Watch dough feel over time: Slight tackiness is desirable; adding small amounts of flour by tablespoon is safer than large adjustments that dry the dough.
- Protect early browning: If the tops brown too fast in your oven, tent with foil during the last few minutes to allow the interior to reach proper temperature without overcoloring.
- Use an instant-read thermometer: Checking for 190°F to 200°F inside a bun is the most reliable way to confirm doneness rather than relying on color alone.